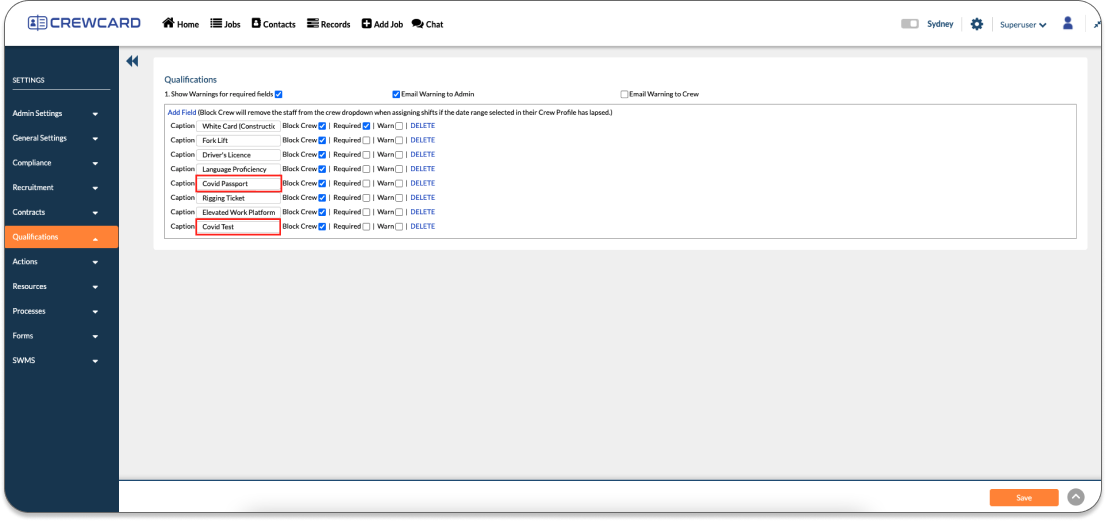
First, you will need to add this requirement as a qualification. To do this, add a new qualification by going into settings and selecting ‘Qualifications’ from the menu on the left hand-side, then enter the name of the qualification and save.
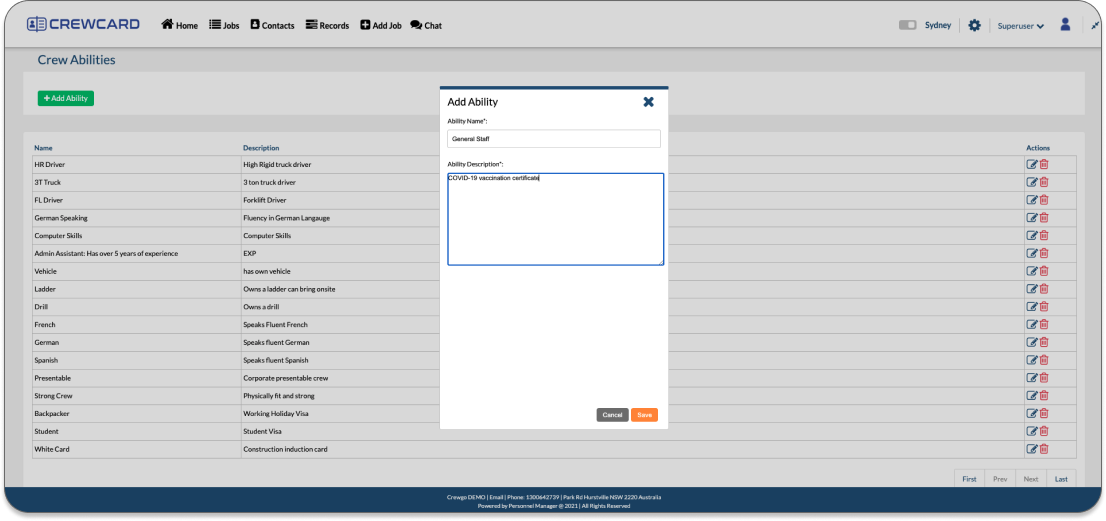
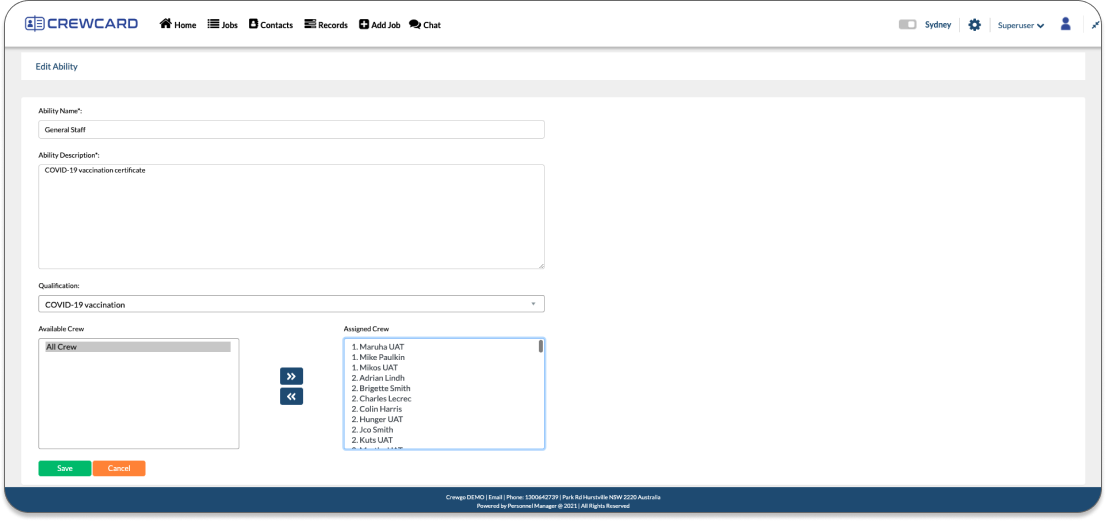
Then, you will need to link this qualification to an ability. To do this, hover over the tab ‘Contacts’, then under ‘Crew’, click on ‘Crew Abilities’. Add a general ability with a description that includes ‘COVID-19 vaccination certificate’ for example. Click on ‘+ Add Ability’ located on the top left-hand corner, and fill out the fields that are displayed on the screen and save.
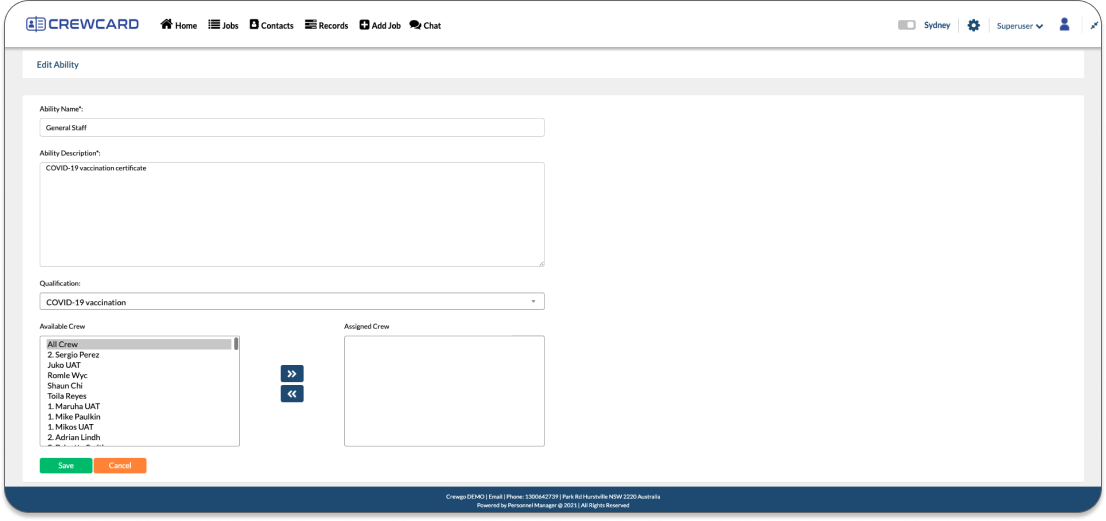
Edit the ability by pressing the edit icon located on the right-hand side. Add a qualification using the drop-down menu under ‘Qualification’, and select the qualification you require your staff to submit.
Then, go to settings, locate the ‘Recruitments’ subheading, then click on setting 21 “Enable Abilities for applicant to select upon sign up”. Select the requirements you would like to assign and then using the arrows, move the availability to ‘Assign Abilities’ To ensure that recruits select this ability on the sign-up page, remove the other abilities from this section so that they are required to upload the relevant documentation, and press save.
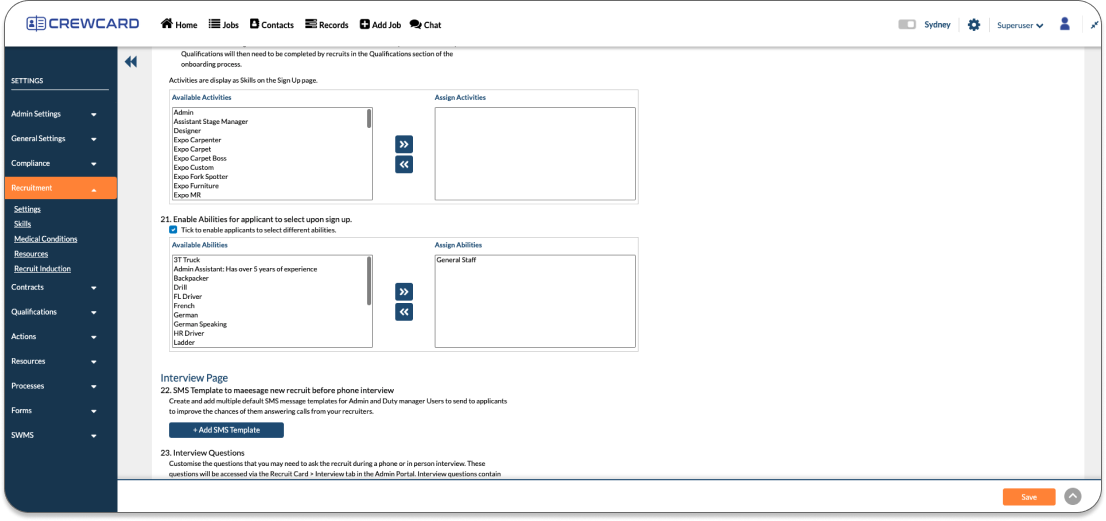
Therefore, an option for ‘General Staff’ will appear on the recruits’ sign-up page, which they can select. As this ability is linked to the qualification ‘COVID-19 vaccination’, they will be required to upload their vaccination certificate, otherwise they will be blocked from assigning shifts.
First, you will need to add this requirement as a qualification. To do this, add a new qualification by going into settings and then selecting ‘Qualifications’ from the menu on the left hand-side, enter the name of the qualification, and save.
Then, you will need to link this qualification to an ability. To do this, hover over the tab ‘Contacts’, then under ‘Crew’, click on ‘Crew Abilities’. Add a general ability with a description that includes ‘COVID-19 vaccination certificate’ for example. Click on ‘+ Add Ability’ located on the top left-hand corner, and fill out the fields that are displayed on the screen and save.
Then, edit the ability by pressing the edit icon located on the right-hand side. Add a qualification using the drop-down menu under ‘Qualification’, and select the qualification you require your staff to submit.
Then, scroll down to ‘Available Crew’, select ‘All crew’ and move them to ‘Assigned Crew’ by using the arrows, and save.
This will then assign a qualification to each crew member, which can also be viewed on their app under ‘Qualifications’, and require them to upload their relevant documentation.
As a condition of push notifications, users must be logged into the CrewCard app in order to receive the notifications sent by you. It is recommended that you also send out SMS messages to your crew to ensure that they receive any messages you wish to communicate to them.
If you have no SMS credits left, the messages you send will appear as ‘queued’. As soon as you purchase more credit, they will be sent immediately.
Tags are useful for descriptive purposes when identifying a crew member. For example, for a crew member that is a team leader, you could type ‘Team Leader’ in their tag in their crew profile. This tag will appear under their name when assigned to shifts.
Ranks are useful for assigning experienced staff to shifts as staff appear according to their rank. Their rank is determined by a number of factors, including score, bias, hours, experience, reliability, and recent activity. Clients can rate staff based on these factors, and their rank will reflect an average of these scores which will be displayed on the crew members’ profile.
The employee ID is useful for payroll and financial purposes. Softwares such as MYOB can use the employee ID to identify the crew member in invoices and other financial documents.
There is a ‘no expiry date’ option on the CrewCard app. However, on the website, you should choose a date that is far into the future, for example ‘31 December 2030’. This will ensure that your documents will continue to be valid.
Yes, your clients are able to view shifts, timesheets, and other details through their portal. It is recommended that they use the CrewCard app to access this information.
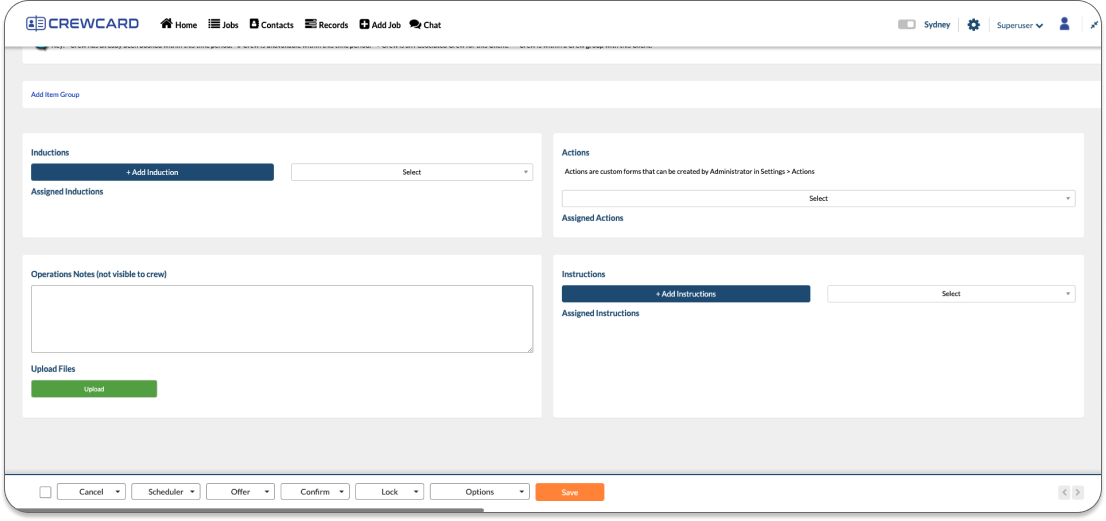
Documents that provide information or instructions for jobs are helpful for staff and provide them with a more in-depth understanding of what is required from them. To add documents to job sheets, hover over the ‘Jobs’ tab, then click ‘Jobs’. Click on the job sheet of the crew member you would like to add the document to, scroll to the bottom, and click on ‘+ Add Induction’ or ‘+ Add Instructions’.
If your staff report any issues with the CrewCard app, before contacting support, it’s important to perform the following steps to avoid incurring extra charges:
1. Login to the Crew Member’s account and check the issue. If the app works as expected, the issue might be connected to the user or their handset.
2. Advise the user to update their handset operating system to the latest version.
3. Advise the user to download the latest version of the CrewCard App.
4. Advise the user to enable location services (iOS & Android) and google location accuracy is on (Android) for the CrewCard App.
5. Make sure that the user time settings is set to 24 hours time.
If the issue persists, please contact support@personnelmanager.com.au and please be sure to clearly explain the issue and attach a video screen recording or screen shots so that our team can rectify.
1. Update your handset’s operating system to the latest version.
2. Download the latest version of the CrewCard App
3. Enable Location Services (iOS & Android) and Google Location Accuracy is on (Android) for the CrewCard App.
1. Hard Refresh for Windows users: hold down Ctrl and then press F5 on your keyboard.
2. Hard Refresh for Mac users: hold down Command and Shift and then press R on your keyboard.
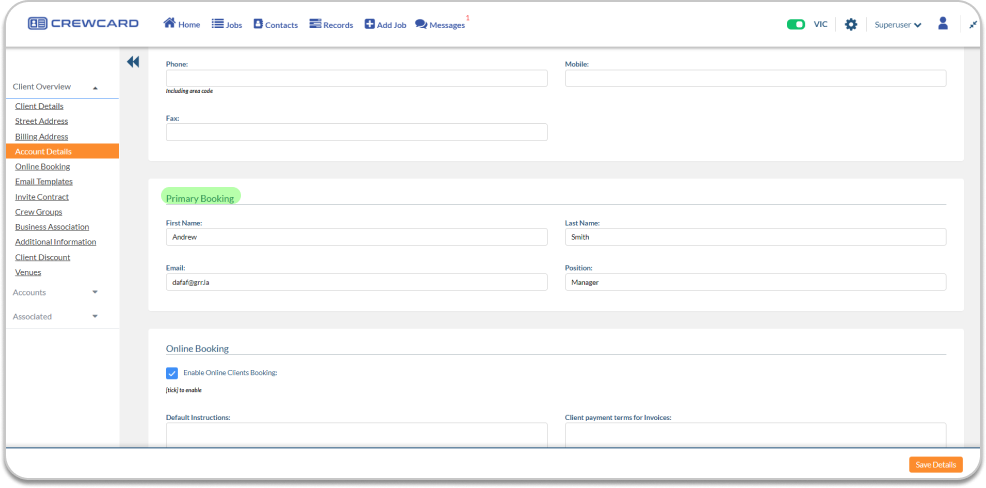
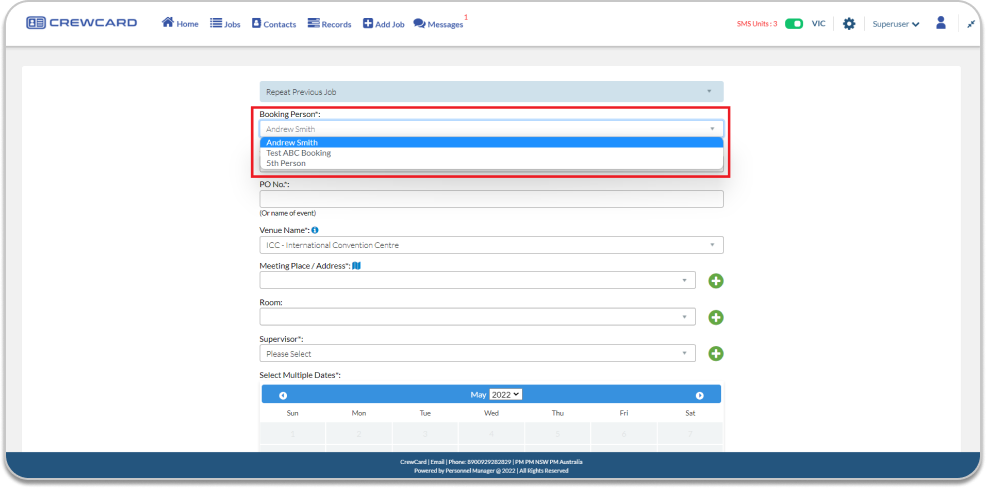
Booking confirmation will be received by the client (client’s email address registered in Client Page) and Primary Booking or the booking person.
Clients email address can be found in the Clients Page. Go to Contact and Select Clients under Clients column.

Select the Client and Click the edit icon in the Clients page. Under Client overview, go to Primary Booking.
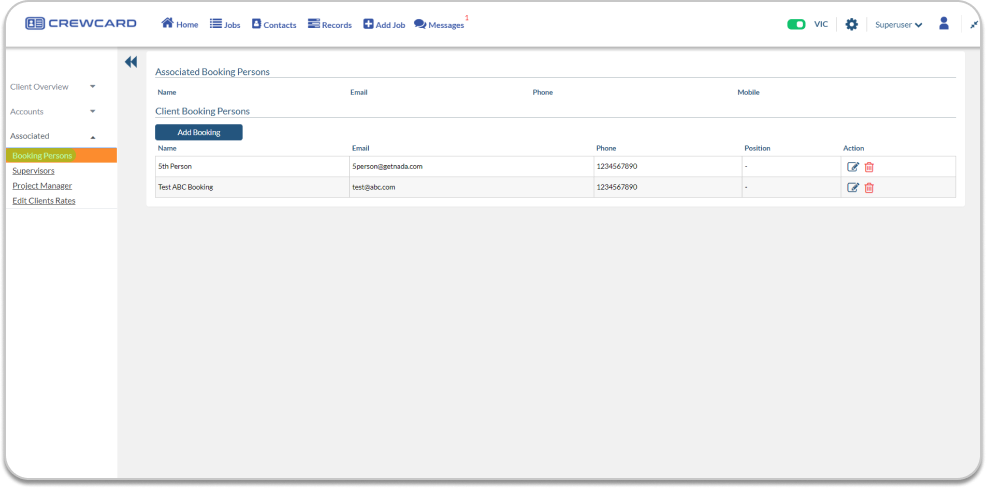
Select Associated on the side menu and select Booking Persons.
When booking a job the one who will receive the Booking confirmation is depending on the client selected and booking person during job creation.
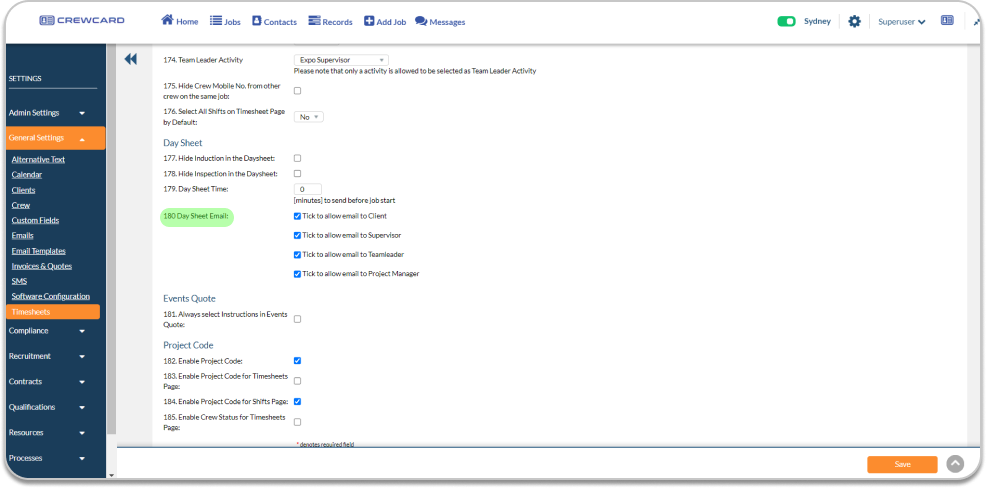
Clients, Supervisor, Team Leader and Project Manager can receive a Daysheet email however the client can only approve the daysheet. To select who to receive the daysheet email, Simply go to General Settings and scroll down until Day Sheet Email. Tick the checkboxes applicable if you require them to receive the DaySheet email.
Users who are in the Invoice loop, added users or users which was added in the Clients Profile>> Accounts.
In the Invoice page, scroll down at the bottom part of the page and go to the invoice loop section. You may select the user(s) who you wish to receive the invoice or add a new user using the last row.
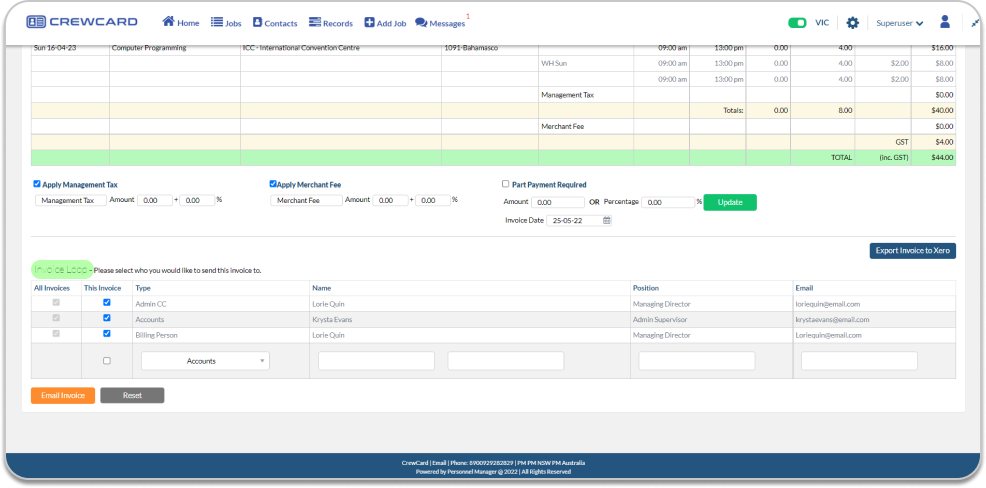
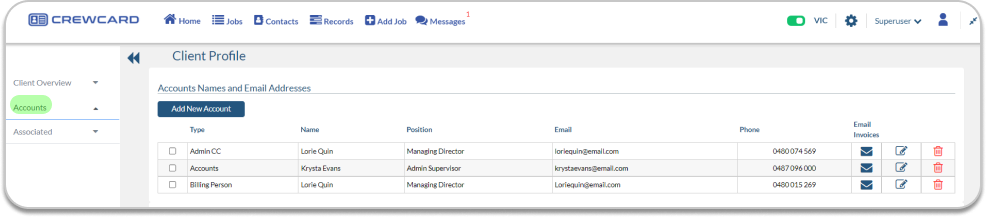
You may also add a new user by going to the client profile>> Accounts
Crew, Client and Admin can access the Portal using the Portal link provided and enter their login credentials.
Admin is the person who administers or manages the daily job or transaction however they have limited access compared to superuser. You can check the login credentials in Admin Settings>>Account Details>> Administrator User Login Details>> Setting# 25 & 26
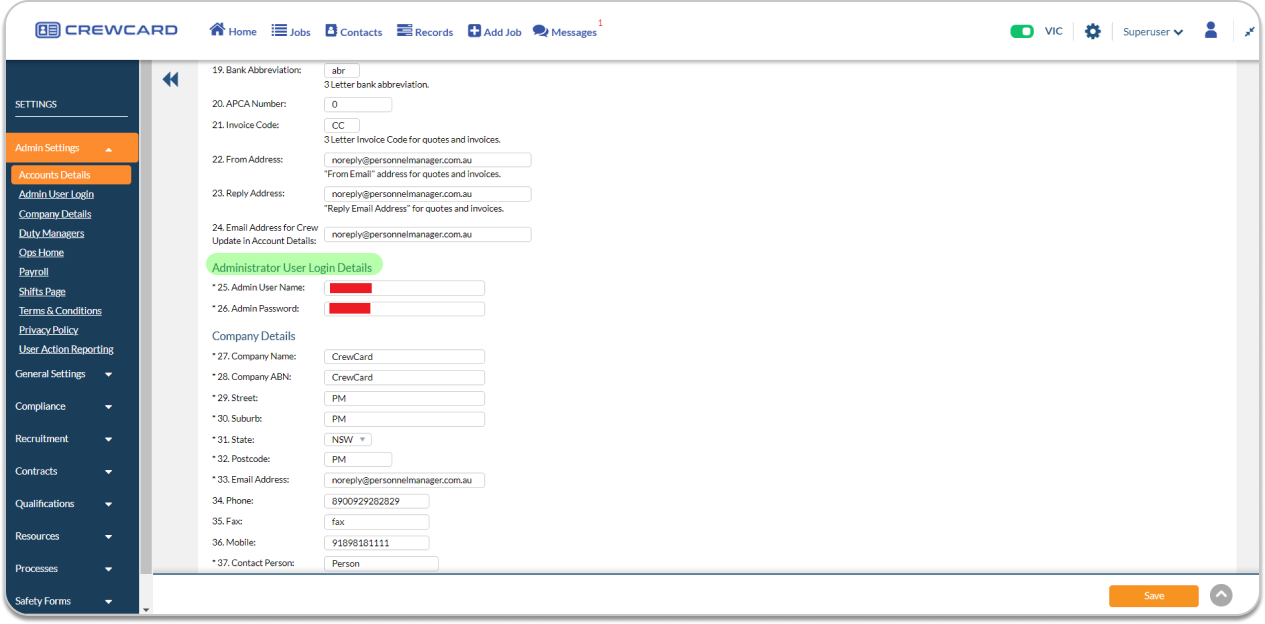
Superuser are the one with special privileges needed to administer the system.
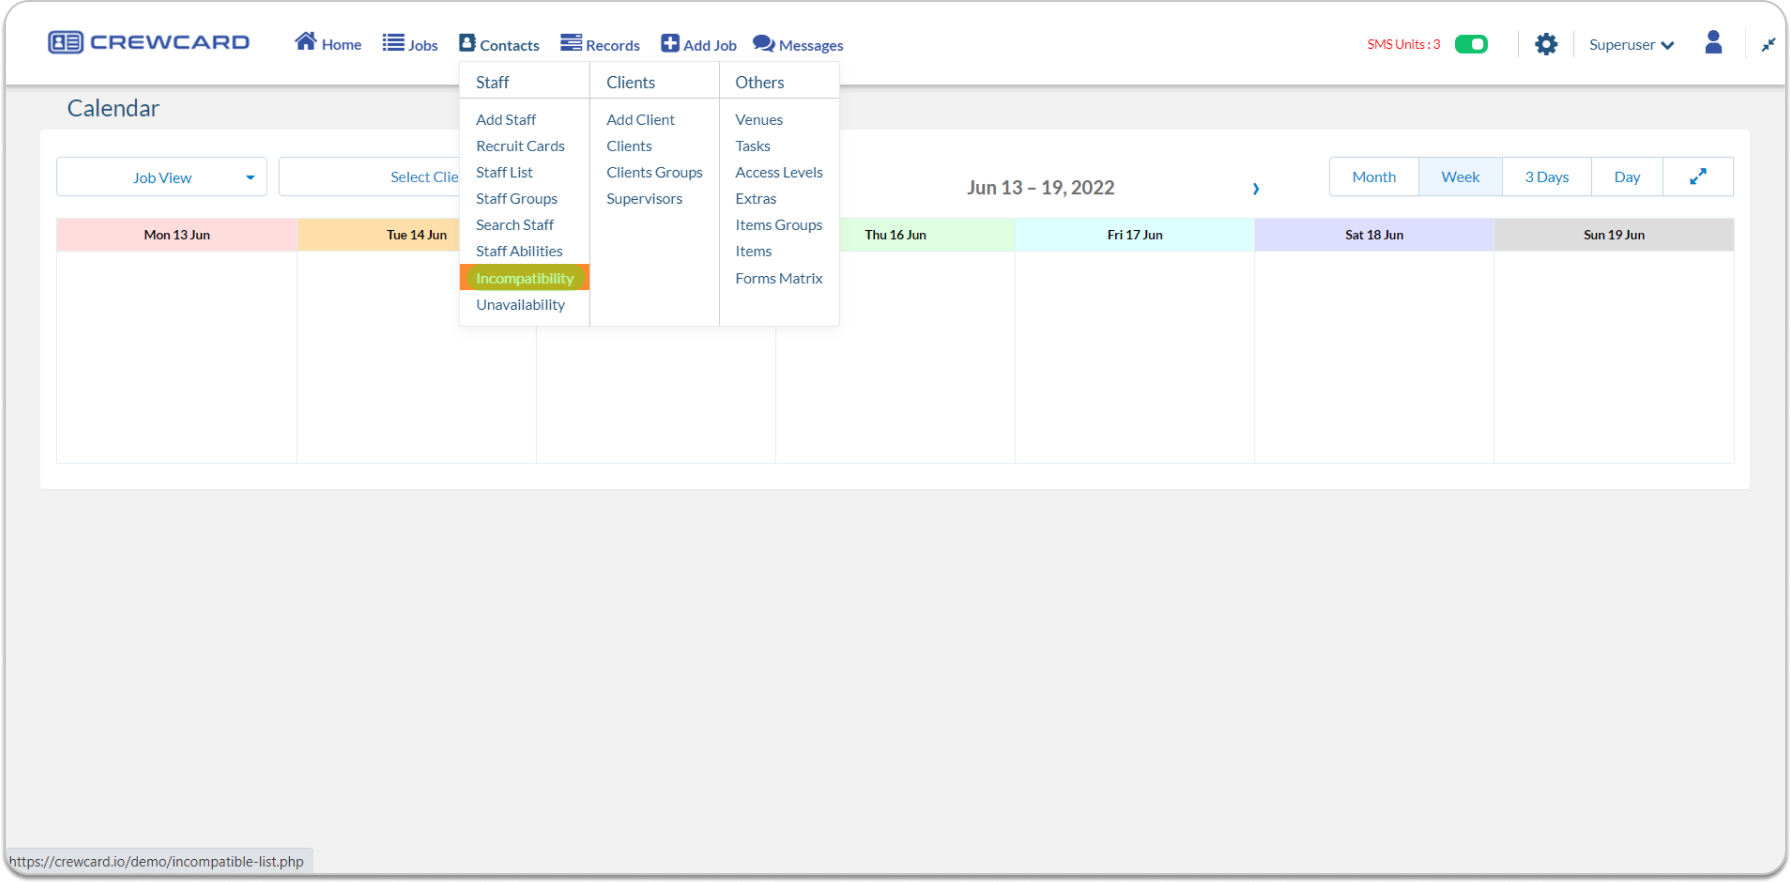
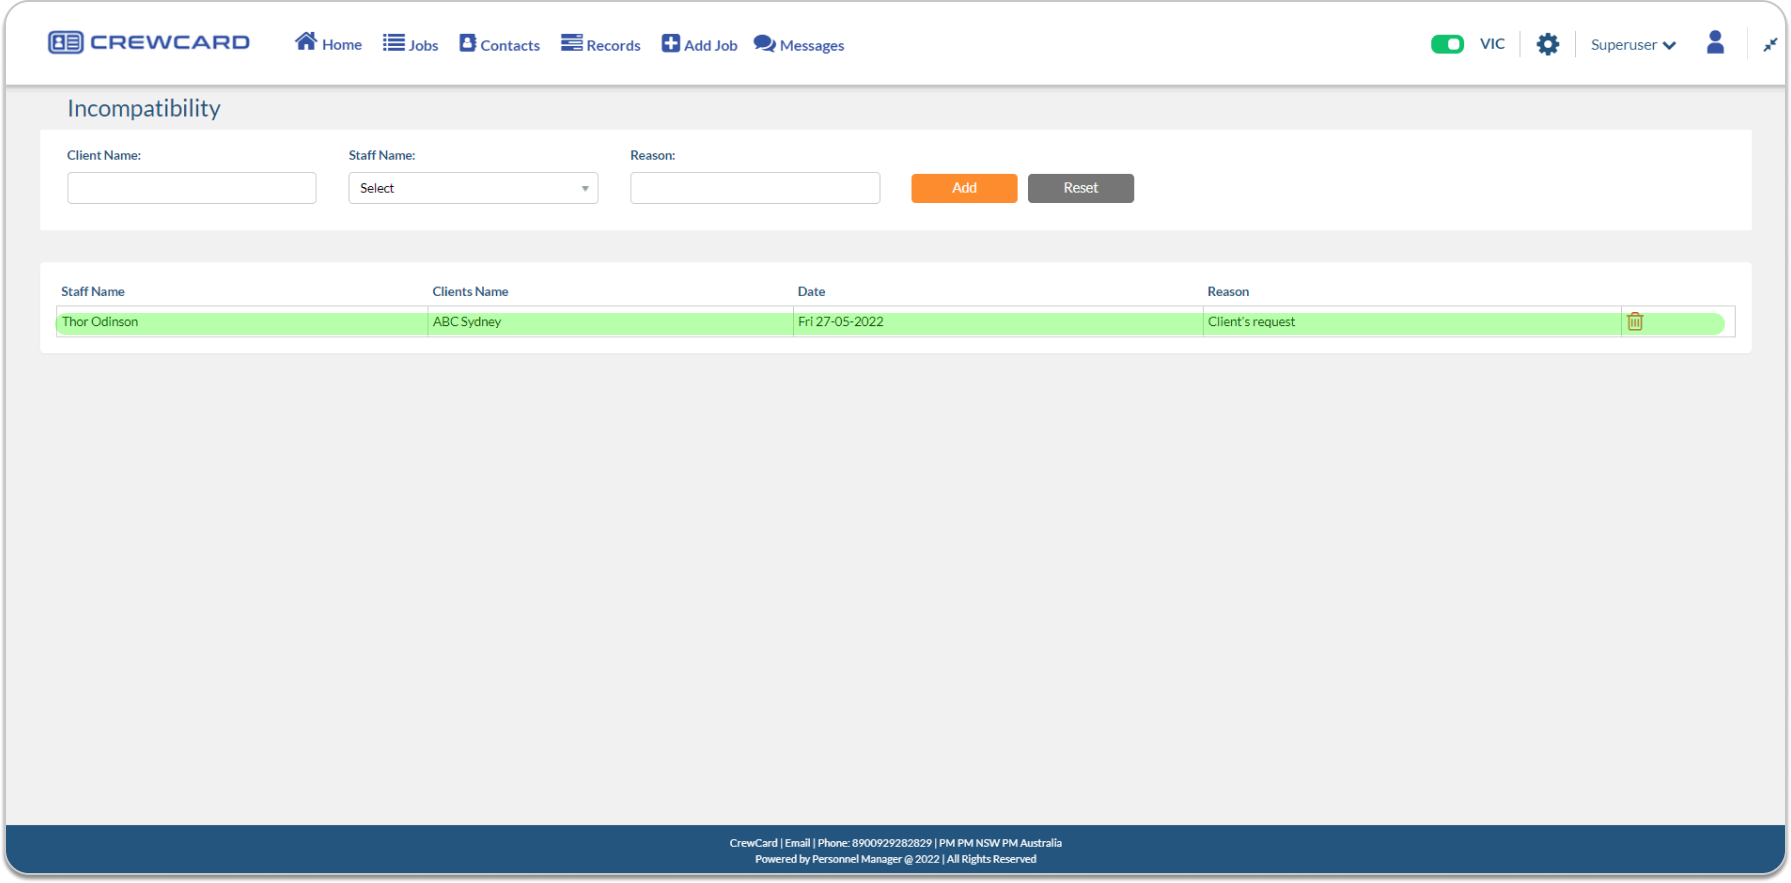
Incompatibility function, This will remove the selected crew name from the list of the available crew when assigning, offering and confirming shifts to a particular client.
Go to Contacts and select Incompatibility under the staff column.
Select the Client Name, Crew Name and Reason for Incompatibility then click the Add button.
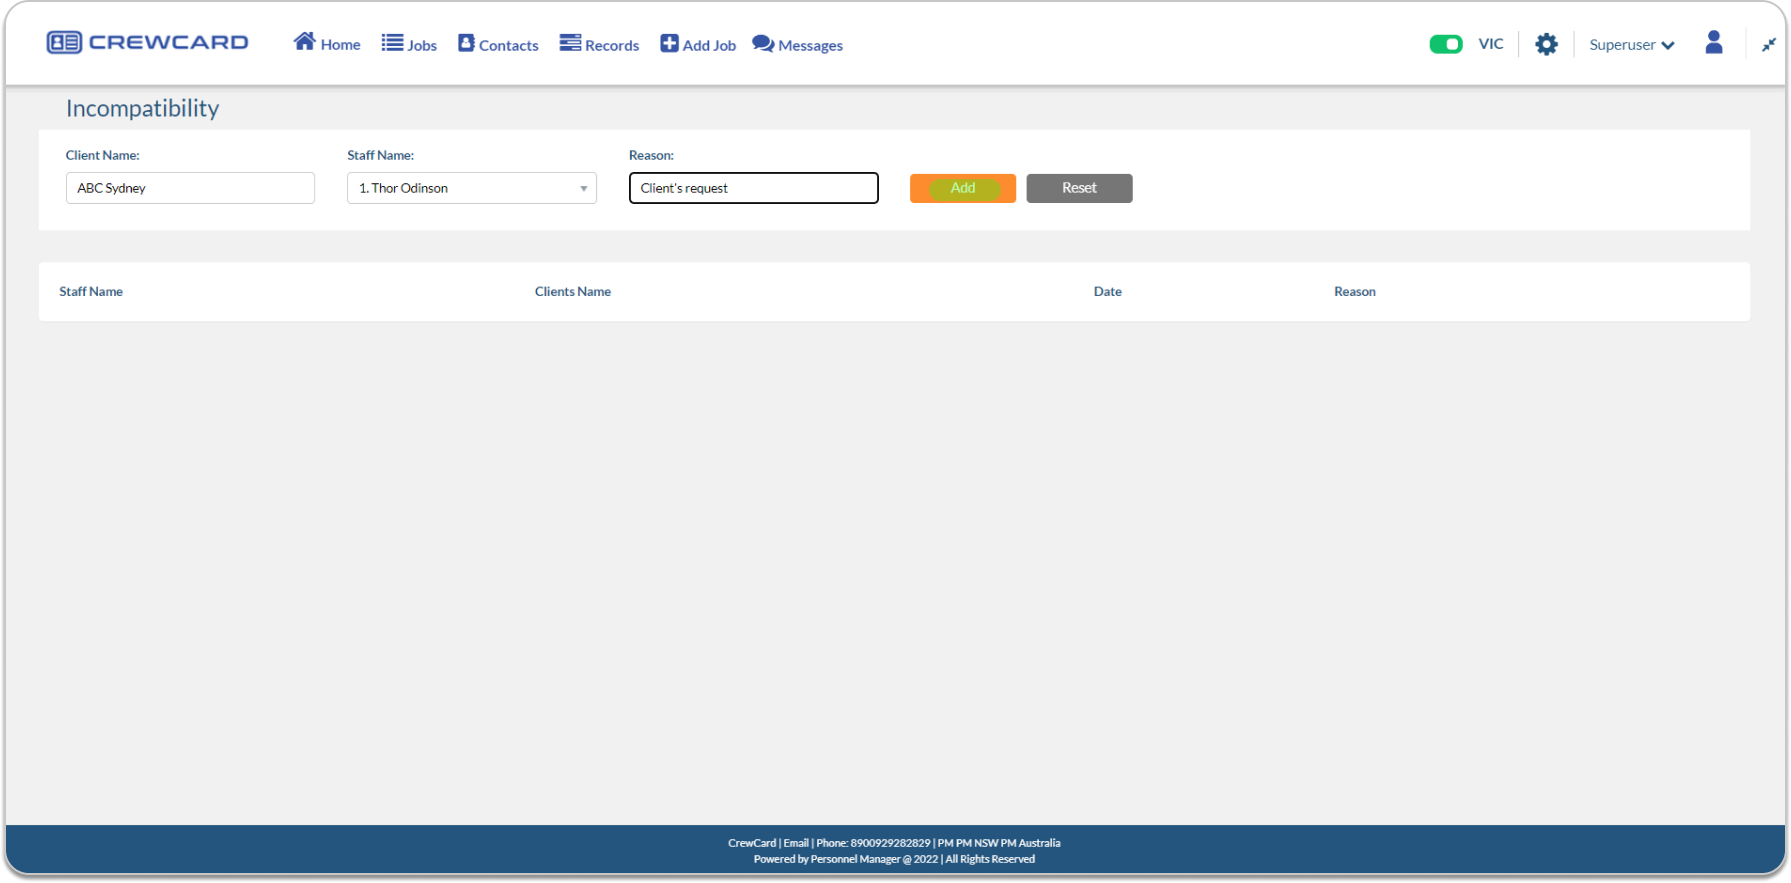
Crew will not be assigned from any shifts to the Client selected.
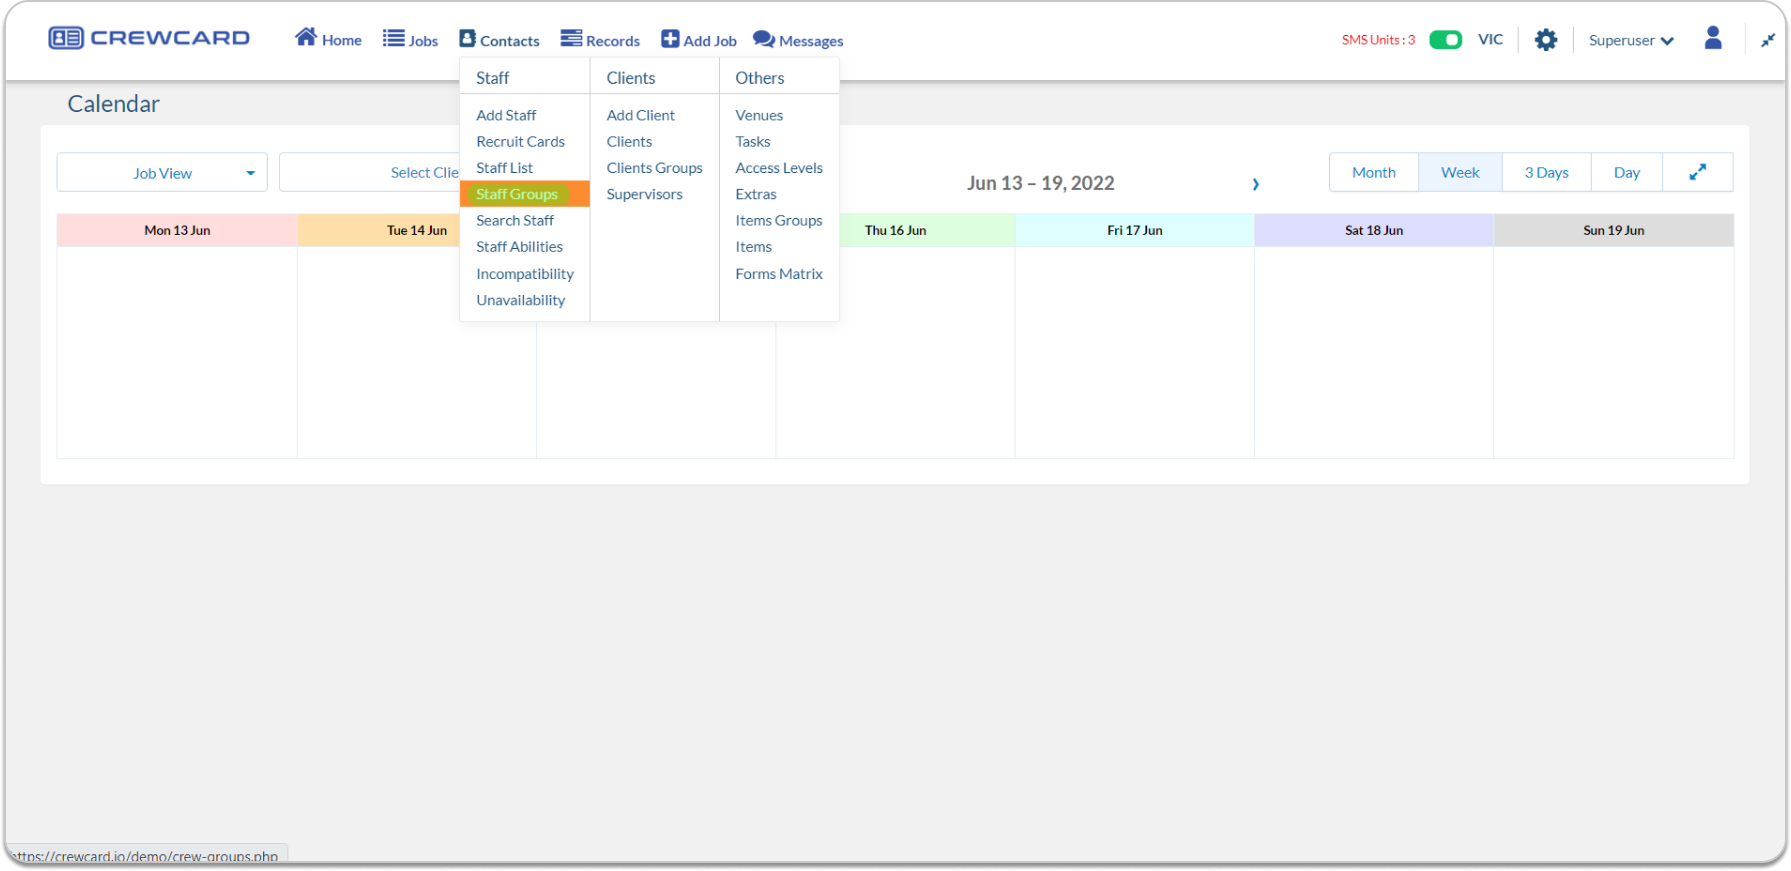
Crew Groups, Allows you to create different groups for different types of clients and staff.
Go to Contacts, Select Staff Groups under the staff column.
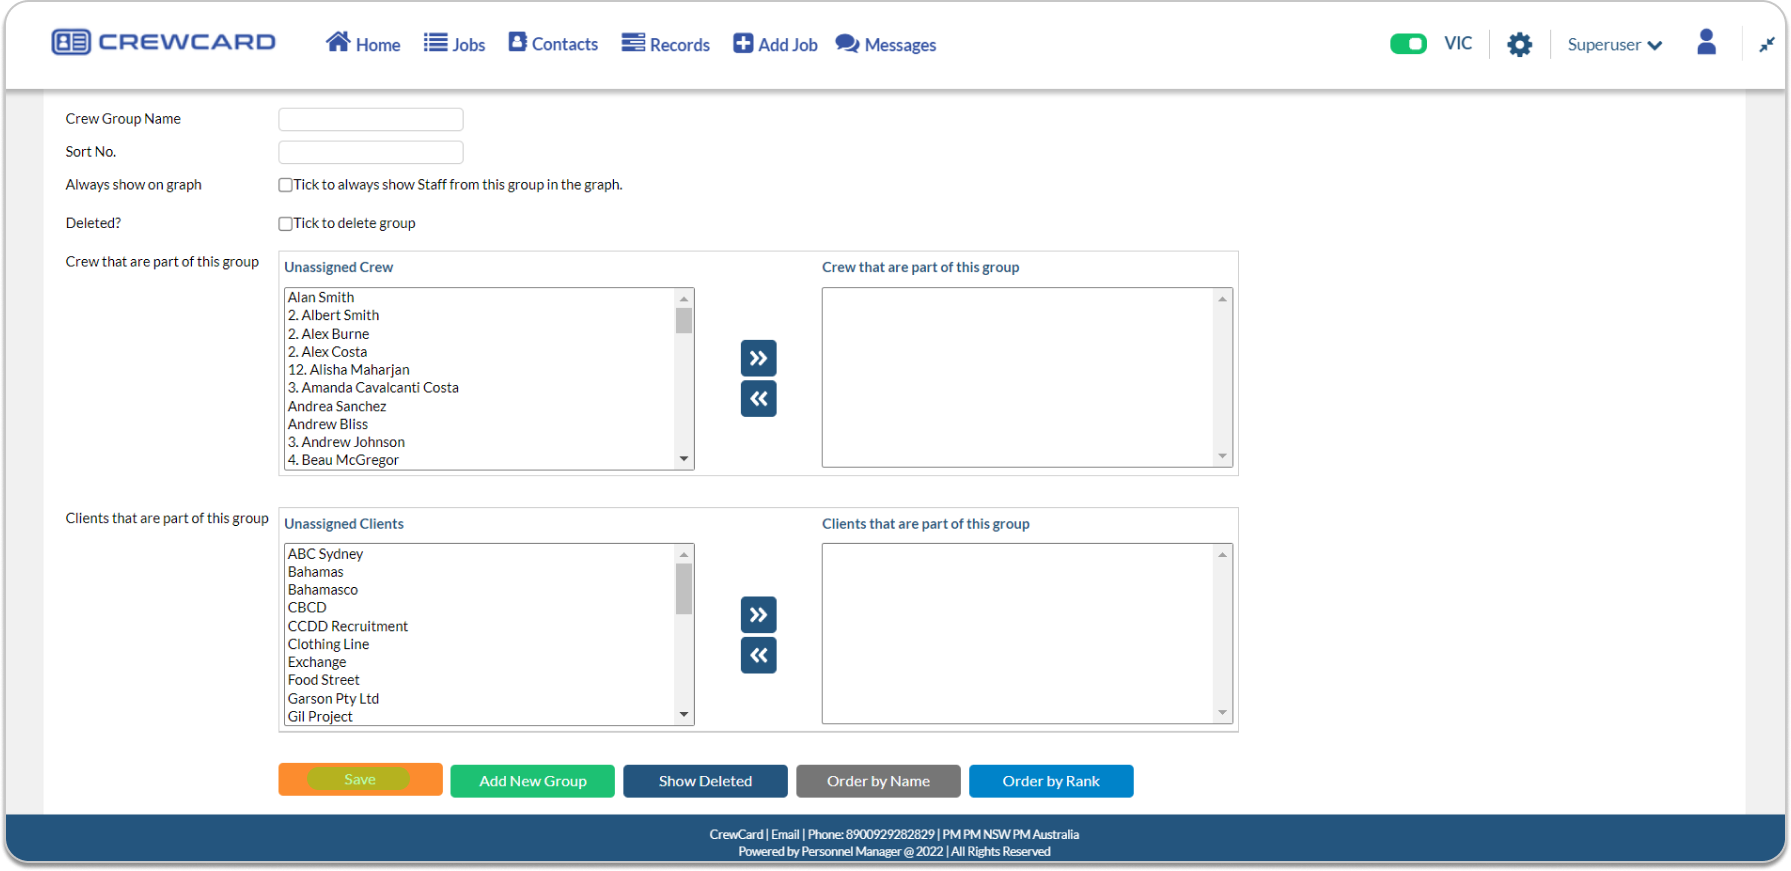
Enter the Crew Group Name, Sort no., Select Crew which is part of this group and Select Client which is also part of this group then click save button.
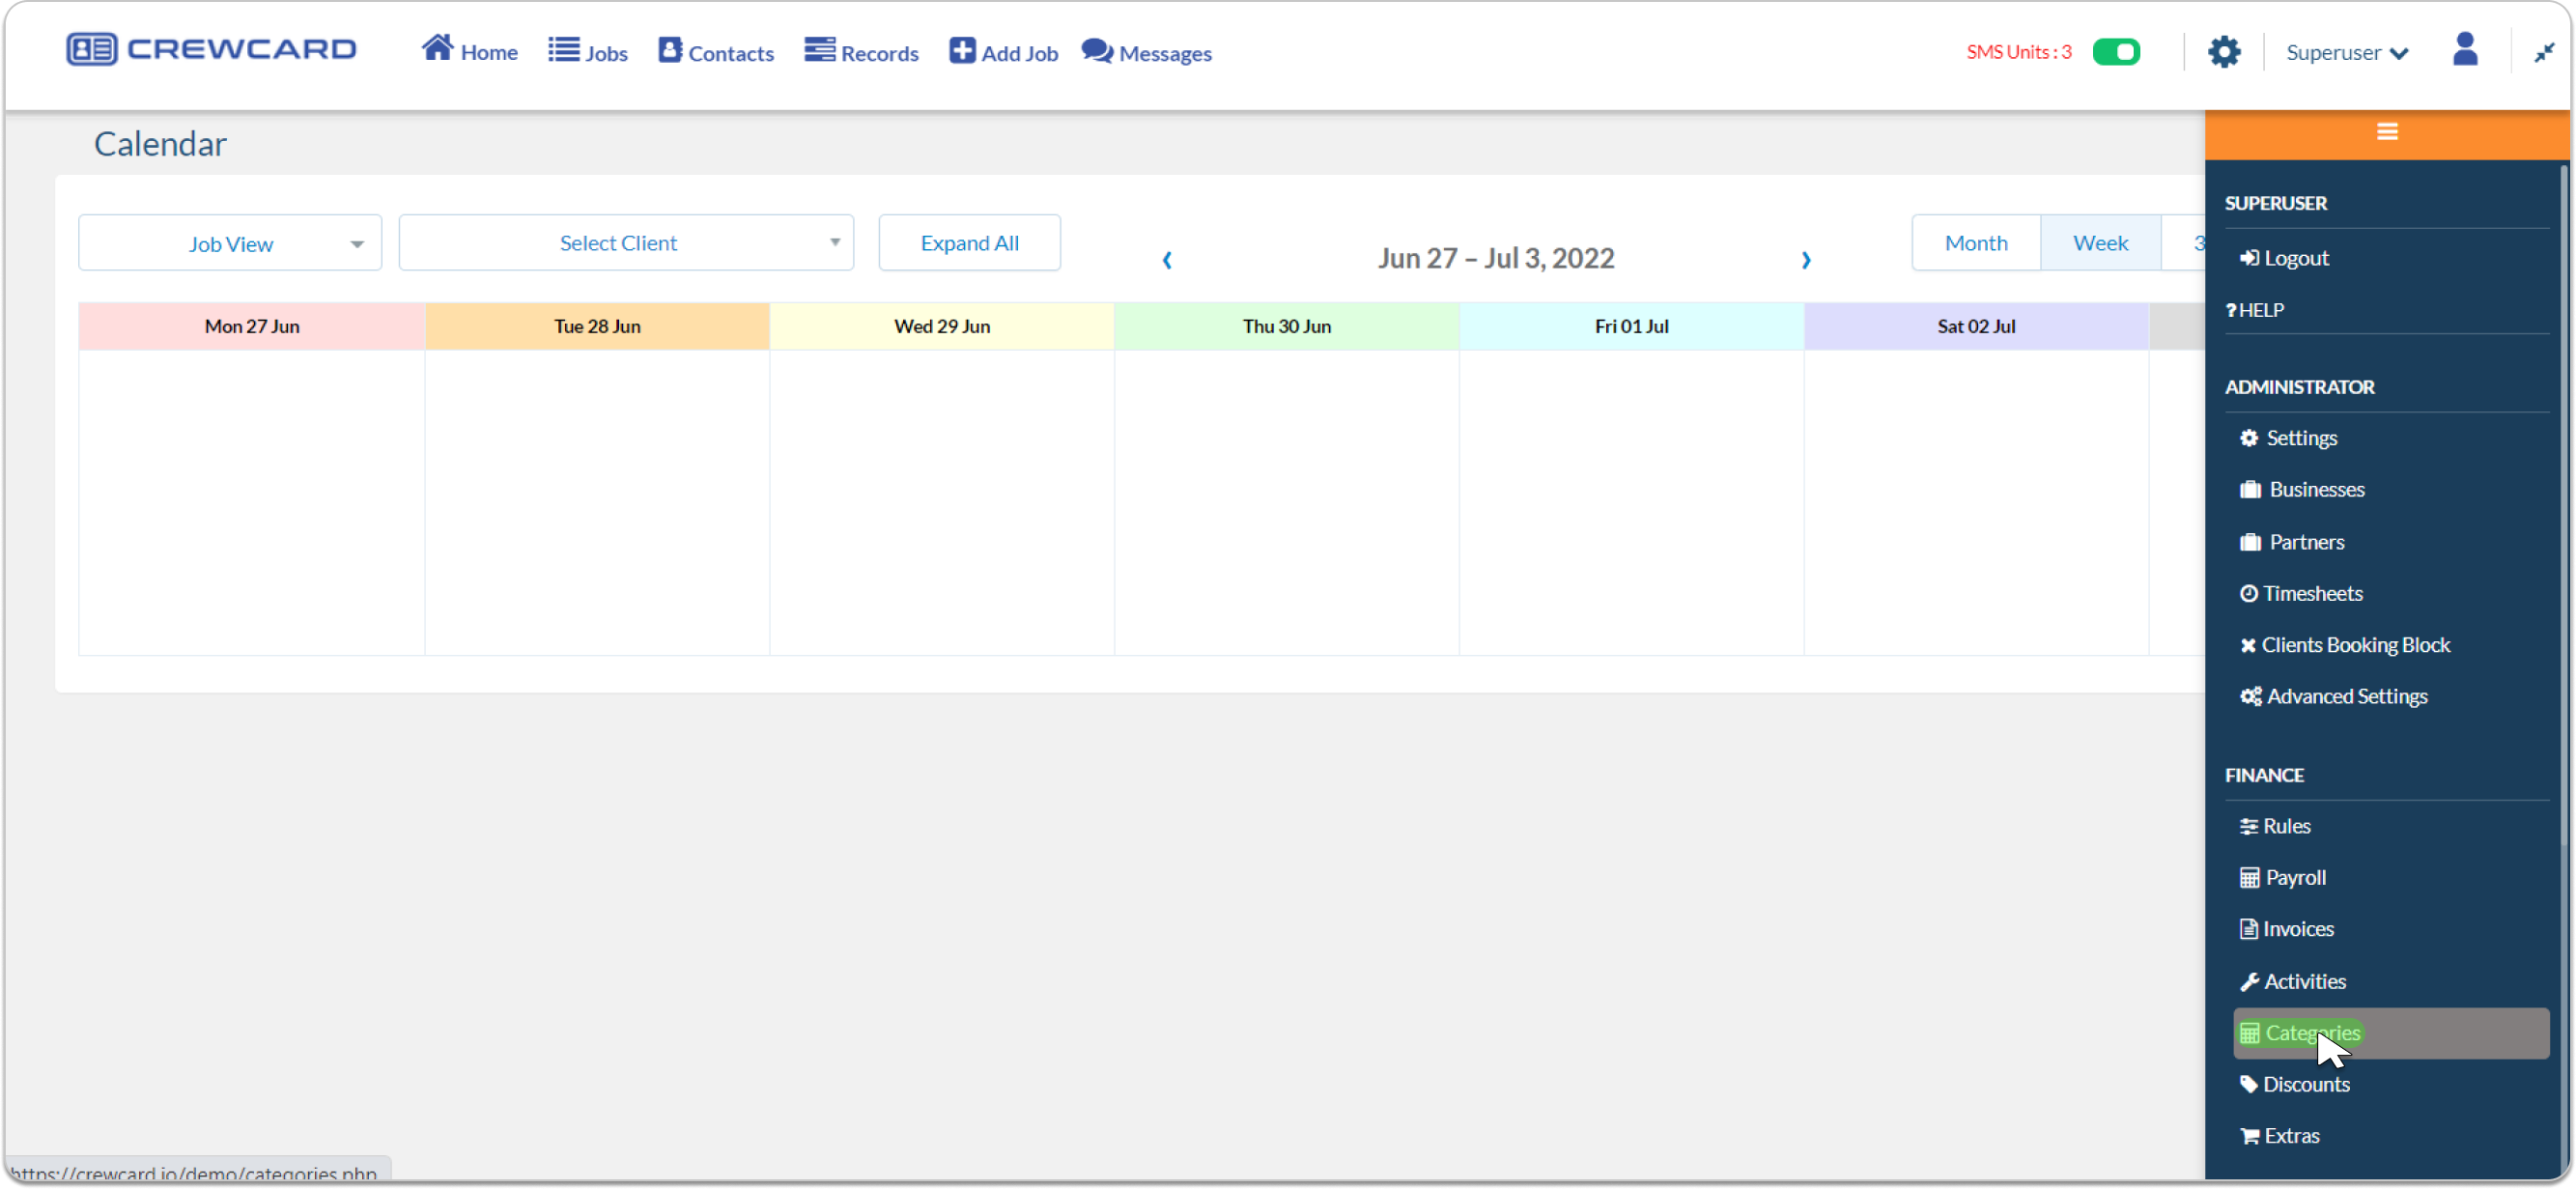
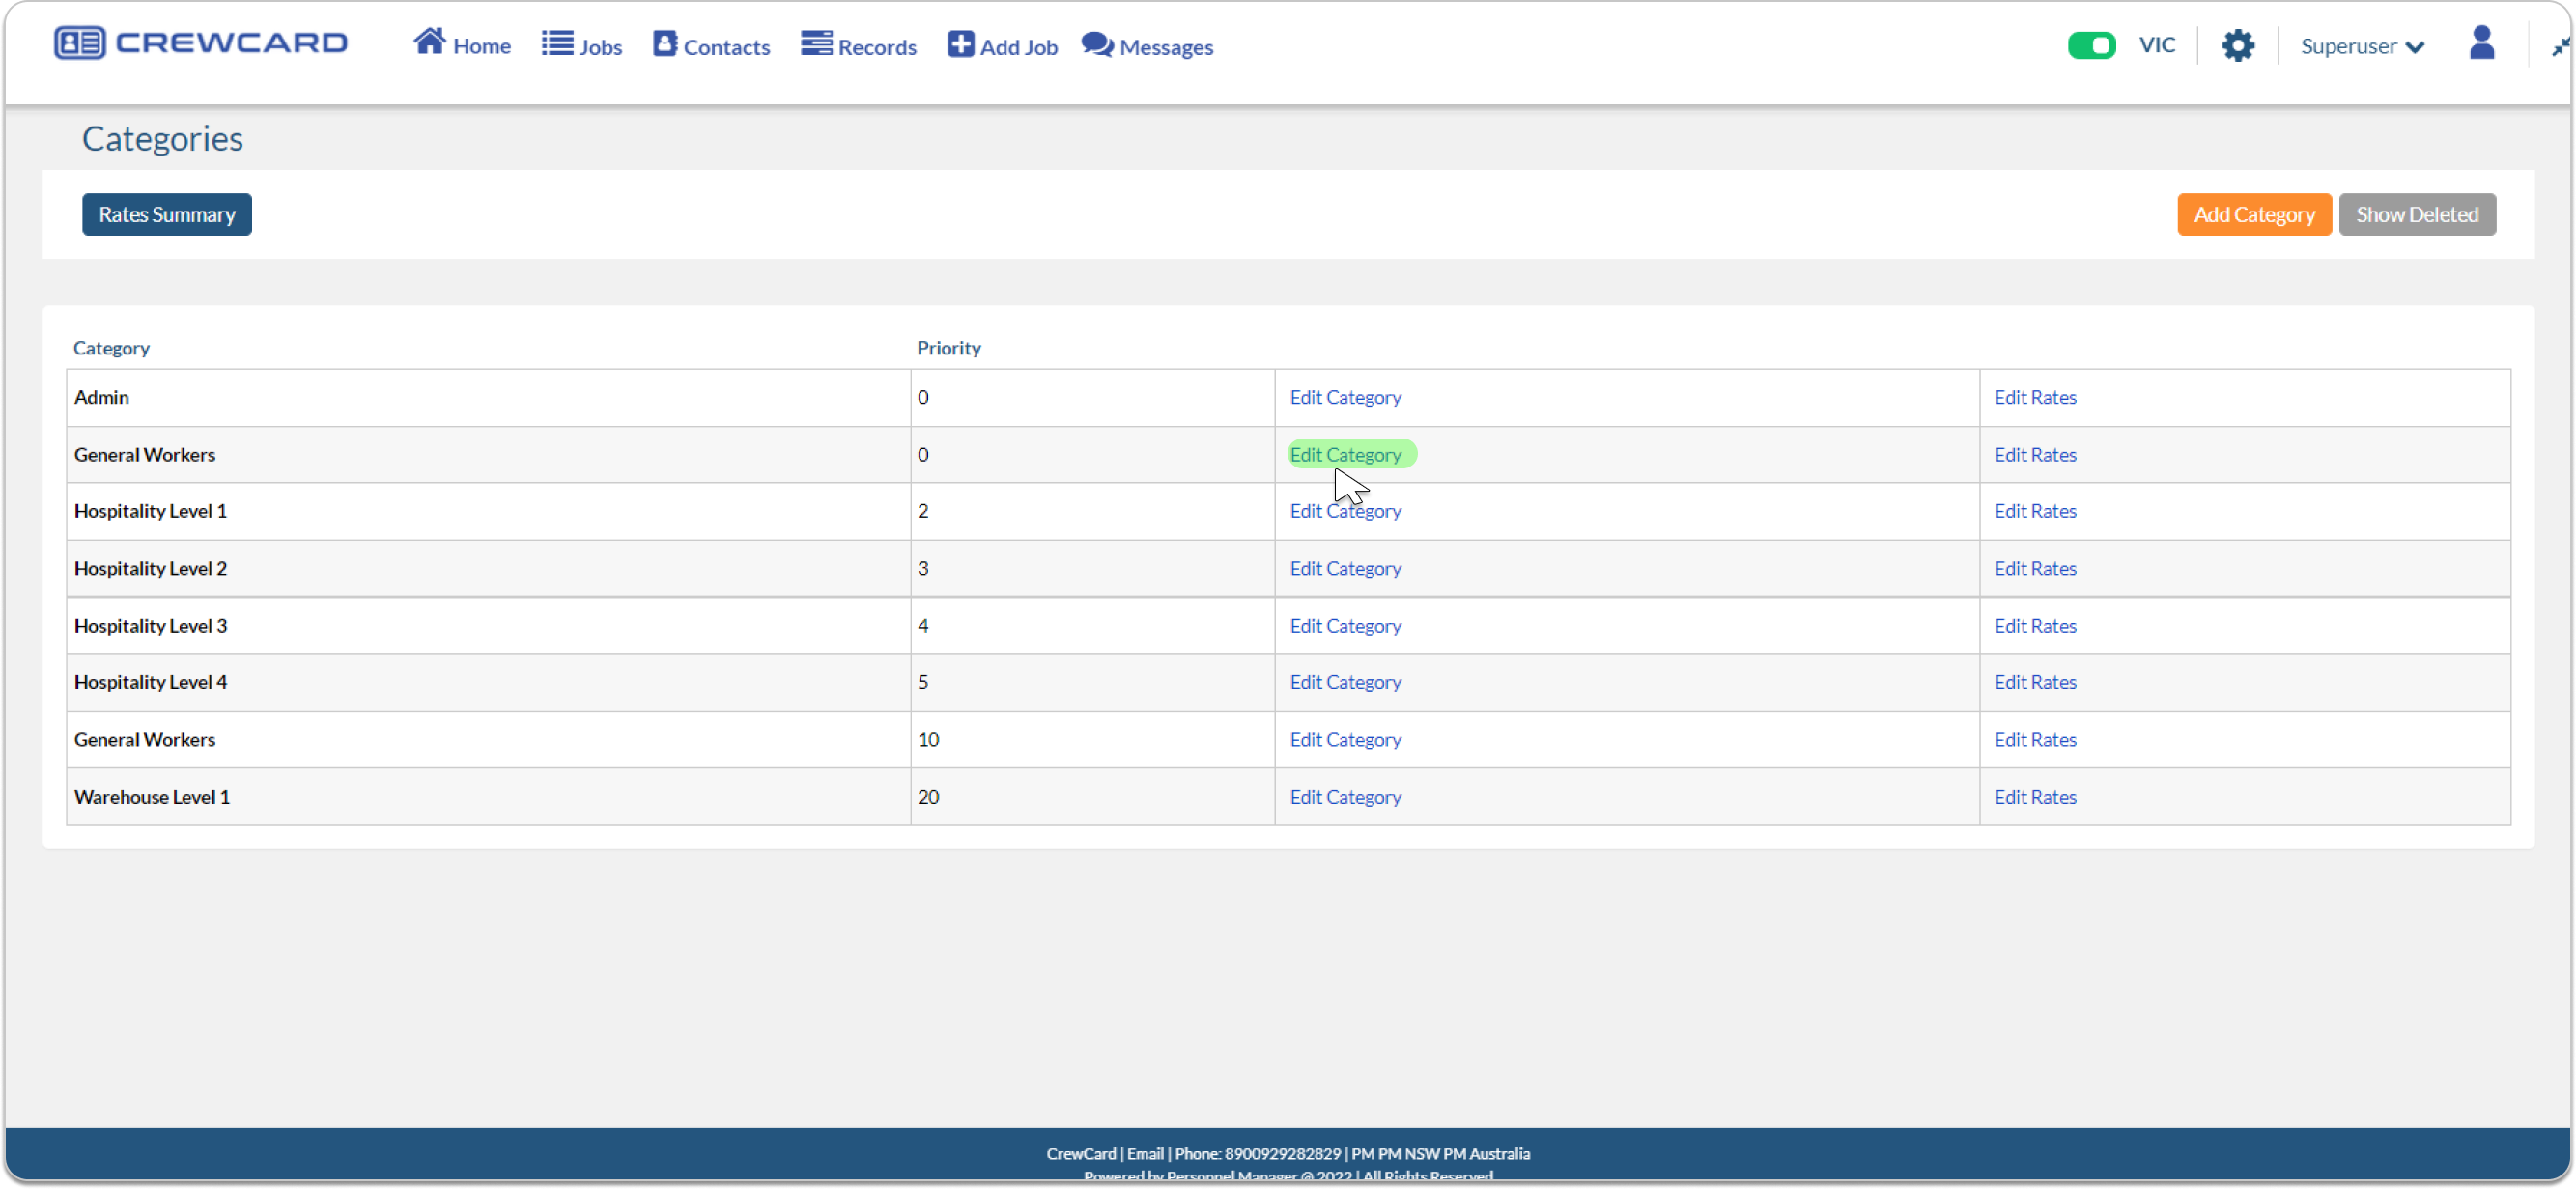
Go to Categories Page
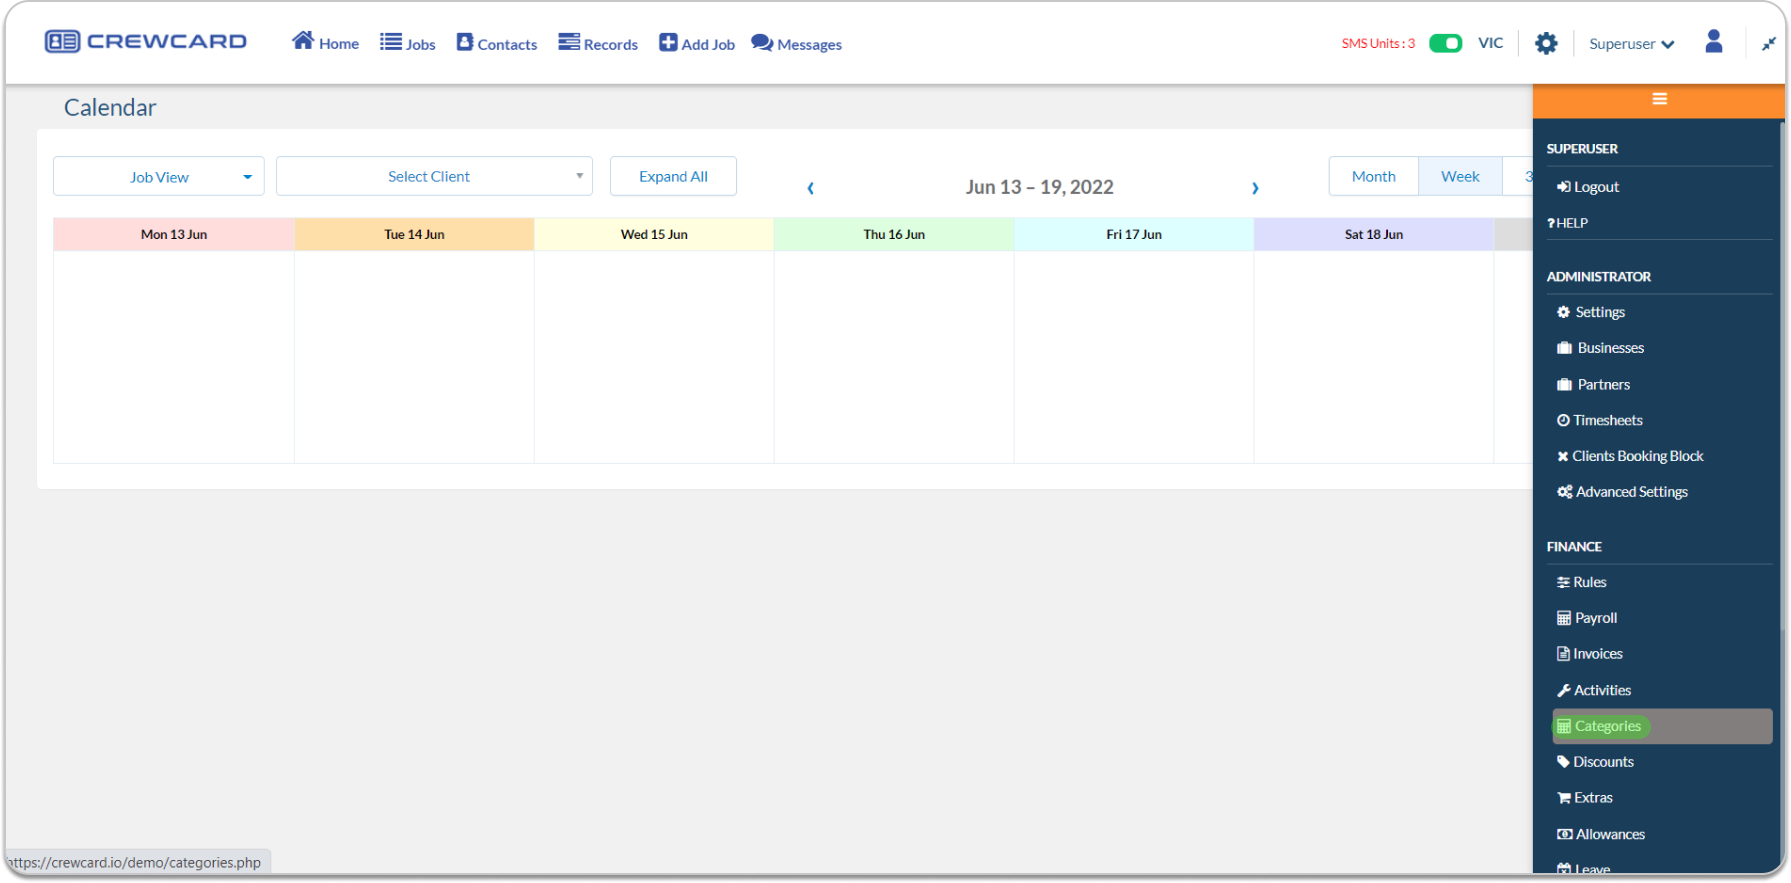
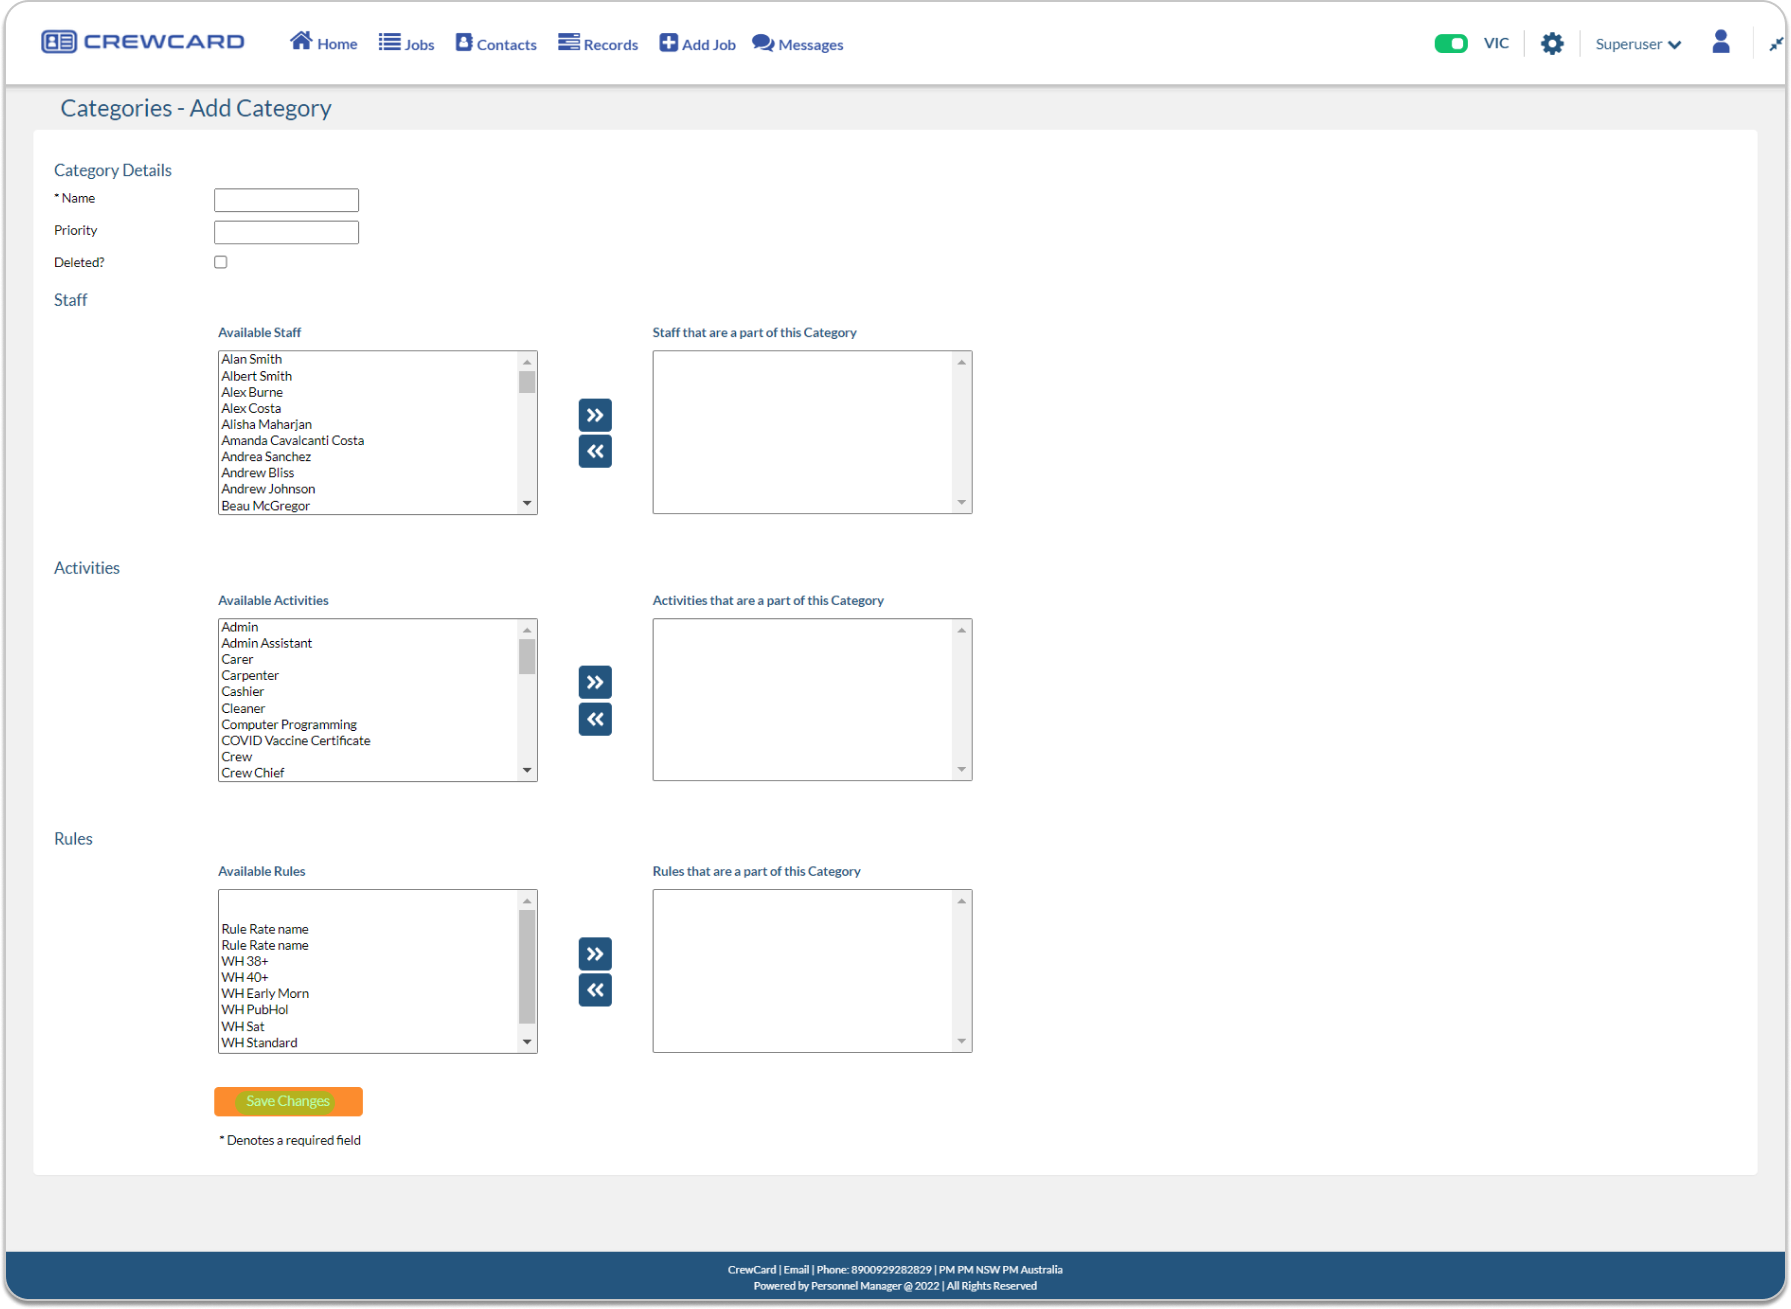
Click Add Category
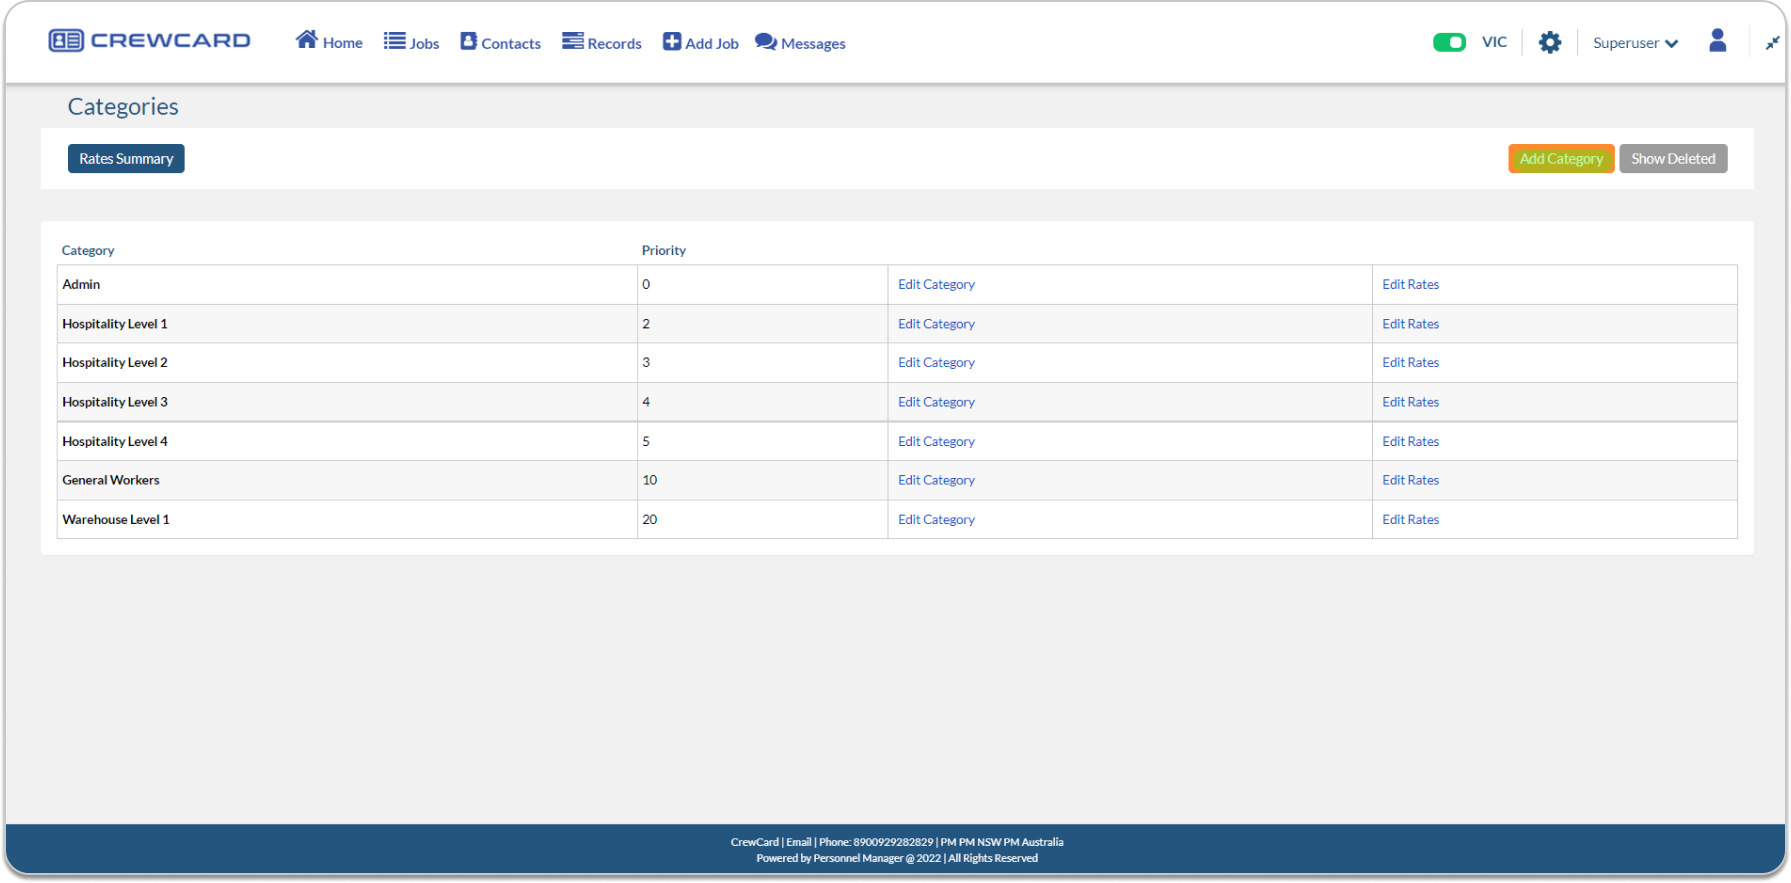
Enter the Category Name,
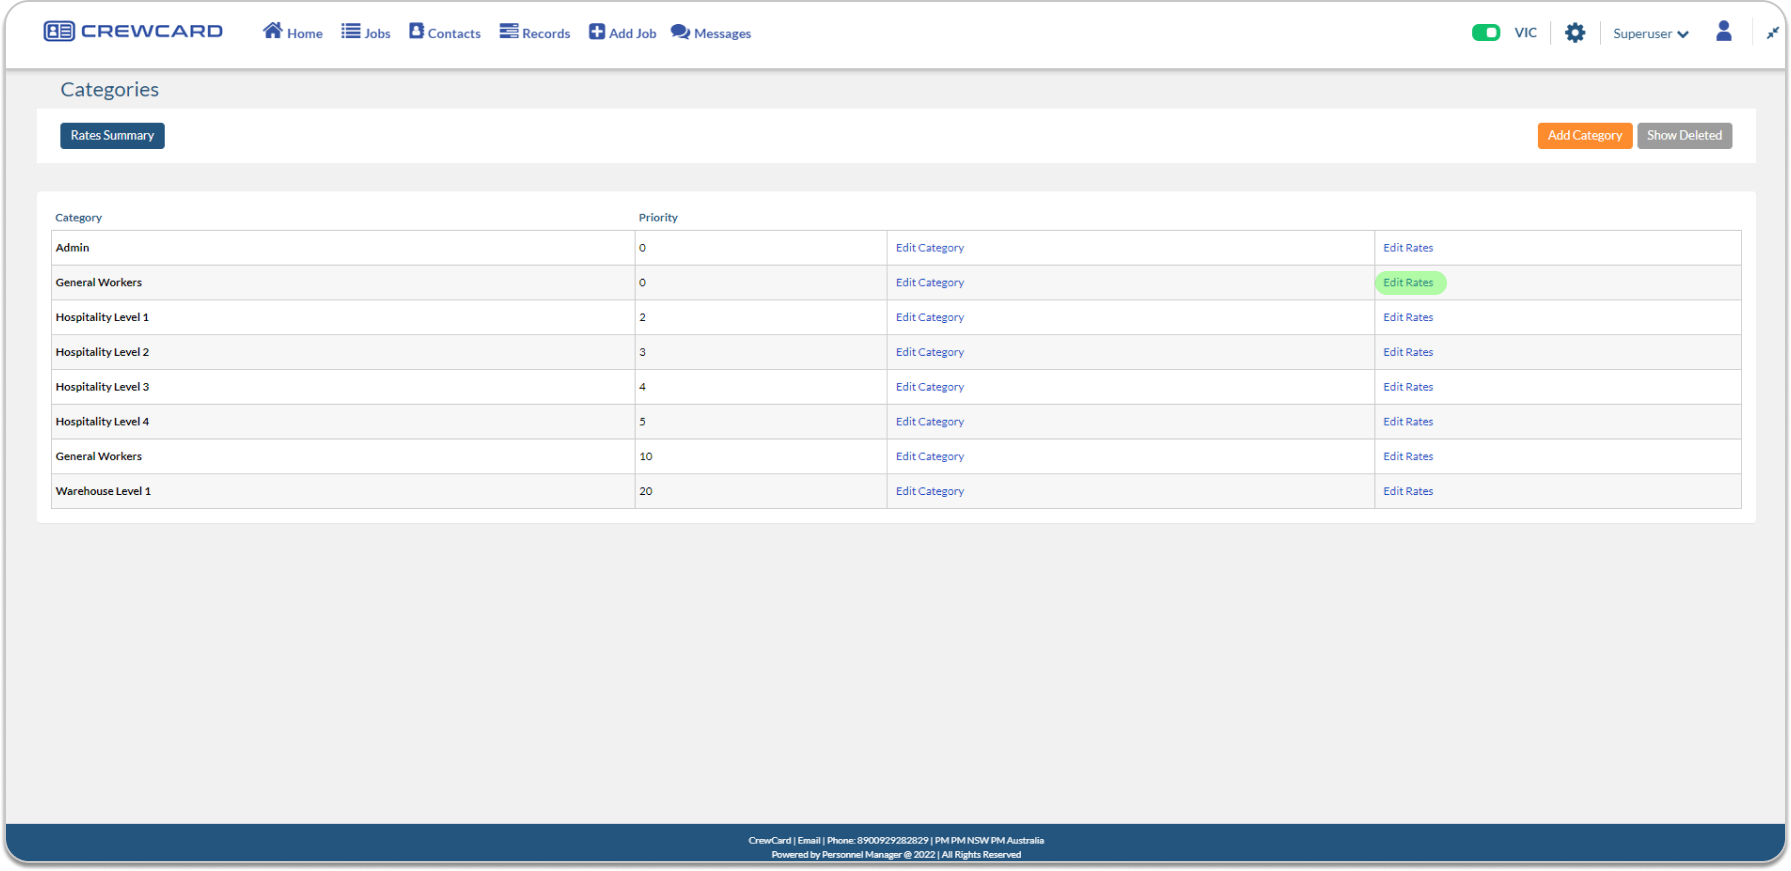
Return to the Categories page and click on ‘Edit Rates’ on the newly created category.
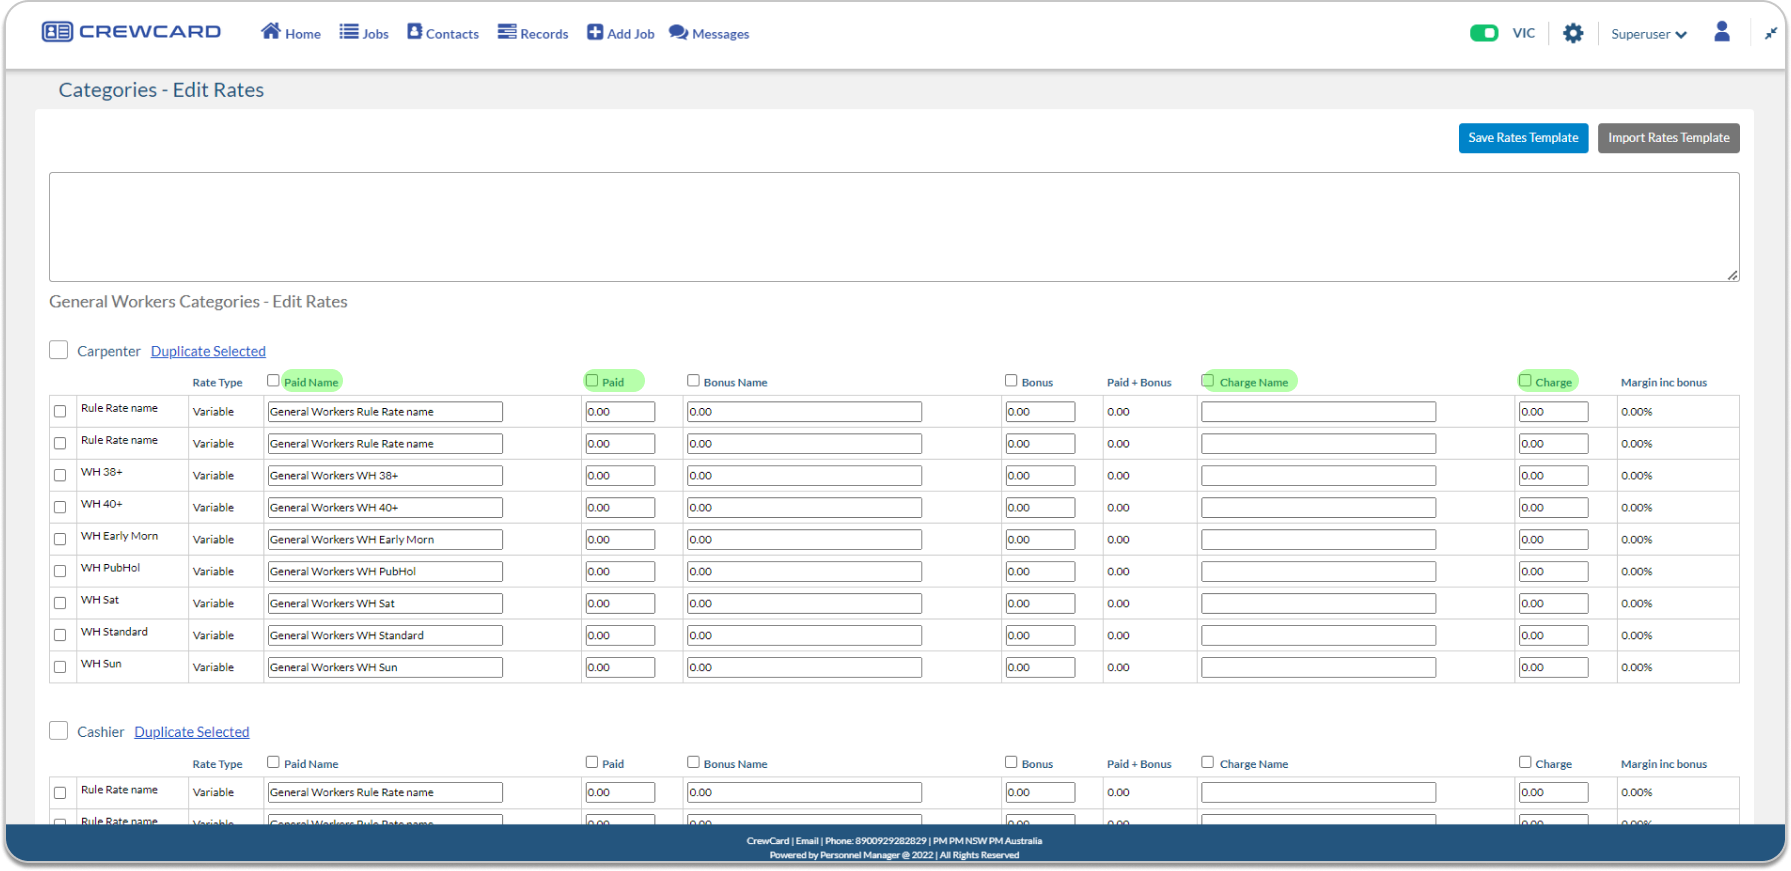
Edit the paid names and charge names by copying those in other categories for the first activity. Enter the paid rates and charge rates desired. Once done click the Save Changes button.
Check with the crew if they’re using the same email address for both clients.
Shifts are not showing in the shifts page
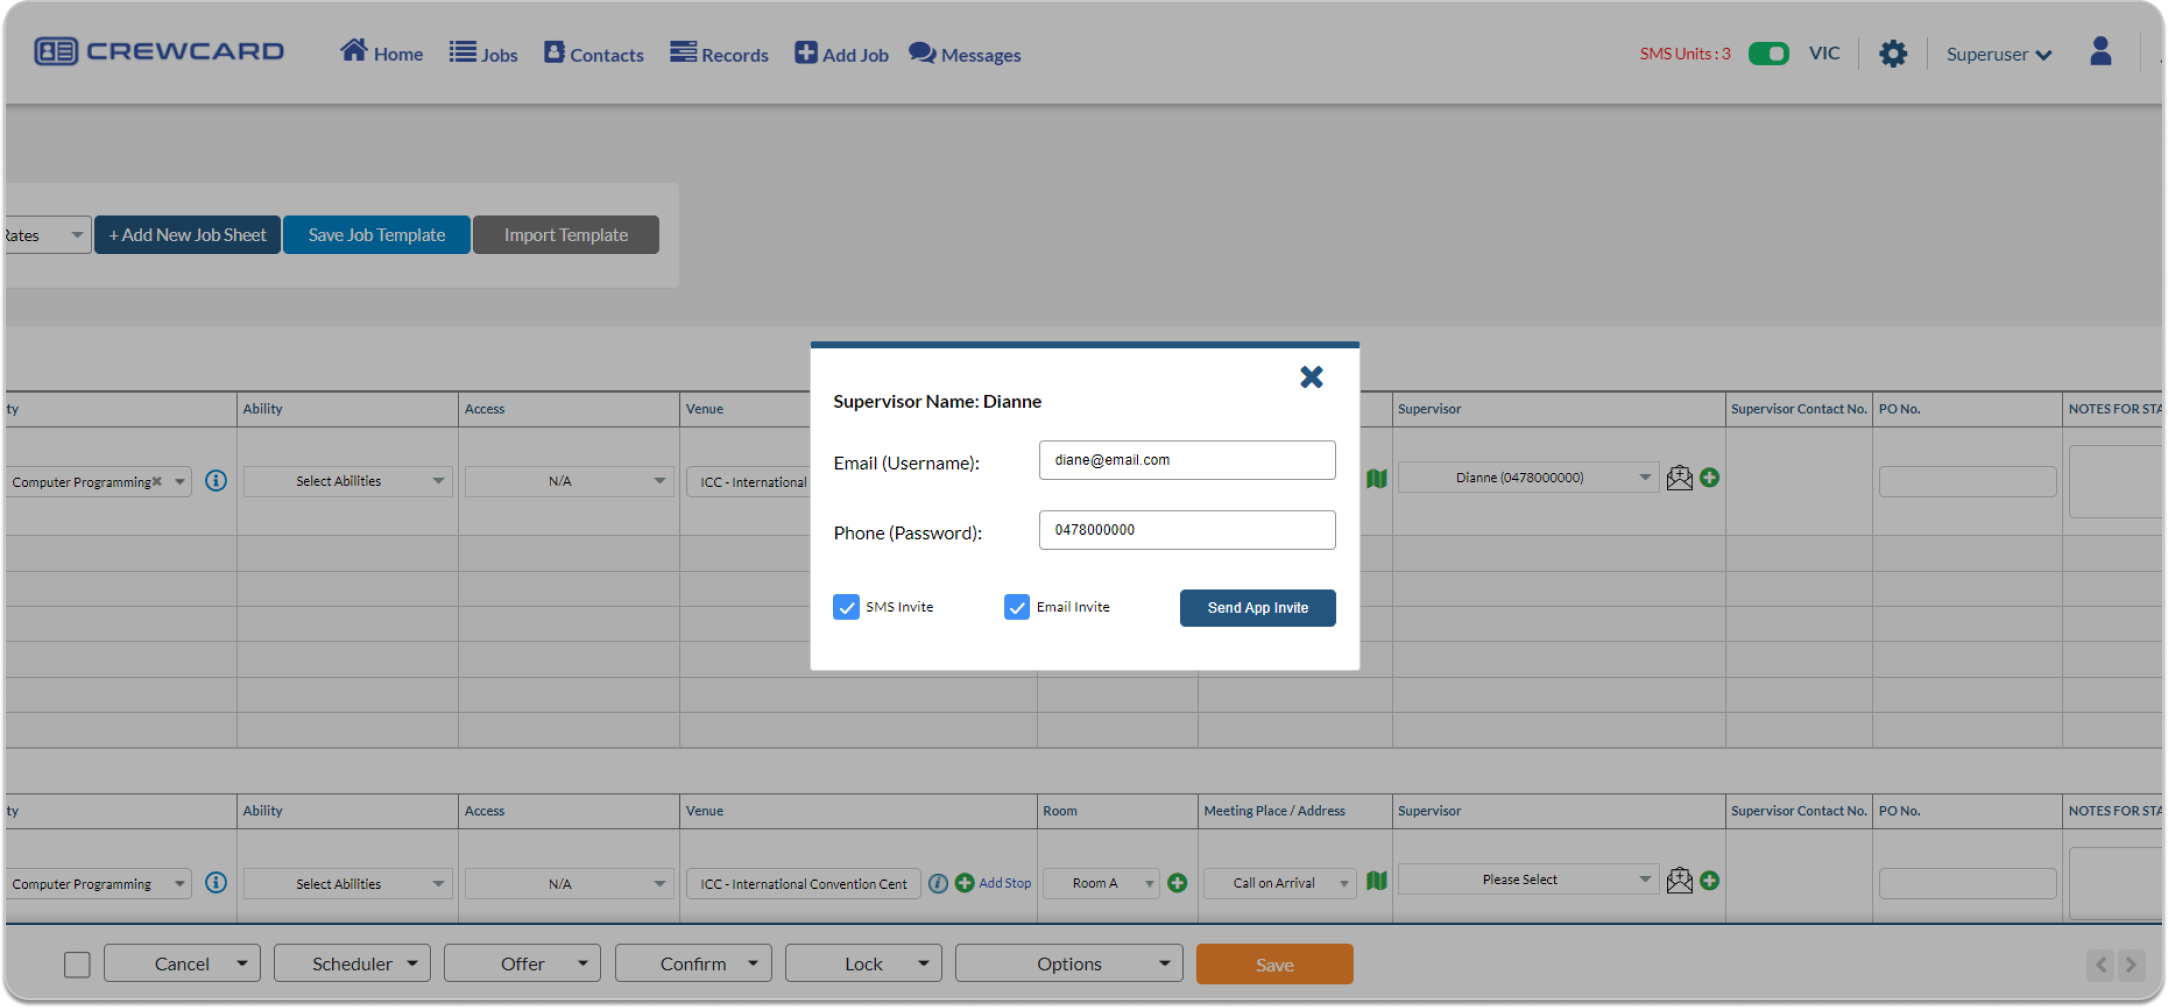
Supervisor will need to be assigned to a job to be able to see that booking. To assign the job to Supervisor, Go to the Job Sheet Page. Add a supervisor or select the supervisor then Send the SMS or Email Invite.
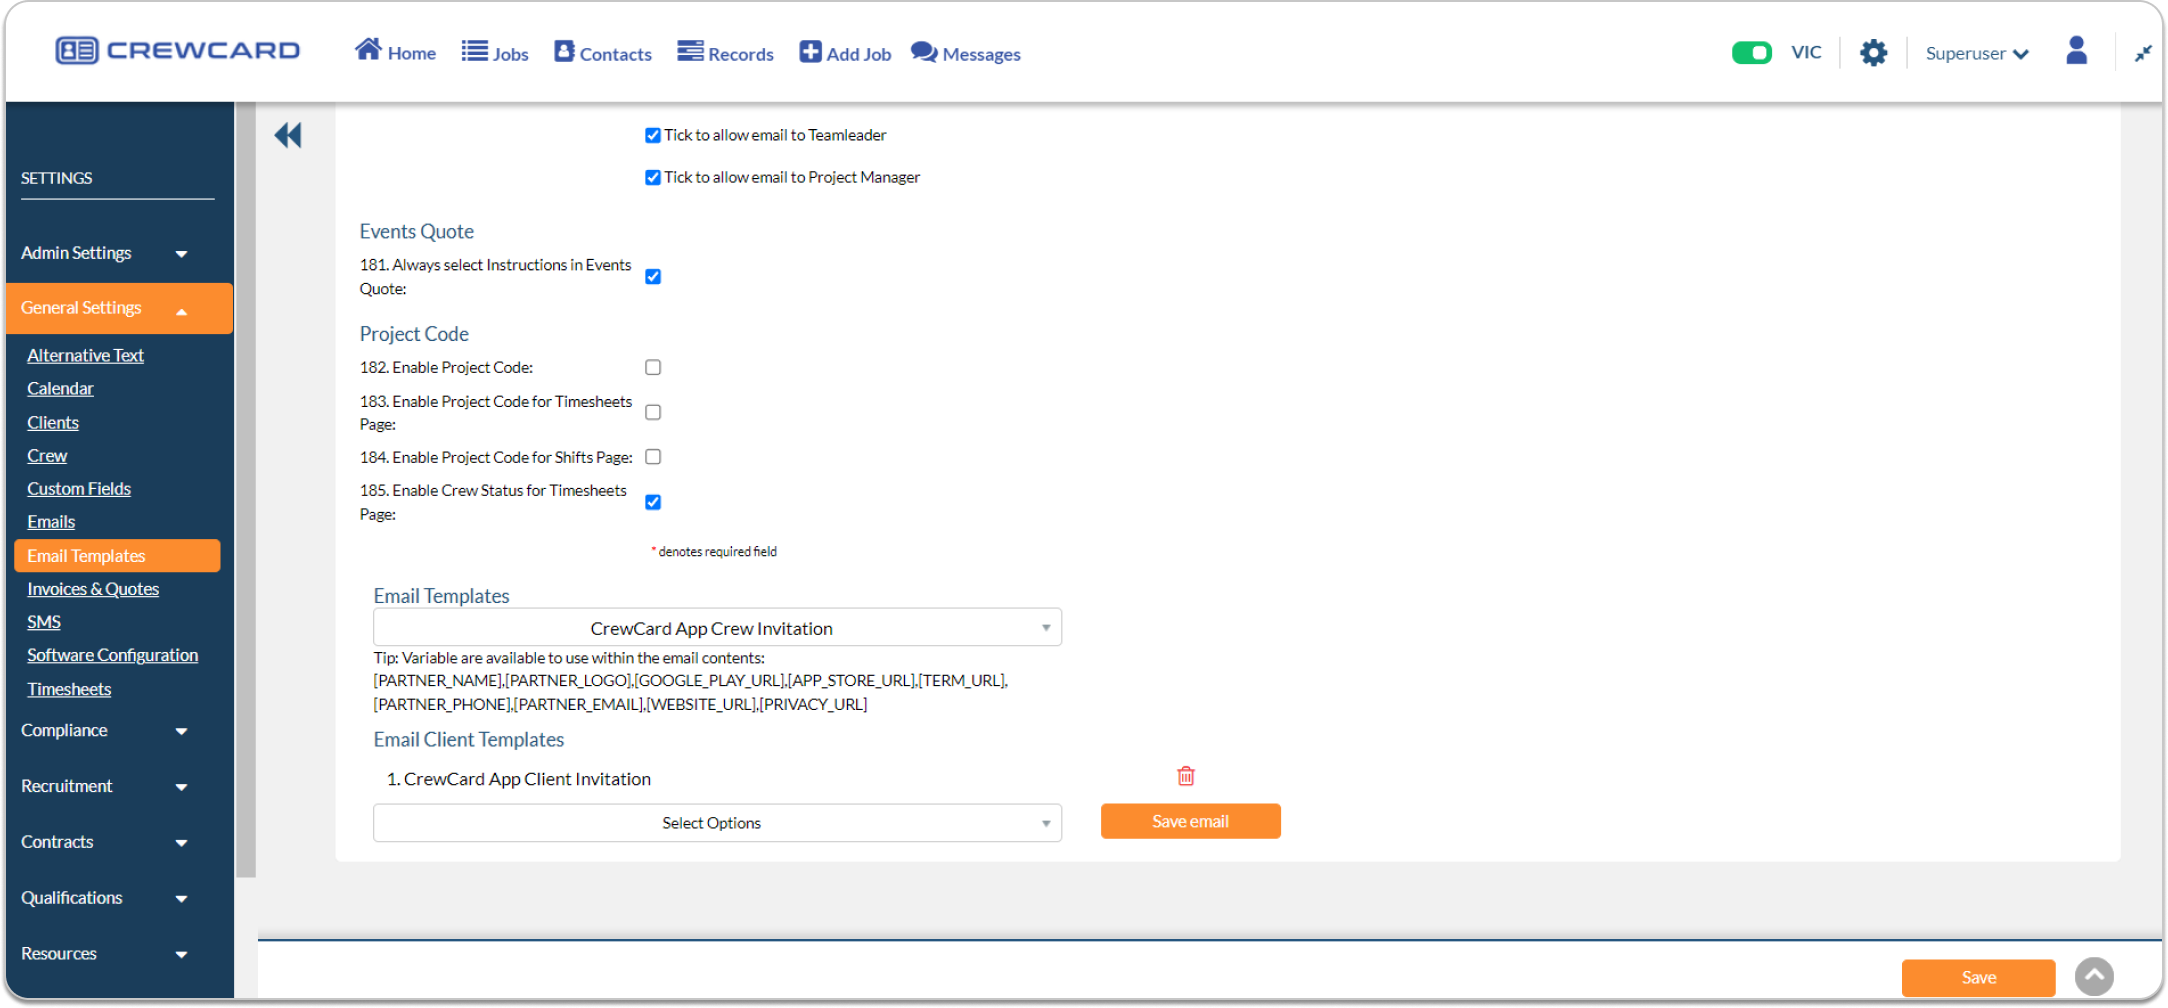
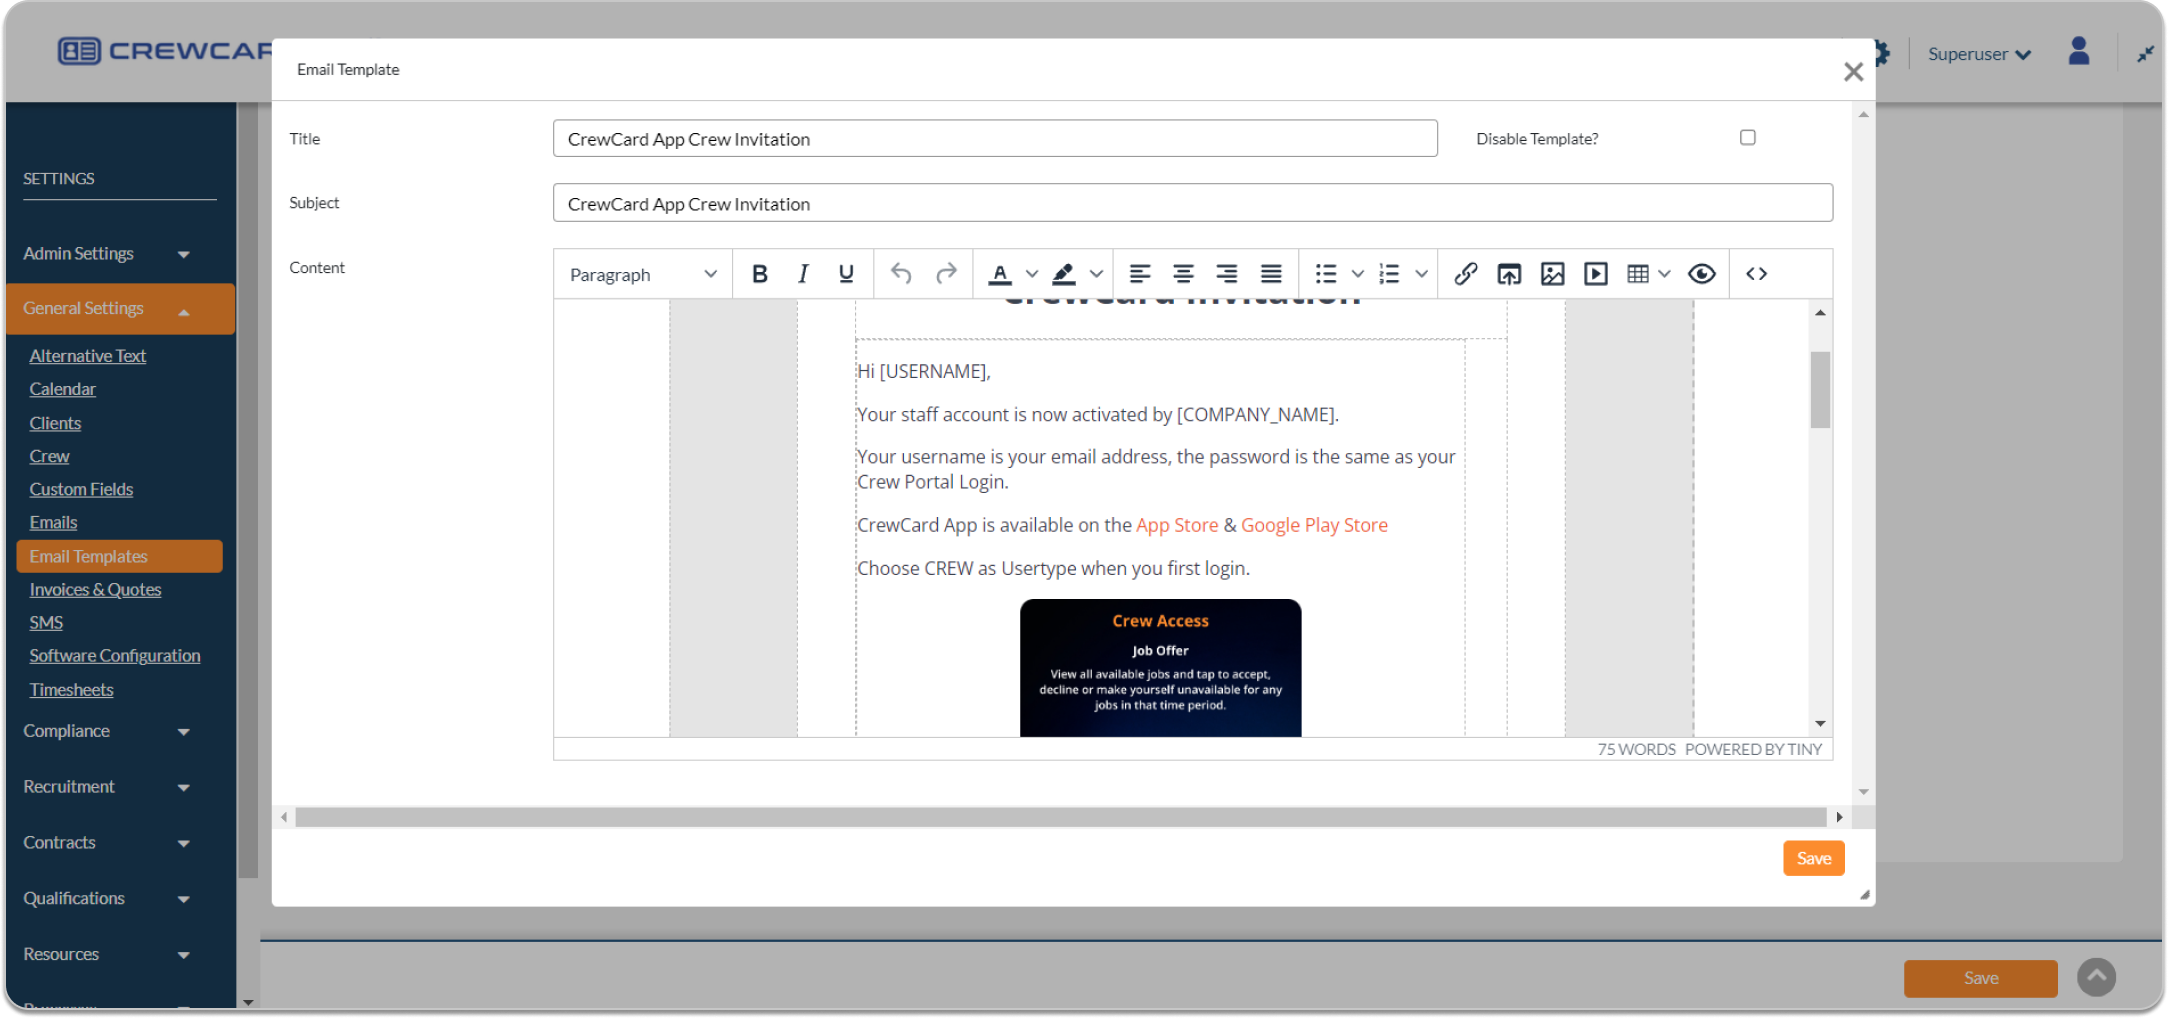
Go to General Settings and Select Email Template. Select the email template you want to modify, change the text or the content of the email template and click Save
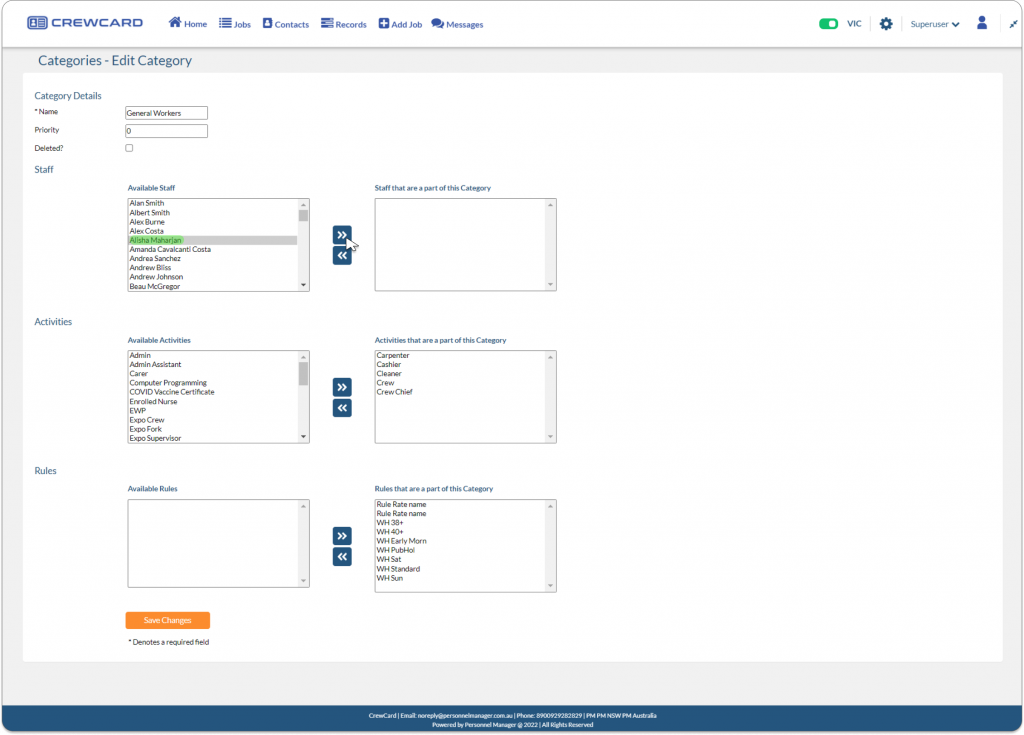
To map an activity to a category, click administration drop down and select Categories.
Select the Category in which you want to map the activity.
Select the activity you want to map to the category by clicking the right arrow to move the activity to “Activities that are part of this Category. Once it has been added, click Save Changes button.

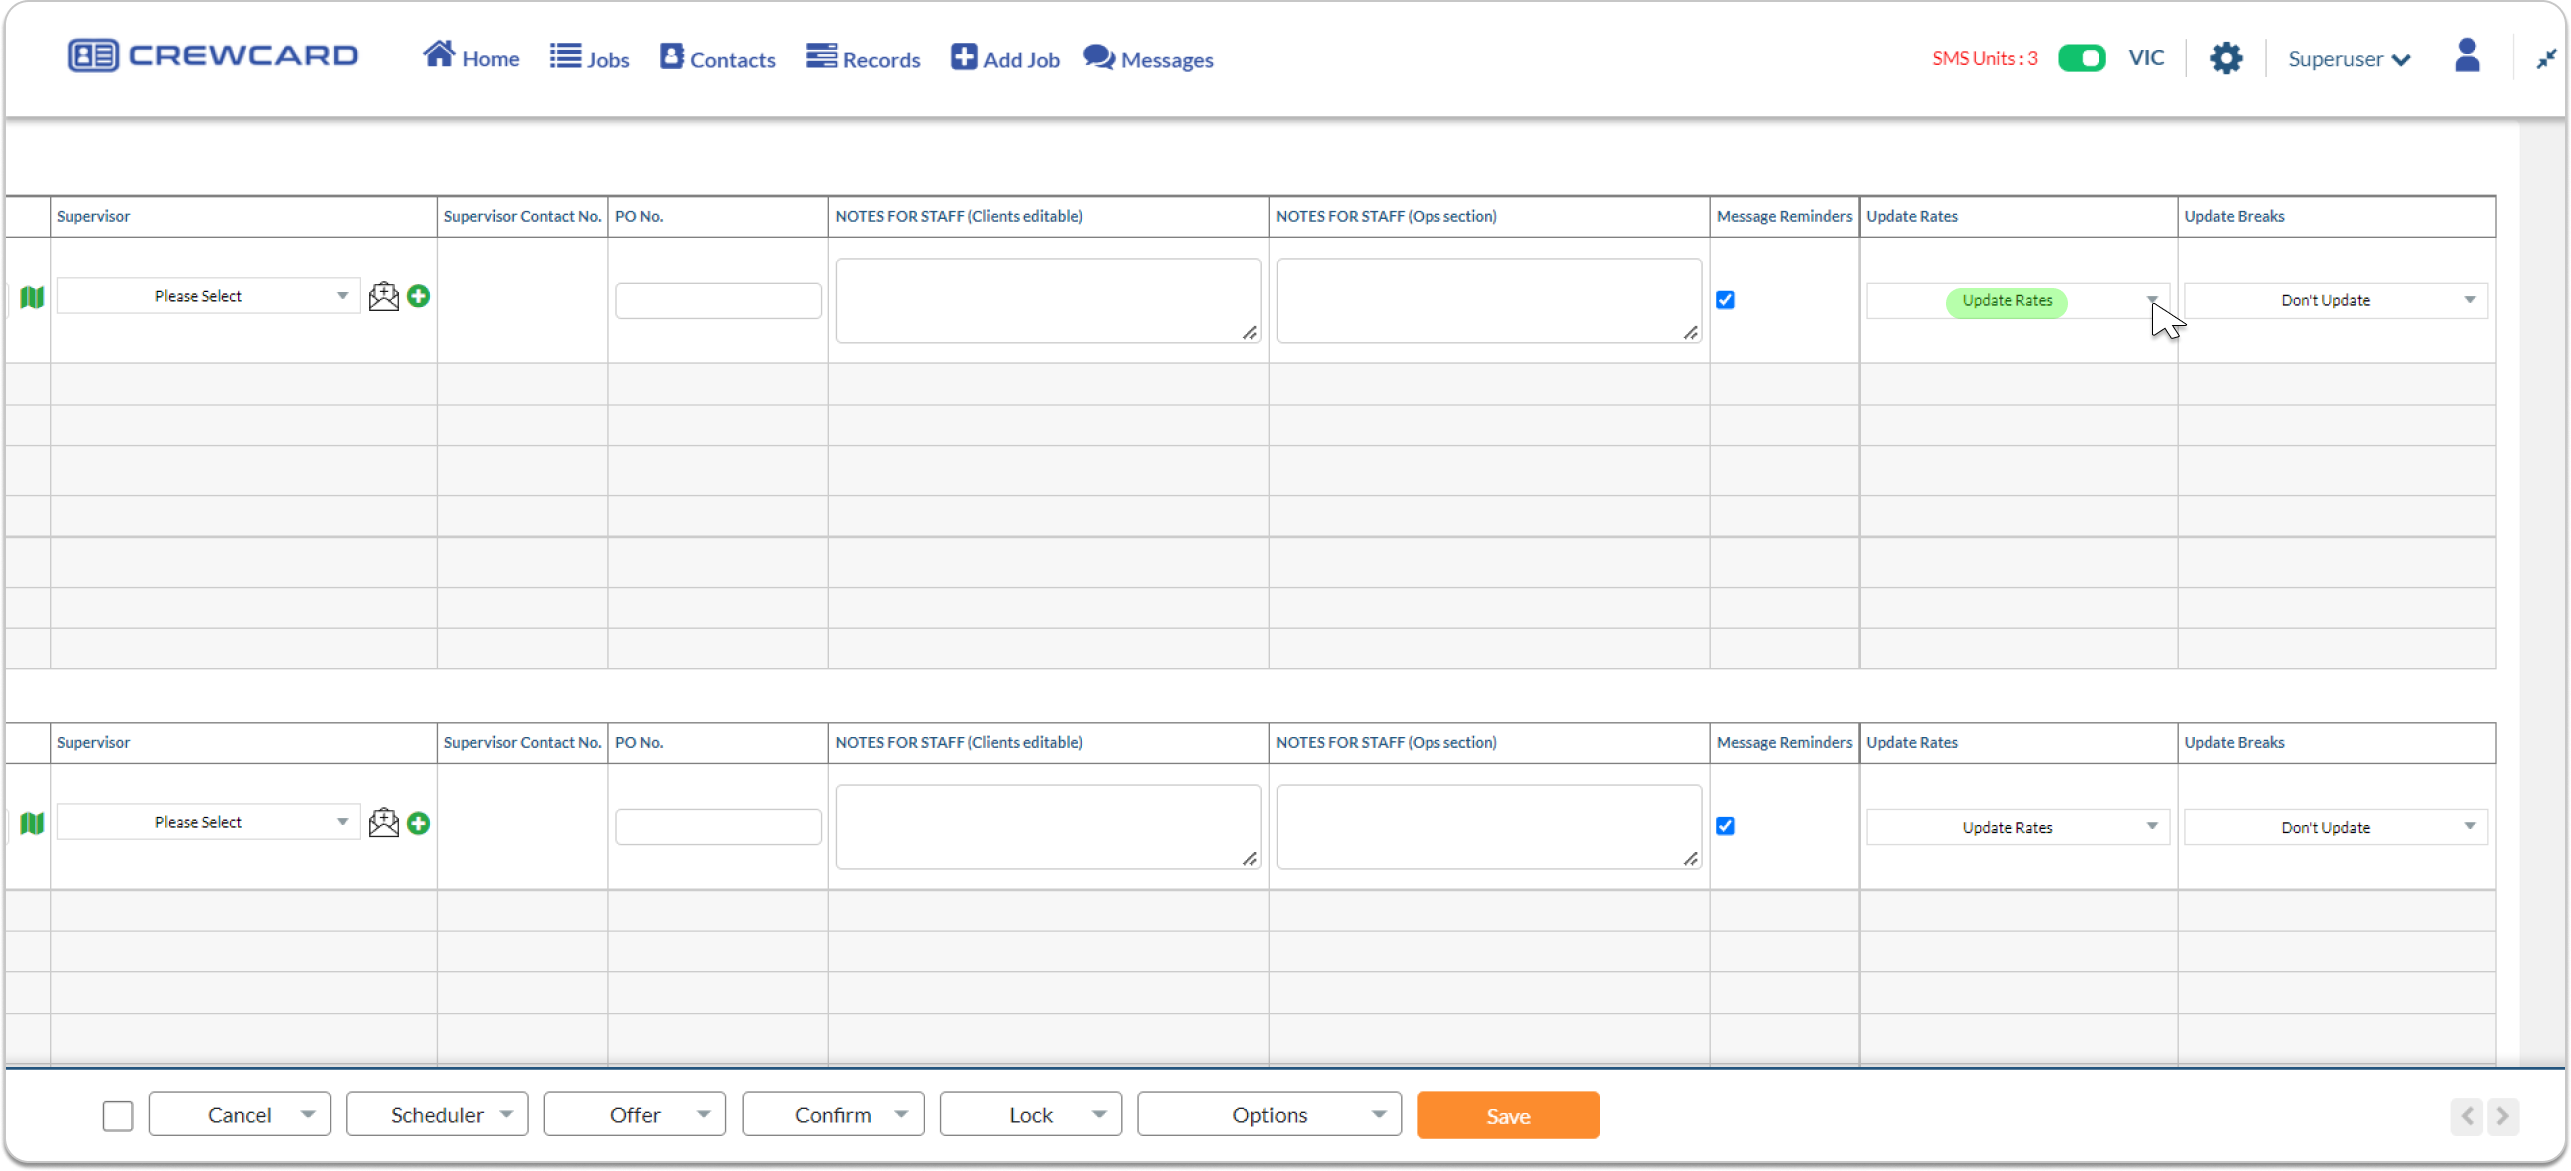
You may go to Job Sheet page, Shift Edit page or Timesheet page to unlock the selected shift you wish to update the rate name. Make sure that Update Rates is selected and save it.
(Job Sheet Page)
(Shift Edit Page)
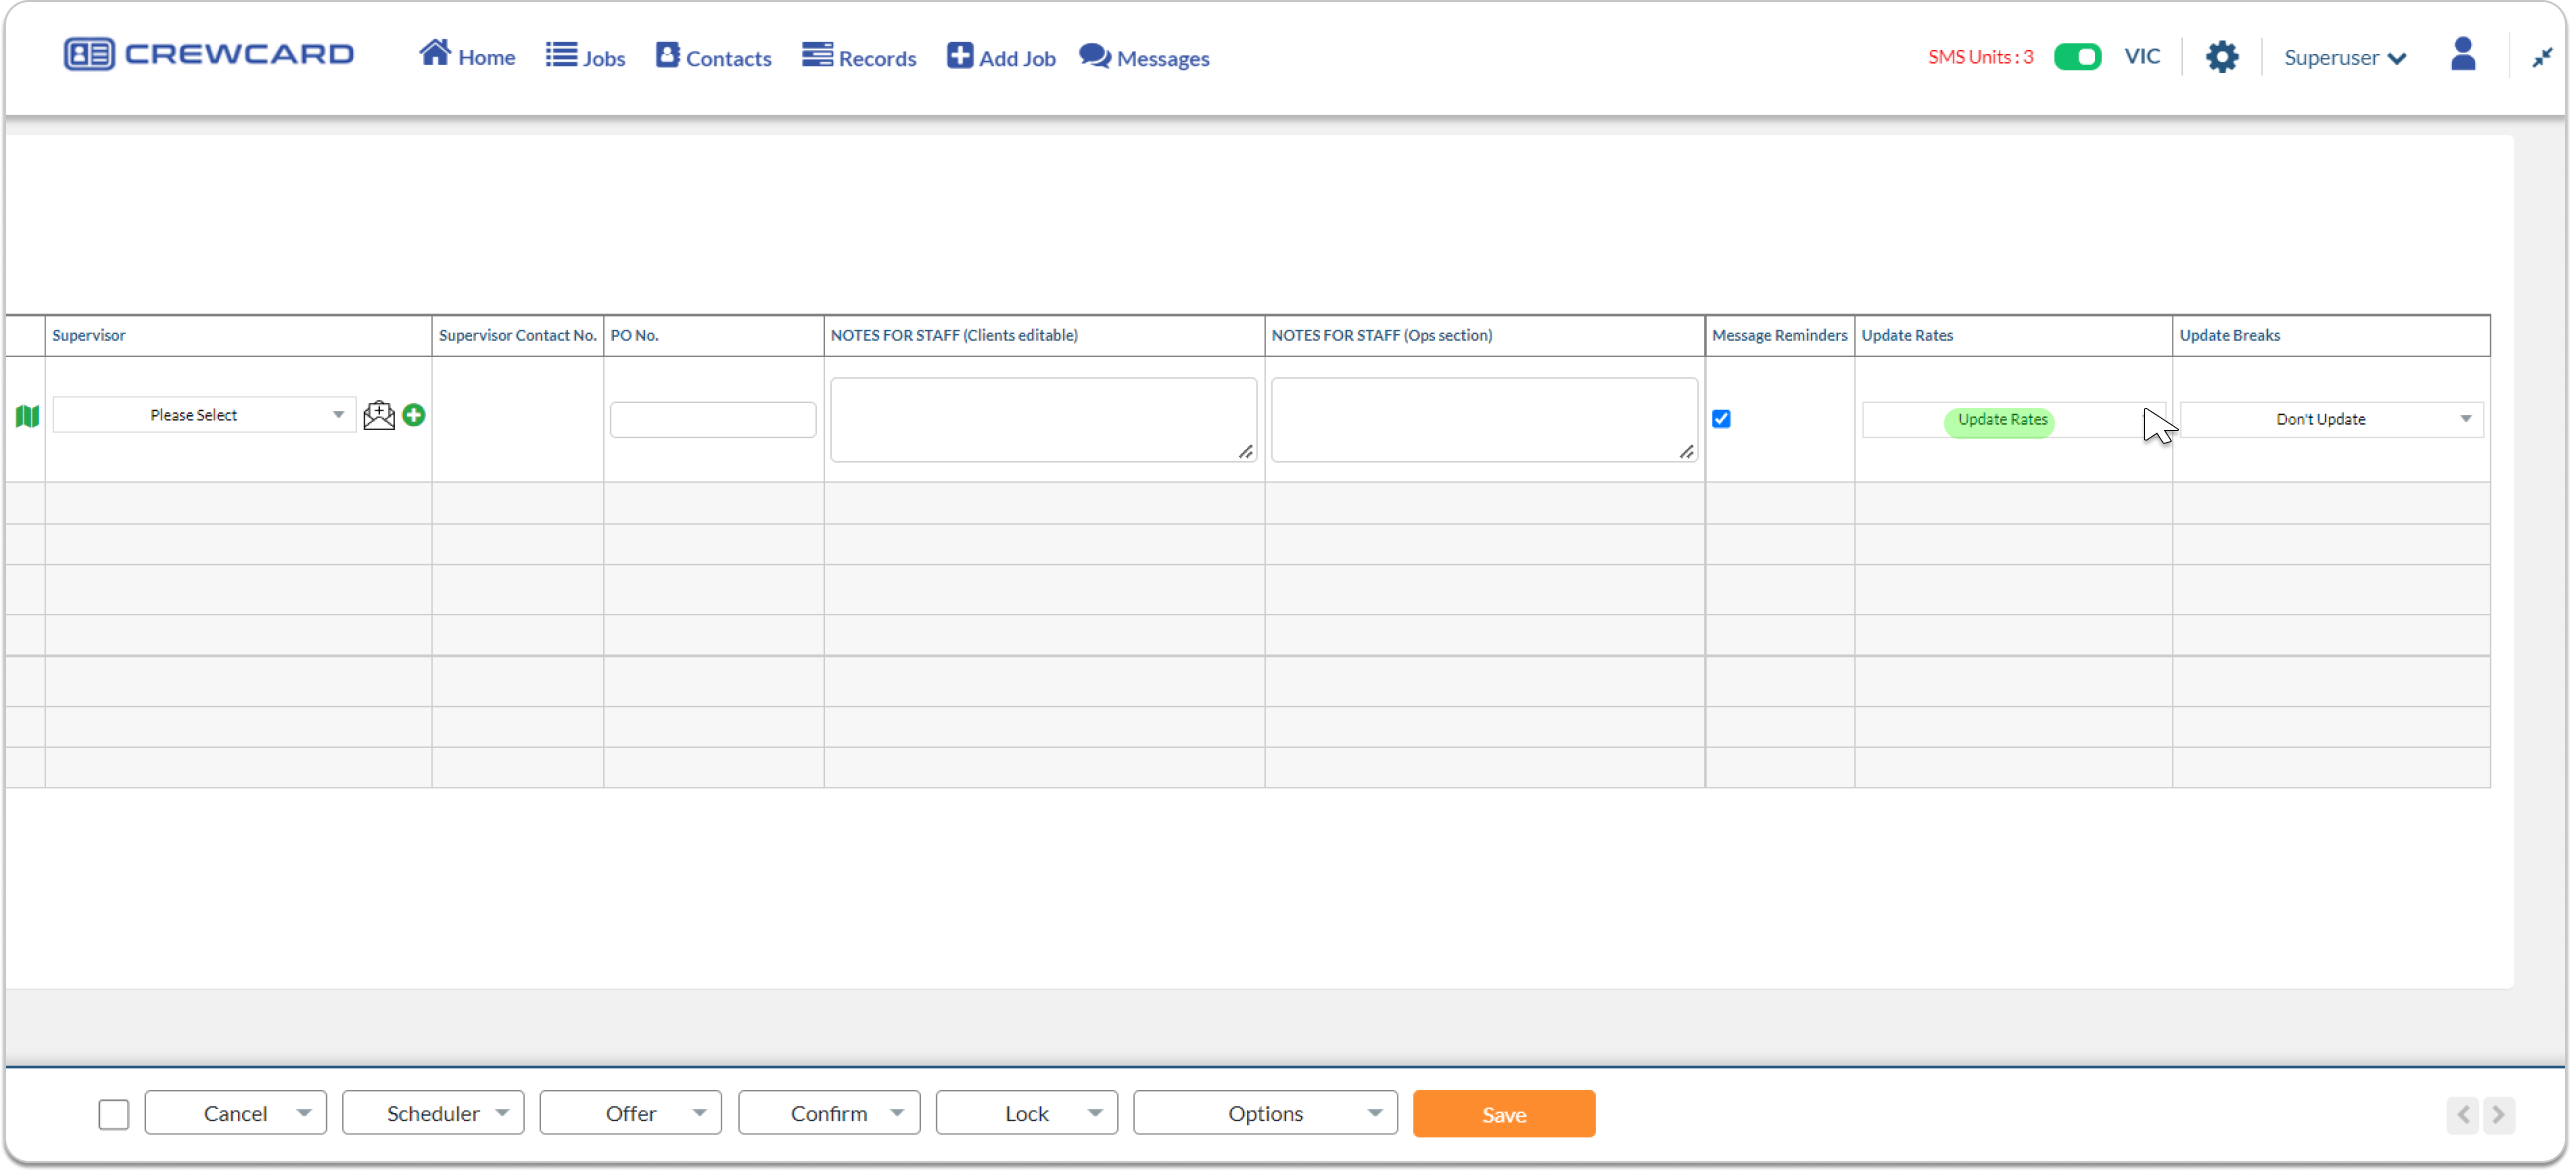
(Timesheet Page)

To map a crew to a category, click administration drop down and select Categories.
Select the Category in which you want to map the activity.
Select the crew you want to map in the Available Crew to the category by clicking the right arrow to move the crew to “Crew that are a part of this Category”. Once it has been added, click Save Changes button.
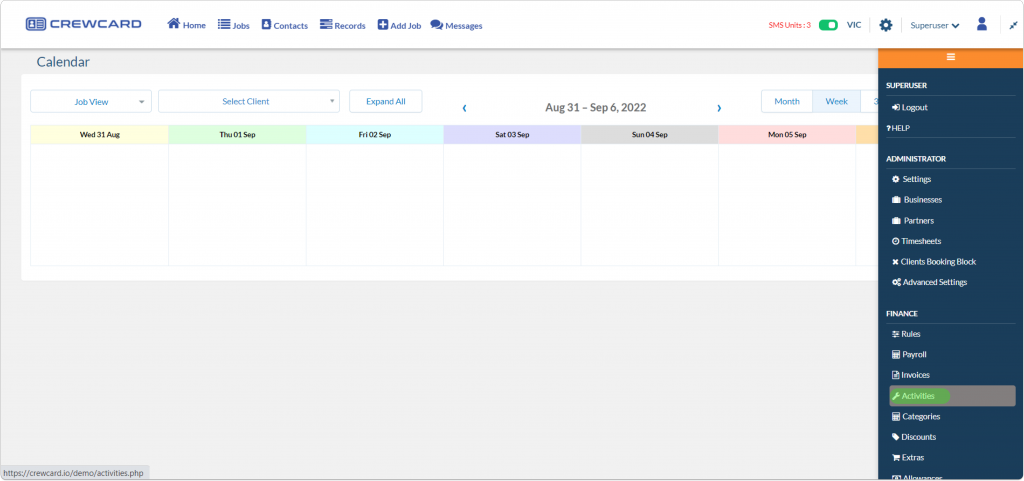
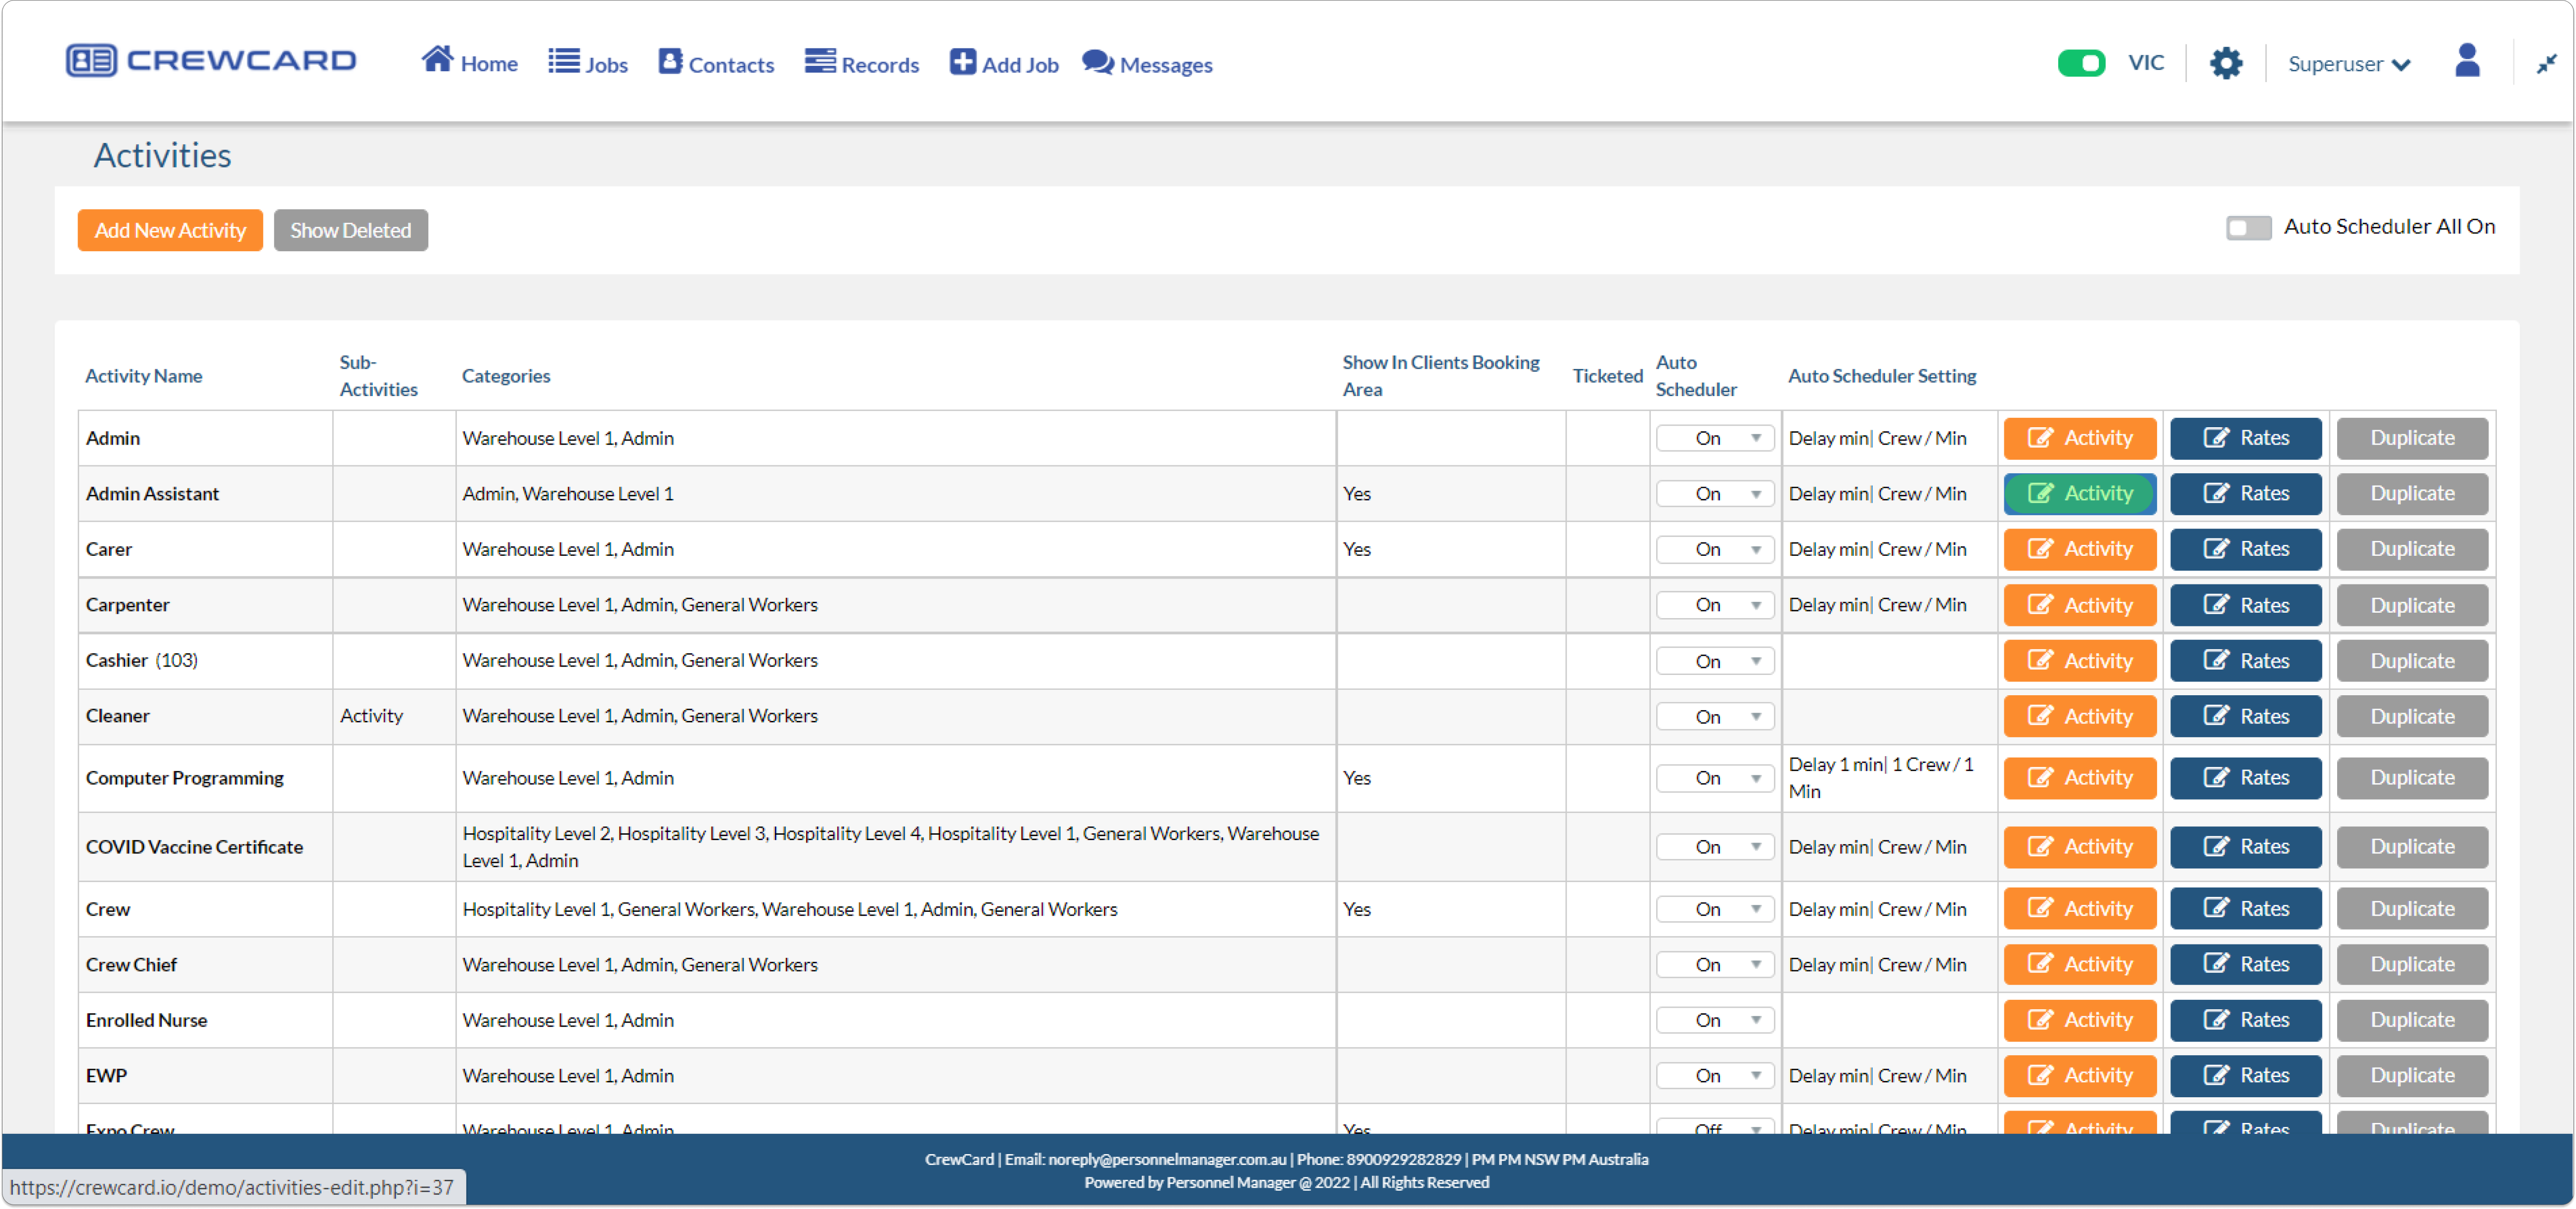
To add the Skill description in the CrewCard App, Go to the Activities Page.
In the Activity Page, Click the Edit icon.
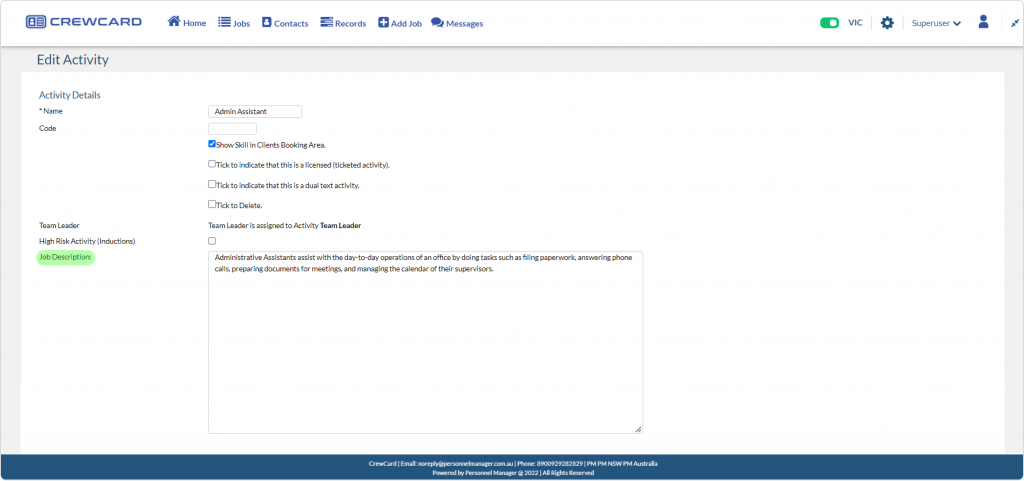
This will direct you to Edit Activity Page, Go to the skill description section and enter the activity or skill description.
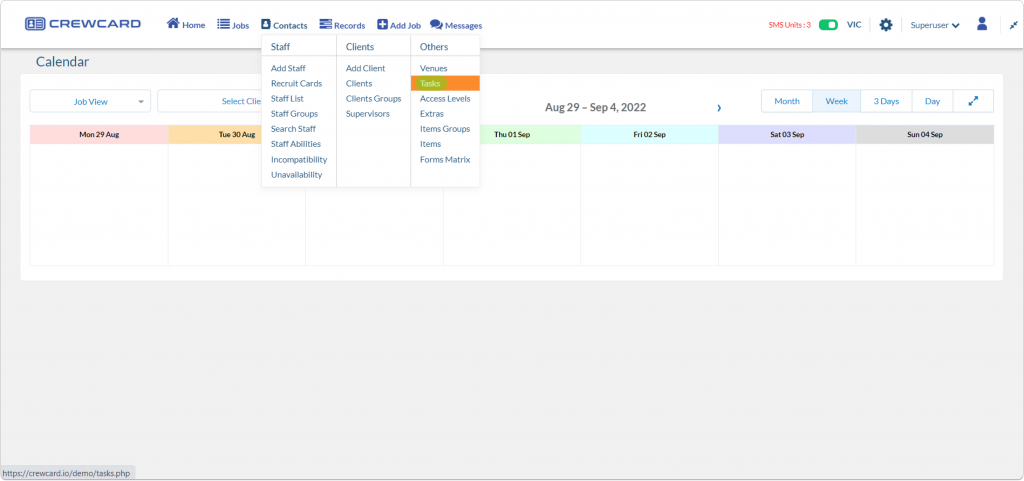
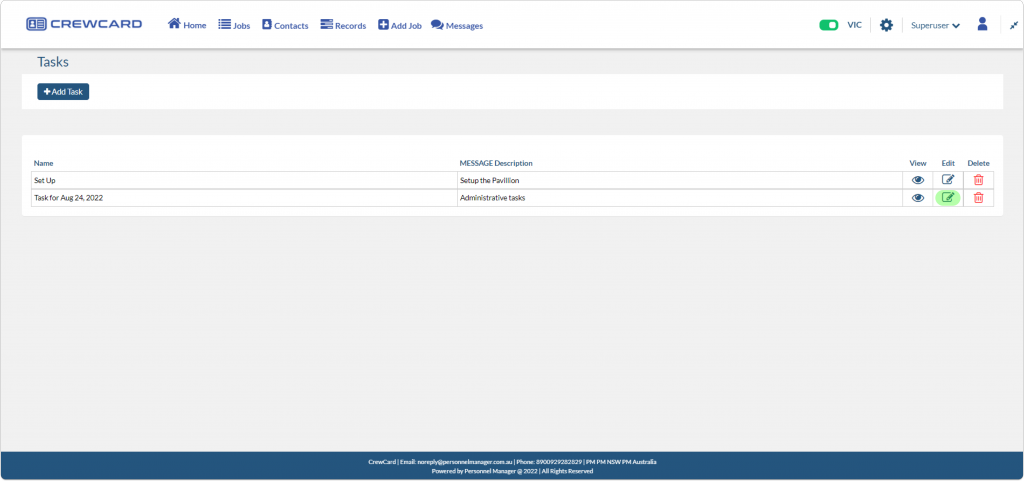
To add a task description in the CrewCard App, Go to Task Page.
In the Task Page, Select the task that you wanted to add the description and click the Edit icon.
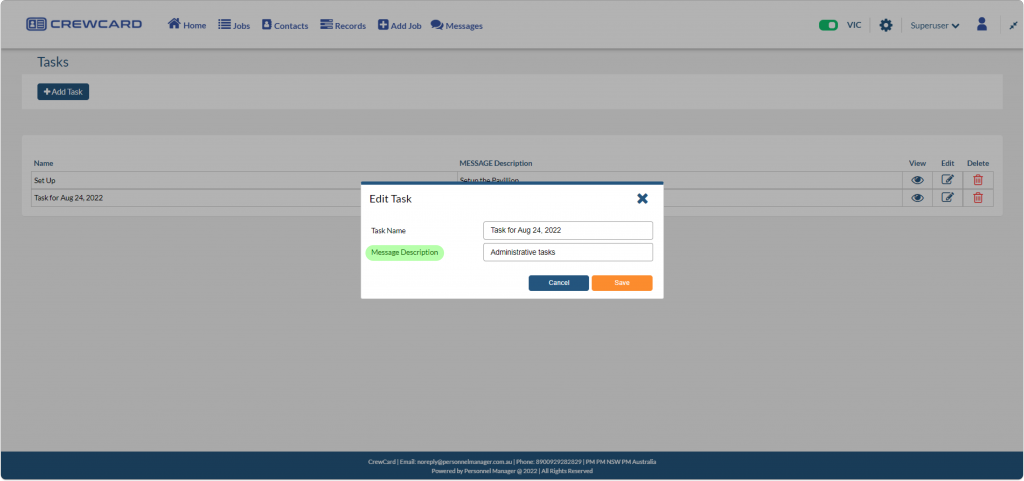
Edit Task pop up window will appear. Enter the Description of the Task in the Message Description and once done, click Save button.
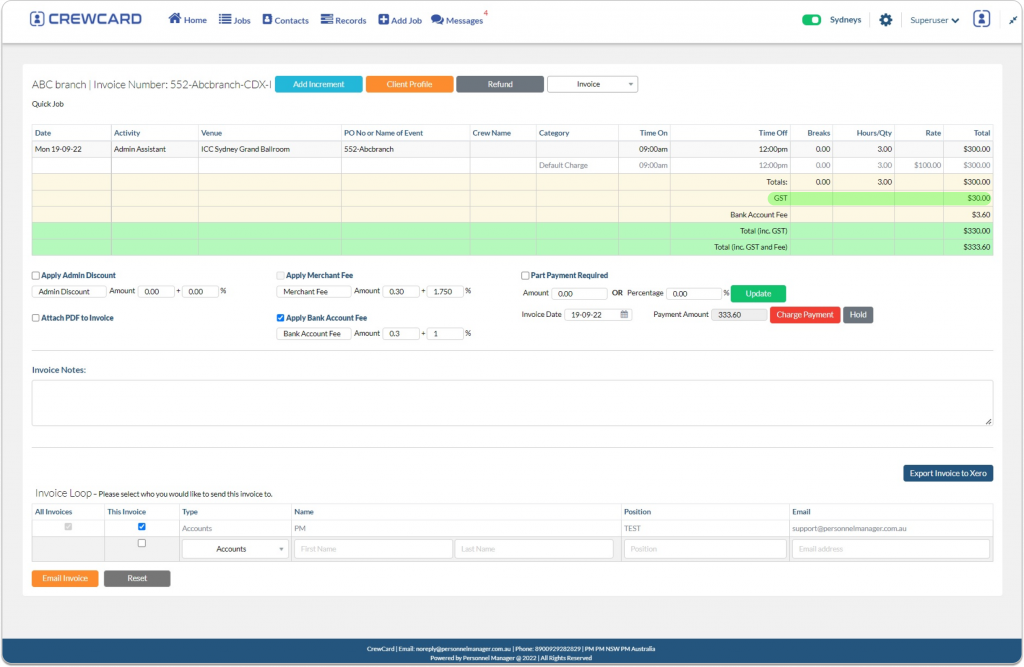
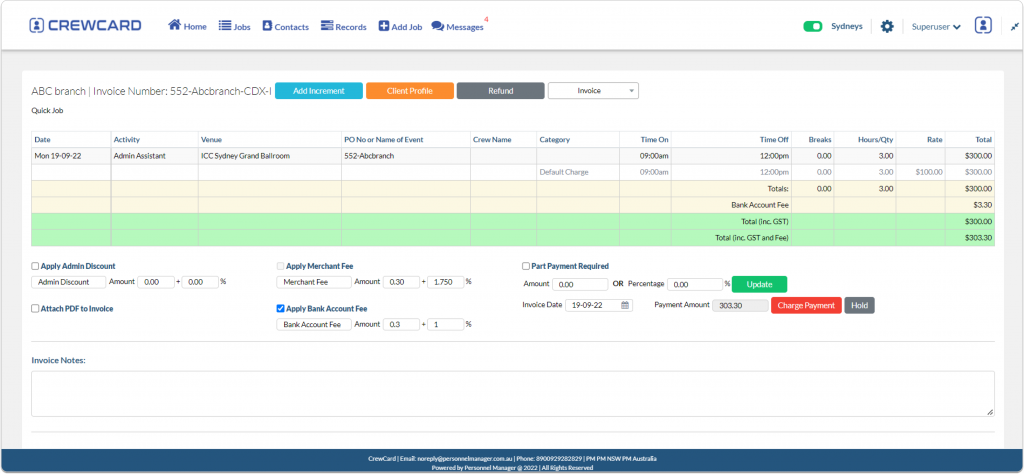
To remove the GST from the Invoice Page, Simply go to the Clients Profile you wish to remove the GST or Click the Client Profile button on the the top of the Invoice page. This will direct you to the Clients Profile Page
In the Clients Profile Page, Click the Client Discount on the side menu.
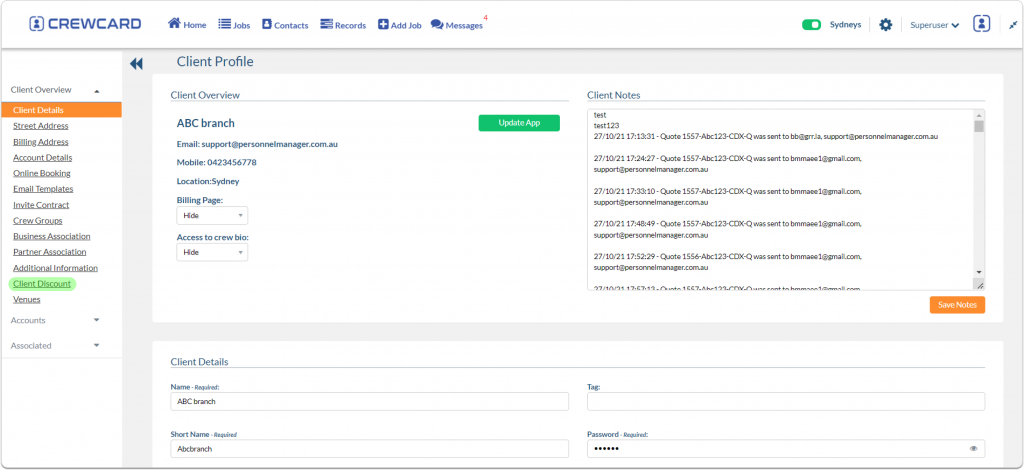
Untick the “Apply GST” and click Save Details
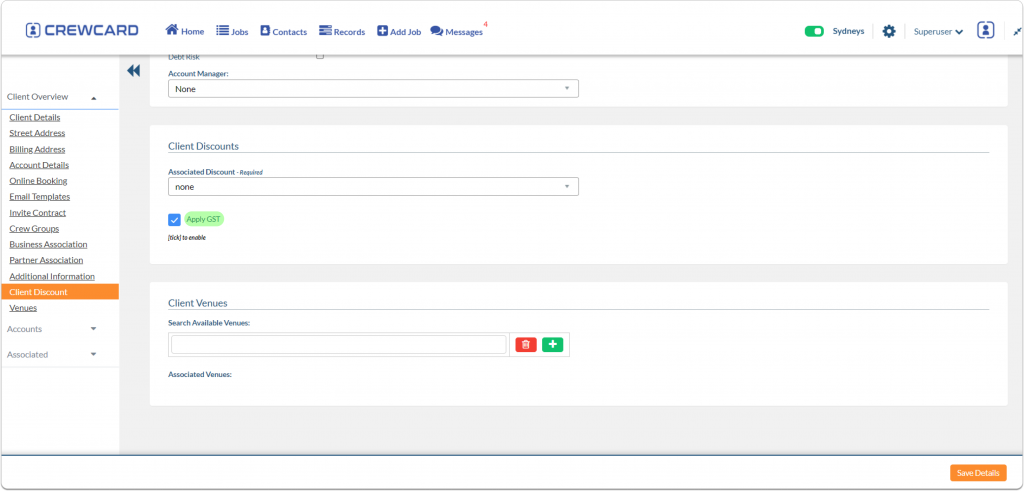
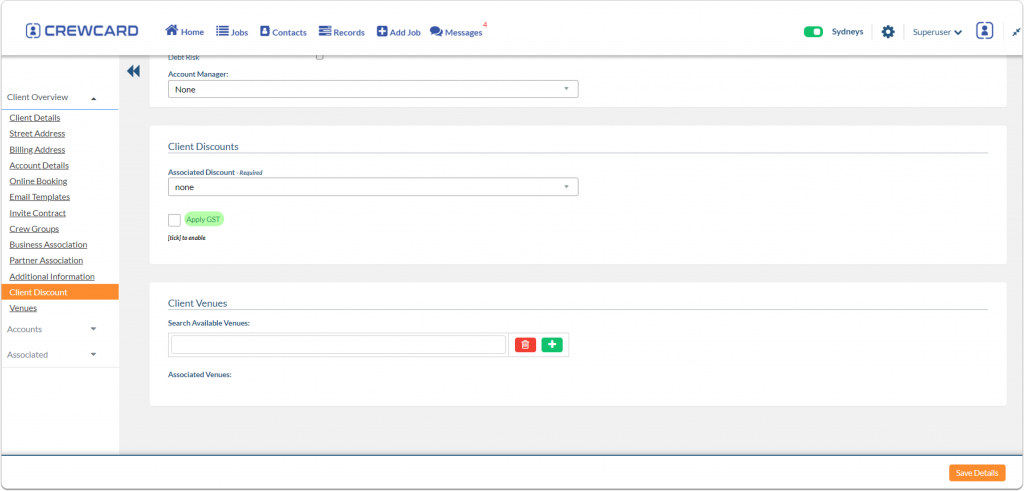
Go back to the Invoice page and refresh it, the GST will no longer reflect in the invoice page of the selected client.
To disable Rank in the Crew Profile, Go to the Admin Settings and Untick 85. Hide reason on Rank Change.
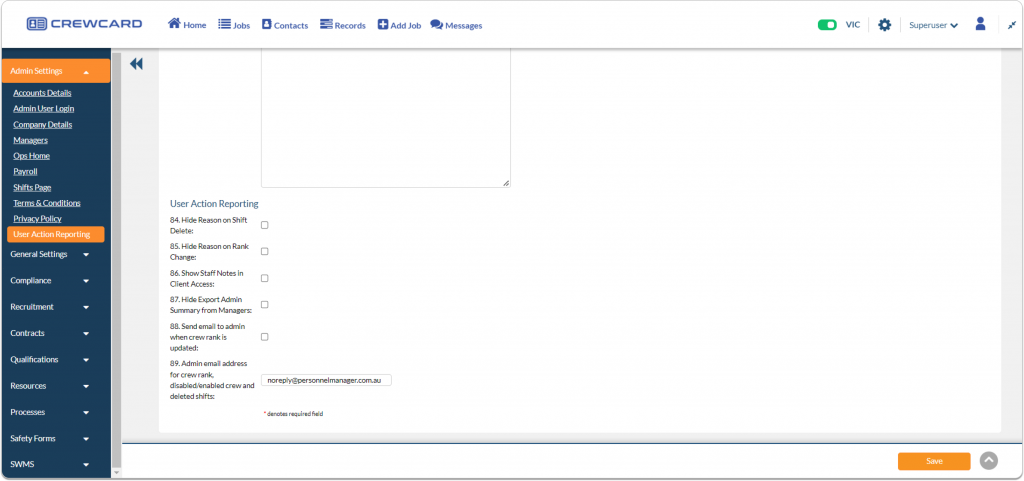
TIP: Only those with Admin privileges would be able to see the Rank Change in the Crew Profile.
To disable the Abilities from the Client’s Booking Form, Go to the General Settings and Untick settings 22. Crew Abilities at Client booking form.

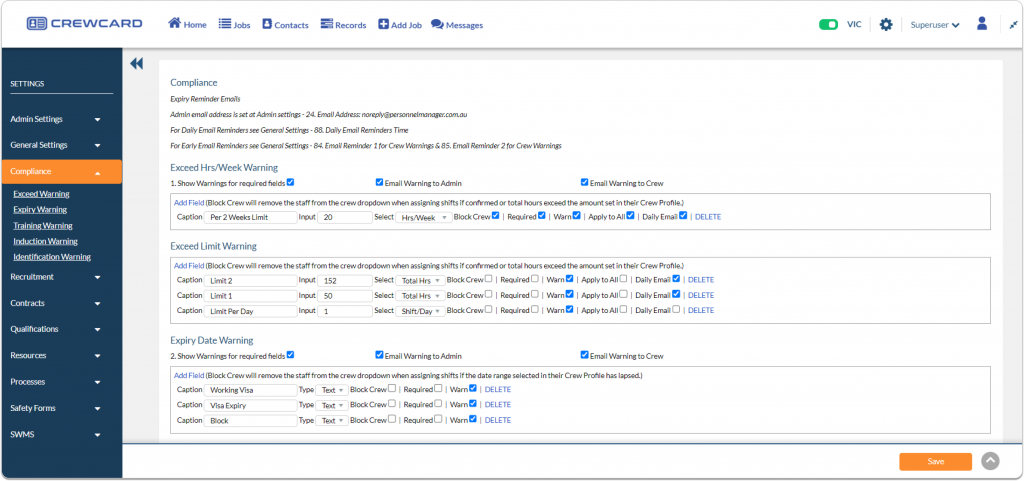
Navigate to Settings and then Compliance. Click Add Field and enter the Caption under Exceed Hrs/Week Warning. Enter the total number of hours required per hour or week and select the required week(s). Check the Block Crew, Required, and Warn boxes.
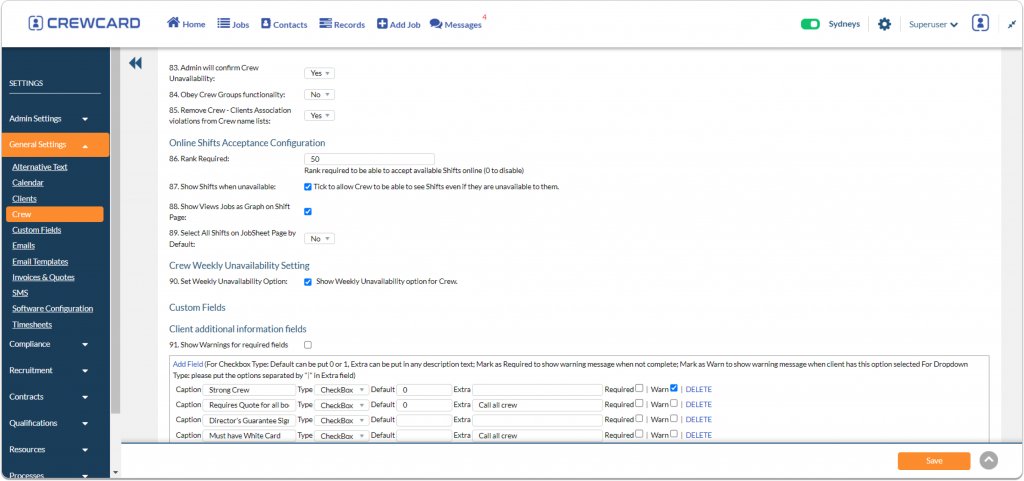
Go to General settings and Select Crew, Under Online Shift Acceptance Configuration enter the rank required on Settings 86. Rank Required.
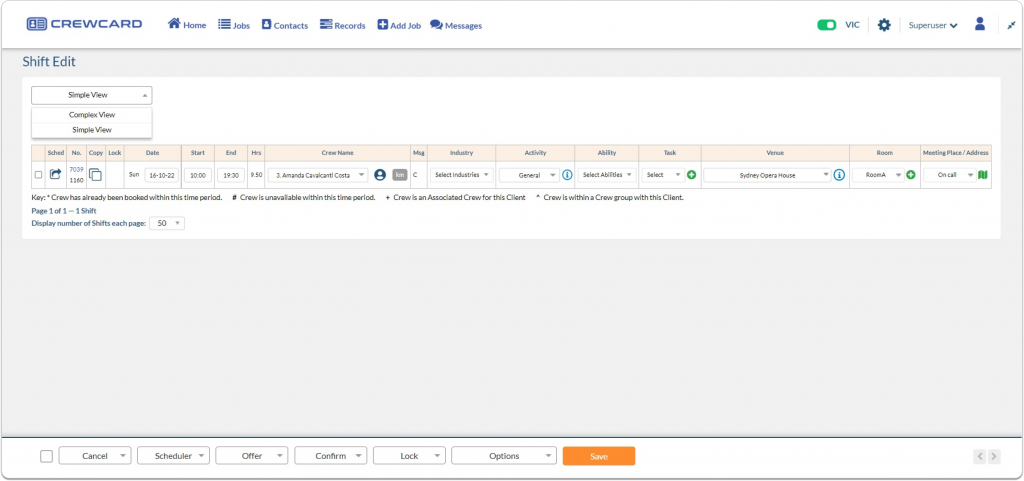
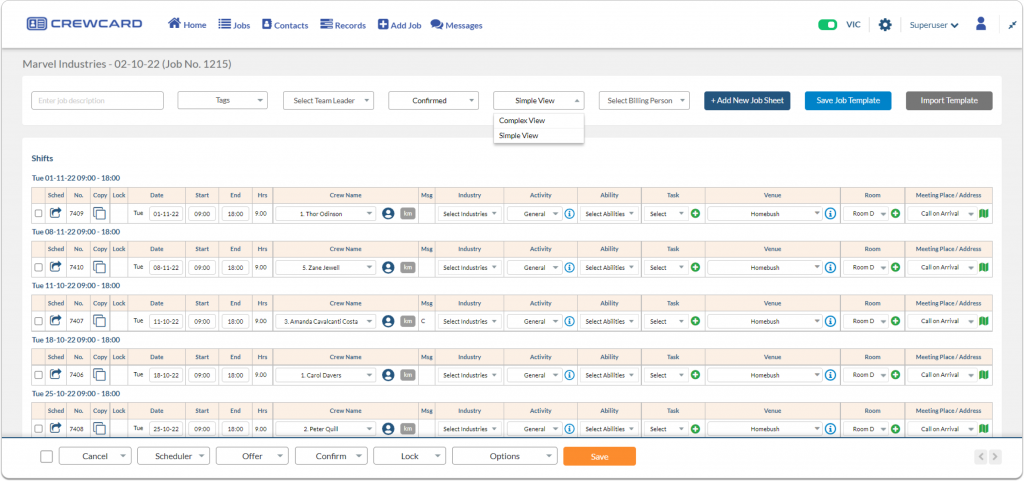
Simply click the Simple View dropdown and select the Complex View on the Shift Edit Page.
Click the Simple View dropdown and select the Complex View on the Job Sheet Page.
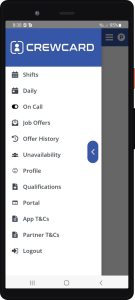
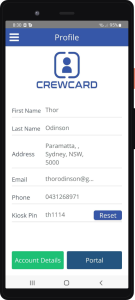
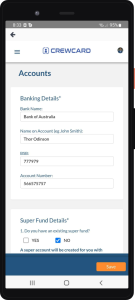
Simply login to the CrewCard App to update the account information. Tap Profile from the Side menu.
In the Profile Page, click the Account Details button.
Select Admin.
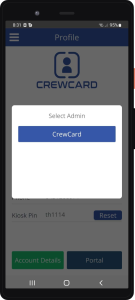
This will take you to the Account Details page, where you can change the information.
Select the recruits you want to change the email address on the Recruit Cards page and select the edit icon next to their email address.
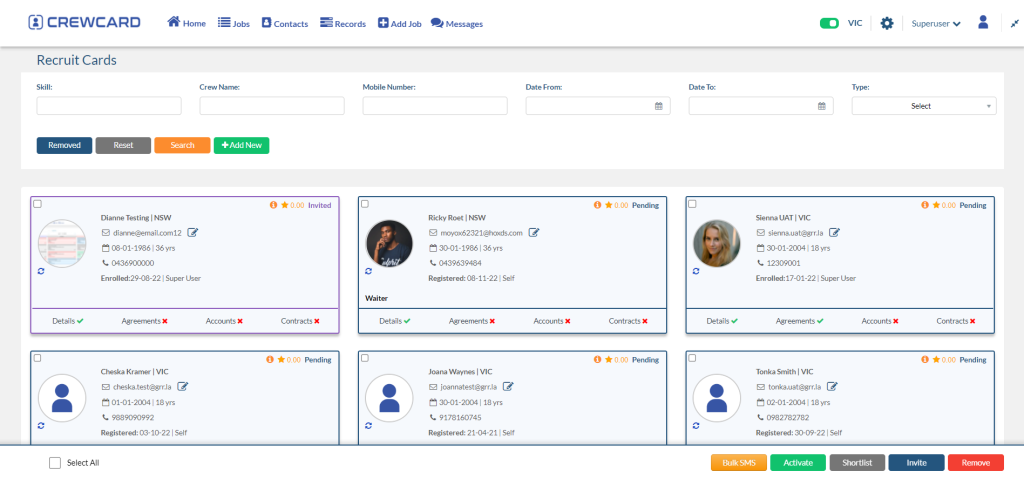
Edit or update the email address of the recruit and press the Save button.
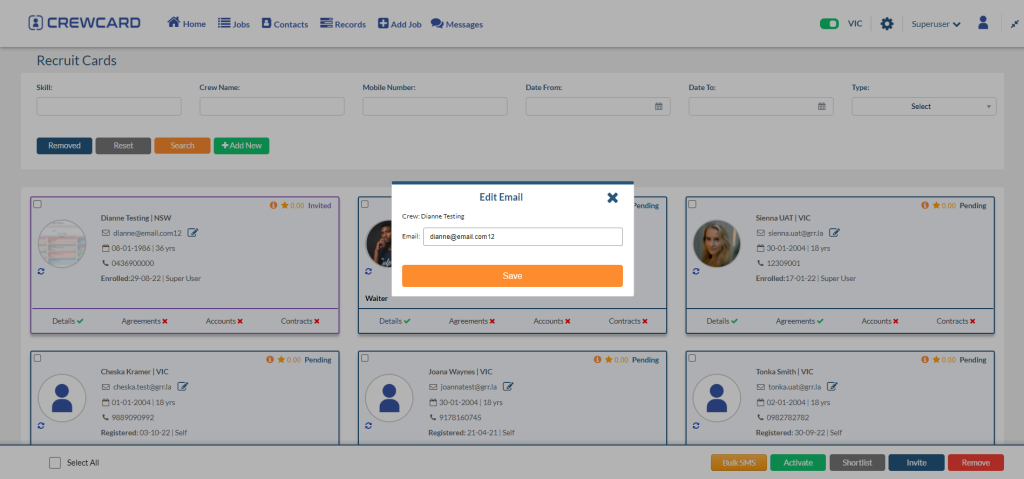
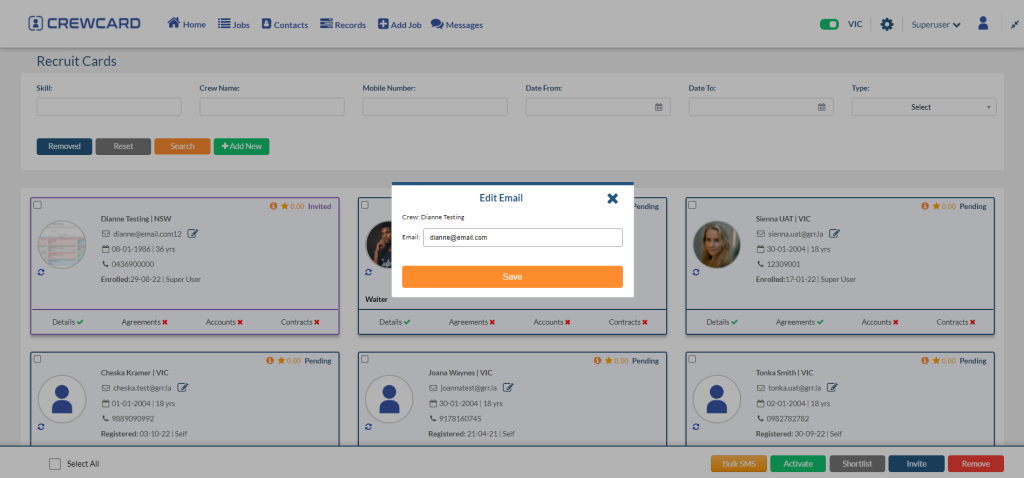
The message “Email Successfully updated” will appear after saving.

To disable the abilities in the Booking Form, simply go to the general settings and untick #22. Crew abilities at Client booking form

Abilities section in the Client booking form will be hidden as shown on below illustration.

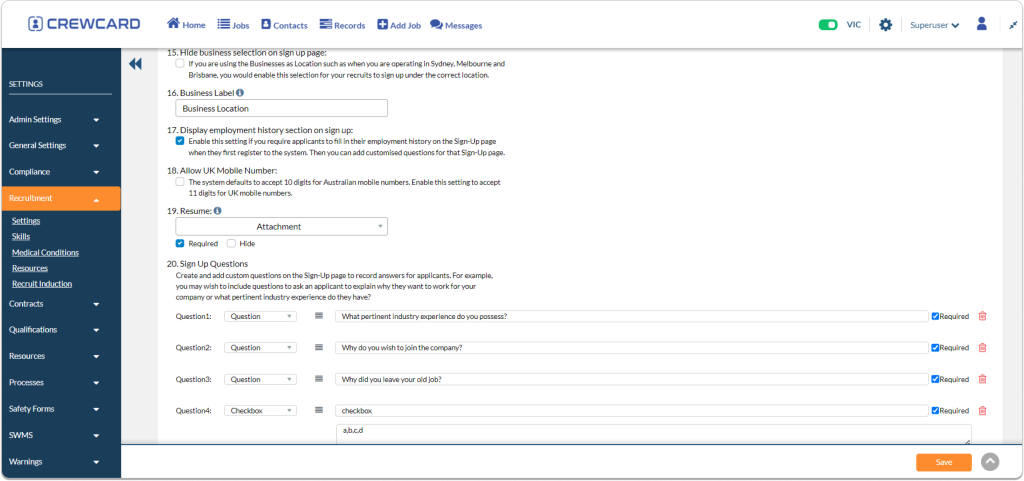
Go to 19. Resume in the Recruitment settings. If a resume is required, check the box next to it. Otherwise, uncheck it. Simply check the Hide checkbox if the resume is not necessary or is not required at all.
CrewCard enables Managers to have 2 Step Factor Authentication (2FA) when logging into the CrewCard/PM Portal.
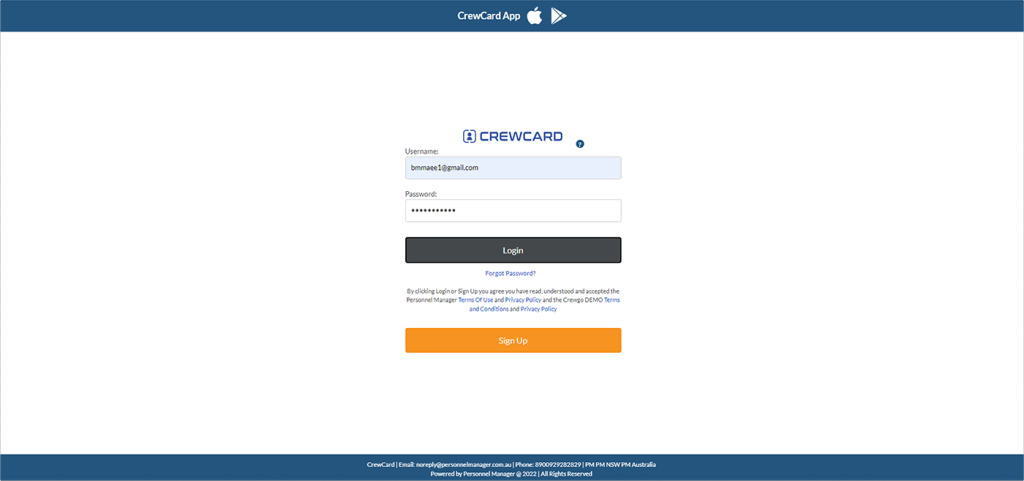
Start by entering the Manager login information into the Crewcard/PM Portal.
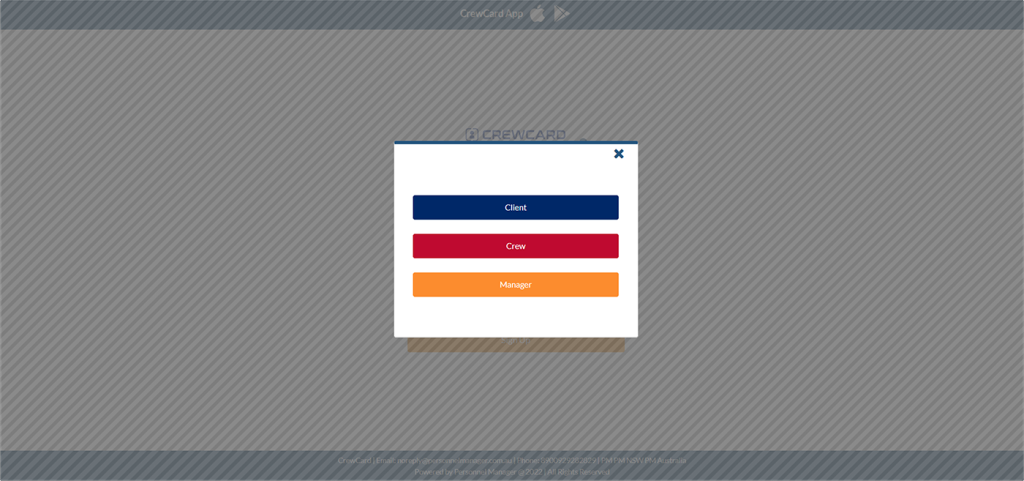
When a popup window appears, choose Manager.
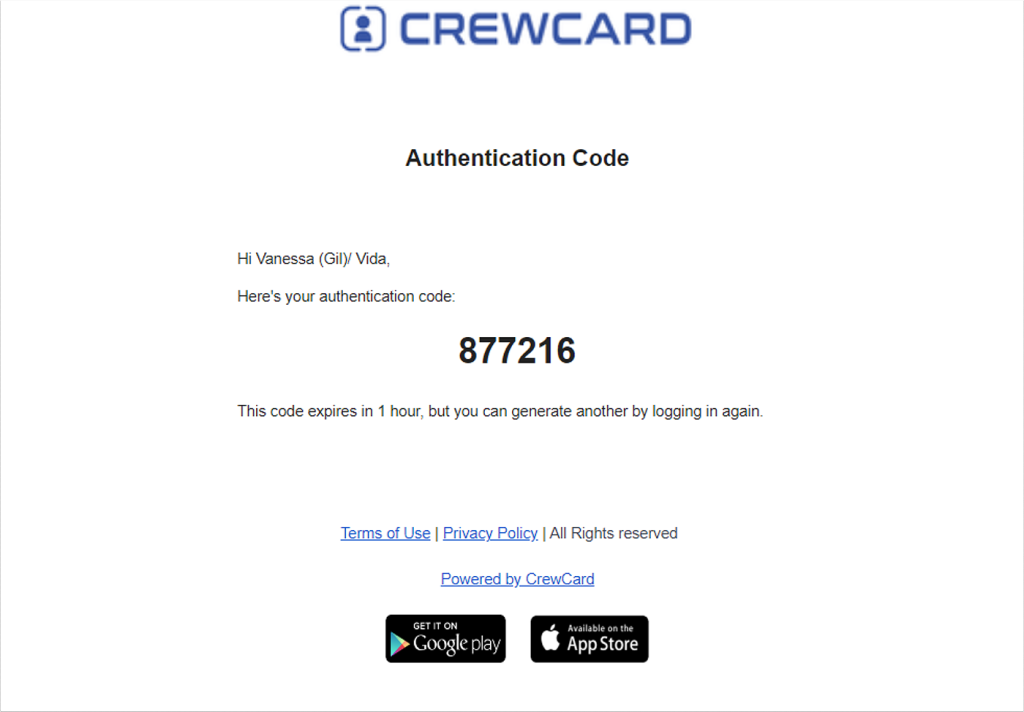
The manager will receive an email with the six-digit authentication code, as shown in the illustration below.
In the popup that will appear over the login page, enter the six-digit authentication code and press the “verify” button.
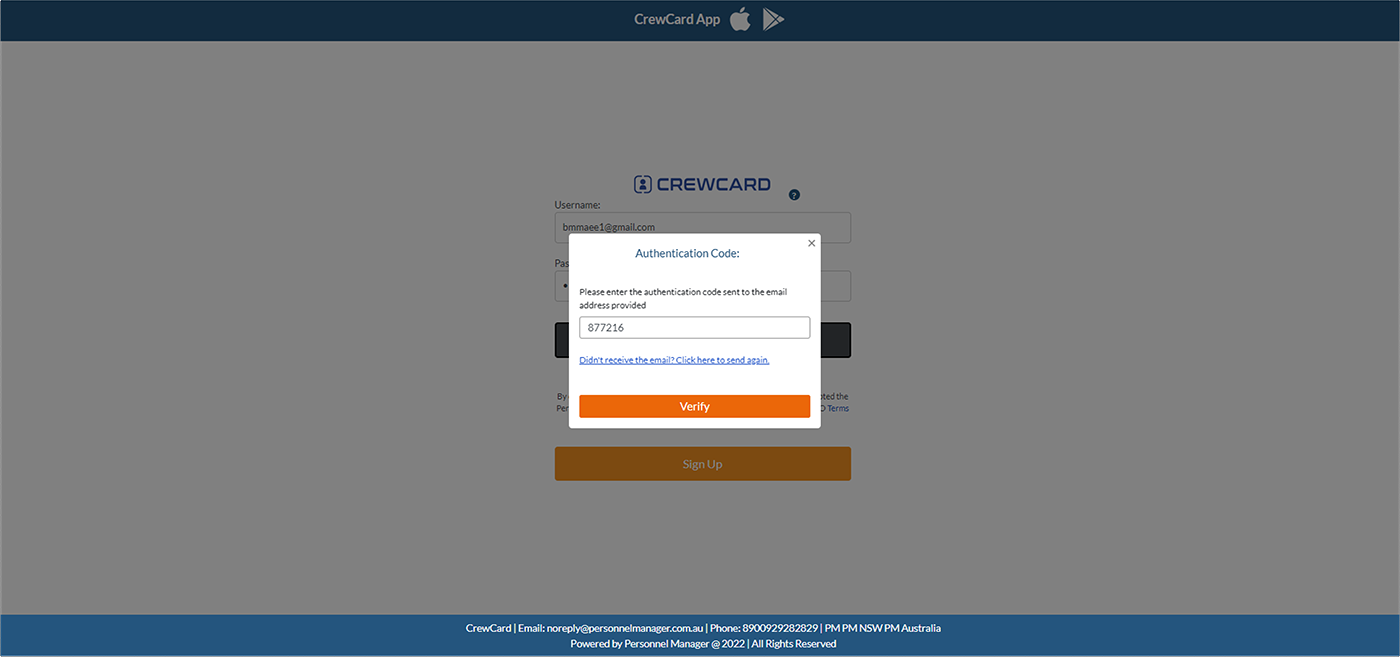
Once verify button has been clicked, Managers will be taken to the Crewcard/PM Portal’s home page.
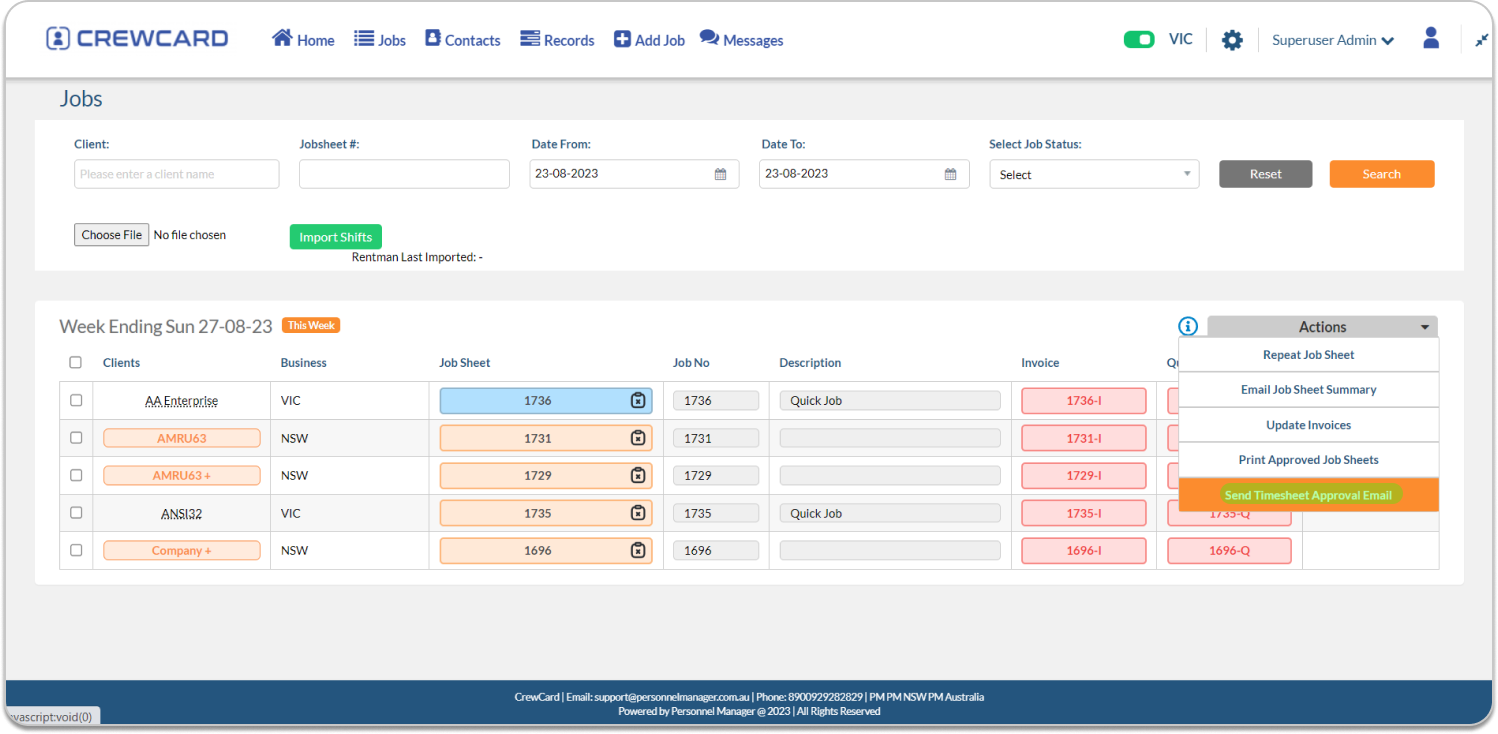
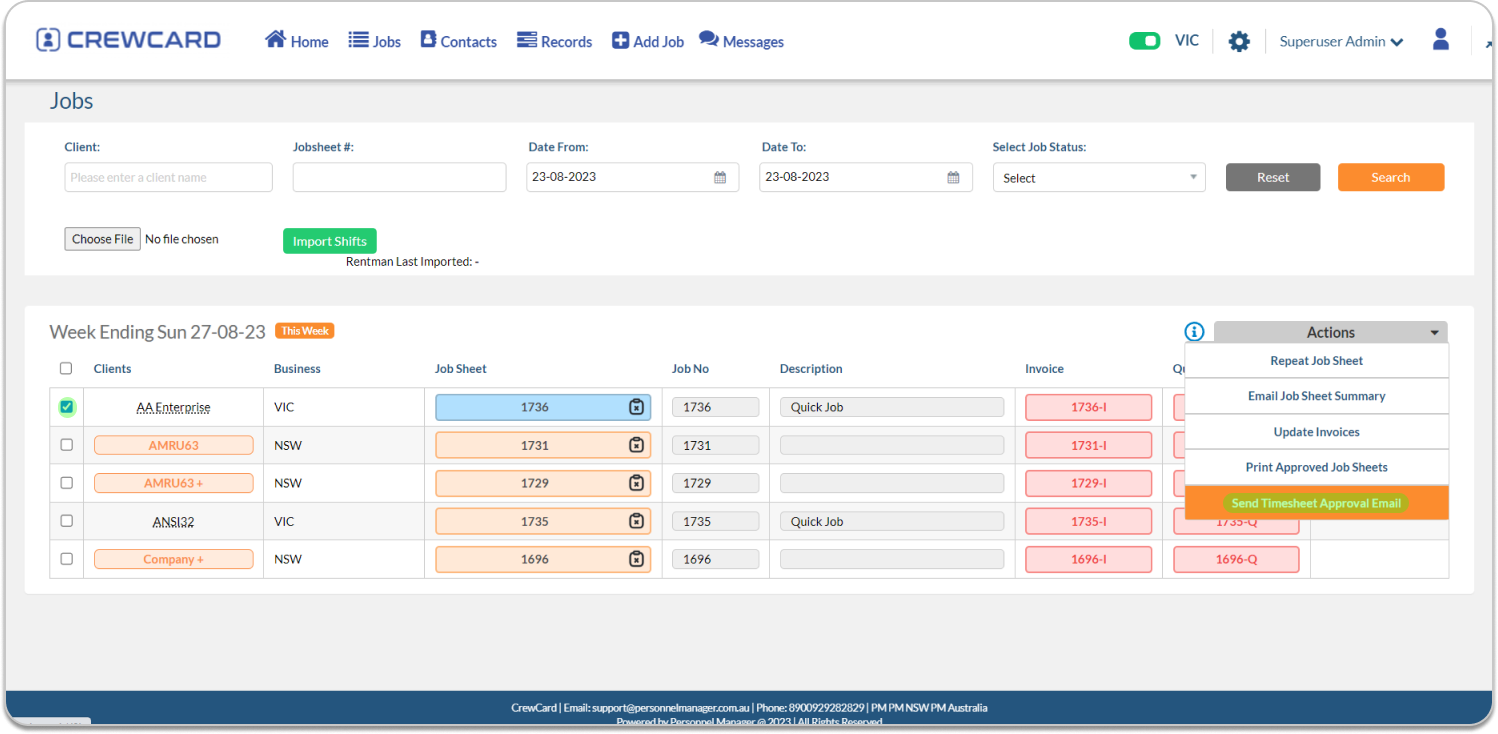
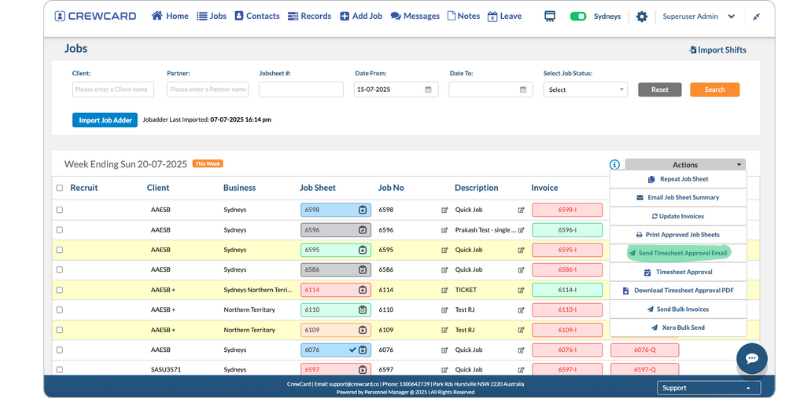
Send Timesheet Approval Email: On the Jobs page, select the desired job and click the actions button, click on “Send Timesheet Approval Email.”
Select a shift or tick the “Select All” option, and subsequently, click the “Send Email” button.
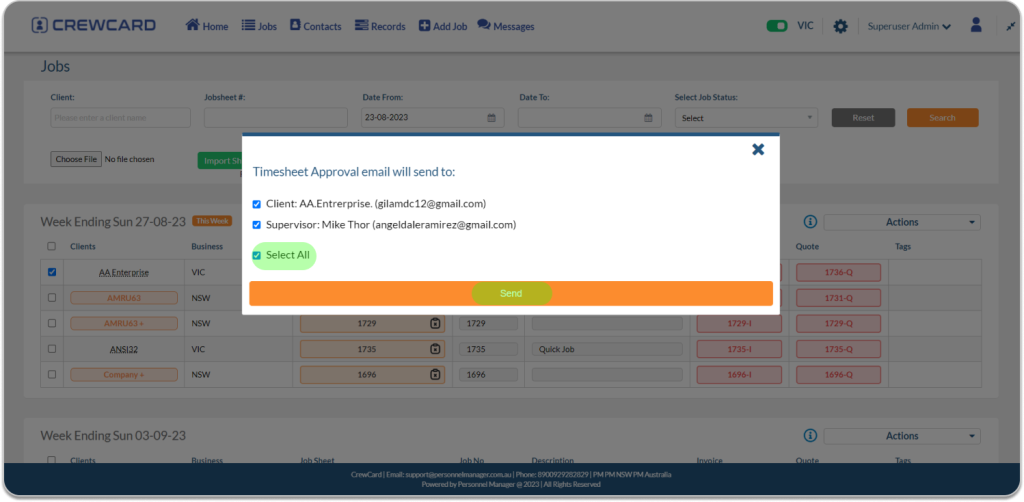
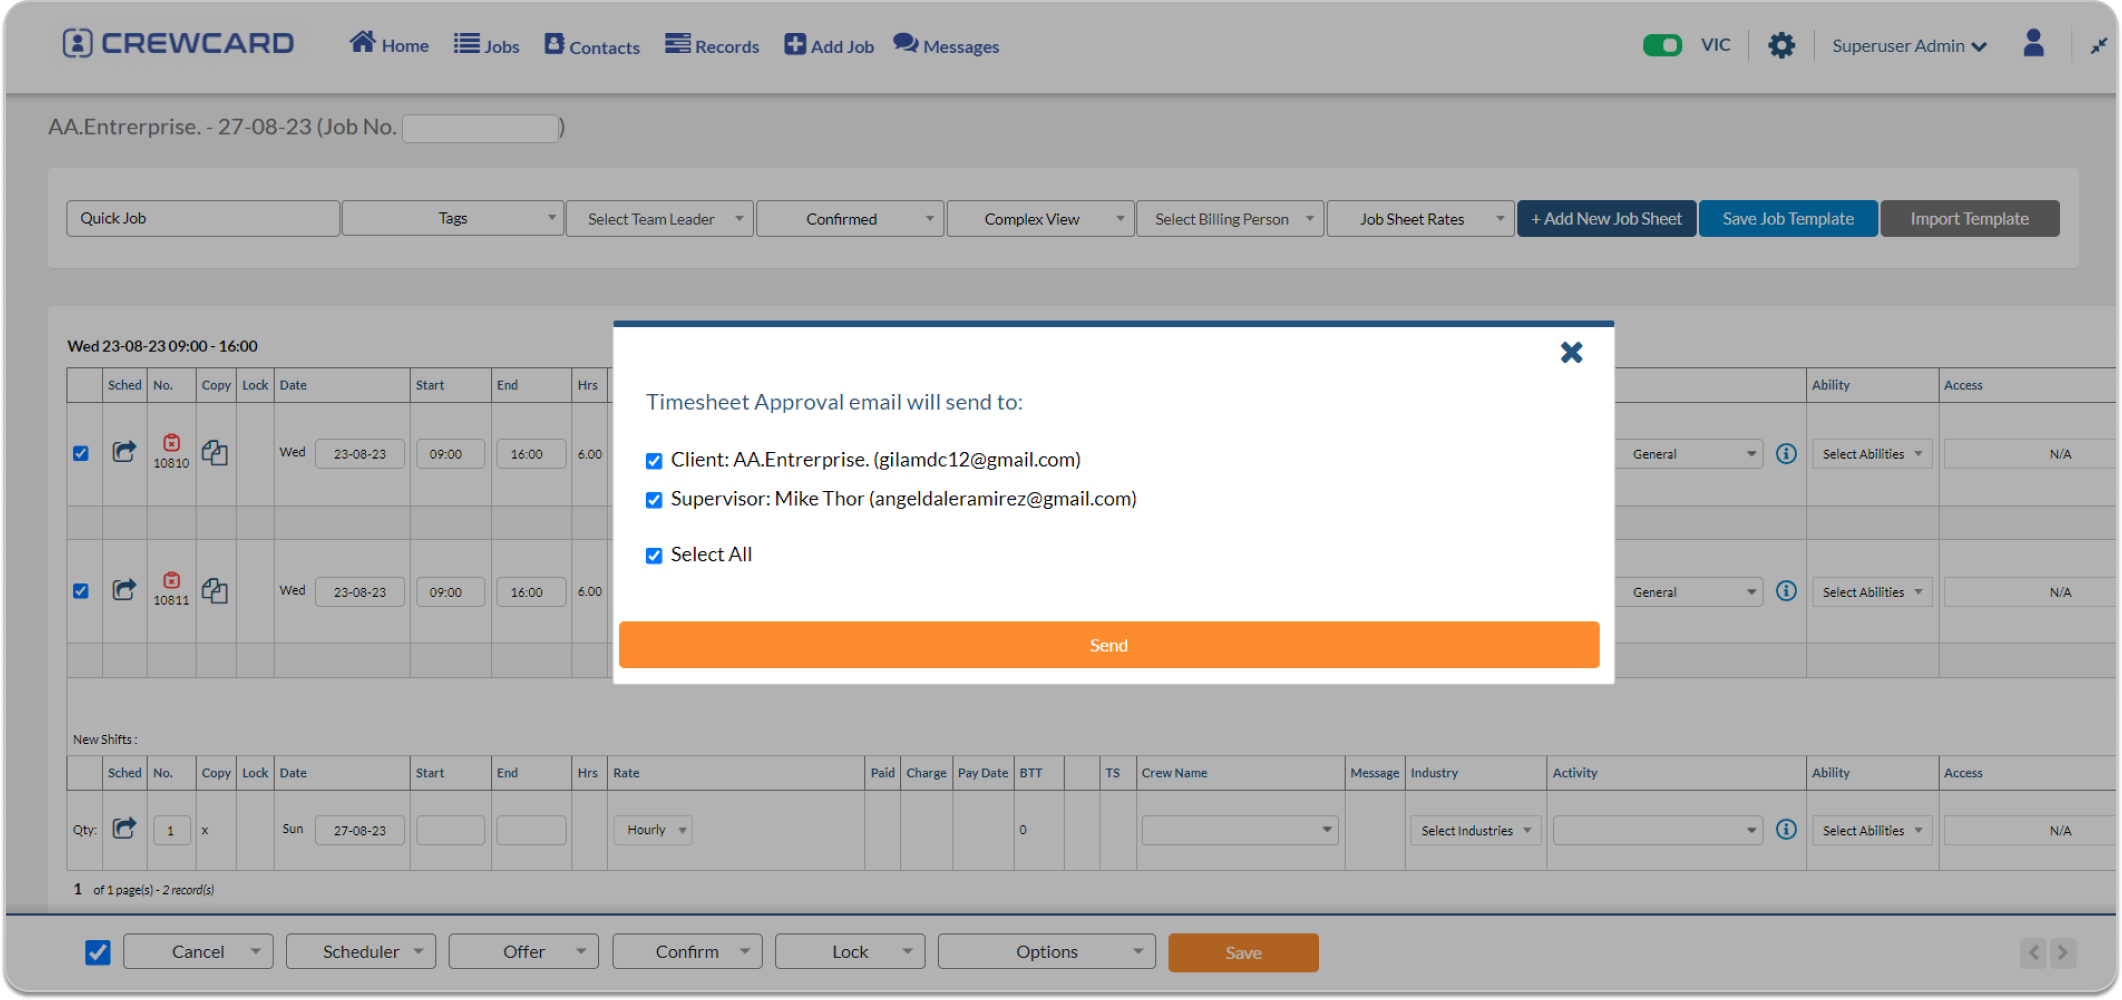
Select the users to whom you wish to send the timesheet approval email, or check the “Select All” option and click the send button.
Users will receive the timesheet approval email and can review and respond to it by rejecting or approving the timesheet.
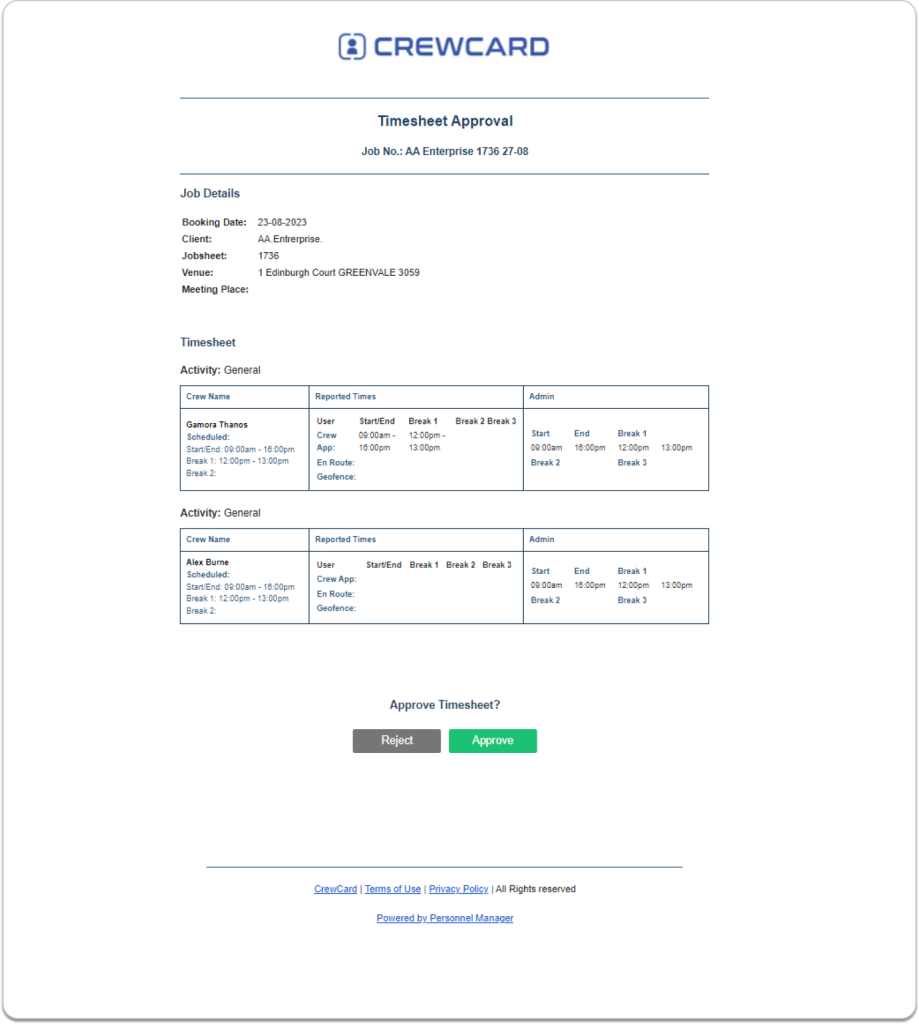
After approving the timesheet, it will be displayed as “Timesheet Approved.”

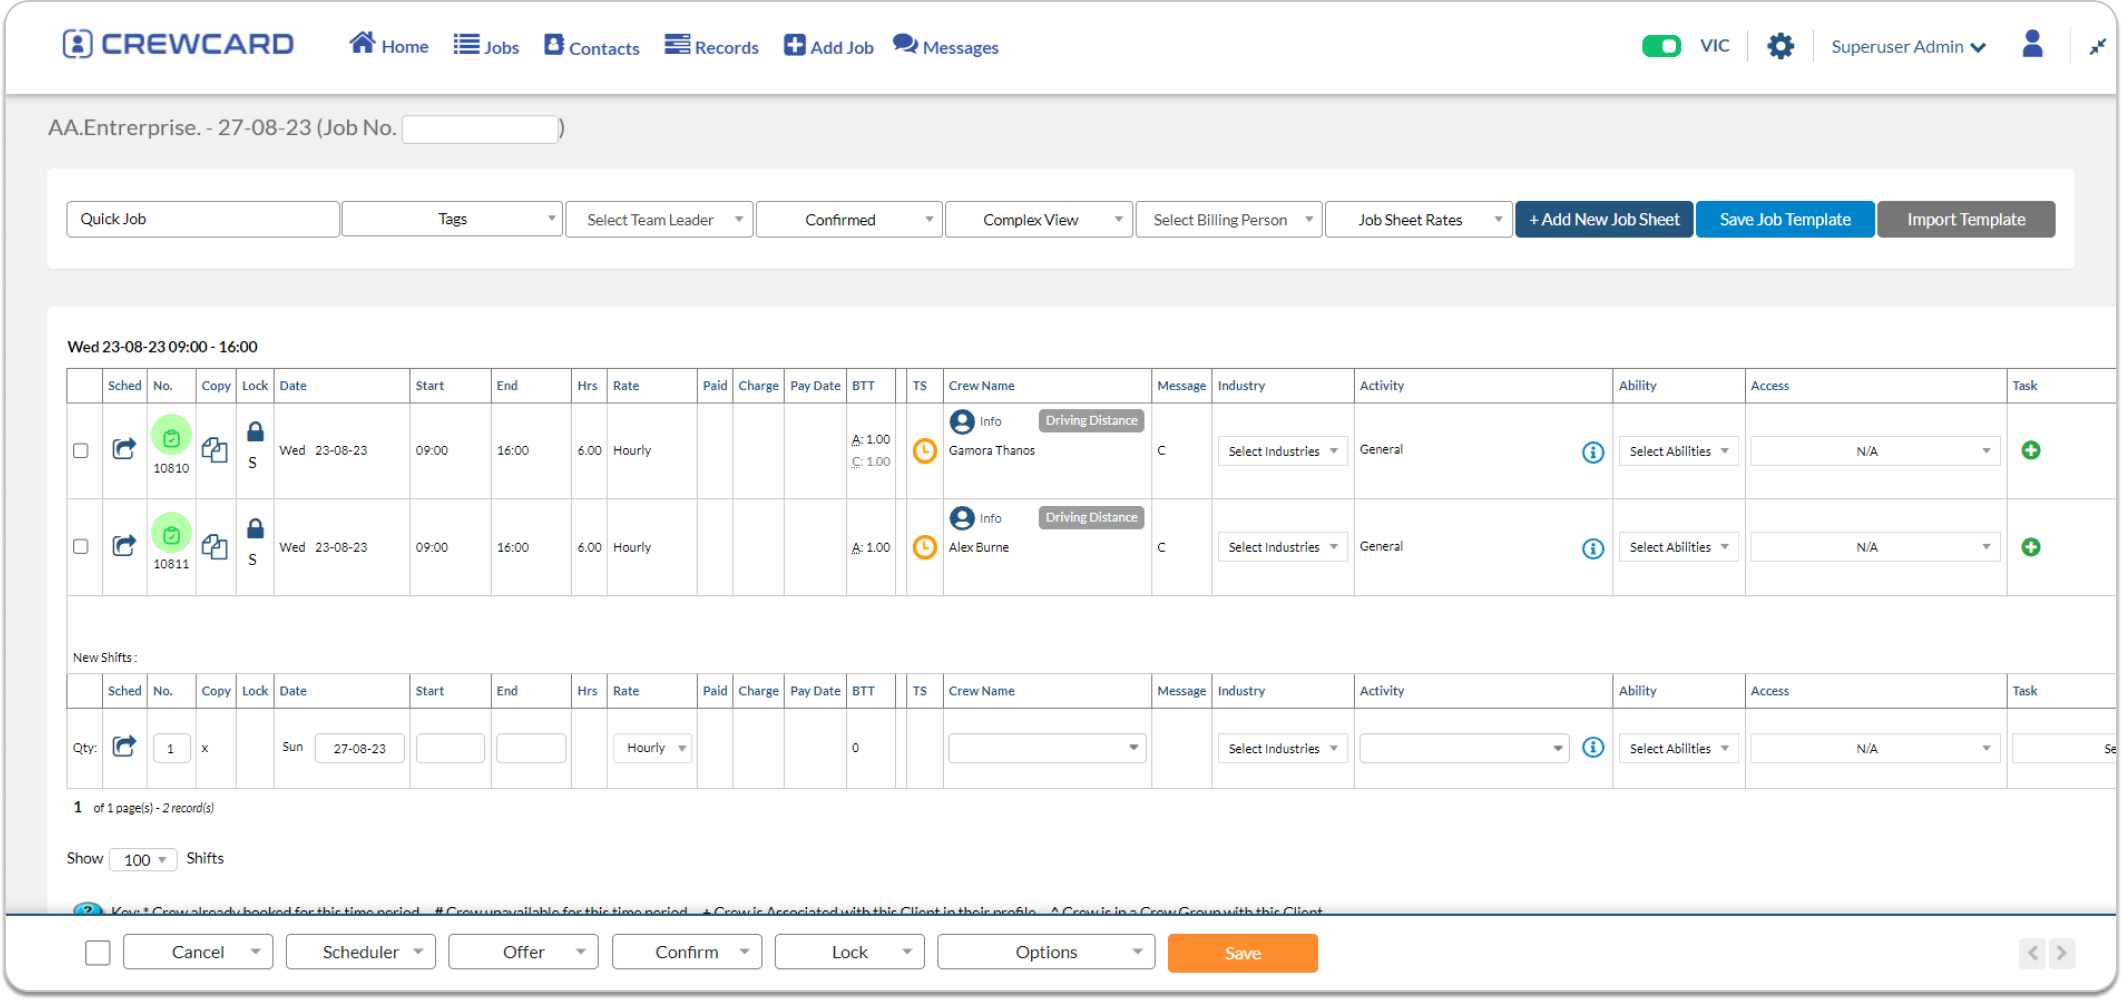
Admins can check the status of timesheet approval by going to the Jobsheet page. Simply hover the mouse over the icon positioned above the shift number, and a tooltip will appear, indicating if the timesheet still requires approval or if it has been fully accepted.
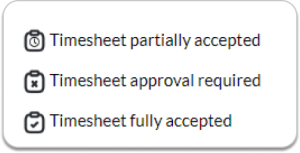
Symbolic representation of the current state of approval for a timesheet:
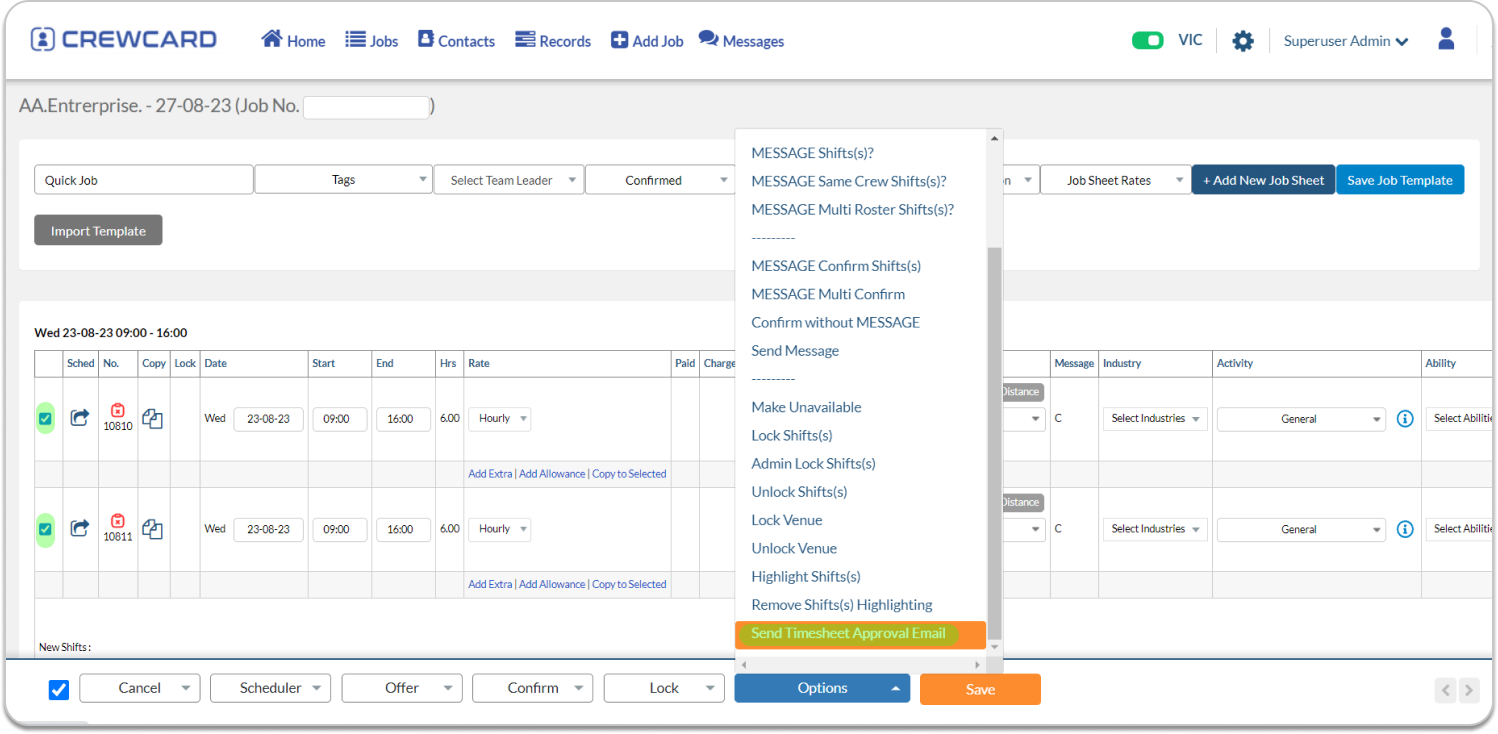
An alternative method to send the timesheet approval is by navigating to the desired Jobsheet page where you intend to send the timesheet approval.
Choose the specific shift select all shifts, click on the options button, and then select “Send Timesheet Approval Email.”
Select the users to whom you wish to send the timesheet approval email, or check the “Select All” option and click the send button.
Users will receive the timesheet approval email and can review and respond to it by rejecting or approving the timesheet.
After approving the timesheet, it will be displayed as “Timesheet Approved.”
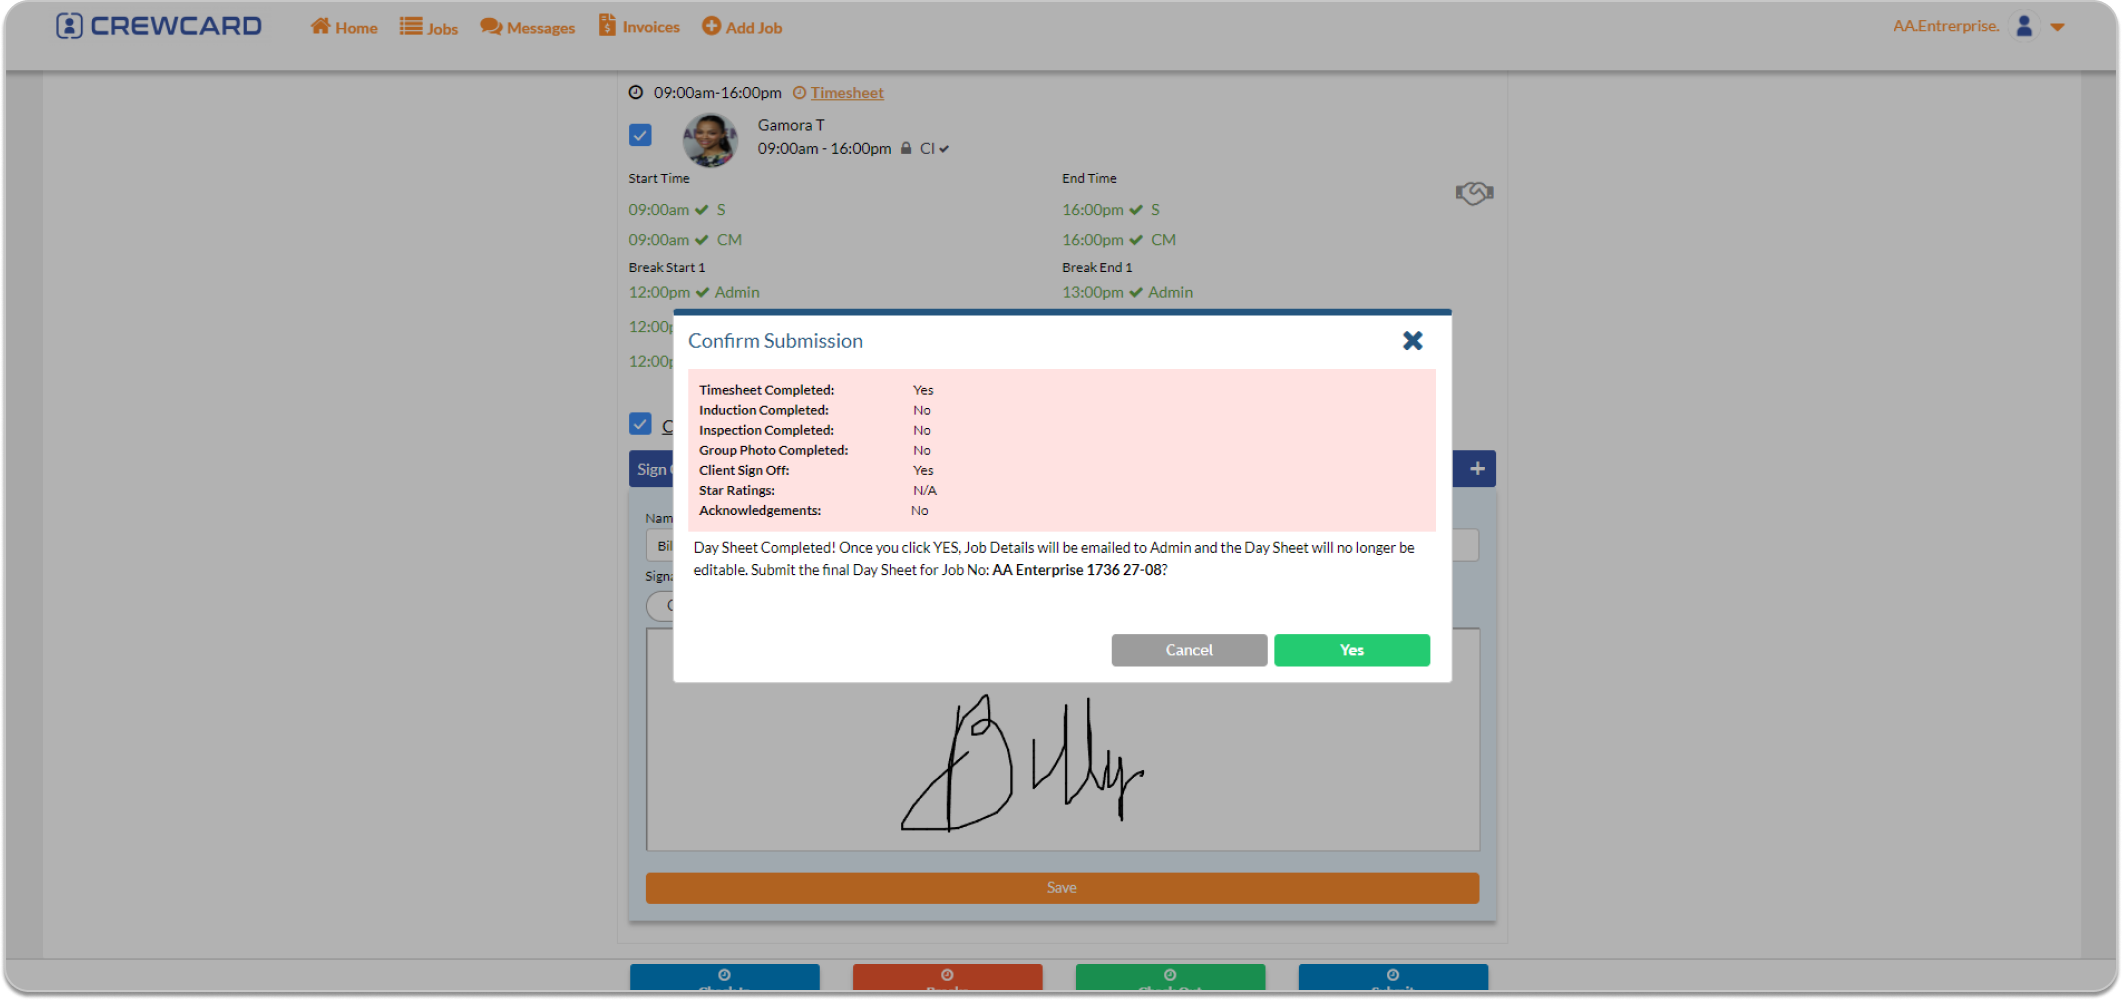
In an event the timesheet is rejected, the user will be redirected to the daysheet page, where they can review the shifts before submitting the timesheet again.
The timesheet approval hierarchy will adhere to the sequence of Crew, Supervisor, Client, and Admin.
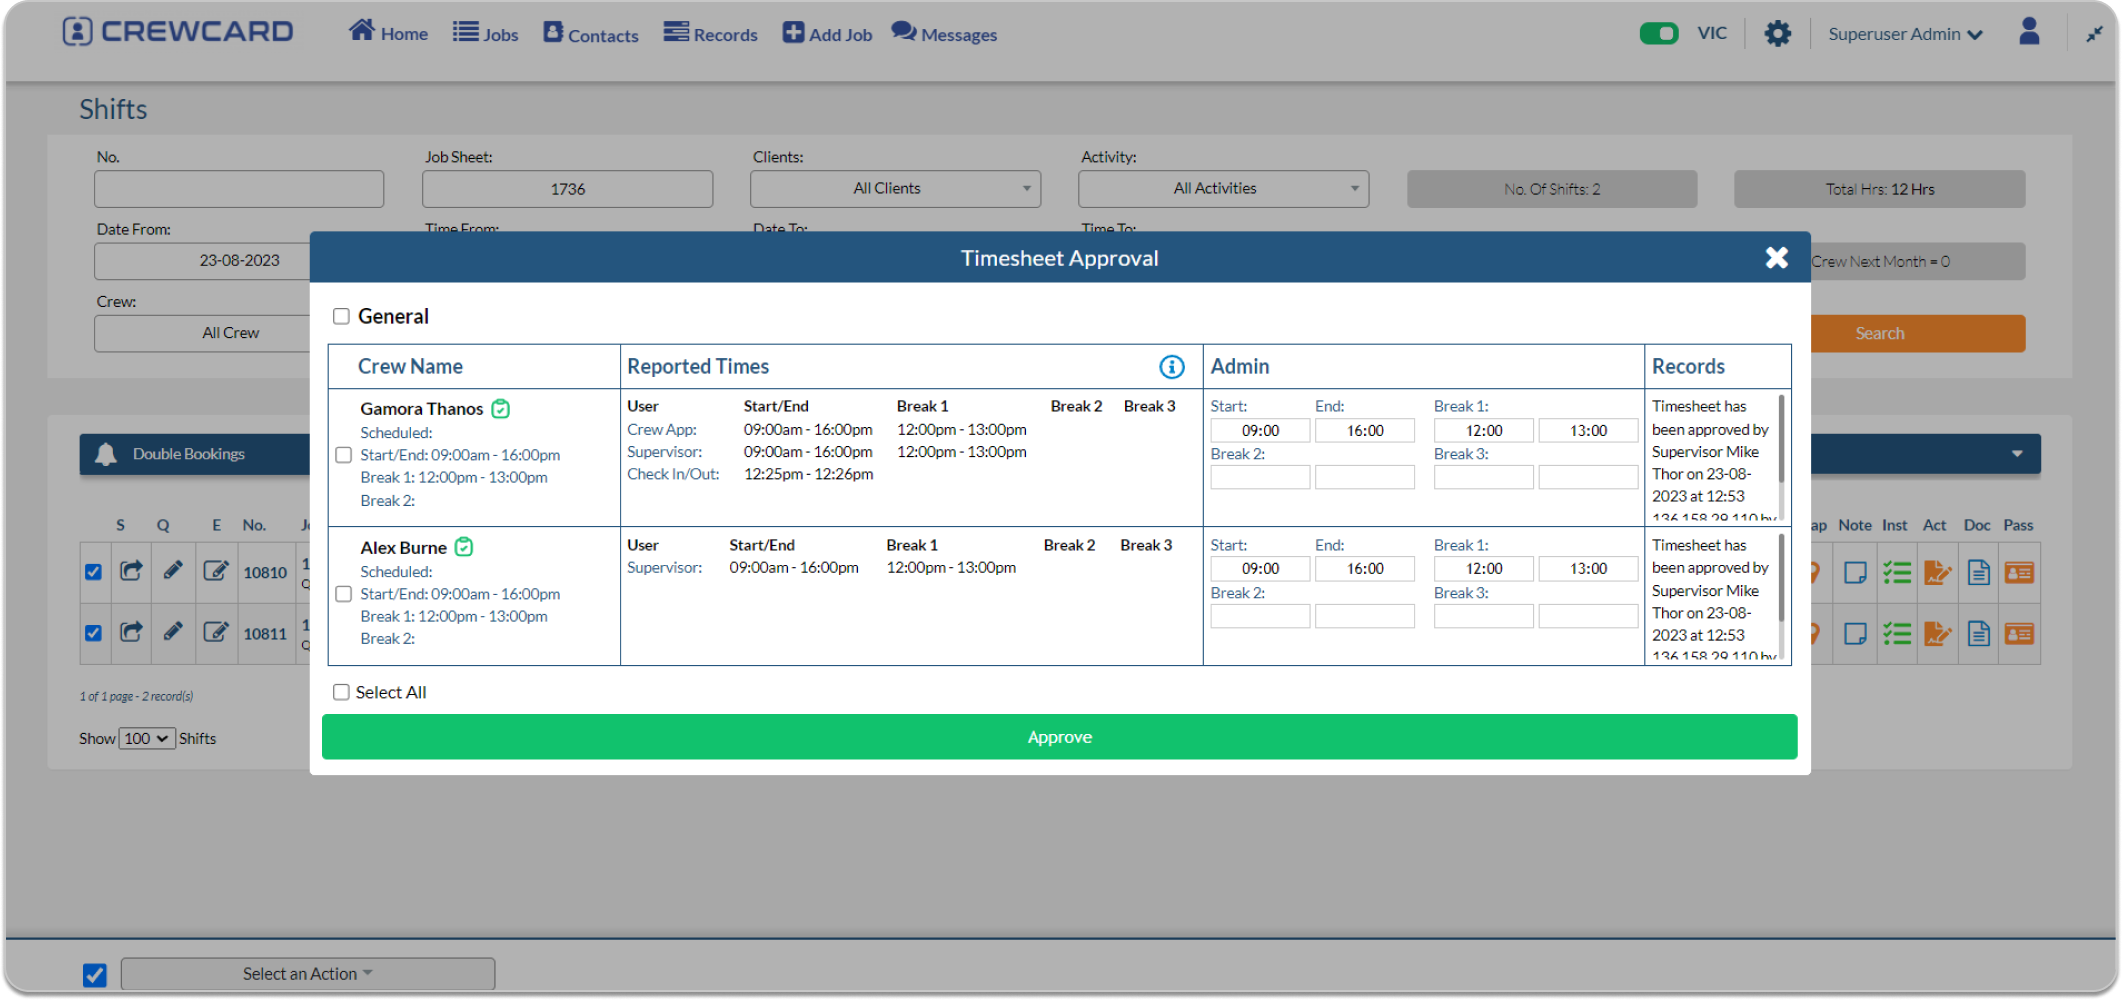
In the provided example, the supervisor has already approved the timesheet. As I am currently logged in as an admin, I retain the ability to review the timesheet once more. This enables me to either grant approval or reject the submission, particularly if any irregularities are identified in the hours entered by the crew.
The Timesheet Approval Email will be sent to the client automatically, in accordance with the designated time set within the settings. Emails will be dispatched to the client continuously until they have granted approval for the timesheet.
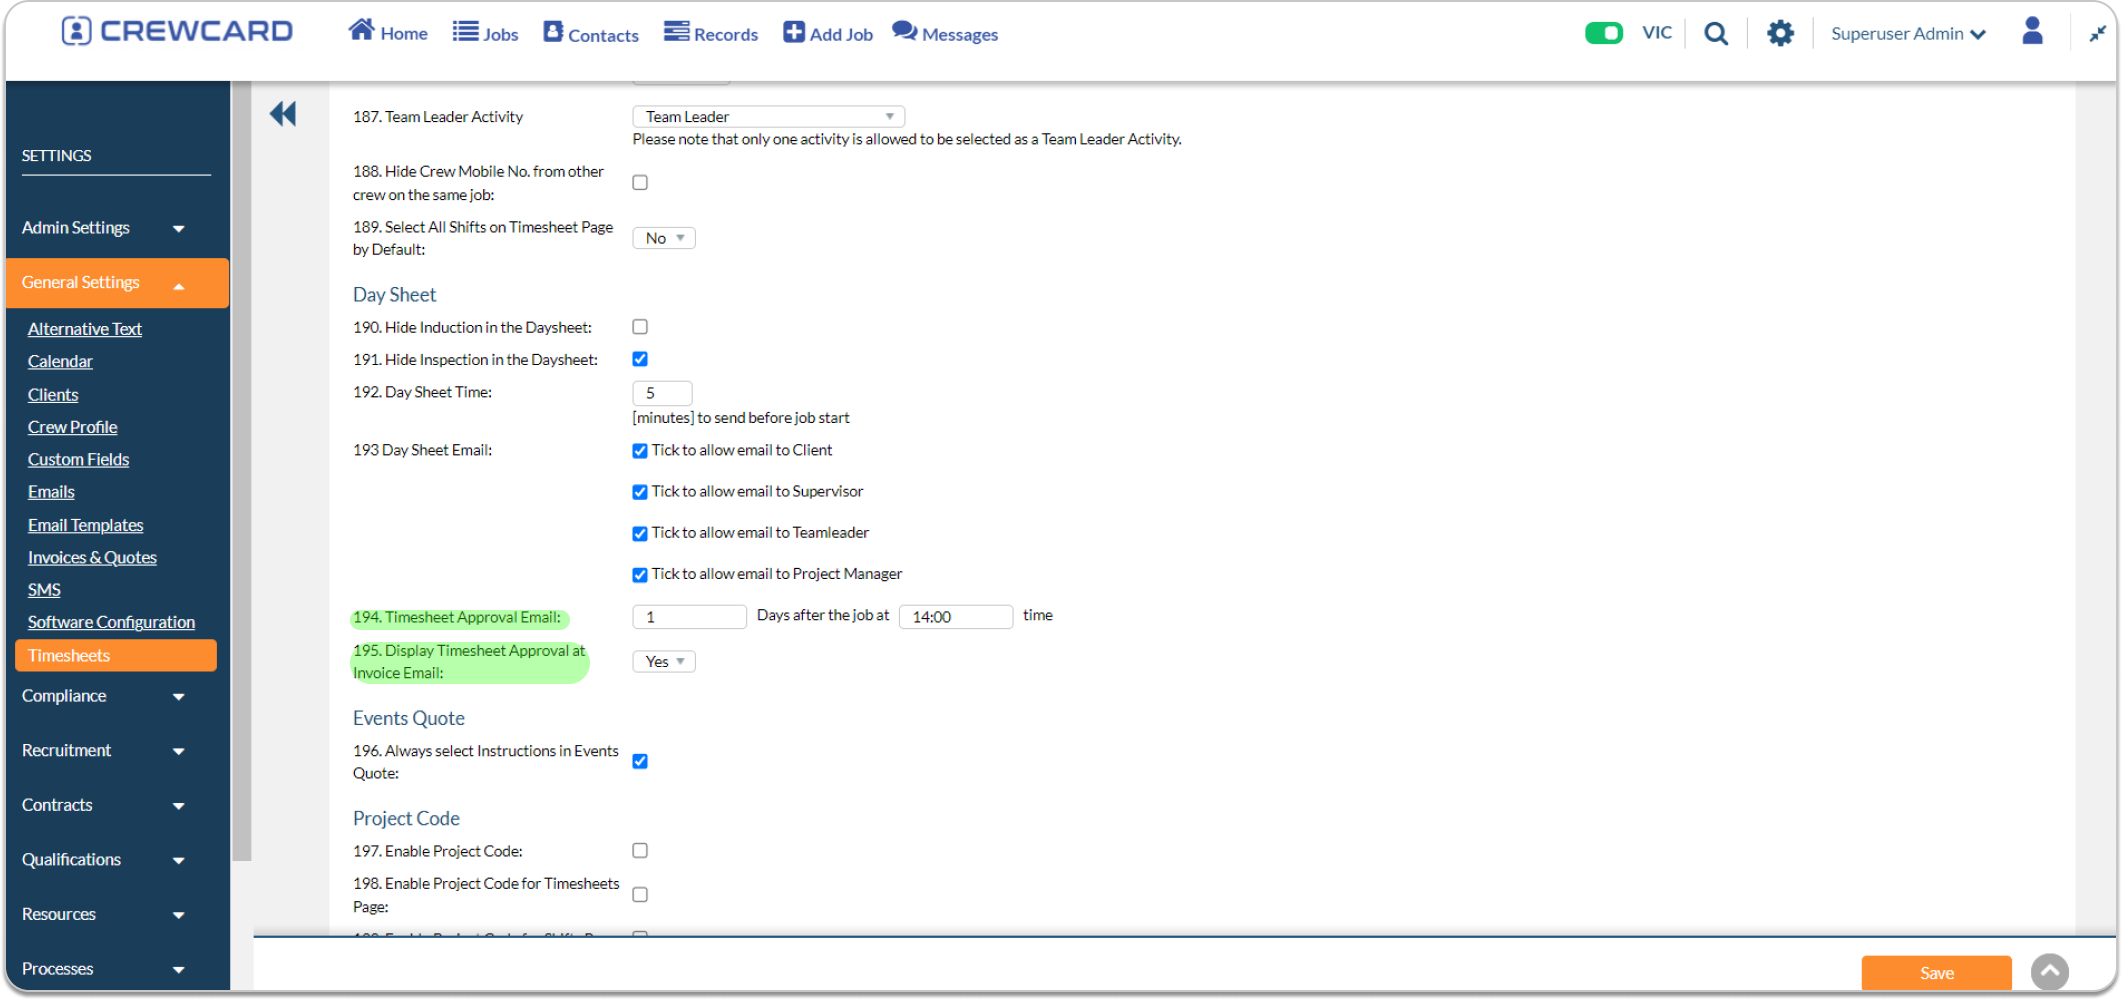
Furthermore, you have the option to activate the feature that shows the timesheet approver in the invoice email by enabling “Display Timesheet Approval at Invoice Email.”
Navigate to the Shifts page and filter for Unlocked Shifts. Then, filter and select the shifts where crew members have not locked off their shifts.

After filtering and selecting the shifts where crew members have not locked off, click the “Select an Action” button and choose “Send Message.”
The Send Message window will open. You can tick APP if you want your crew members to receive a push notification. Select the MSG Template, and the names selected on the shifts page will appear in the Send to Column. Once everything is set, click Send SMS.

Create Msg Template:
On the Records tab, under the Utilities section, click Msg Template.

This will redirect you to the Message Template page. Click ‘Add Message Template’ and fill out the fields, then click save.

Navigate to the Shifts Page, Find and tap on your active shift that you want to lock off.
Verify the shift details to ensure accuracy.
Tap the check out button and choose the check out time using the time picker.


A pop-up message will appear confirming “Check out successful.” Tap OK to confirm locking off your shift.

Note: Crew Members will always receive a push notification reminding them to check out their shift.

Additionally, crew members have the option to lock their shift on the daily page.

Following these steps will successfully lock off your shift and ensure your working hours are accurately logged in the CrewCard app.
The Pre-Start Quiz (PSQ) is crucial in ensuring that all crew members are prepared and informed before commencing their shifts. This guide will instruct you on accessing and filling out the PSQ.
To enable the Pre-Start Quiz (PSQ), navigate to General Settings and check the box for Pre-Start Quiz to activate the feature. The disclaimer text can be customized as needed.

Click the “Add New Quiz” button to add a new quiz. Enter the title and text or select from the resources (these are available in Resources Settings). Input the questions and answers, and if a question has multiple answers, check the “Multiple Answers” checkbox. Finally, click the “Save Quiz” button.
Ensure you add a new quiz; otherwise, the PSQ will be considered disabled.


After adding the quiz, select it from the dropdown menu and click “Save.”

Accessing PSA in the CrewCard App
Proceed to the Main Menu and choose the ‘Shifts’ option.

Please select the desired shift, Find the Shift you wish to check in for and click on it.

You will be prompted to complete the Pre-Start Acceptance (PSA) process, which requires you to ‘Accept’ the terms and conditions if PSA is required ( Check General Settings>> Pre-Start Acceptance Page is enabled).


If you have not yet completed the Pre-Start Quiz, it will be immediately accessible. Crew members can answer each Quiz once.
Note: If the PSA and PSQ are enabled, crew members must complete them; otherwise, they cannot check-in for their shift.
Click the ‘OK’ button on the Pre-Start Quiz prompt to initiate the Quiz.

First Quiz Page: You will be directed to the first quiz page, which includes the title, instructions, and available resources. Click ‘Start Quiz’ to begin the Quiz.

Read the instructions carefully and utilize any provided resources to answer the quiz questions.
Complete all the questions and submit your answers.

After you finish the Quiz, it will no longer appear on the Shifts page. Additionally, if the “Email Admin” and “Email Crew” options are selected in the PSQ settings, an email alert will be dispatched to both the administrator and the crew.
Navigate to the Crew List Page
On the Crew List page, locate and click on the “Import from CSV” button.

This action will take you to the “Import from CSV” page. Scroll to the bottom of this page and click on the “Download CSV Template” button.
The template will be saved in your download folder. Open the file and fill it out with the required information.

Once you’ve filled out the CSV template, Click the “Choose File” button in the Import from CSV page and navigate to the location where your completed CSV file is saved.
Select the file, then click the “Upload CSV” button to import the crew information.

Encountering slowness? Follow these steps to get your business back up to speed:
Check if any Anti-Malware and Anti-Virus software security is causing the issue.
On the Jobs page, select the desired job and click the actions button, click on “Send Timesheet Approval Email.”
Timesheet Approval Logic
Access to Timesheet approval is limited to specific user roles: Client, Project Manager, Supervisor, and Admin.
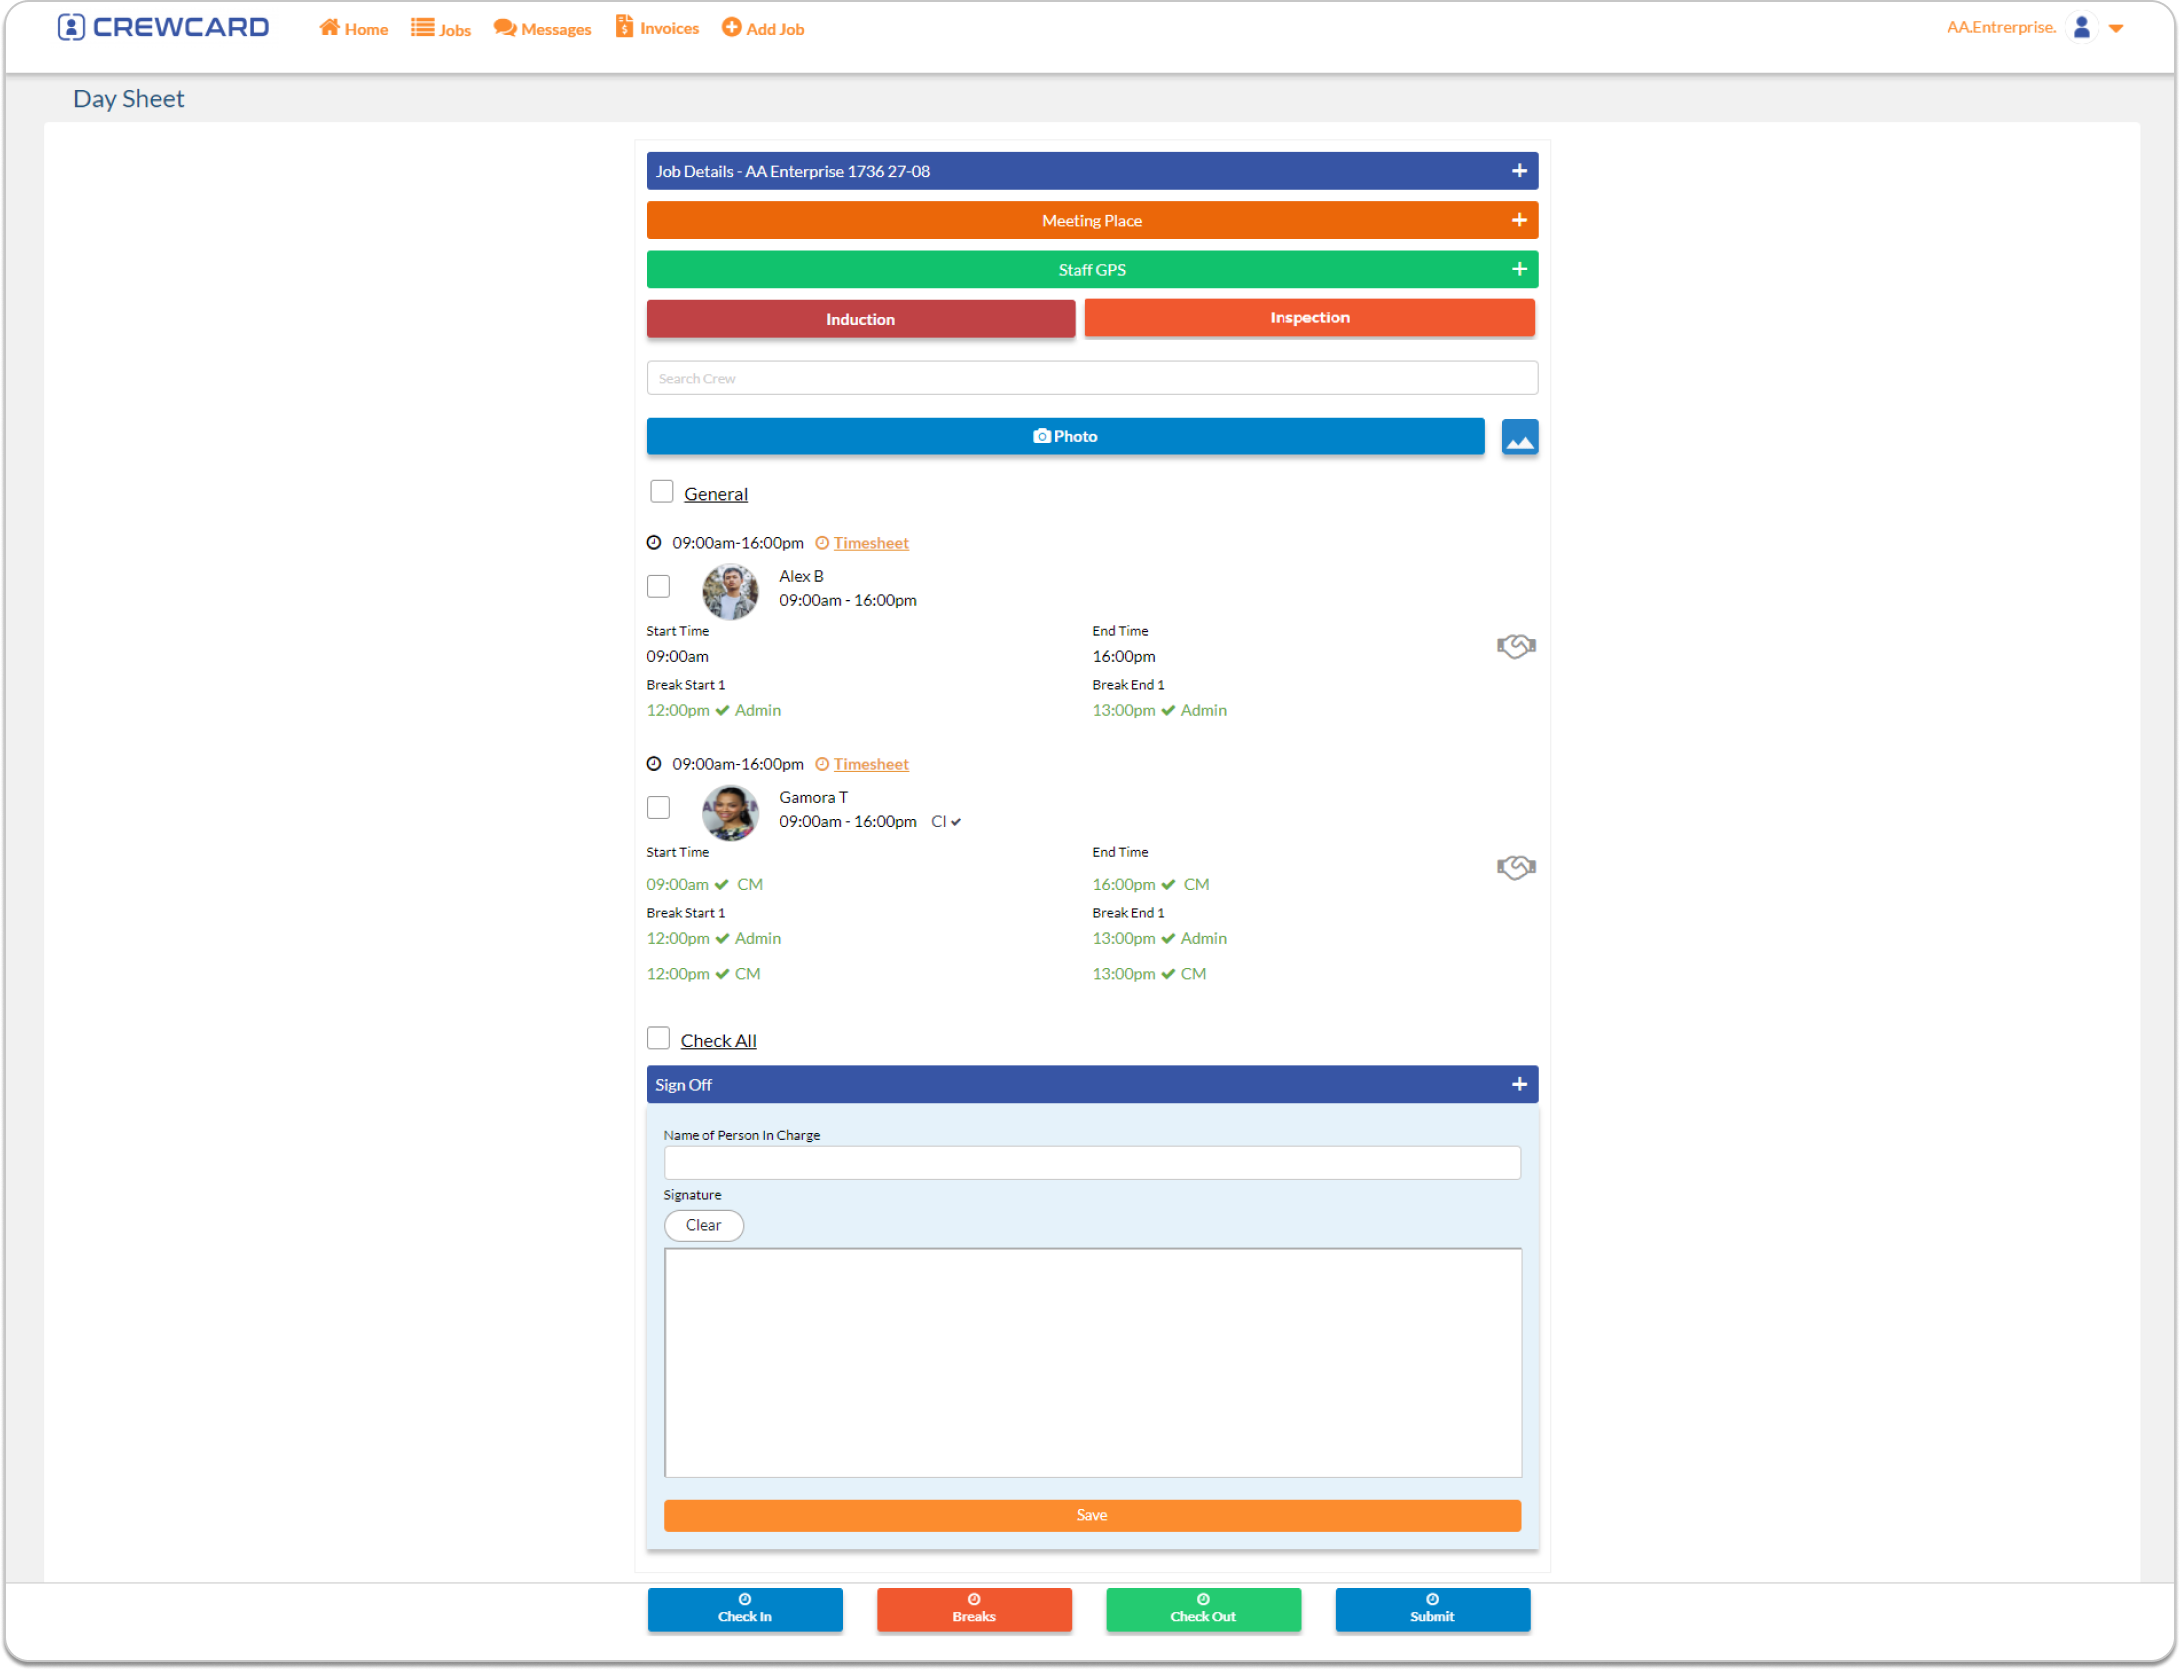
Within the app, the following designations apply:
A: Admin (Schedule Time)
CM: Crew Member (Actual Time)
S: Supervisor
CL: ClientFor example, when a client logs into the app, they have the ability to view both the scheduled time and actual time entries submitted by the crew. However, they can only make edits to the time entries that they themselves have entered. In this scenario, an additional editable time field is provided for the Client (CL).
Select the users to whom you wish to send the timesheet approval email, or check the “Select All” option and click the send button.
Review all the shift informations and click on ‘Send Email’.


The selected members will receive the timesheet approval email and can review and respond to it by rejecting or approving the timesheet.
Once the timesheet is approved, it will be marked as “Timesheet Approved.”
An alternative method to send the timesheet approval is by navigating to the desired Job Sheet page where you intend to send the timesheet approval.
Choose the specific shift or select all shifts, click on the options button, and then select “Send Timesheet Approval Email.”
Select the users to whom you wish to send the timesheet approval email, or check the “Select All” option and click the send button.
The selected members will receive the timesheet approval email and can review and respond to it by rejecting or approving the timesheet.
After approving the timesheet, it will be displayed as “Timesheet Approved.”
In an event the timesheet is rejected, the user will be redirected to the daysheet page, where they can review the shifts before submitting the timesheet again.
The timesheet approval hierarchy will adhere to the sequence of Crew, Supervisor, Client, and Admin.
In the provided example, the supervisor has already approved the timesheet. As I am currently logged in as an admin, I retain the ability to review the timesheet once more. This enables me to either grant approval or reject the submission, particularly if any irregularities are identified in the hours entered by the crew.
The Timesheet Approval Email will be sent to the client automatically, in accordance with the designated time set within the settings. Emails will be dispatched to the client continuously until they have granted approval for the timesheet.
Furthermore, you have the option to activate the feature that shows the timesheet approver in the invoice email by enabling “Display Timesheet Approval at Invoice Email.”
