The Payroll Module is accessible through the URL that CrewCard will provide.
Depending on the name of your instance, the URL address to access Payroll Module will be different from each client.

The initial username and password will be provided by CrewCard.
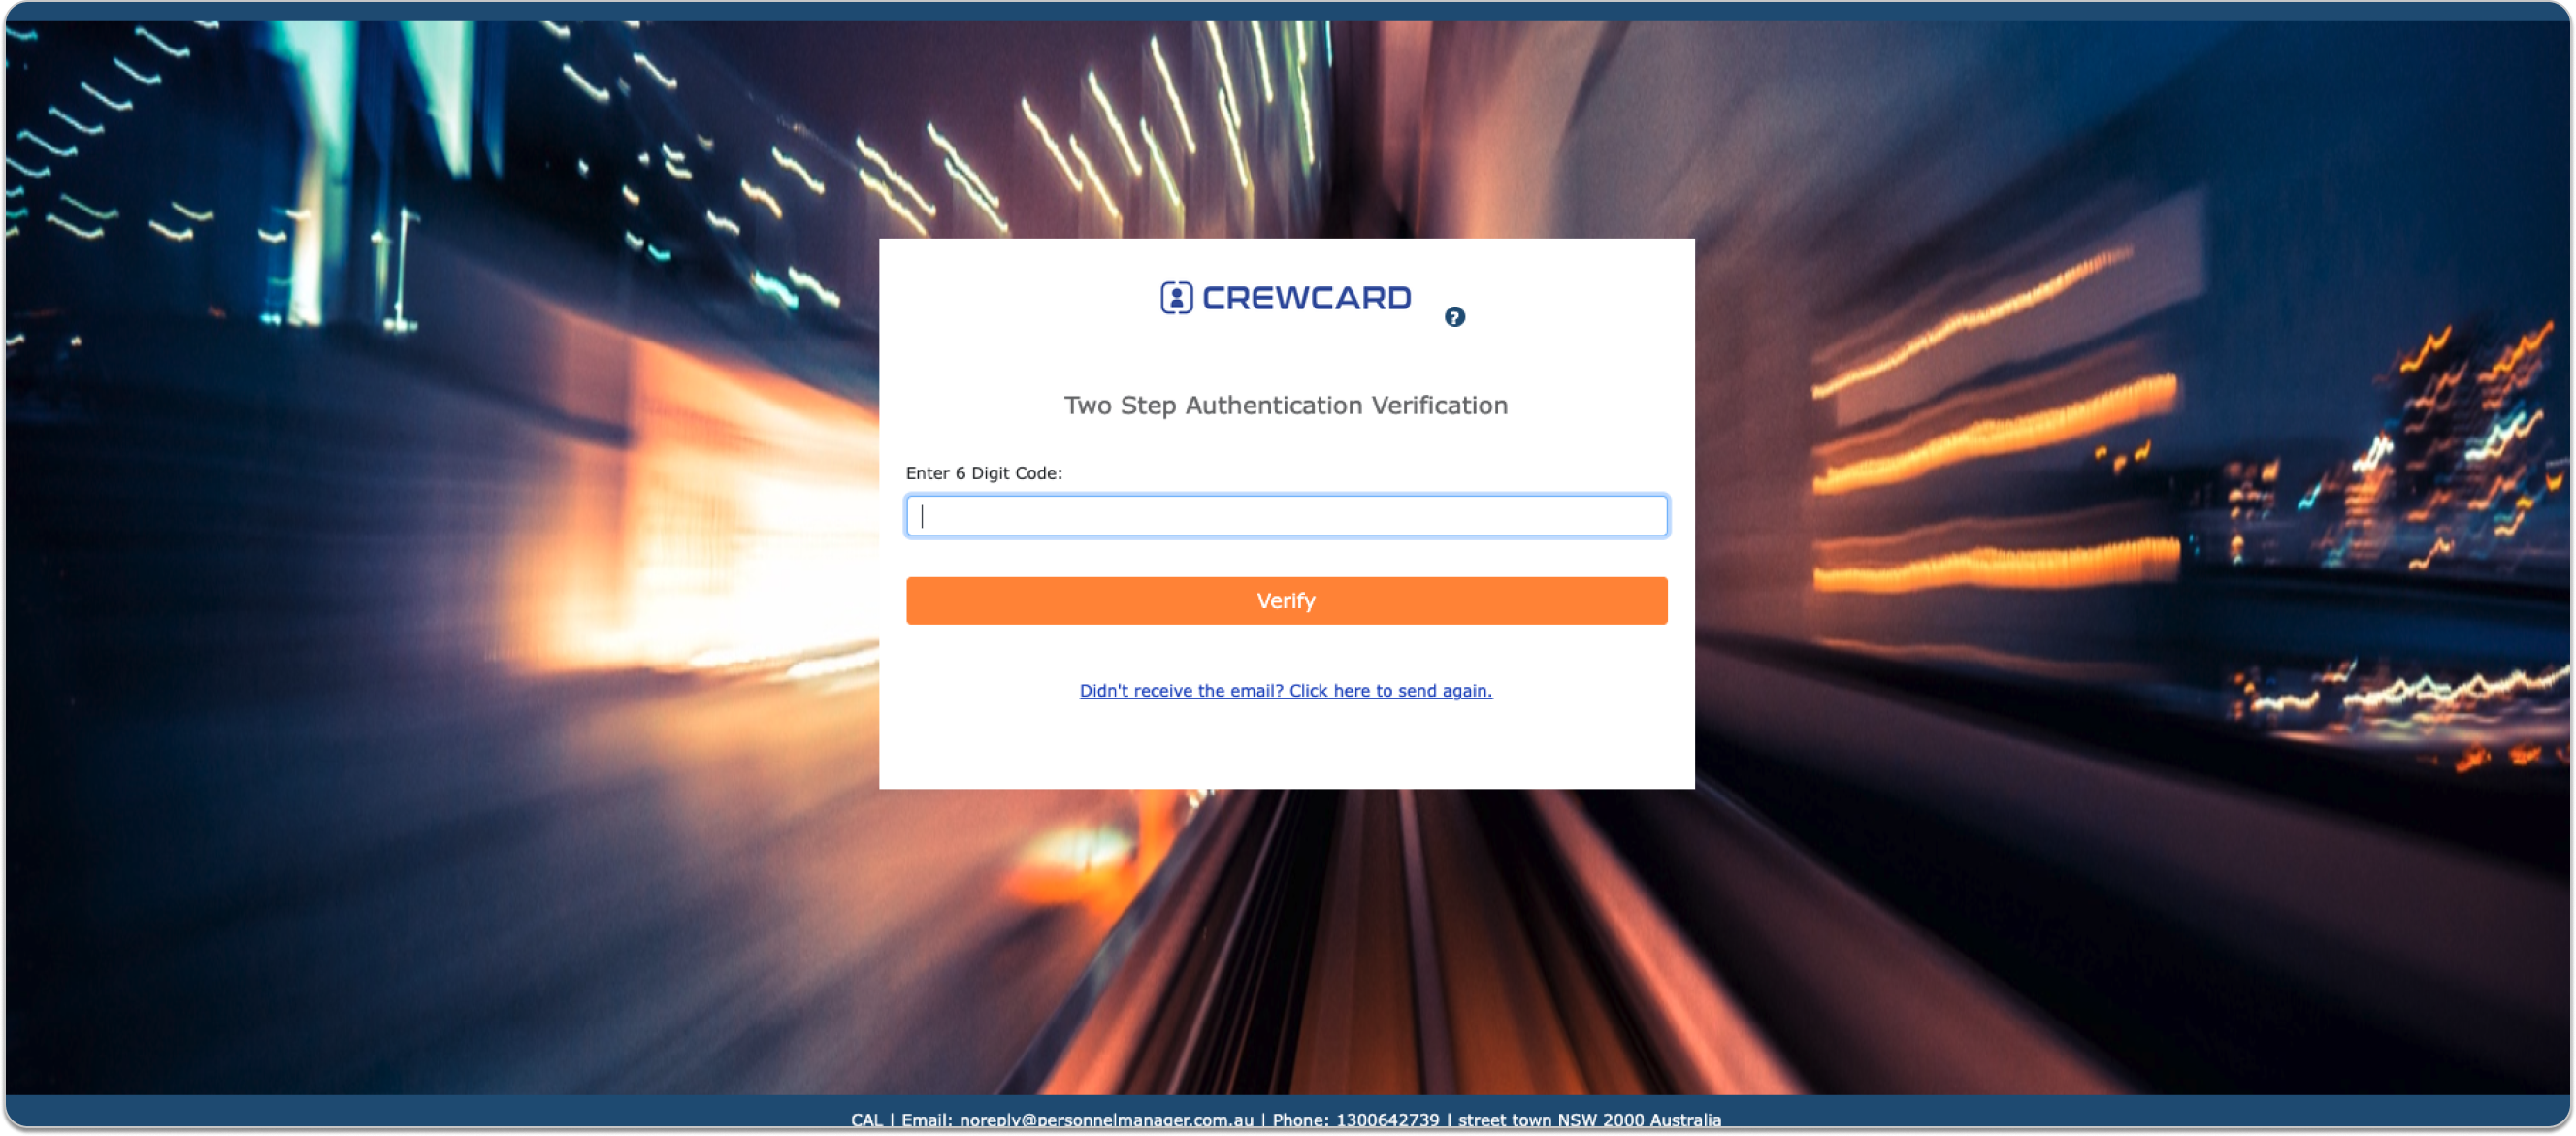
Once you have login to the Payroll Portal, a two-step authentication code will be required.
The code will be sent to your registered e-mail address.
Enter the code in the provided field and click Verify.
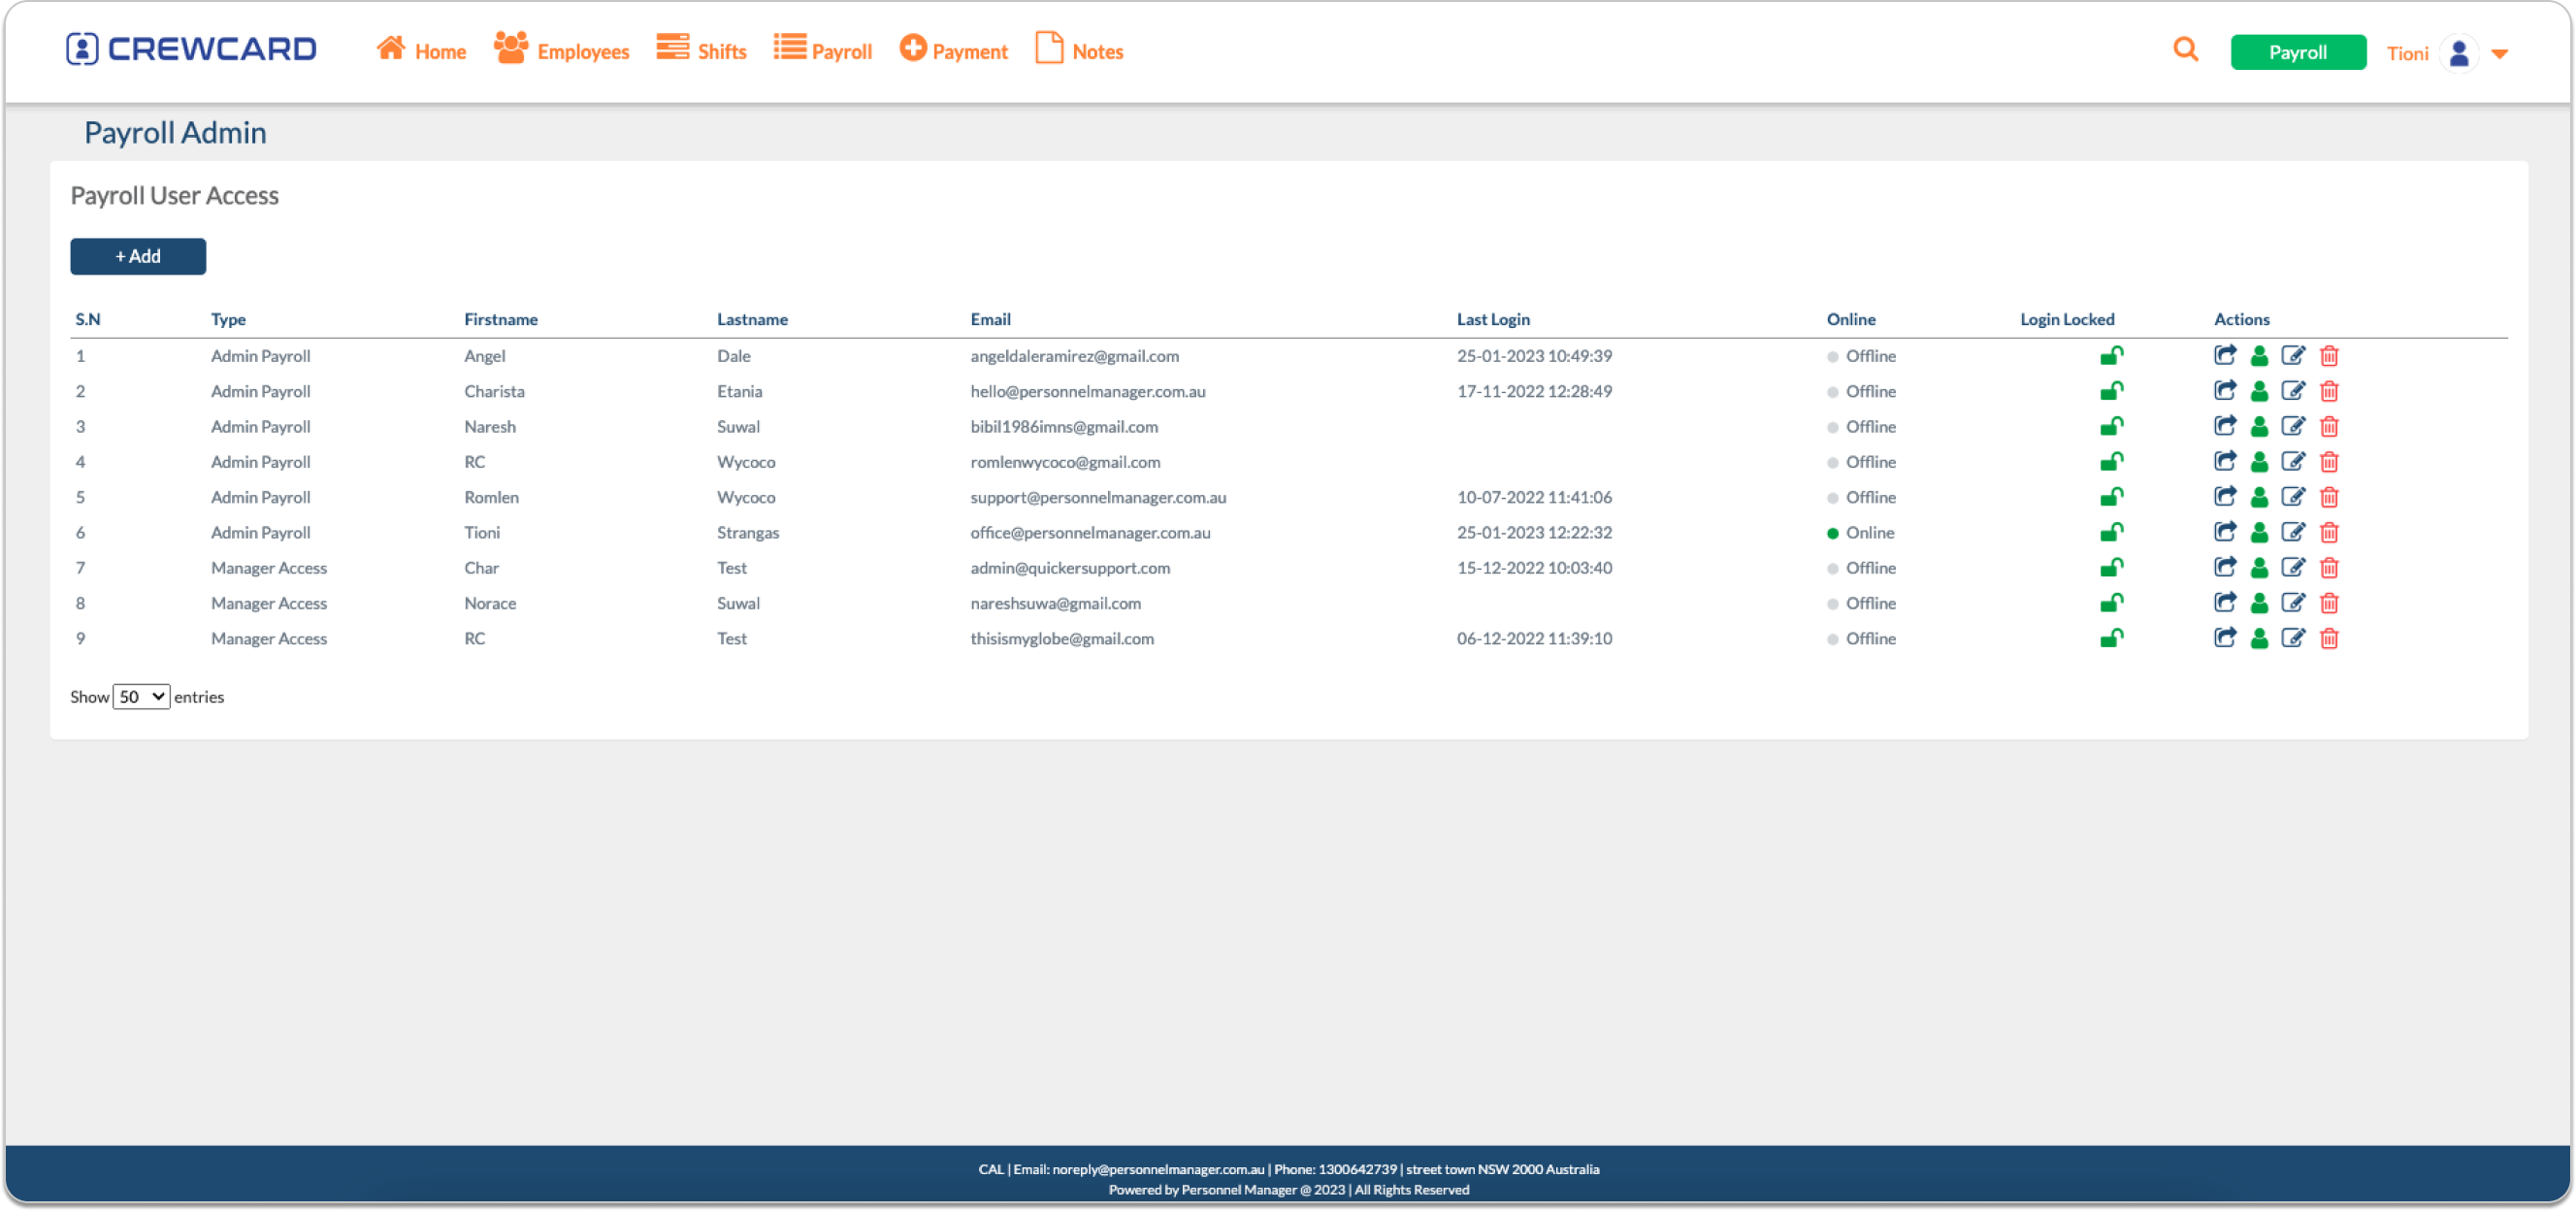
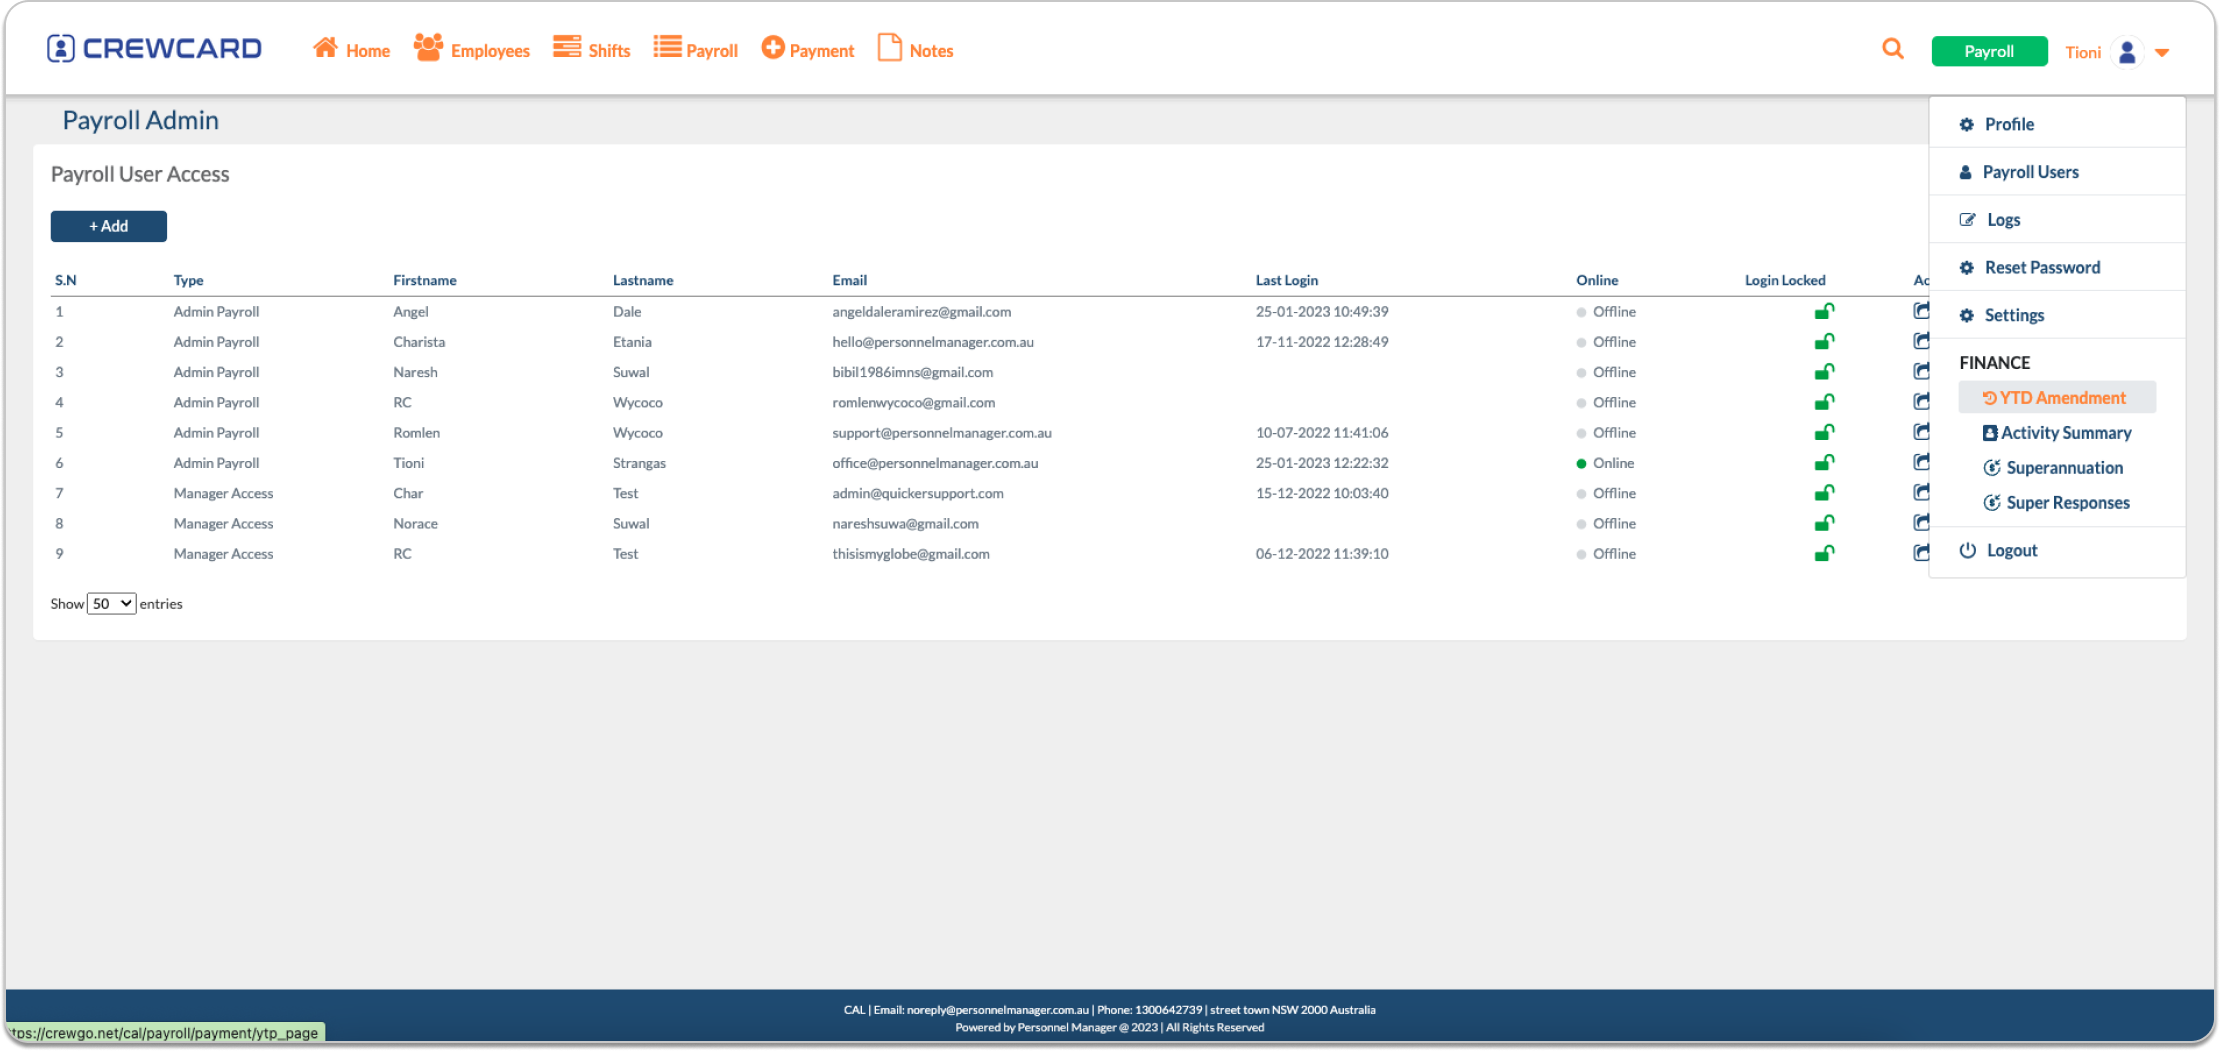
These users will have access to the Payroll Portal.
On this page, you can add, edit and delete a user.
Forgotten Password
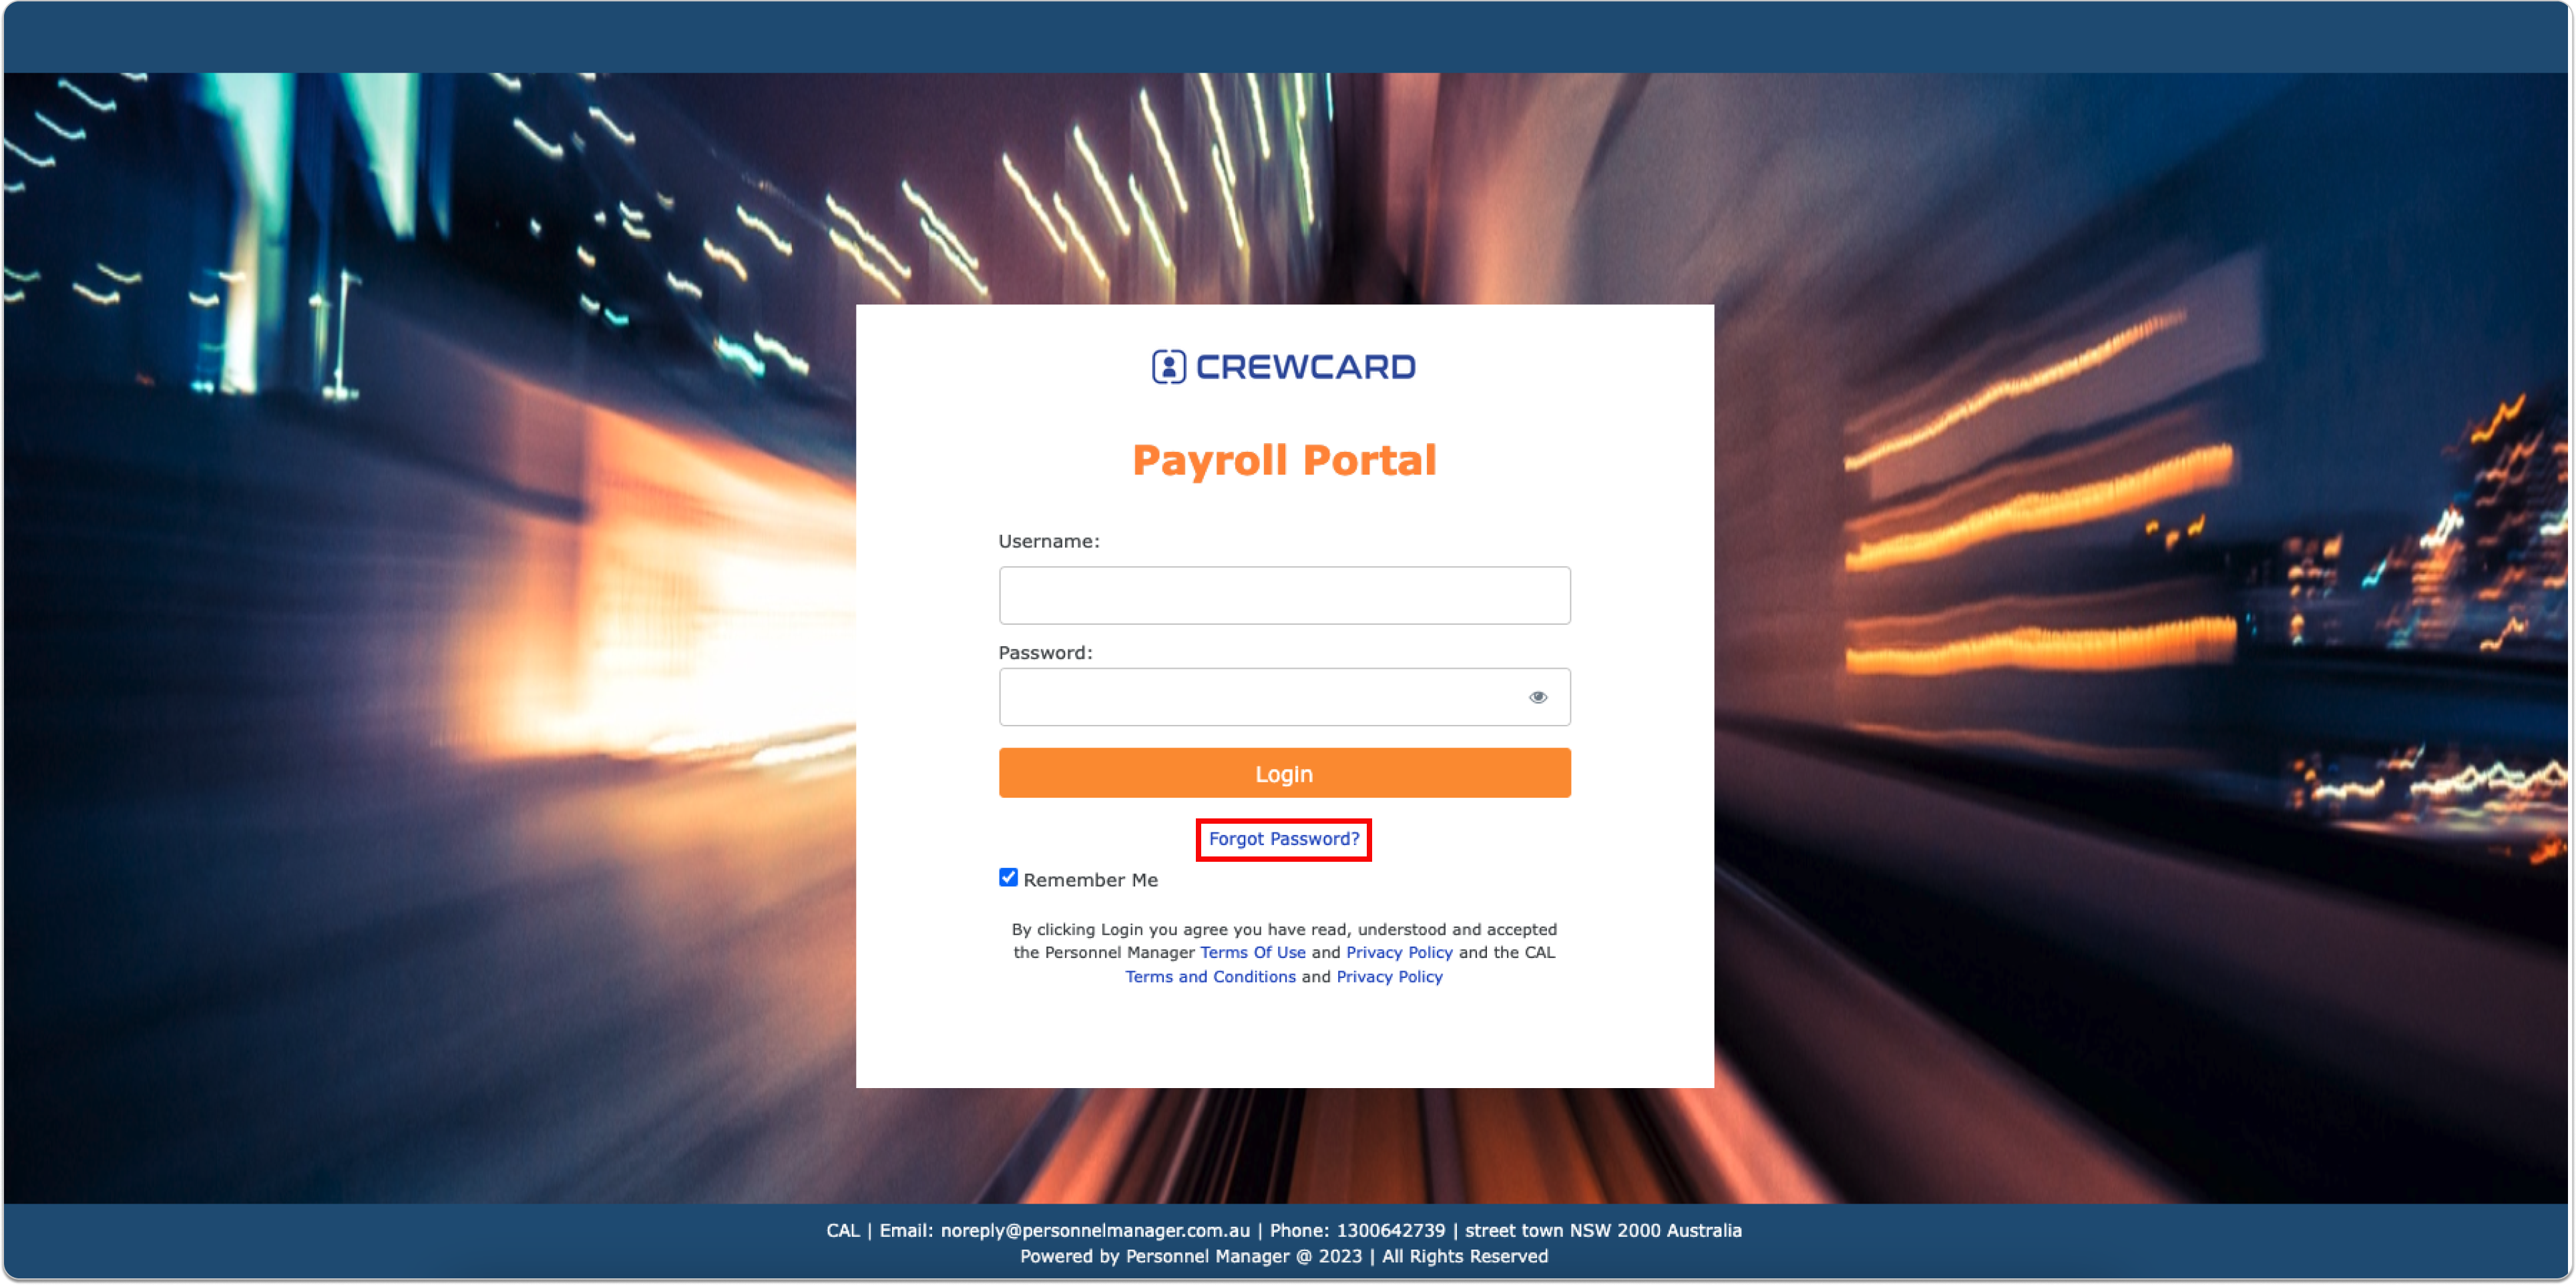
In the event that a user has forgotten their password, they should click on the “Forgot Password” button.
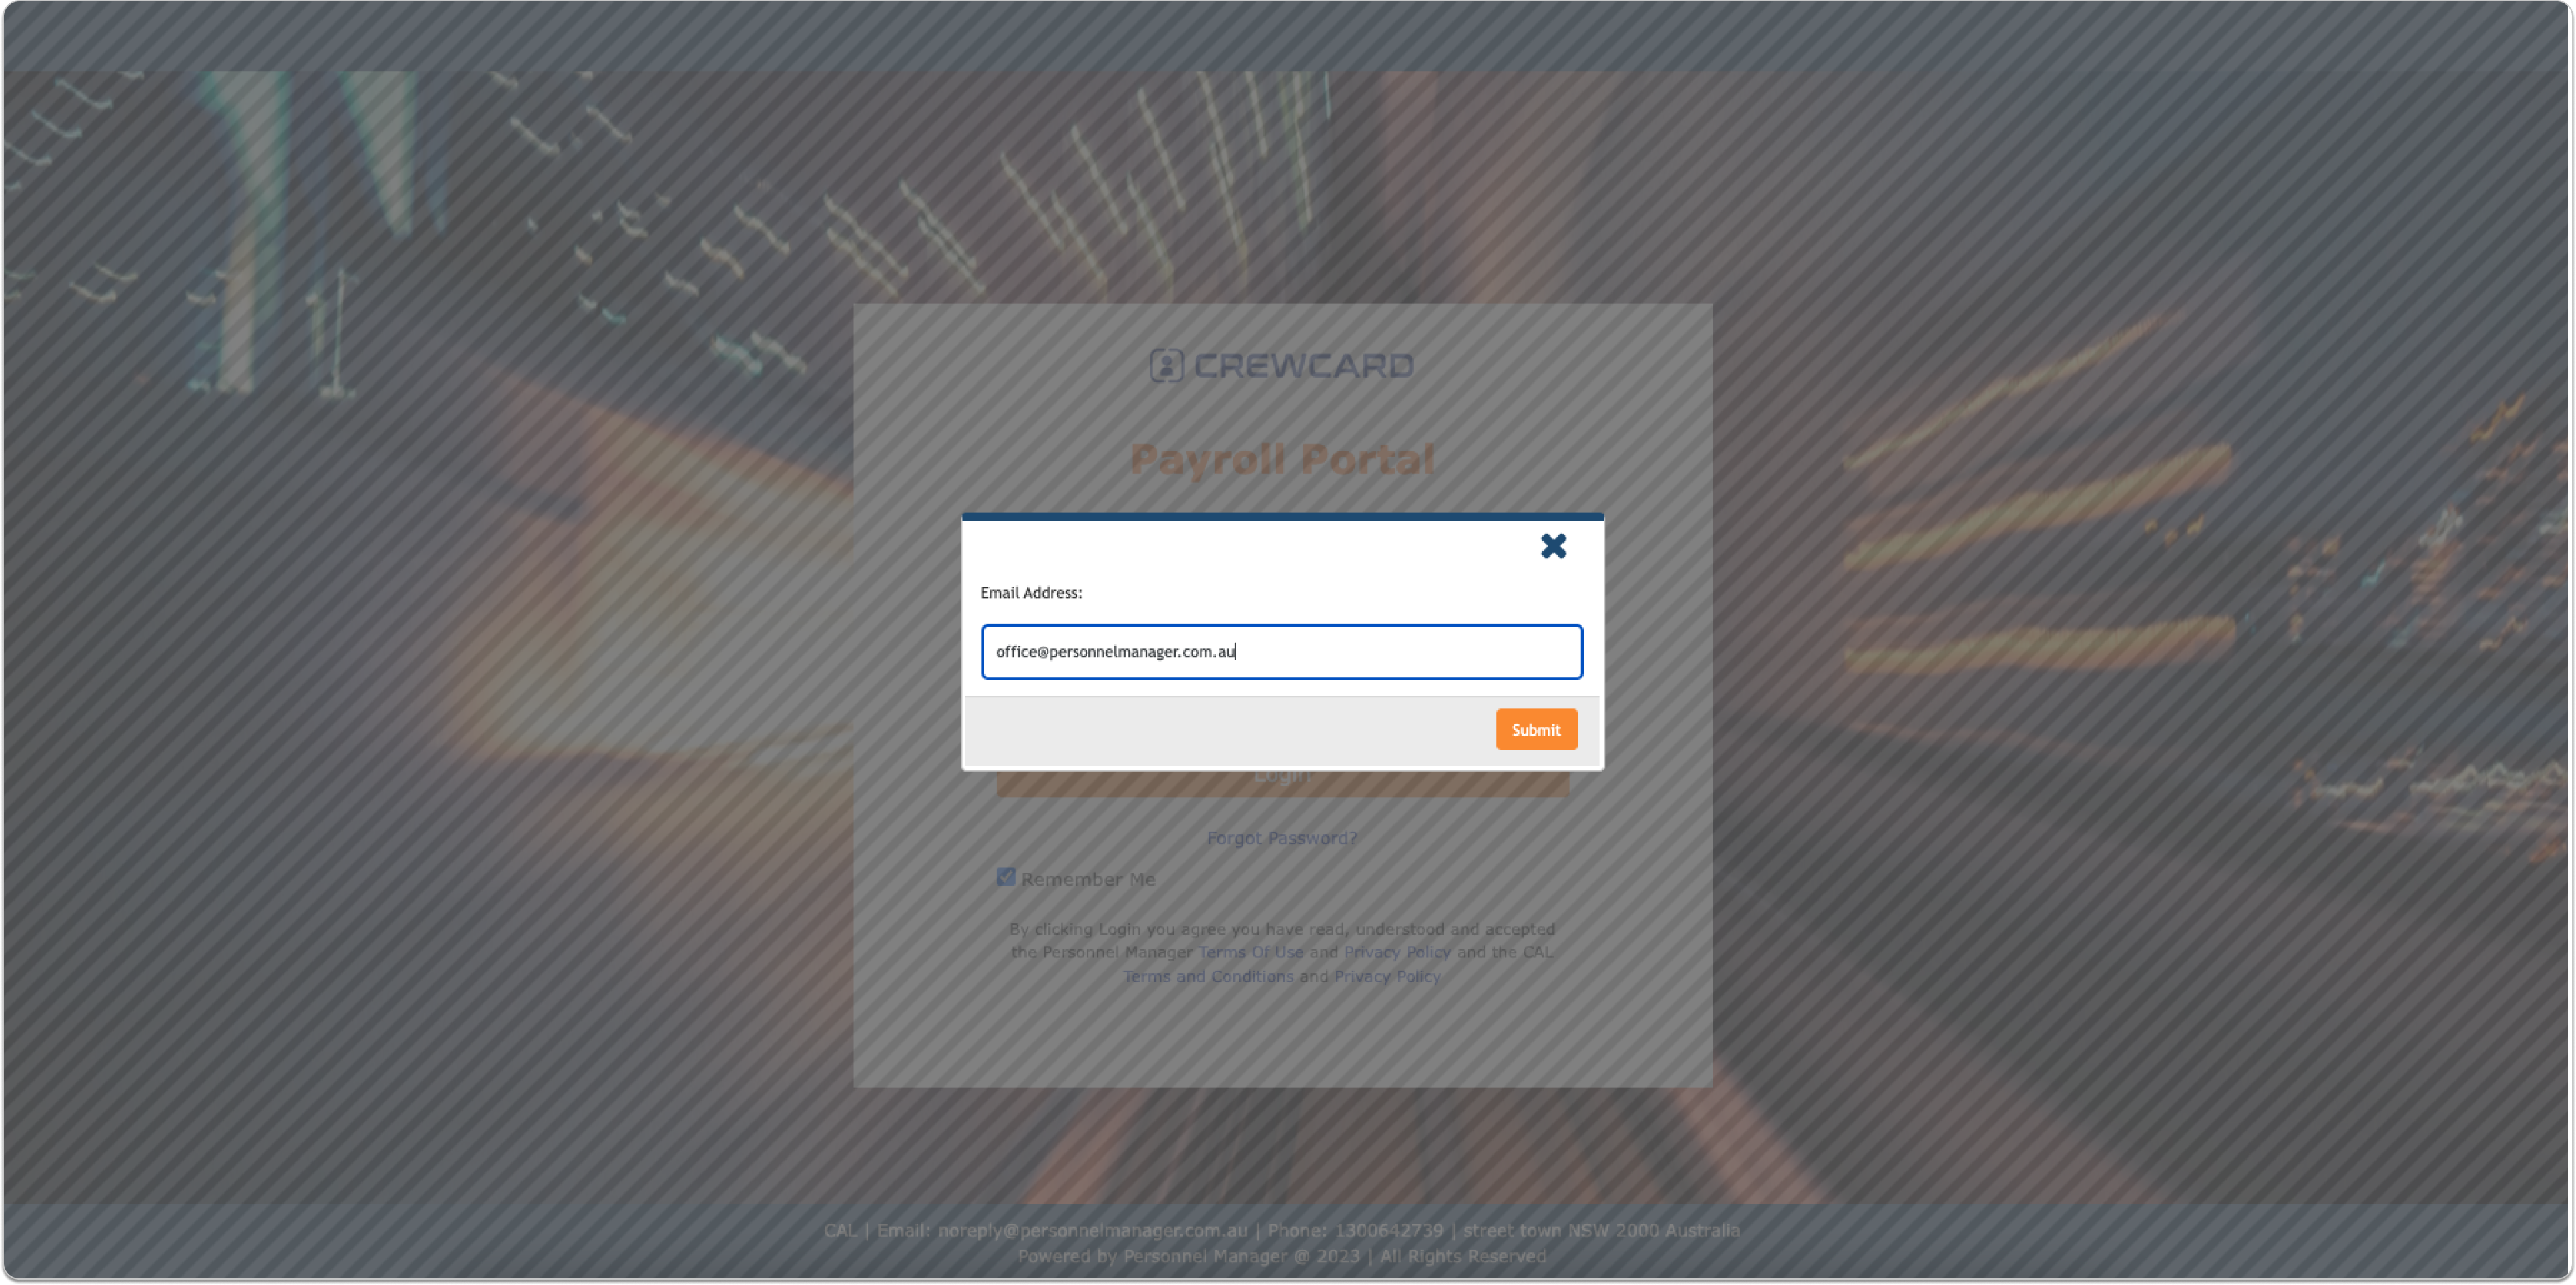
 They will be prompted to enter their email address associated with their account.
 After providing their email address, they will receive an email containing a link to reset their password. Click on the link to proceed with resetting the password.
 The user will be directed to the login page where a pop-up window will appear, requesting them to set a new password. Enter the desired password in the designated text box and confirm it by re-entering it in the text box below.
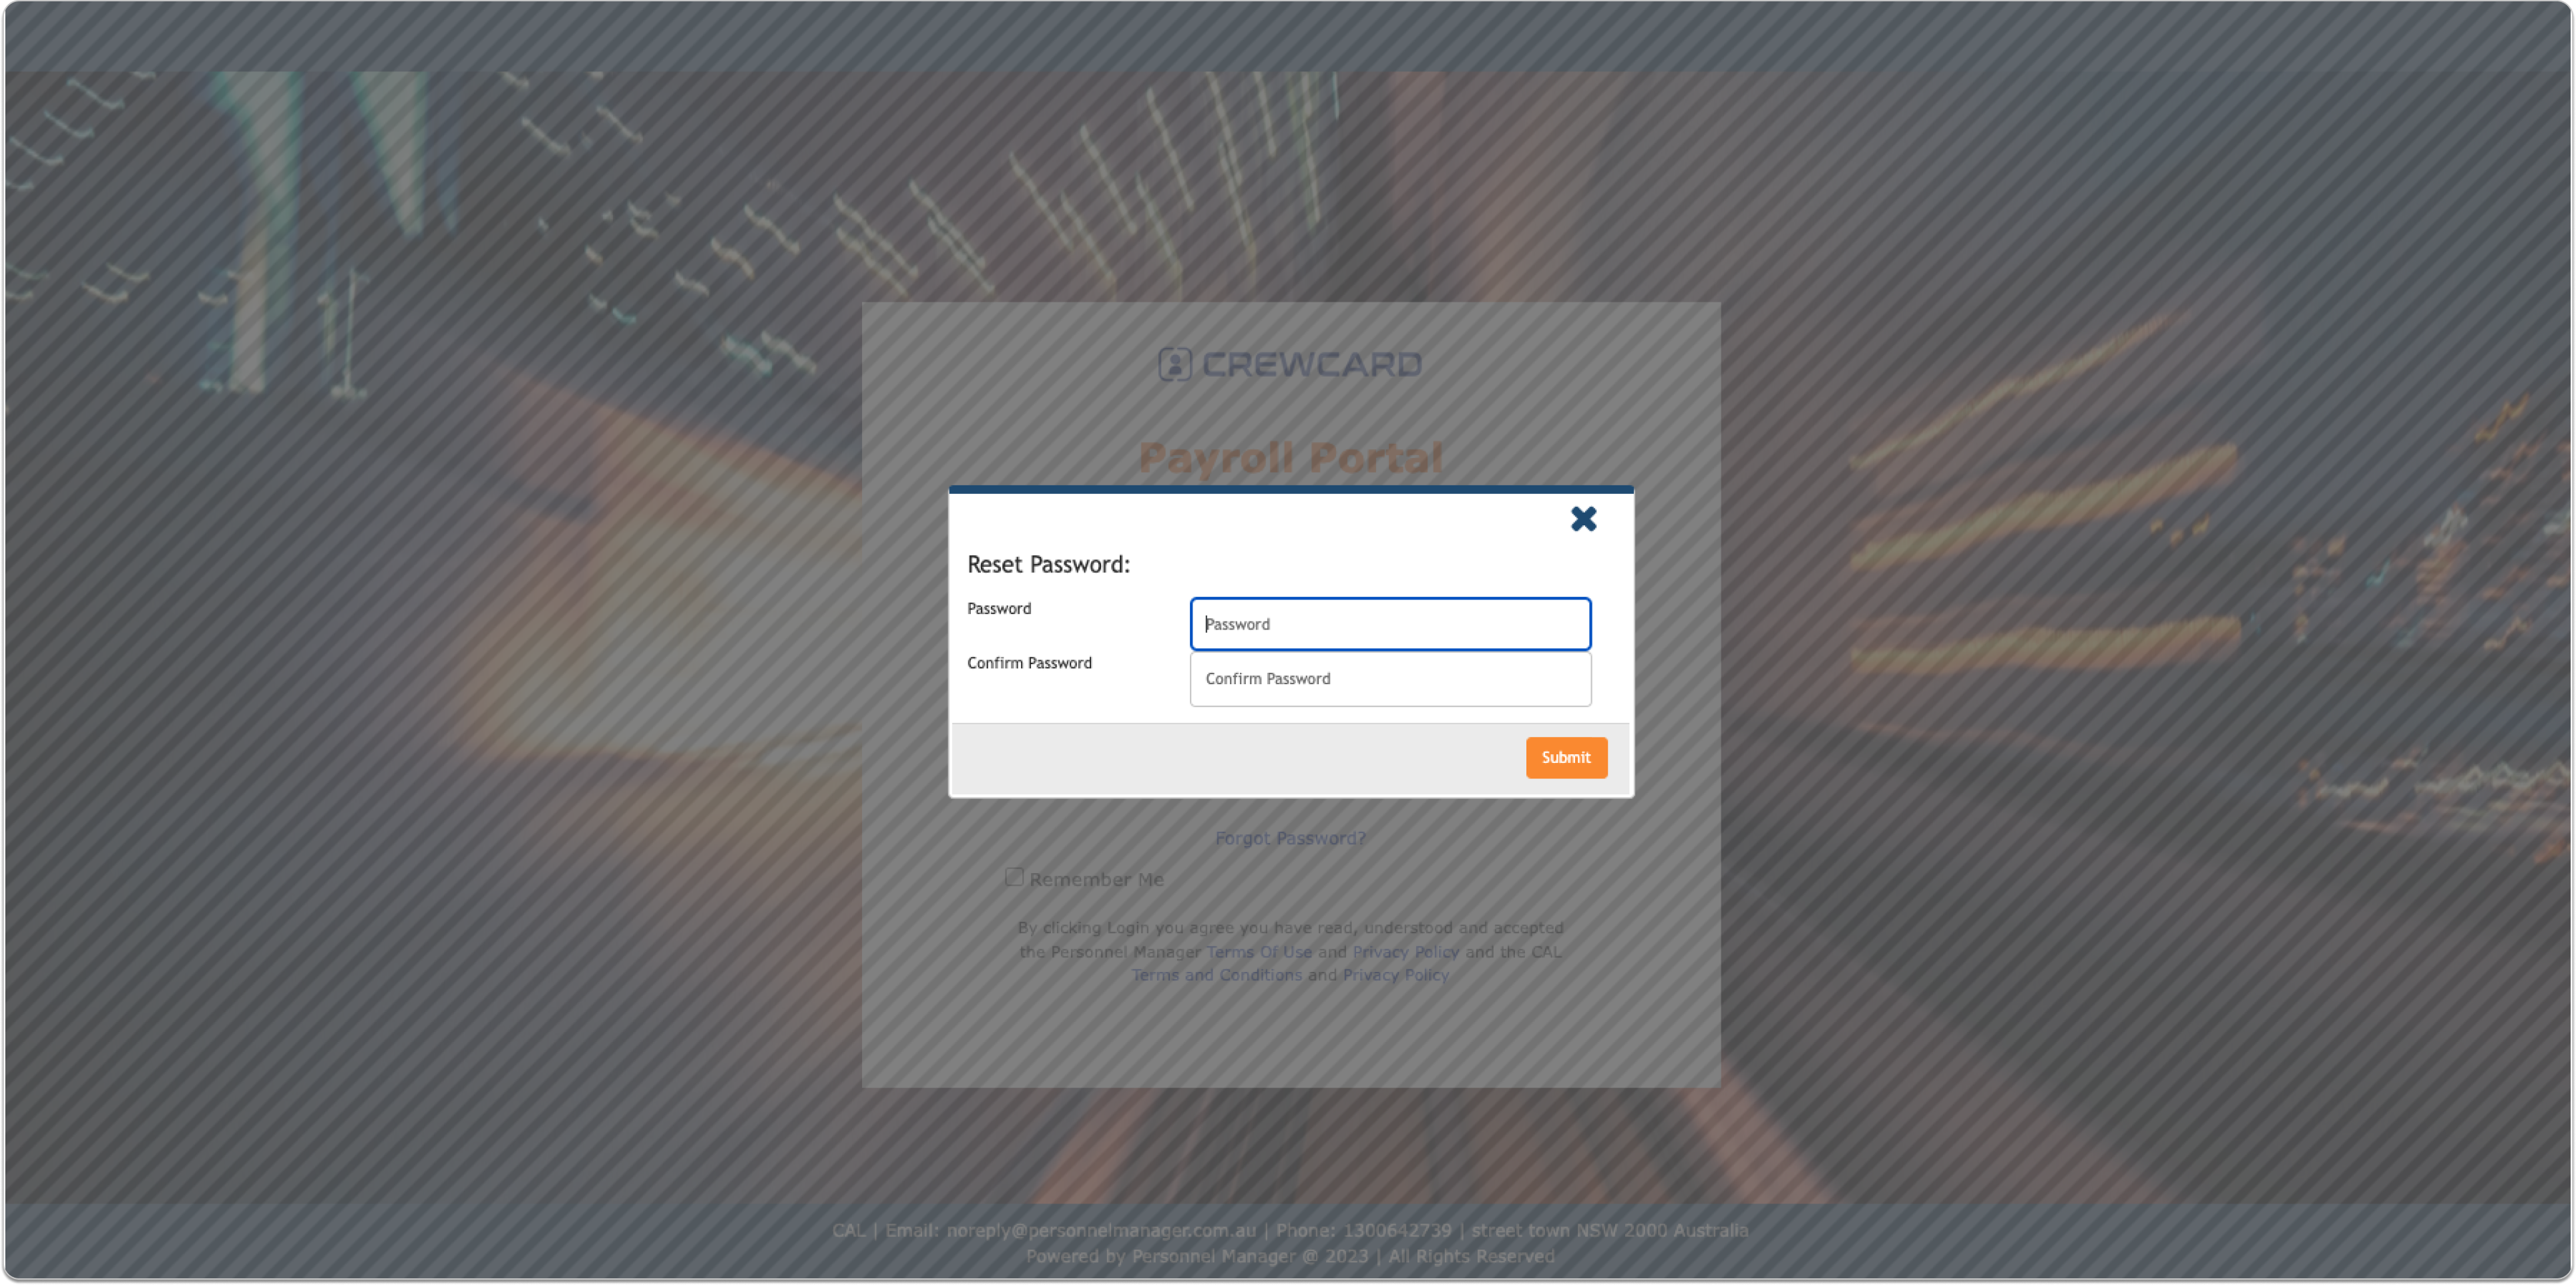 Save the new password and a confirmation email will be sent, indicating that the password has been reset successfully.
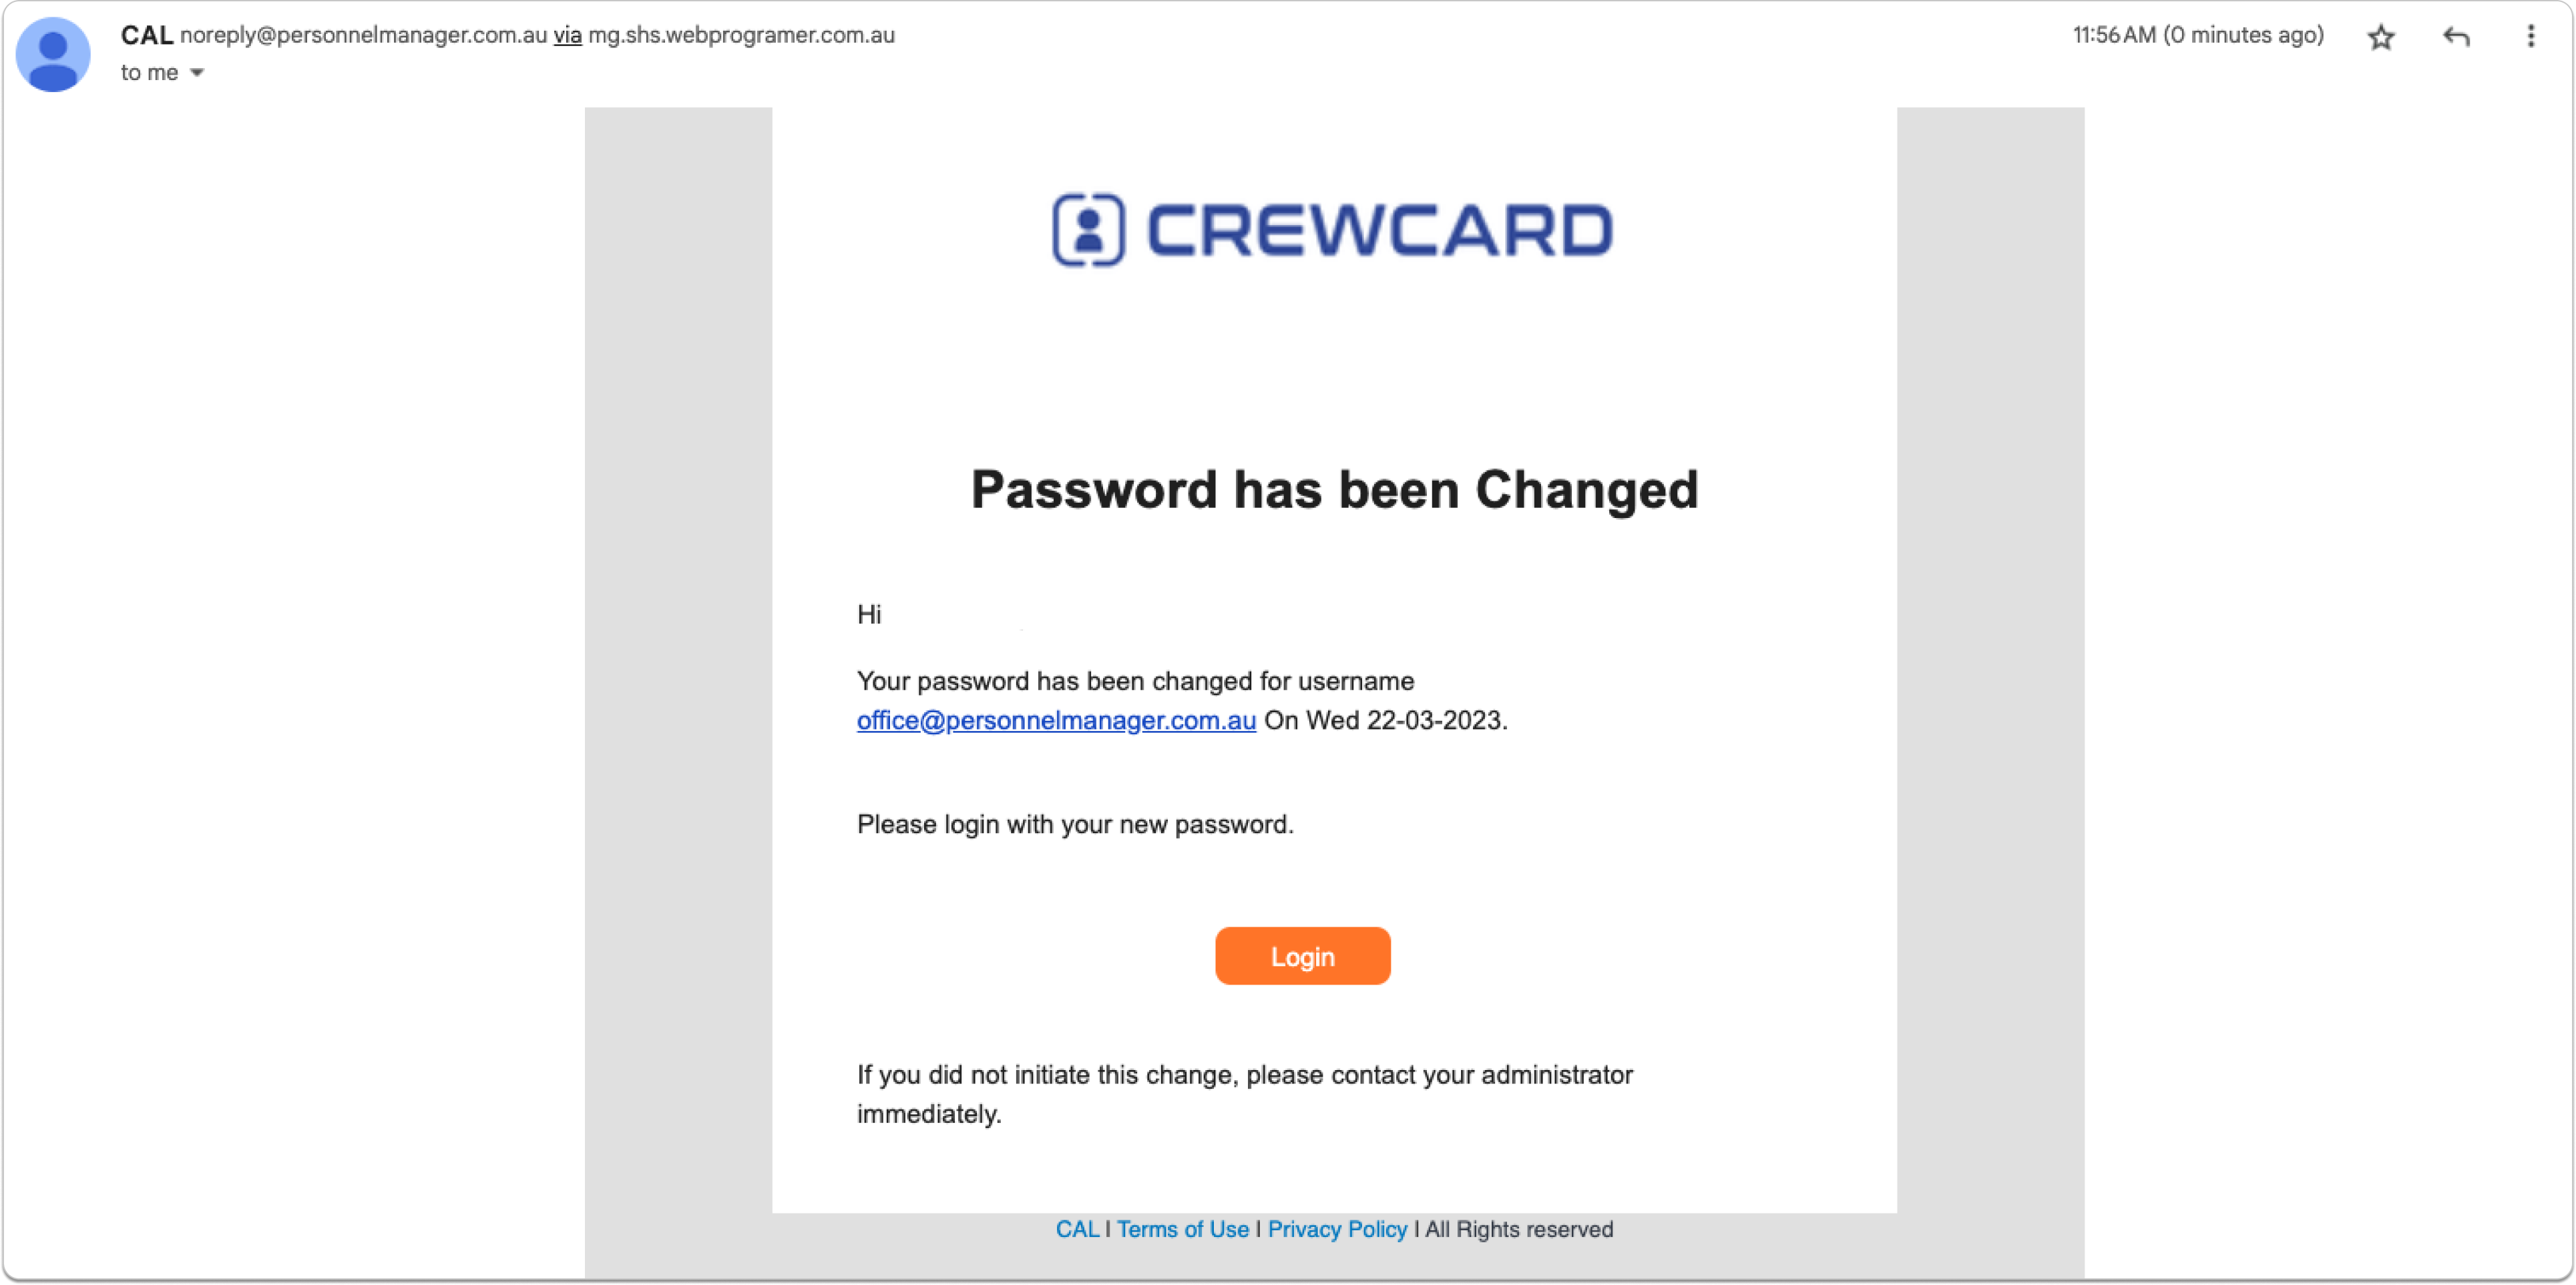 The user can now log in using their newly updated password.
We can update the crew member tax type by selecting the Old Income type or the Changing of Income Type.
Old Income Type:
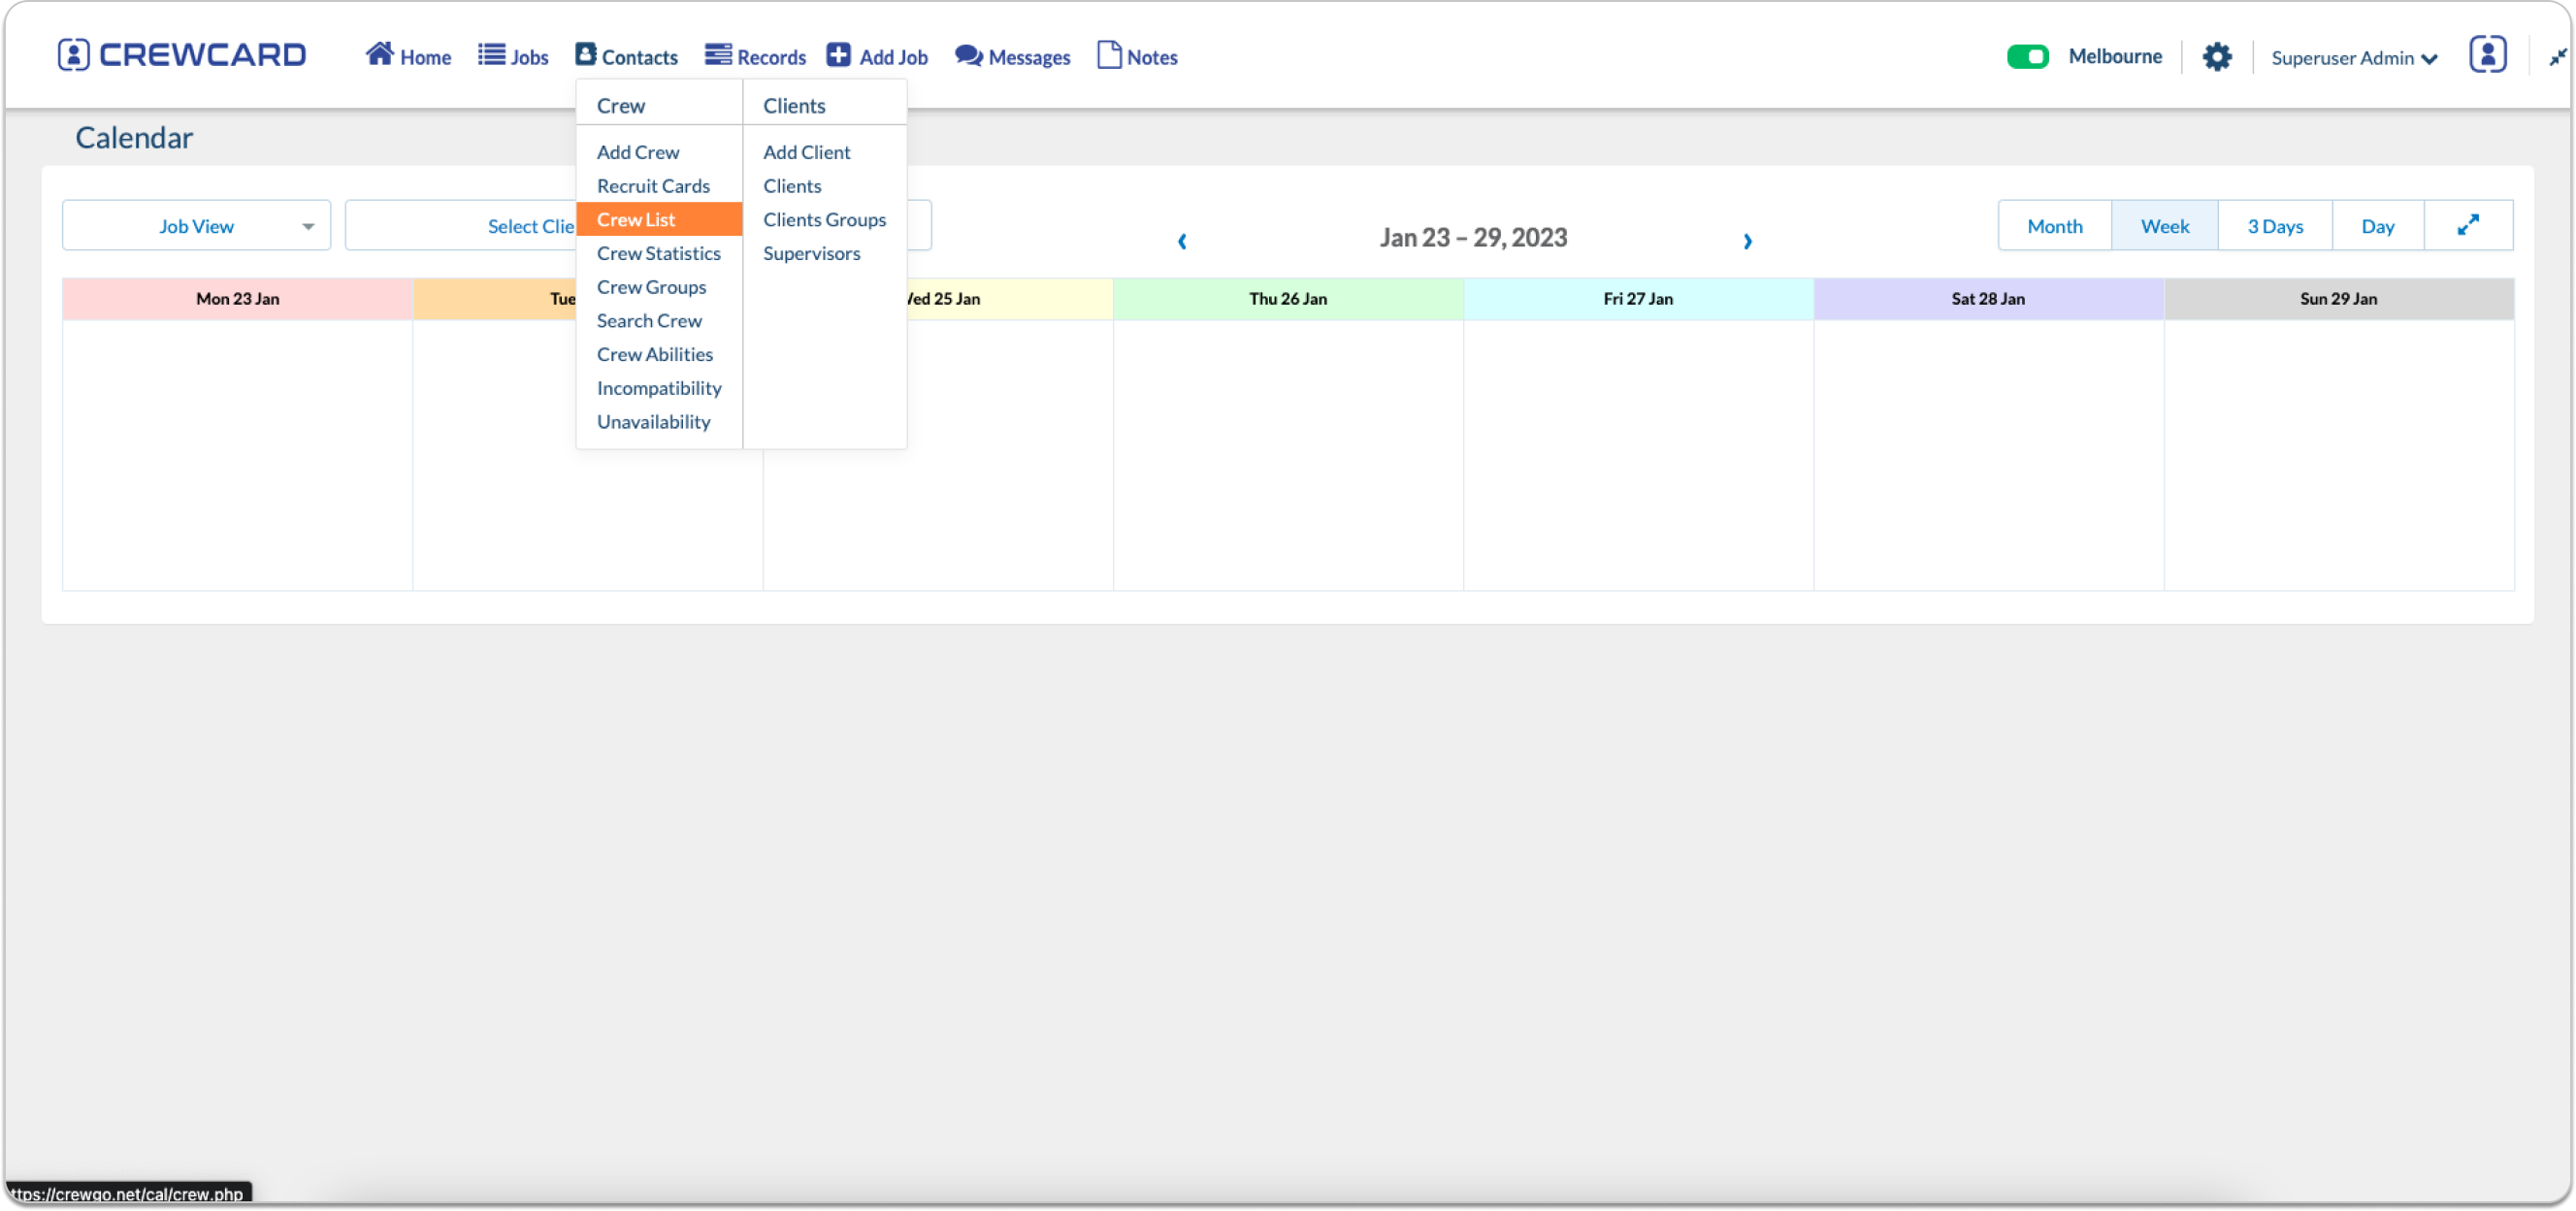
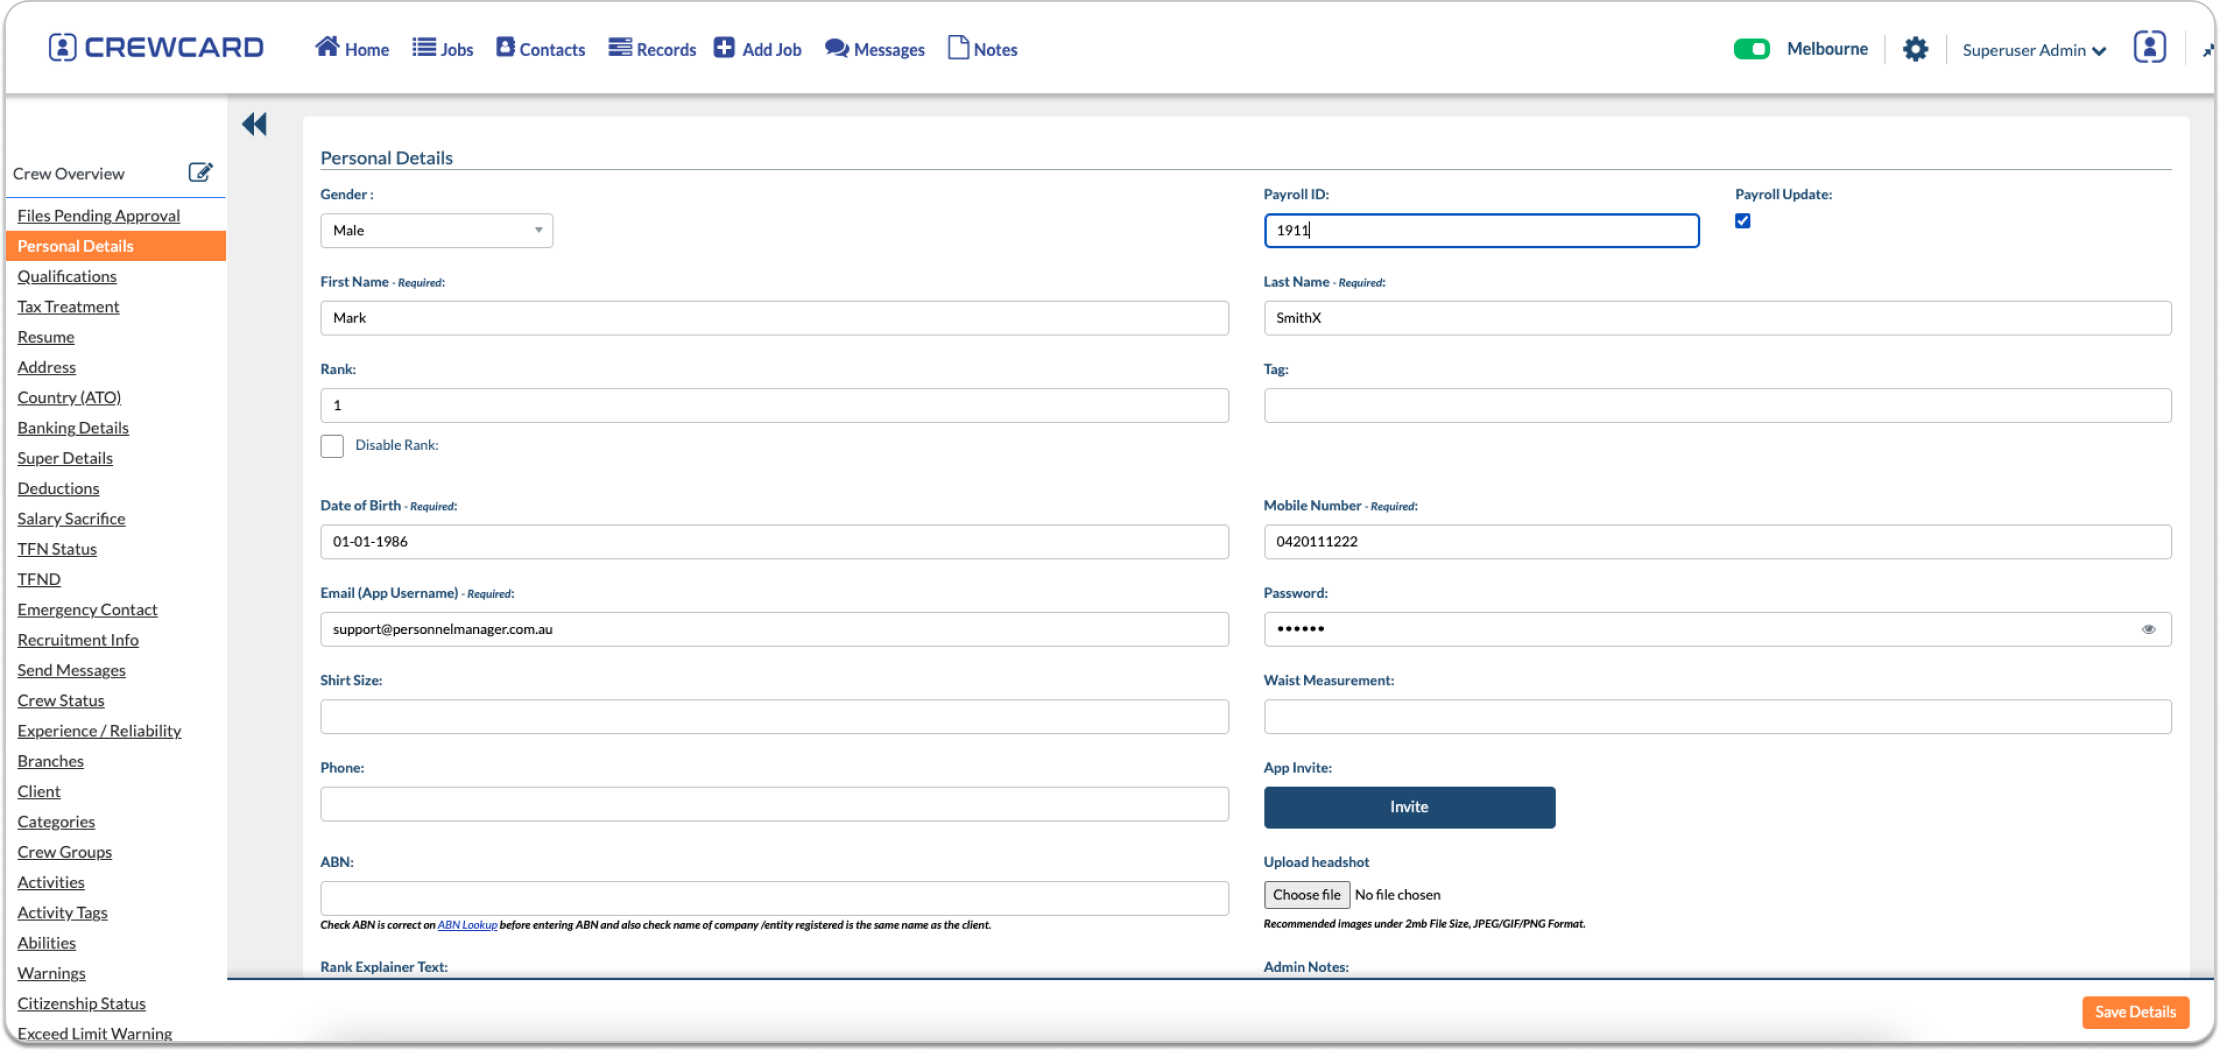
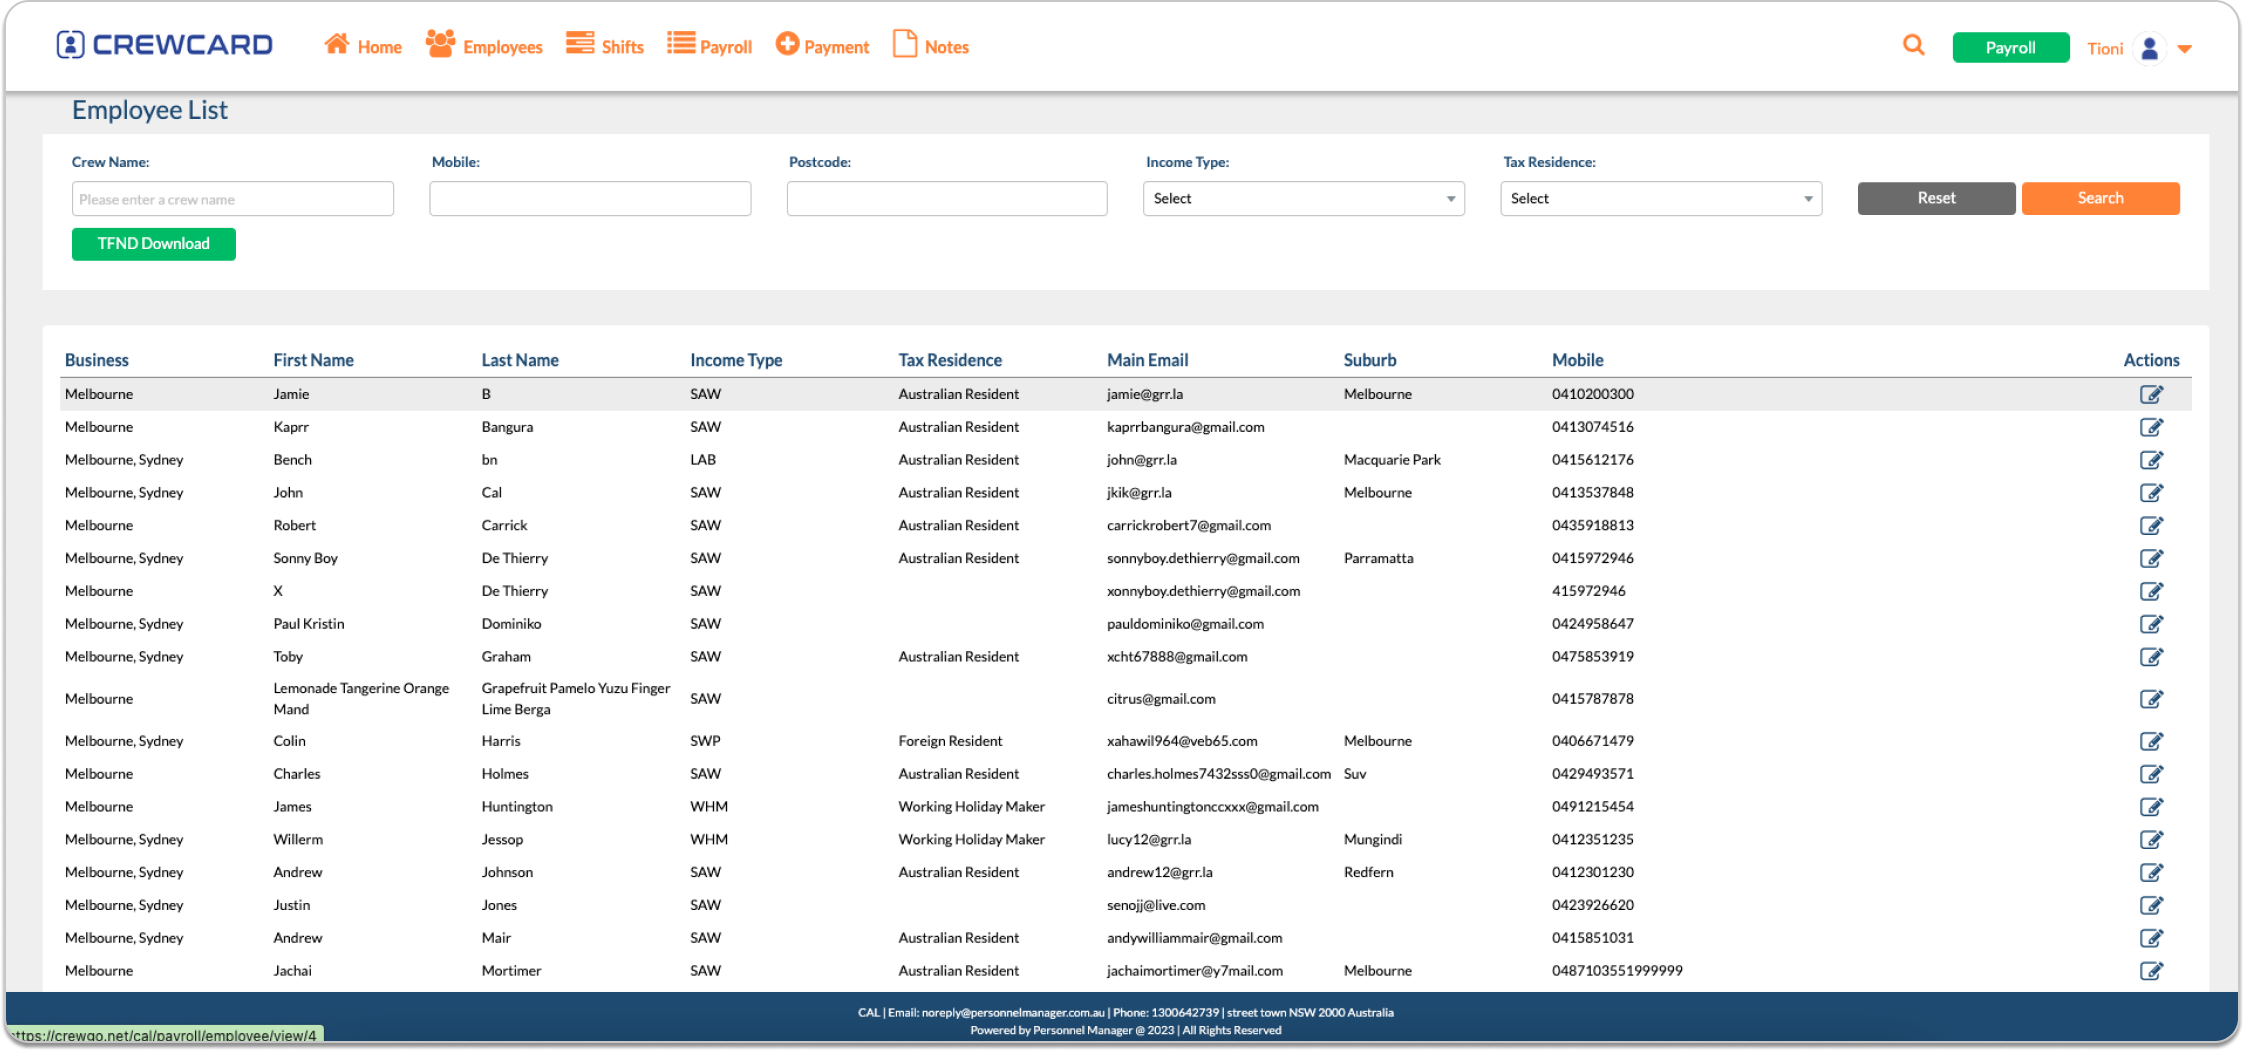
To access the Crew profile, Hover your mouse to Contacts and select Crew List under Crew column.
Select the crew and click the edit icon.
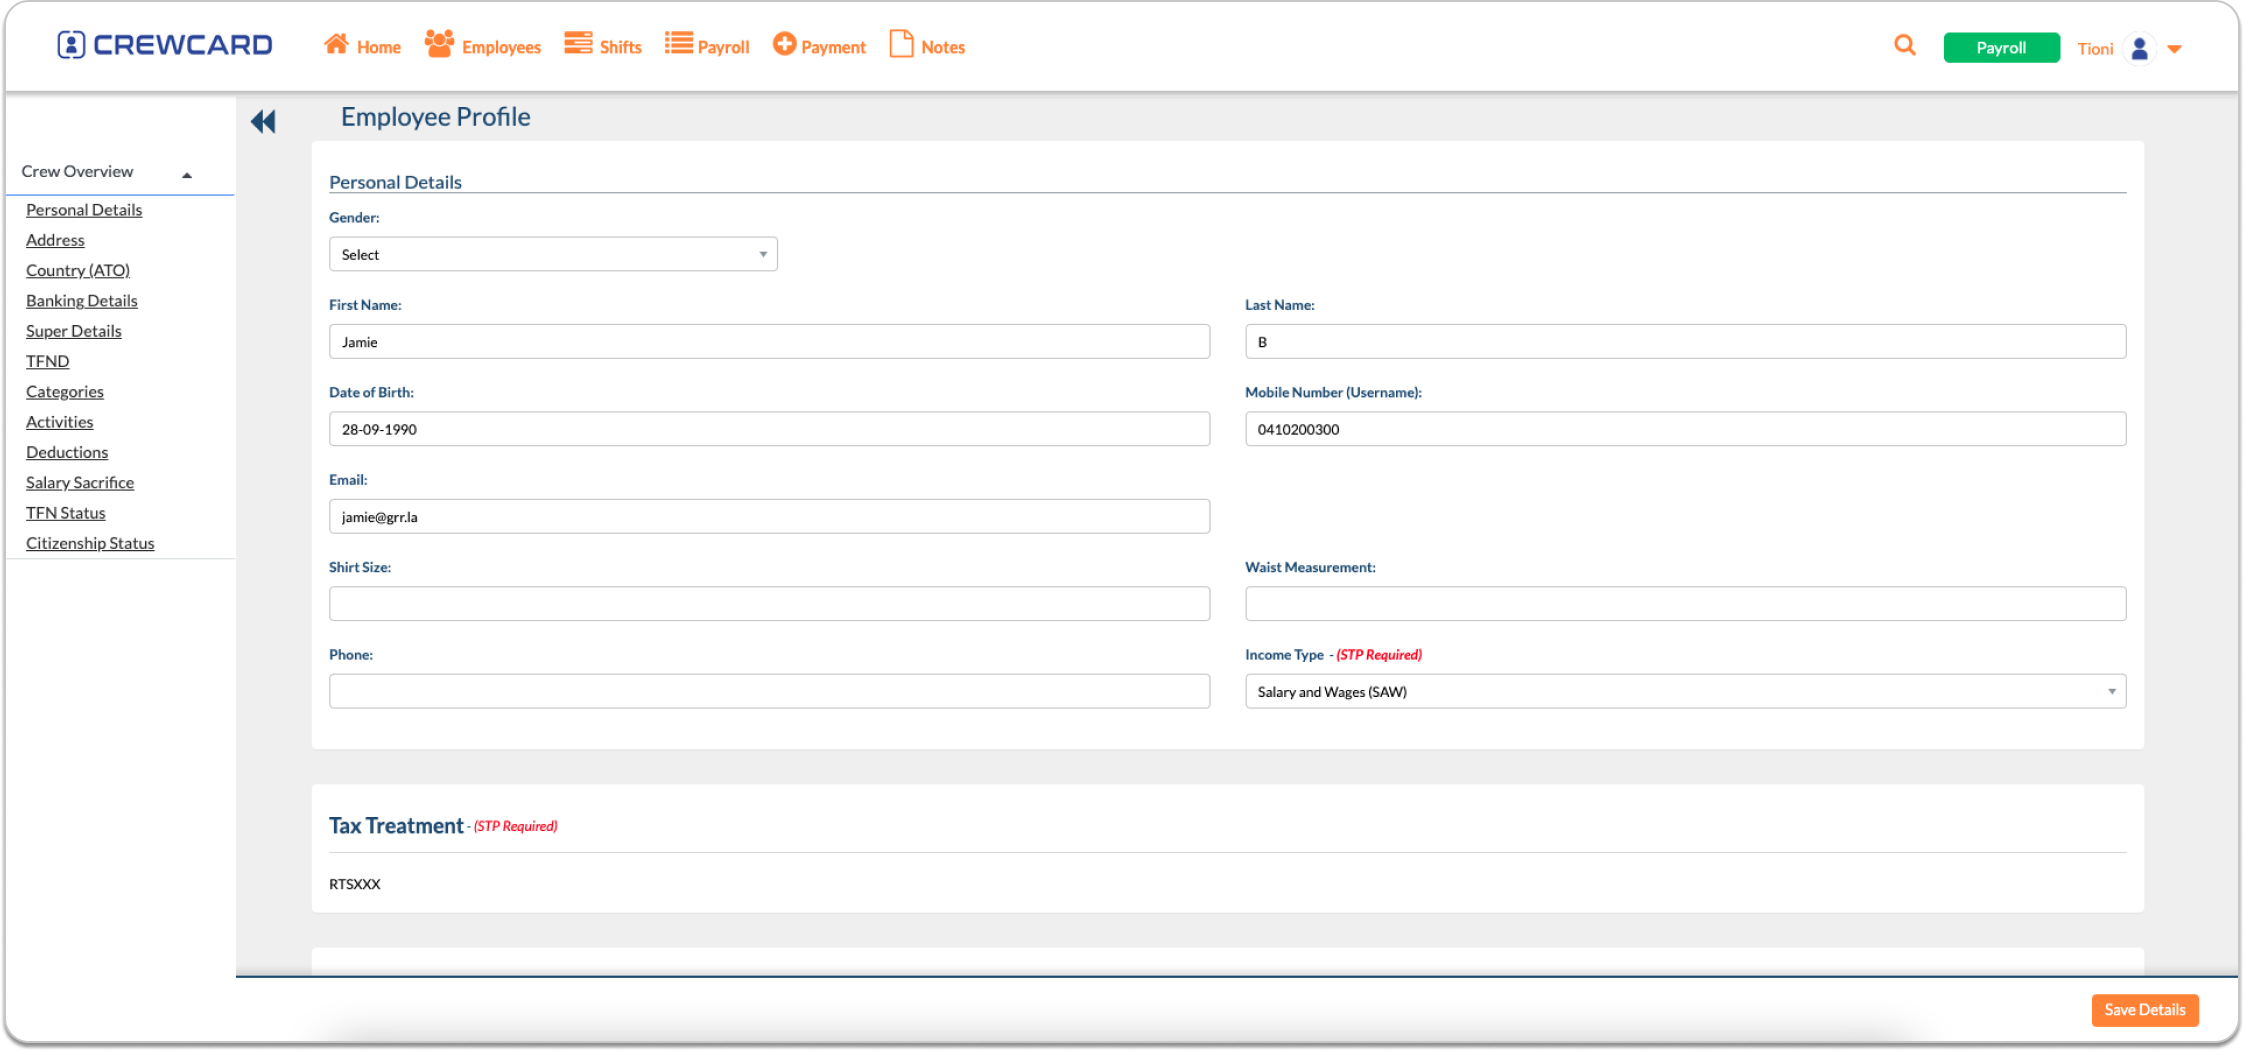
In the Crew Profile, go to the Personal Details section.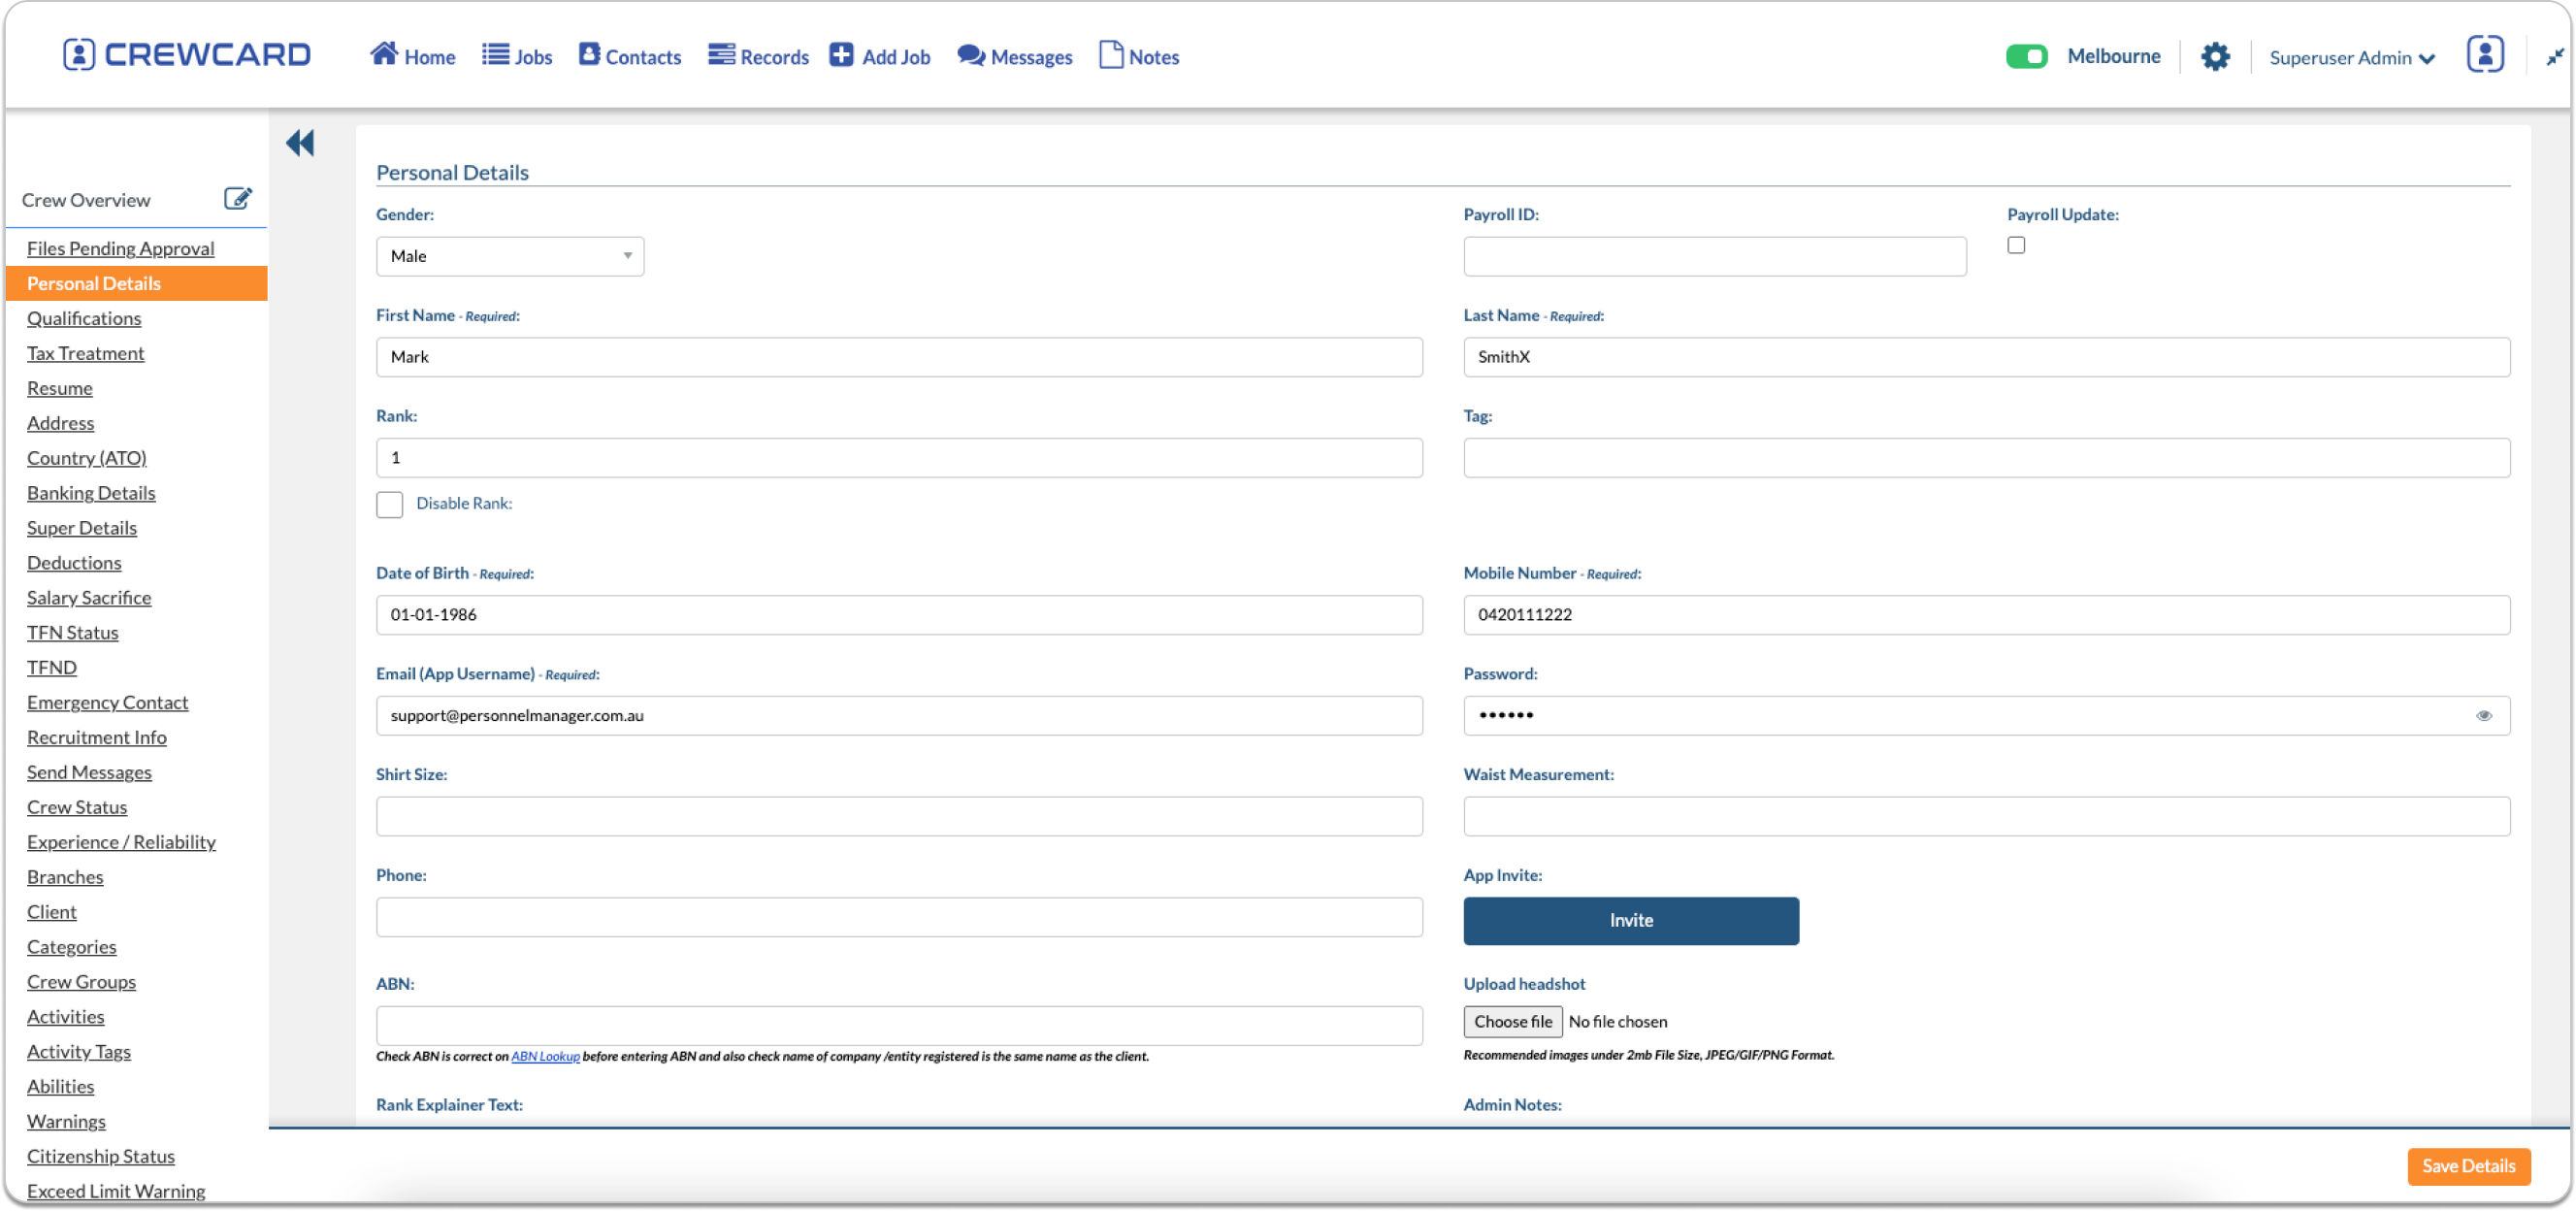
Follow the guidelines of the fields:
First Name: Does not accept characters with tremor
Last Name: Accepts up to 40 characters only
Mobile Number: Accepts up to 16 characters only
Enter the payroll ID and Tick the Payroll Update checkbox.
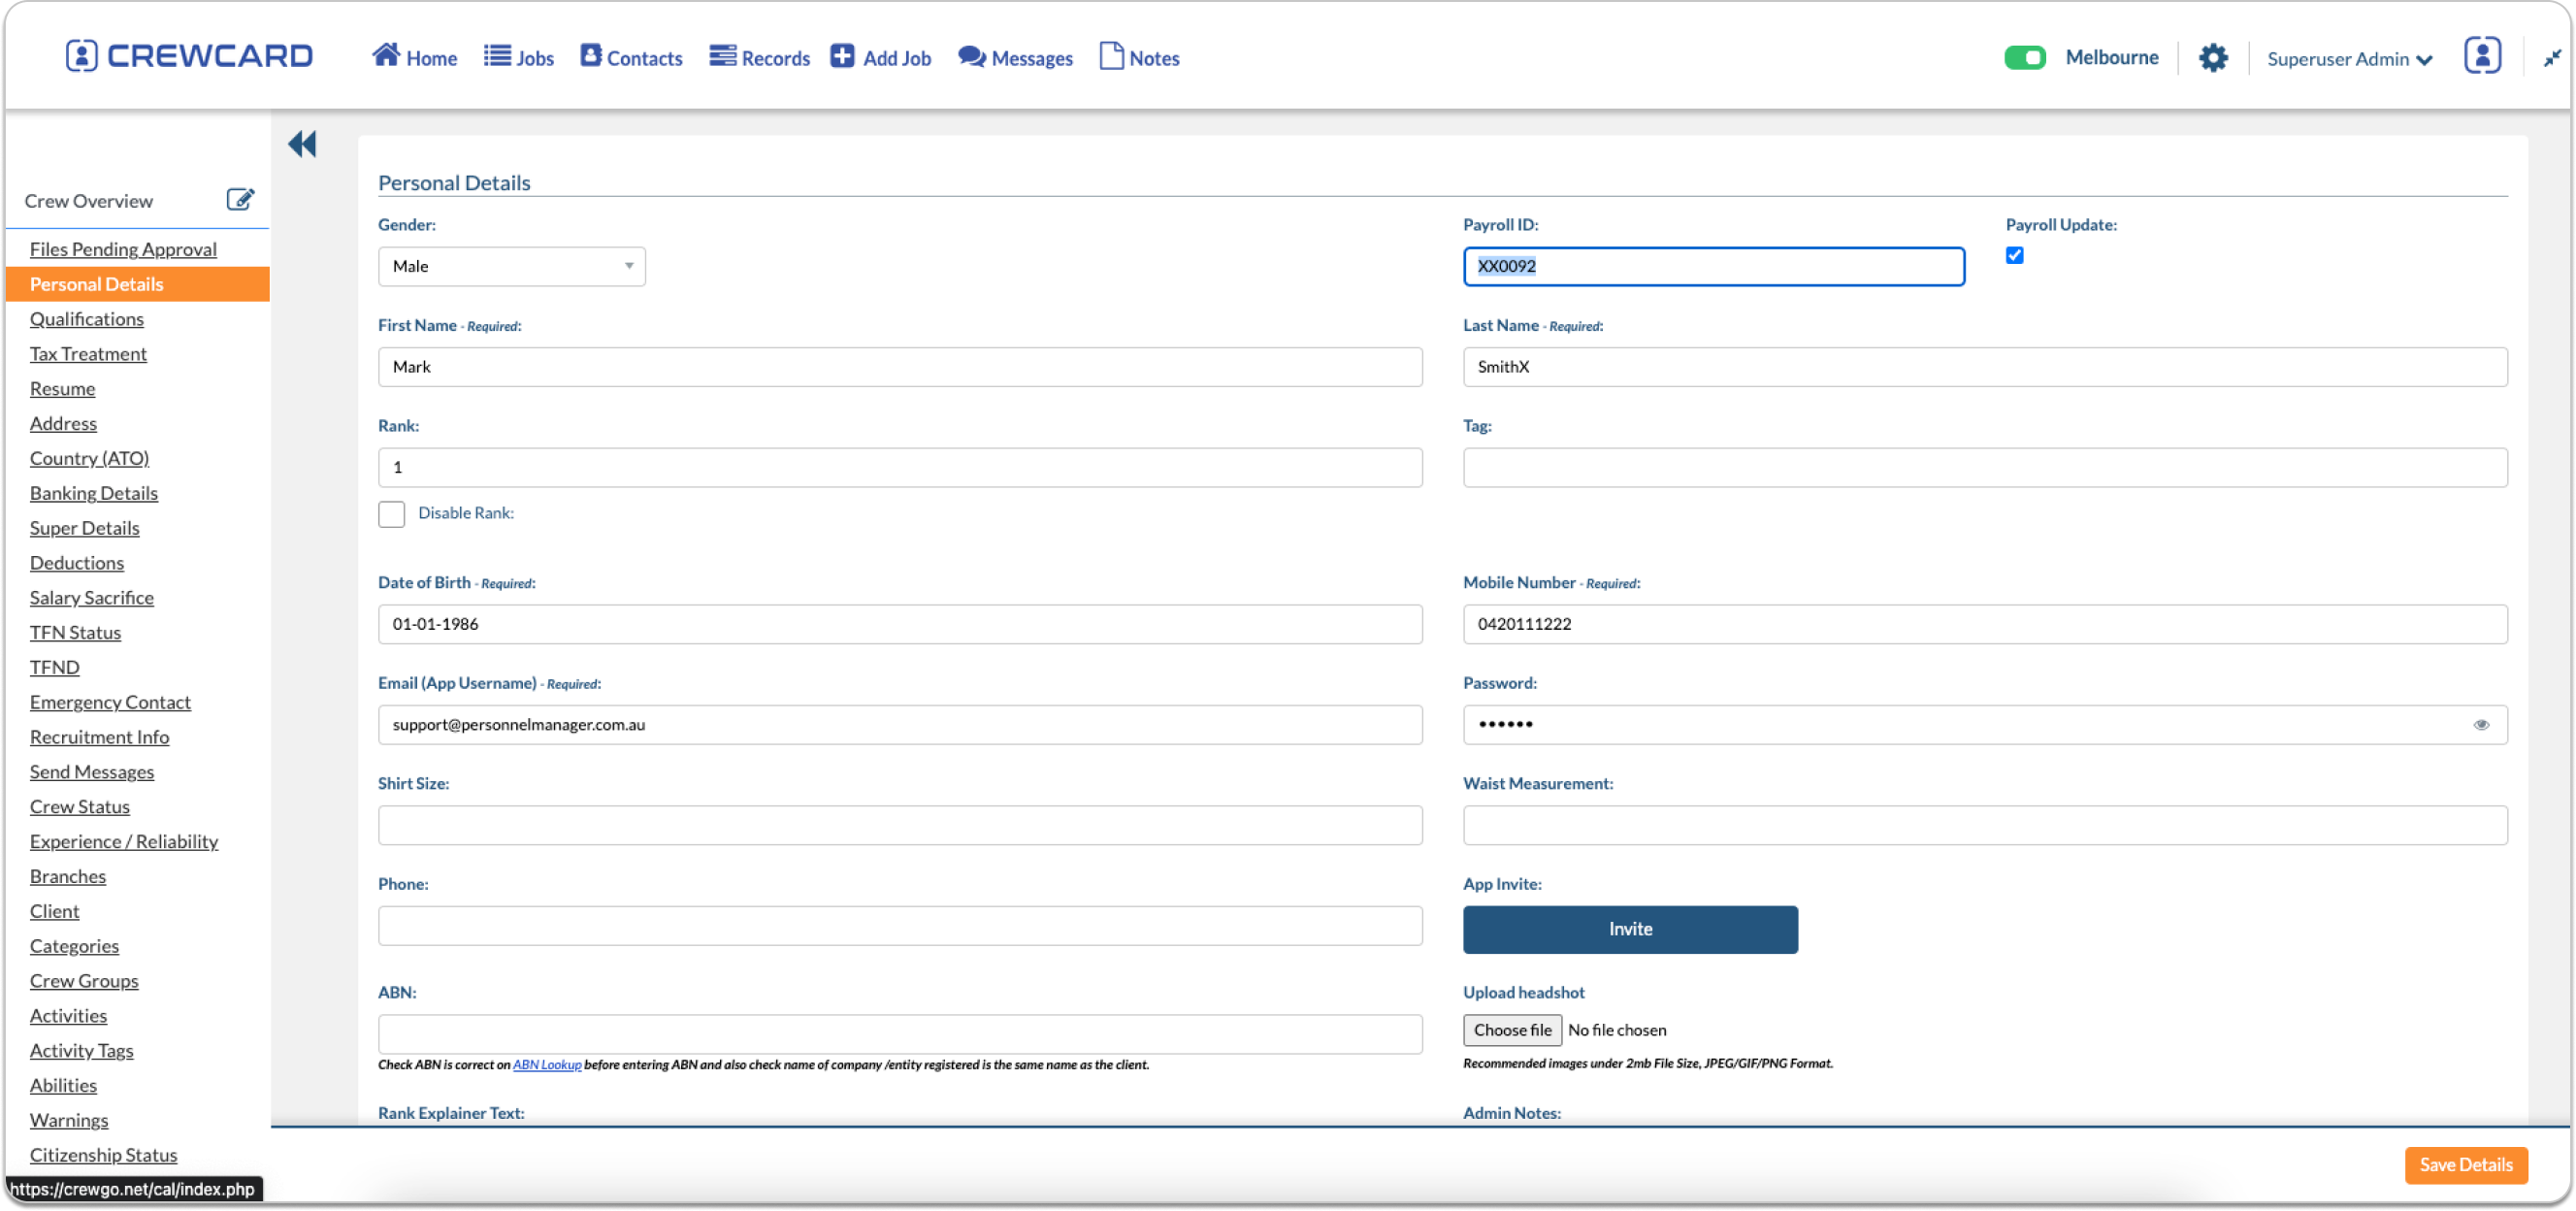
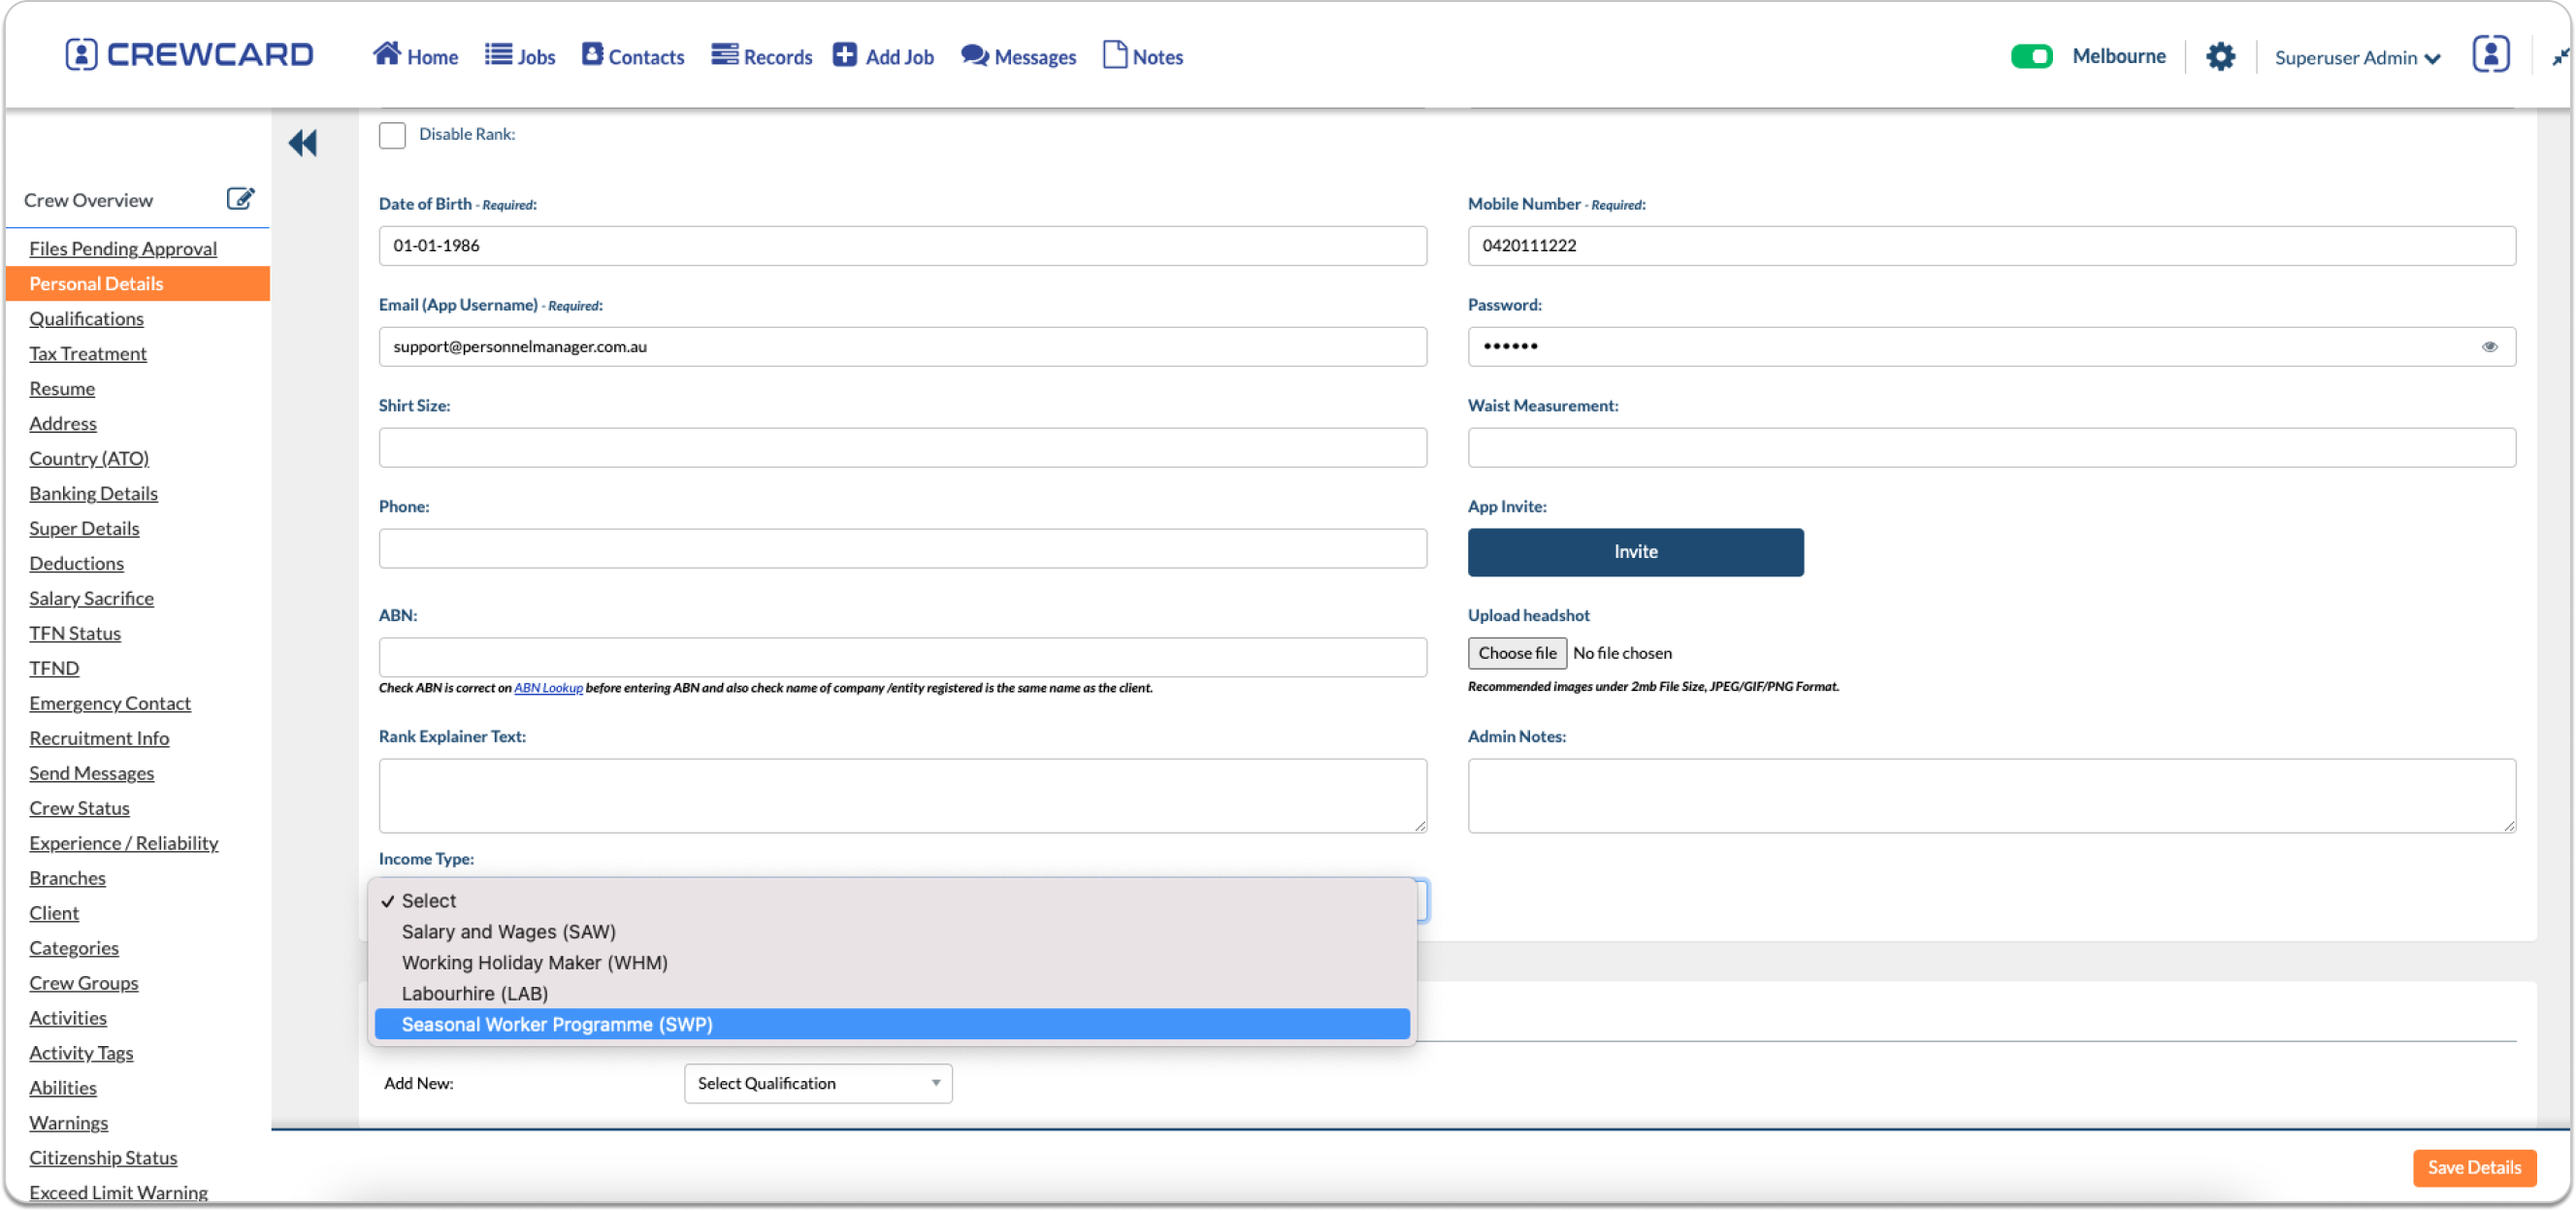
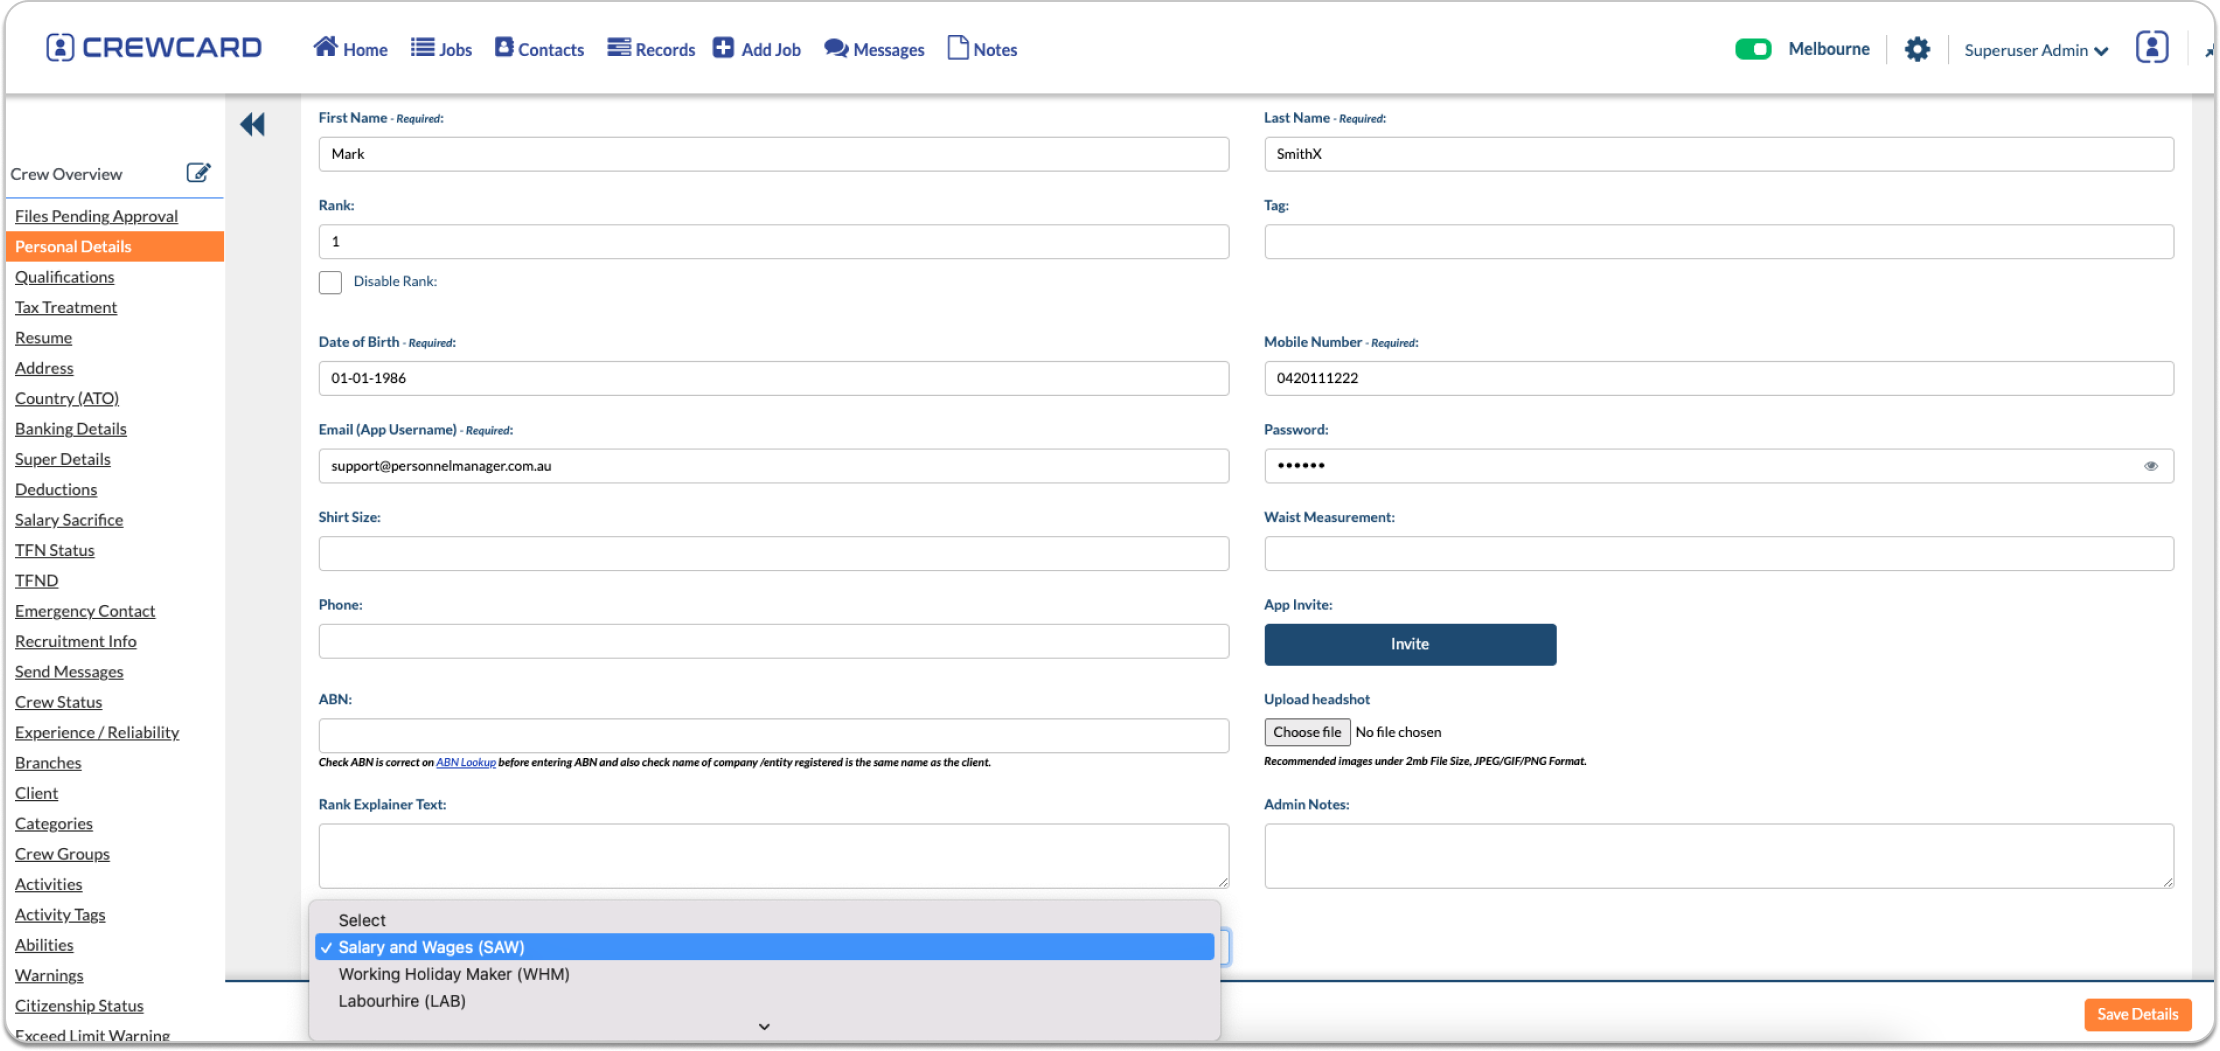
Select the Income Type and click the Save Details button.
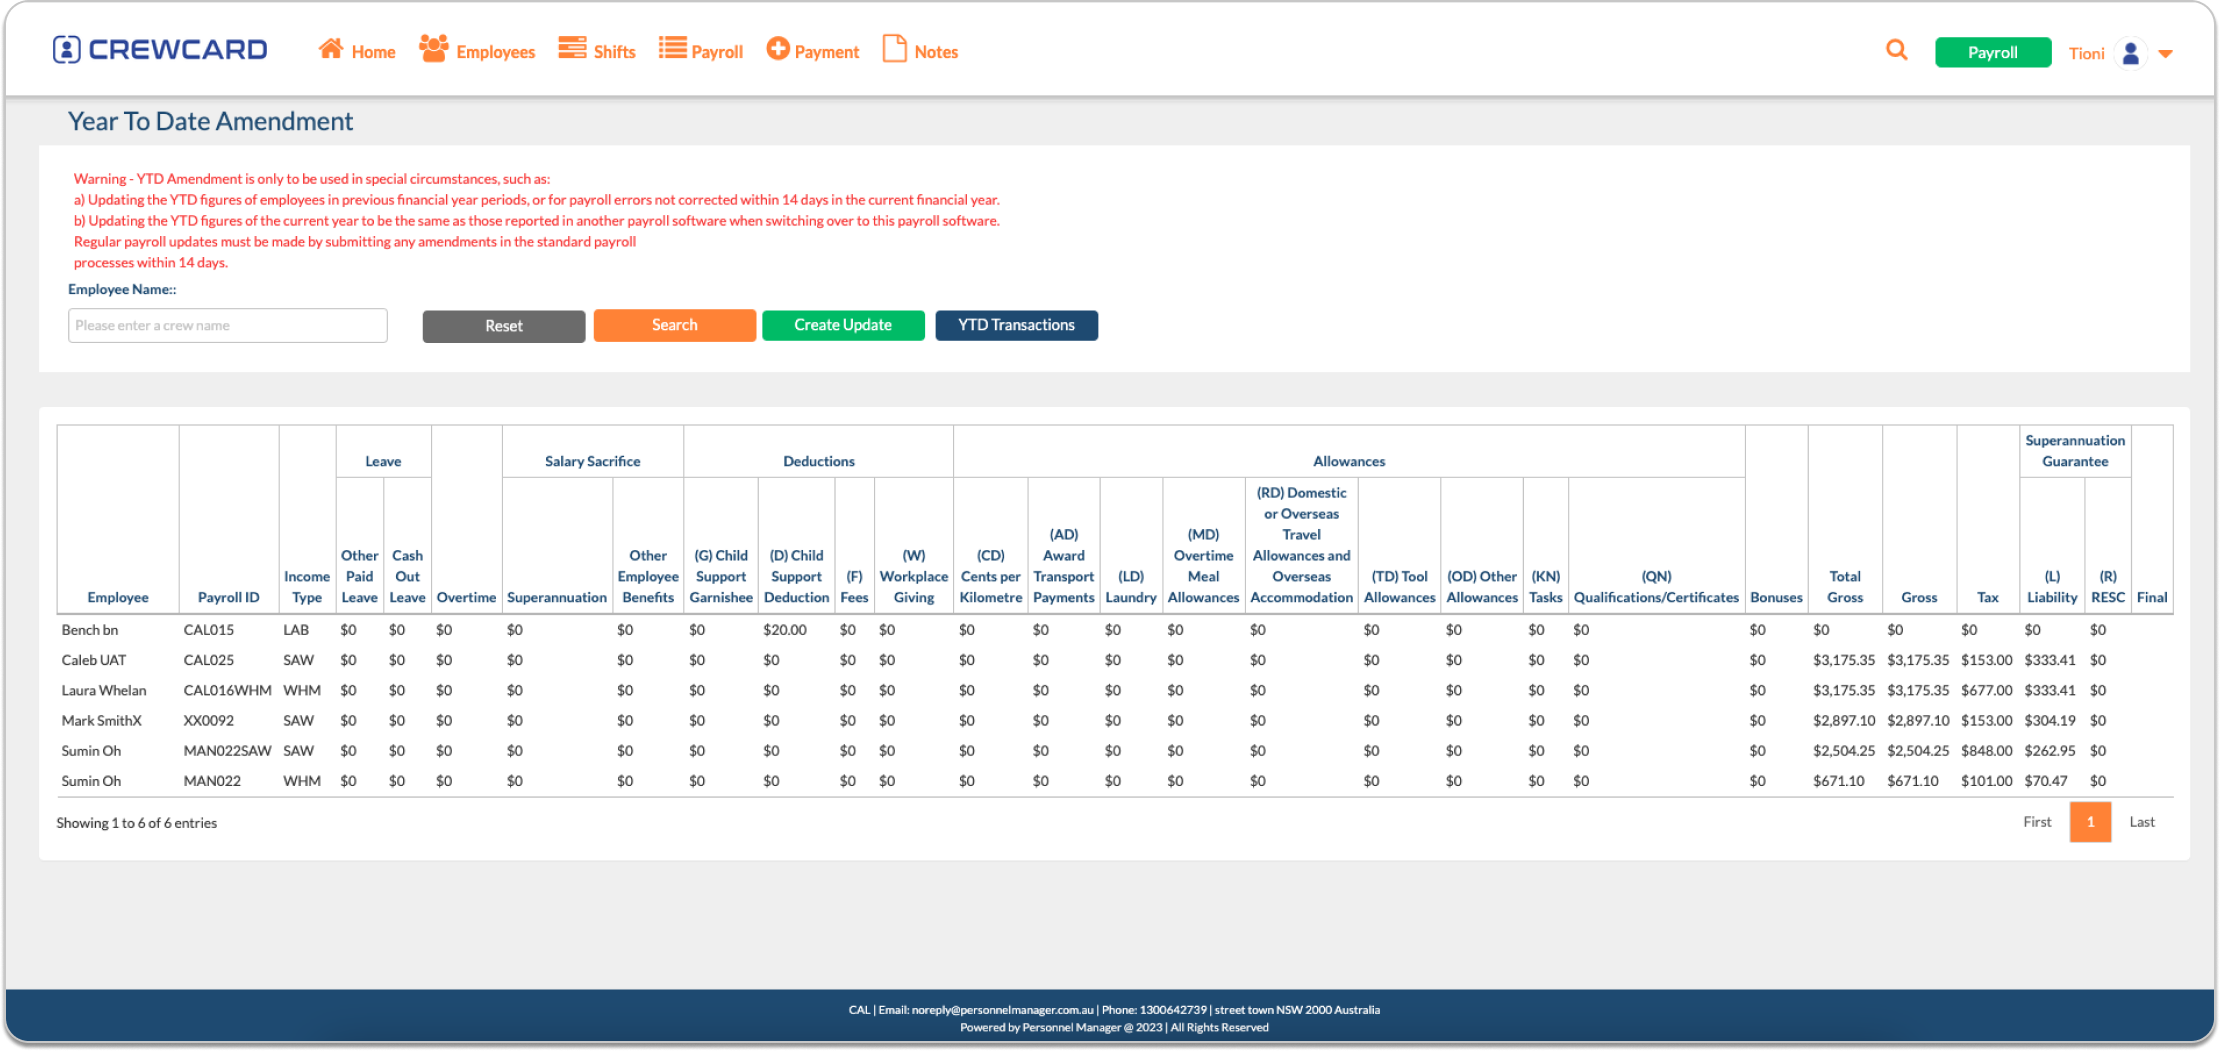
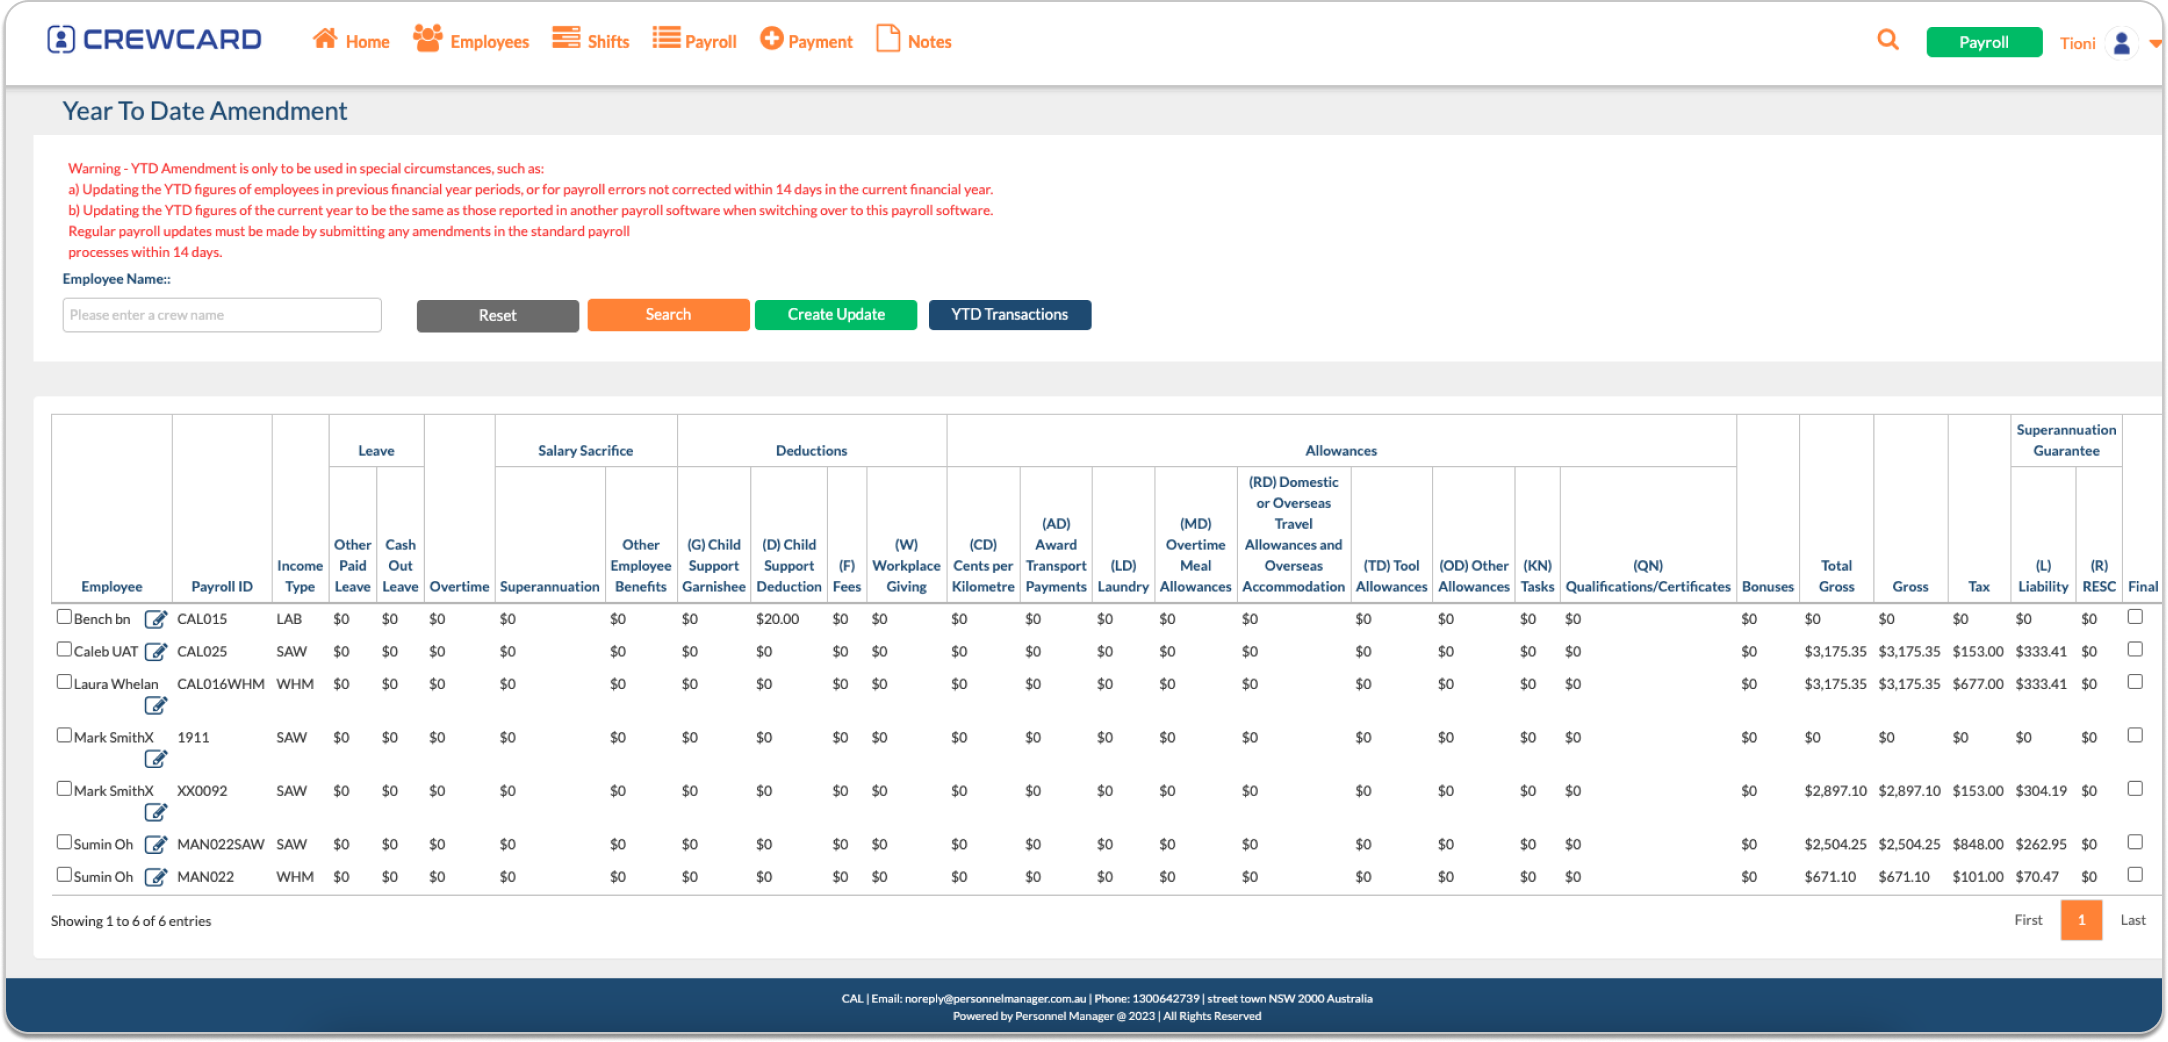
Click Administration drop down and select Payroll Settings.
Click the Payroll drop down and select YTD Amendment.
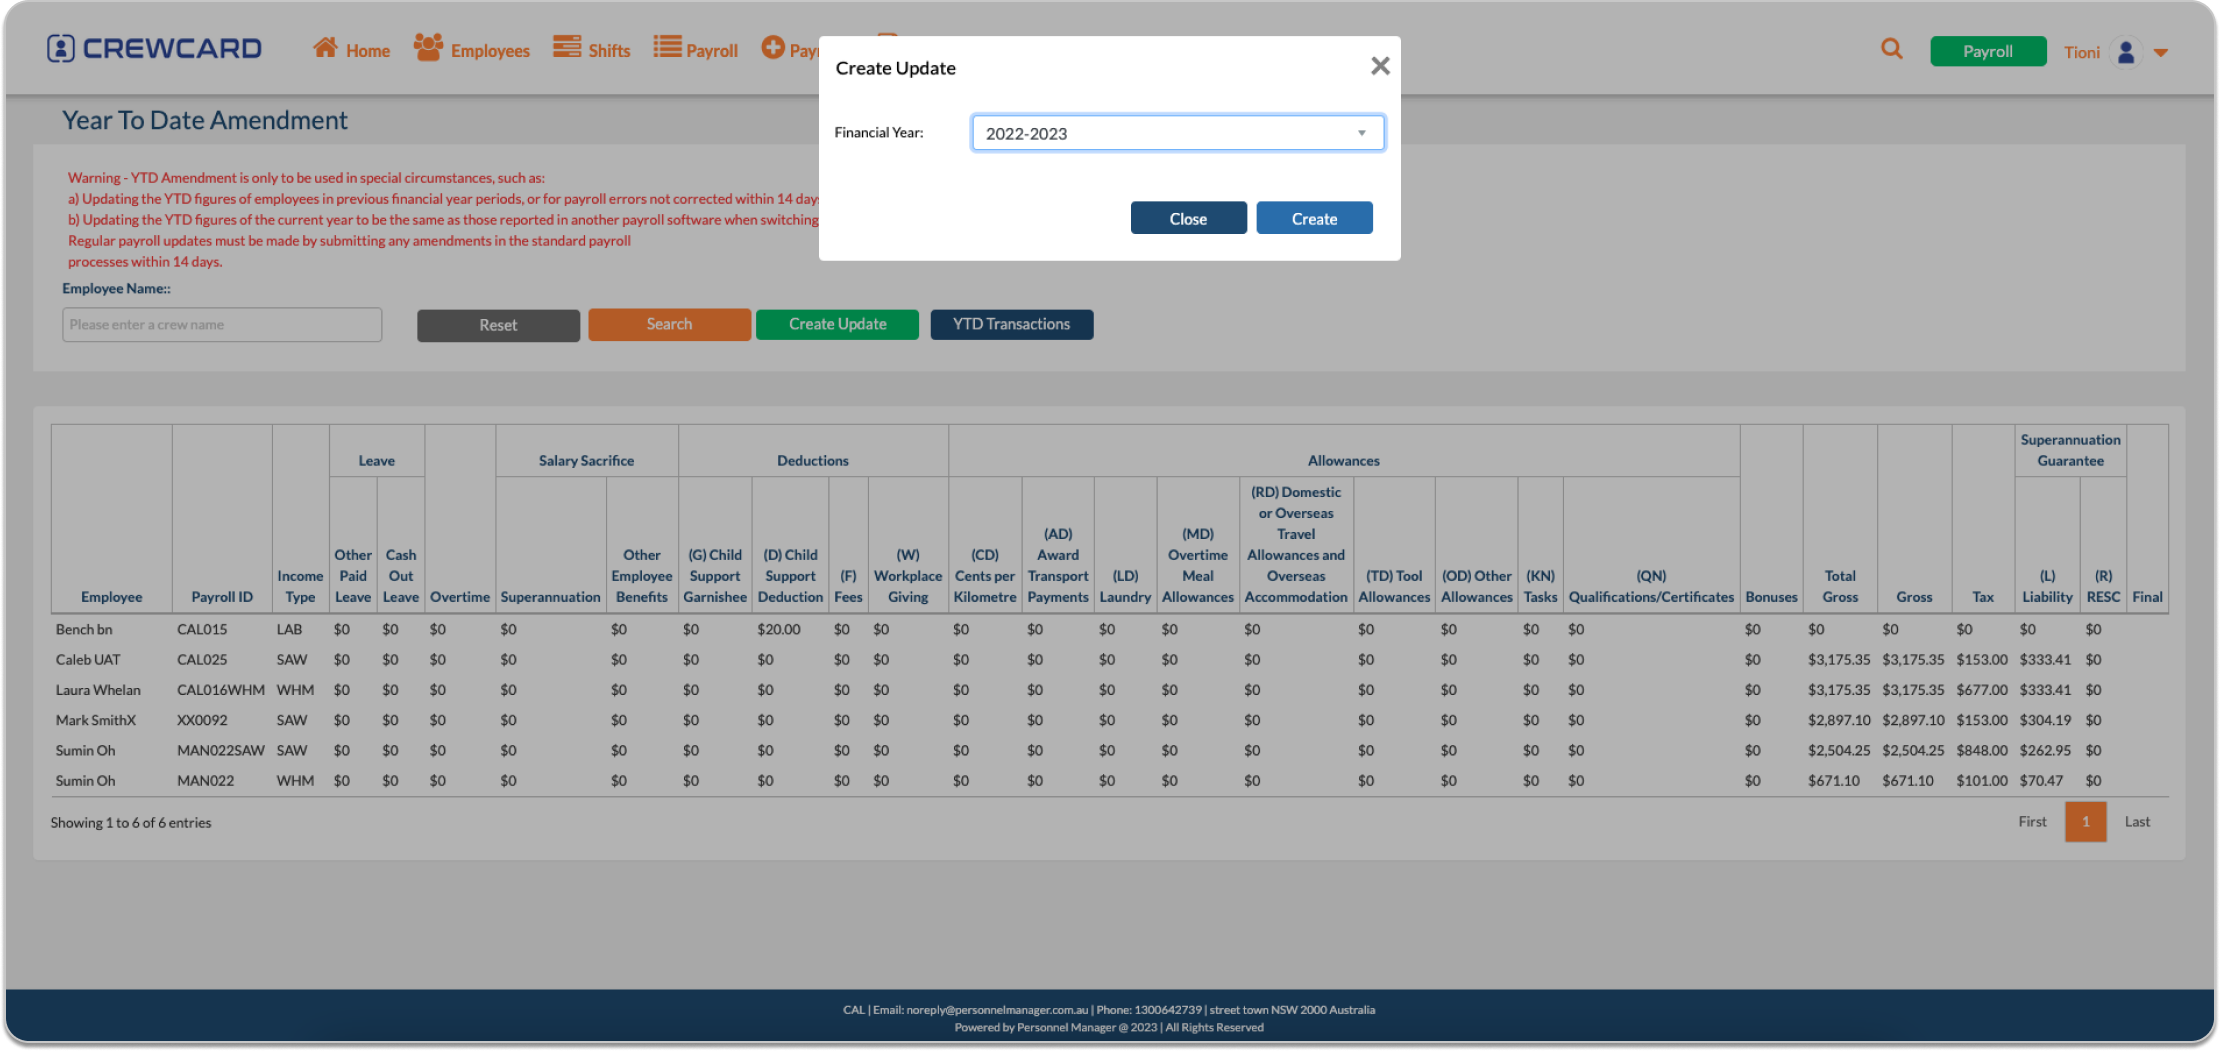
In the YTD page, click the Create Update button.
Select the Financial Year and click the Create button.
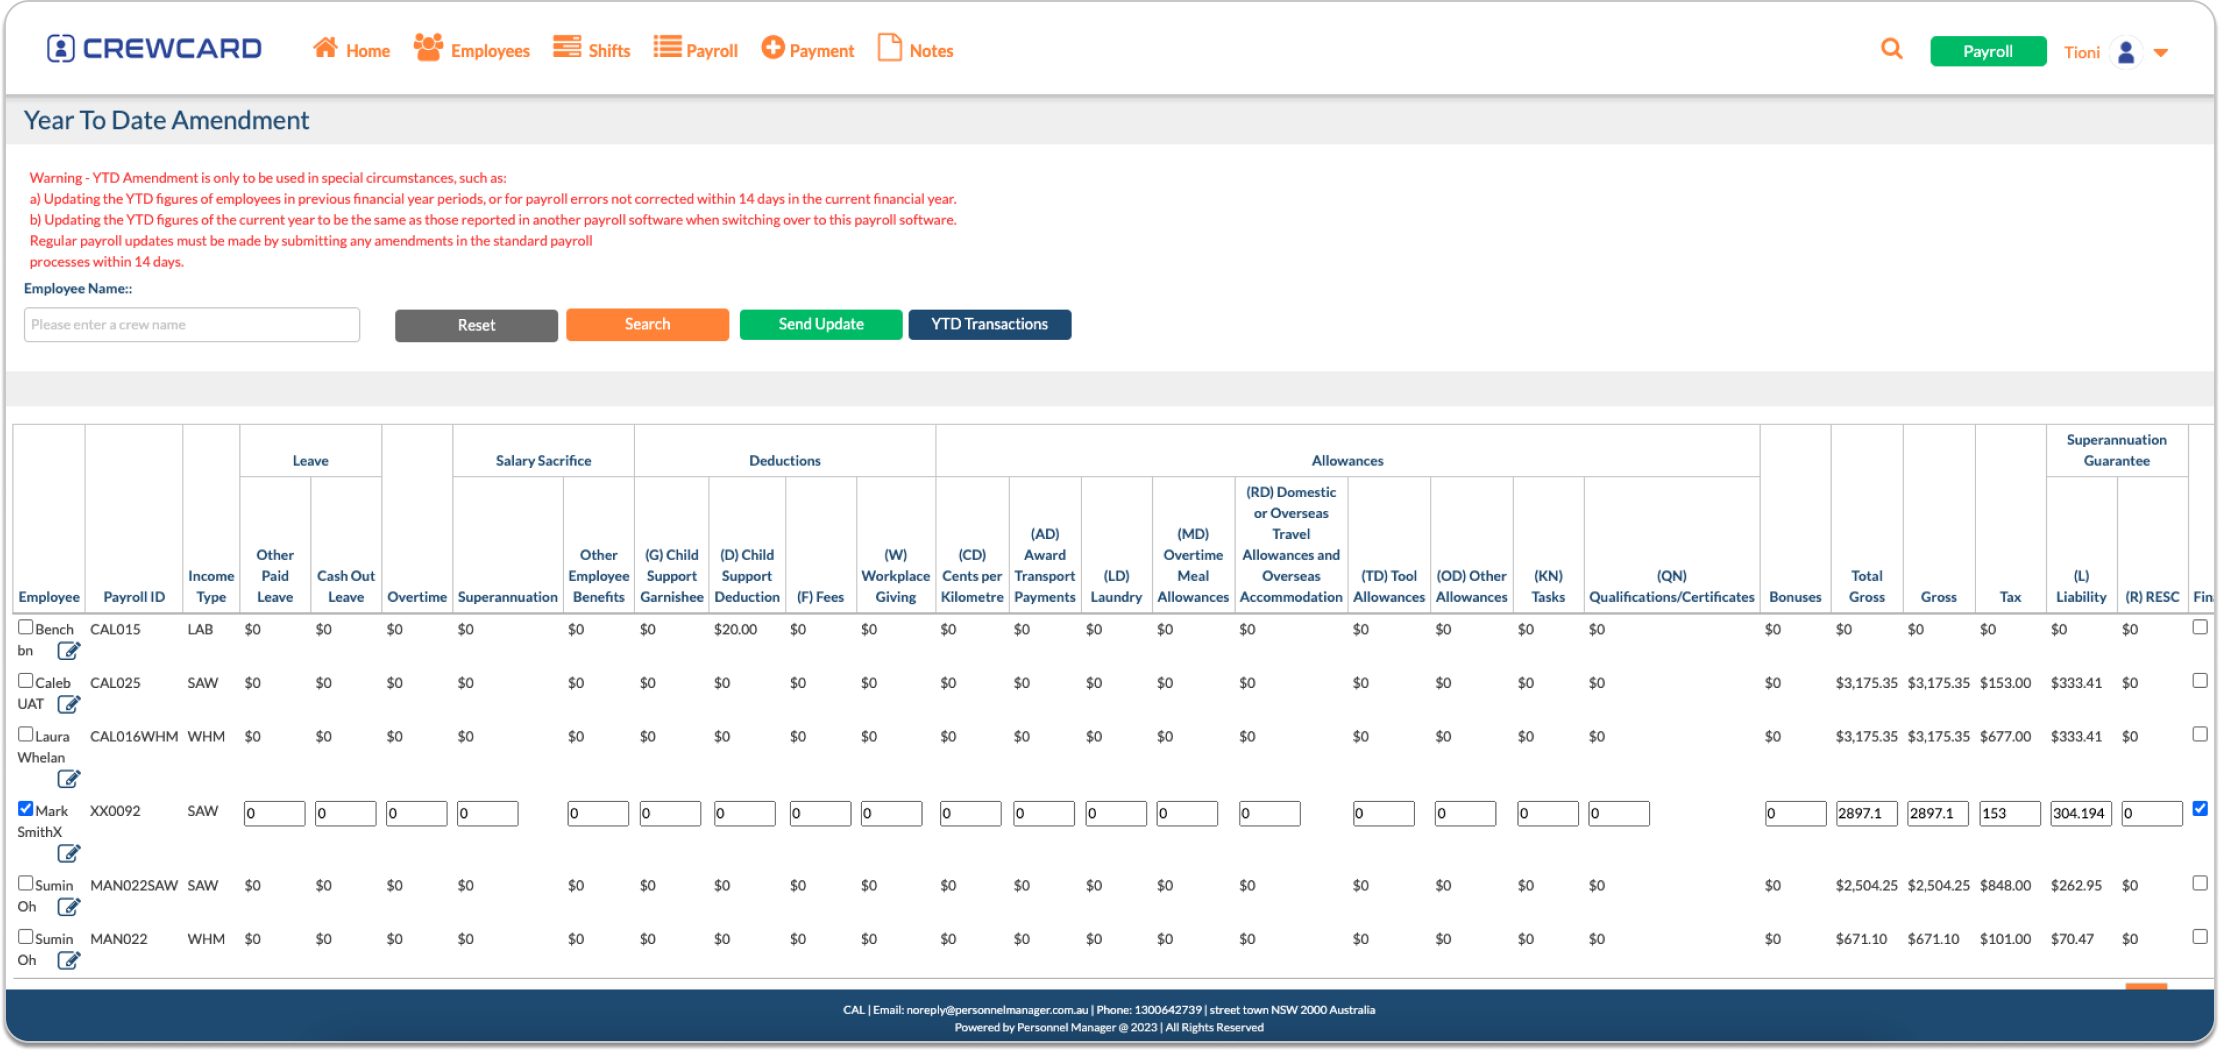
Click the Edit icon to change the Old Income type.

Tick the checkbox under the Final column of the selected Old Income Type of the Crew Member.

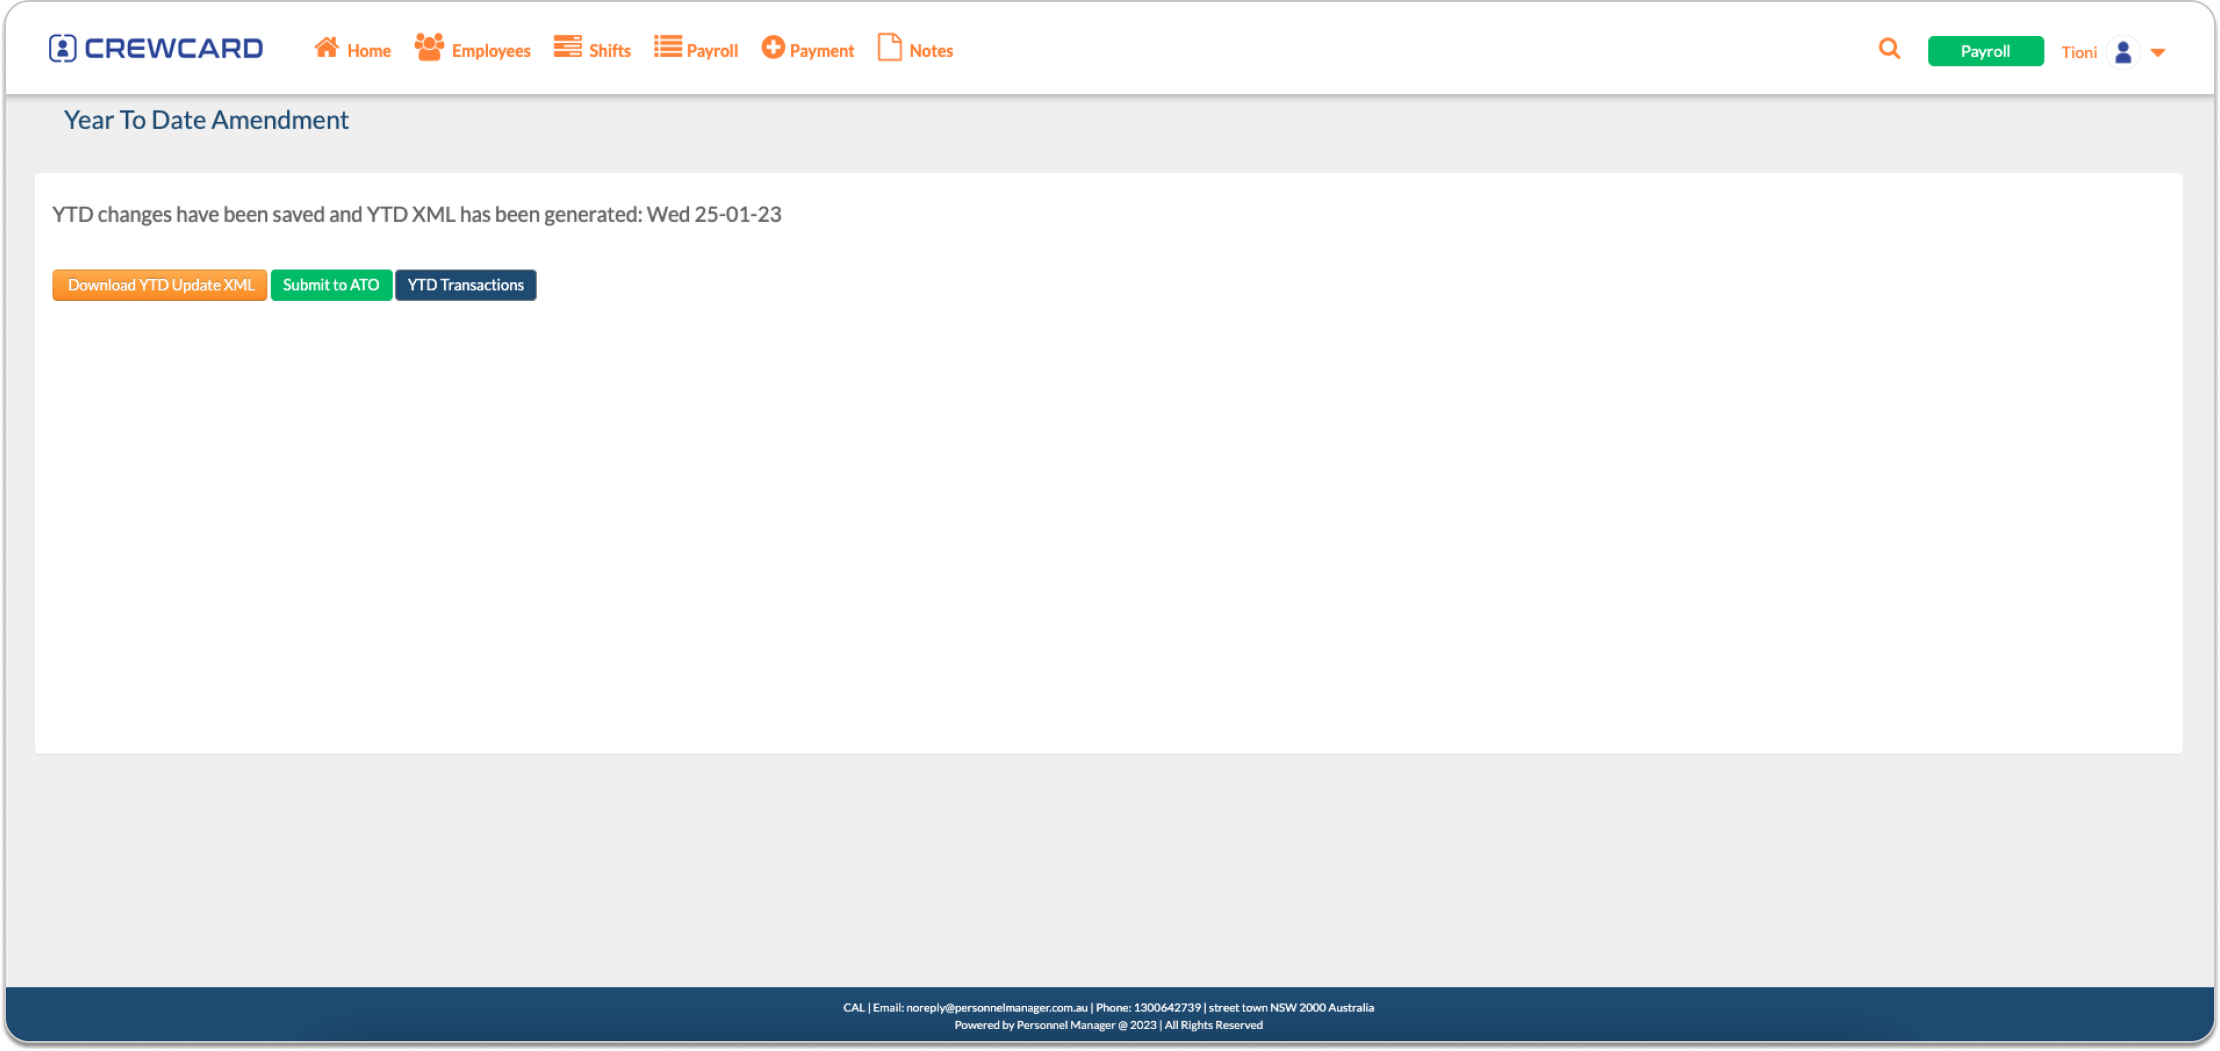
Click the Send Update button.
If you want to submit to ATO, Click Submit to ATO.
Changing of Income Type:
Go to the Employees page, and enter a new Payroll ID for the Crew.
Select the new Income Type from the dropdown menu, then click SAVE.
Now the next time you create a Pay Run for that crew, a new row in the Year To Date Amendment page will be added.
As such, you need to close and finalise the old Income Type of that crew.
Click Create Update. Select applicable financial year. Then click Create.
Click the pencil icon of the old Income Type of the crew. The box will automatically have a check on it.
Tick the box of the Final and Click the Send Update.
If you want to send the update even to ATO, click Submit ATO. Otherwise, click YTD Transaction where you can send the update event on a later date.
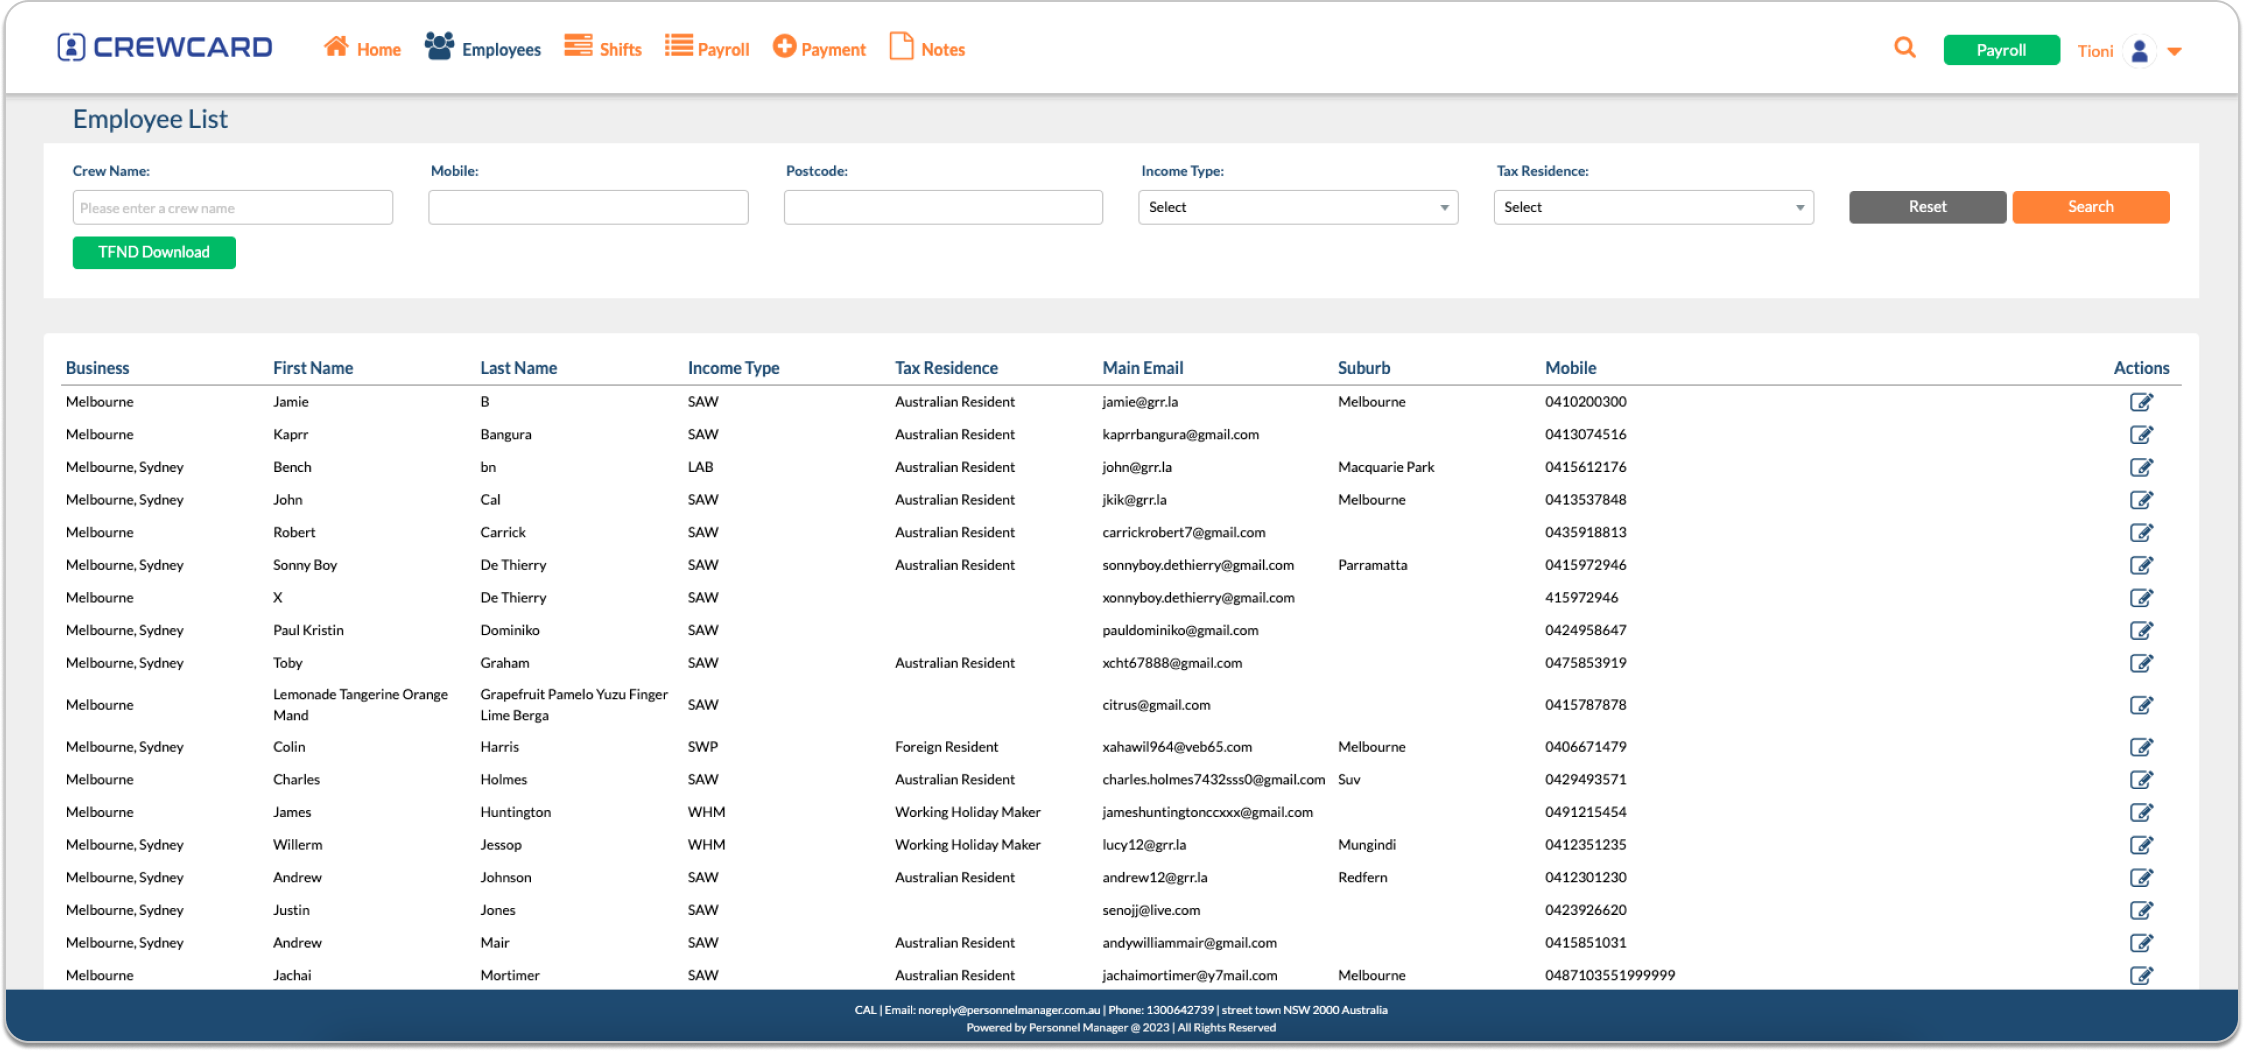
CrewPayer will retrieve important data and information from the Employees page.
It is a requirement to ensure that the employee has accurate information entered on the Employee’s page.
Click Employees in the Navigation Bar.

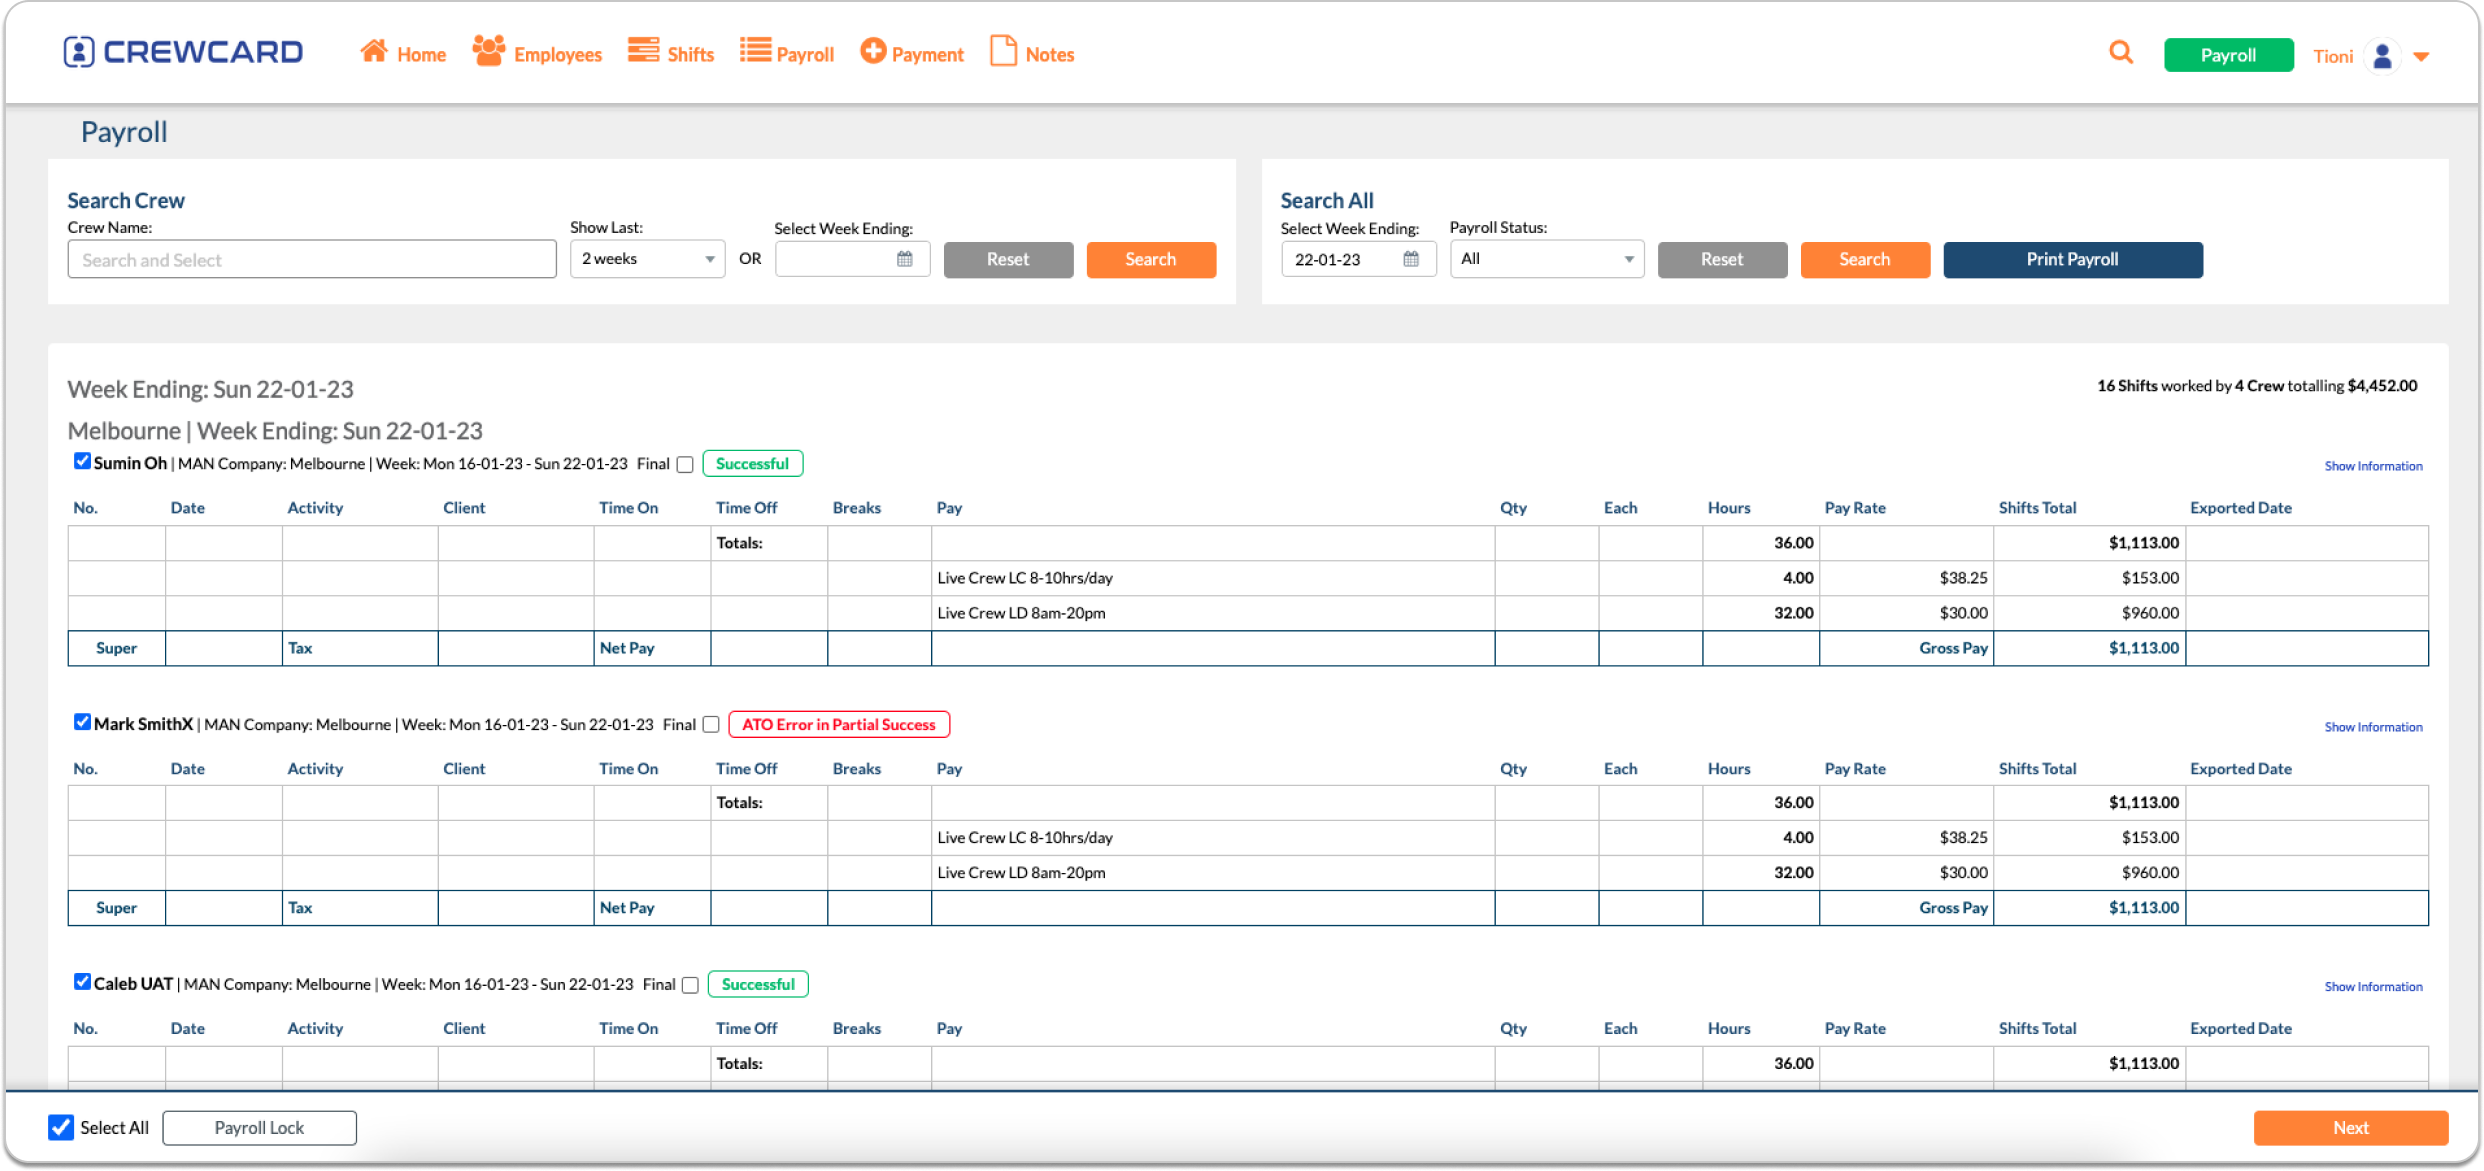
When everything is all set, you are now ready to process payroll.
Click Payroll under the Payroll menu.
You will be redirected to the Payroll page.
By default, the Payroll page will display the last payroll week.
All crew which have not been processed for payroll will have a check before their names.
Click the button Next found in the lower right corner of the payroll page.
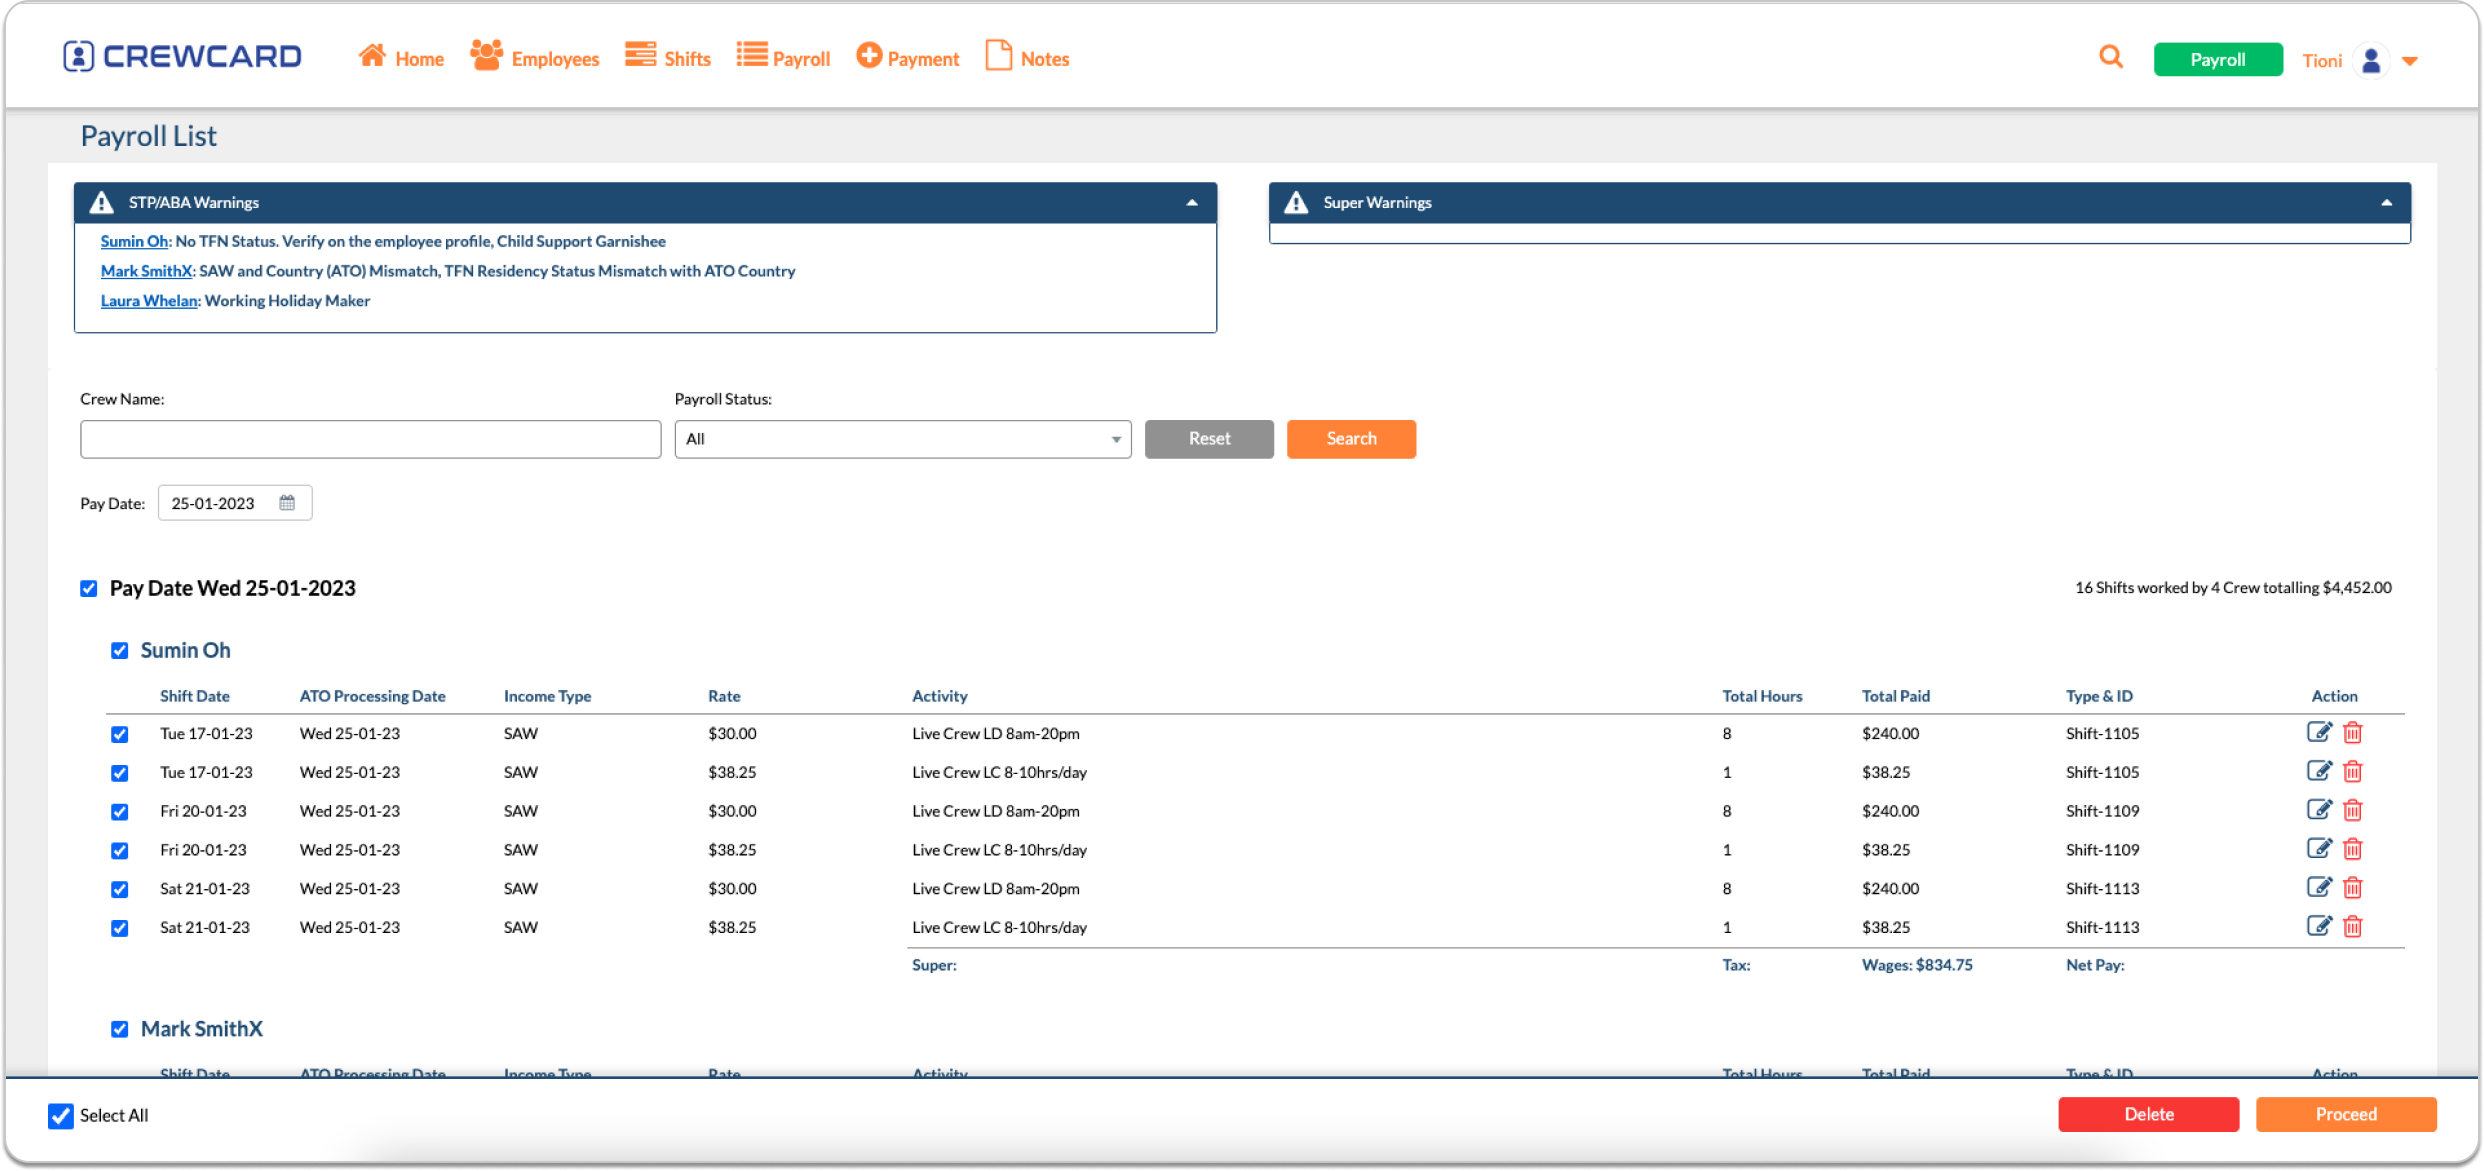
You will be redirected to the Payroll List page.
In this page, STP/ABA Warnings and Super Warnings will be displayed.
Ensure that STP/ABA Warnings are fixed first before submitting the STP to the ATO.
The warnings contain links to the specific crew so you can change and update their details.
Please see: STP/ABA Warnings and Super Warnings for more details.
If you have corrected all the warnings, you can click Proceed.
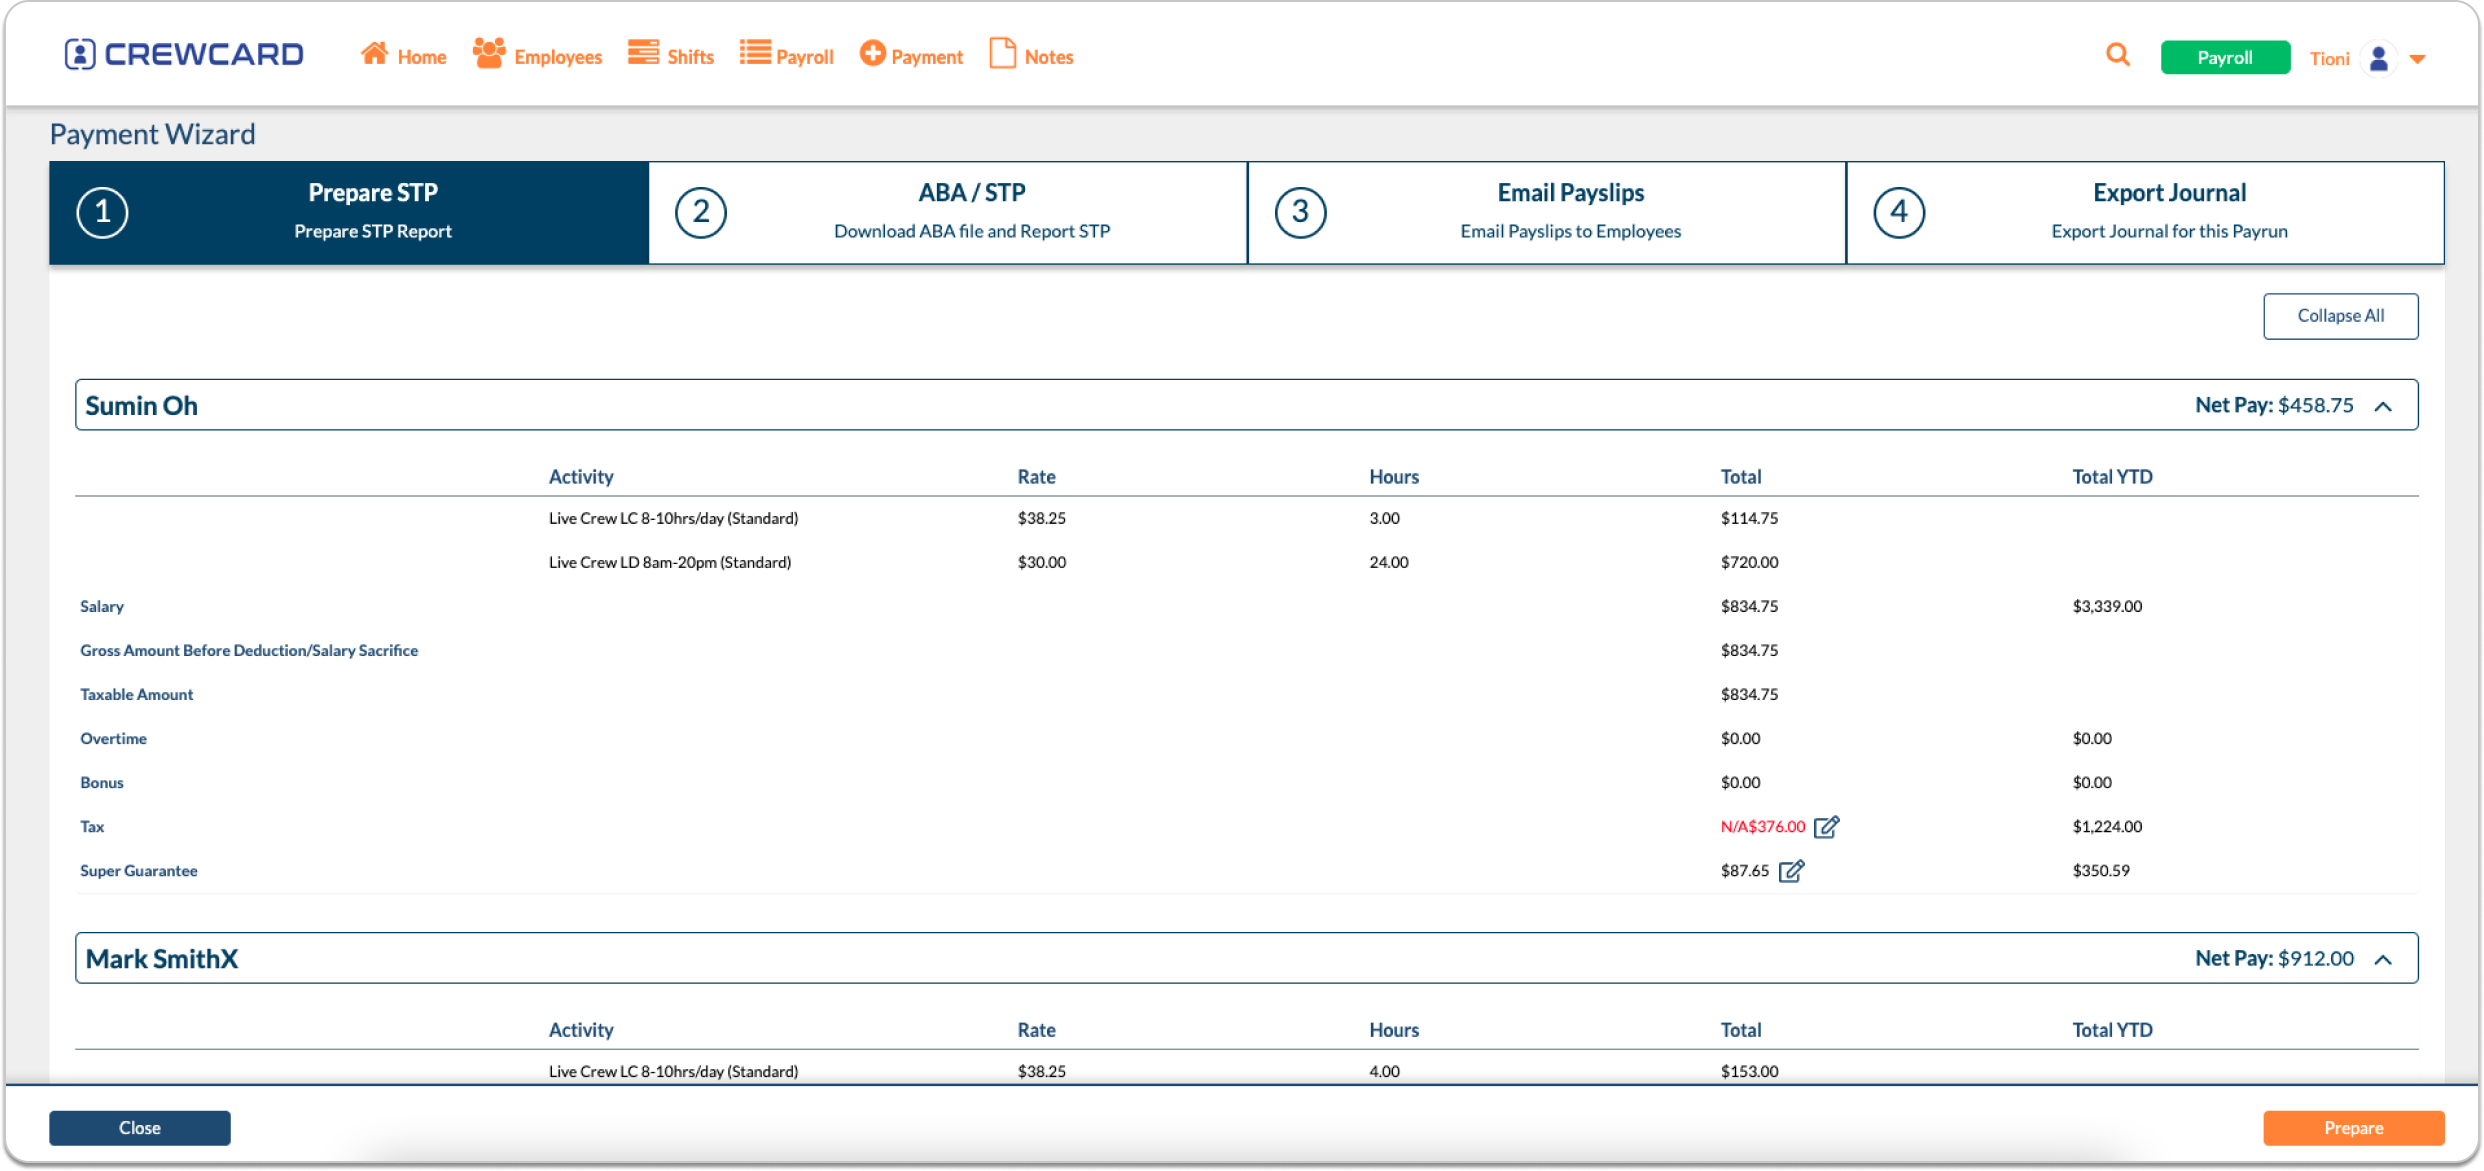
You will be redirected to the Payment Wizard Step 1 of the STP Payroll.
The details of the pay rates will be summarized here including the YTD amount per category.
Click Prepare.
You will be redirected to Payment Wizard Step 2.
On this page, you will be able to Download ABA and Report to STP.
It will also display how much you need to process for the bank.
Click Download ABA to download the aba file.
The ABA file will be used for your online banking to process payment to your crew.
Skip STP – the report will not be submitted to ATO. It will also not generate any payruns.
Report STP – it will initiate submission of STP to ATO.
Click the Report STP button once ready.

Only Authorised Person will be allowed to submit an STP to ATO.
Click Report.
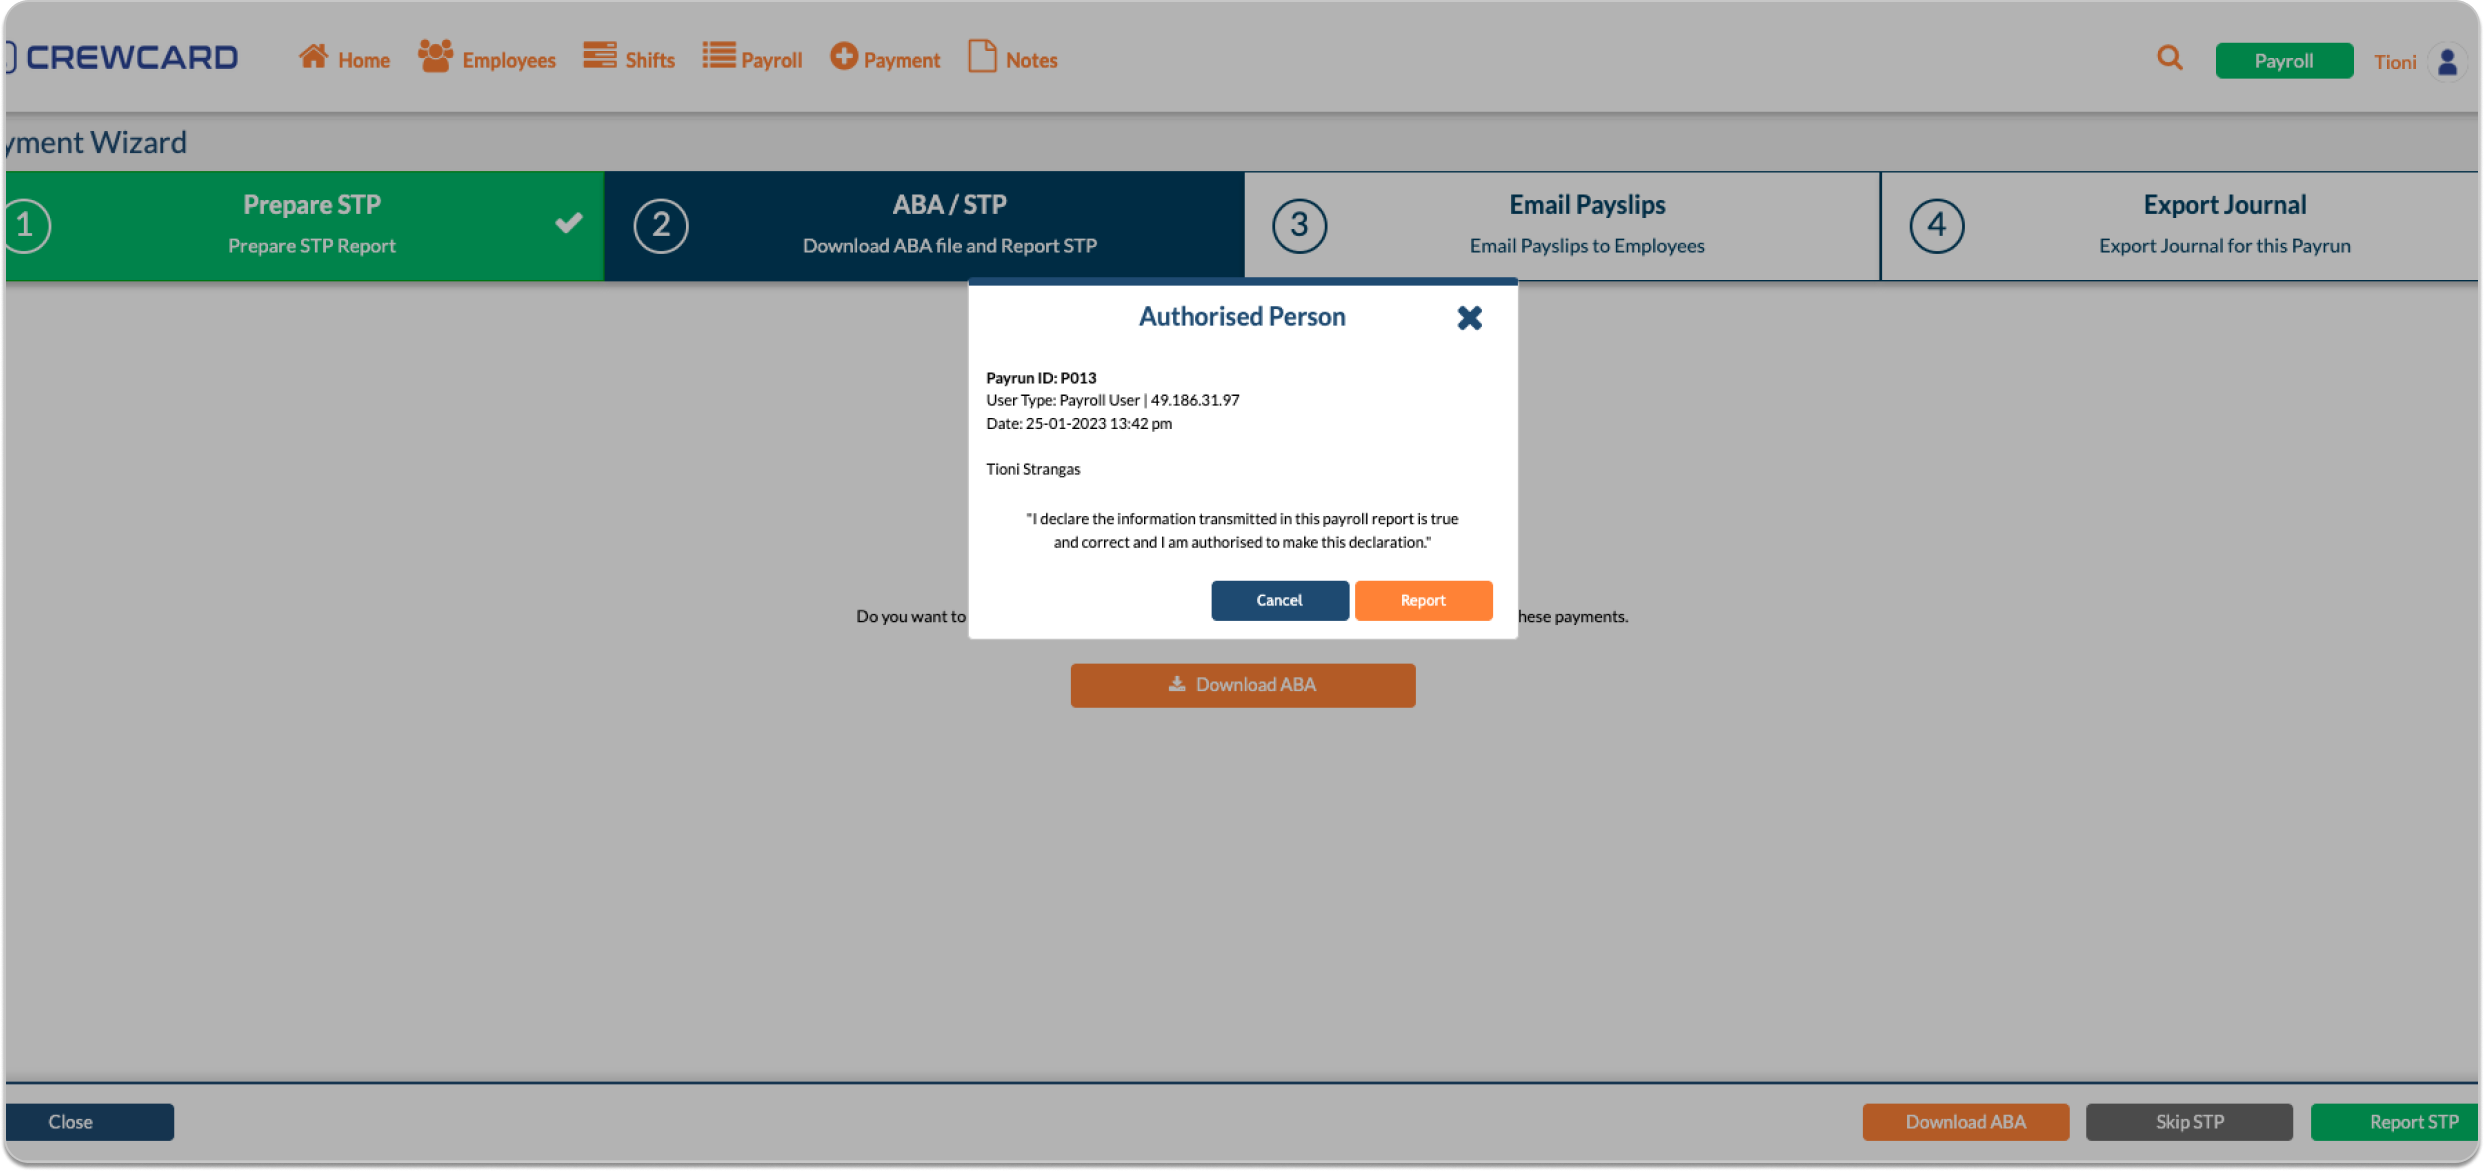
The page will initiate the submission of STP to ATO.
DO NOT REFRESH THE PAGE. WAIT FOR THE PAGE TO FINISH LOADING.

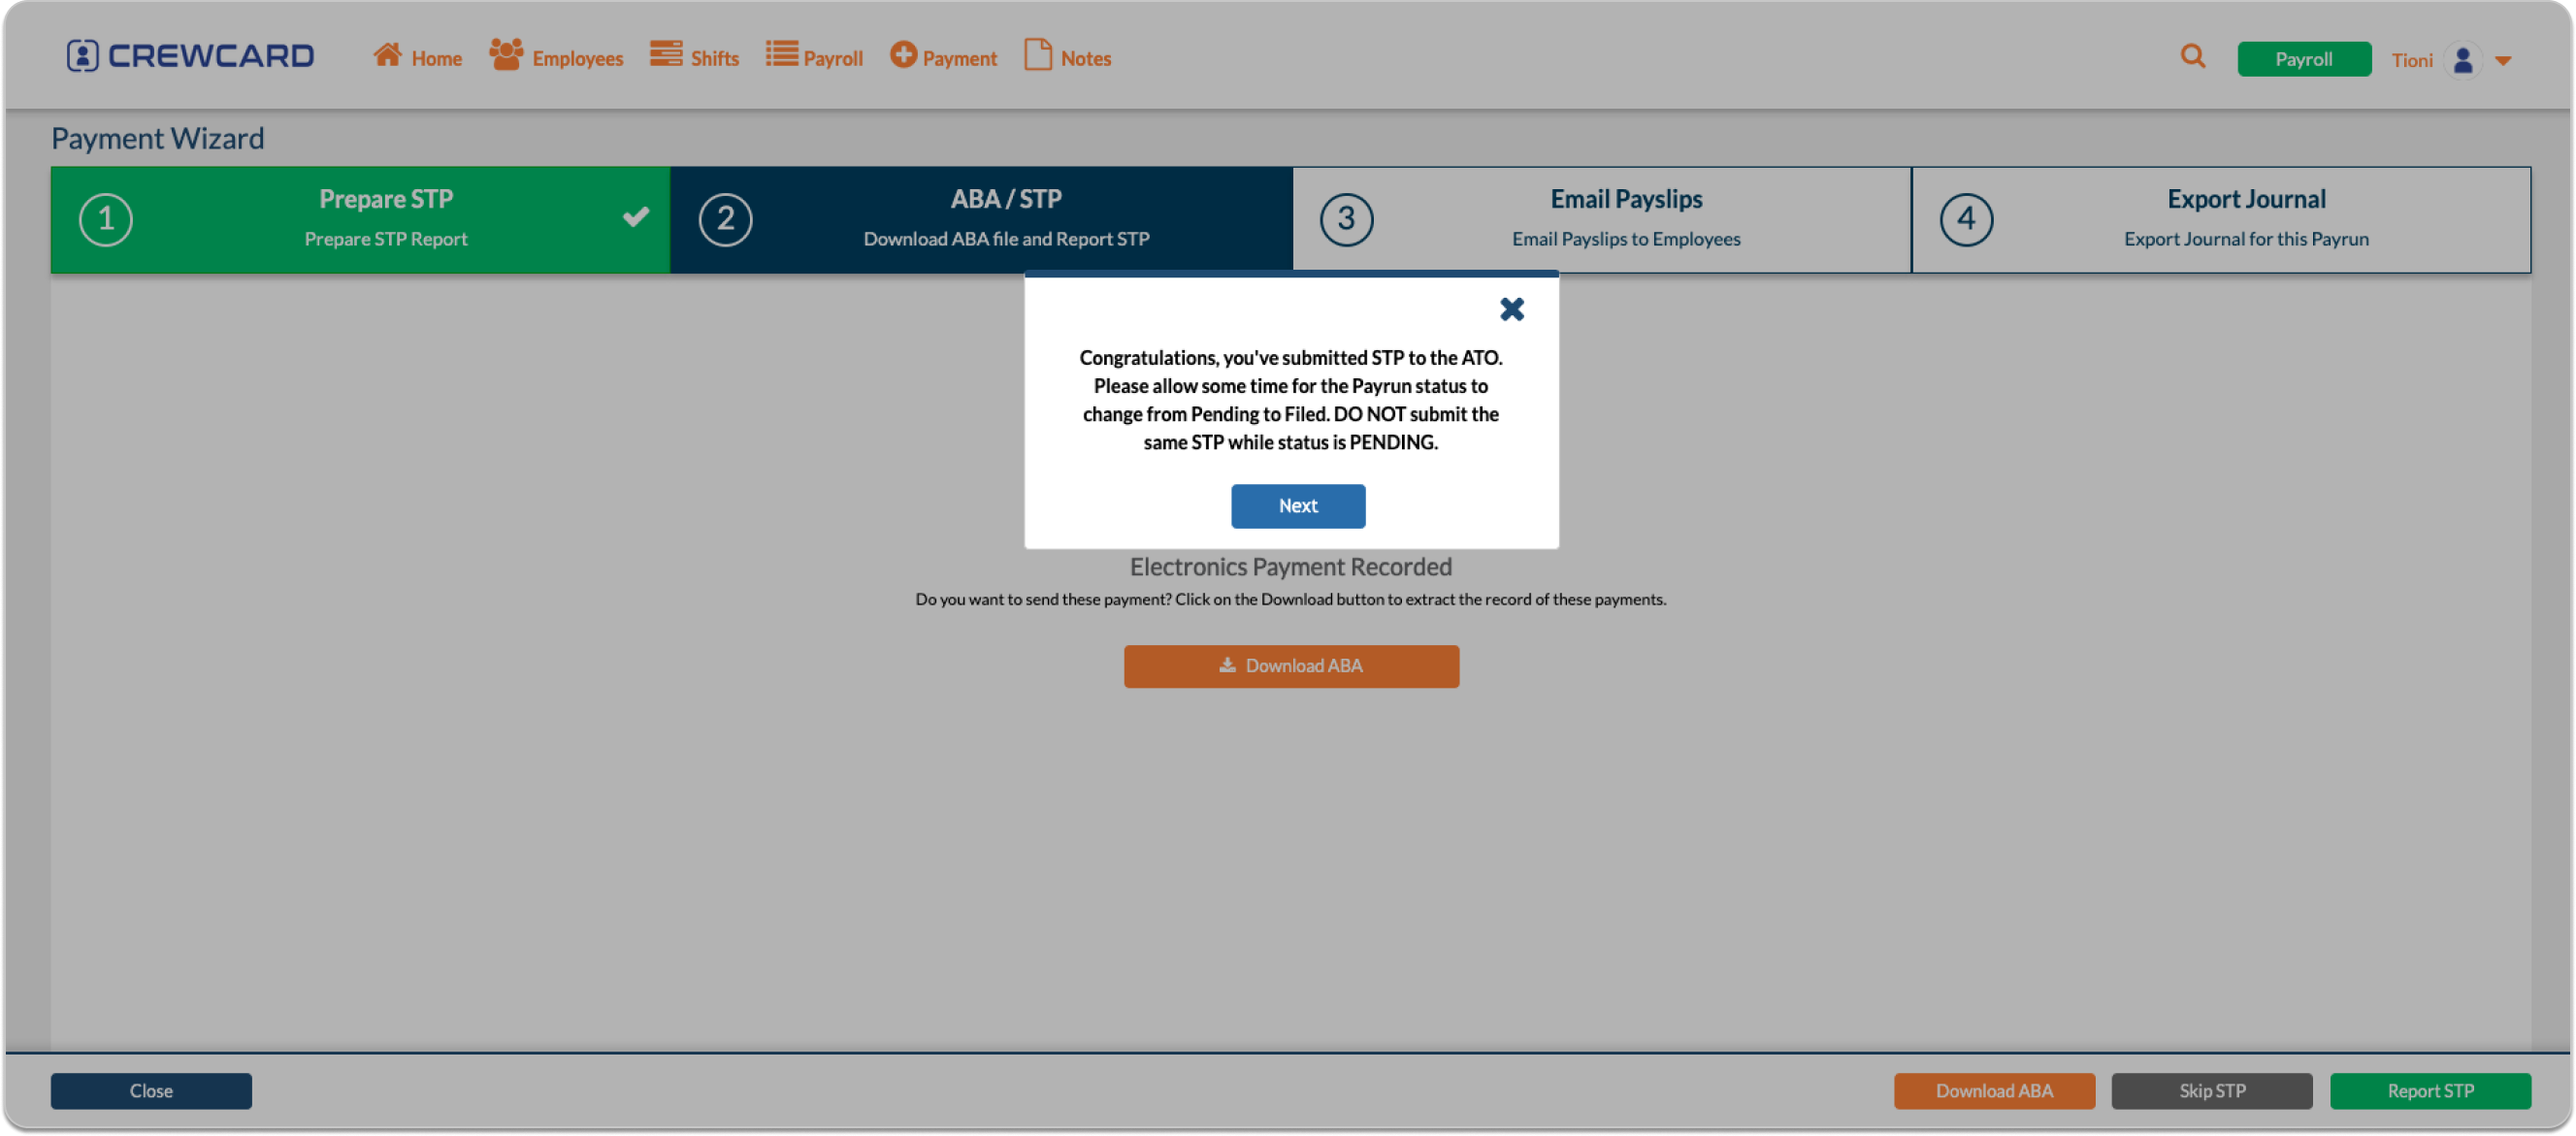
Once the submission is completed, this dialog box will be displayed.
Click Next.
You will be redirected Payment Wizard Step 3.
This page will display all the crew included in the STP.
Click Email Payslip to send the payslips.
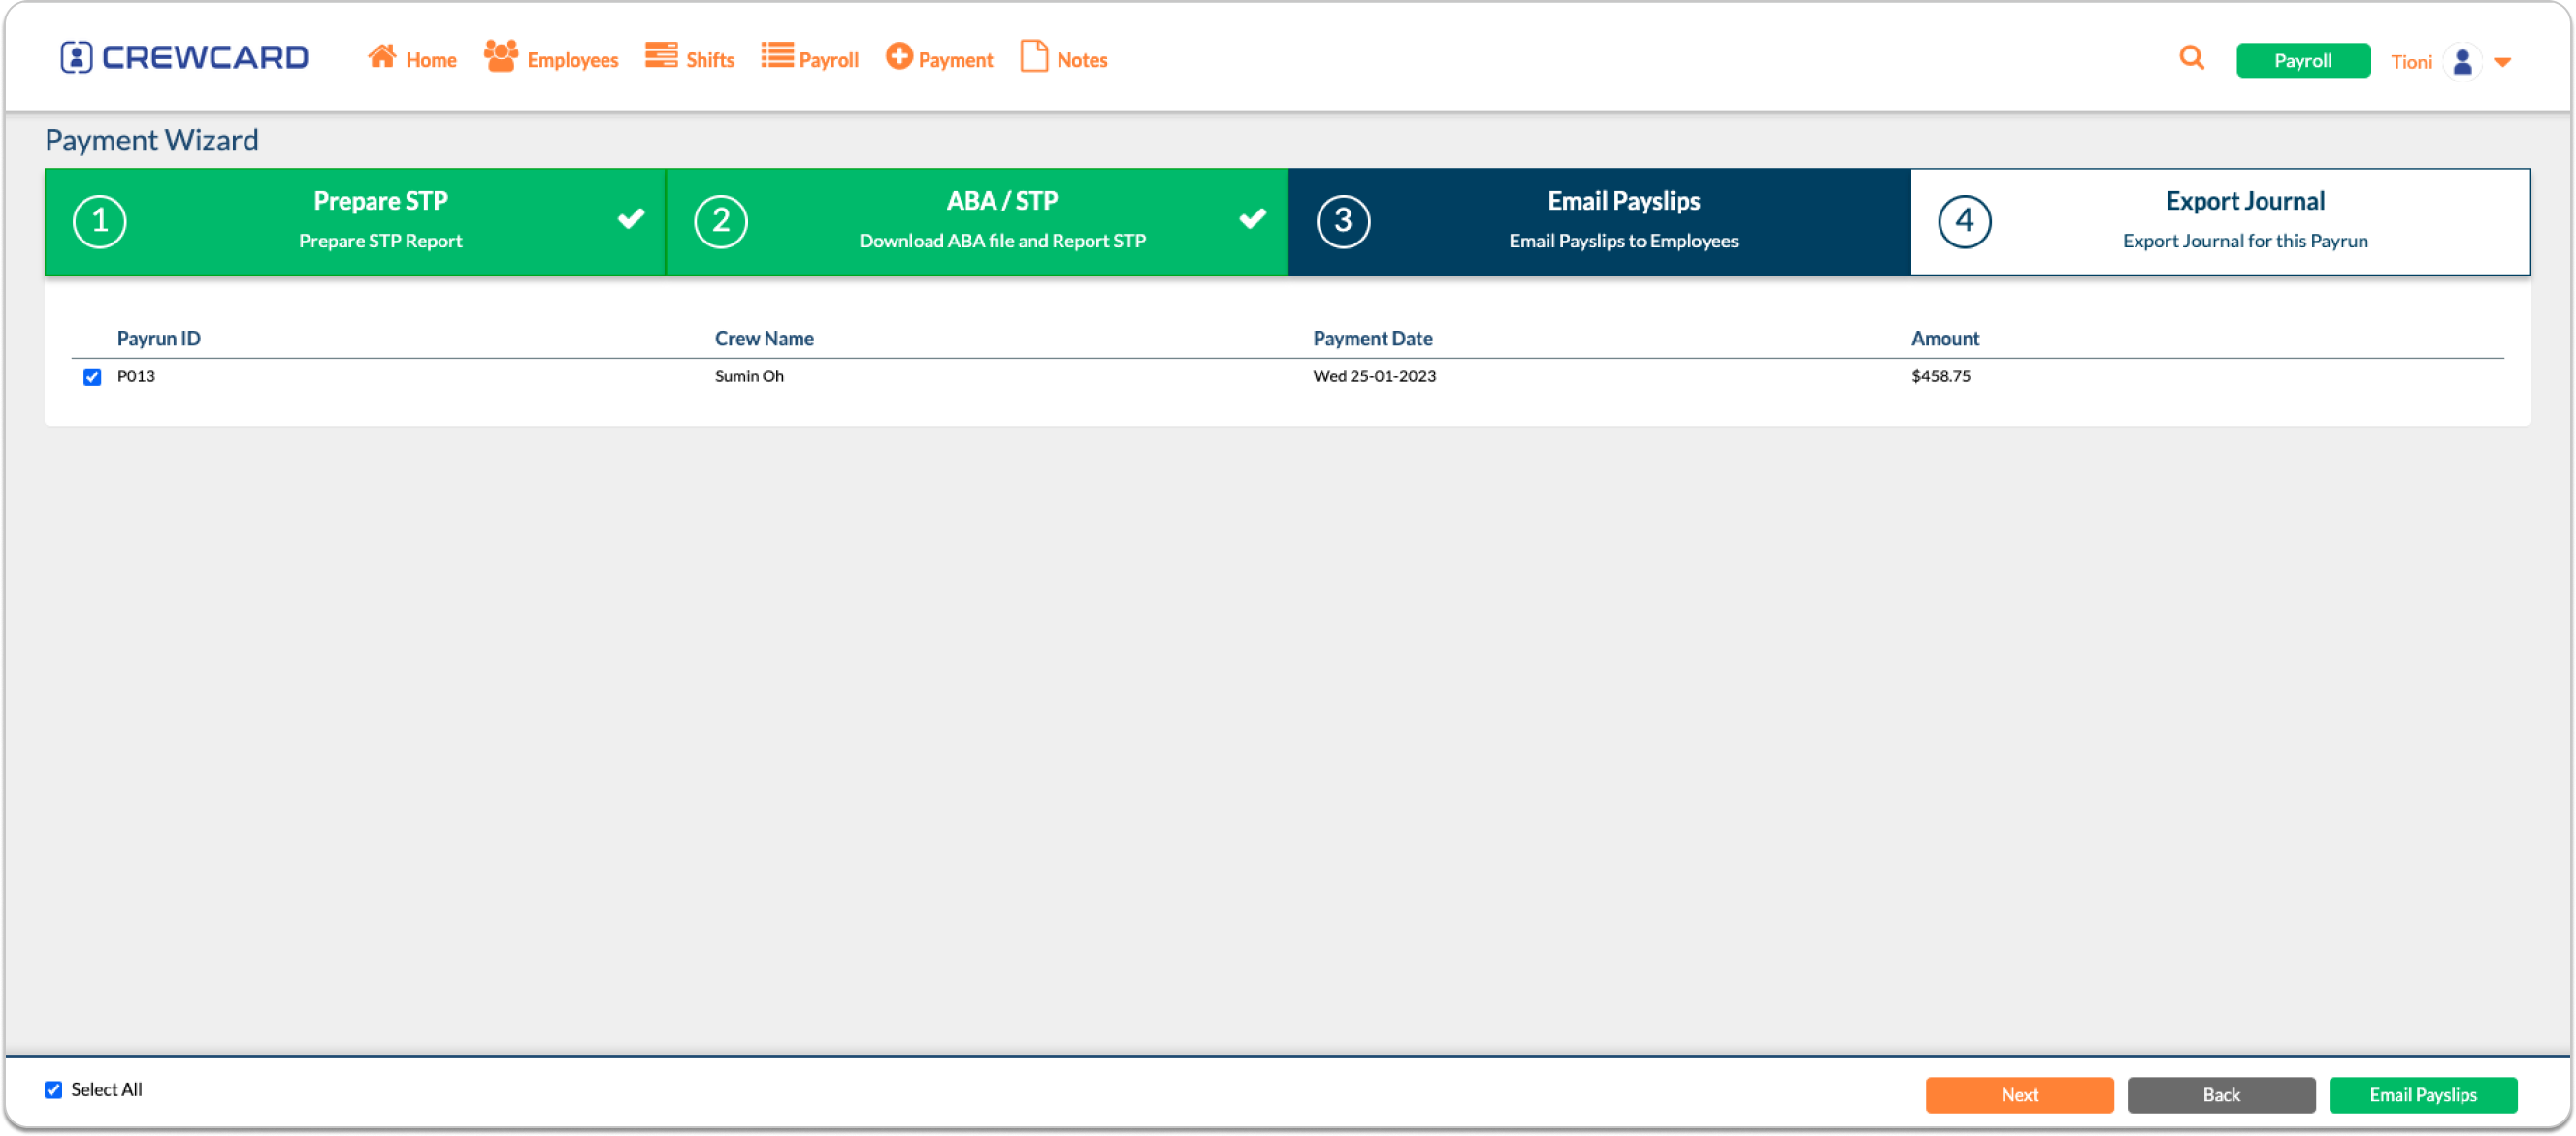
A dialog box for sending payslips will appear.
Once completed, you will automatically redirected to the last step in the Payment Wizard.
Click Export Journal to download the Journal file. This file will be used for your accounting process.
Click Complete.
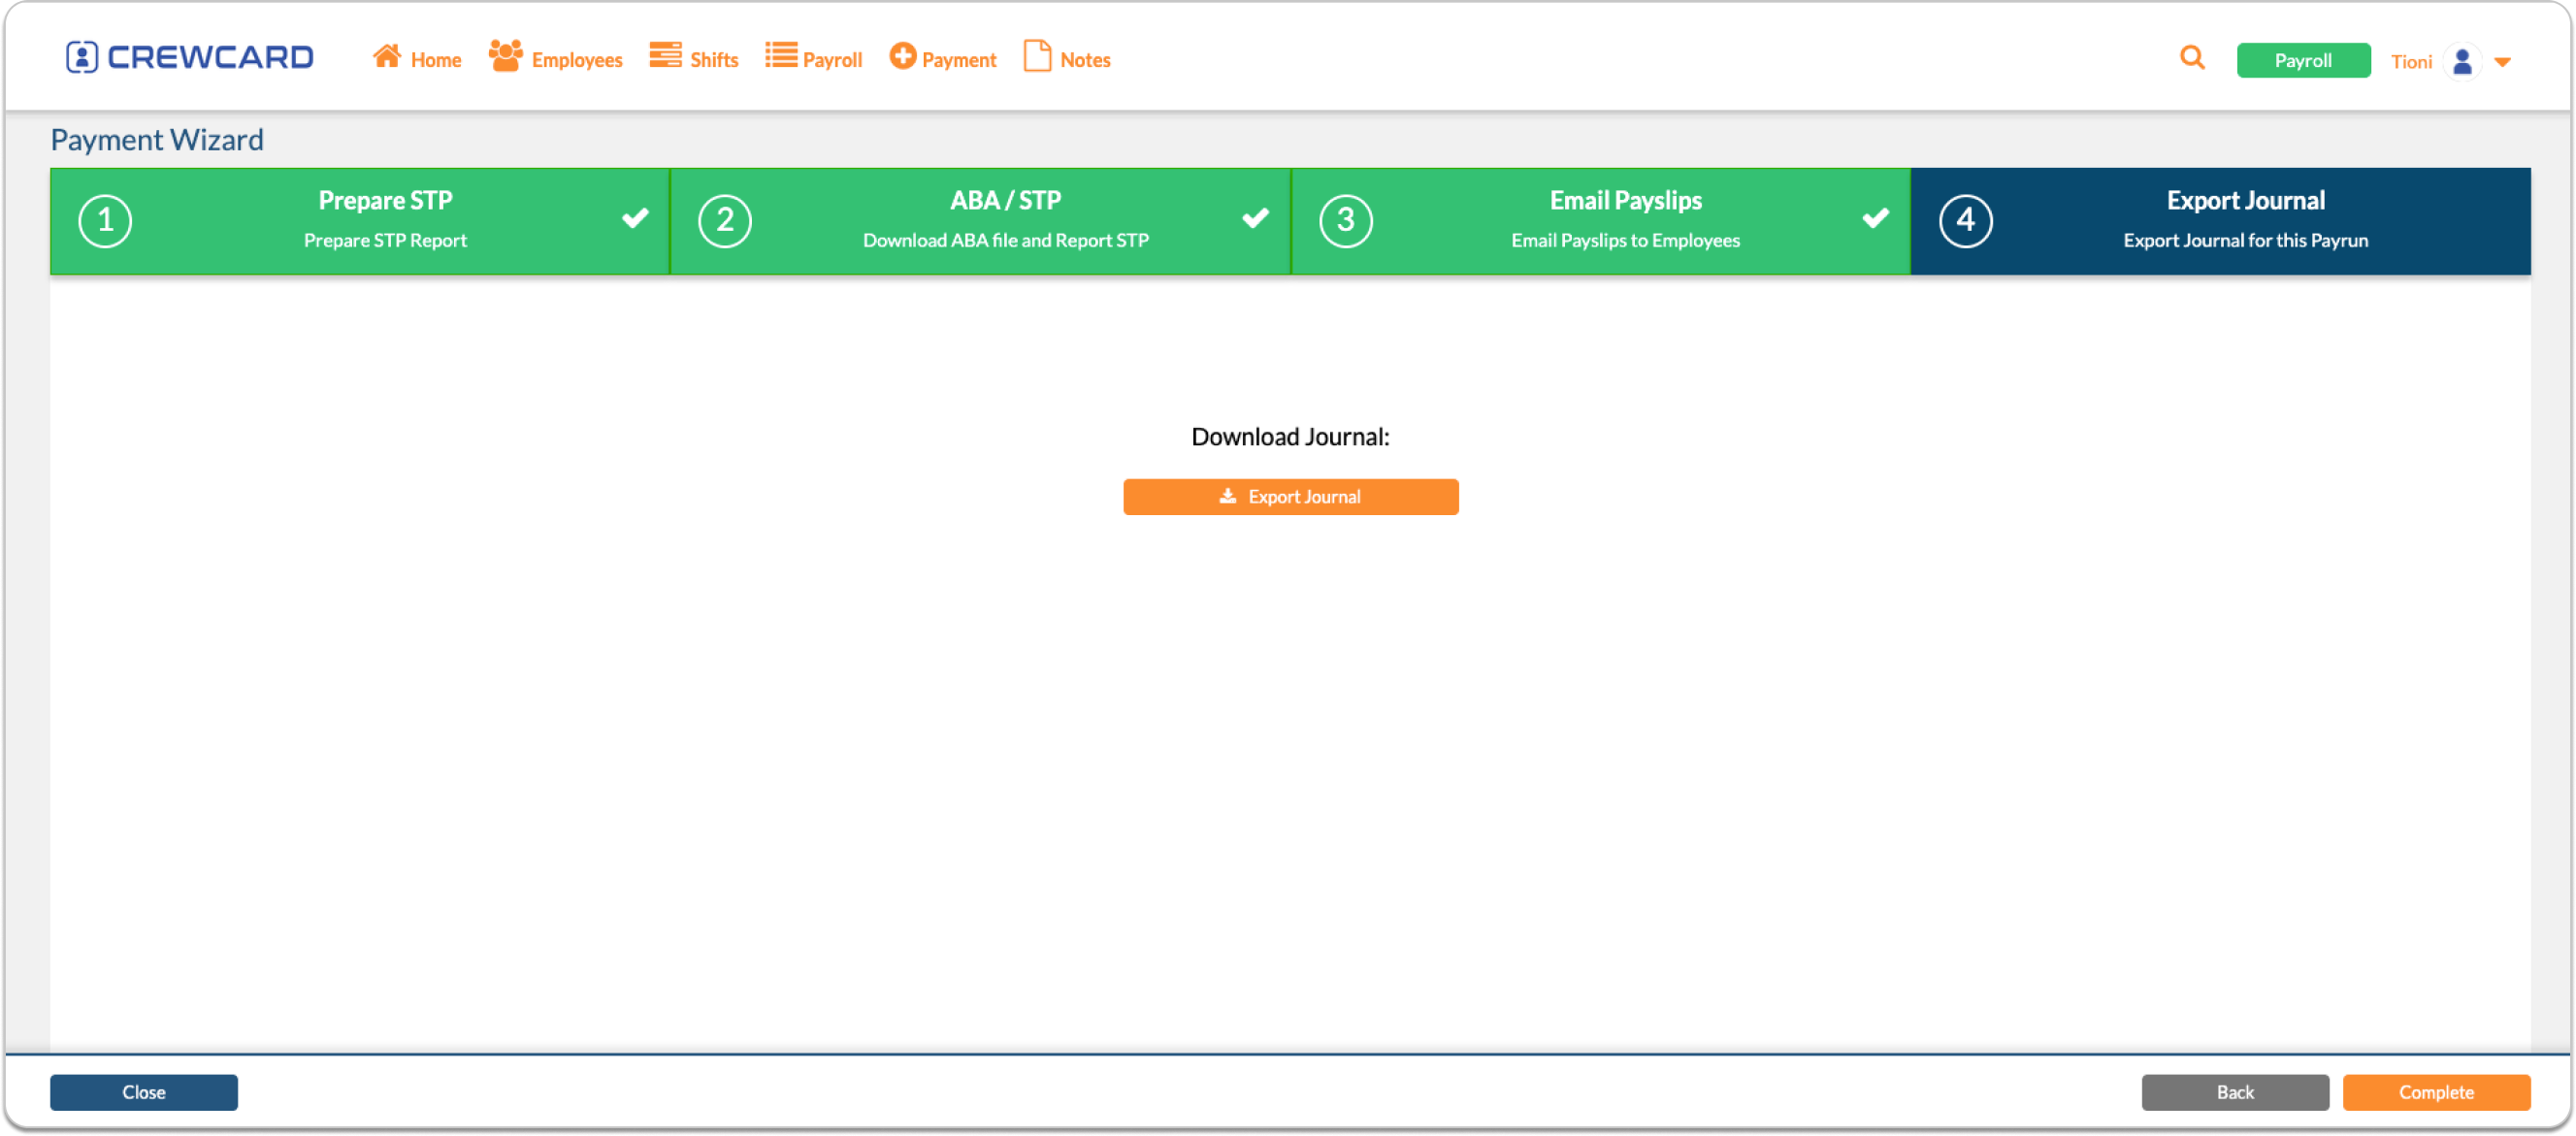
You will be redirected to the Payruns page.
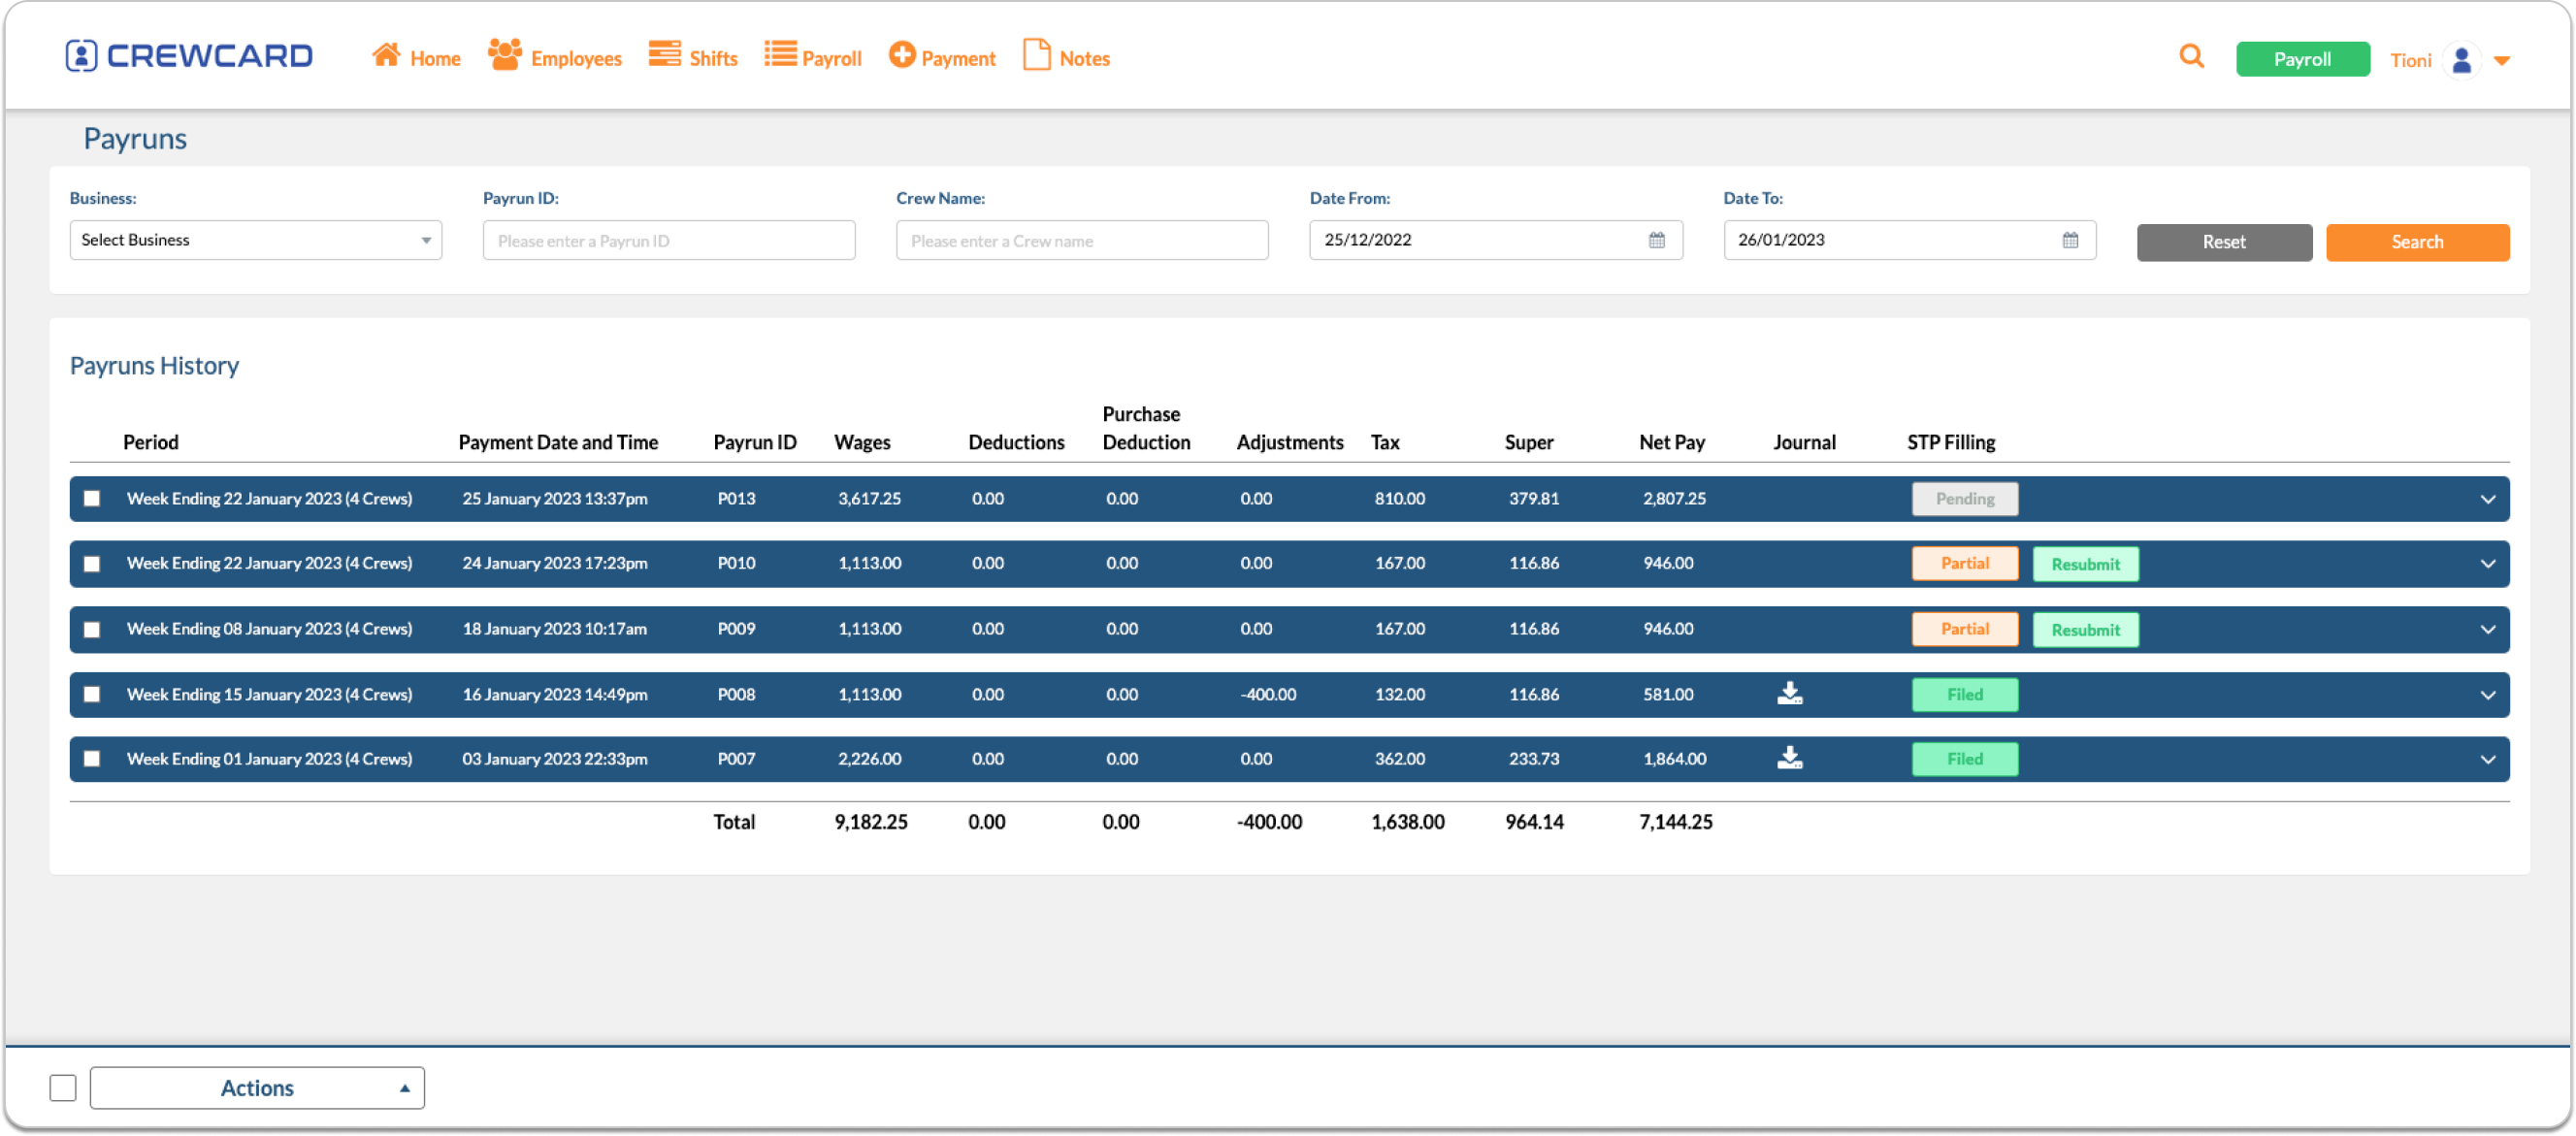
On this page, you will see the status of your STP submission.
See “10.0 Common STP Errors and Solutions.”
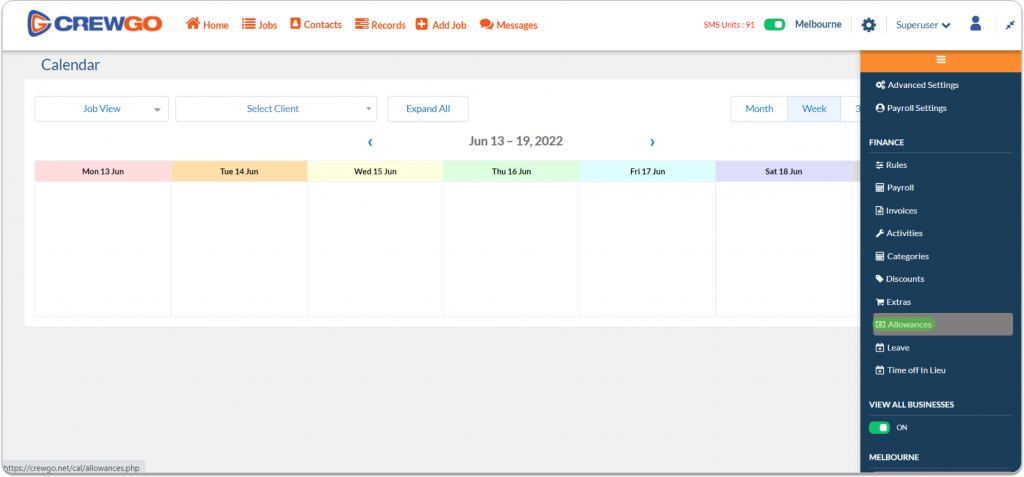
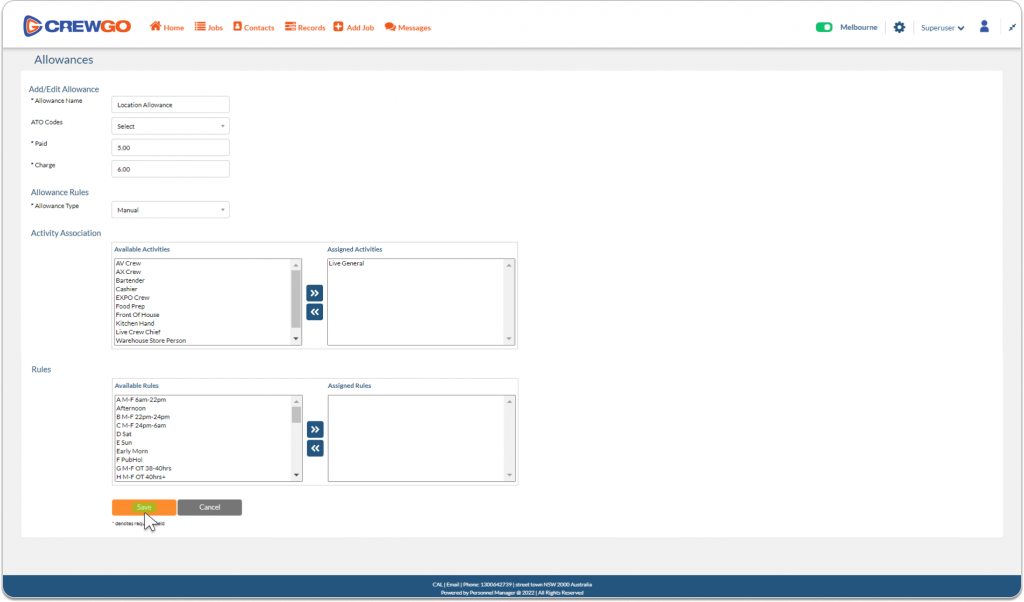
To add an allowance, hover your mouse over the Administration menu.
Select Allowance to direct you to the Allowance Page.
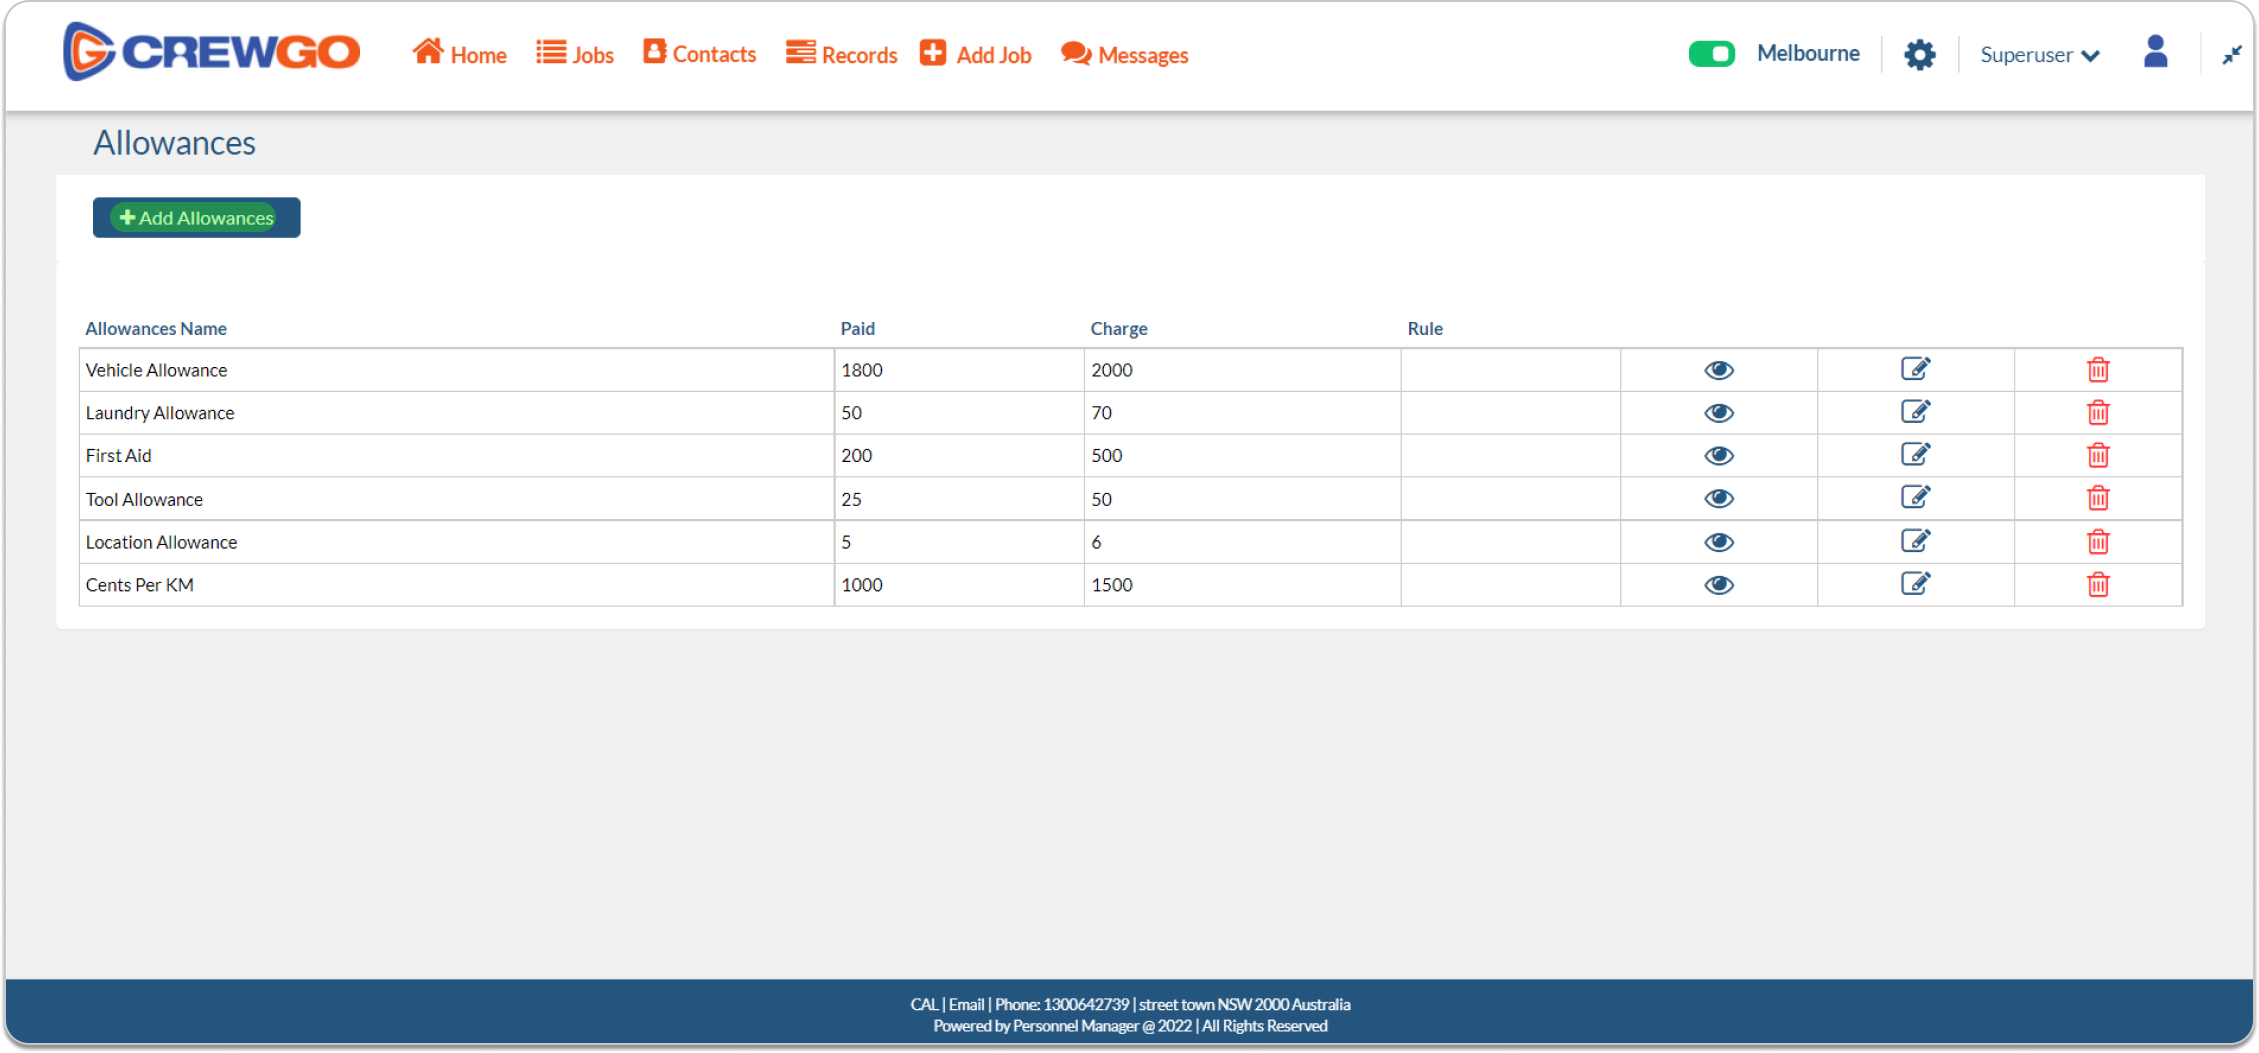
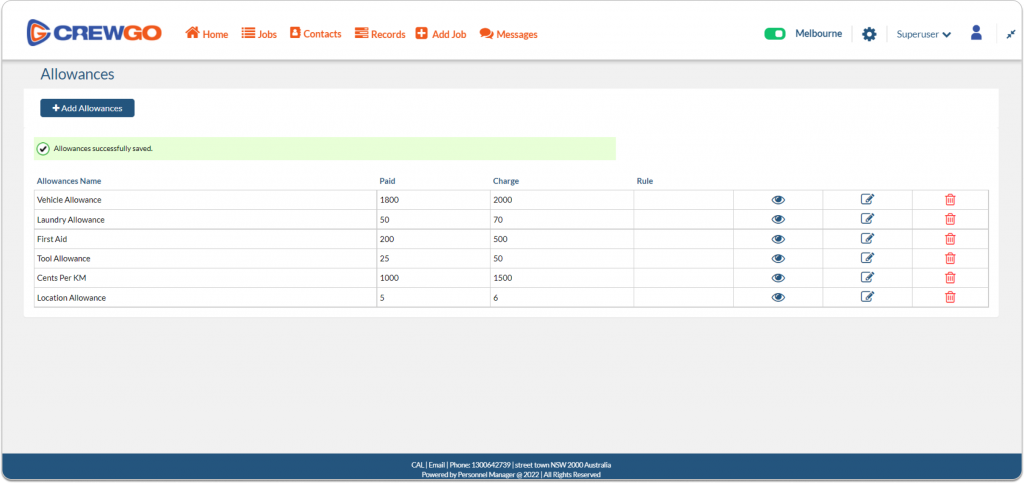
In the Allowance page, Click +Add Allowance. You may also view, edit and delete the allowance from this page.
Fill out the Add Allowance form.
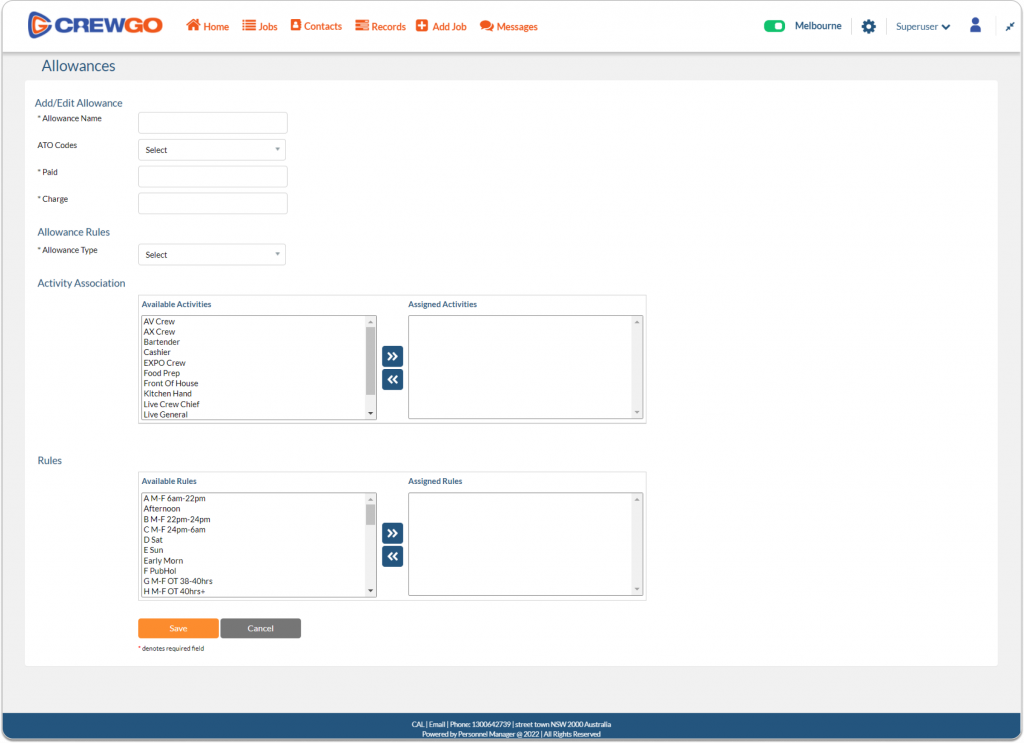
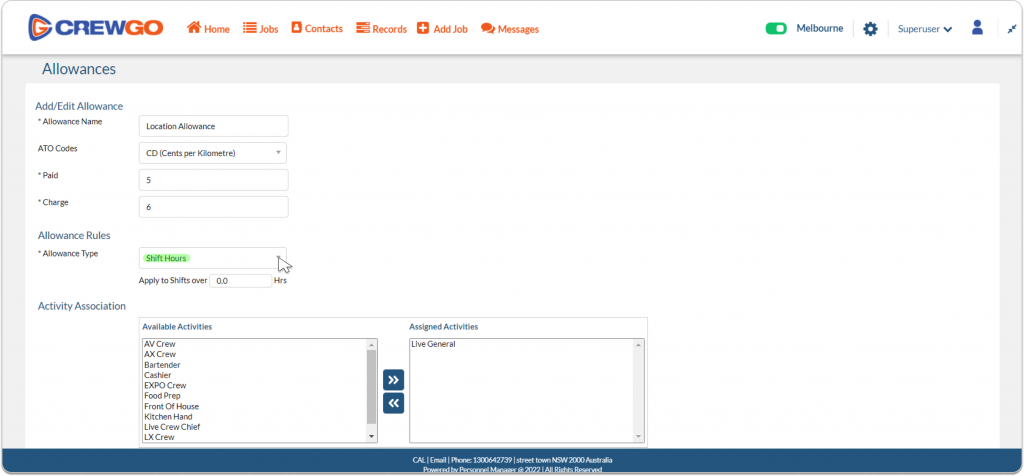
In the Add/ Edit Allowance page, select the ATO code
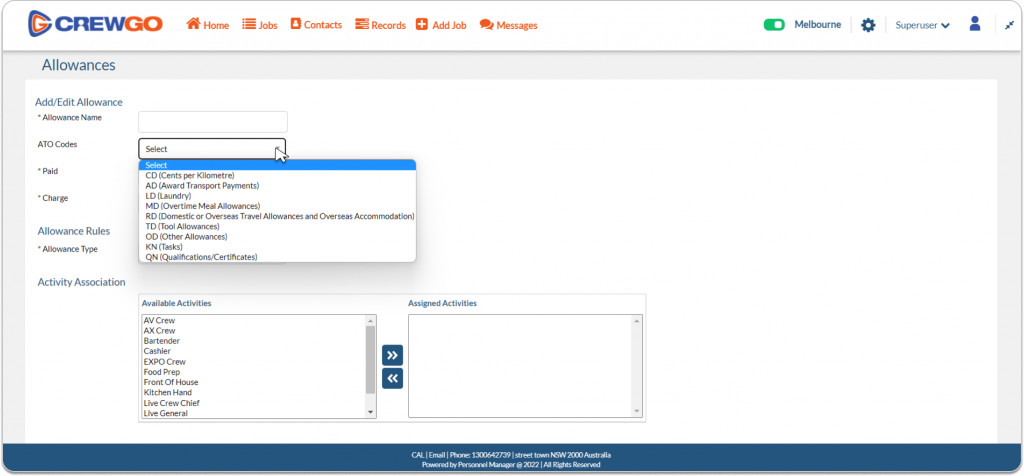
ATO Code:
CD (Cents per Kilometre)
AD (Award Transport Payments)
LD (Laundry)
MD (Overtime Meal Allowances)
RD (Domestic or Overseas Travel Allowances and Overseas Accommodation)
TD (Tool Allowances)
OD (Other Allowances)
KN (Tasks)
QN (Qualifications/ Certificates)
And select the Allowance type.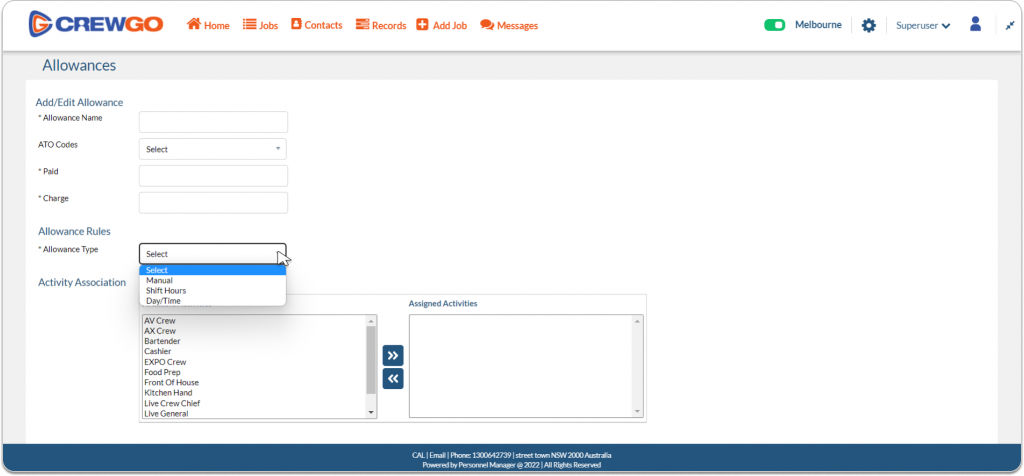
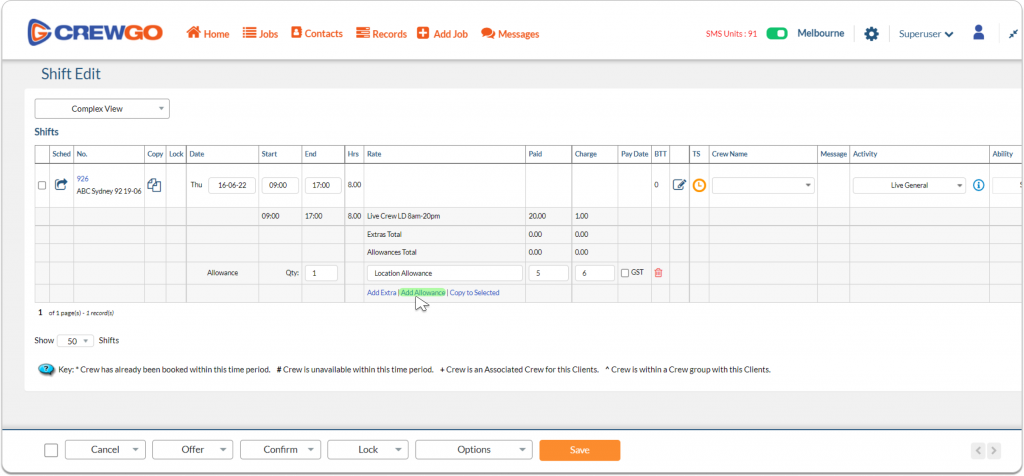
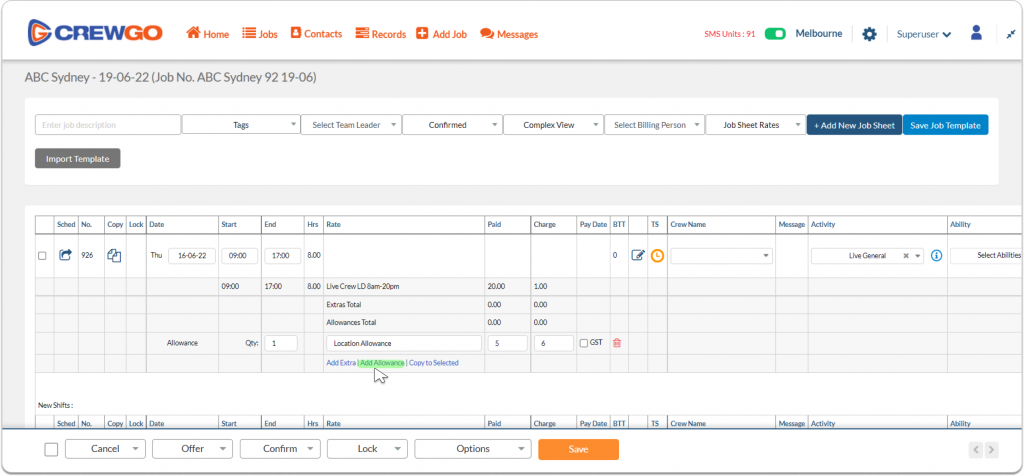
Manual – will allow the allowance to be manually entered on the Edit Shift page or Job Sheet page.
Shift Hours – will trigger allowance based on the entered shift hours.
Day/Time – will trigger allowance based on the entered day/time.
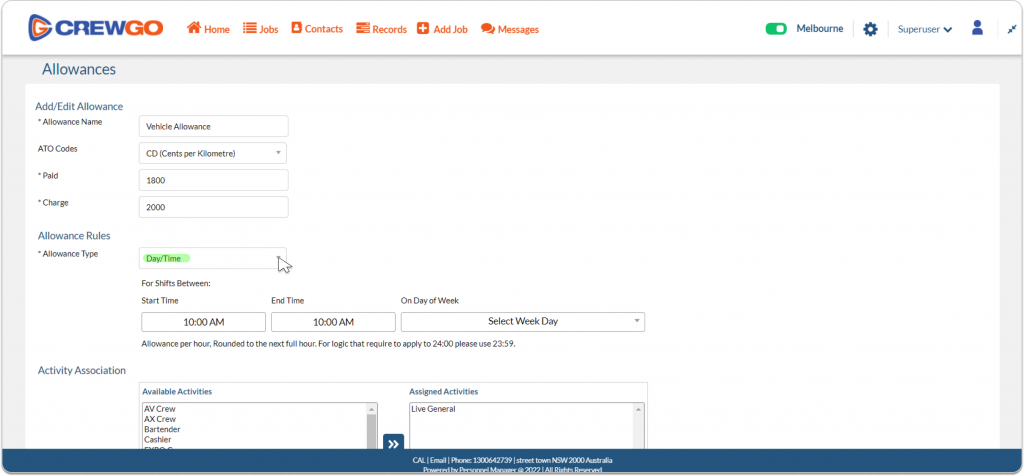
Once done filling out, Click Save button.
Once saved, a notification will show that Allowance was successfully saved.
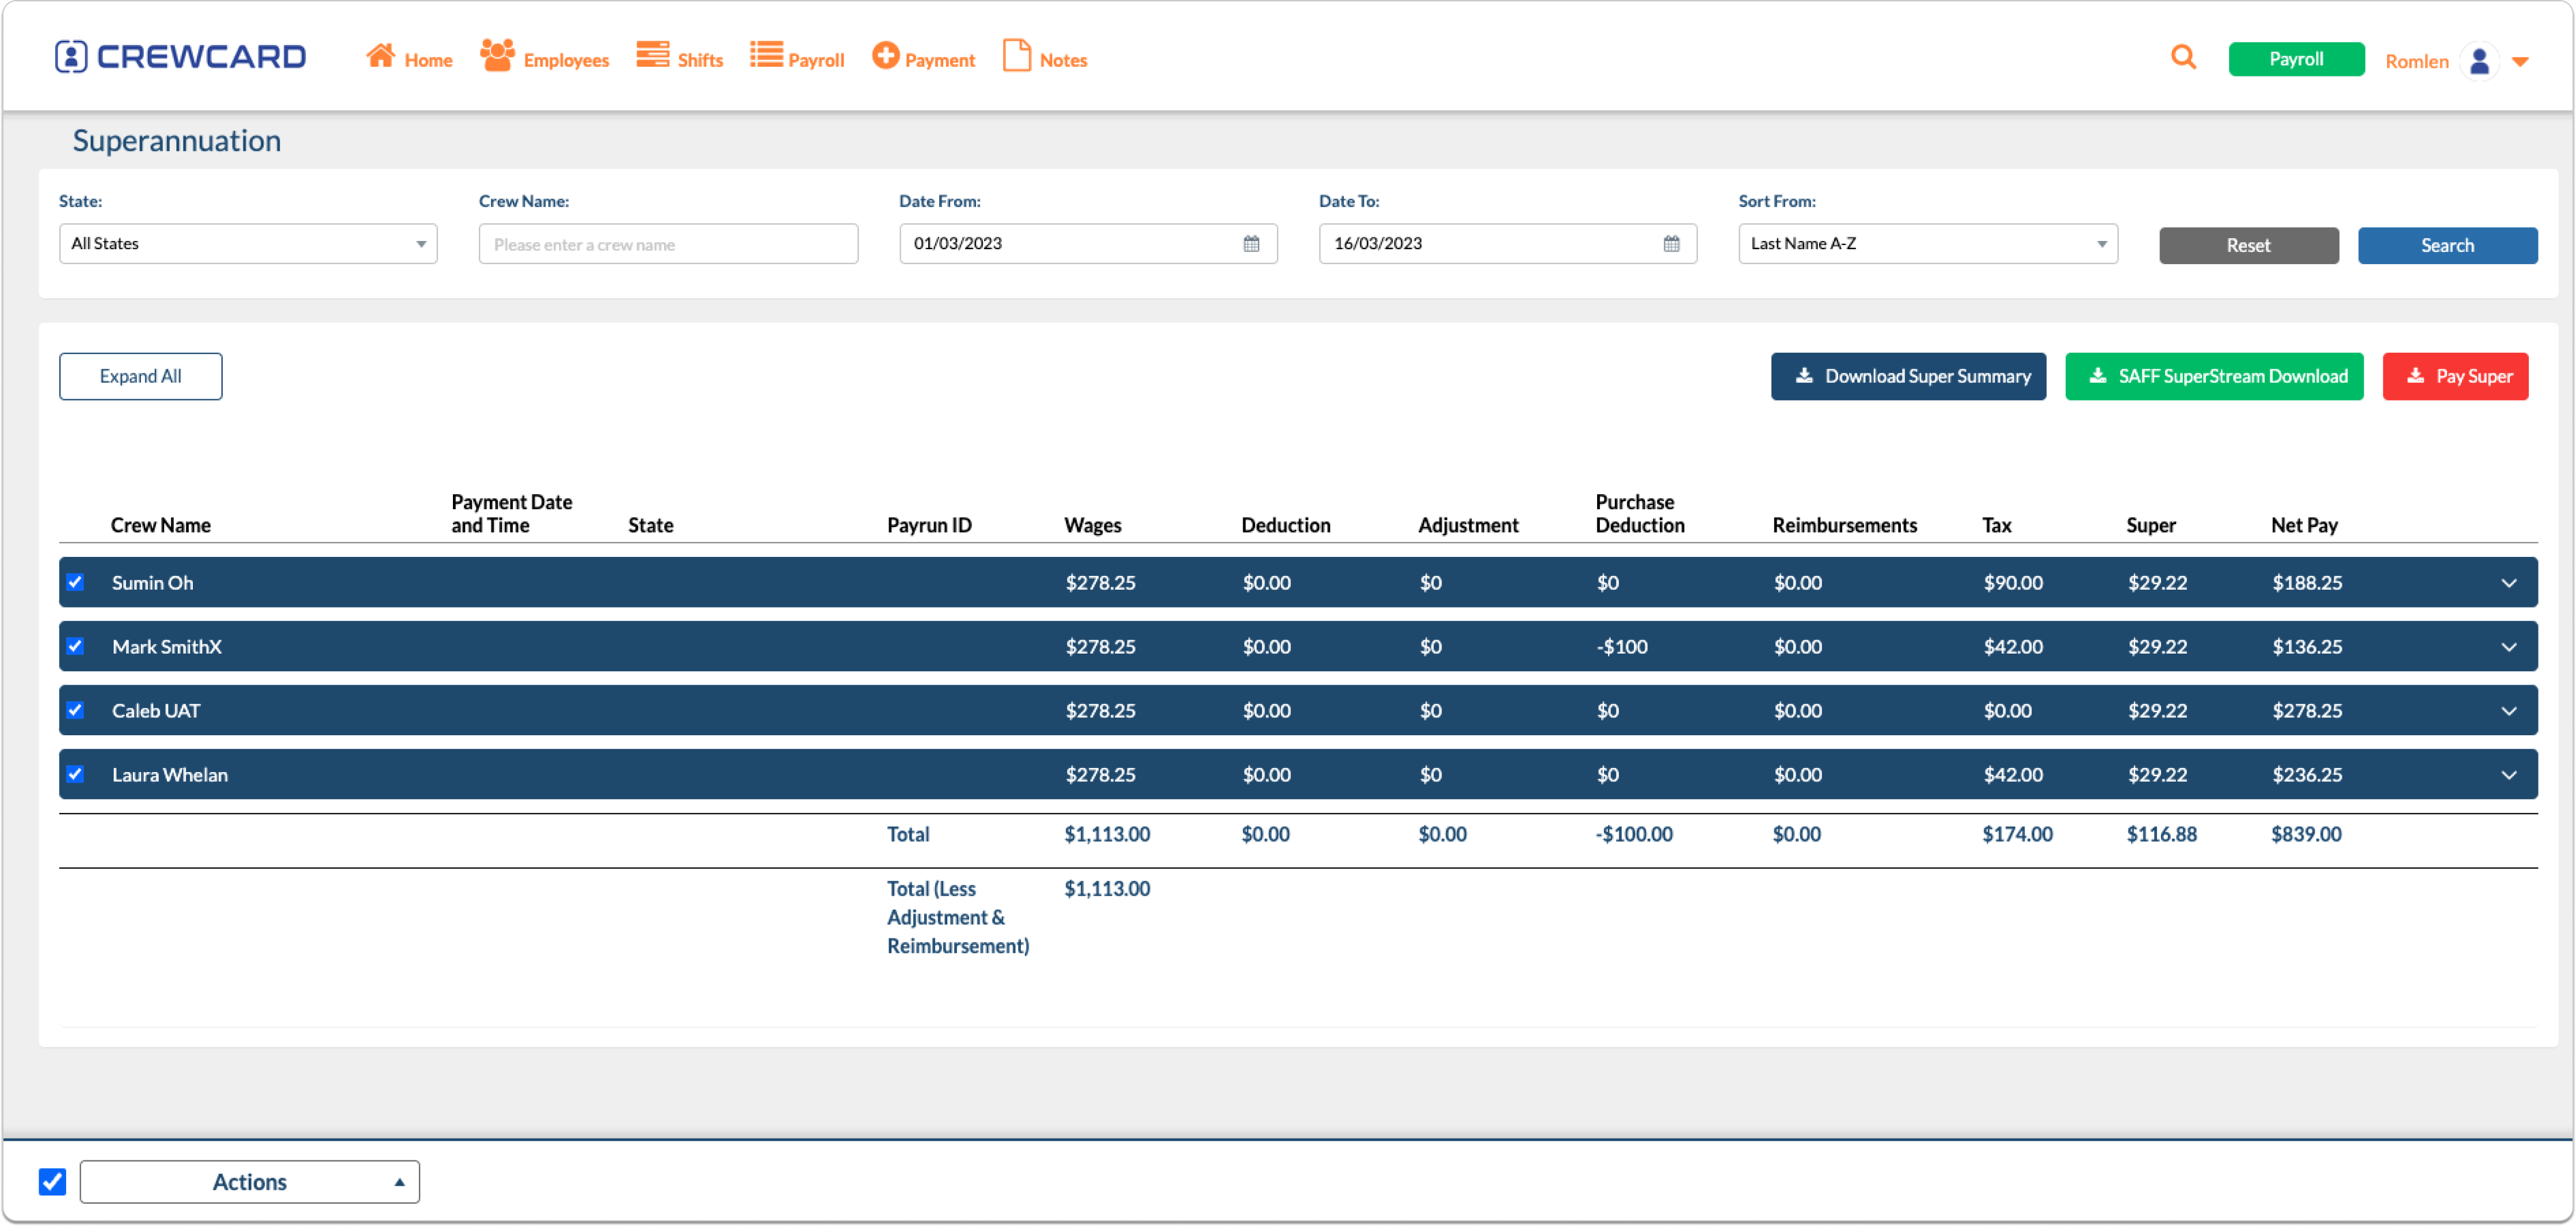
 You will then be directed to the Superannuation page, which displays a list of crew members, their wages, deductions, adjustments, purchase deductions, reimbursements, tax, super and net pay over a specified period. You can select the period by using the Date From and Date to fields at the top of the page. Additionally, you can filter the results by State, Crew name, and order of sort.
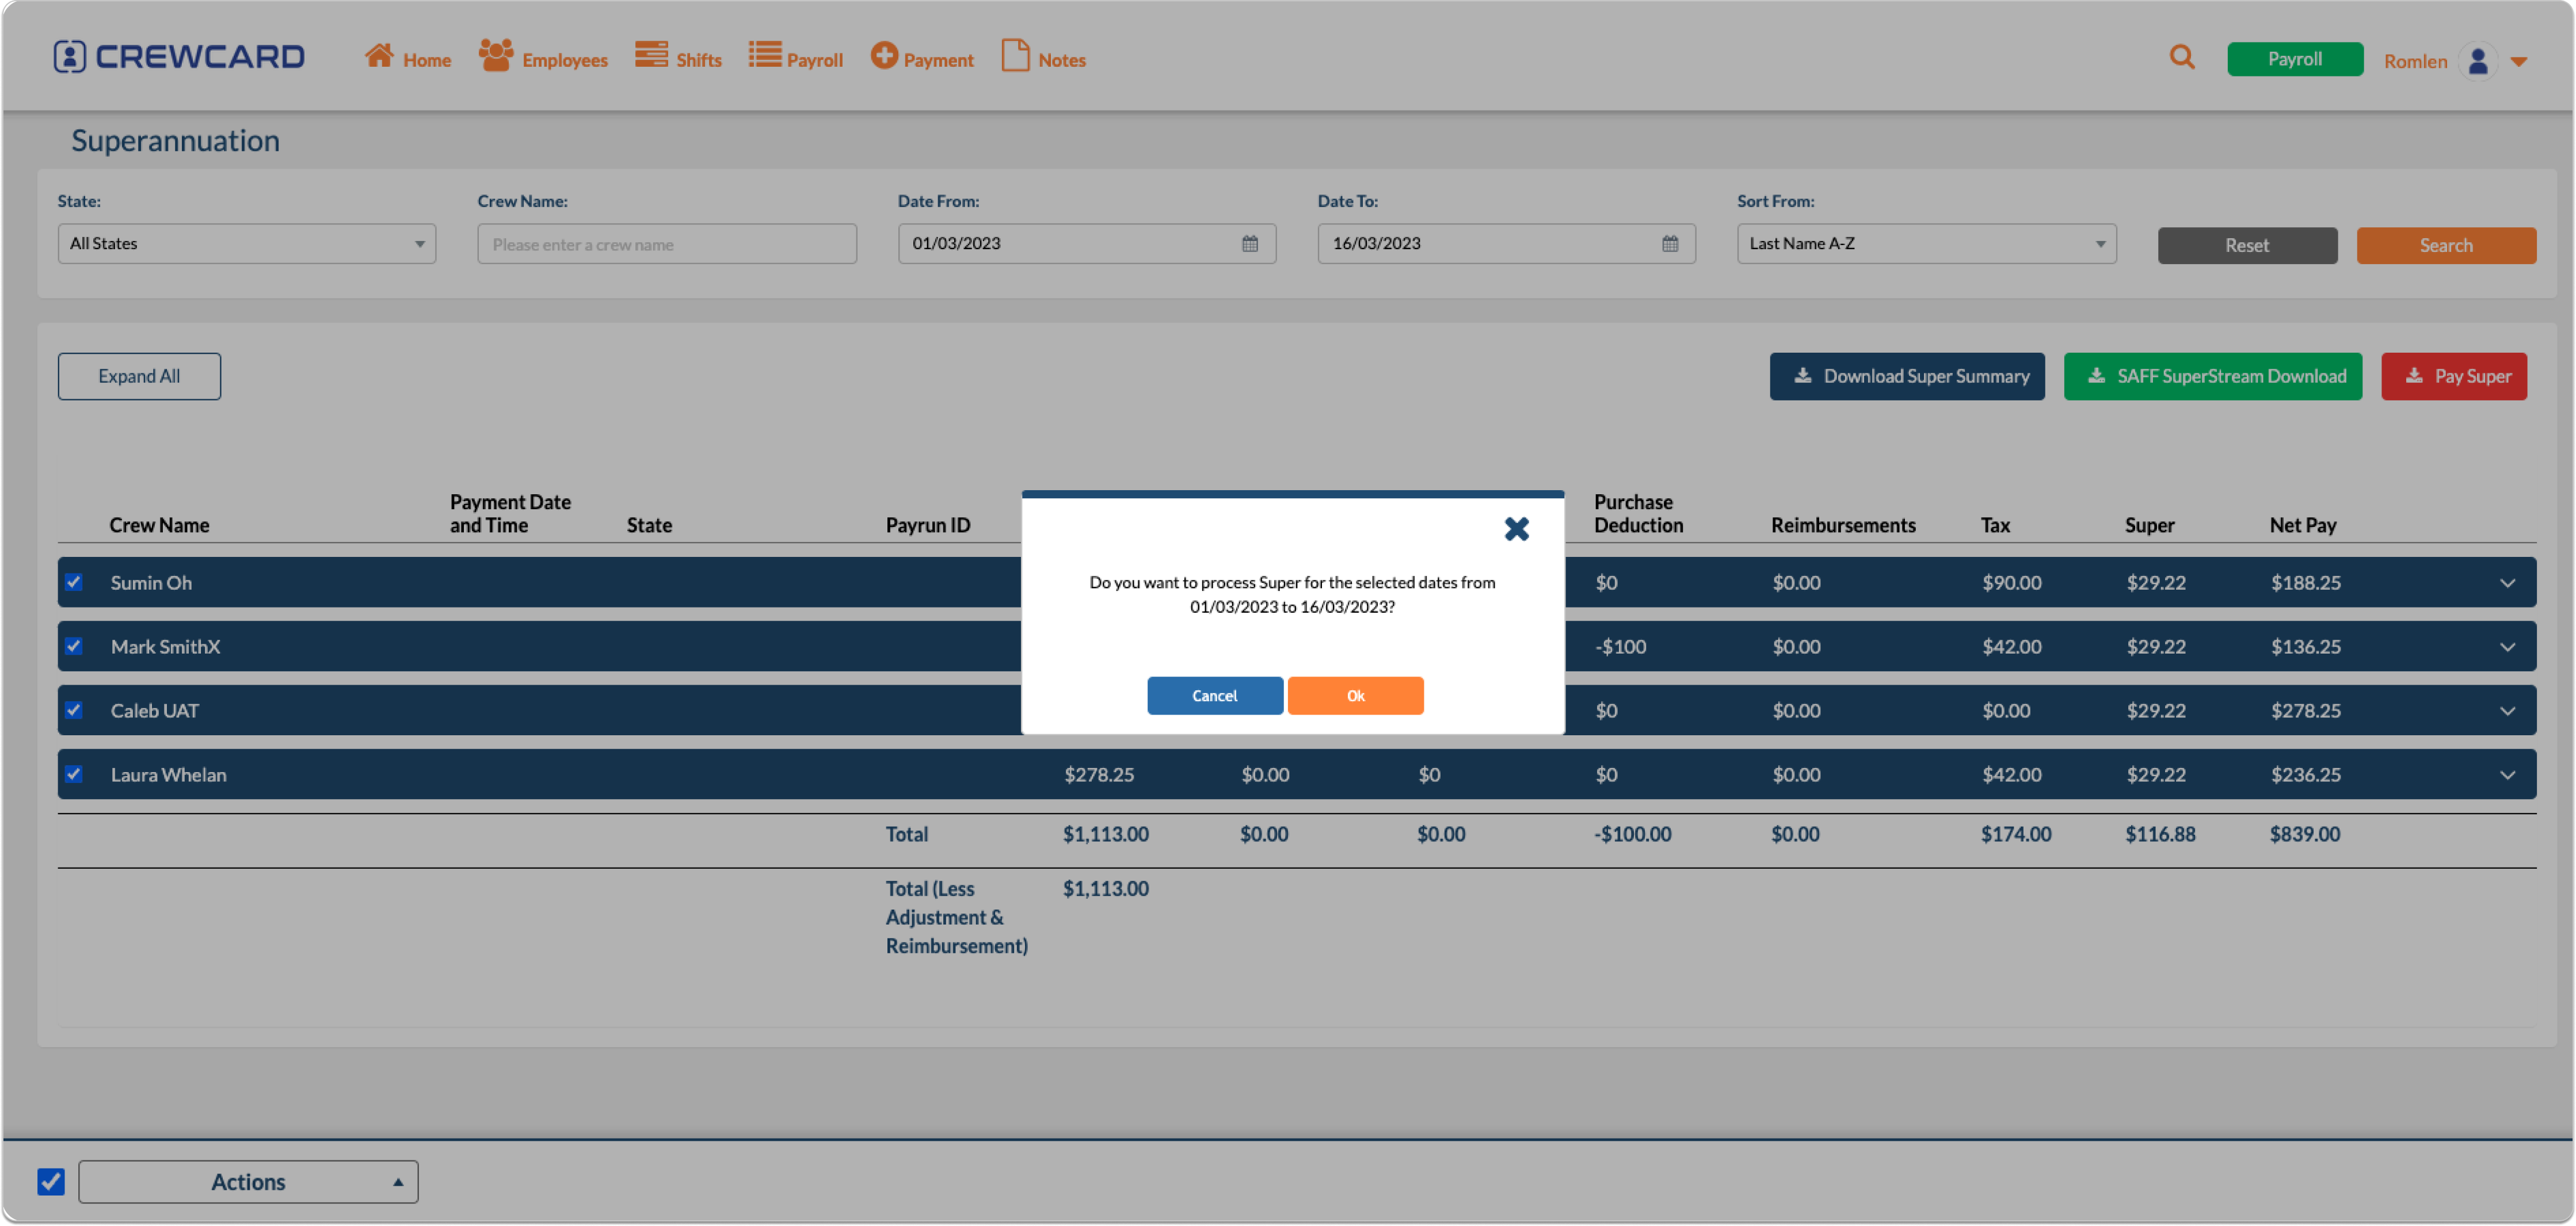
 To pay for the selected crew’s super, click on the red ‘Pay Super’ button, and check the blue box next to each of their names. A pop-up window will appear, asking you to confirm your intention to process Super for the selected dates. Press ‘Ok’ to proceed.
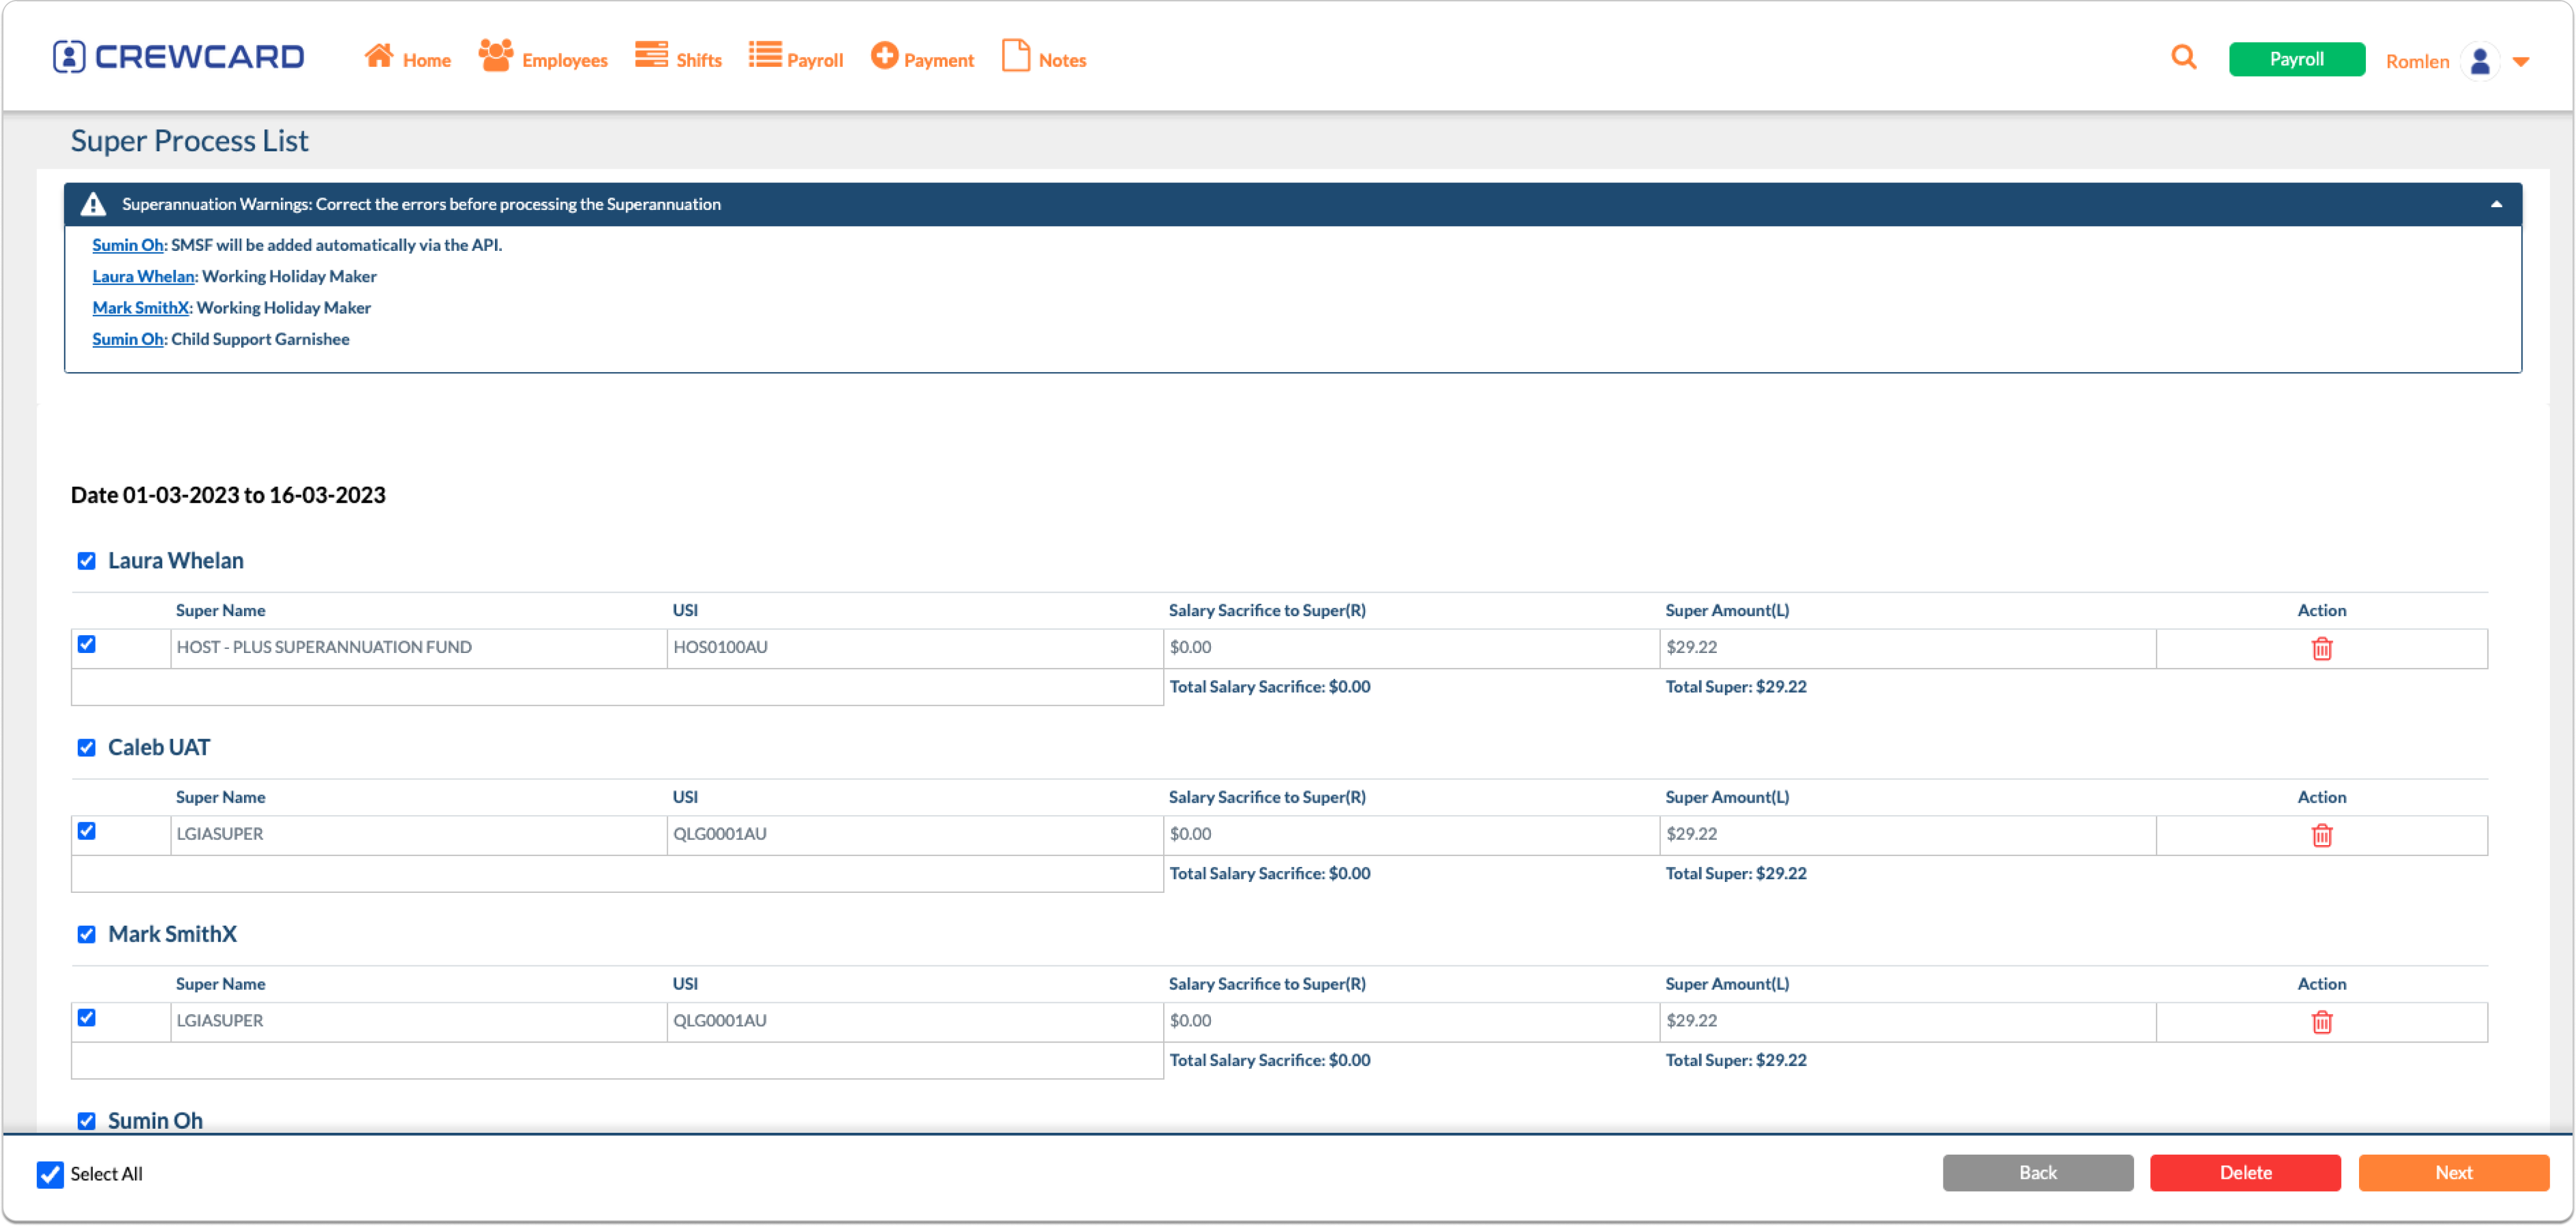
 This will direct you to the Super Process List page. The page will show Superannuation Warnings at the top, which are alerts to inform you of crew members who may have an alternative process of payment such as those who are Working Holiday Makers, Child Support Garnishees, etc. Below that, there will be a list of crew members whose super must be processed. Click the next button, located at the bottom right corner of the screen.
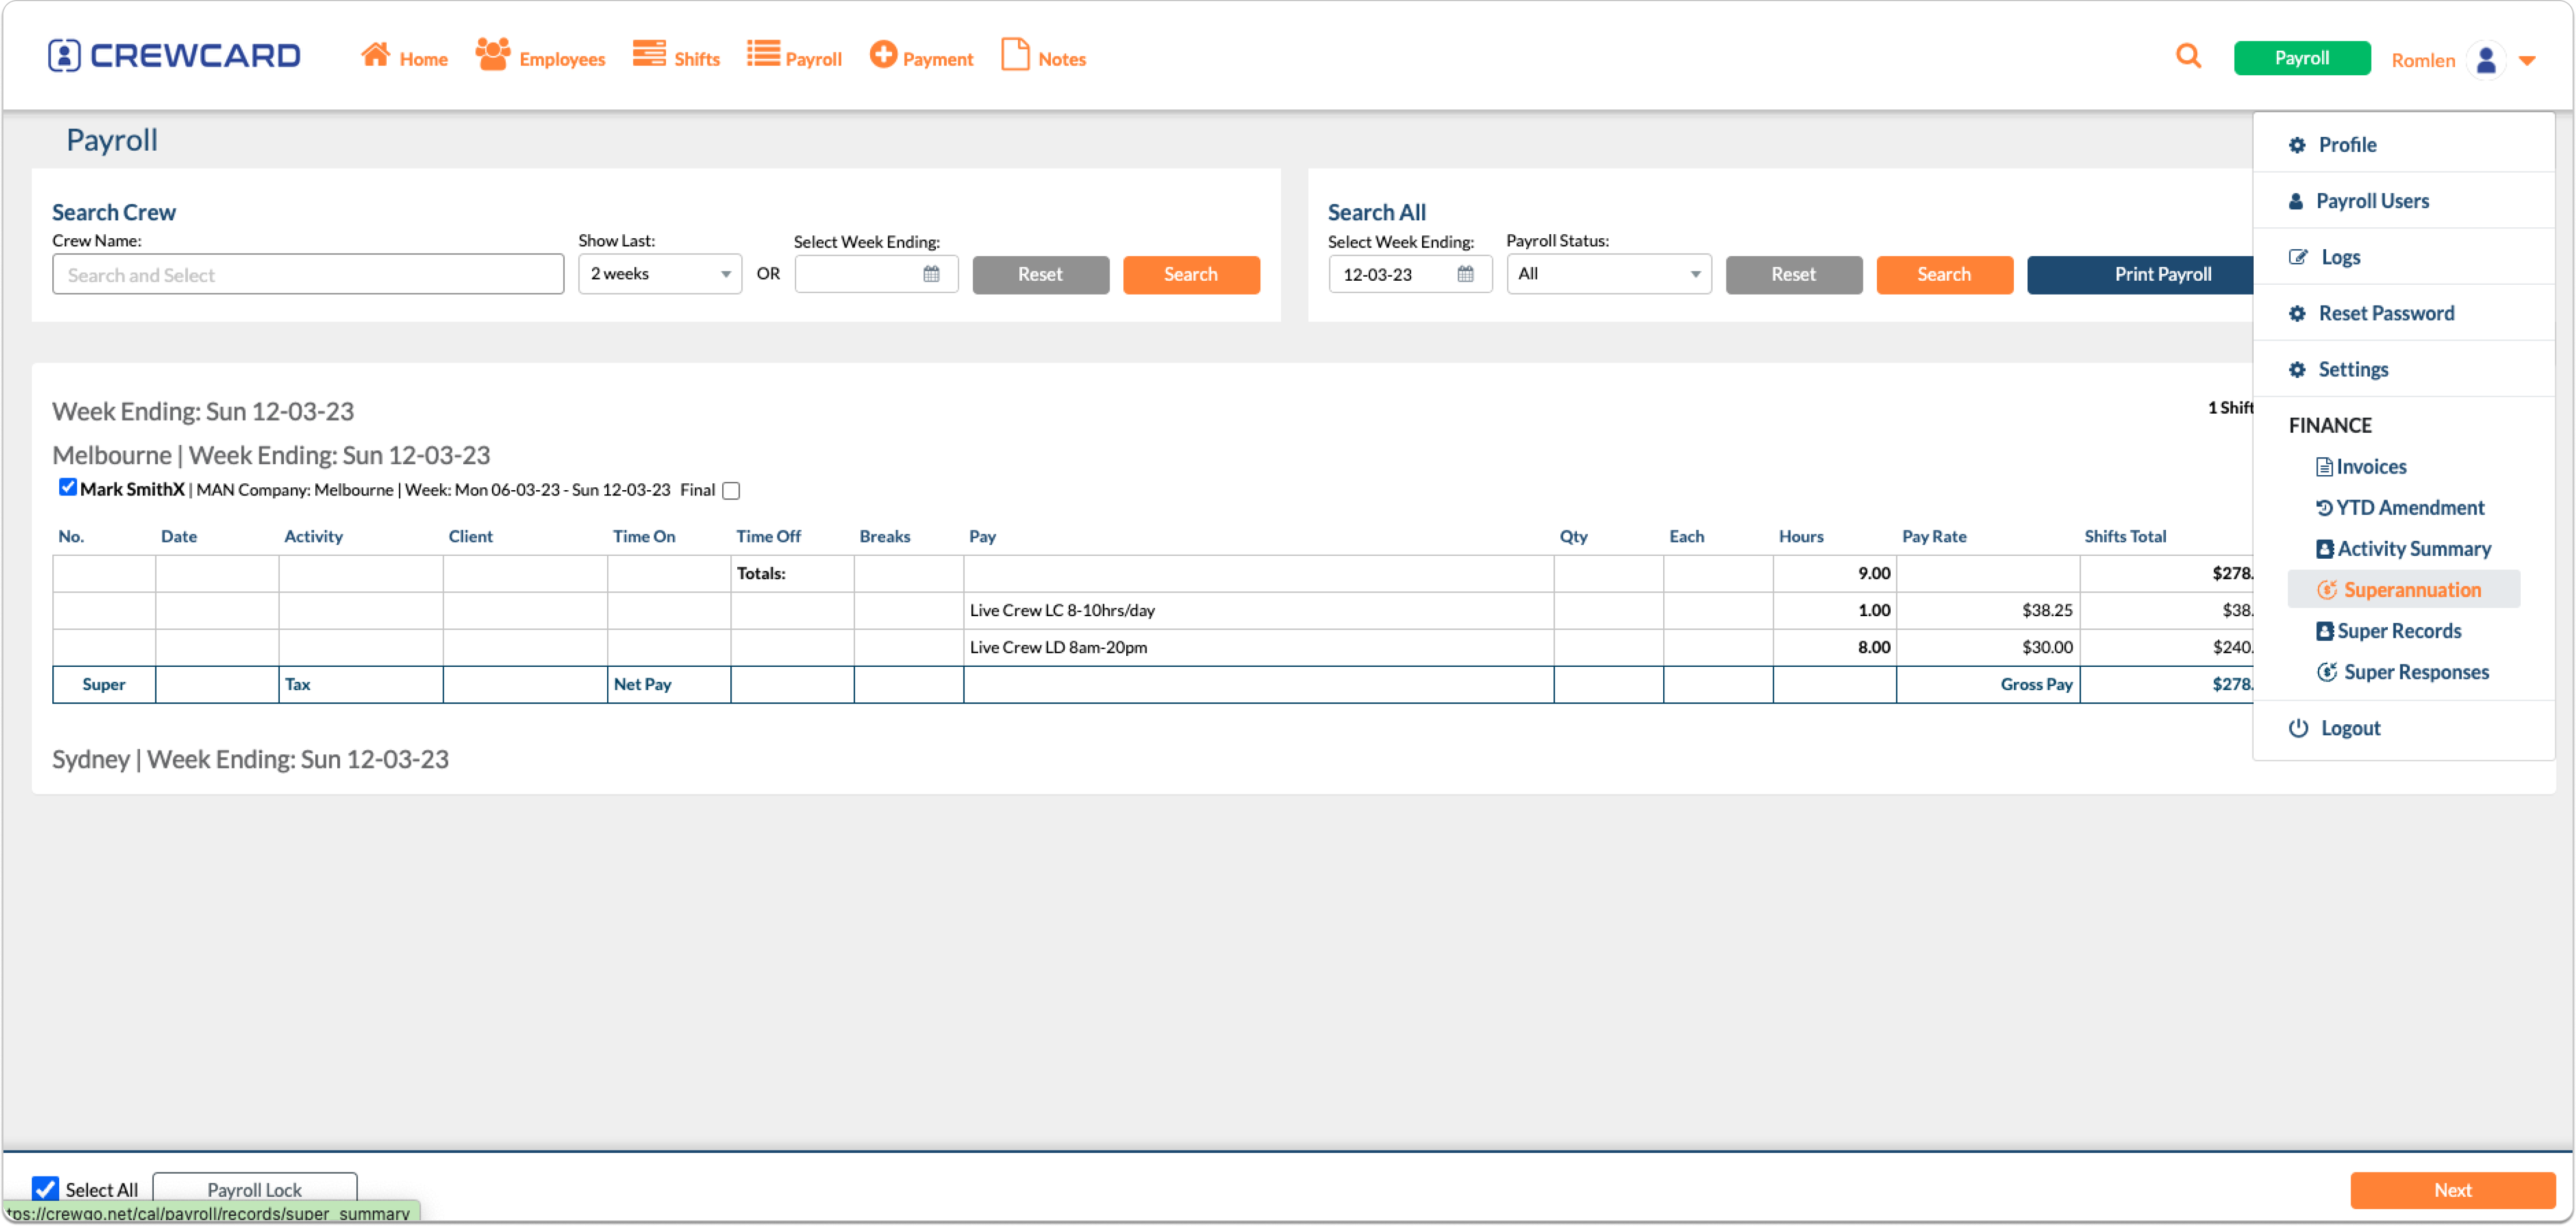
 You will then be directed to the Super Summary page. This page displays the superannuation to be paid, grouped by each super fund. Each crew member is placed under their respective super fund, as shown in the example below.
 Finally, click the green Send button to initiate the process of paying the employees’ superannuation fees.
 Here are some common errors in the Payroll Software and how to solve them.
When you process a pay, it will generate a corresponding payrun.
On the Payrun page, the STP Status will be displayed.
STP Filing can be:
CrewPayer will display STP/ABA Warnings when processing a payroll.
Some warnings are mandatory to be fixed. While other warnings are simply reminders.
The warnings will appear on the top portion of the Payroll List page.
Here are some of the common STP/ABA Warnings that you might encounter.
1. Child Support Deduction
This is a reminder that your employee has deduction for child support. Ensure that the amount is properly setup either via Direct Payments or Employee page.
2. Child Support Garnishee
This is a reminder that your employee has garnishee for child support. Ensure that the amount is properly setup either via Direct Payments or Employee page.
3. Working Holiday Maker
This is a reminder that your employee is Working Holiday Maker. Ensure that his/her Country (ATO) is not set to Australia
4. WHM / Country Code Conflict
This is a reminder that your employee is Working Holiday Maker. Ensure that his/her Country (ATO) is not set to Australia
5. Empty Tax File Number
The tax file number in the TFND is blank
6. Empty TFN First Name
The First Name in the TFND is blank
7. Empty Tax Treatment (Check TFN Status and Residency Status)
Make sure that Question 5 in the TFND form on the Employees page is not blank.
Ensure as well that appropriate TFN Status is selected.
8. Empty Account Name
The Account Name in the Bank Details section of the Employee’s page is blank.
9. Empty Bank Account Number
The Account Number in the Bank Details section of the Employee’s page is blank.
10. Empty BSB Number
The BSB Number in the Bank Details section of the Employee’s page is blank.
11. Empty Country (ATO)
Ensure that his/her Country (ATO) is not blank.