CrewCard provides tools and features that make the job of an employee more efficient and effective. There are three main pages for the client to access calendar, shifts and day sheets. The manual will help guide you to use these ages. As well as settings and chat.
When accessing the sign up page in the CrewCard software, you will be presented with a Customer Sign Up and Job Seeker Sign Up option. Next to each link, a QR code is provided.
Click the icon next to Customer Sign Up. A larger QR code will appear.
When scanned by a mobile device, the potential user is taken to an internet page, as displayed below.

The welcome page requests Account Details, Company name, First name, Last Name, Contact Number, Email/username, Password.
Once completed, you are signed up to CrewCard, and are able to use your details to log in and access the software.
Once you have attained your log in details, if you would like to activate two-factor authentication, please contact support@personnelmanager.com.au
If activated, upon logging in to the CrewCard software, users will be presented with a pop up window requesting an authentication code. The authentication code that is being requested is sent to the email address and the mobile number, that is registered to the account that is being logged into.
A unique 6-digit code will be sent, and must be entered into the textbox in order to gain access to the account. This code changes each time a user logs in to their account.

This mechanism of security a strong protection against unauthorised access to your accounts, reducing any chance of fraud or breach of sensitive information.
Furthermore, users can contact support@personnelmanager.com.au to enable an additional layer of security when logging in. When activated, a user has 4 chances to log in. On the 5th time entering the wrong login credentials, the system will block the user for 15 minutes before they are able to log in again. This security measure has been implemented to prevent brute force attacks or consistent guessing of passwords in order to gain access to accounts that do not belong to CrewCard users.
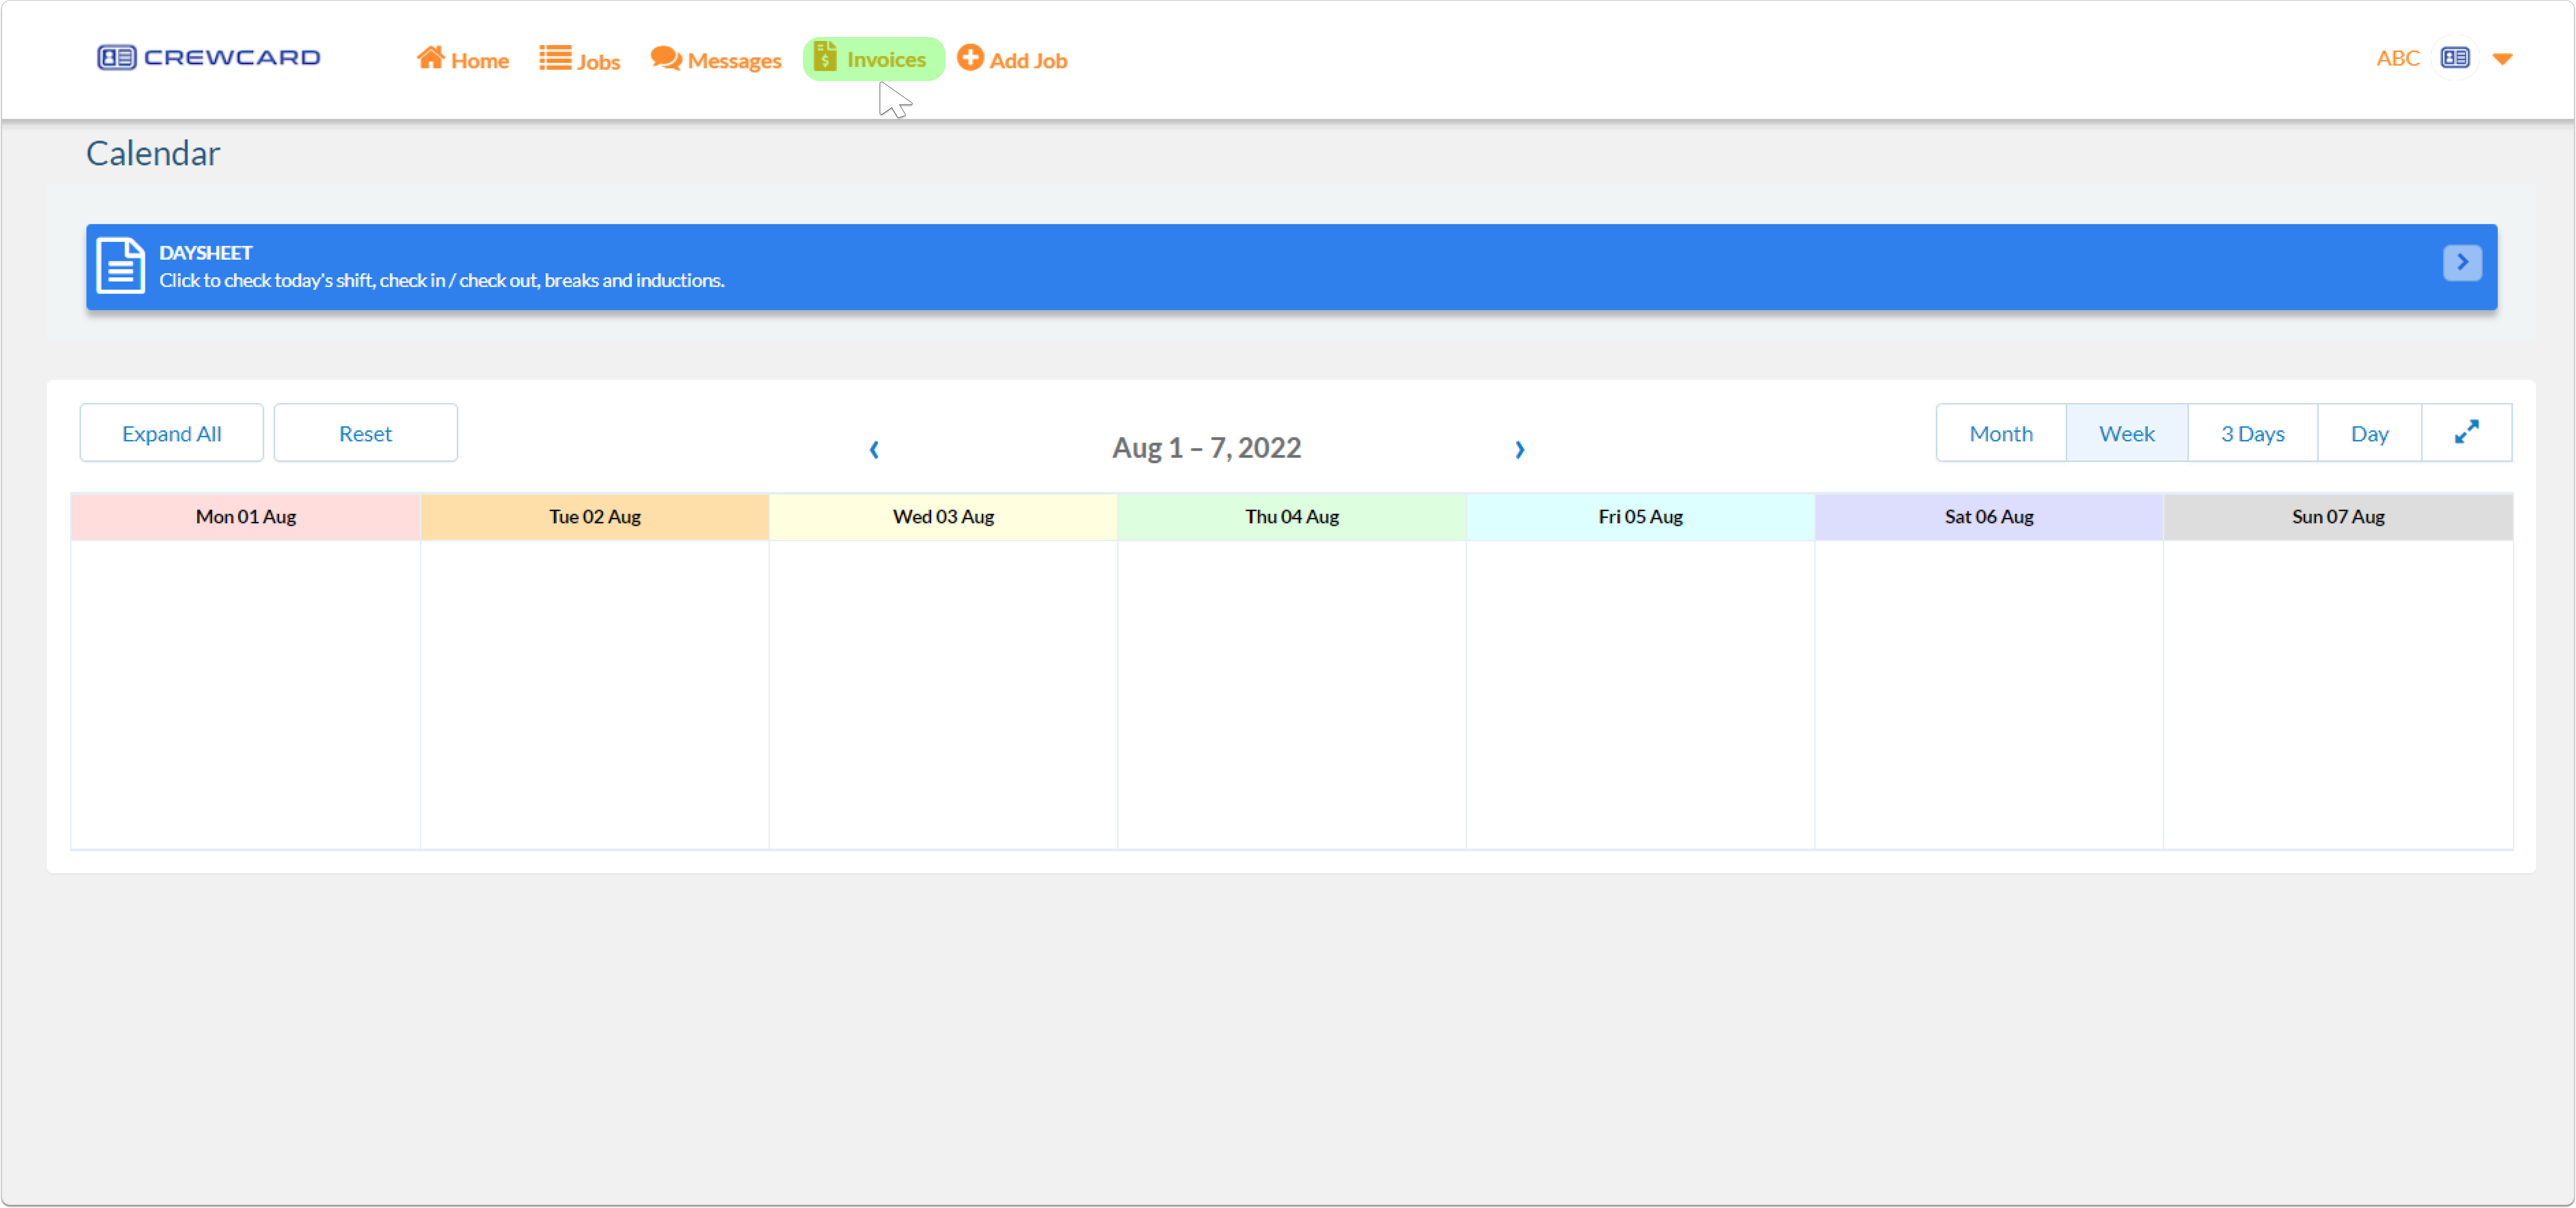
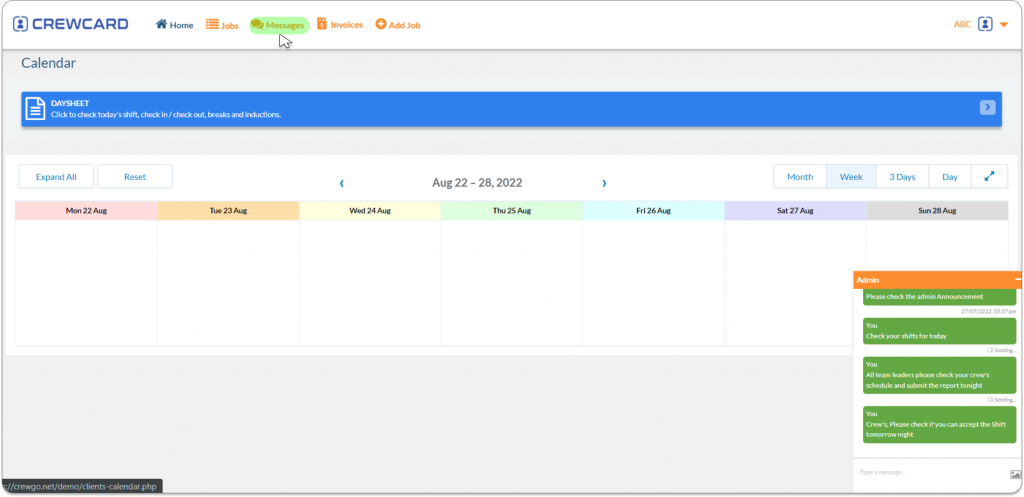
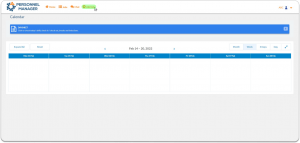
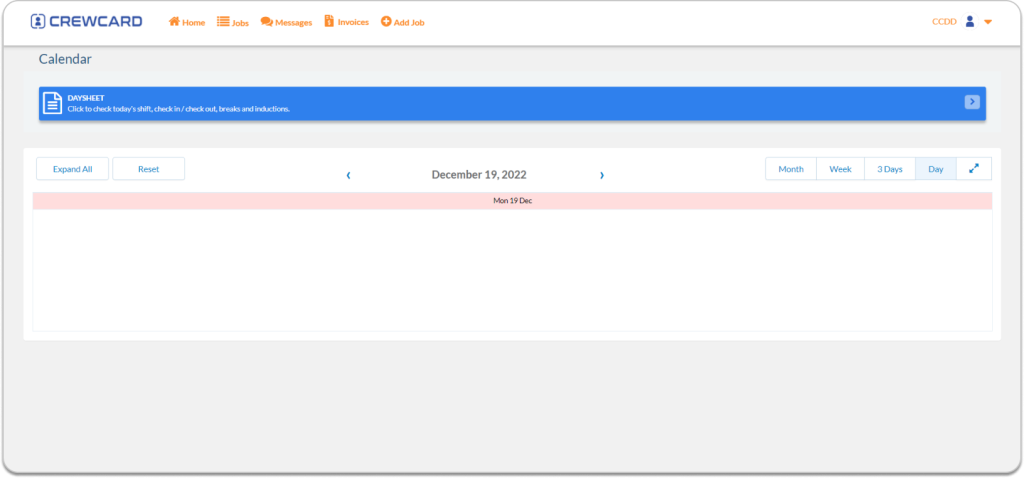
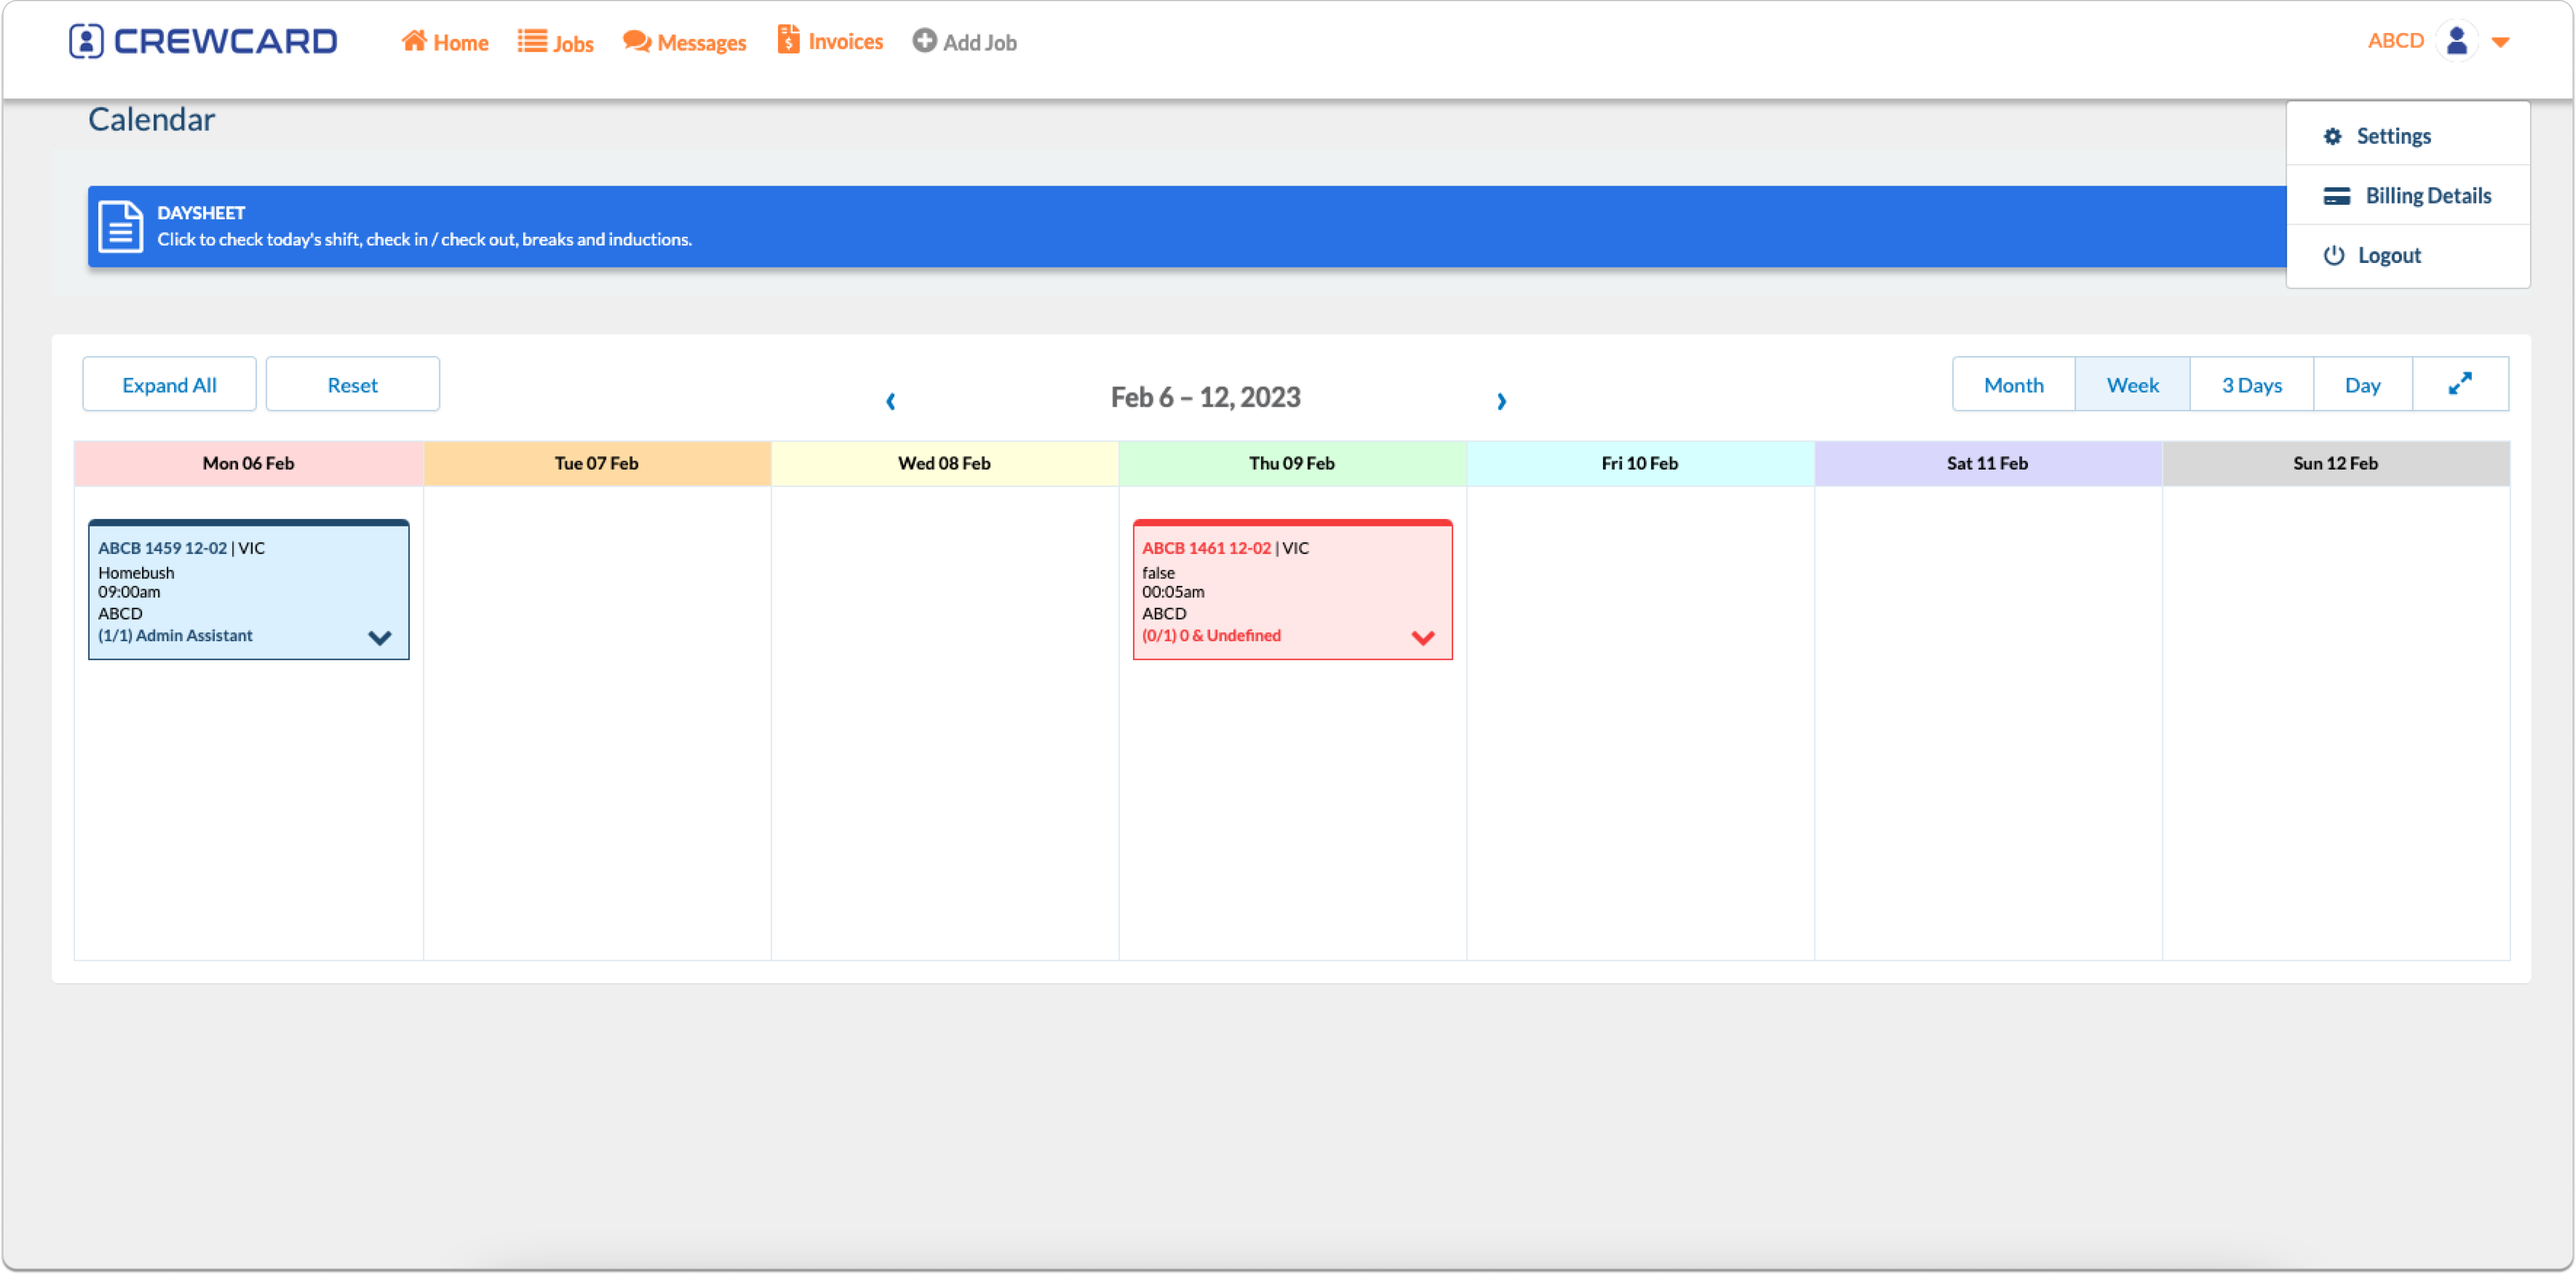
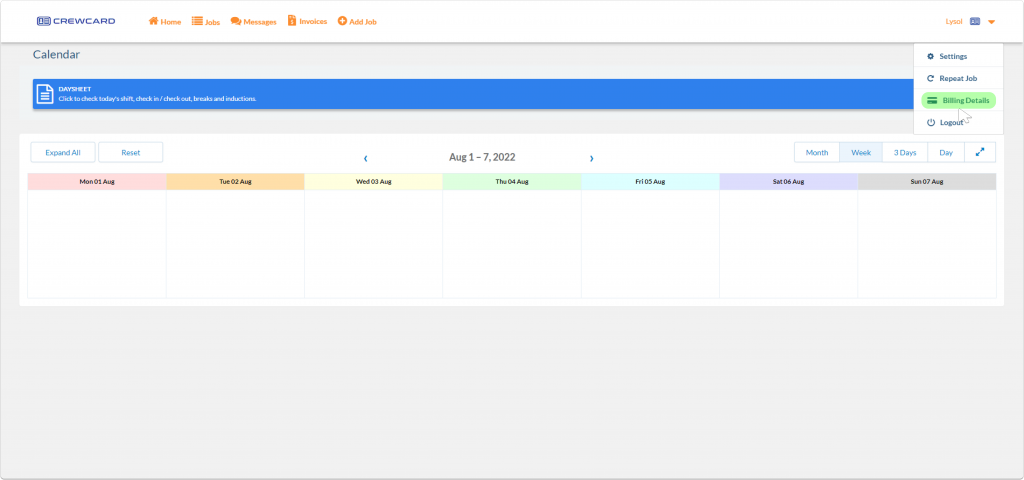
Calendar allows you to overview shifts by Month, Week, 3 Days, and by Day.
Click the arrow button to expand the shift to view more information.
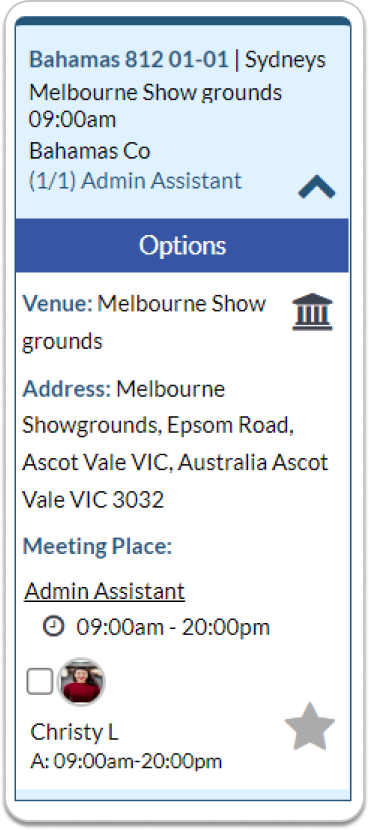
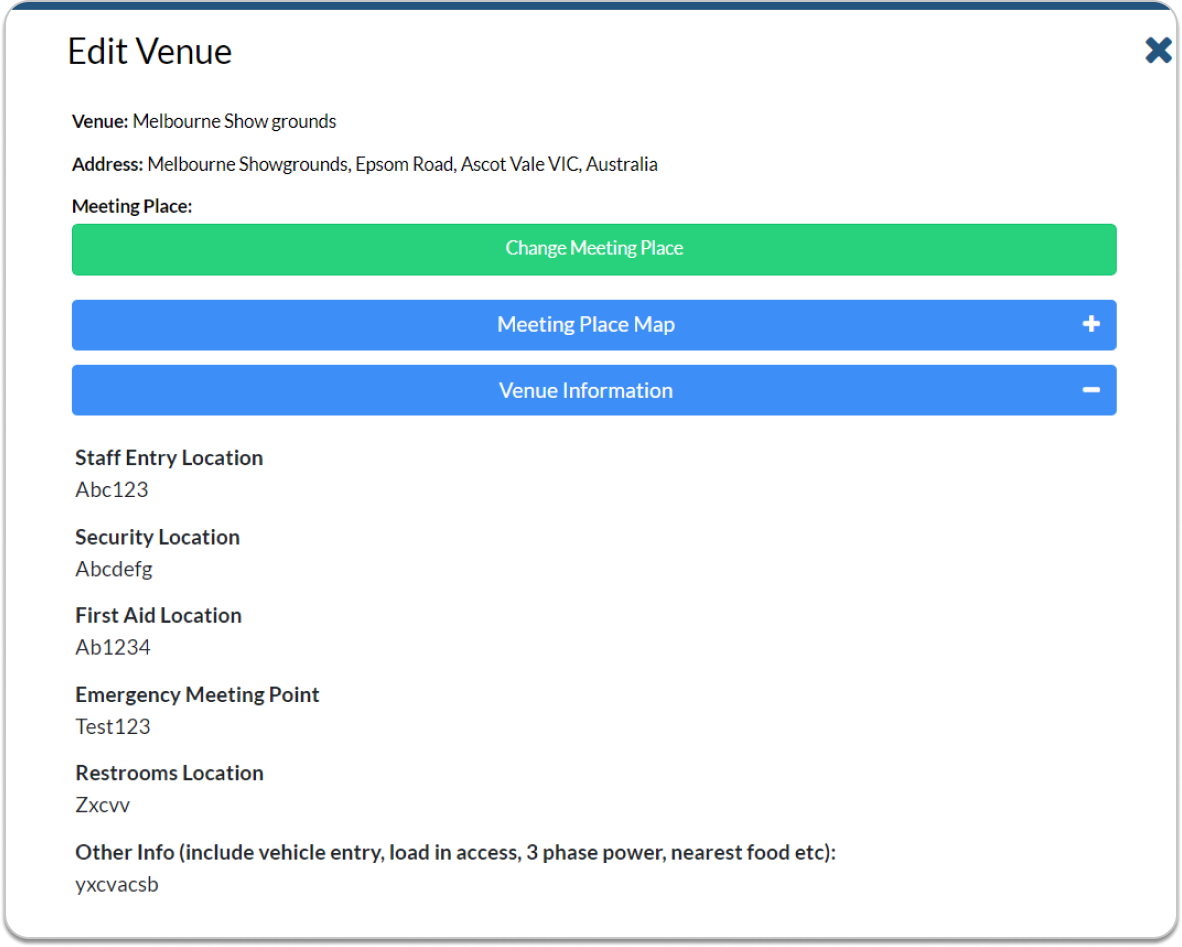
Click the house icon to view or edit the location of the job.
You can access the day sheet and shift page through this too.
A day sheet is create for each job.
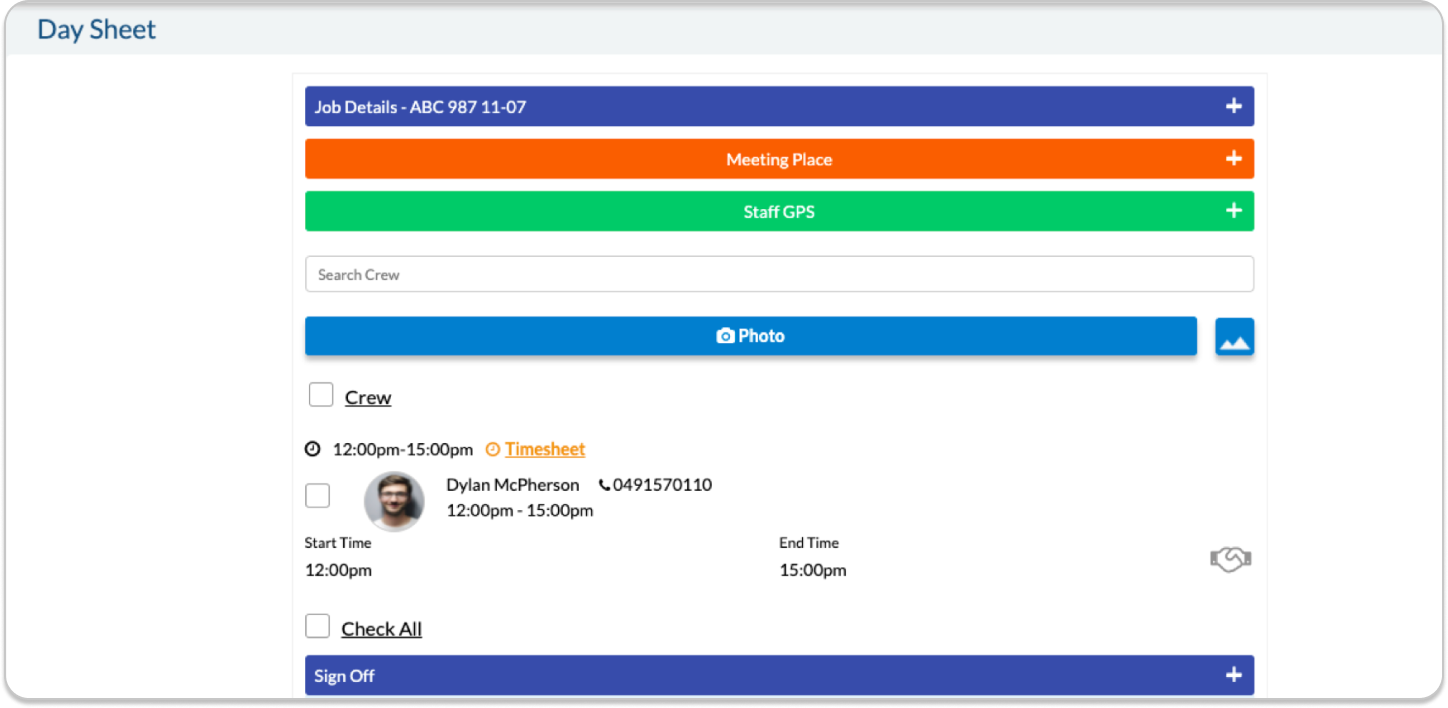
Job Details: Information about the job will show when it is expanded.
Meeting Point: View the location you will meet at.
Staff GPS: This will show your location live on a map.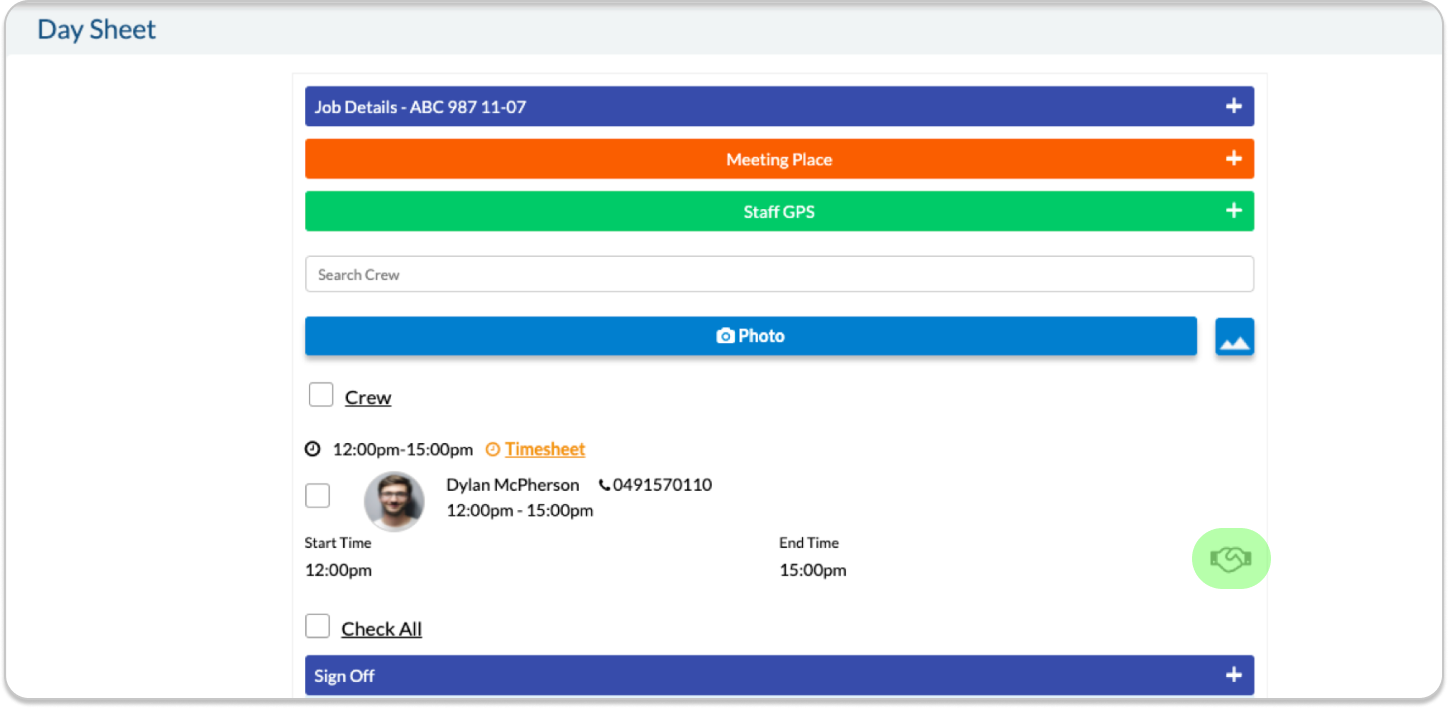 A pop out window will open, if you agree please click ‘I Agree’.
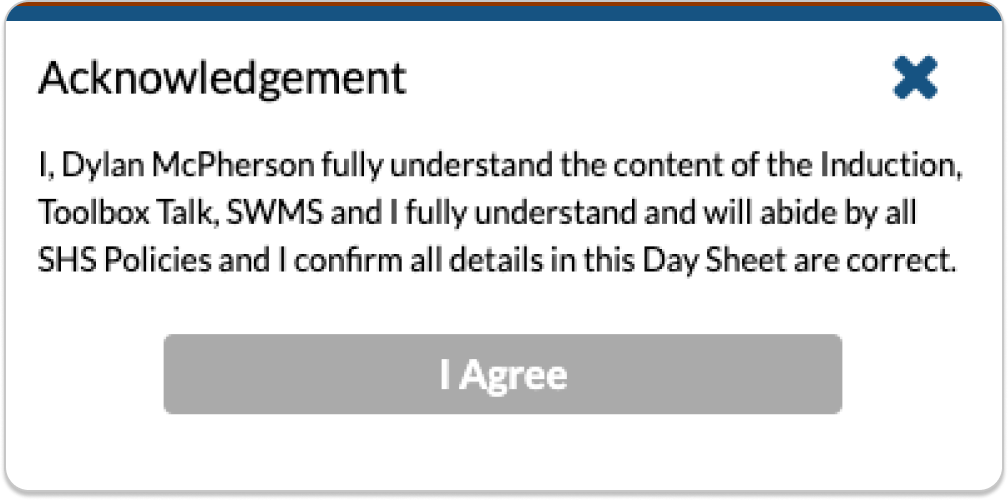
Sign off, use your mouse to sign the form once completed.
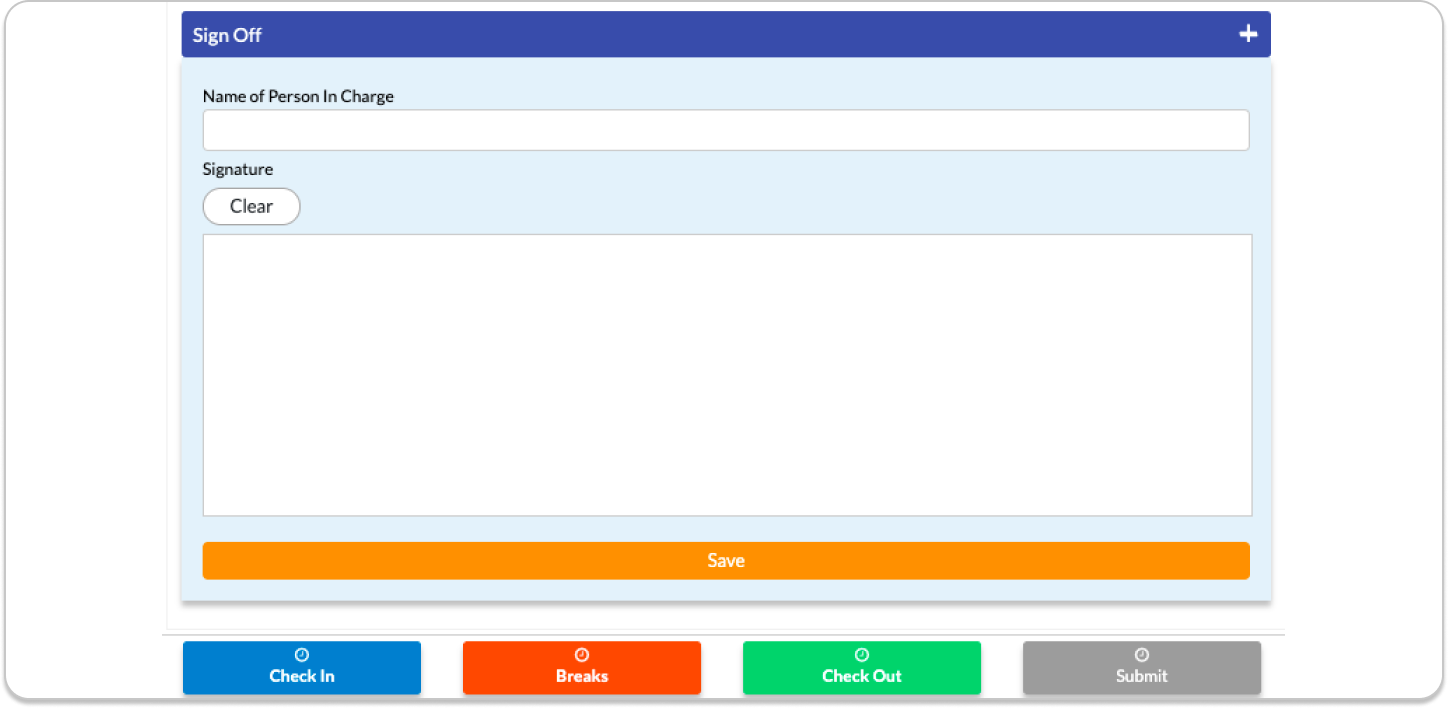
At the bottom of the page there are 4 buttons.
Check In: Enter the time when you start your shift.
Breaks: Press the button when you start your break and enter the time. Press the button again and enter the time when your shift is over.
Check Out: Enter the time when you finish the job.
Submit: Submit your time sheet once completed.
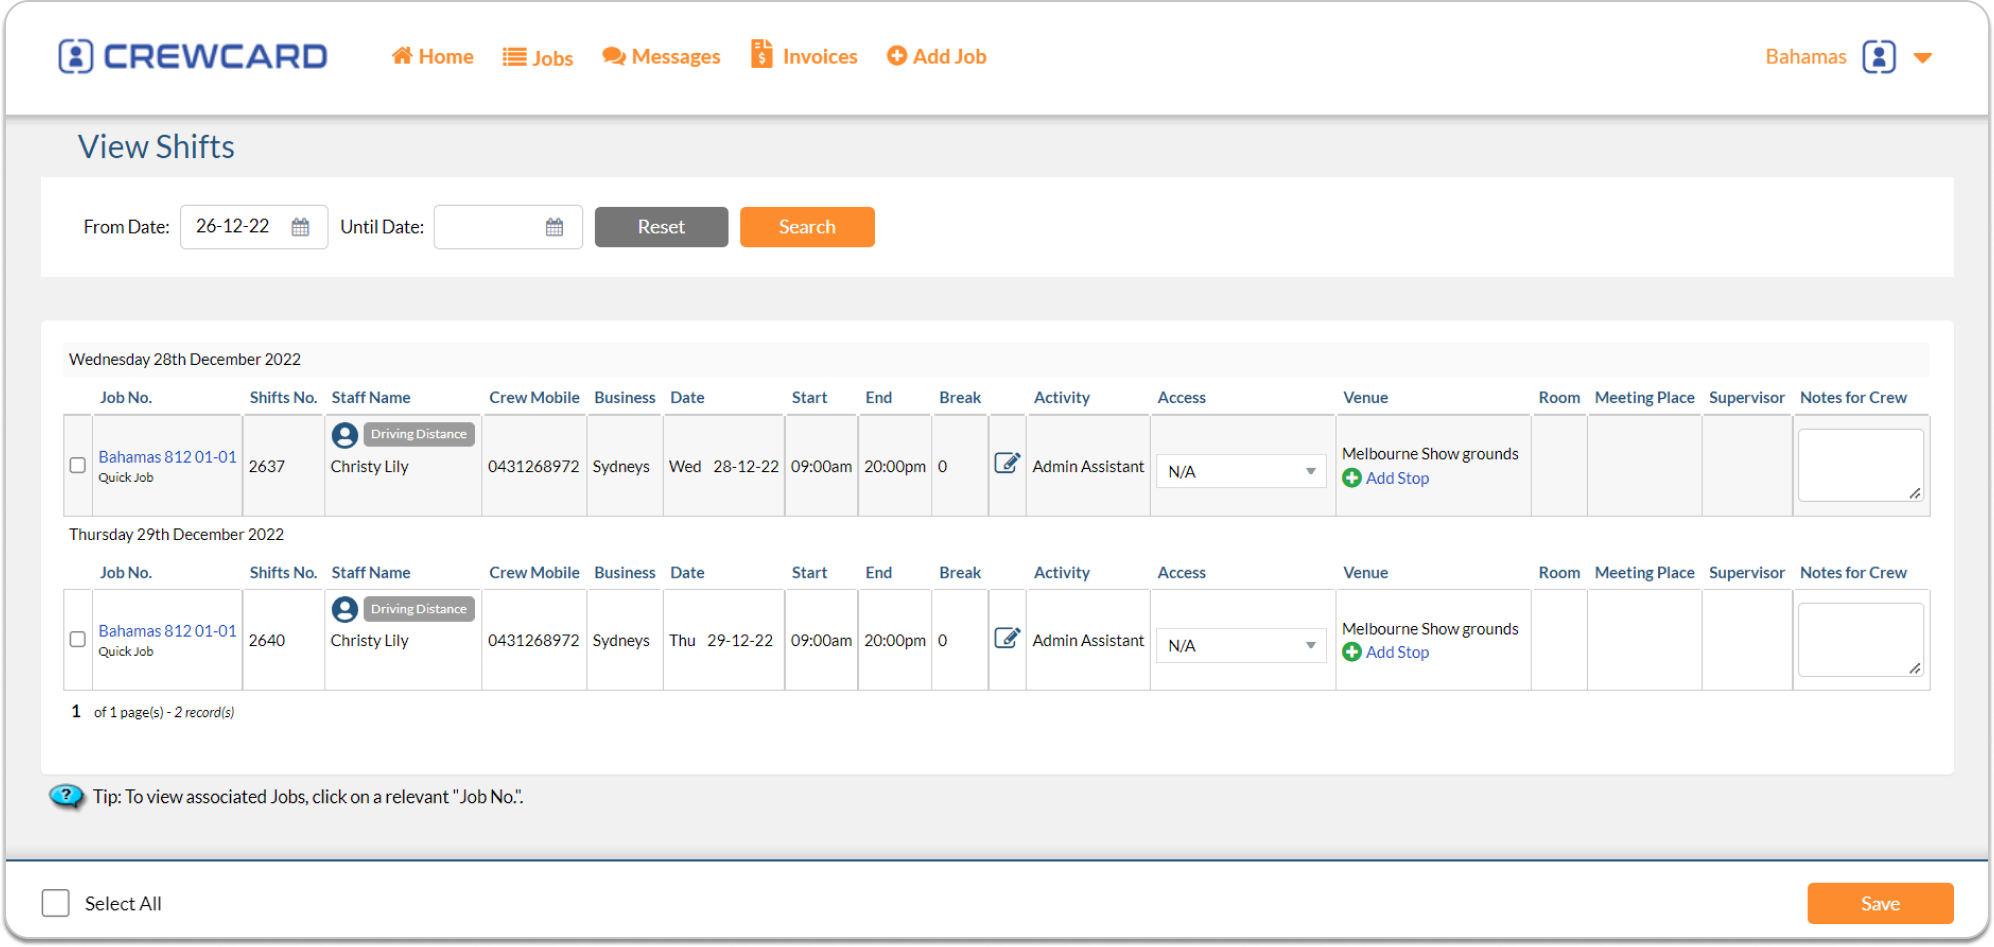
View all shifts that are roster for your company. You can set break times and add notes to shifts for the crew to view.
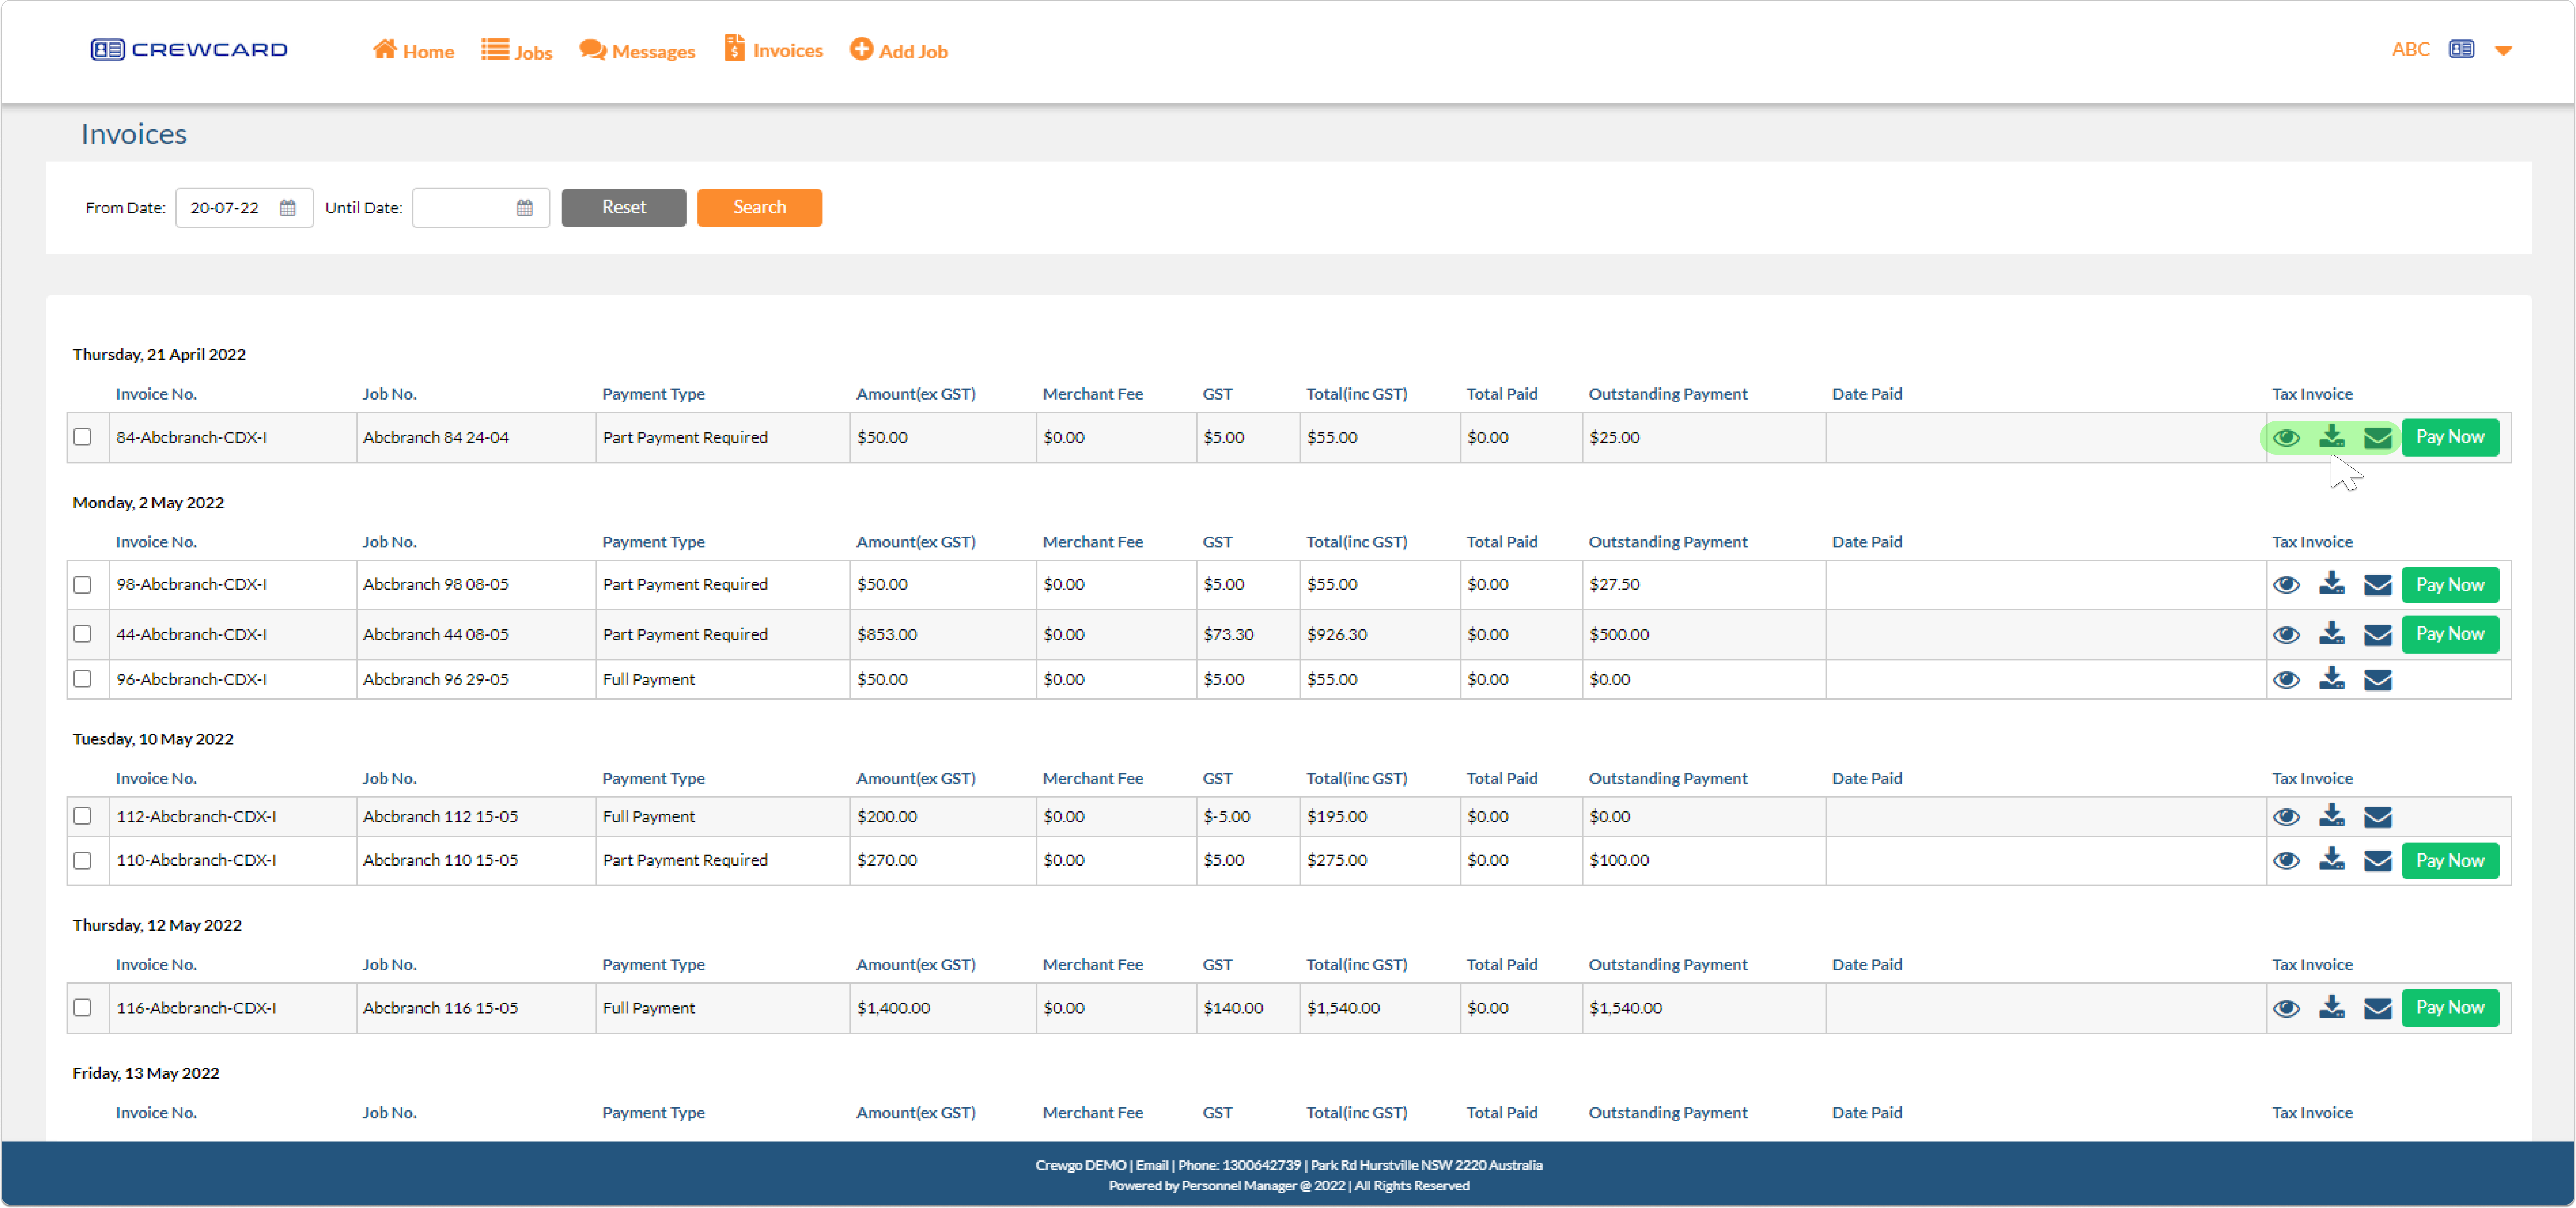
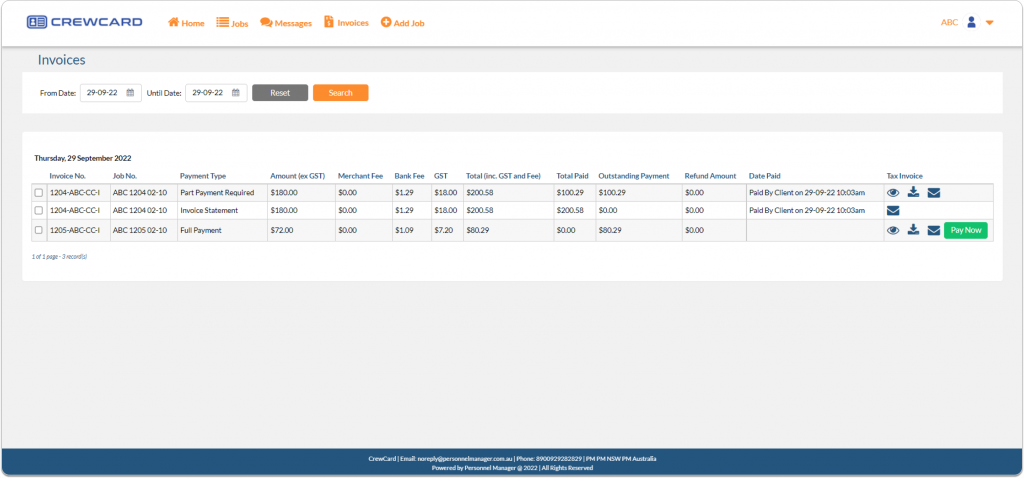
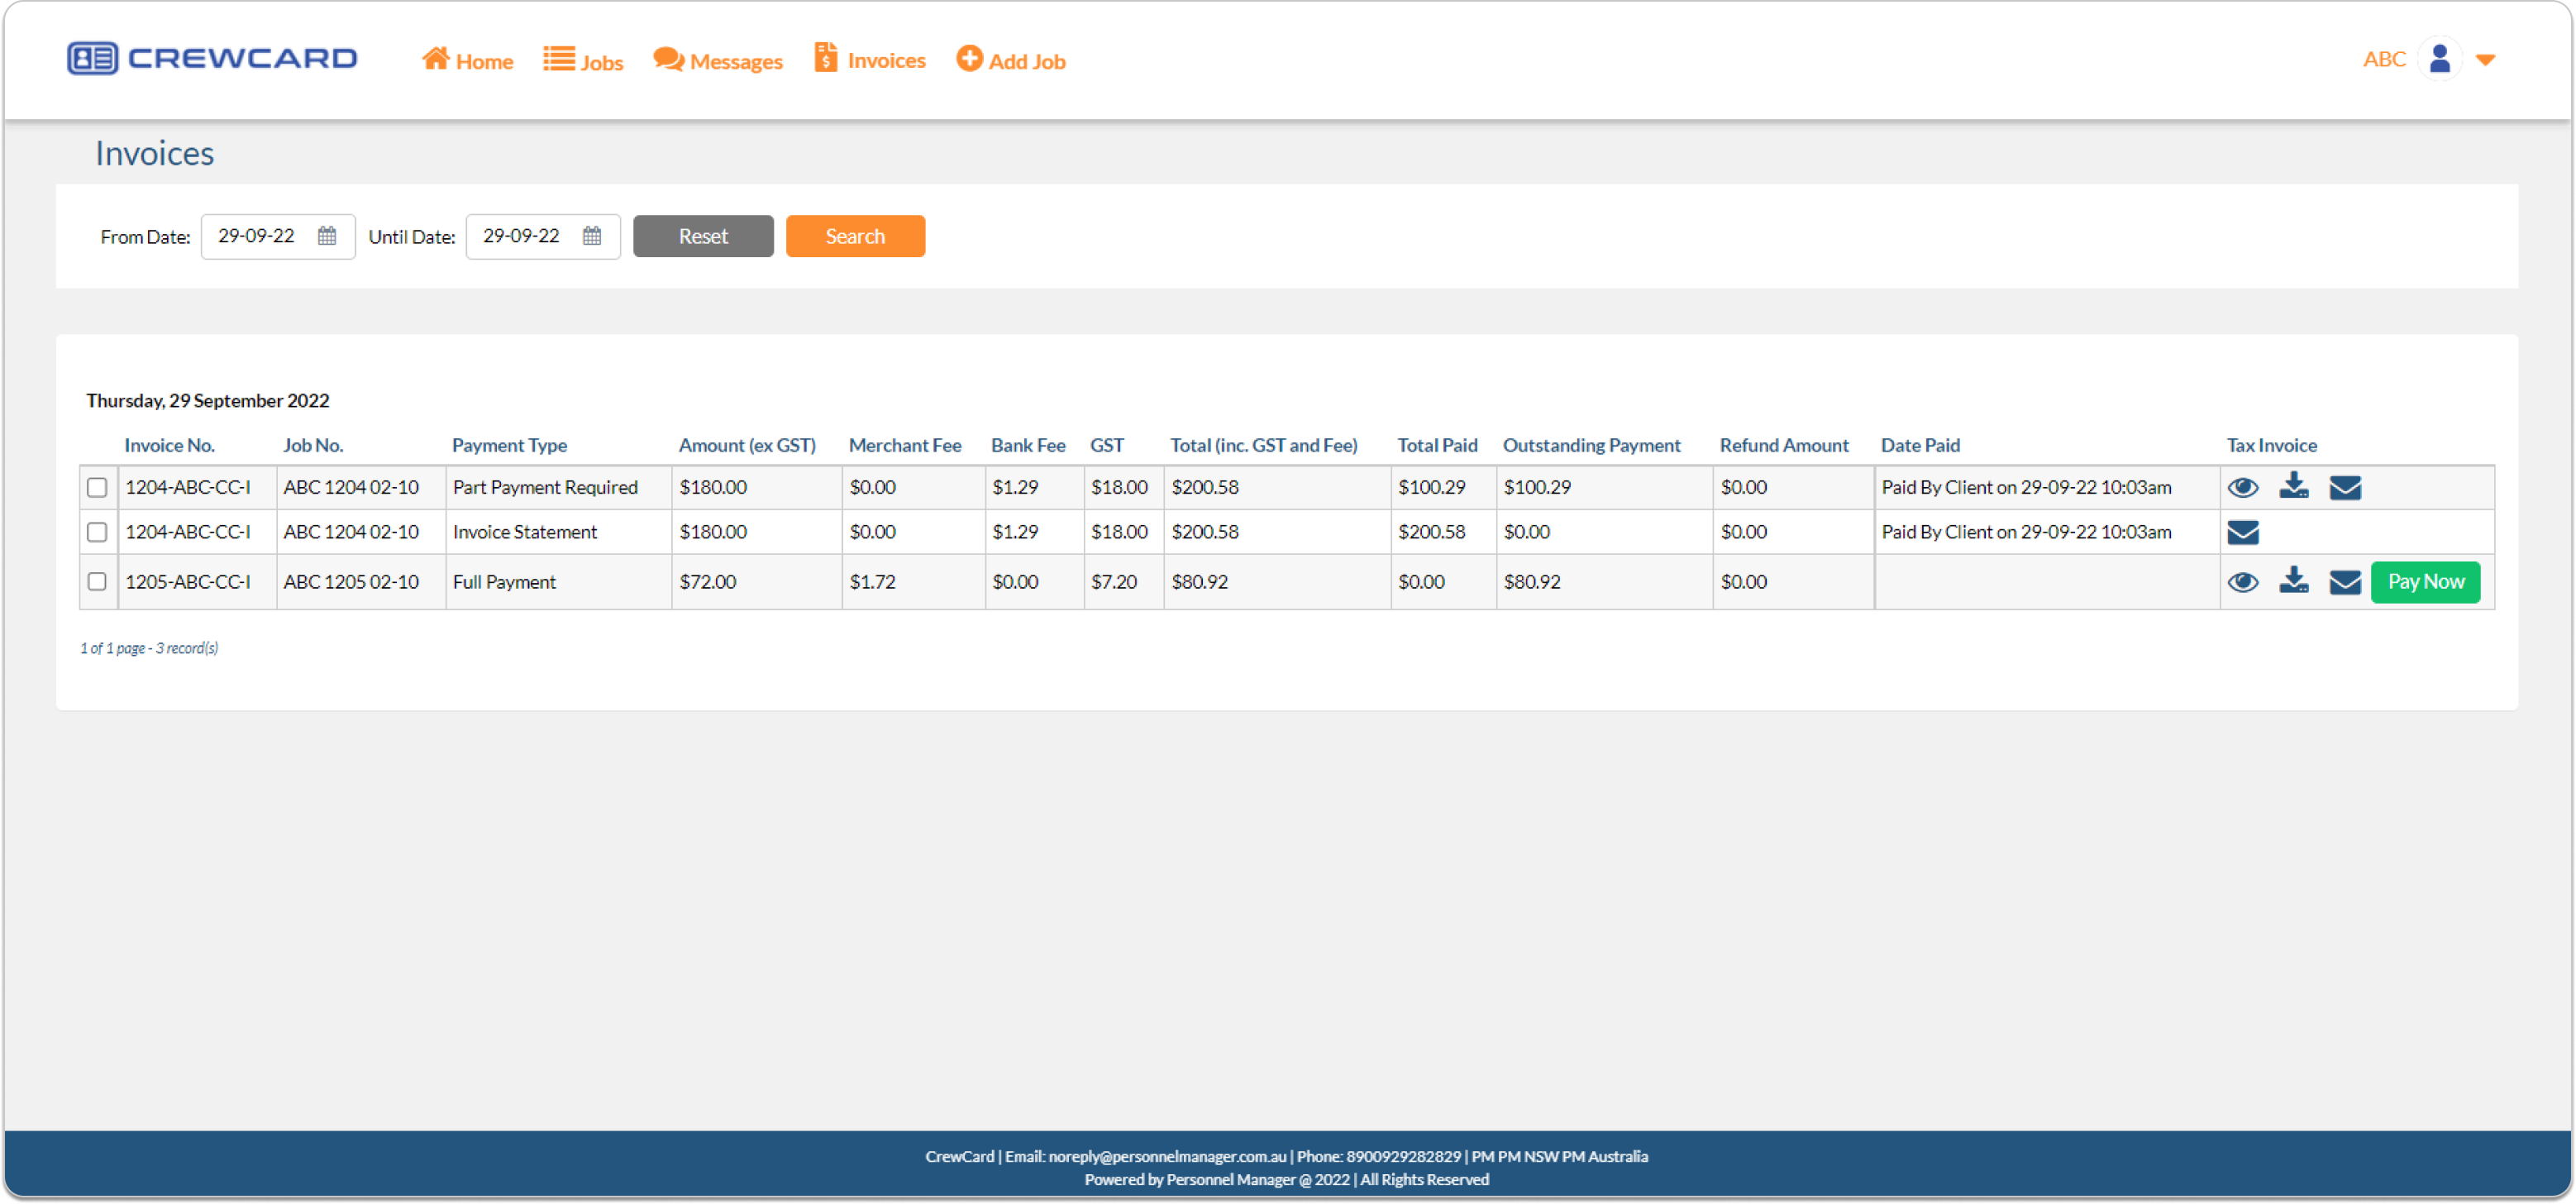
Clients can now access their invoice by going to the Invoices in the Central Navigation bar on the the top page of Client’s Portal.
Once Invoices is clicked you will be directed to the Invoices Page, wherein you can view, download and email invoice.
Invoice advance search will allow you to search the invoice by date range.
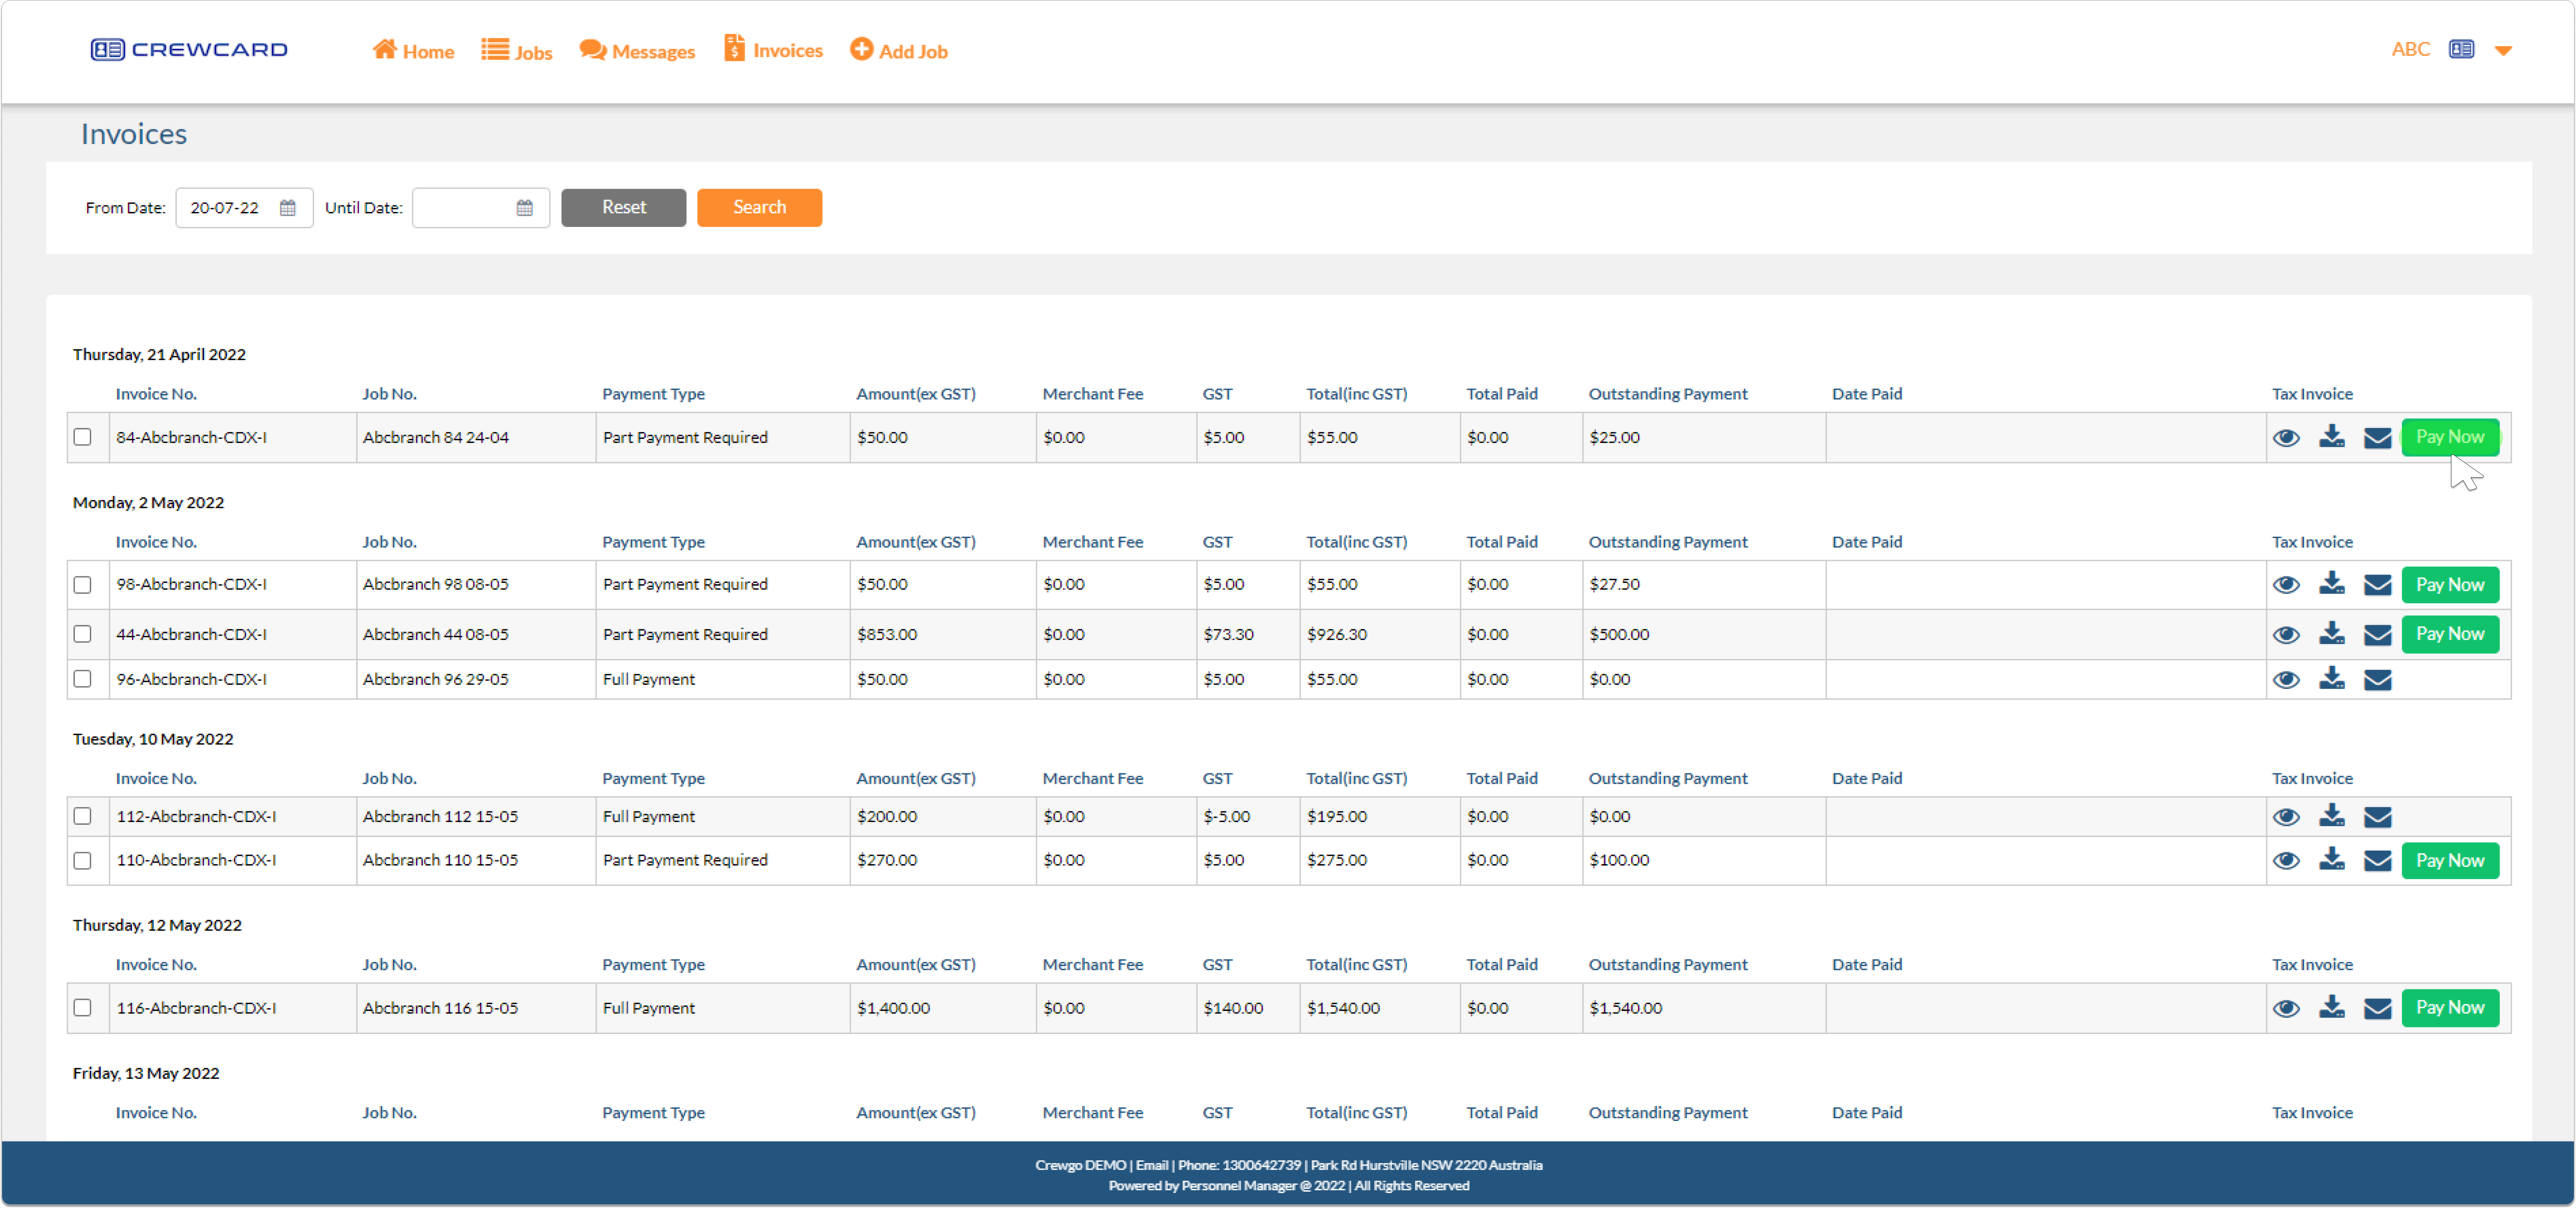
The Pay Now button only appears when the client did the part payment and still has outstanding payment. It will also direct the client to the Invite billing details page. To learn more about the billing details page, pls refer to (Billing details User Guide).
Invoice Date: Date when email invoice was sent by Admin.
Invoice No.: Invoice no in the invoice.
Job No.: Number allocated to the job.
Payment Type: Full Payment/ Part Payment.
Amount (ex GST): Total amount without GST.
Merchant Fee: Amount of fee to be applied (include % sign to use a percentage of invoice total).
Edit GST:In the case of international business, such as operations in the USA, CrewCard has the option to edit the GST to a number other than the fixed Australian rate. This can be done when accessing an invoice, where a tick box can be selected to either an entered amount, OR percentage. If the tick box is not selected, the default 10% will be applied.
Total (inc GST): Total amount including GST.
Total Paid: Total amount paid by the Client.
Outstanding Payment: If the client paid the full payment then the outstanding amount should reflect as 0 while Client who made part payment should reflect the remaining amount to be paid.
Refund Amount:The amount refunded applied to the client’s invoice.
Date Paid: The date when the client made the payment.
View Invoice: Click to view the invoice.
Download Invoice: Click to download the invoice.
Email invoice: When clicked the email invoice will pop up, enter the email address you wish to send the invoice.
In the Client’s Portal, Go to the Invoice Page. Select the invoice you want to pay Click Pay Now button.
Click the Pay Now button.
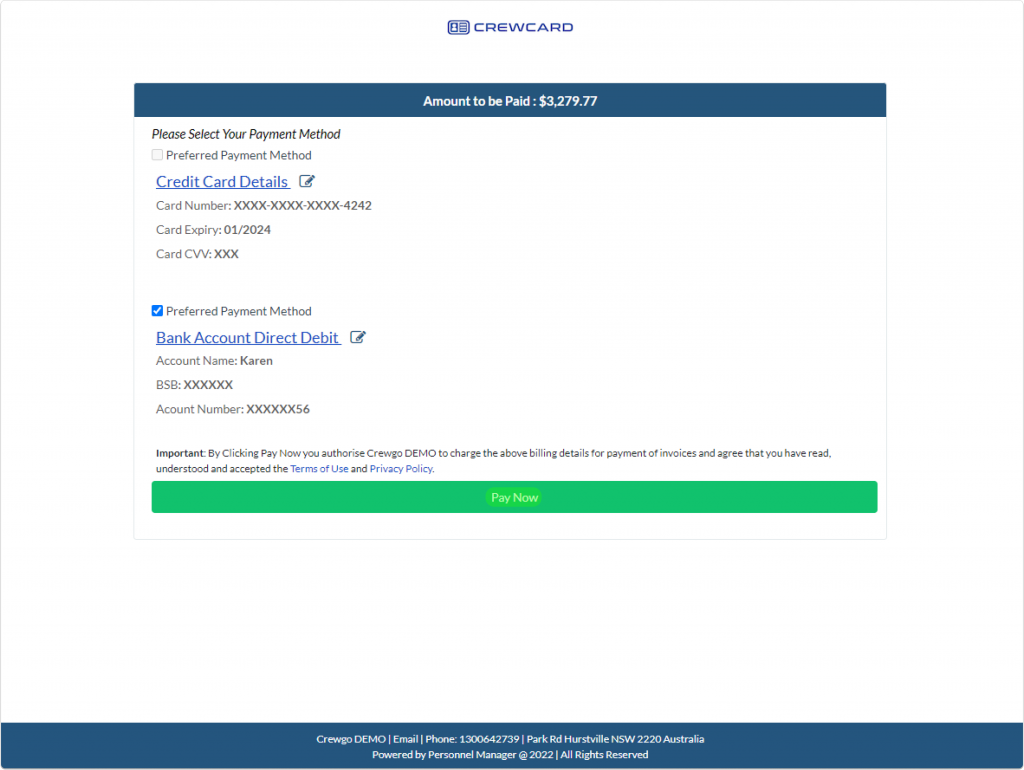
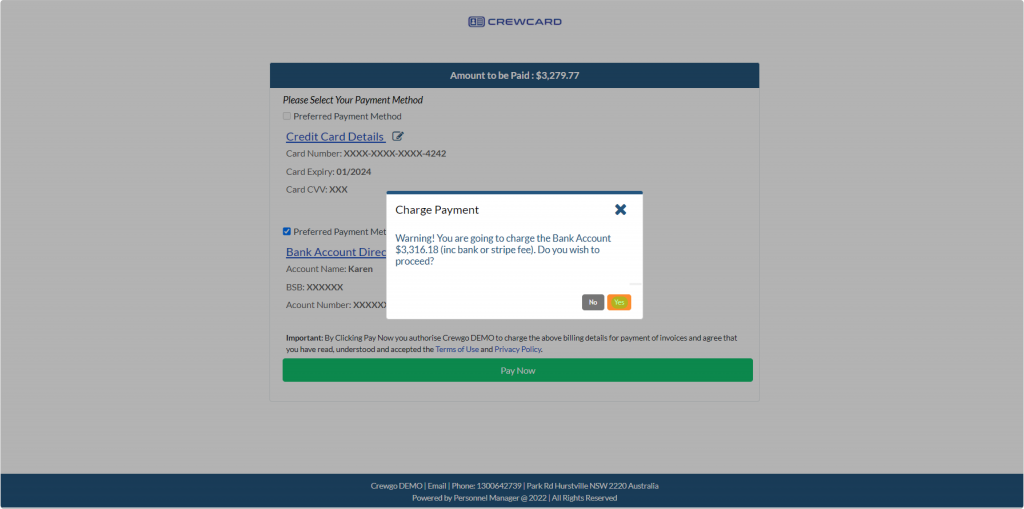
The Charge Payment window will open and notify you of the Amount to be charged to your bank account including the Merchant or Bank Account fee. Click yes if you wish to proceed with the payment.
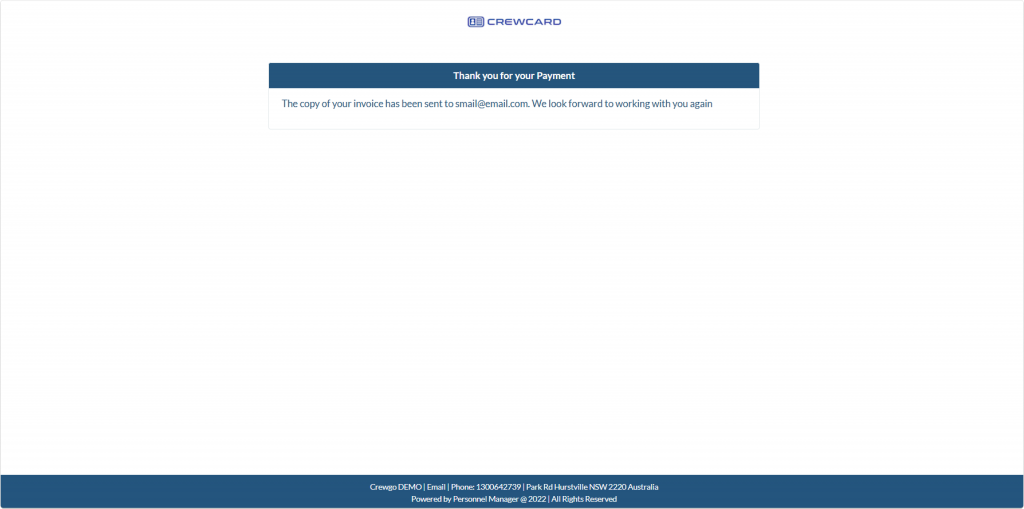
Clients will be directed to the Thank you for your Payment page and will receive a Customer Payment Email for confirmation.
Even if the admin has already issued the invoice or the client has already received it, the client has the option to change their preferred payment method. After receiving the invoice, clients can switch to a different preferred payment method.
Clients will be alerted through email after the invoice has been received, and the invoice email will seem as follows:
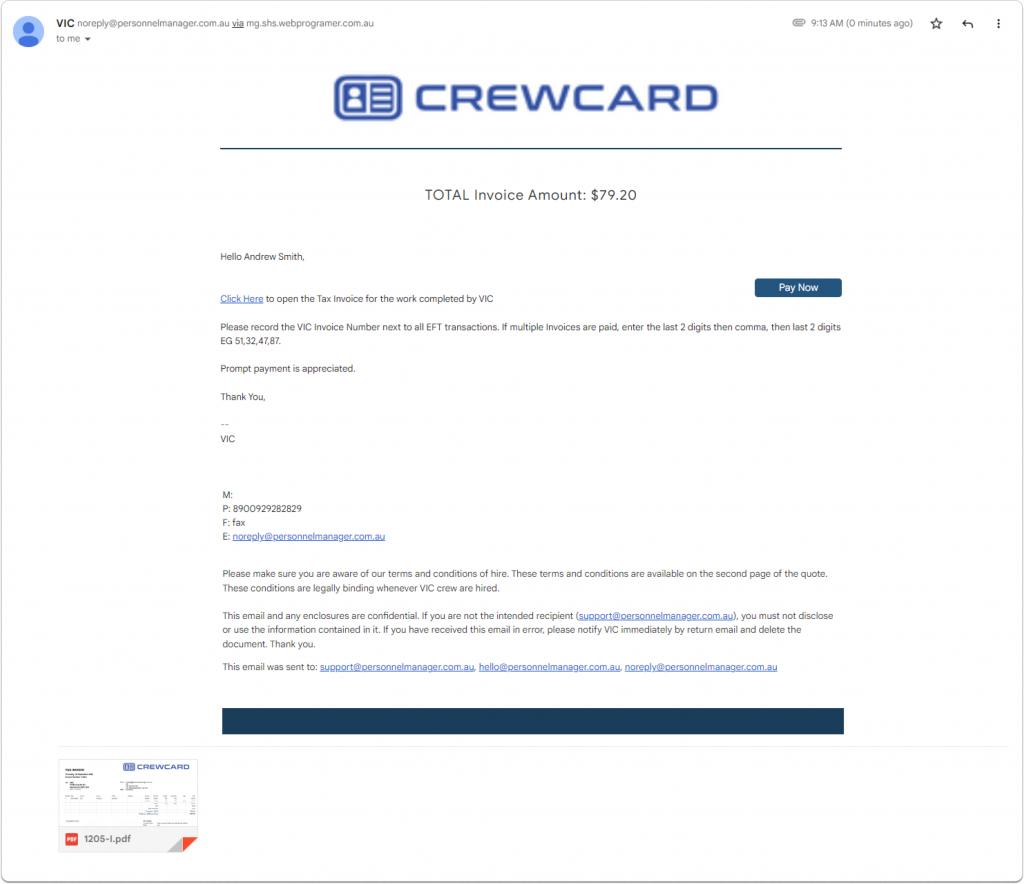
The pay now button can be clicked by clients from the email or by logging into the client portal, going to the invoices page, and choosing the invoice that has to be paid.
Clients will be taken to the Pay Now Page after clicking the Pay Now button, where they can modify their preferred payment method by selecting the edit icon next to either their credit card information or their bank account direct debit.
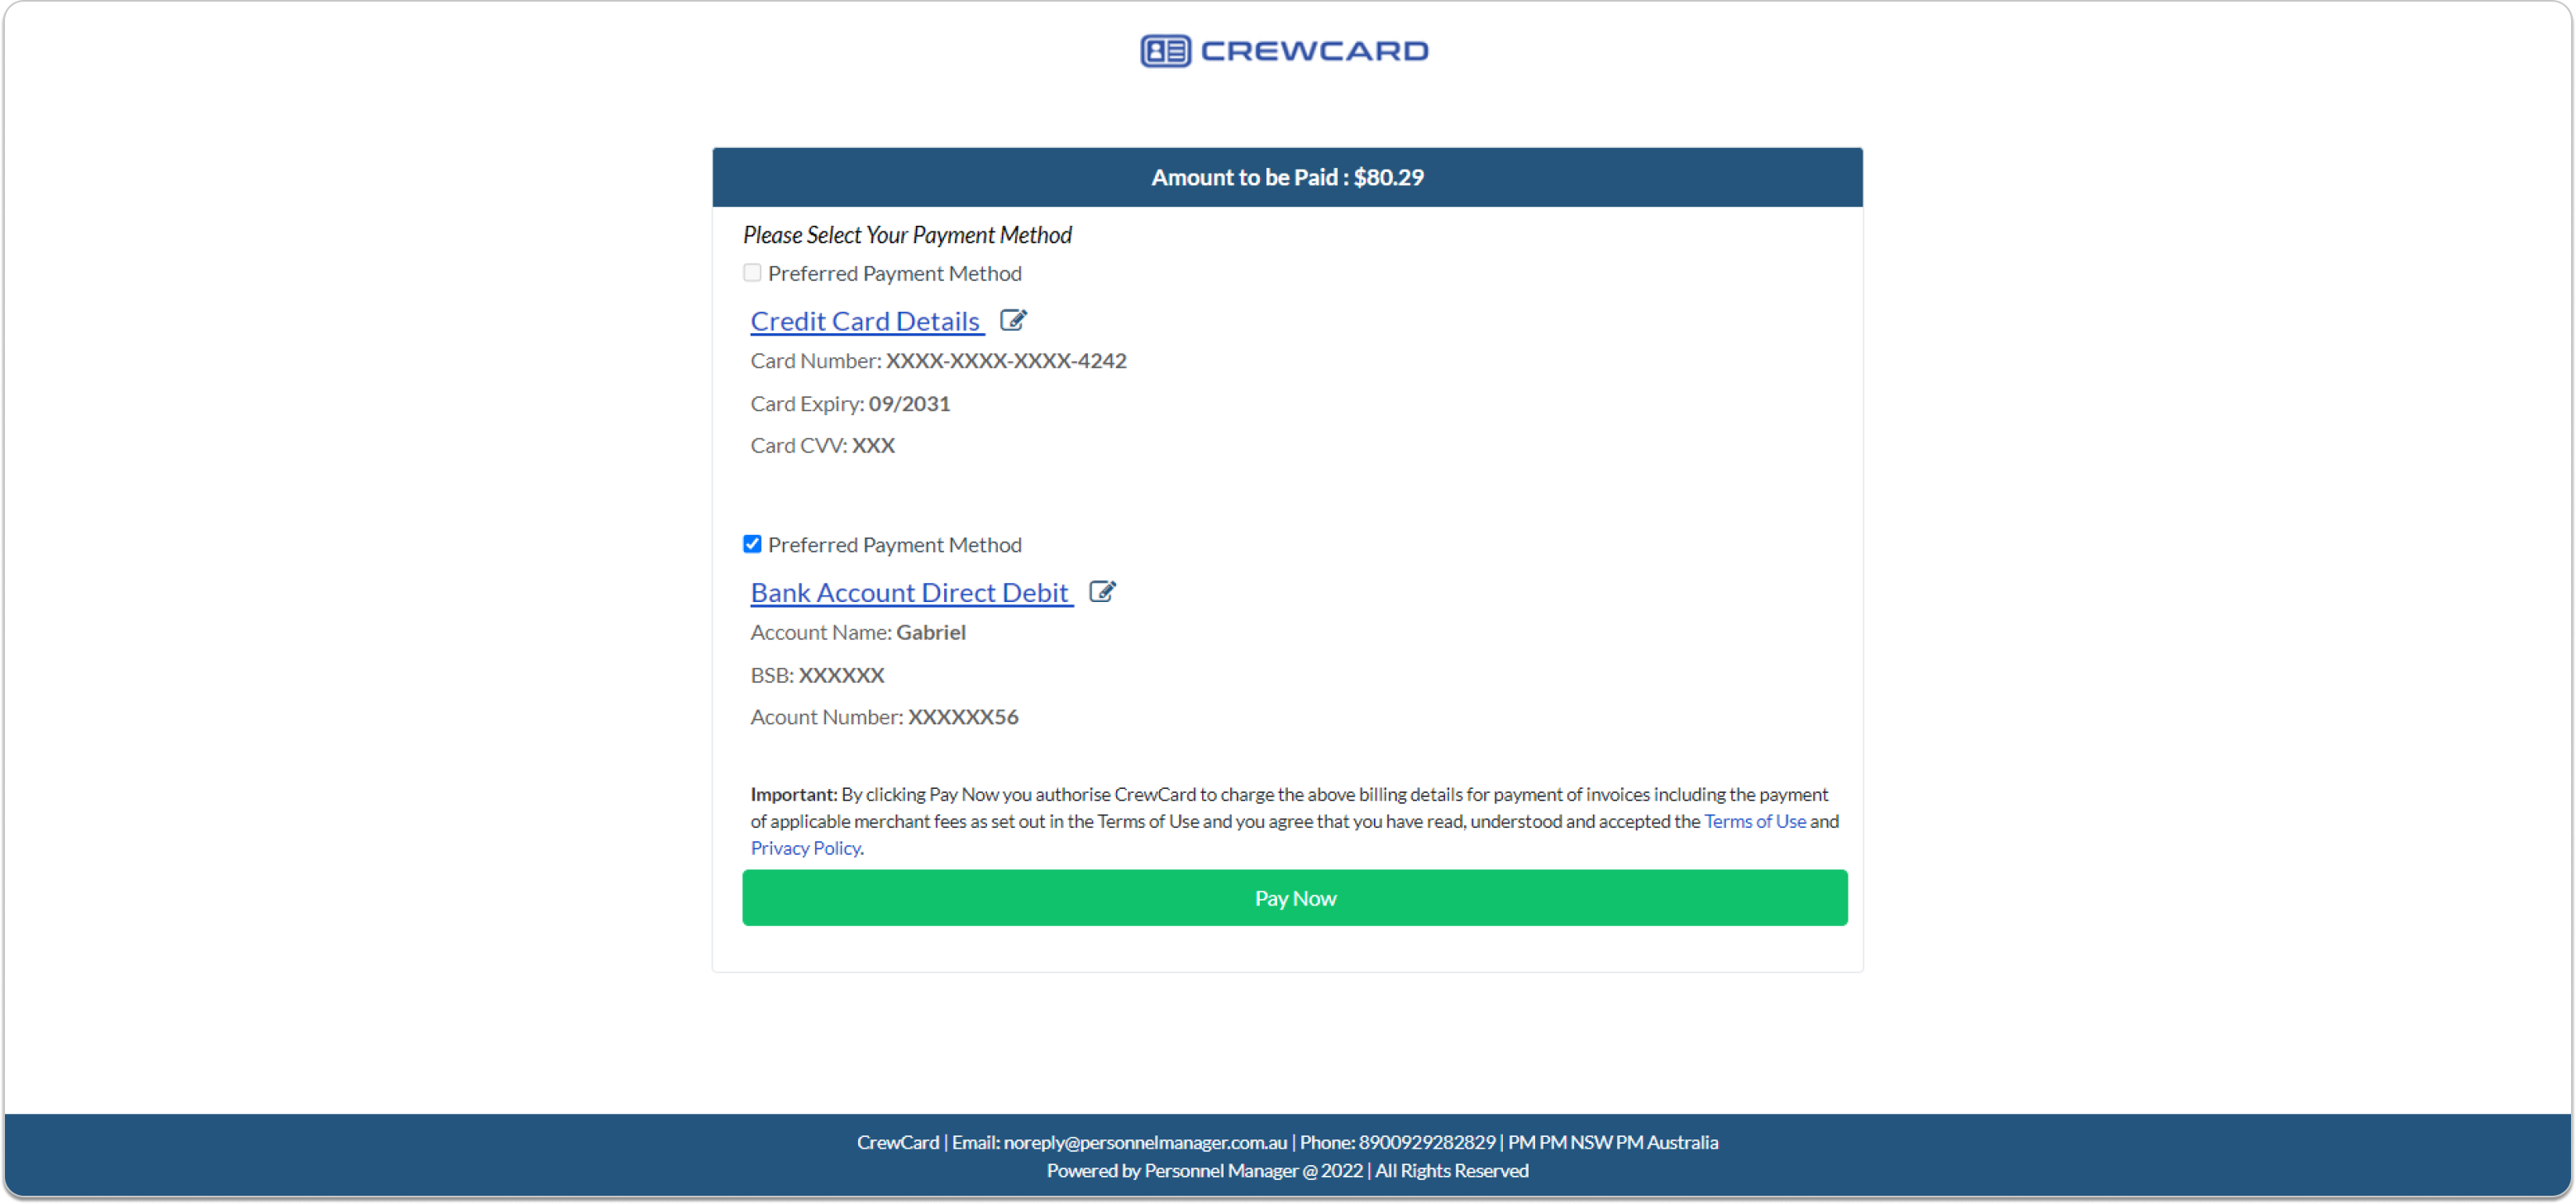
This will take you to the Billing Details page. Uncheck the checkbox next to your current preferred payment method and check the box next to your preferred payment method.
The Client’s current preferred payment method, for example, is Bank Account Direct Debit. Remove the checkmark from the checkbox.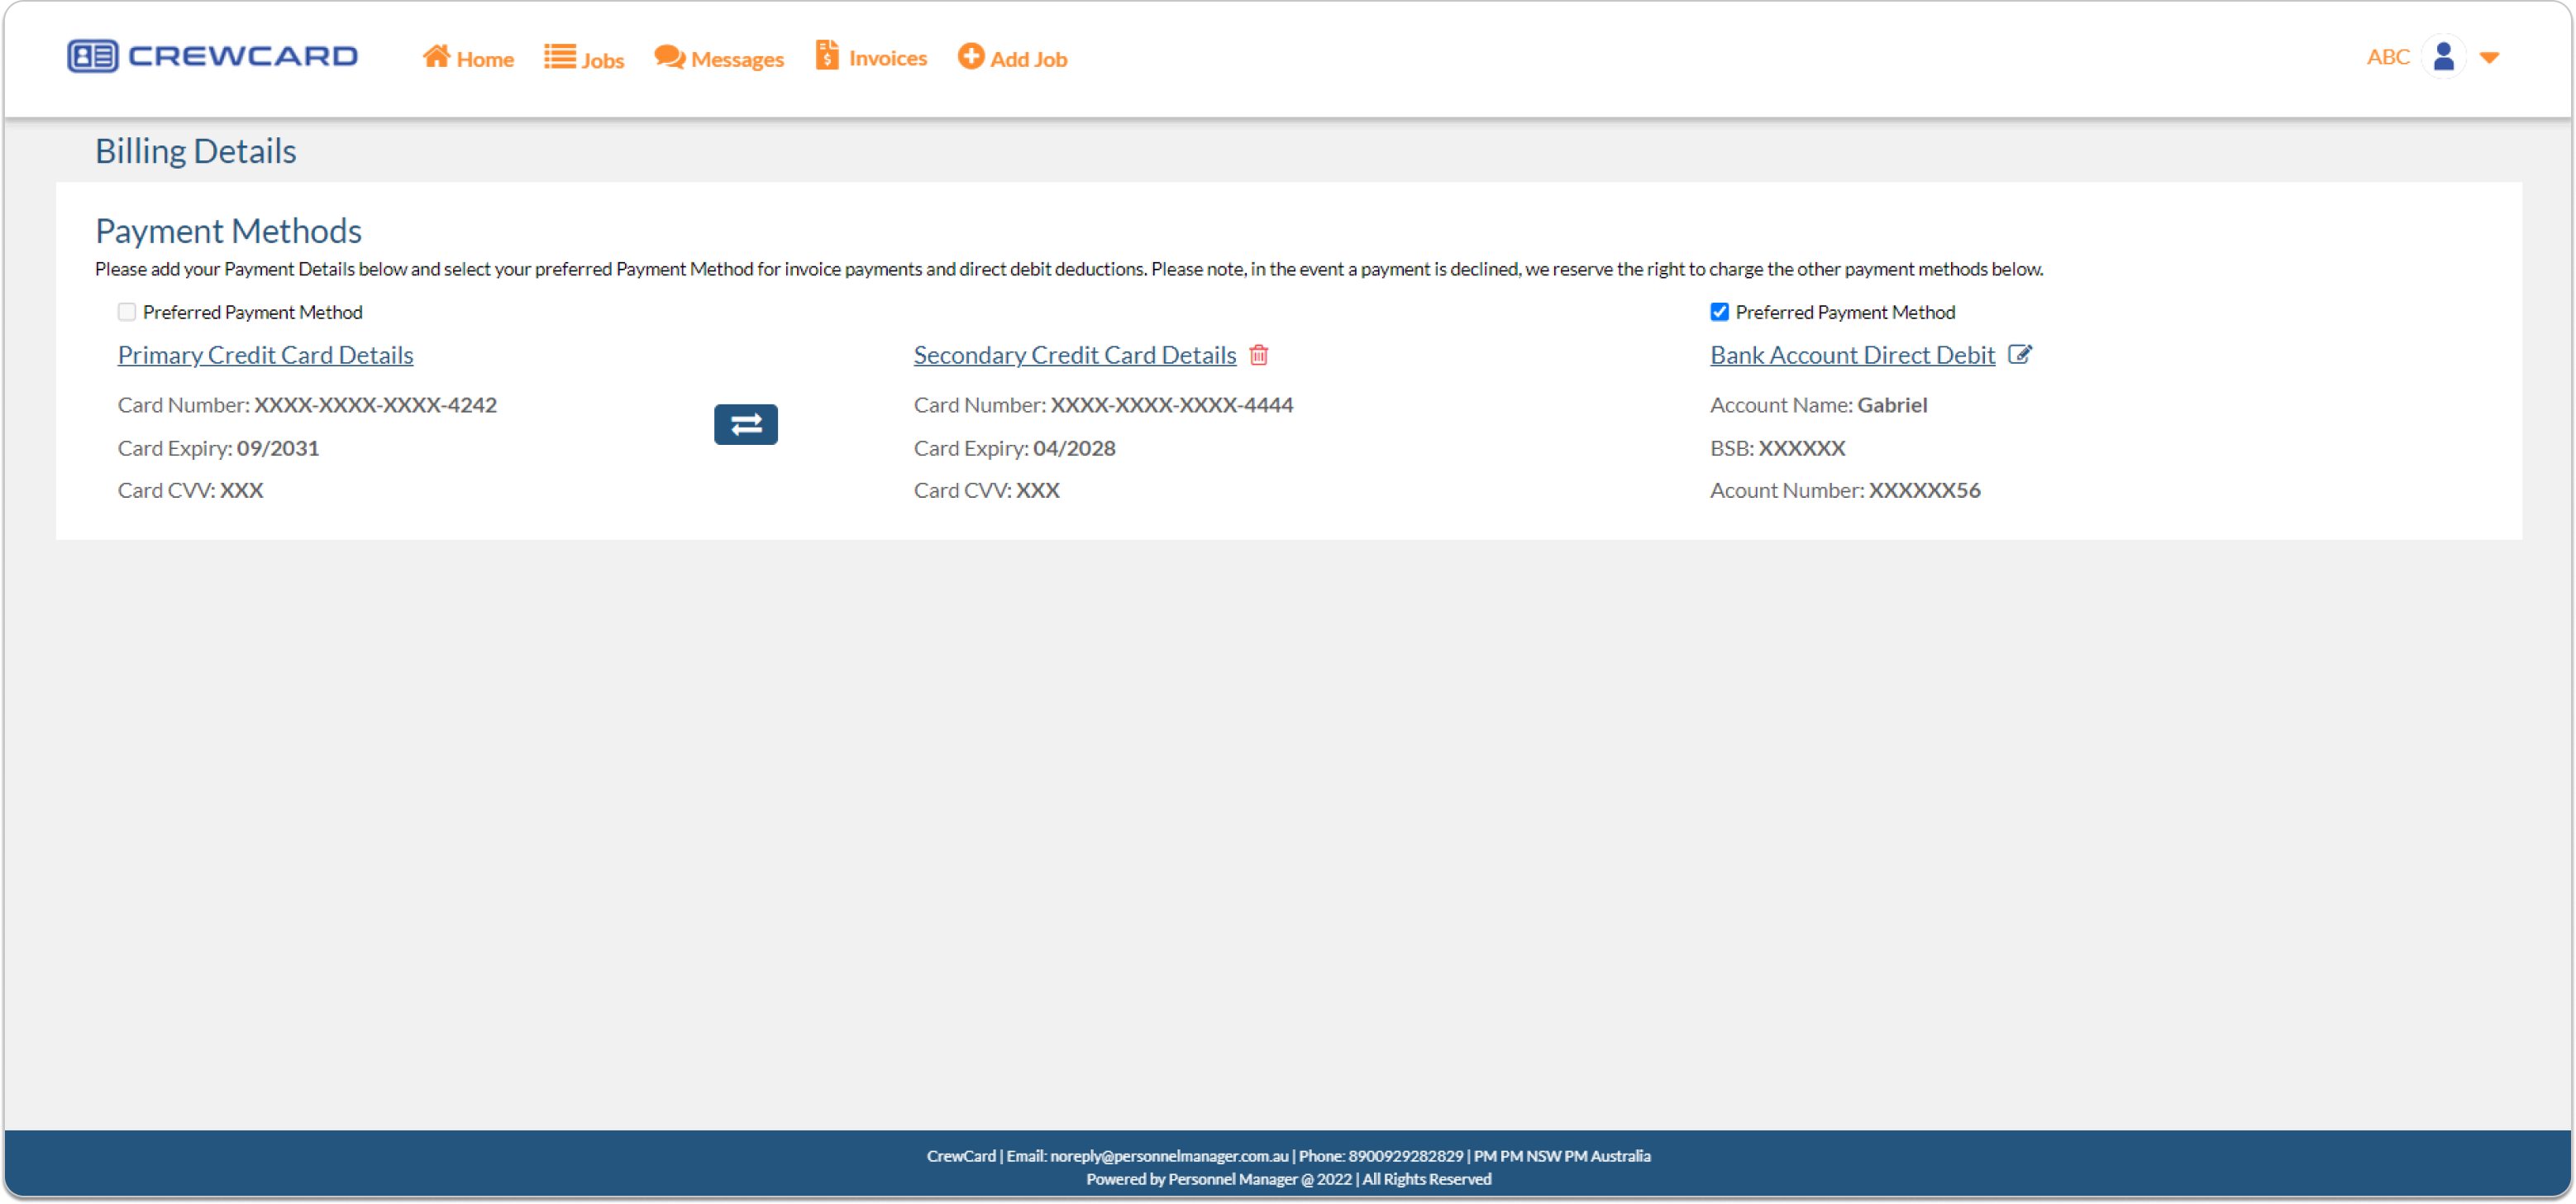
Additionally, select Primary Card Credit Details as your preferred payment method.
Return to the invoices page, and you’ll see that the invoice has been recalculated based on your preferred payment method.
Complete your payment transaction by clicking the Pay Now button.
Please keep in mind that the client may also click the Pay now button in the email that they received; however, once the button is clicked, the updated amount after the preferred payment method will be displayed.
Live chat to the admin of the account. Click Messages and the message window will open.
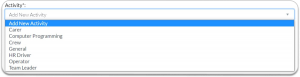
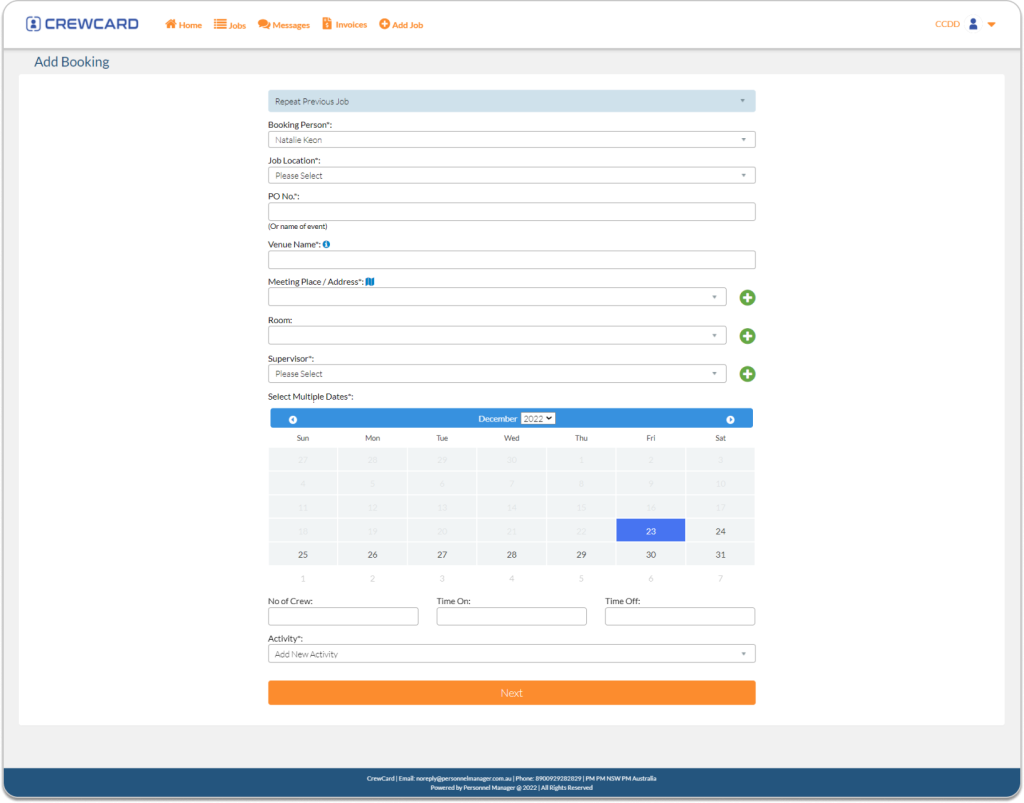
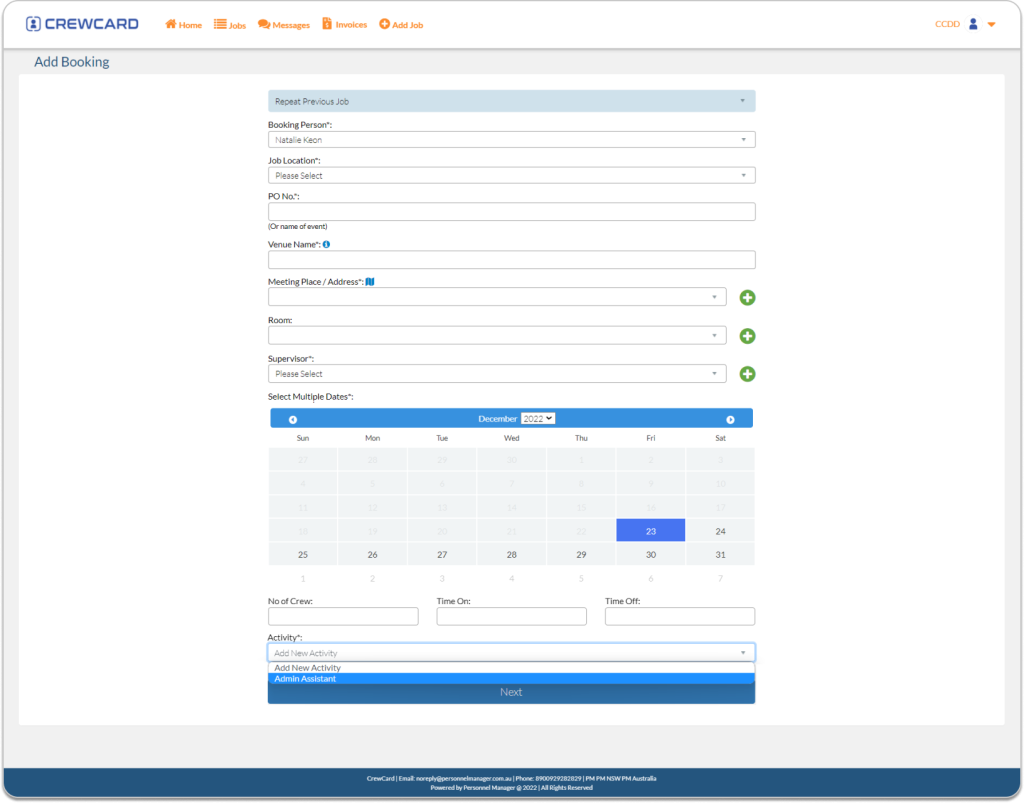
For a new job, CrewCard does provide a feature called Add Job. To access said feature, on the homepage, please select Add Job on the top menu.
Once on the Add Booking page, please input the following information:
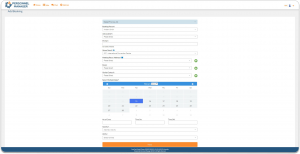


To finish please select Next.
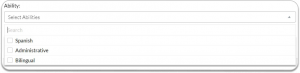
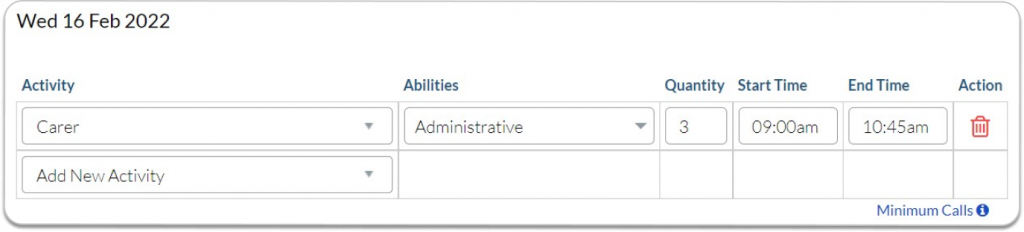
On the Job Details page please input/confirm the following information for each date.
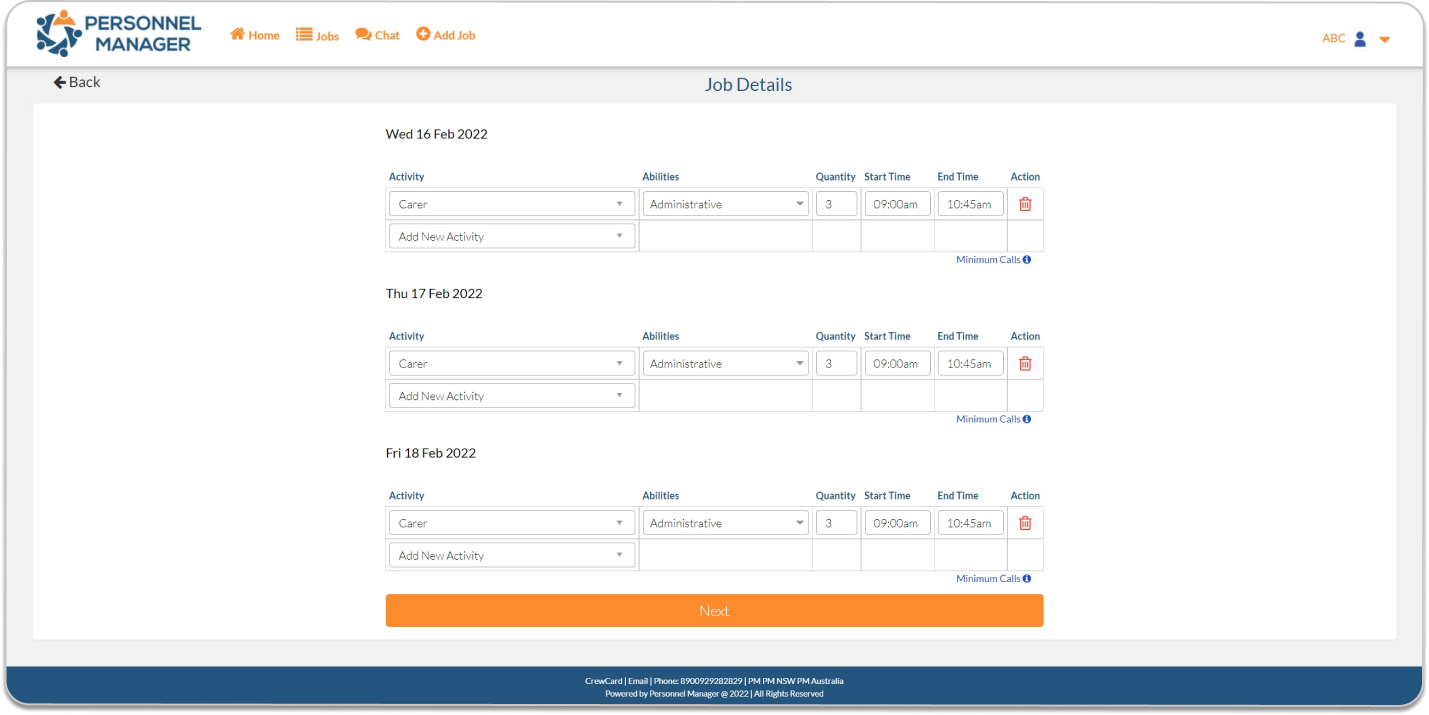
There is also an option to delete or add a new Activity. Once confirmed please select Next.
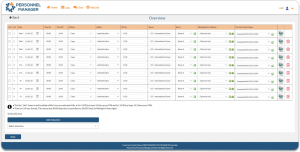
On the Overview Page, a summary of the Jobs to be created is shown together with the corresponding information.
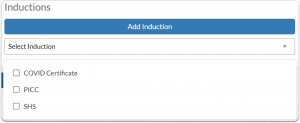
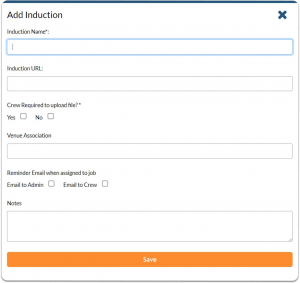
There is also an option to select from the pre-existing Inductions or add a new Induction. Once confirmed please select Next.
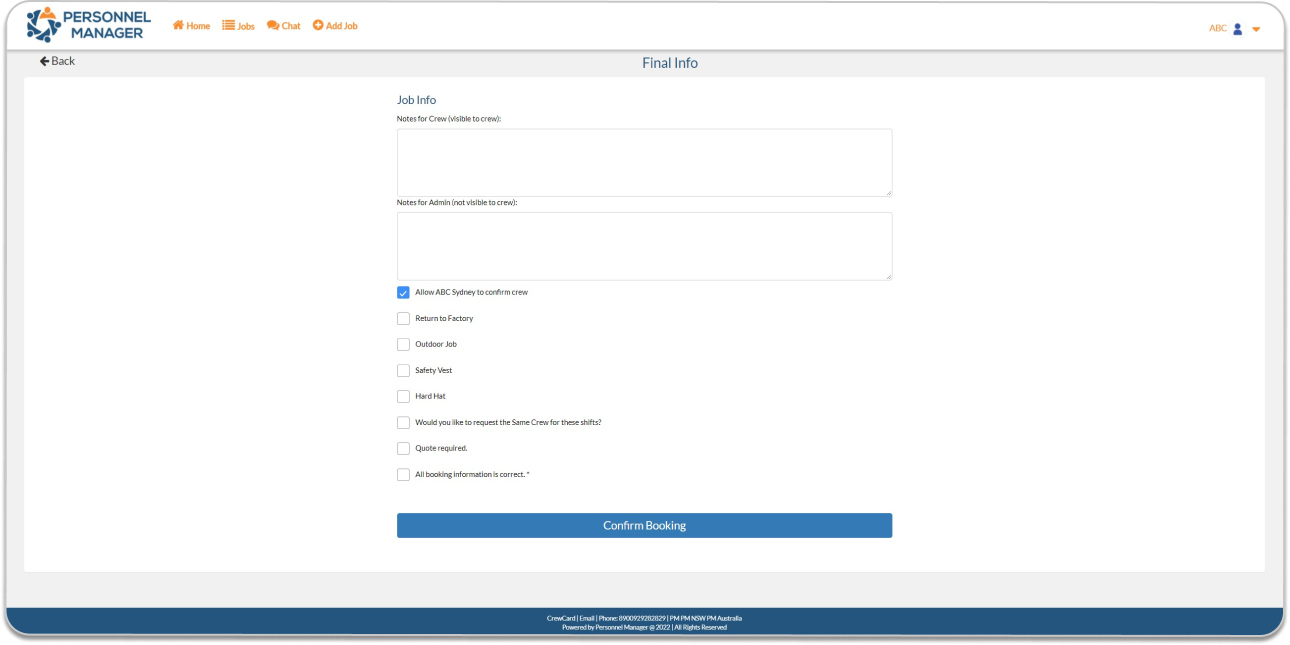
On the Final Info page, you may be able to leave notes for the Crew and Admin also additional requirements may be set here. Once confirmed please select Confirm Booking.
Once the booking is successful you will be redirected to a confirmation page showing the status and details of the created job.

CrewCard makes it easy for Admin to limit clients ability to book a jobs based on their activity. Please email support@personnelmanager.com.au with any queries or concerns.
Admin Portal
Navigate to the Client Profile and scroll down to the bottom of the page.
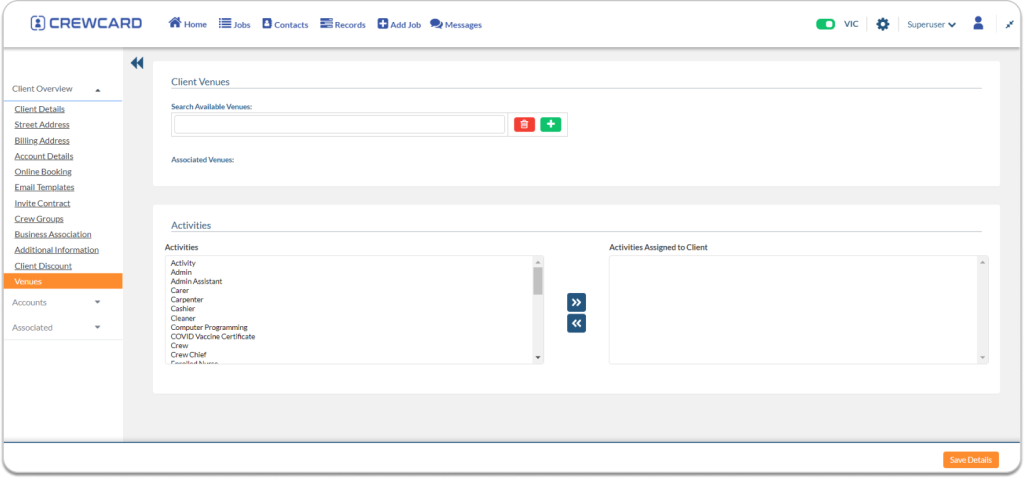
Select an activity to assign to the Client in the Activities section by clicking the right arrow button.
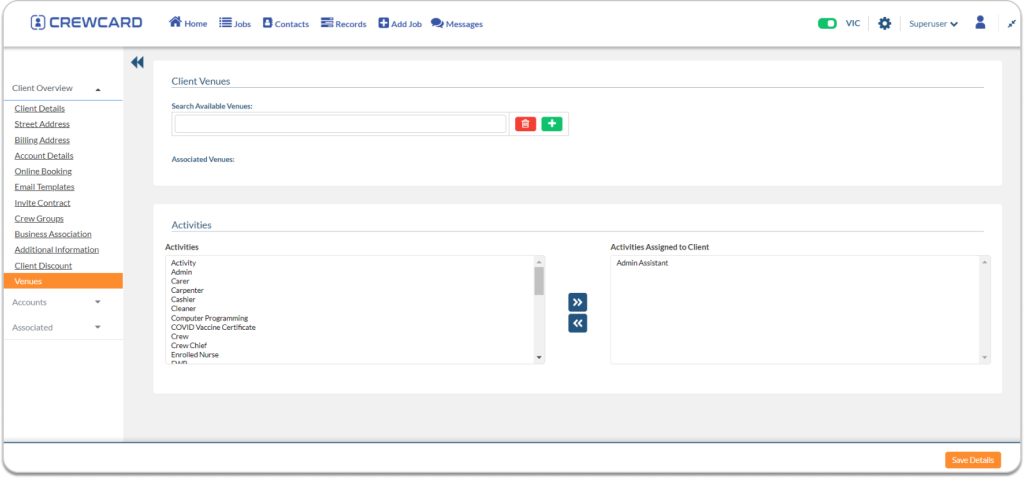
After assigning an activity to the client, click the Save button.
Client Portal
In the center navigation bar, click the Add Job button.
Fill out the booking form.
Because Admin only assigns this activity to the specified client, the client will only be able to book a job for Admin Assistant activity in the activity area.
On the final step of client booking, a Final Step Disclaimer is displayed where the client must acknowledge and accept the terms before proceeding with the booking.

Admin can select activities that require a Final Step Disclaimer by going to the Activities page and clicking Edit.

On the Edit Activity page, there is a checkbox that can be ticked to enable the Final Step Disclaimer. Admins can also view or enter the disclaimer message that will appear on the final step of the client booking process.

Once the client clicks Accept, a copy of the disclaimer will be sent to their email.

Once the client clicks Accept, a copy of the disclaimer will be sent to their email.
The disclaimer will also be displayed in the footer section of the email.

Under Accounts in the Client Profile, logs are available showing when the client accepted the disclaimer.

Click View Details to see the date, IP address, and the changes recorded in the logs.

Details
Settings is more of a profile detail for your company. Enter the details of your company including ABN.
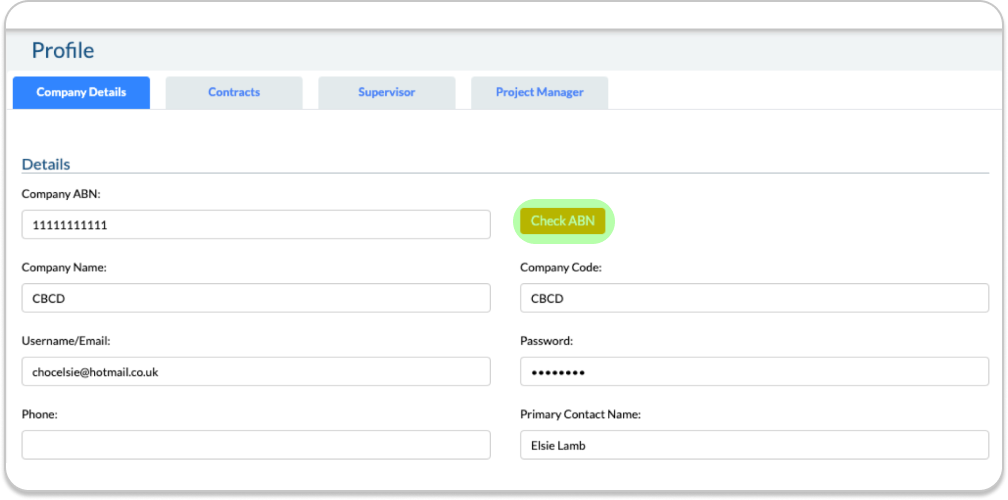
Check ABN will make sure the ABN you have enter is valid.
Account details is the contact in the company that will handle invoices.
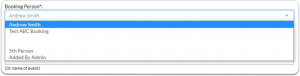
Primary booking person, is the key contact if there is any issues when created a booking, they will manage the bookings made.
Contracts
Contract are upload by the admin of the system they will be here, and need to be read and signed. You can come back and visit them at any time.
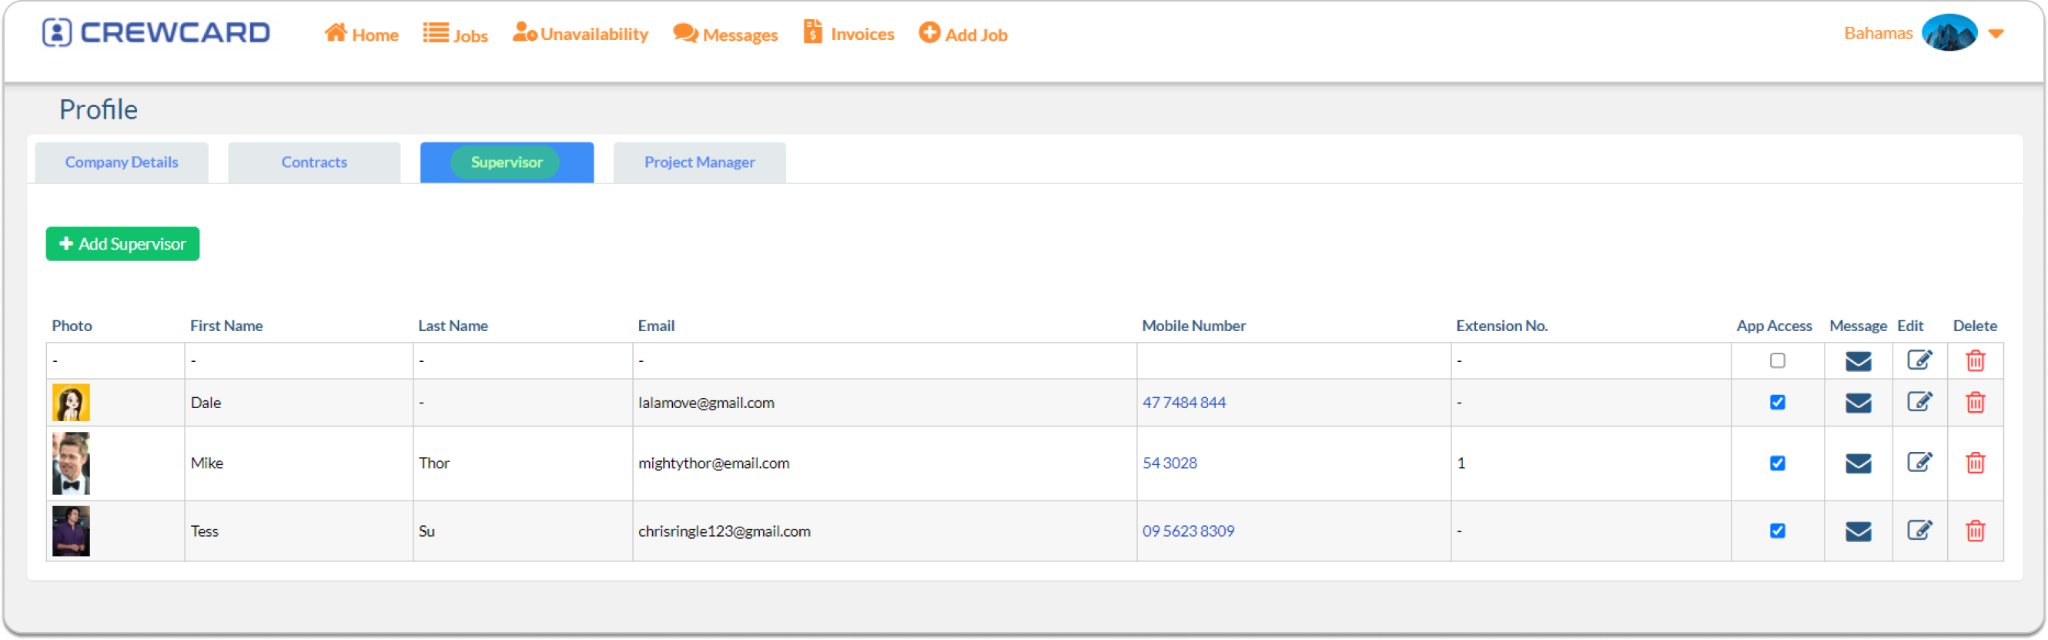
Supervisor
This page will store different supervisors that will be allocated to jobs when they are booked. You can add, edit and delete them.
Furthermore, clients have the ability to send SMS messages to their designated supervisors.
Navigate to the “Supervisor” tab within the settings section.
To initiate sending an SMS to your chosen recipient, hover your cursor over the “Message” column.
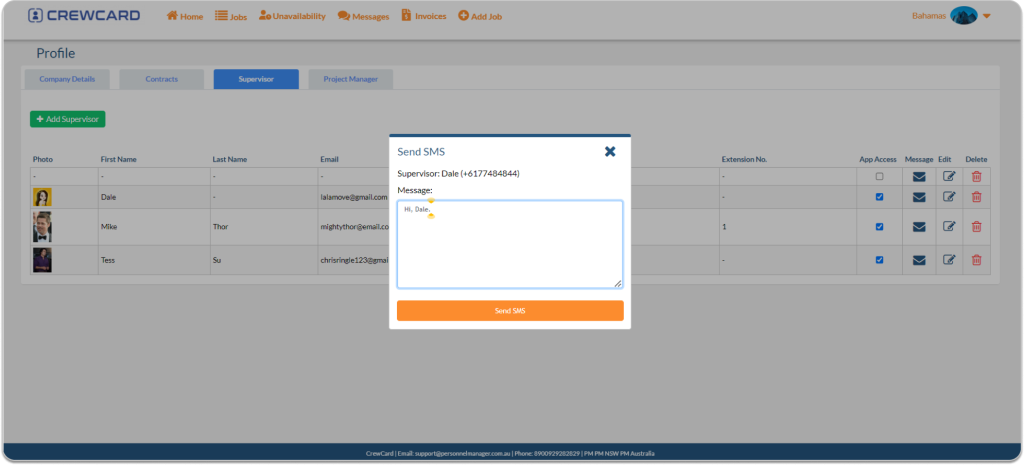
Once the SMS has been sent, a popup notification will appear.

Project Manager
This is the same as supervisor however, this will be the project manager for the over all job.
Clients are able to repeat jobs under the control of the admin. As seen below, the client’s account is unable to ‘Add Job’ – located in the central navigation bar -, nor are they able to ‘Repeat Job’ – there is no option to do so.
Under the account of admin, within the client profile overview, there is the option to enable online clients booking.
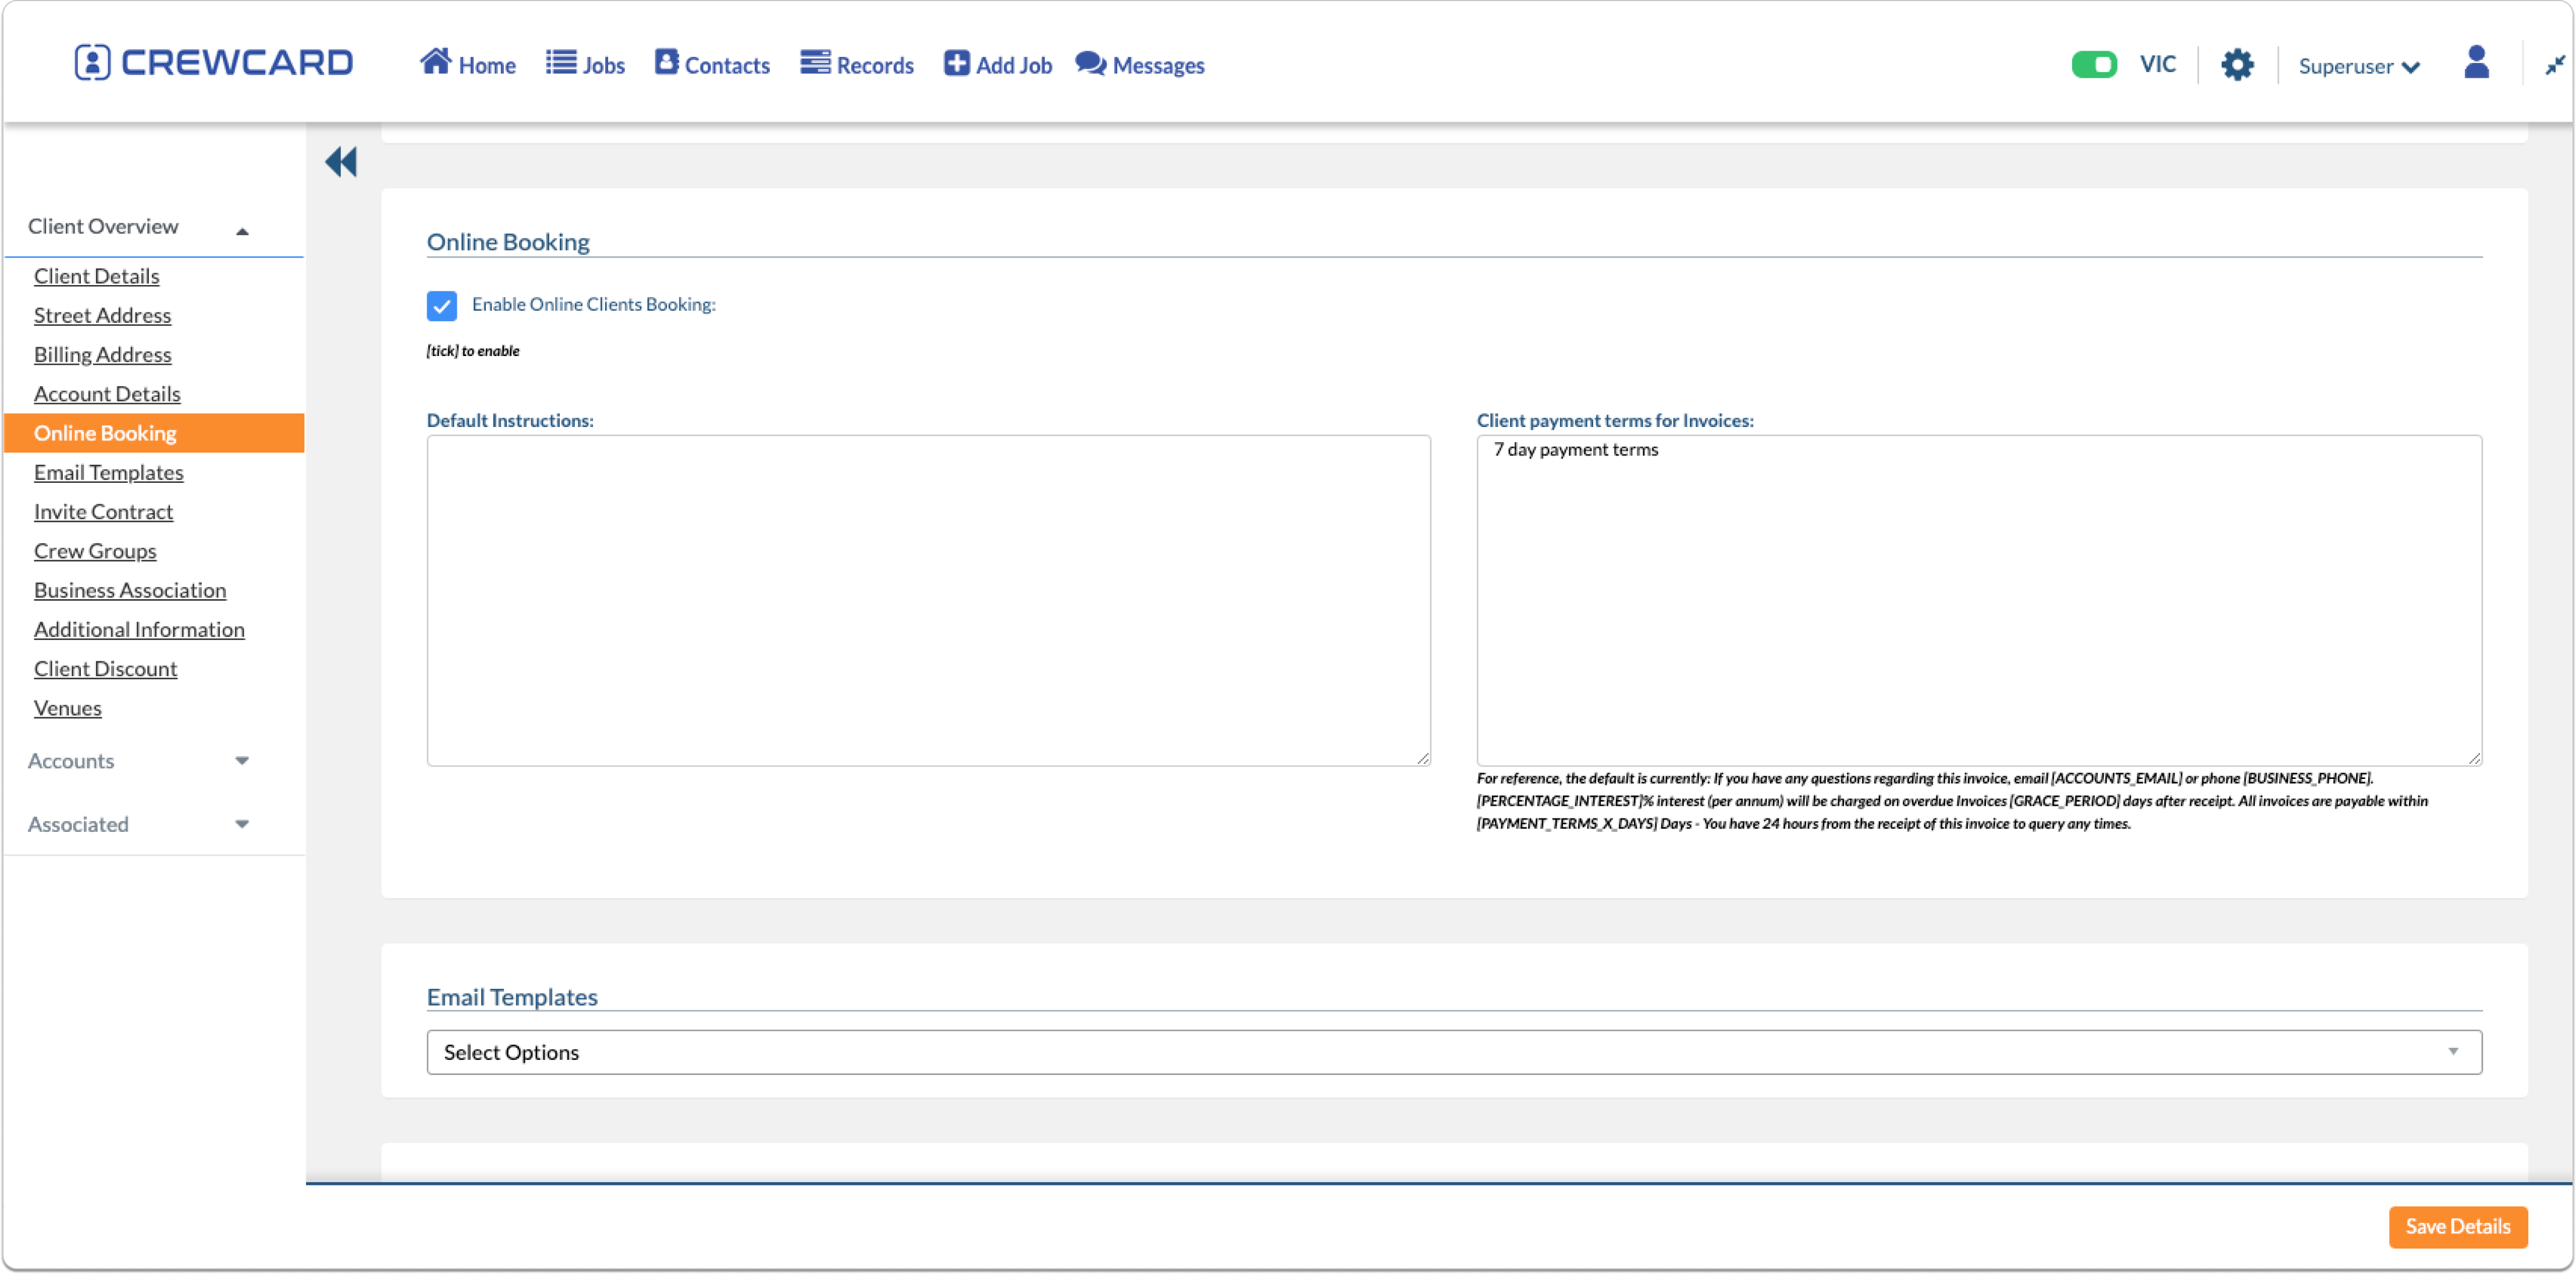
Once this tick box is checked, the client profile will have the option to Add Job and Repeat Job.
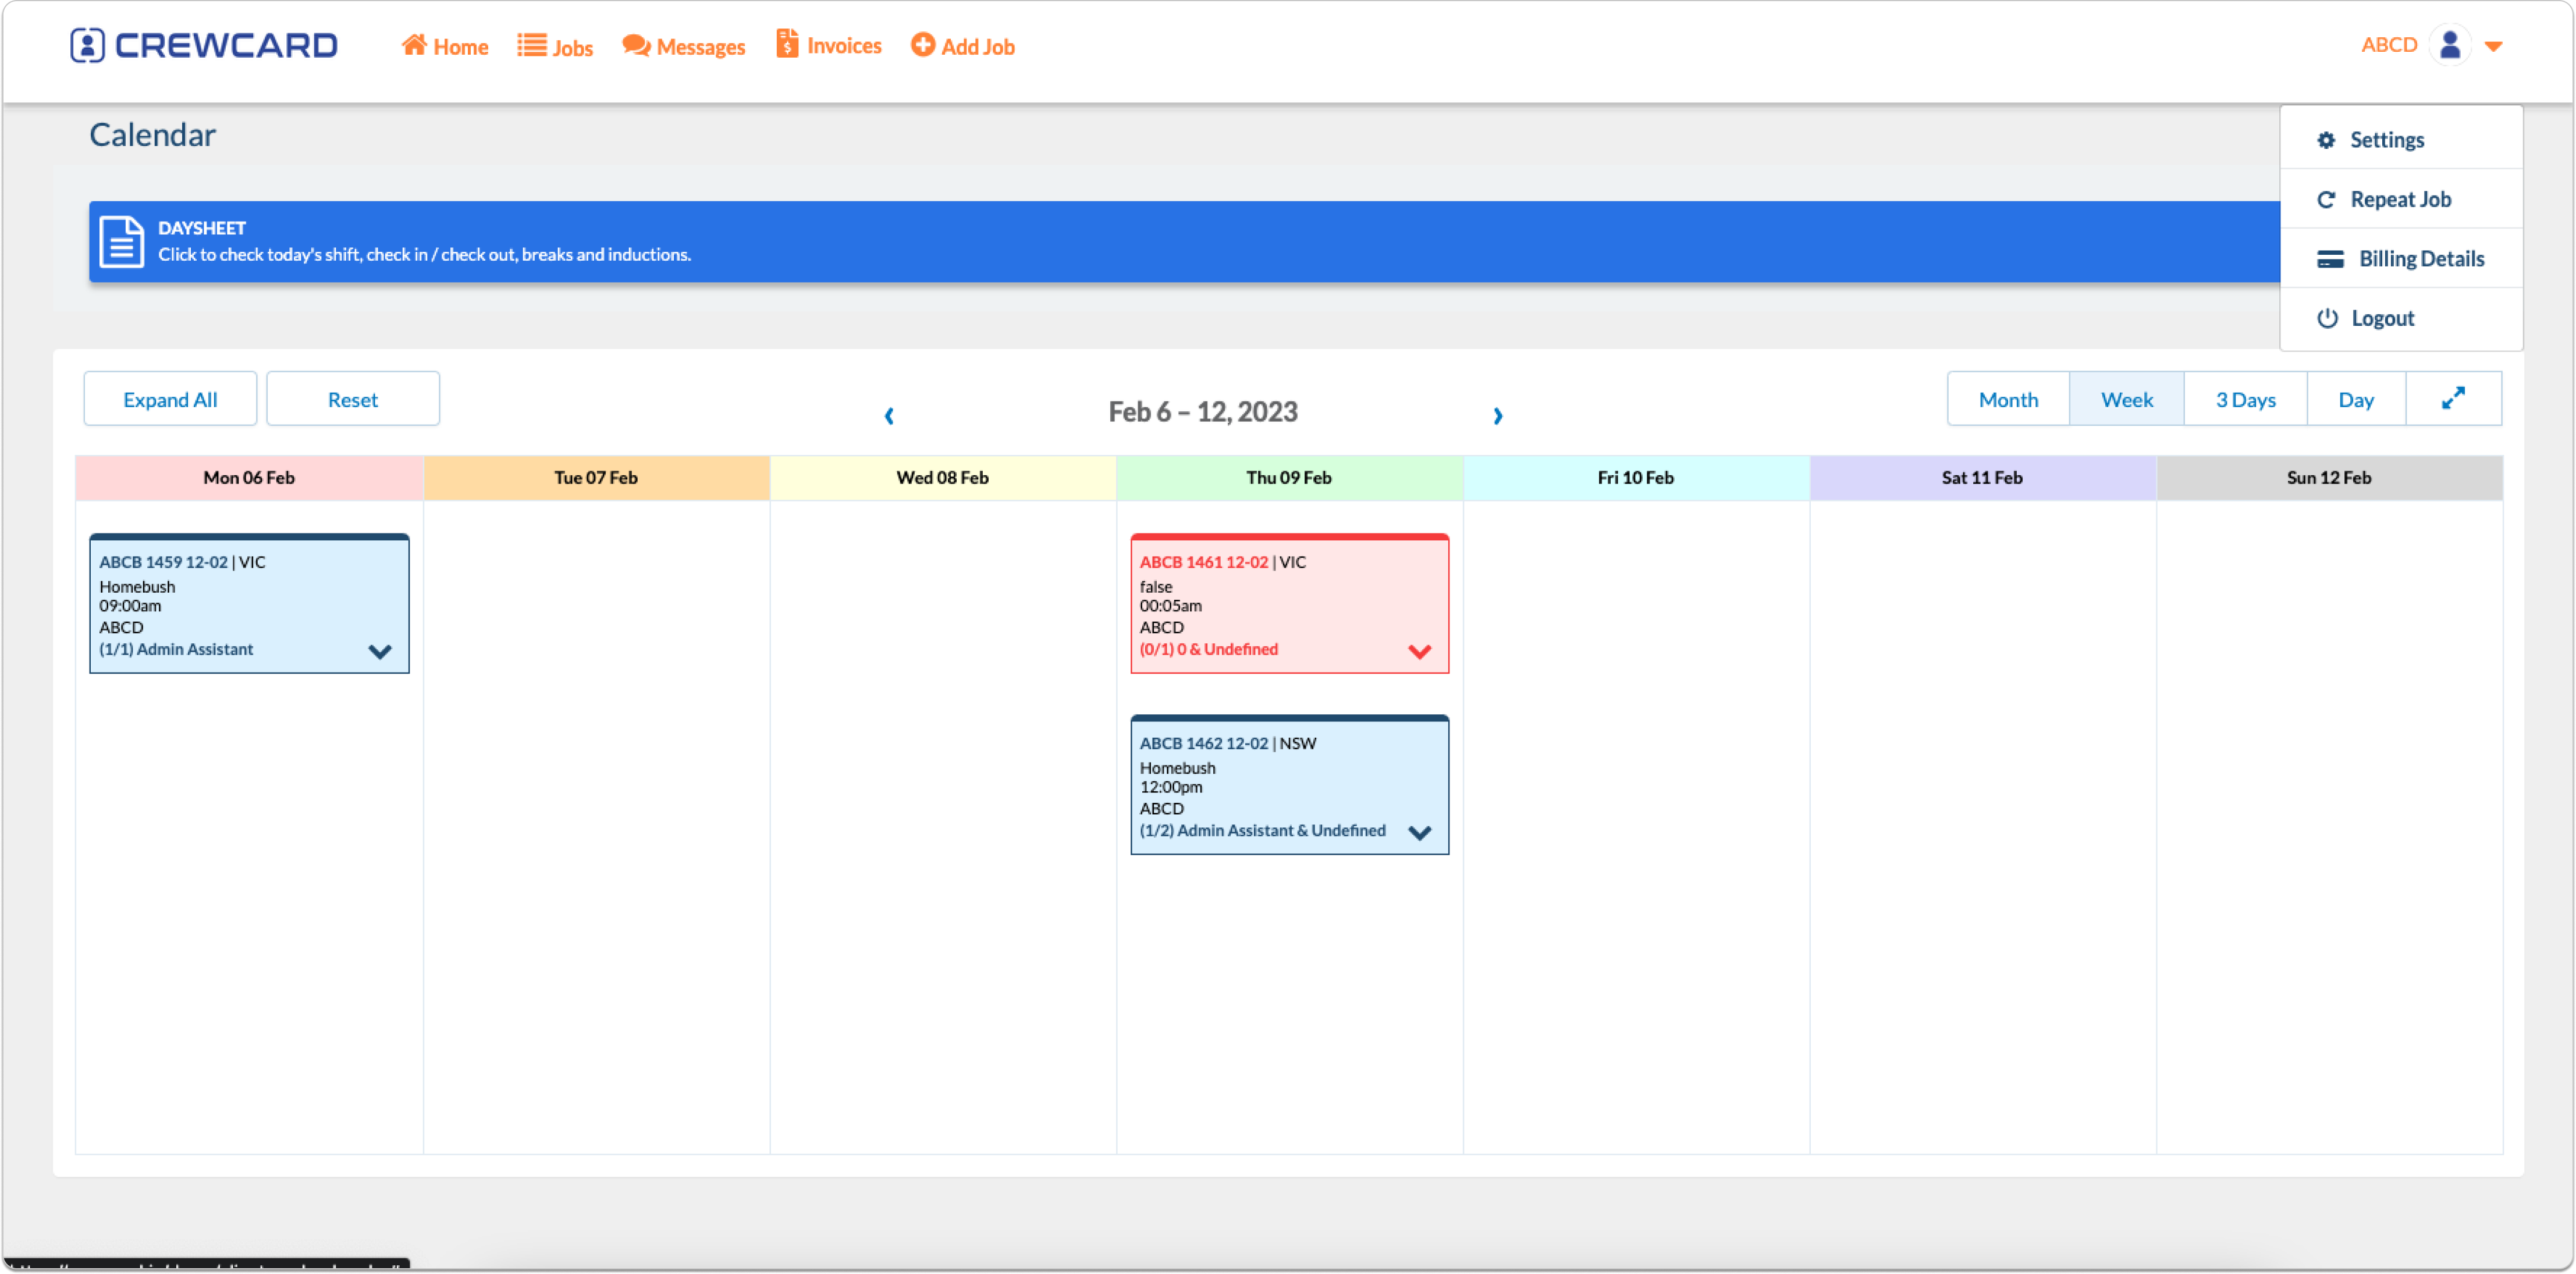
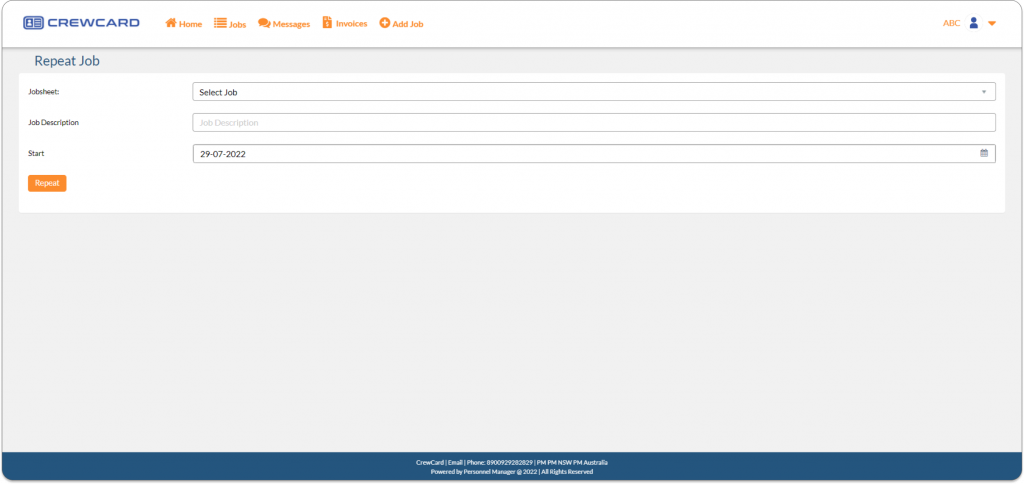
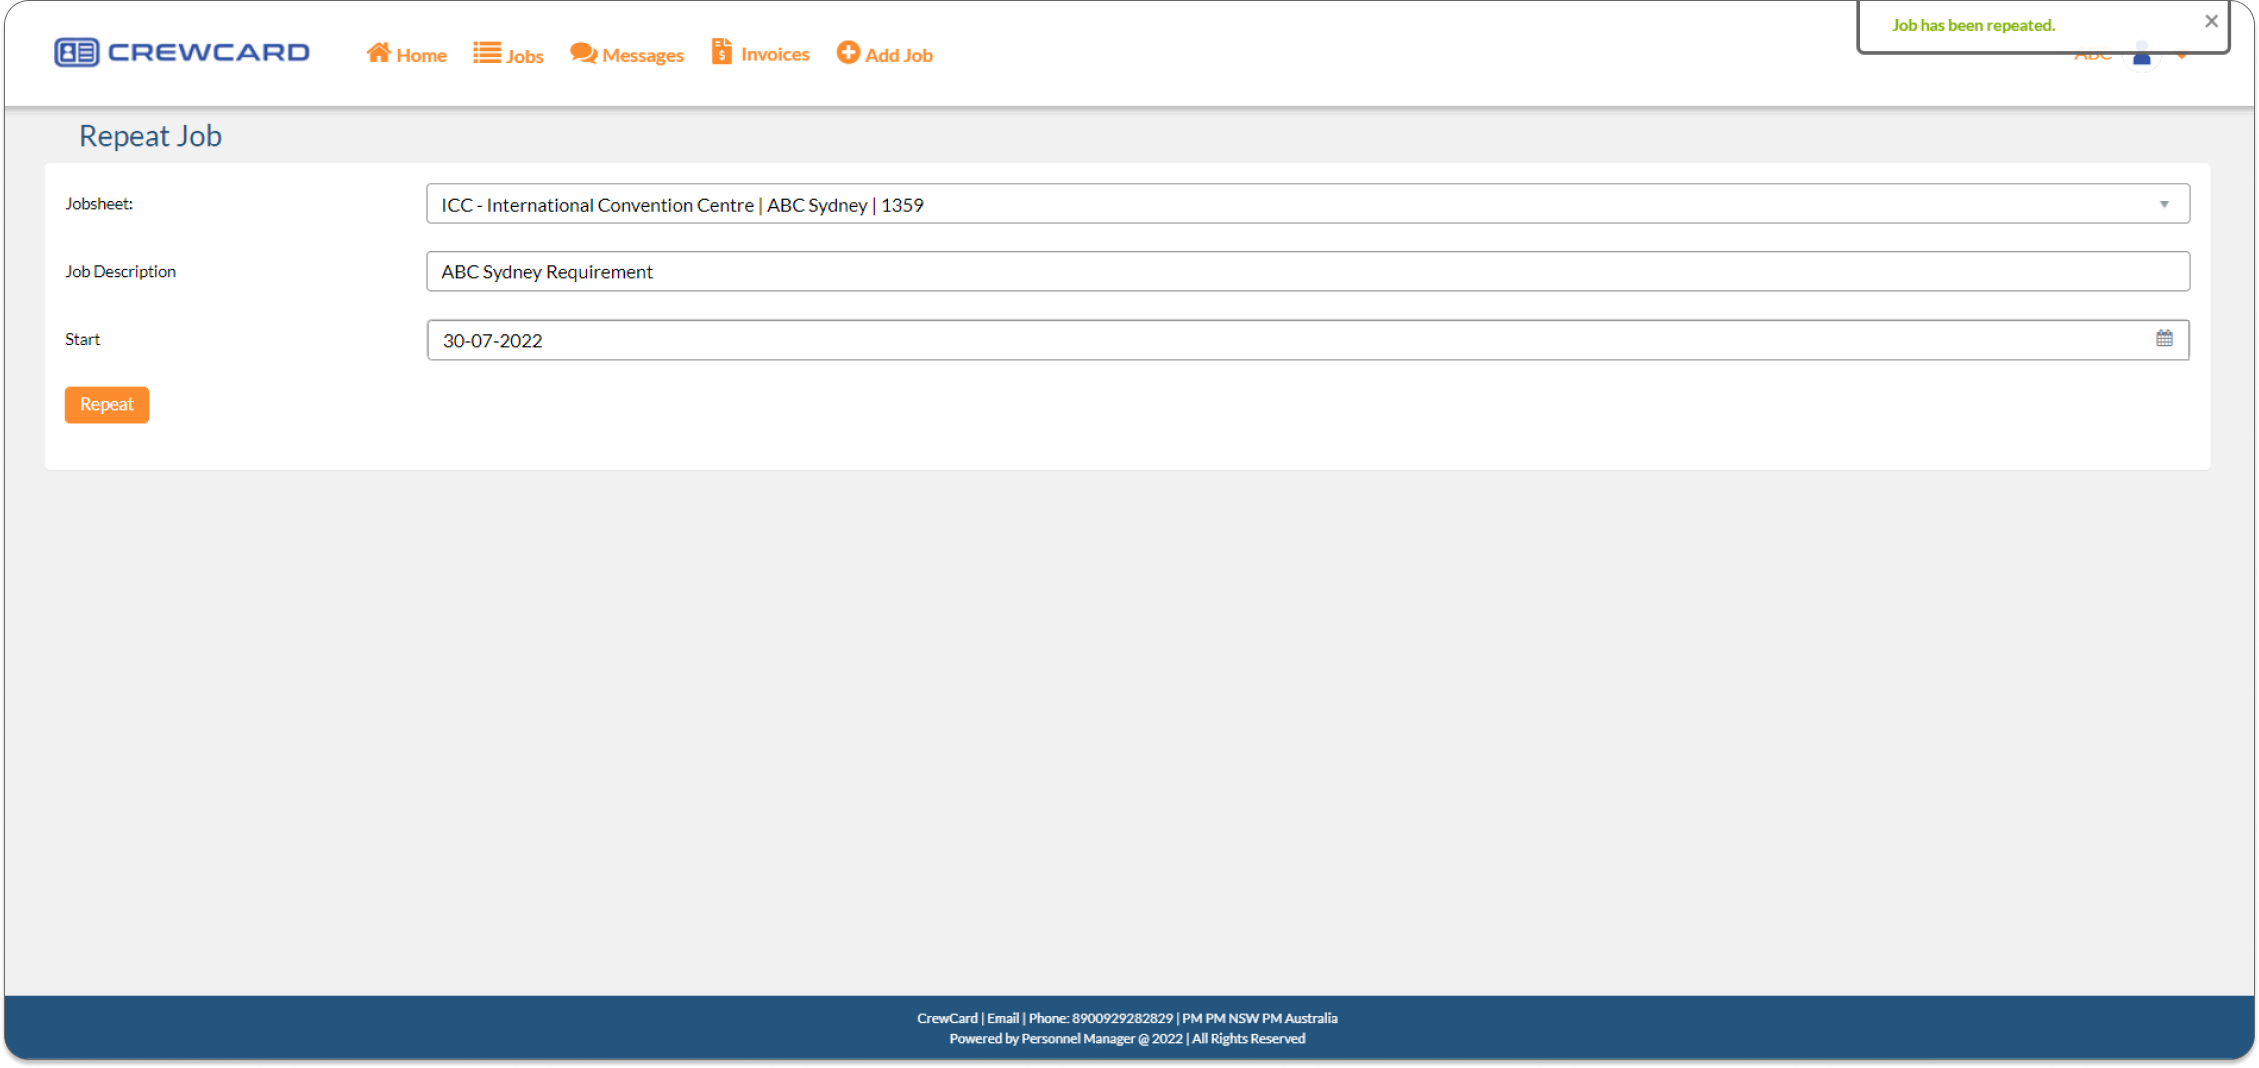
Clients can easily repeat existing jobs with a new start date. In the Client’s portal, click the Drop down arrow on the upper right side of your screen and Select Repeat Job.
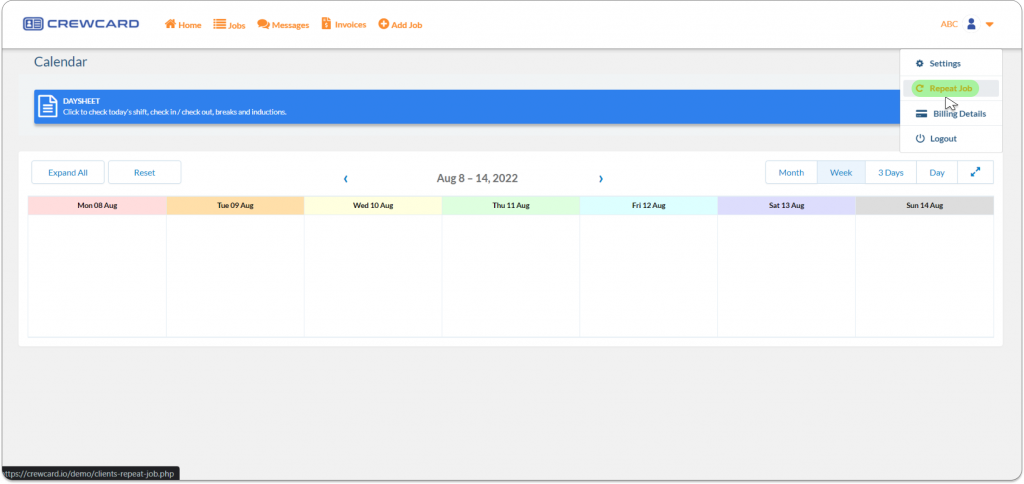
Fill out all fields and click Repeat, the job will be added throughout the system.
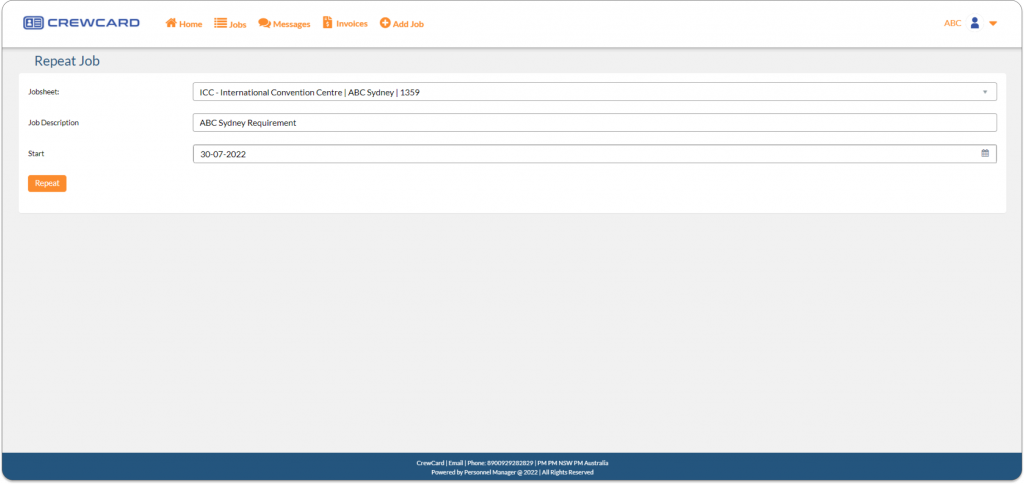
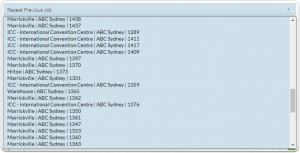
Job Sheet: Select the Job you wish to repeat.
Job Description: Enter the brief description about the Job
Start Date: Select the Start Date of the repeated job.
Once the Repeat button has been clicked, a pop up will appear on the upper right side of your page that says “ Job has been Repeated”.
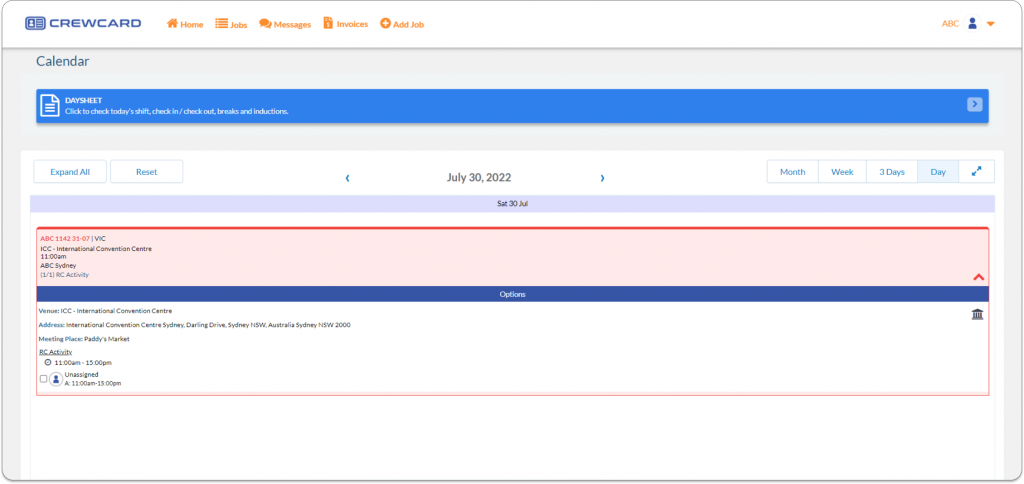
Go back to the Home Page (Calendar Page) and check whether the Job has been repeated.
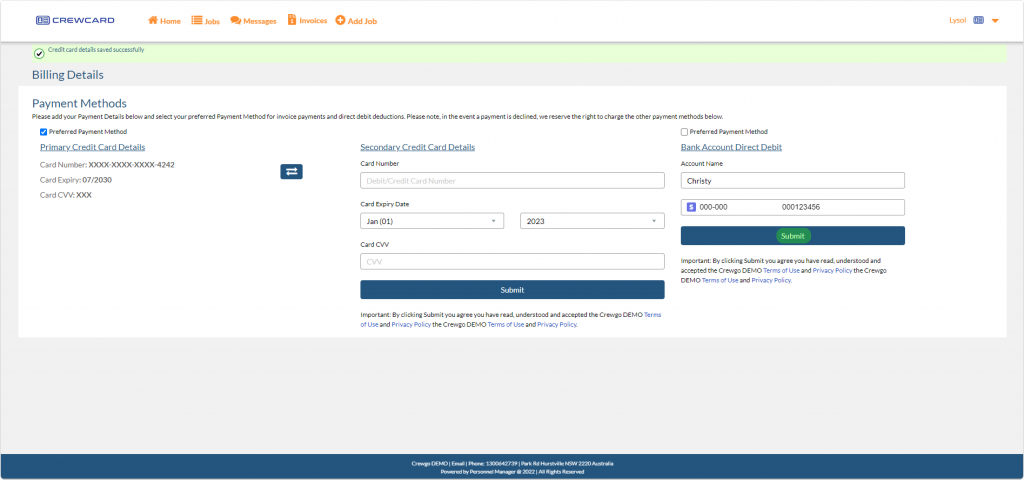
 In the billing details page, it will allow you to add, edit and remove your billing details. Additionally clients can select the preferred payment method for invoice payment and direct debit deductions.
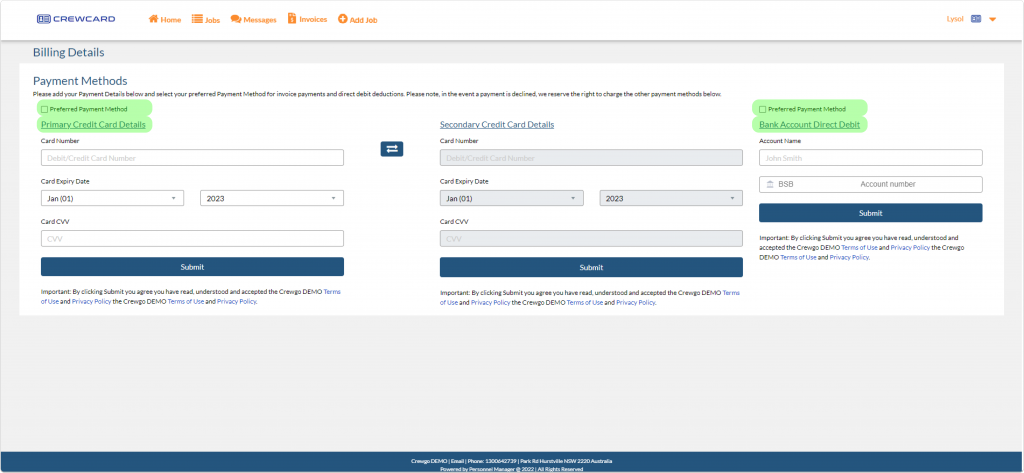 The Client can’t fill the secondary Credit Card Details until they fill out the primary Credit Card details first.
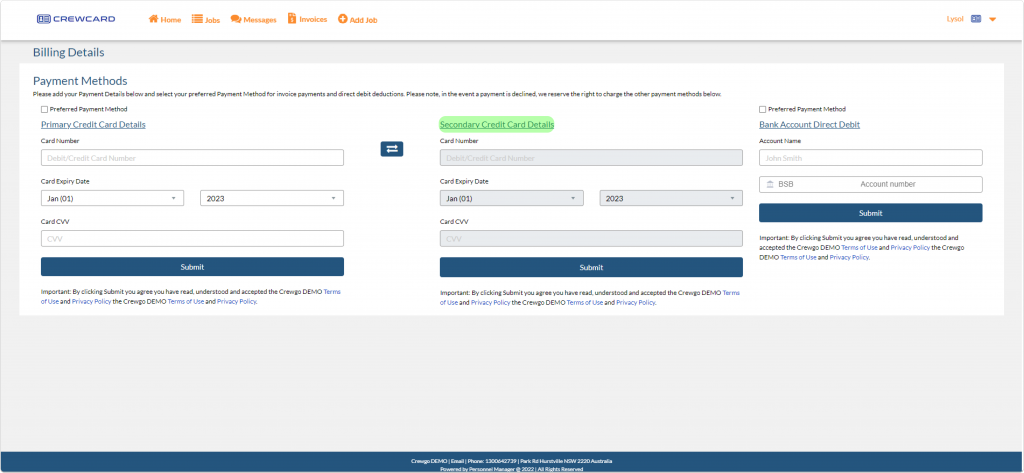 Once the client has filled out the Primary Credit Card details, Click the submit button.
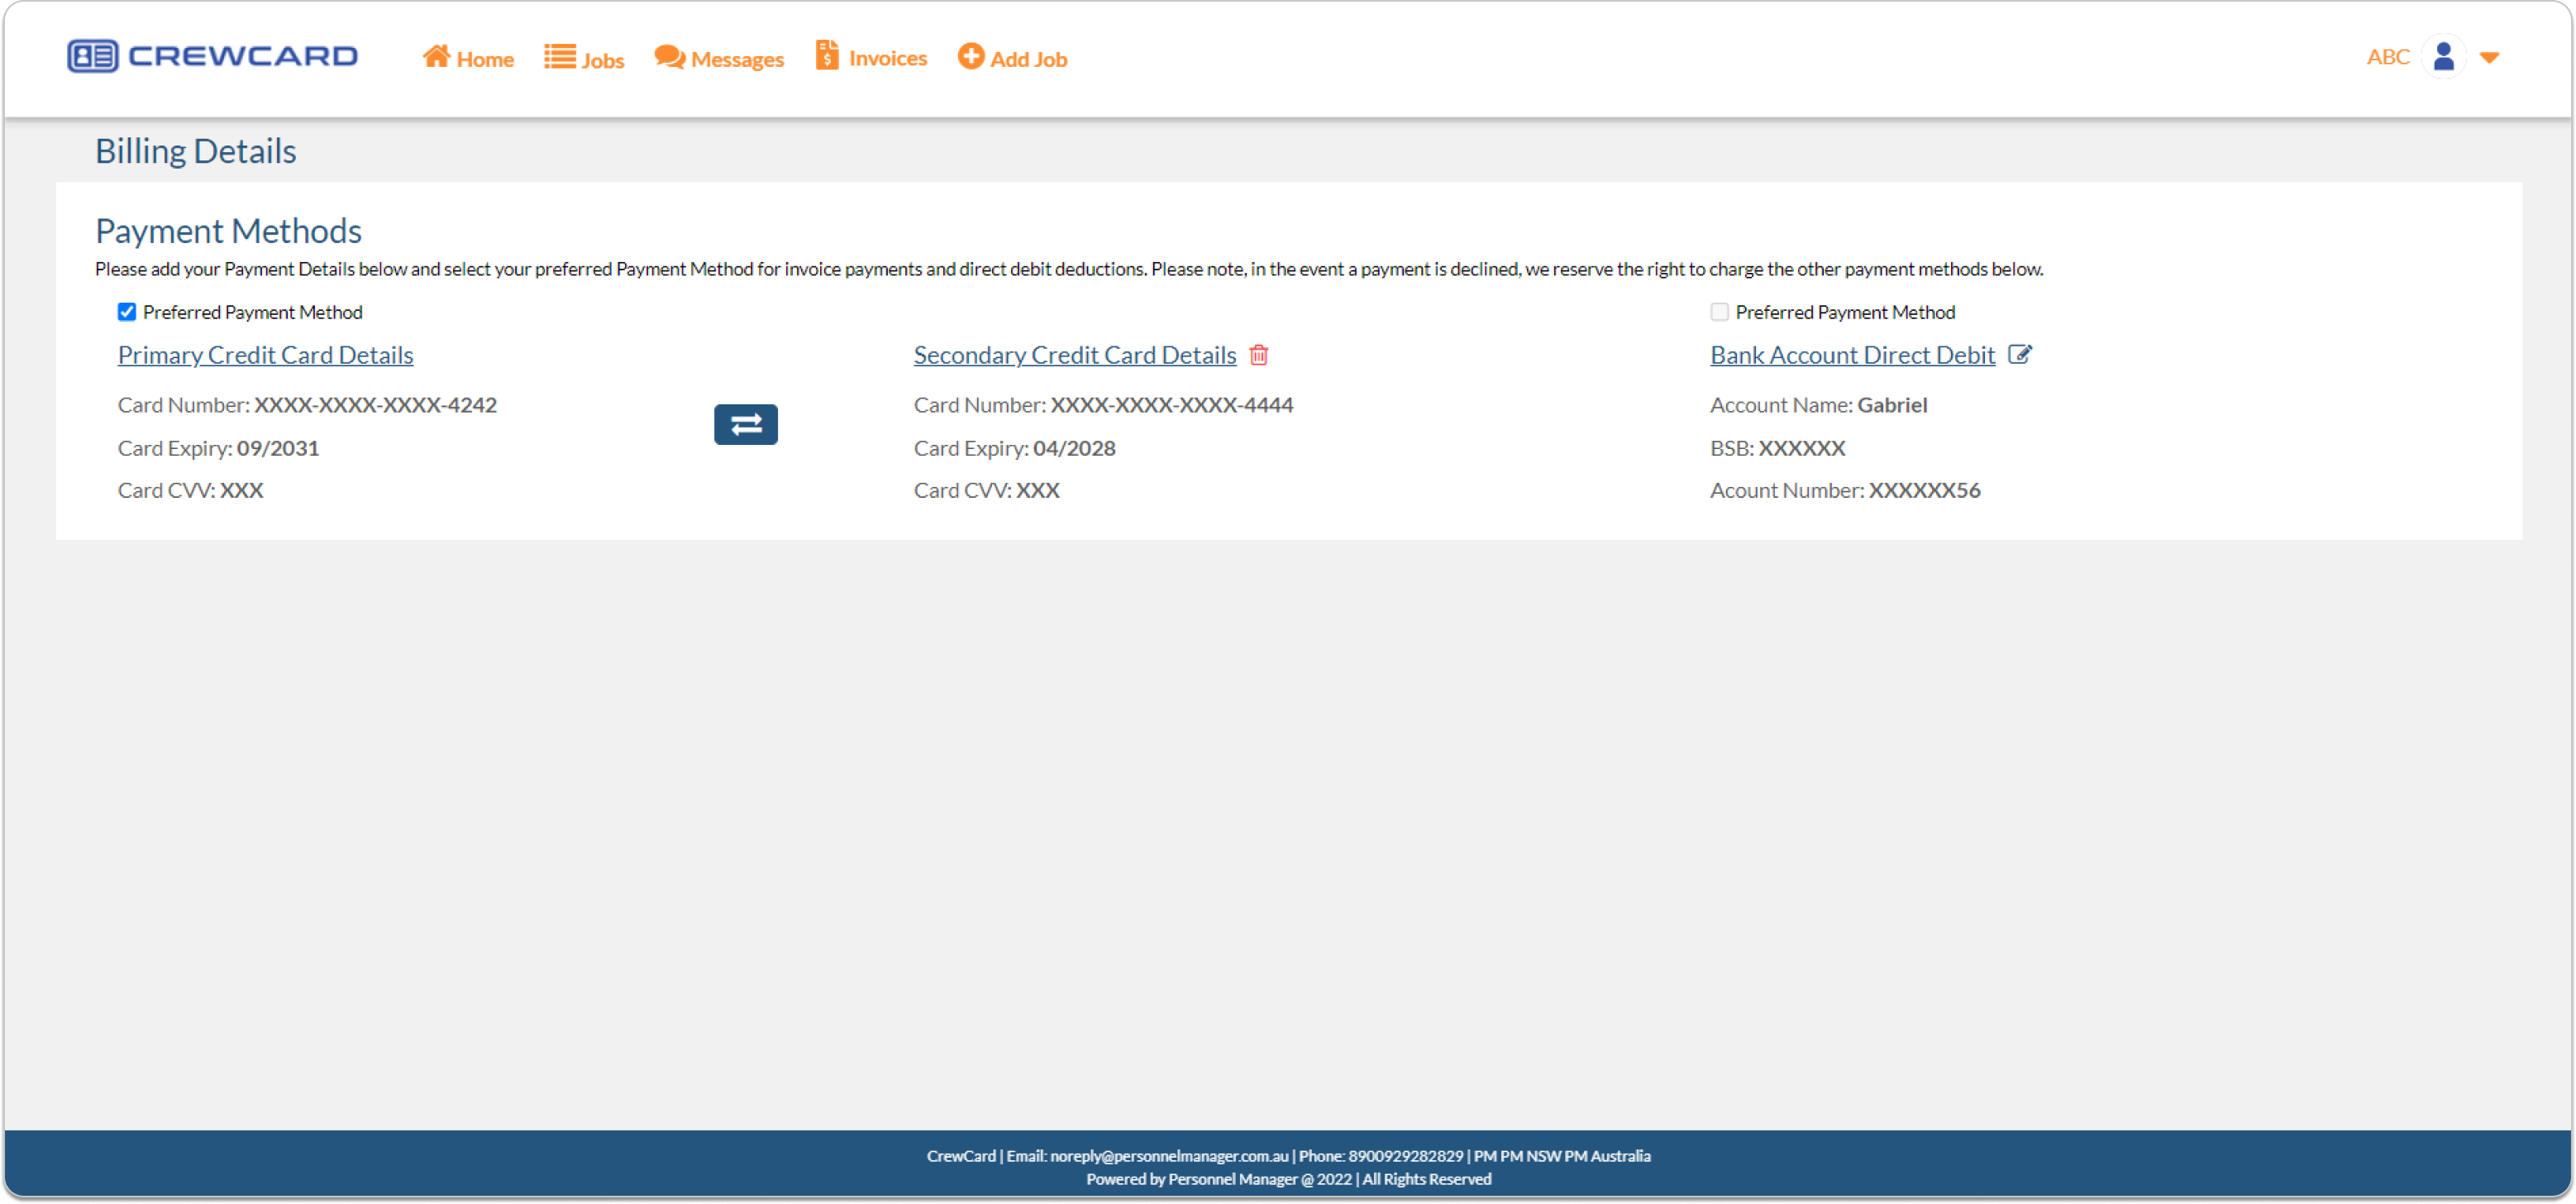
 The checkbox for the Preferred Payment Method above the Primary Credit card Details is automatically ticked and the checkbox for Preferred Payment Method above the Bank Account Direct Debit should be grayed out. Note that clients can only choose 1 preferred payment method.
To choose the Preferred payment method, untick the checkbox and select your Preferred Payment Method.
The checkbox for the Preferred Payment Method above the Primary Credit card Details is automatically ticked and the checkbox for Preferred Payment Method above the Bank Account Direct Debit should be grayed out. Note that clients can only choose 1 preferred payment method.
To choose the Preferred payment method, untick the checkbox and select your Preferred Payment Method.
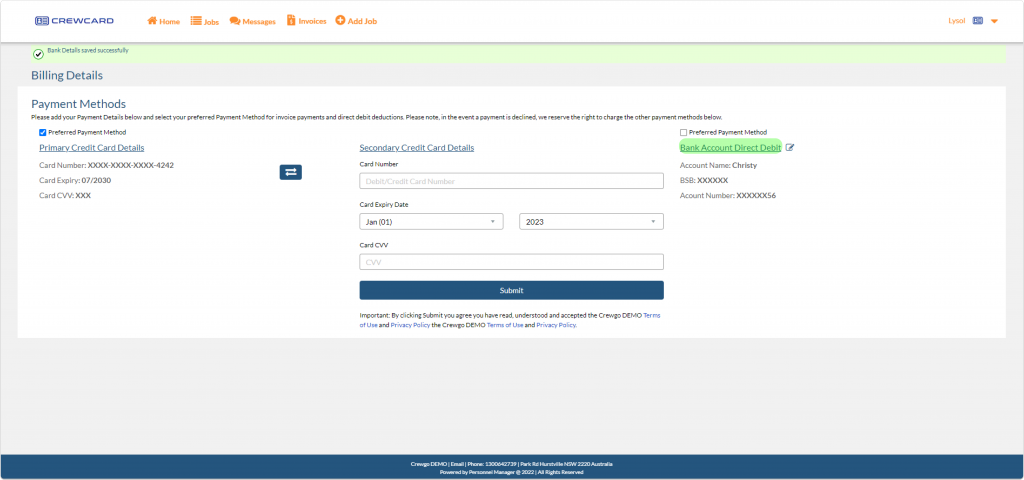
 Alternatively clients can add their Bank Account Direct Debit by filling out the form and click the Submit button.
 Clients can modify the Bank Account Direct debit anytime by clicking the Edit icon. You can also tick the checkbox for the Preferred Payment method if you wish your Bank Account Direct Debit to be your preferred method of payment.
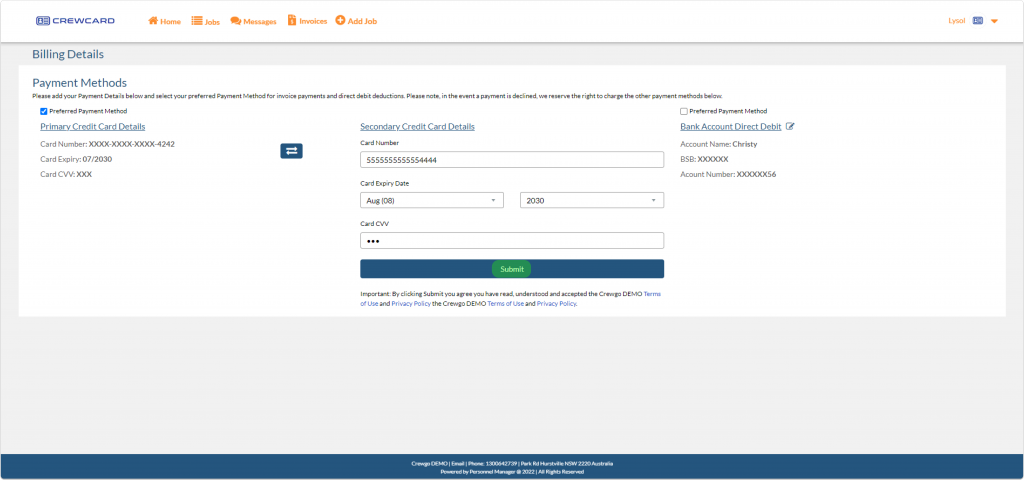
 The Secondary Credit Card Details is optional if clients want to add their details. Fill out the form and click the Submit button.
 Once it has been submitted clients can switch the Secondary Credit Card Details to the Primary Credit Card Details record by clicking the switch button.
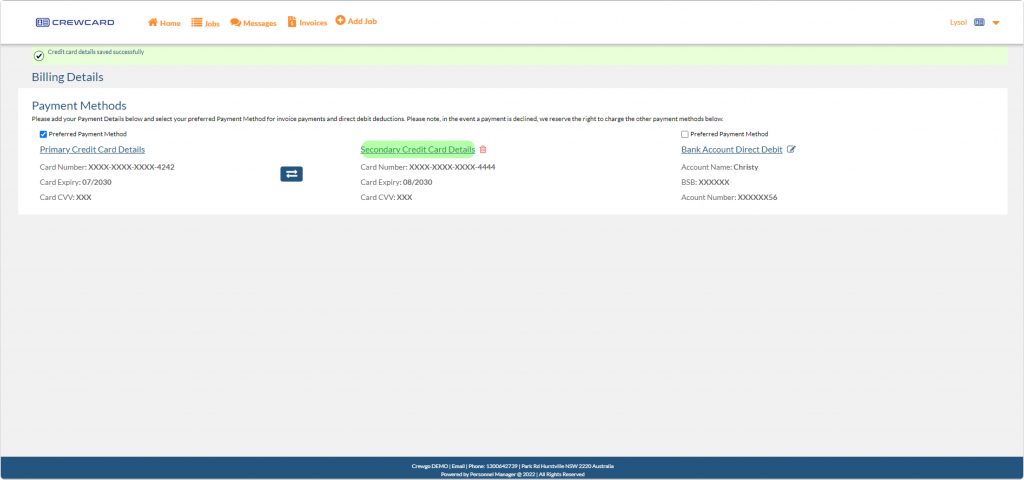 After the Switch button has been clicked the Secondary Credit Card Details has been set as the Primary Credit Card Details.
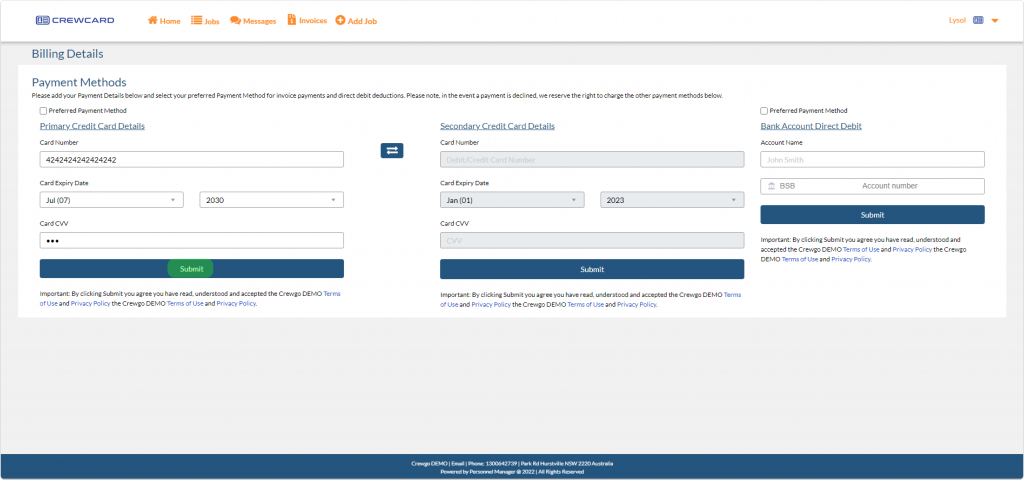
 Please note, in the event the payment is declined, it will automatically charge the other payment method.
Client Resources
Clients can create and manage materials tailored to their operational requirements. These materials are referred to as “Resources” which are linked to Pre-Start Quizzes to provide extra context or instructions to completing the quiz. Resources are accessible through both the Crewcard Client Portal and the Crewcard Client App.
Client Portal
Users should be directed to the Dashboard page after logging in.
Hover the mouse over the “Options” heading and click on “Resources”.

After clicking on the “Resources” section, you will be directed to this page.
This page will display a list of all resources that have already been created.
If no resources have been created yet, the page will appear empty.

Clicking on a resource will open a pop-up showing detailed information associated with that resource. Users can scroll through the document allowing for a full review before closing the pop-up.

Client App
Click on the menu icon on the top left corner (three lines) to display the menu options.

Click on the “Resources” section and a list of all resources that have already been created will be displayed. If no resources have been created yet, the page will appear empty.
Clicking on a resource will open a new page showing detailed information associated with that resource. Users can scroll through the document allowing for a full review before clicking back.


How to Add Resources
Resources can only be added or created through the Admin Portal.
All clients with Crewcard are provided with login credentials.
After logging in:

Click on the “Resources” section from the settings menu on the left side.
This page allows you to create, upload, and manage Resources that can be displayed in the Portal and App.
The Client Portal/Client App Resources
This section controls which resources are visible.