Check your team who’s working where anytime/anywhere with CrewCard. User friendly, simple and convenient specifically made to handle your business needs.
1.1 iOS download
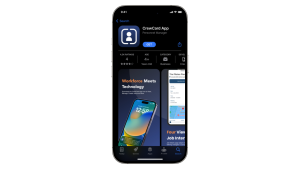
Launch the App Store
Search the app CrewCard by Personnel Manager
Press download
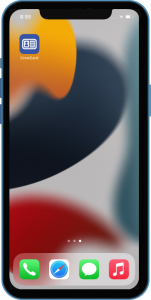
Click the app
1.2 Android Download
Android Download
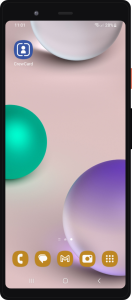
Launch the Google Play Store.
Type CrewCard in the search bar.
Tap Install once you’ve found the app.
2.0 Login
Upon successfully downloading and launching the CrewCard application, you will be directed to a login page. To proceed, enter your email address and password.
The administrator will grant you access to the application and provide you with the necessary password.
While entering your password, you might notice the presence of an eye icon with a crossed-out line. This icon signifies that the characters of your password are currently obscured. To make your password visible, tap on the icon.
Reset Password
In case you have forgotten your password, you can access the password recovery option by selecting the underlined phrase “Forgot Password” found above the login button. This action will redirect you to a new page where you can input the email address associated with your account. After providing the email address, choose the “Reset password” option. Subsequently, you will receive an email containing instructions on how to reset your account password.
Please be aware that if you require any assistance regarding access to the CrewCard app, you can click on the underlined phrase “Need Help?” situated at the bottom of the login page. This action will guide you to contact your system administrator and provide you with a link to the official CrewCard website.
Remember Me
Enter the User Name and Password. To store your credentials, select the “Remember Me” checkbox.
Once the feature is activated, the app will securely store your login credentials. The next time you launch the app, you will be automatically logged in without needing to enter your username and password.
3.0 Daily Page
The Daily page organizes jobs chronologically by day. To access a specific date, simply scroll left or right. When you locate the date you want to view, click the blue arrow associated with the job you’re interested in. This action will direct you to the job details.
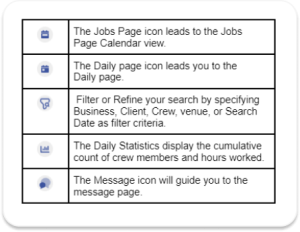
Available icons found on the Daily Page within the Supervisor App:
4.0 Jobs Page
The Job page will display job cards for your current job bookings and upcoming job bookings. The job card will have the following details:
Job Number
Location of the job
Activity for the Job
Client Name
Available icons found on the Jobs Page within the Supervisor App:
Click the arrow to view Job Details:
GPS MAP: The GPS maps will display a pin representing the crew members. The pin will determine if the crew is within the vicinity of the job location. You can also slide the timer to see the whereabouts of the crew on a given time.
App Communication: On the Job Details page, you can call or send a message to the staff.
Simply tap on the phone icon of the staff to initiate the call.
Next to each crew there is a phone icon with the En Route (EN) key – a notification will be sent to the crew if they are en route to the job location. If they have confirmed to be en route, a check mark will appear next to “EN”.
The message icon allows you to message the crew through the app. Under is the Check In (CI) key – once crew has checked in to the job, there will be a check symbol next to “CI”
Notes: Add a checklist for the crew to make sure they complete all tasks on the job and bring all the required equipment.
Star Rating: You can rate the star based on his performance. Tap the star icon to open the rating pop-up. Select the number of stars for the rating of the crew.
You may also leave your feedback and tap the boxes below if they have complete PPE, Uniform, shown Professionalism and workmanship during the entire shift.
Offline Functionality
The offline functionality acts as a backup for data in situations where the CrewCard system experiences downtime or loss of internet connection. Once the job list page, job details page and daily job page have been loaded while online, users will still have access to them, even when offline.
If applicable, the CrewPass row will appear to display the access level, job details, and relevant qualifications required for that job. CrewPass will automatically show all qualifications of the crew member associated with the activity for that shift. Additionally, you can view and select qualification documents, then simply tap “Email Selected Docs” to send them to yourself or directly to your clients.
4.1 Timesheet
There are four actions buttons at the footer of the page. When tapped on timesheet, it will direct you to the Daysheet page.
The Day Sheet allows you to enter times directly into the system and to report the performance of a crew. You can also process safety inspection and induction.
For more details about the Day Sheet, please refer to CrewCard Client App Access 5.0 Jobs >> Day Sheet
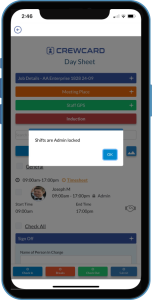
When a shift has been admin locked or payroll locked, a pop up window will appear to let the user know. This will happen when checkboxes from the daysheet are selected, and the submit button is pressed. Please see the example below.
Furthermore,
The Day Sheet illustrates the check in and check out standards that must be upheld with each shift.
Note: when a crew member submits their day sheet with their check in and check out times entered, if the supervisor has not entered these times in themselves, the check in and check out times will be that of which the crew has submitted.
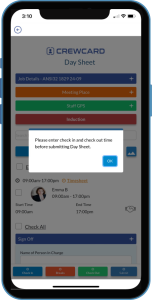
On the other hand, in a situation where a crew member has not entered the check in and check out times of their shift, the team leader, supervisor, client or admin of the job will be unable to submit the day sheet. A pop up will appear for these users, stating that they will need to enter check in and check out times, given that there are no times previously entered.
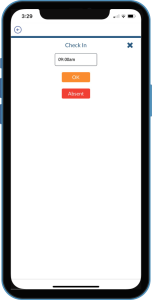
Similarly, if a Crew member is absent, the supervisor will first have to click ‘Check in’, then select Absent. Once submitted, this will then be reflected in the DaySheet.
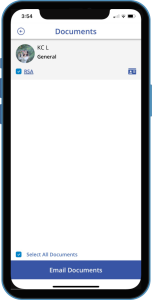
4.2 Documents
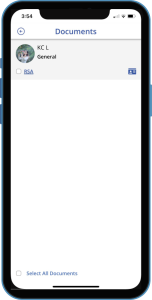
The Documents page displays all the qualifications of the Crew that are associated with the activity of the certain shift.
In the Job details page, tap the Documents button at the footer of the page.
To view the Document, simply tap the document name or the Crew Pass icon.
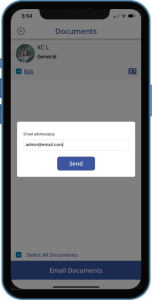
If you wish to send the documents to your Client, select the document you wish to send and Tap Email Documents.
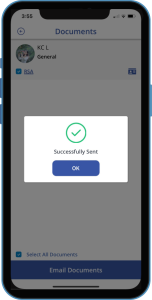
A pop up will appear, enter the Email Address and tap the Send button.
To Send all the documents, Tap the checkbox “ Select All Documents” and tap the Email Documents.
A pop up will appear, enter the Email Address and tap the Send button.
Note that you can send the documents to multiple users by adding a comma after the email address has been entered.
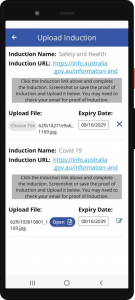
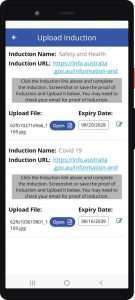
4.3 Inductions
Induction is important to a job as it educates the crew about important information about a job that they may not be aware of.
Tap the induction button in the Job Details page.
Once redirected to the Induction Page wherein you may do the following:
Expiry Date, edit the expiry date
Open Upload File
Furthermore, If you need to view the uploaded inductions, you may tap on the Documents button in the Job details page or tap the Crew Pass icon in the Home page.
4.4 Instructions
Some jobs need additional instruction to be able to finish the job properly. Instructions are not only limited to text but may also include photos, images, or files. To add an instruction please check the instructions below:
On the homepage, please tap on the right arrow on the job.
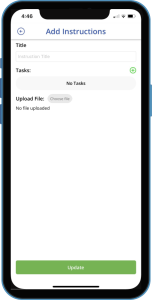
Once on the Details page, please select Instructions at the bottom of the screen.
On the Instructions Page, you may do the following tasks:
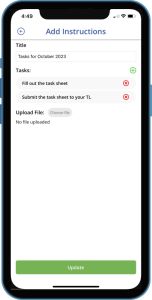
Input the Title into the title textbox.
Add tasks by selecting the + icon, input Task Name, and once done tap Add.
Remove tasks by selecting the X icon.
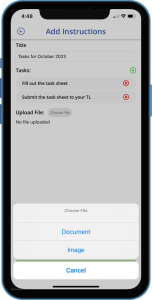
To upload file(s), tap Choose File and select the source where the file is located on your device.
Tap on Update to save the changes.
To check if the instructions were updated, you may check on the Details page to see the update.
5.0 Profile
On the Main Menu please tap Profile.
Once on your Profile Page, you may access the following Information:
First Name
Email
Phone
Kiosk Pin
6.0 Timesheet Approval
The ‘Timesheet Approval’ feature gives users an overview of all the crew’s shift details. Here supervisors can verify if the check in/out time logged by the crew is accurate. This allows admins to determine the correct amount of hours a crew member has worked before sending out their pay.
Open the CrewCard app. Click on the hamburger icon in the top left to open the side menu. Click on Timesheet Approval. You will be directed to the Timesheet Approval page.
On this page a list of all timesheets that have been sent for approval will be listed, with the most recent date at the top. Use the buttons on the top labelled ‘Daily’, ‘Weekly’ and ‘Monthly’ to toggle the view of Timesheet Approvals.
Daily : Click this button, and the user will be shown ‘today’ shifts only.
Weekly : Click this button, and the user will be shown a week’s shifts.
Monthly: Click this button, and the user will be shown a month’s shifts.
In the top right of the header you will find three icons.
Filter: This will take you to the filter page where the user is able to filter shifts by Crew, Timesheet Status and Date. Tap ‘Search’ to filter out results or ‘Reset’ to clear the fields.
Message: This will direct you to the Messages page where the user can message admin.
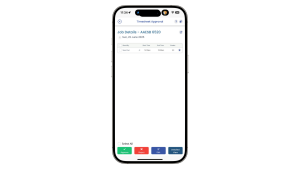
Tap on a timesheet approval, this will open up the information on another page. At the top on the page, the Job Details will be displayed with the client and job sheet number. Under the Job Details is the date of the jobs listed. The crew and their shifts will also be listed below with the information; crew name, start time, end time and break.
In the footer there are four buttons:
Approve: User can approve the timesheet
Reject: The user can reject the timesheet
Edit: Also the user to edit the logged times
Detailed/Simplify View: Toggle this to change how the Timesheet Approval information is presented.
If the user clicks ‘Approve’, the timesheet will be saved and a confirmation message will appear saying “Successfully approved timesheets”. The shift’s colour on the Timesheet Approval page will change to green colour.
If the user clicks ‘Reject’, a confirmation pop-up action will appear where it requires the user to give a reason why to reject. Tap ‘X’ or ‘Cancel to cancel action or tap ‘Save’ to Save.
P.s. If the Timesheet is approved, the user would not be able to ‘Reject it’. However, if a user rejects it, then has a change of mind, they would be able to approve it after.
Editing Timesheet Approvals
To edit a Timesheet Approval either click on the edit button in the footer or tap on the pencil icon located next to the Job Details. This allows the user to edit the logged times. If there is a discrepancy in the times logged the user can tap the icon to enter in the correct start time, end time and no. of breaks the crew did.
Alternatively, you can use the buttons in the footer to log the times the crew checked in and out. Tap on the checkbox next to a crew, then tap on check in. Add in the time and date. Tap on breaks to add start and end time, or tap on the plus button to add another break then tap save. The user can now tap check out and add in checkout date and time.
P.S.The letter next to the crew name indicates who logged the time. ‘A’ for Admin, ‘S’ for supervisor and ‘C’ for Client.
Once the times have been edited, tap save updates in the footer then tap back. The times imputed by the user will appear in green under the ones logged by the crew and client.
7.0 iOS Kiosk
For instances where a crew does not have access to their phone during their shift, CrewCard has developed a feature called Kiosk. The kiosk would enable clients or supervisors to Check-In/Out, and Start/End break on behalf of the crew. To use this feature please follow the instructions below:
On the Main Menu please tap Profile.
You would be redirected to your Profile and would be able to view your Kiosk Pin, you may tap Reset icon to generate a new Pin. Once the new pin is generated please take note of the pin as it is needed in the latter part of the process.
Please tap the Main Menu at the top-left corner of the page and tap Kiosk.
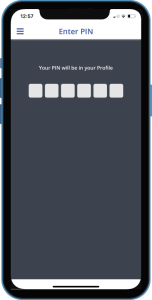
You will be redirected to a page where the Kiosk Pin would be needed, please input and enter.
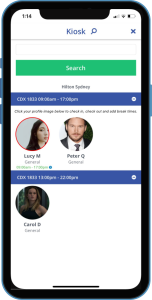
A page where a list of locations where a crew(s) is assigned will be provided. Please select the location from the list.
A page showing a list of the crew will be provided. Please select a crew from the list by tapping their picture and selecting Check In.
A window would appear, asking for the kiosk pin of the crew. Once done a confirmation window would appear with the status of the check-in. Tap Ok to confirm.(For scenarios where the client only has 1 tablet/smartphone at the location, the Crew is required to check in by themselves else the client or a supervisor would have to check in on behalf of the crew).
To add, please see the list below on what each border color on the crew’s profile means.
No Color – Crew haven’t checked-in yet.
Green – Crew is currently checked-in.
Red – Crew has checked-out.
For adding a break please select the crew’s profile and select Add Break (For scenarios where a crew does not have a break you may select check out.)
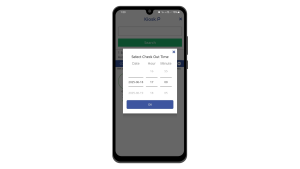
After selecting Add Break, a window would appear where you may select Date, Hour, and Minute according to the break time. Once done please tap Done.
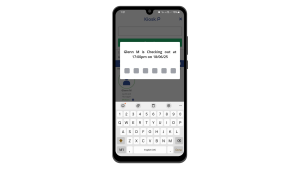
A window would appear, asking for the kiosk pin of the crew. Once done a confirmation window would appear with the status of the break. Tap Ok to confirm.
For ending a break please select the crew’s profile and select End Break.
After selecting End Break, a window would appear where you may select Date, Hour, and Minute according to the break time. Once done please tap Done.
A window would appear, asking for the kiosk pin of the crew. Once done a confirmation window would appear with the status of the break. Tap Ok to confirm.
For checking out please select the crew’s profile and select Check Out.
After selecting Check Out, a window would appear where you may select Date, Hour, and Minute according to the checkout time. Once done please tap Done.
A window would appear, asking for the kiosk pin of the crew. Once done a confirmation window would appear with the status of the checkout. Tap Ok to confirm.
Once an employee has been checked out a red border would be placed around their picture. You may also tap on the time below the picture to view the timesheet it can provide information regarding the following:
Check-In Time
Start Break Time
End Break Time
Check-Out Time
Crew, Supervisor, or Client (on who have attended the activity)
There is also a Search function represented by the search icon beside Kiosk at the top of the page. The Search function may help you filter and manage multiple crew’s.
To exit the Kiosk page please select the X icon at the top-right part of the page. For clients or supervisors you would need to enter your Kiosk Pin to exit and will be redirected to the homepage.
7.1 Android Kiosk
For instances where a crew does not have access to their phone during their shift, CrewCard has developed a feature called Kiosk. The kiosk would enable clients or supervisors to Check-In/Out, and Start/End break on behalf of the crew. To use this feature please follow the instructions below:
On the Main Menu please tap Profile.
You would be redirected to your Profile and would be able to view your Kiosk Pin, you may tap Reset to generate a new Pin. Once the new pin is generated please take note of the pin as it is needed in the latter parts of the process.
Please tap the Main Menu at the top-left corner of the page and tap Kiosk.
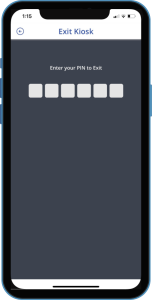
You will be redirected to a page where the Kiosk Pin would be needed, please input and enter.
A page where a list of locations where a crew(s) is assigned will be provided. Please select the location from the list.
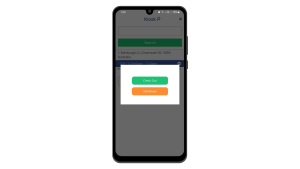
A page showing a list of the crew will be provided. Please select a crew from the list by tapping their picture and selecting Check In.
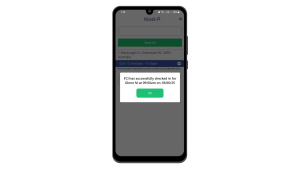
A window would appear, asking for the kiosk pin of the crew. Once done a confirmation window would appear with the status of the check-in. Tap Ok to confirm.(For scenarios where the client only has 1 tablet/smartphone at the location, the Crew is required to check in by themselves else the client or a supervisor would have to check in on behalf of the crew).
To add, please see the list below on what each border color on the crew’s profile means.
No Color – Crew haven’t checked-in yet.
Green – Crew is currently checked-in.
Red – Crew has checked-out.
For adding a break please select the crew’s profile and select Add Break (For scenarios where a crew does not have a break you may select check out.)
After selecting Add Break, a window would appear where you may select Date, Hour, and Minute according to the break time. Once done please tap Ok.
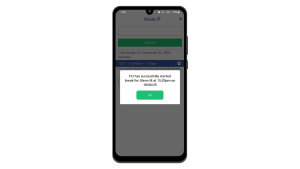
A window would appear, asking for the kiosk pin of the crew. Once done a confirmation window would appear with the status of the break. Tap Ok to confirm.
For ending a break please select the crew’s profile and select End Break.
After selecting End Break, a window would appear where you may select Date, Hour, and Minute according to the break time. Once done please tap Ok.
A window would appear, asking for the kiosk pin of the crew. Once done a confirmation window would appear with the status of the break. Tap Ok to confirm.
For checking out please select the crew’s profile and select Check Out.
After selecting Check Out, a window would appear where you may select Date, Hour, and Minute according to the checkout time. Once done please tap Ok.
Once an employee has been checked out a red border would be placed around their picture. You may also tap on the time below the picture to view the timesheet it can provide information regarding the following:
Check-In Time
Start Break Time
End Break Time
Check-Out Time
Crew, Supervisor, or Client (on who have attended the activity)
There is also a Search function represented by the search icon beside Kiosk at the top of the page. The Search function may help you filter and manage multiple crew’s.
To exit the Kiosk page please select the X icon at the top-right part of the page. For clients or supervisors, you would need to enter your Kiosk Pin to exit and will be redirected to the homepage.