This manual is created to provide guidance and reference to the users of CrewCard, it gives users a depth of understanding its functions and capabilities.
CNB – Central Navigation Bar
Central Navigation Bar is on the top of the page. Hover your mouse over the icons to show dropdown menu lists.
When accessing the sign up page in the CrewCard software, you will be presented with a Customer Sign Up and Job Seeker Sign Up option. Next to each link, a QR code is provided.
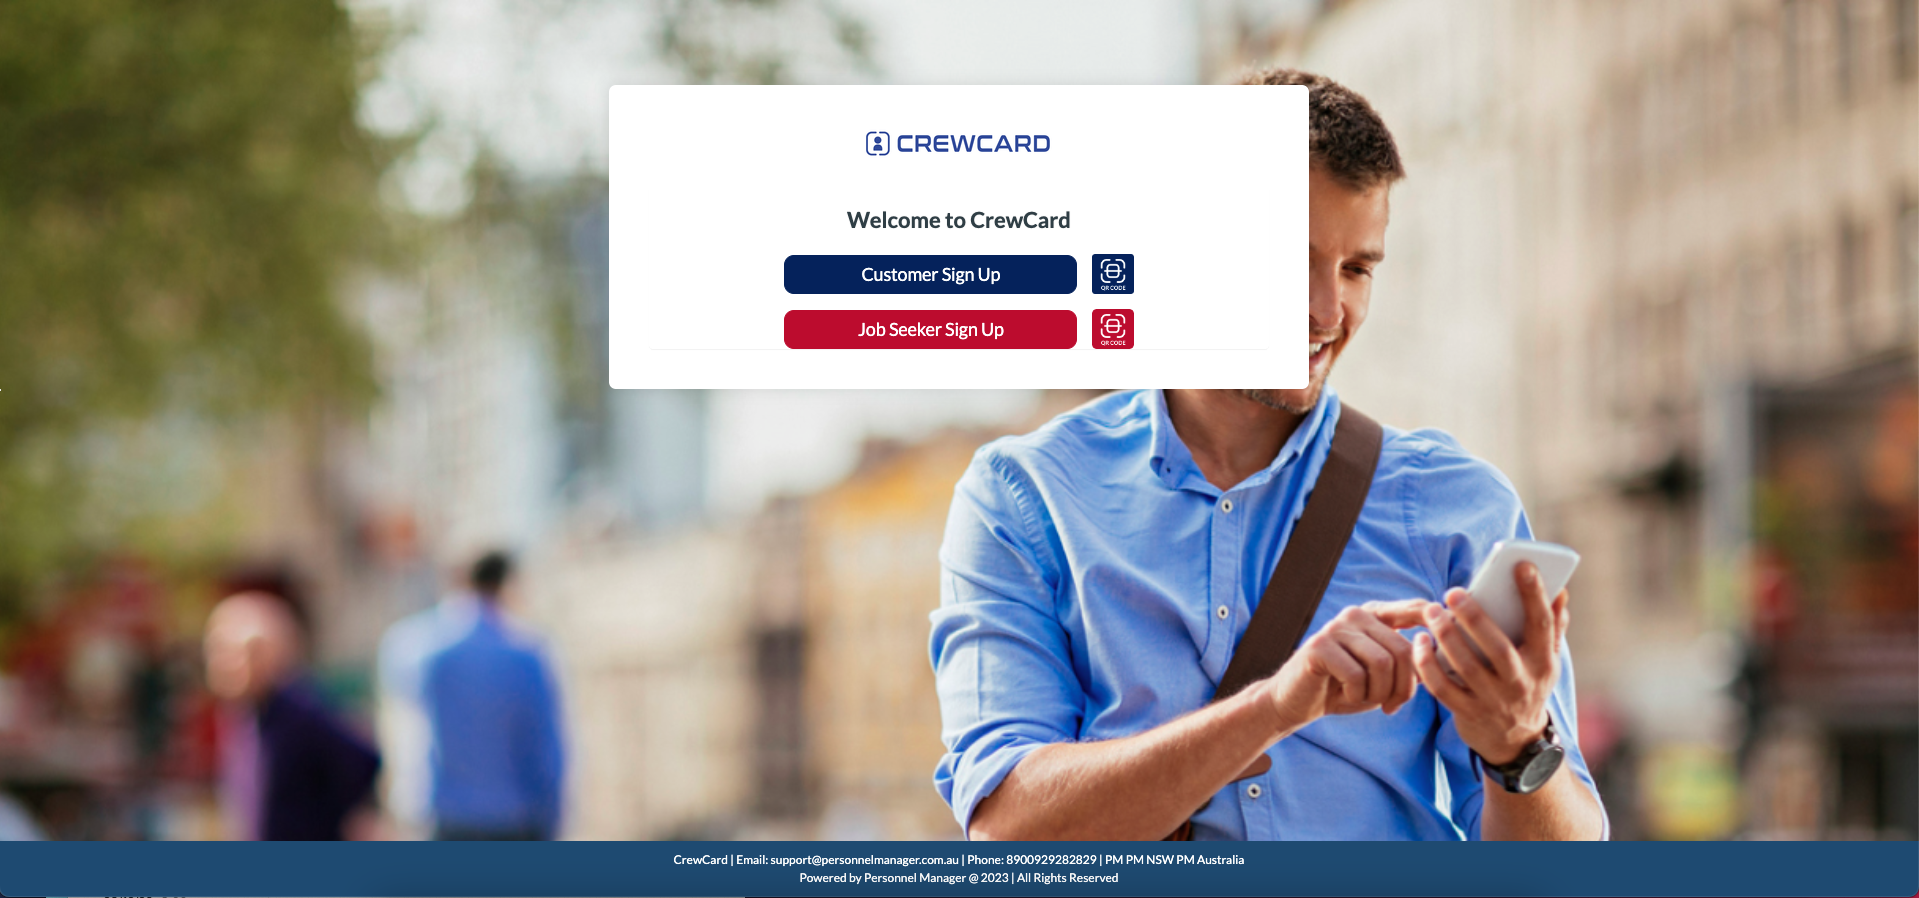
Click the icon next to Job Seeker Sign Up. A larger QR code will appear.
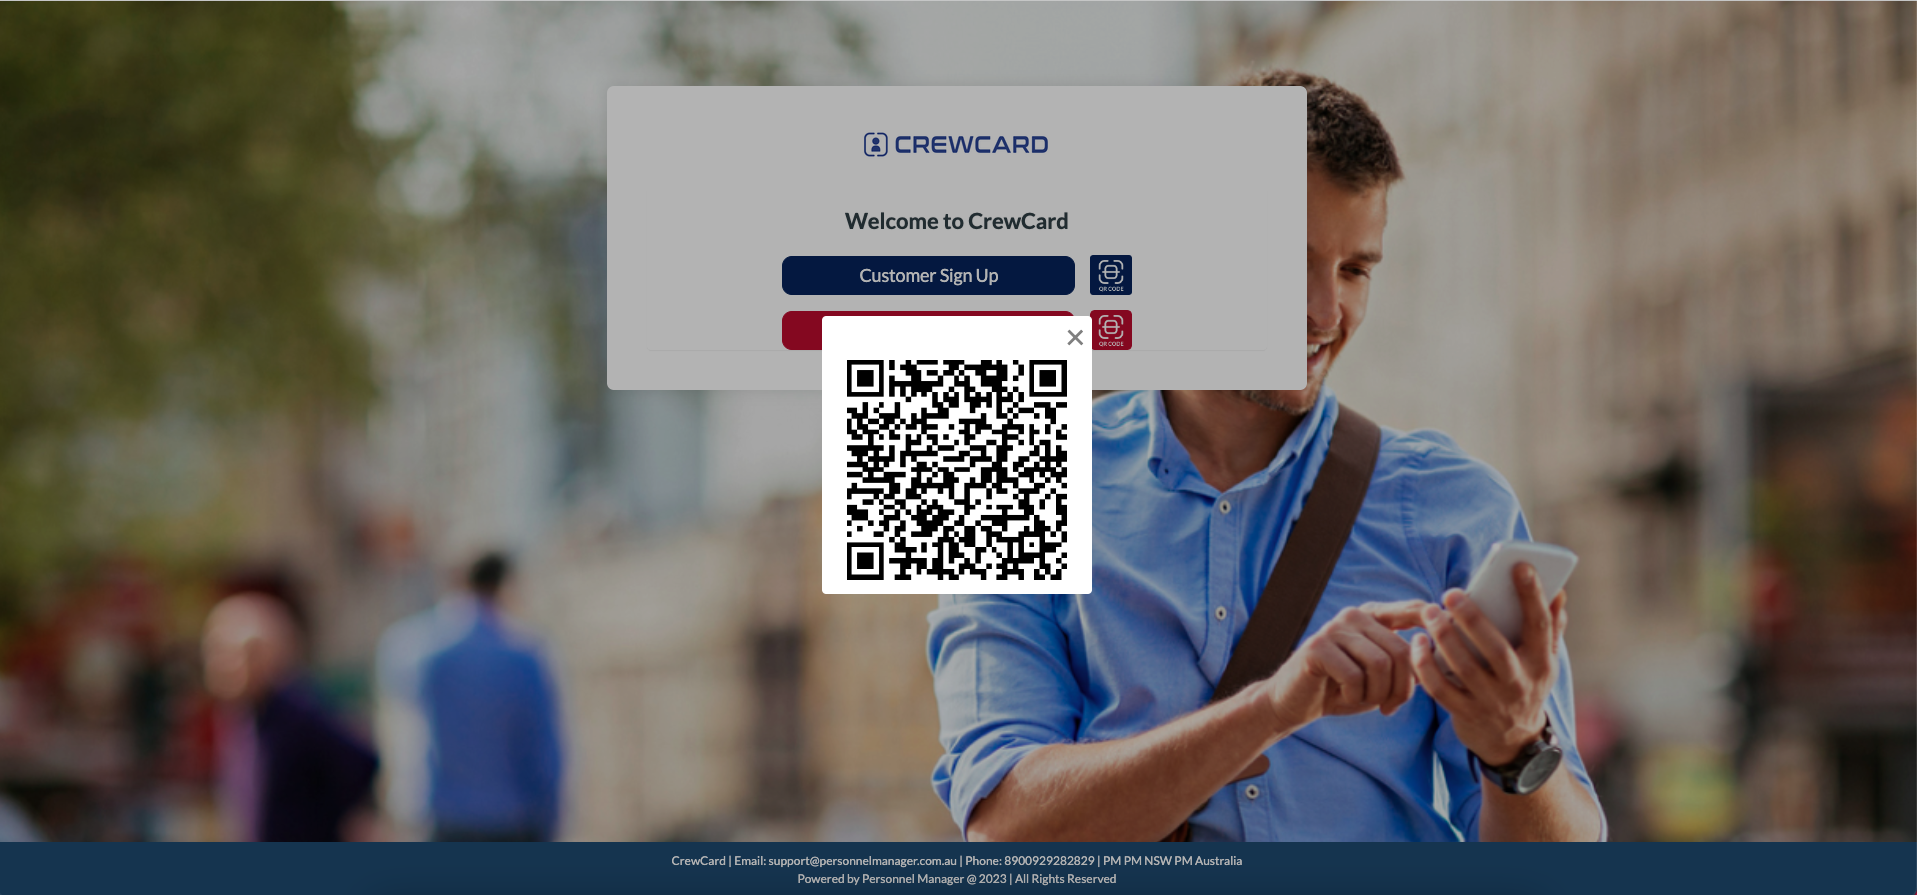
When scanned by a mobile device, the potential user is taken to an internet page, as displayed below.
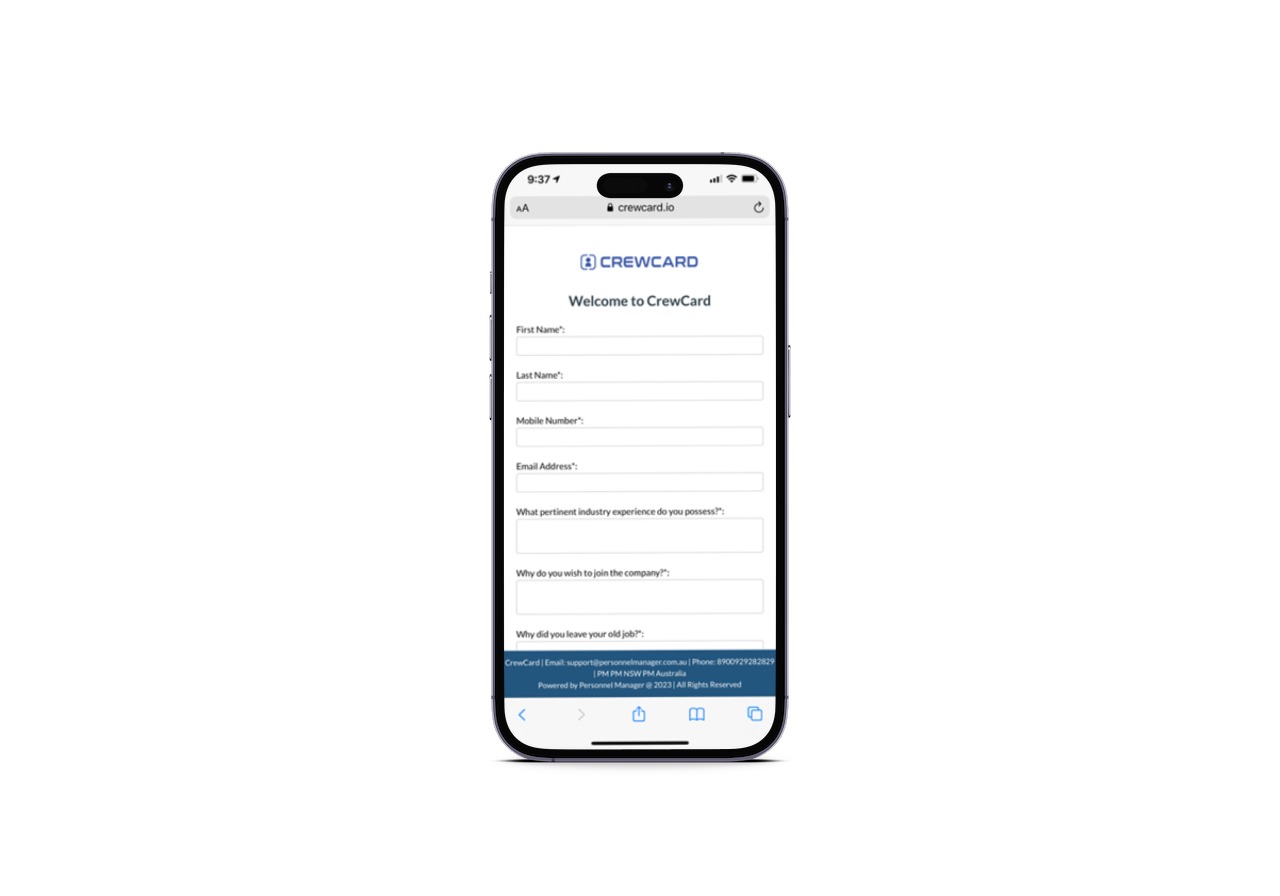
The welcome page requests First Name, Last Name, Mobile Number, Email Address, Industry Experience, Why you wish to join the company, Why you left your previous job, and other questions specified by your employer. You are also able to upload files, and fill out employment history, skills, availability, and a resume.
Once completed, you are signed up to CrewCard, and are able to use your details to log in and access the software.
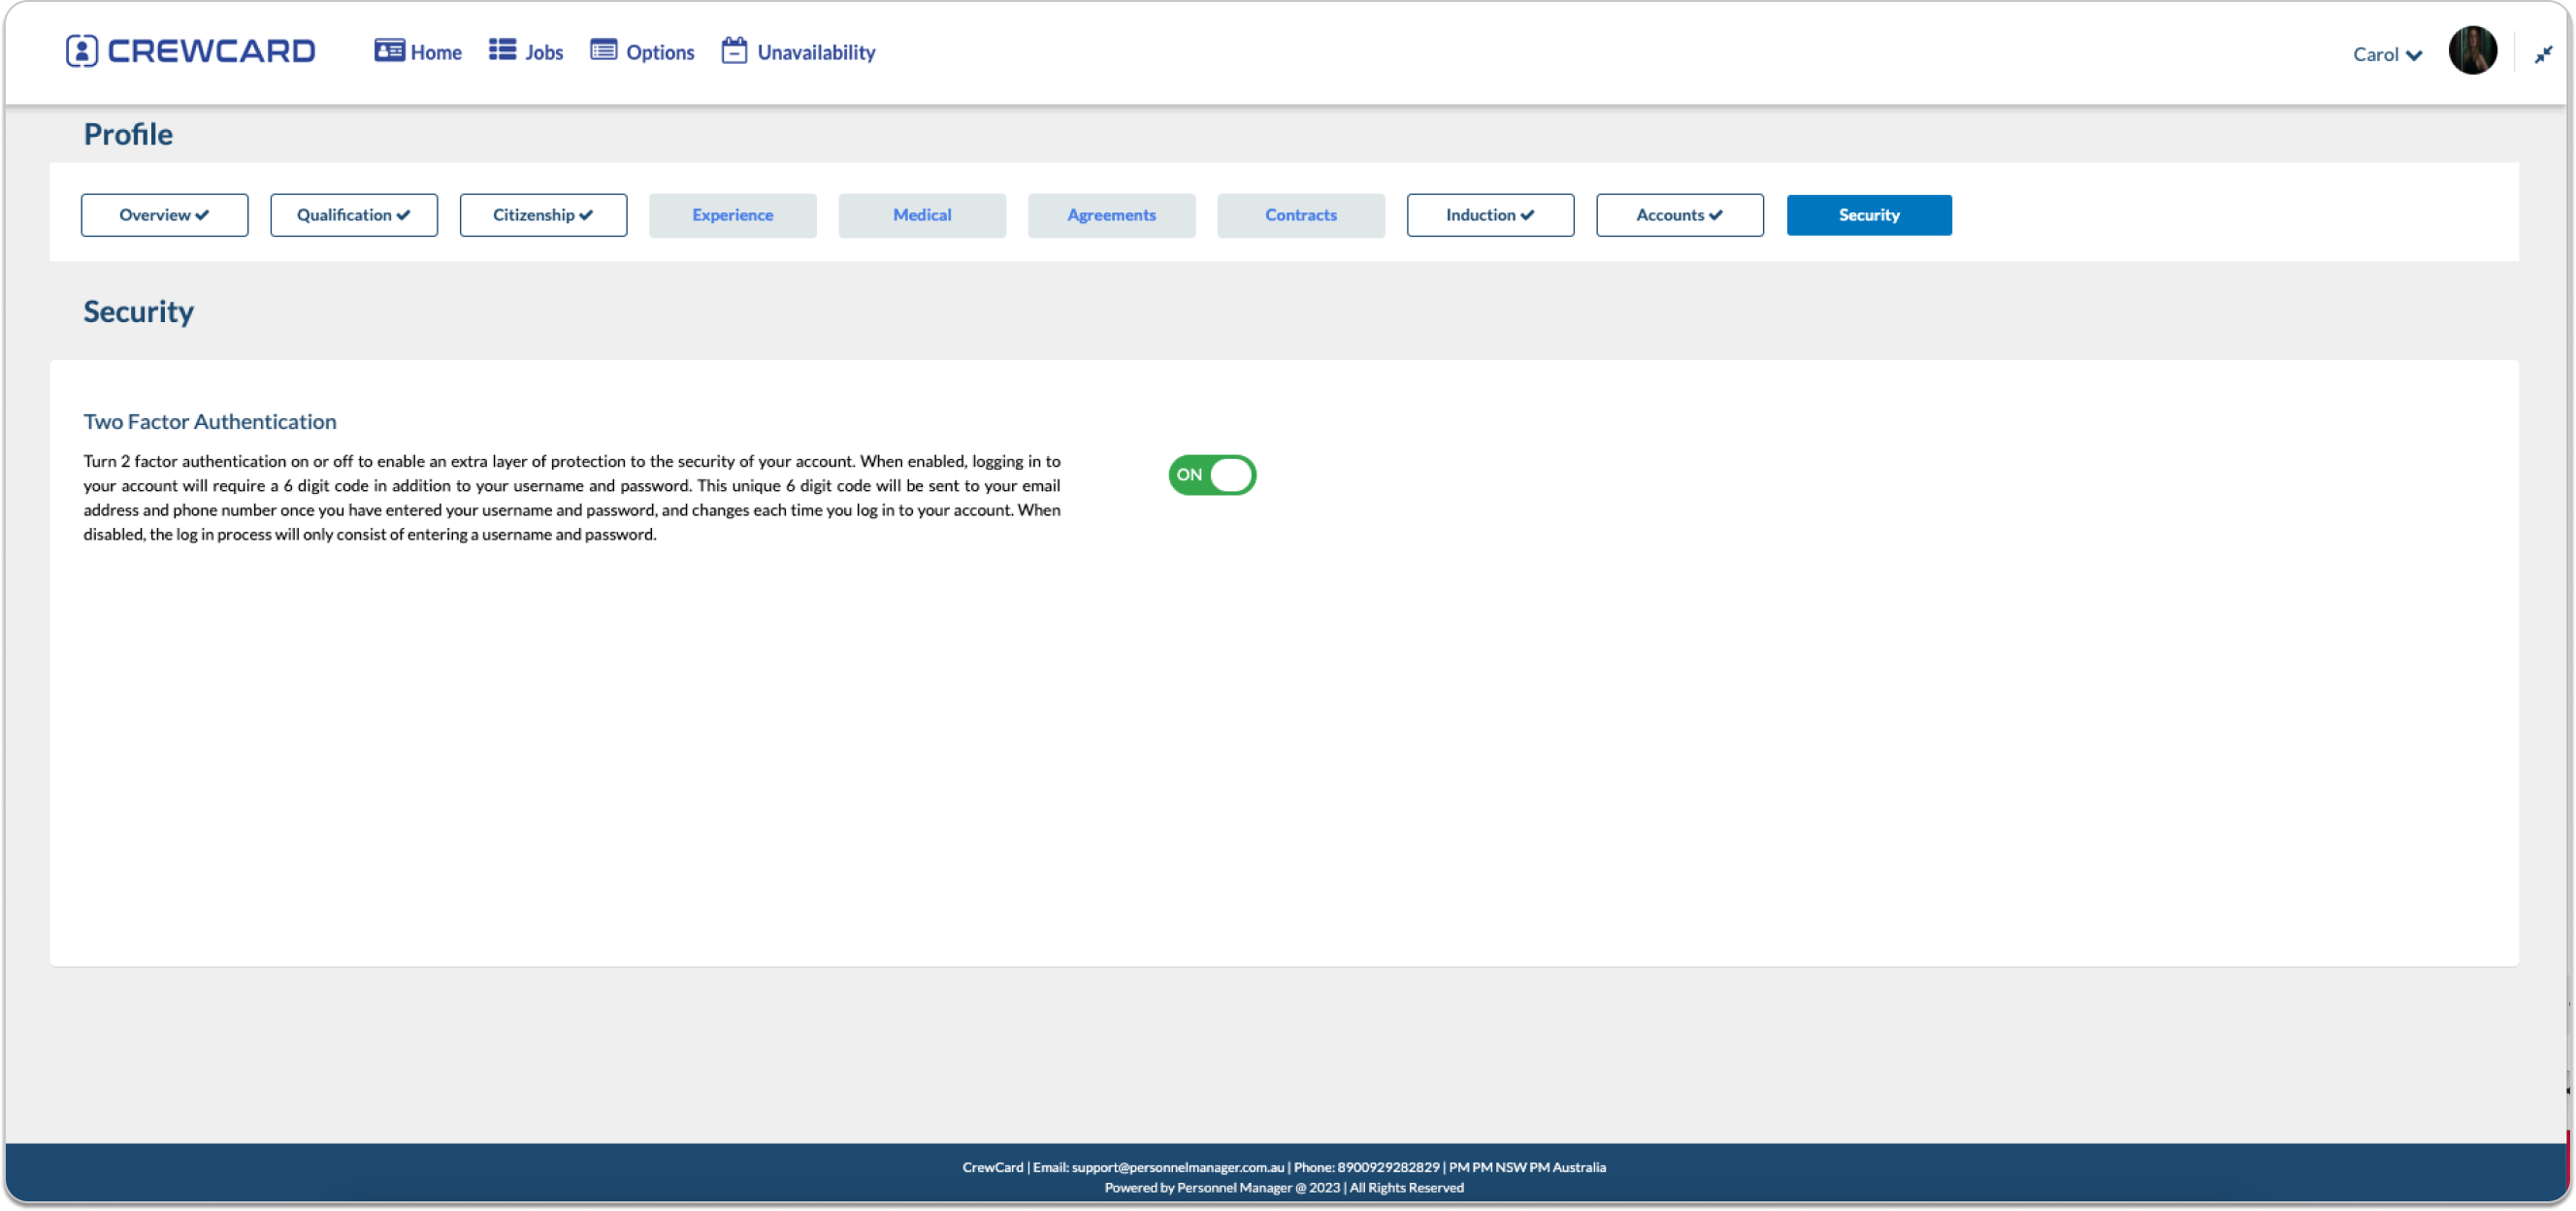
Once you have attained your log in details, if you would like to activate two-factor authentication, please contact support@personnelmanager.com.au
If activated, upon logging in to the CrewCard software, users will be presented with a pop up window requesting an authentication code. The authentication code that is being requested is sent to the email address and the mobile number, that is registered to the account that is being logged into.
A unique 6-digit code will be sent, and must be entered into the textbox in order to gain access to the account. This code changes each time a user logs in to their account.

This mechanism of security a strong protection against unauthorised access to your accounts, reducing any chance of fraud or breach of sensitive information.
Furthermore, users can contact support@personnelmanager.com.au to enable an additional layer of security when logging in. When activated, a user has 4 chances to log in. On the 5th time entering the wrong login credentials, the system will block the user for 15 minutes before they are able to log in again. This security measure has been implemented to prevent brute force attacks or consistent guessing of passwords in order to gain access to accounts that do not belong to CrewCard users.
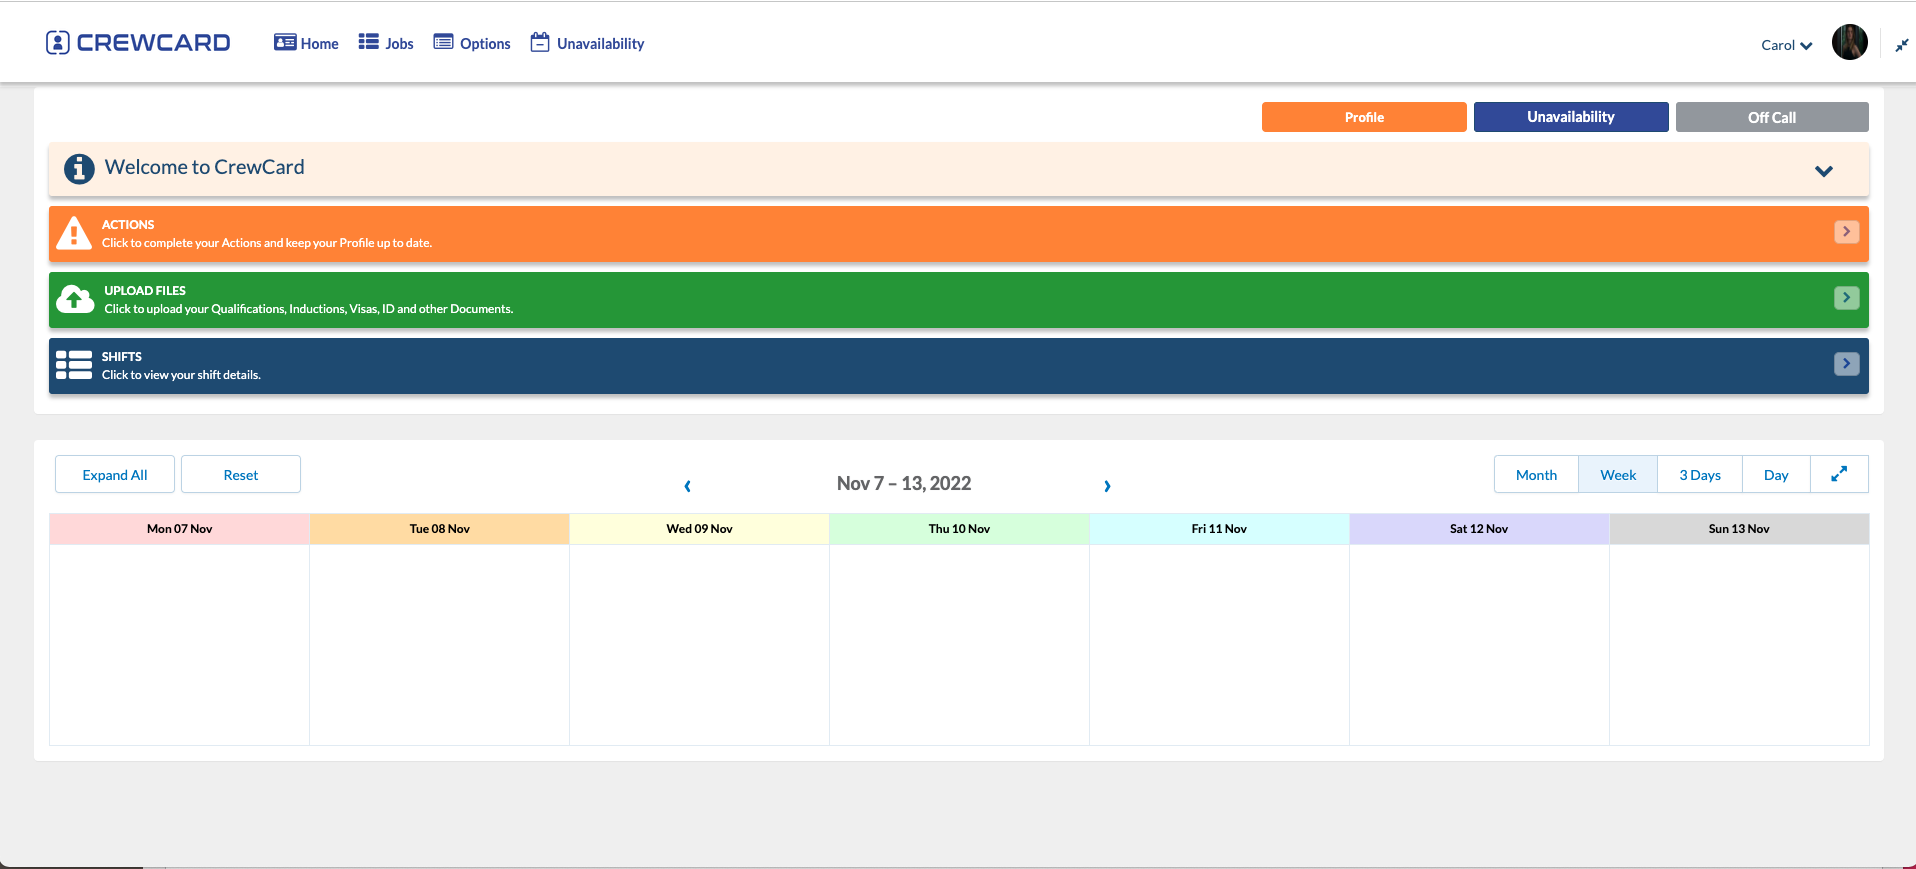
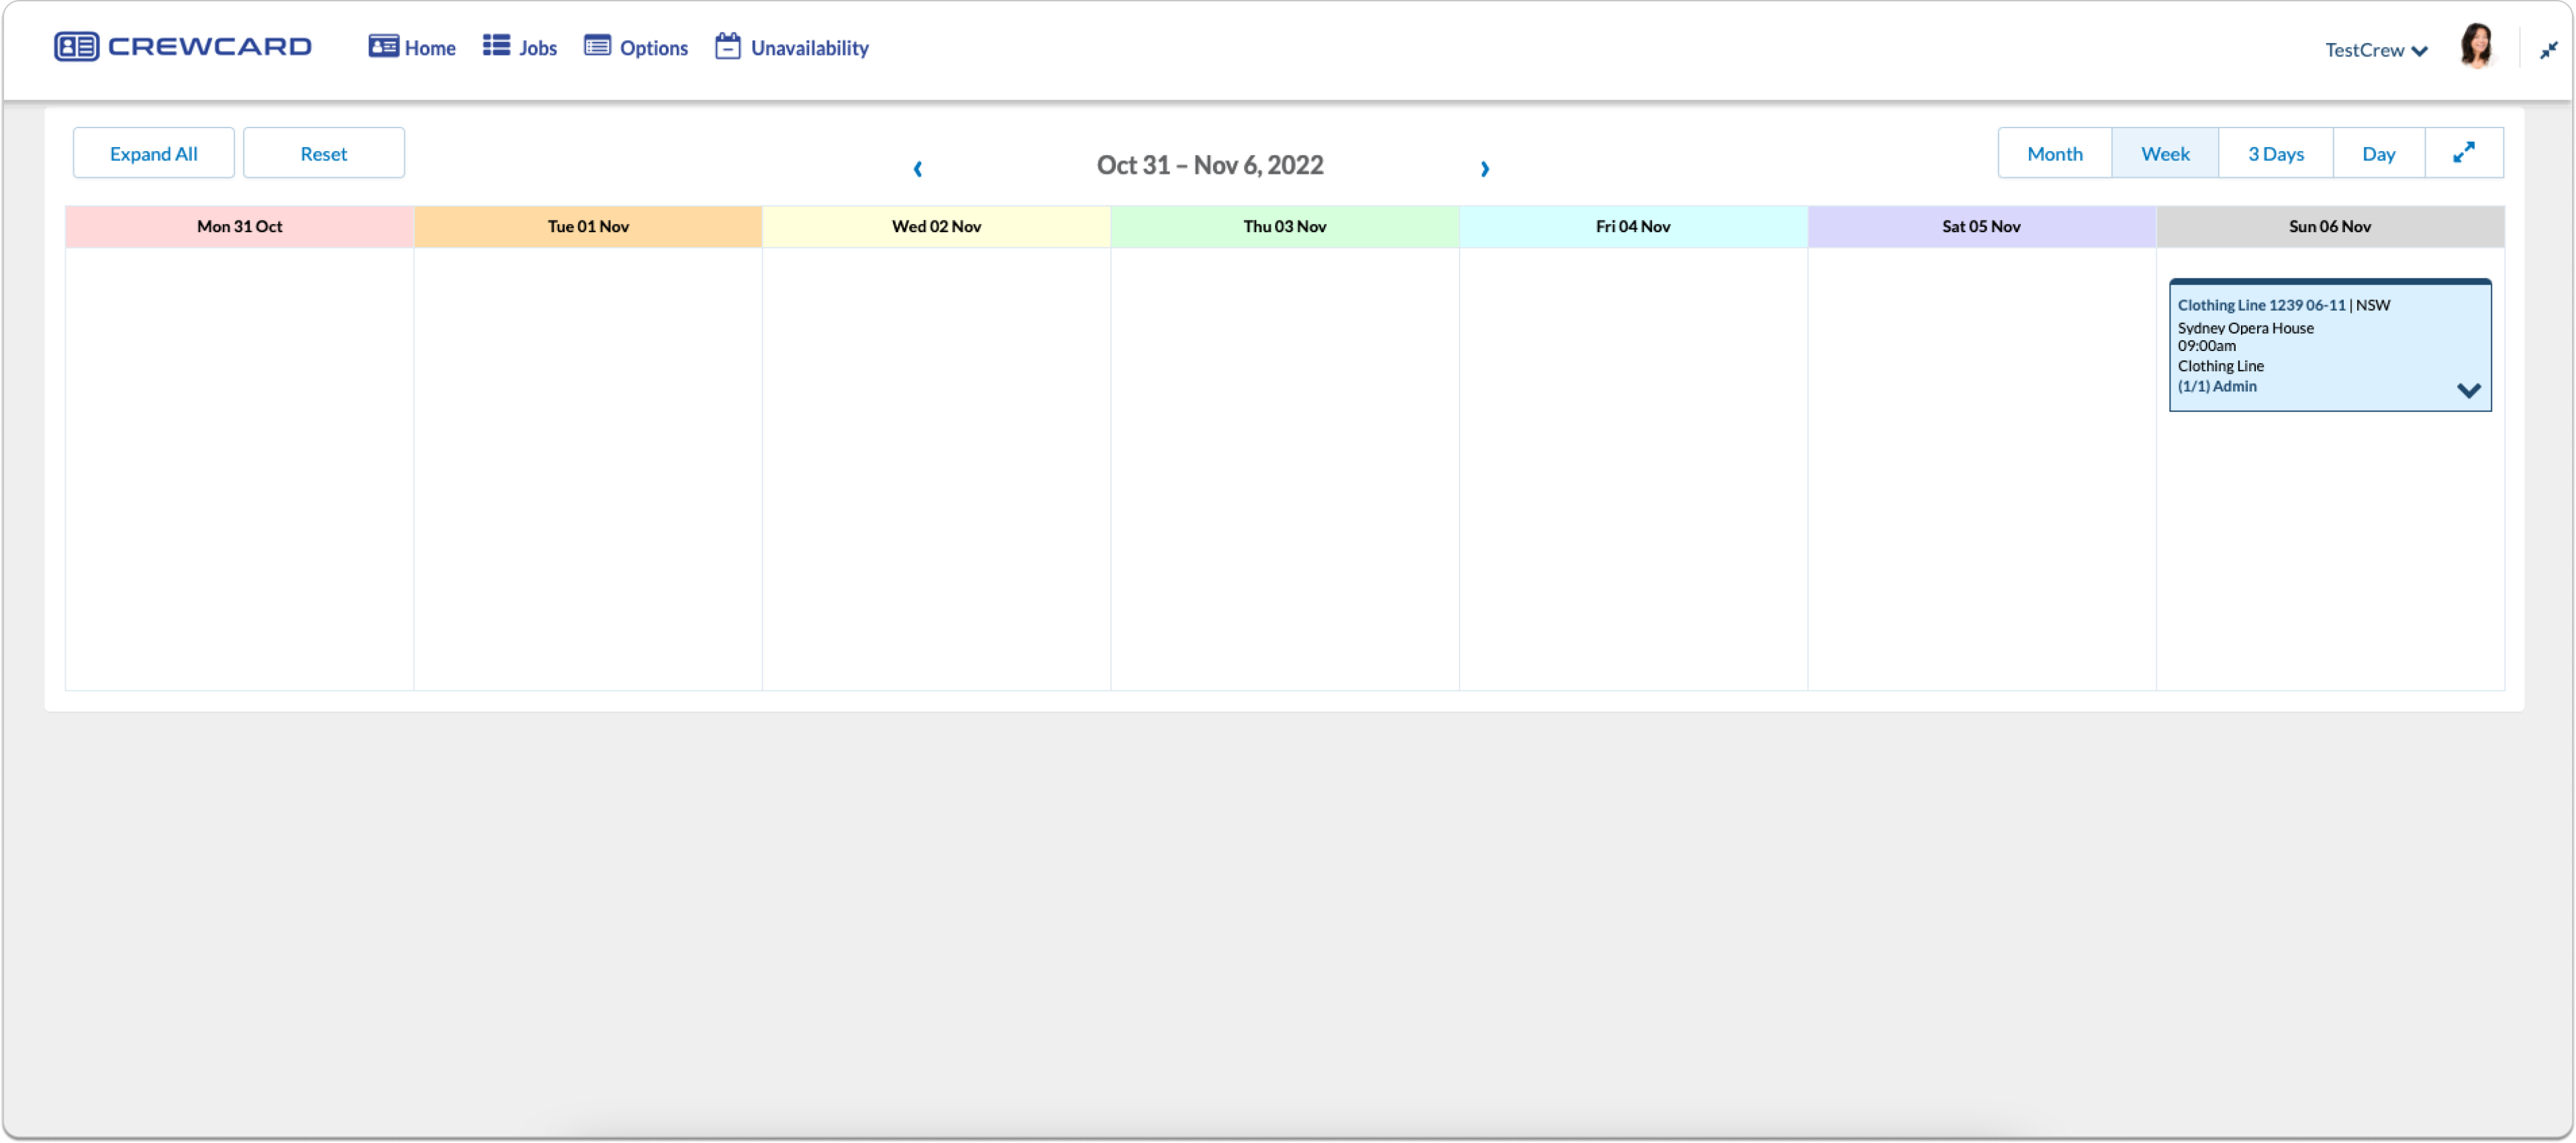
Once logged in you will be taken to the home page which will display the calendar.
The calendar will show you the jobs you are rostered on. You can view the calendar by month, week, 3 days and a day.
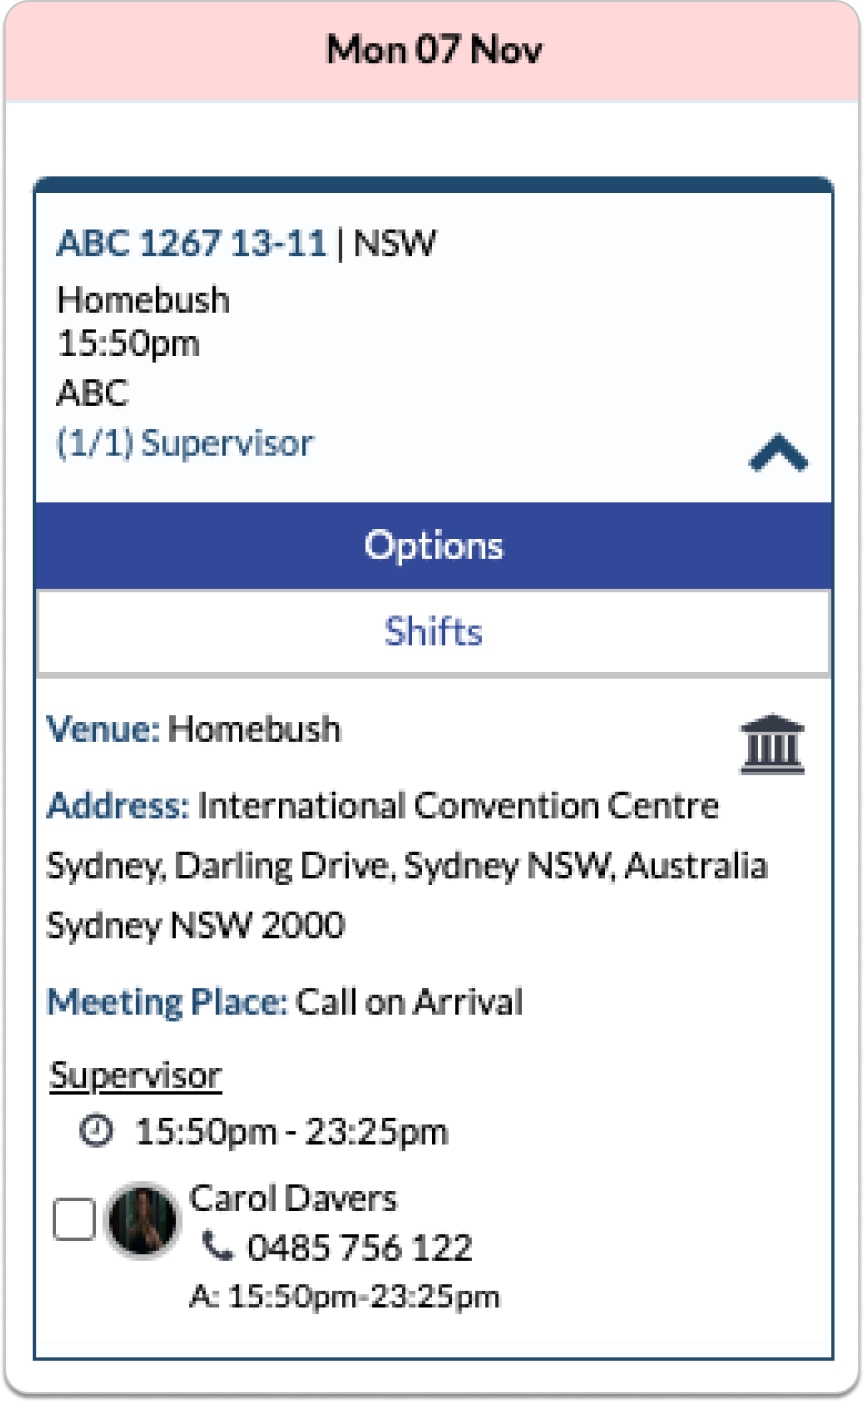
Click the arrow on the shift to extend the job information.
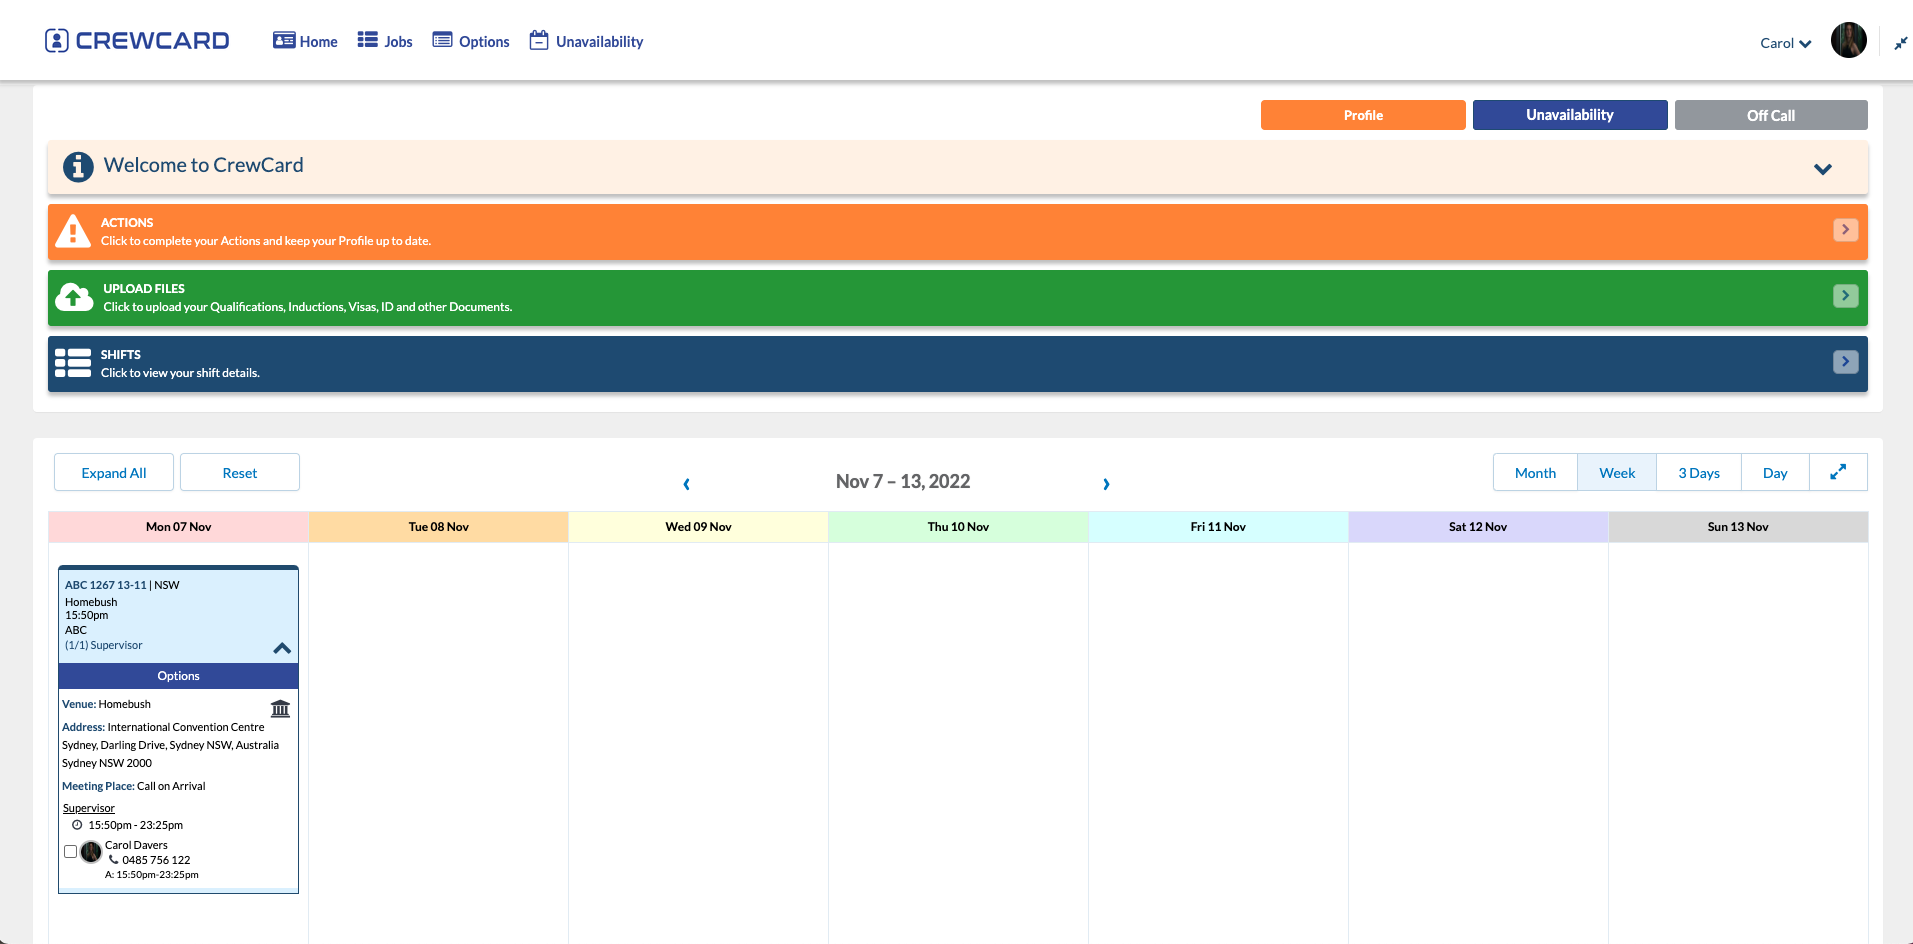
This will show you who else is on the job, the job time and the venue location.

Click Options. This will give you access to the shifts button which will direct you to the shifts page.
To learn more about shifts, see guide 2.5.
To view the venue details, click the house icon.
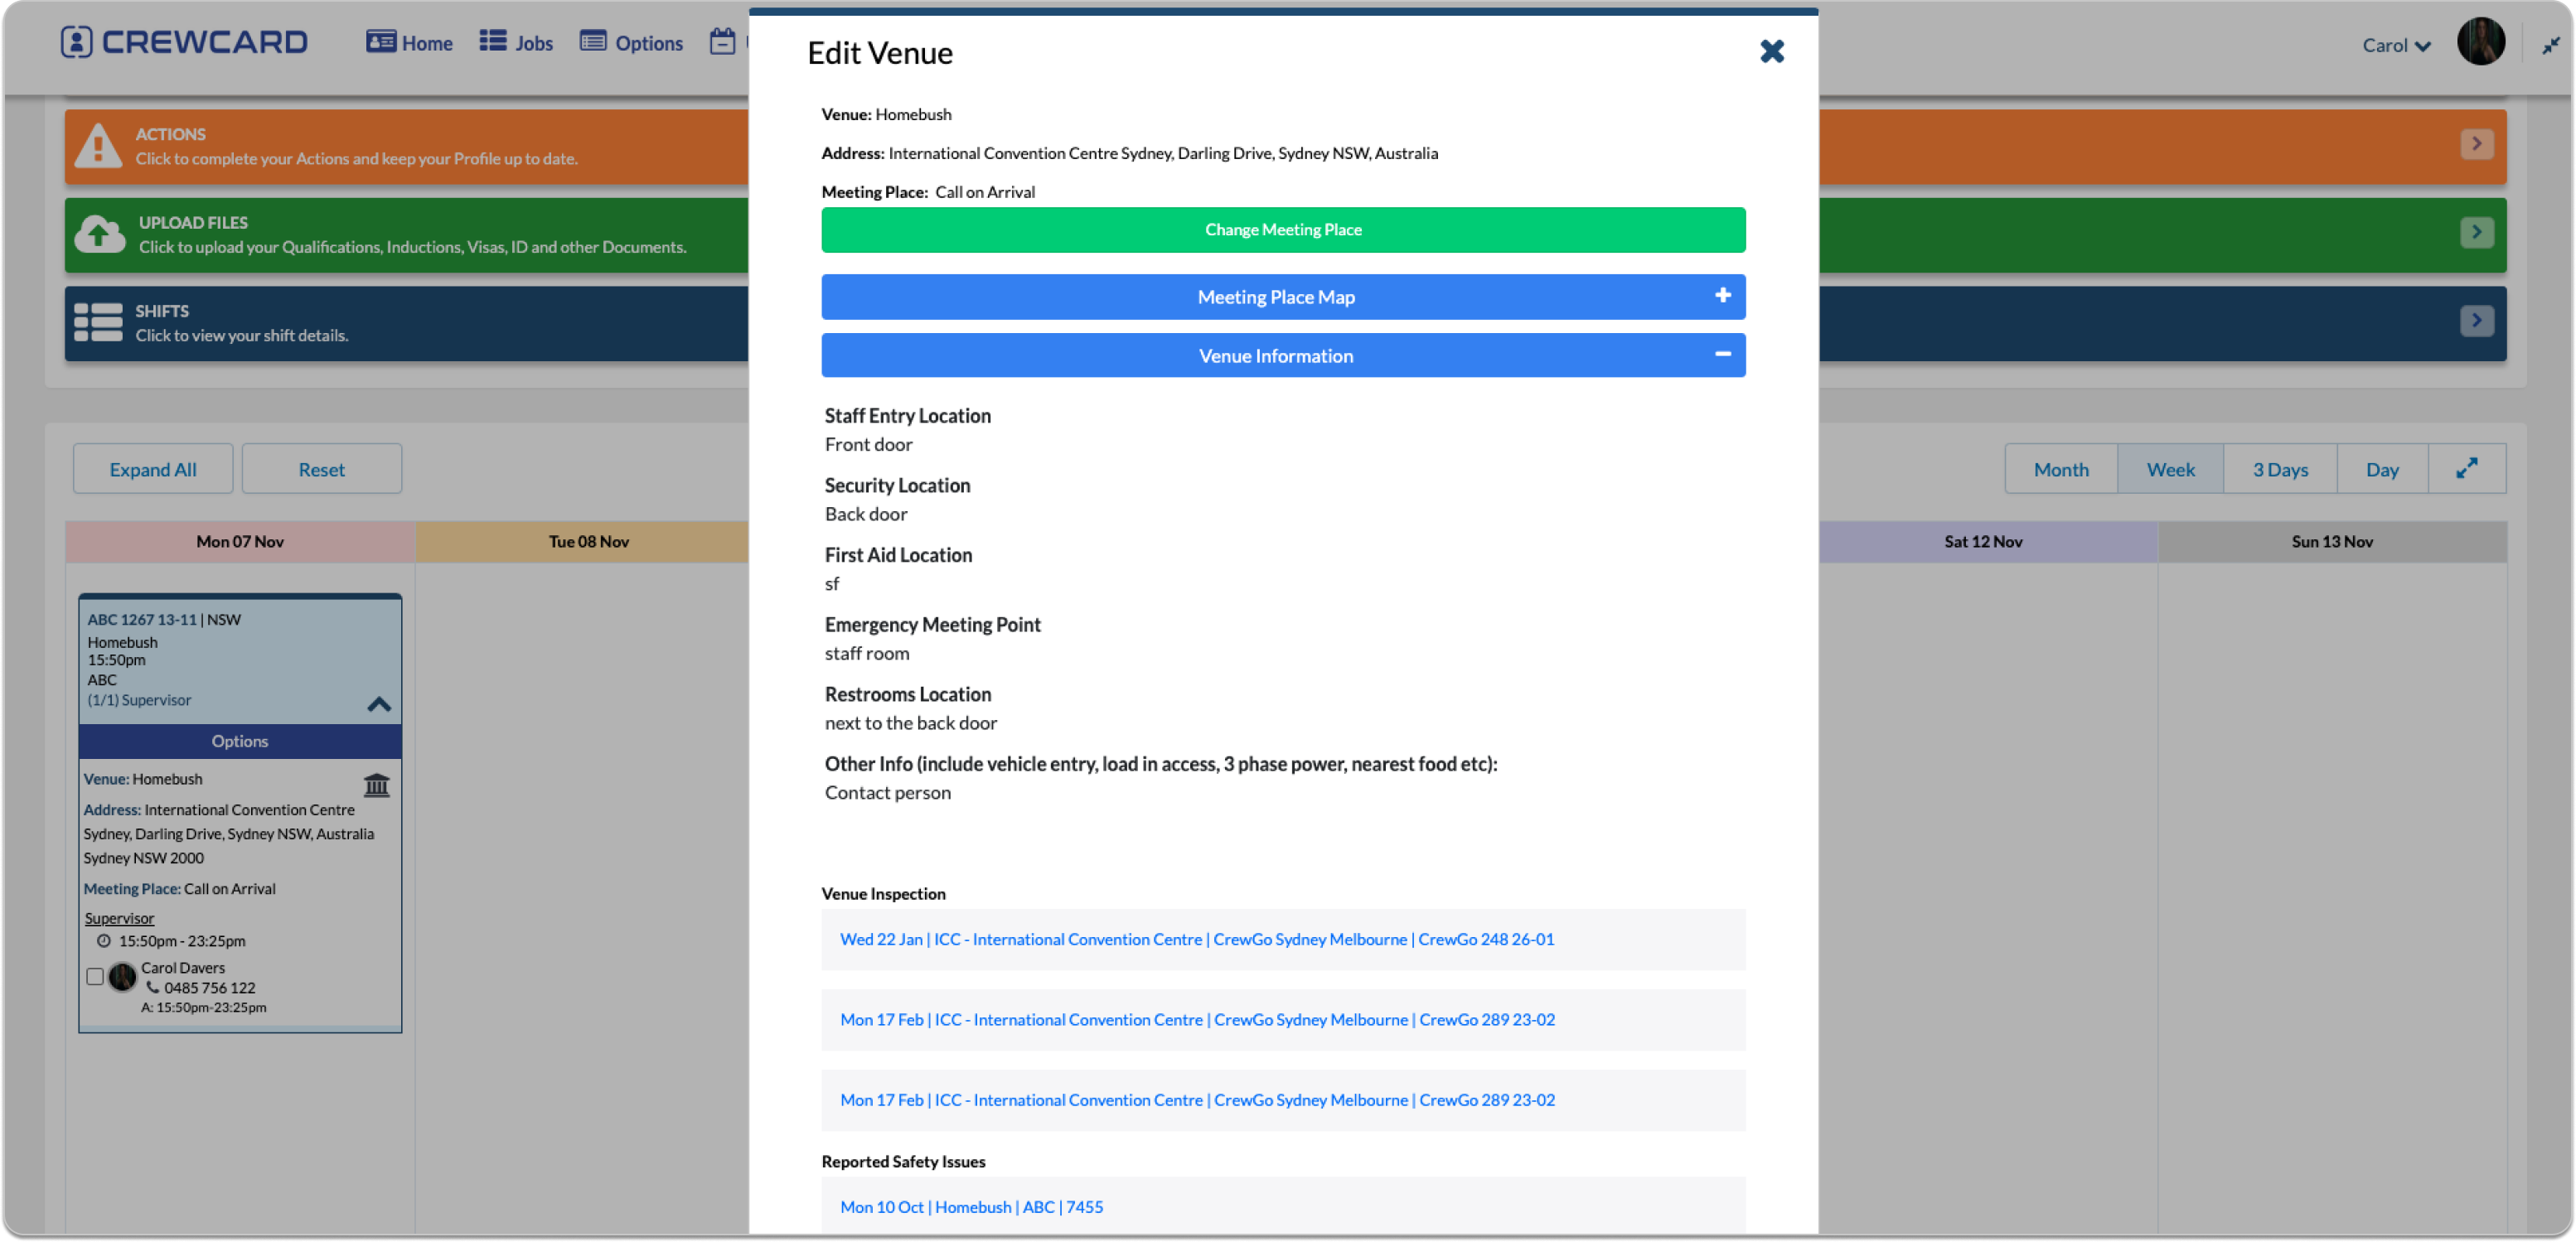
It will display information about the venue and the key locations
If you cannot view the Day Sheet on the home page and you would like access, contact support@personnelmanager.com.au
A day sheet is created for each job.
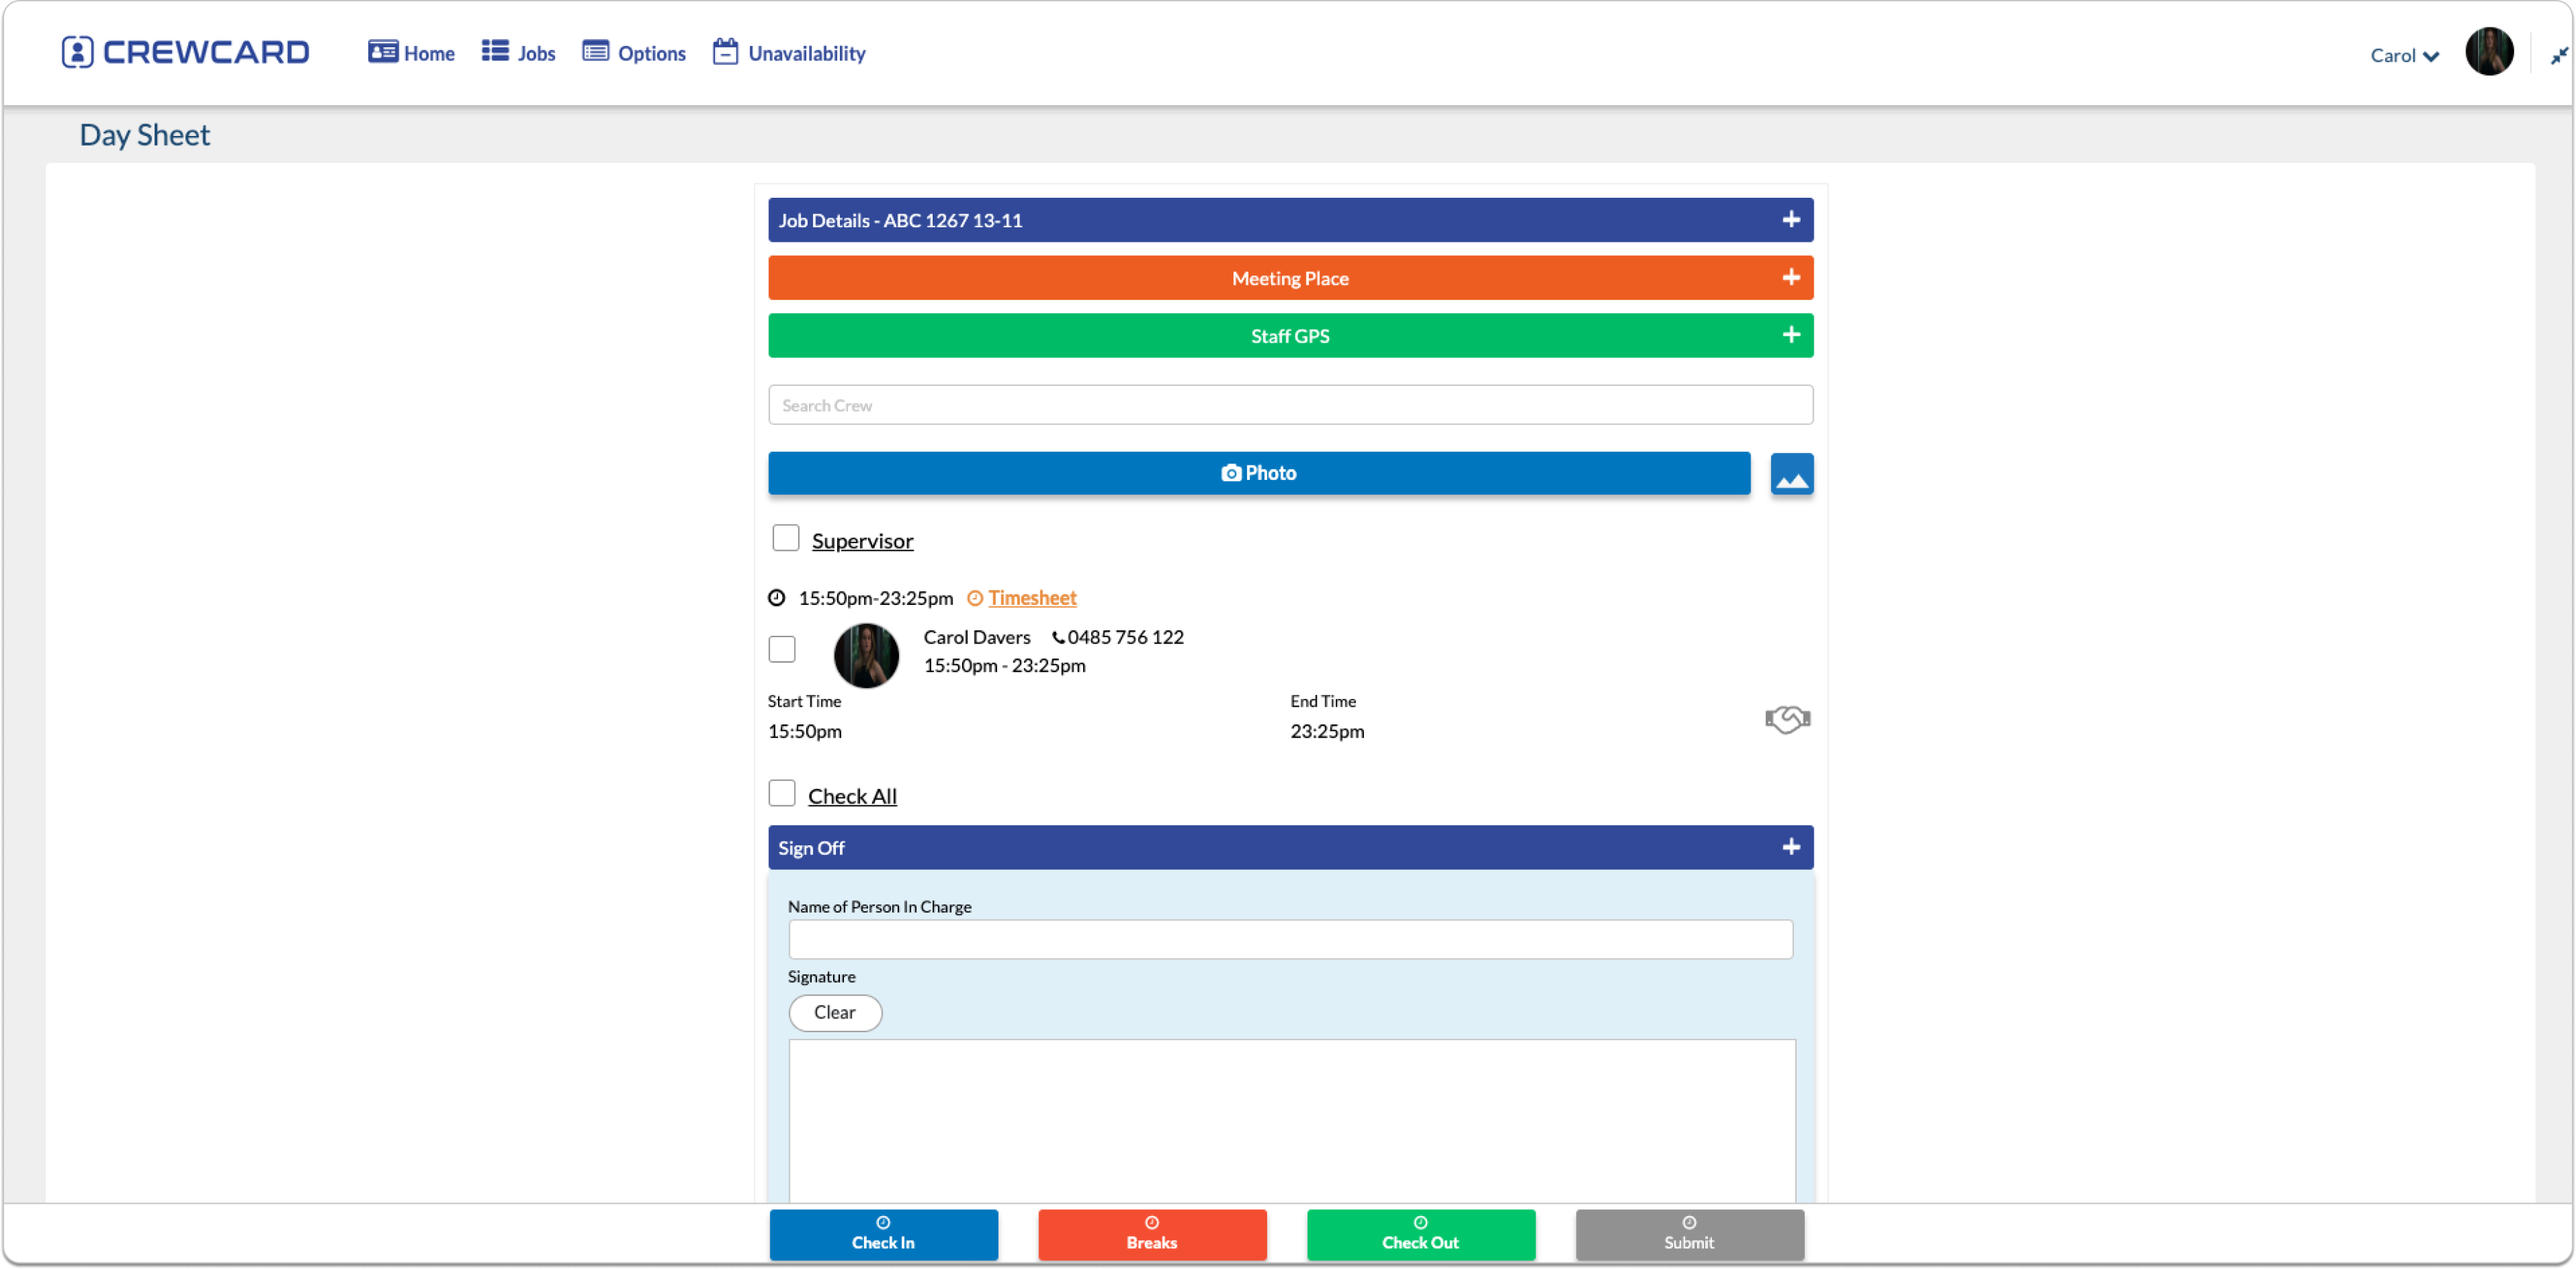
Job Details: Information about the job will show when it is expanded.
Meeting Point: View the location you will meet at.
Staff GPS: This will show your location live on a map.
Select the hand shake icon. A pop out window will open, if you agree please click ‘I Agree’.
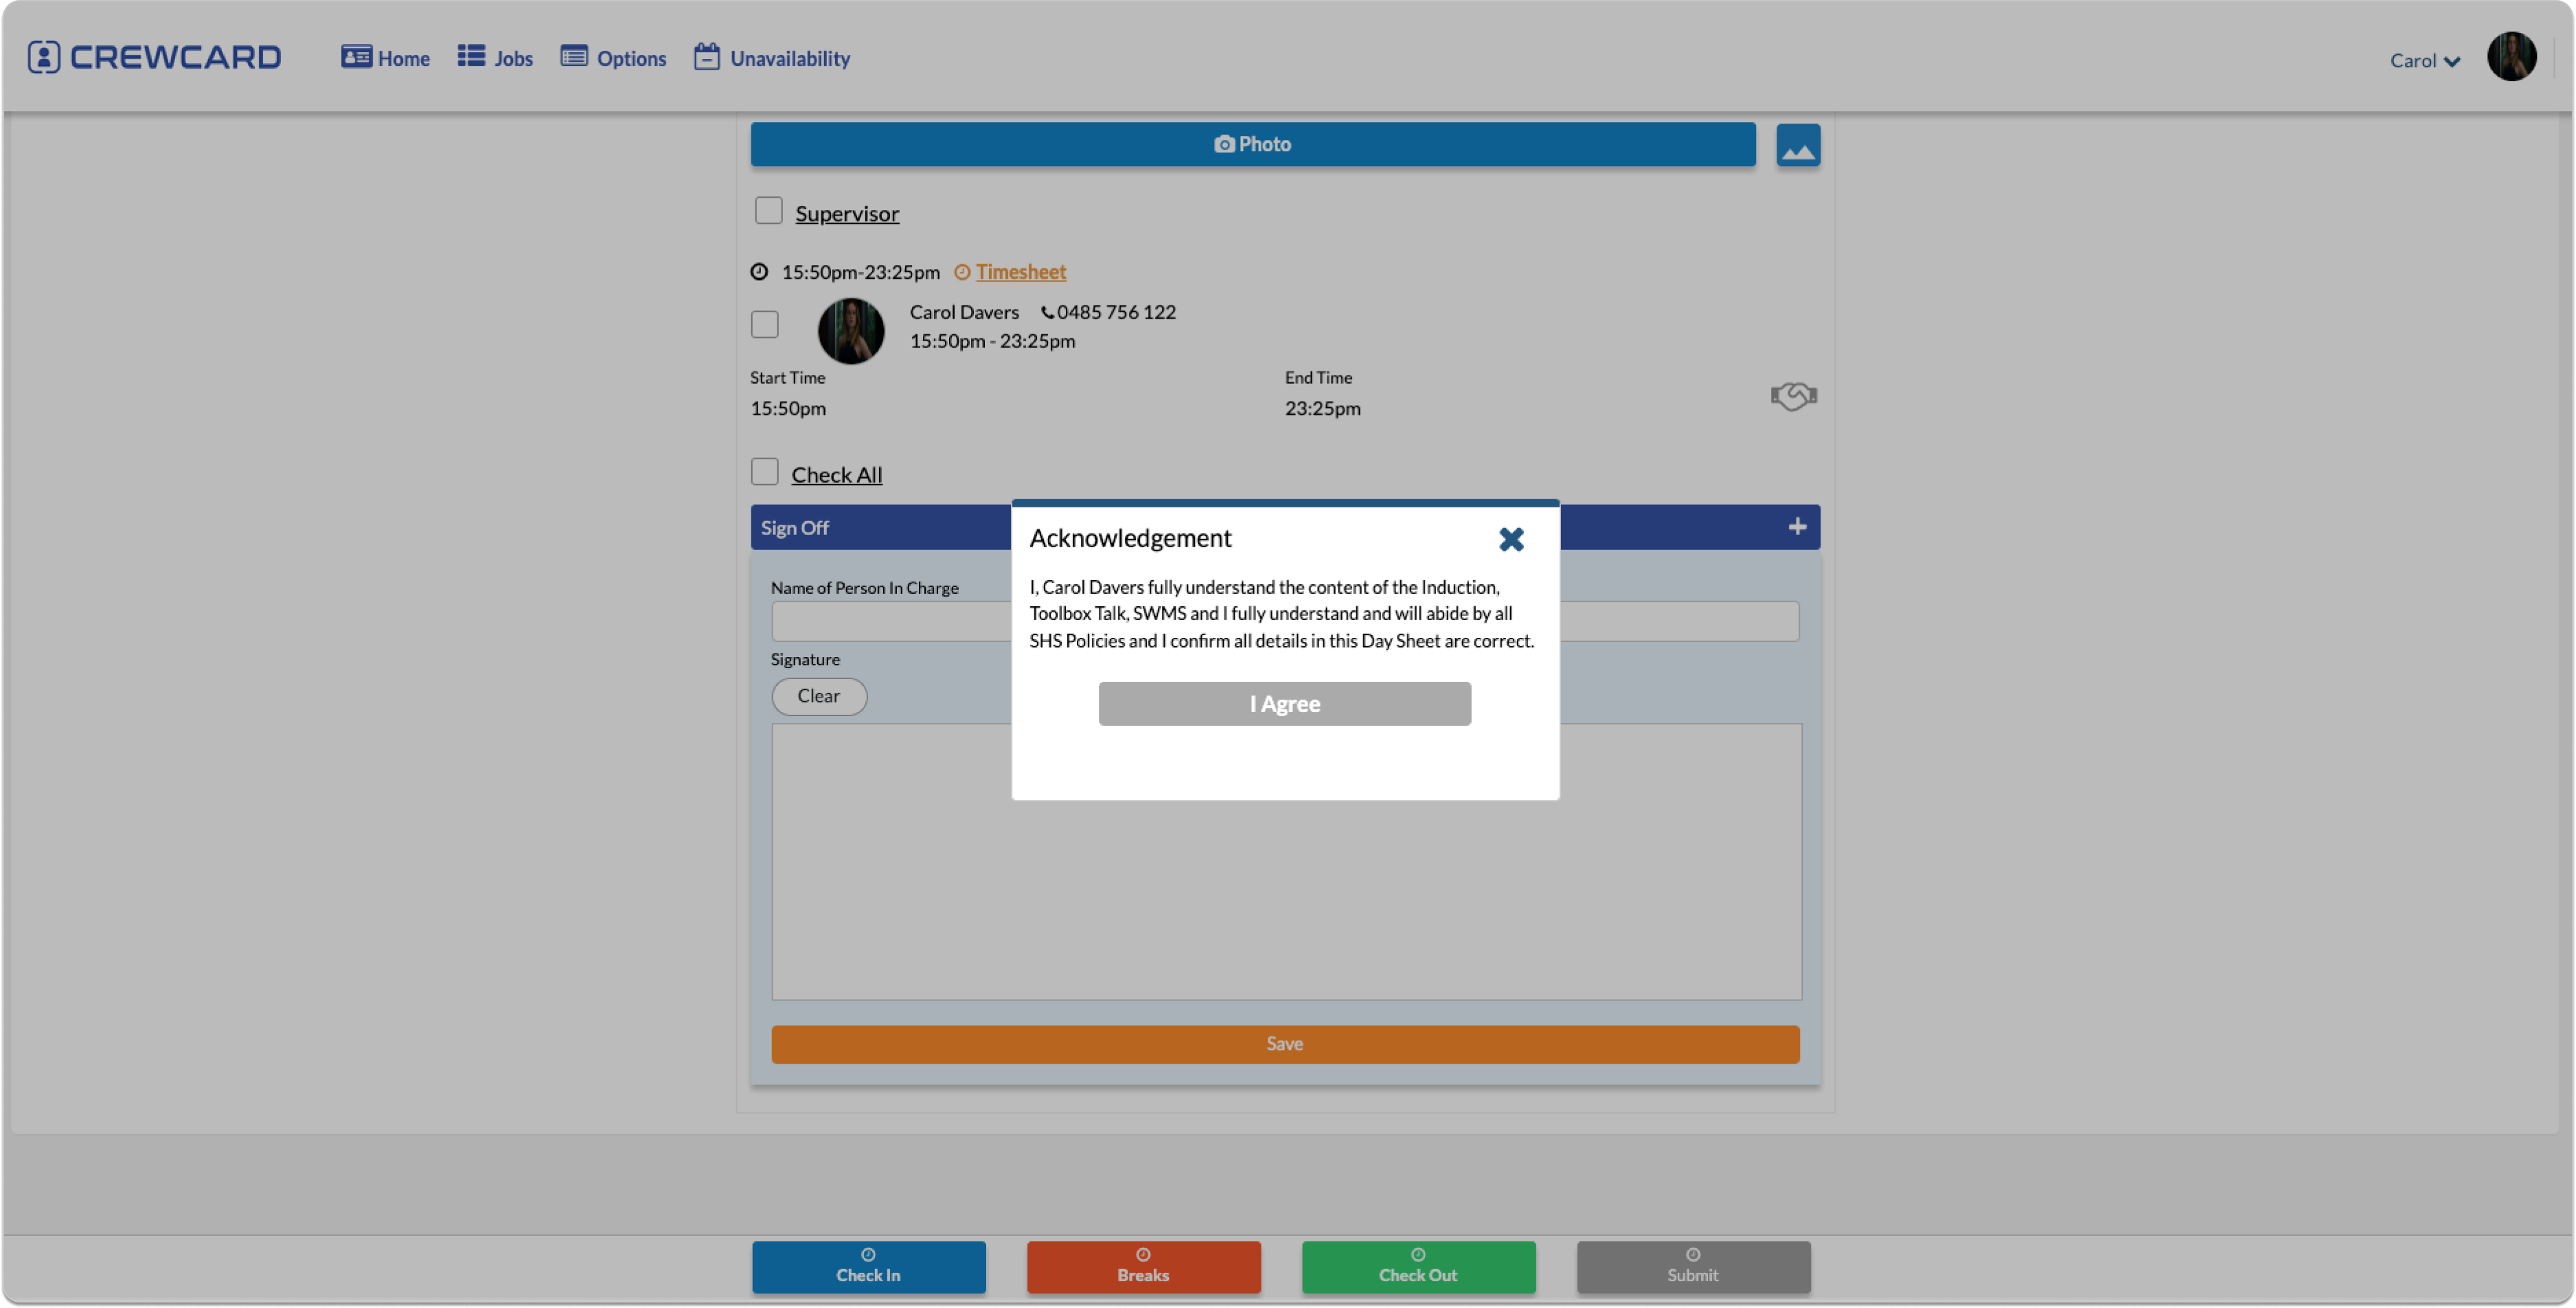
Sign off by using your mouse to sign the form once completed.
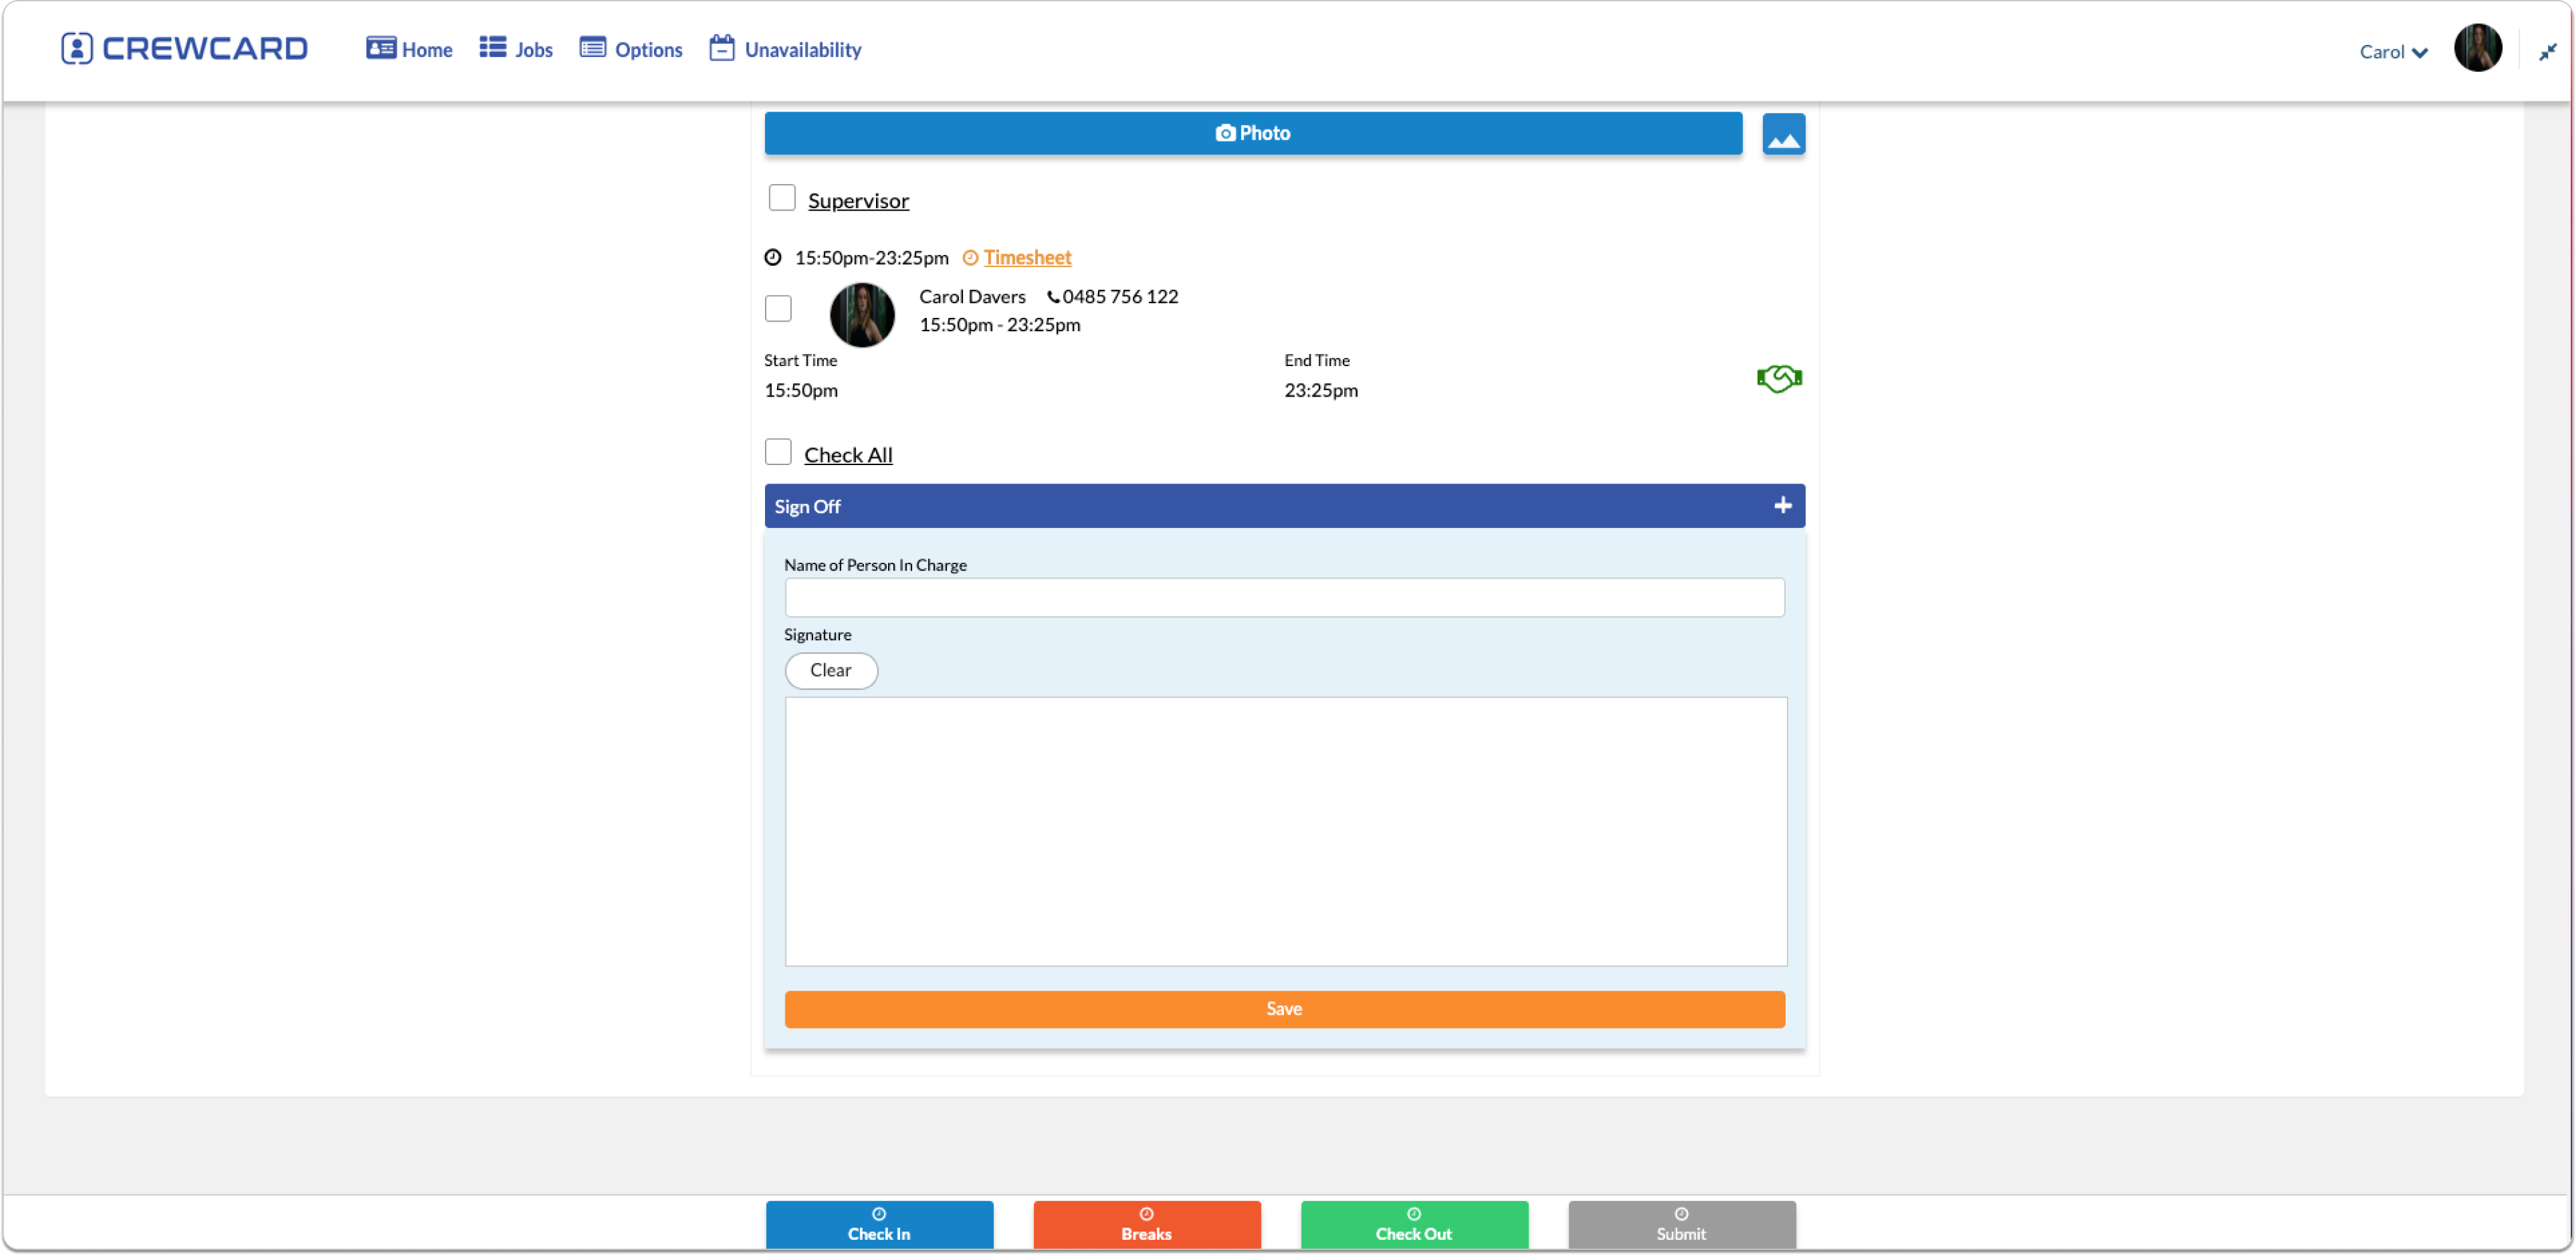
At the bottom of the page there are 4 buttons.
Check In: Enter the time when you start your shift
Breaks: Press the button when you start your break and enter the time. Press the button again and enter the time when your shift is over.
Check Out: Enter the time when you finish the job
Submit: Submit your time sheet once completed
If you are required to complete forms or policies that have been updated by the admin it will display here for you to read.
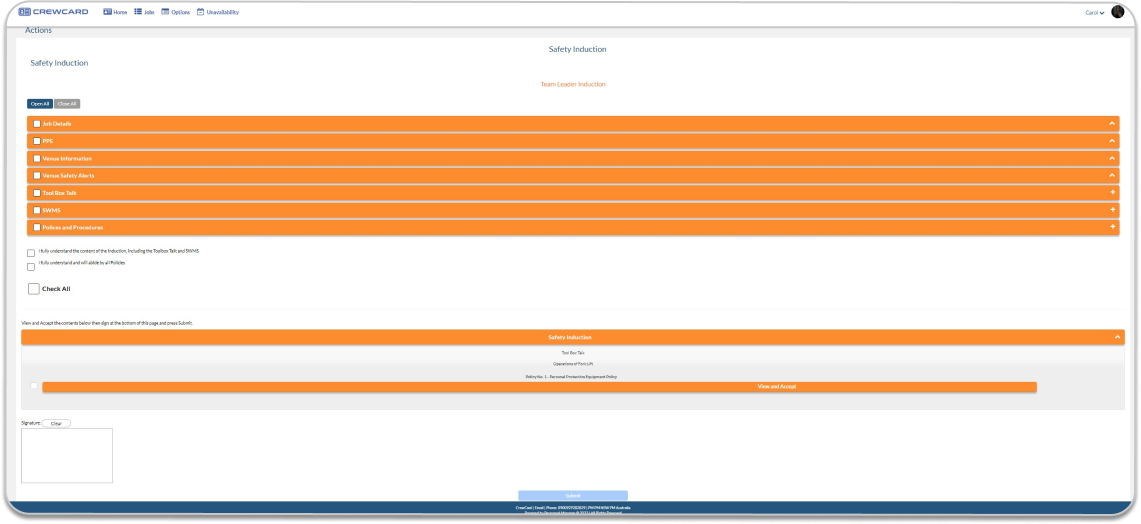
You will have to agree, accept and sign the form once understood.
It is required to upload files to your crew profile to keep it up to date. These documents include Qualifications, Inductions, Visa, ID and other important documents.
Make sure you press save after uploading the documents.
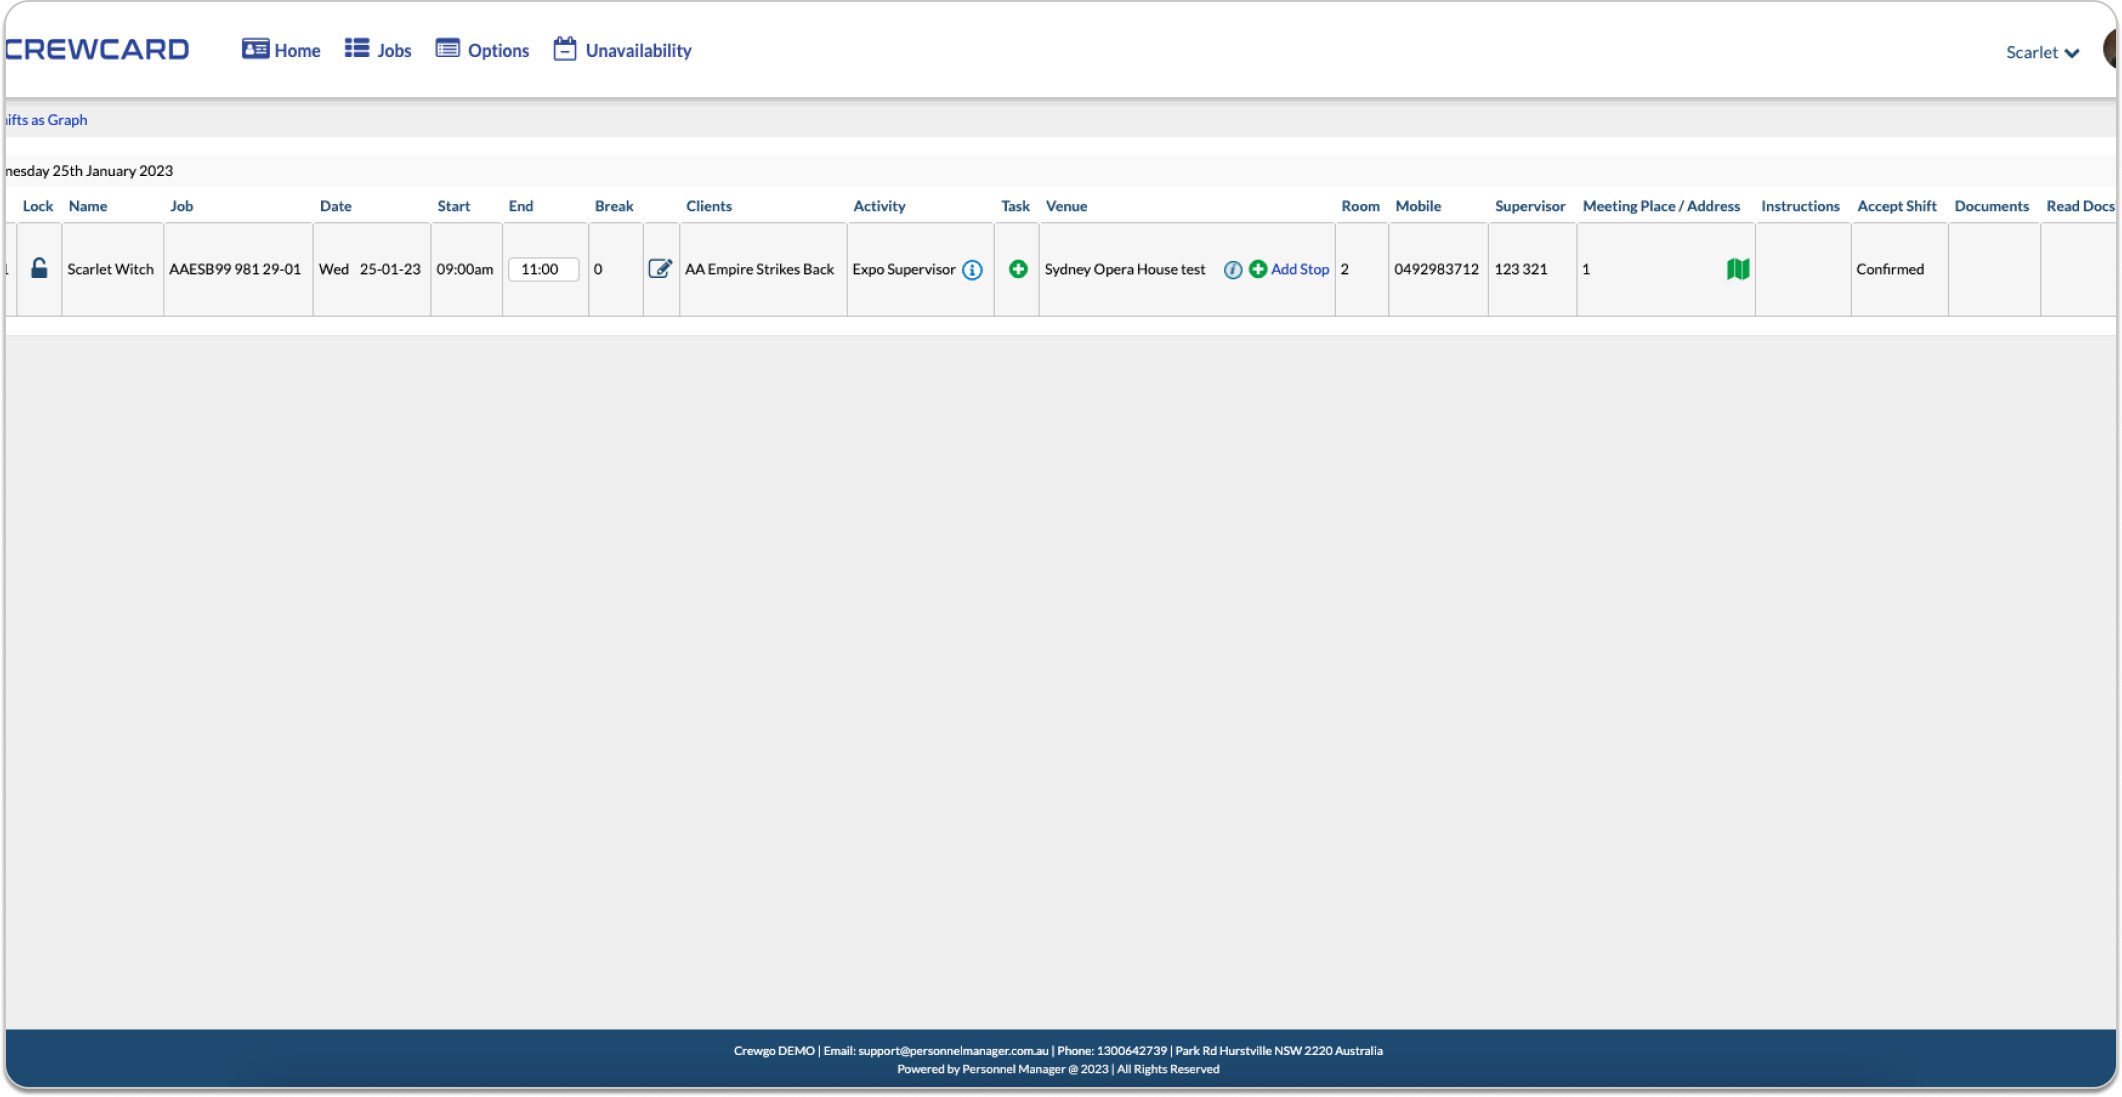
The shifts page will show you an overview of all upcoming, confirmed shifts.
Here, crew members are able to lock in their shifts, confirming their start time, end time, and breaks. To do so, select the unlocked lock icon on the left side of the row of the shift desired.
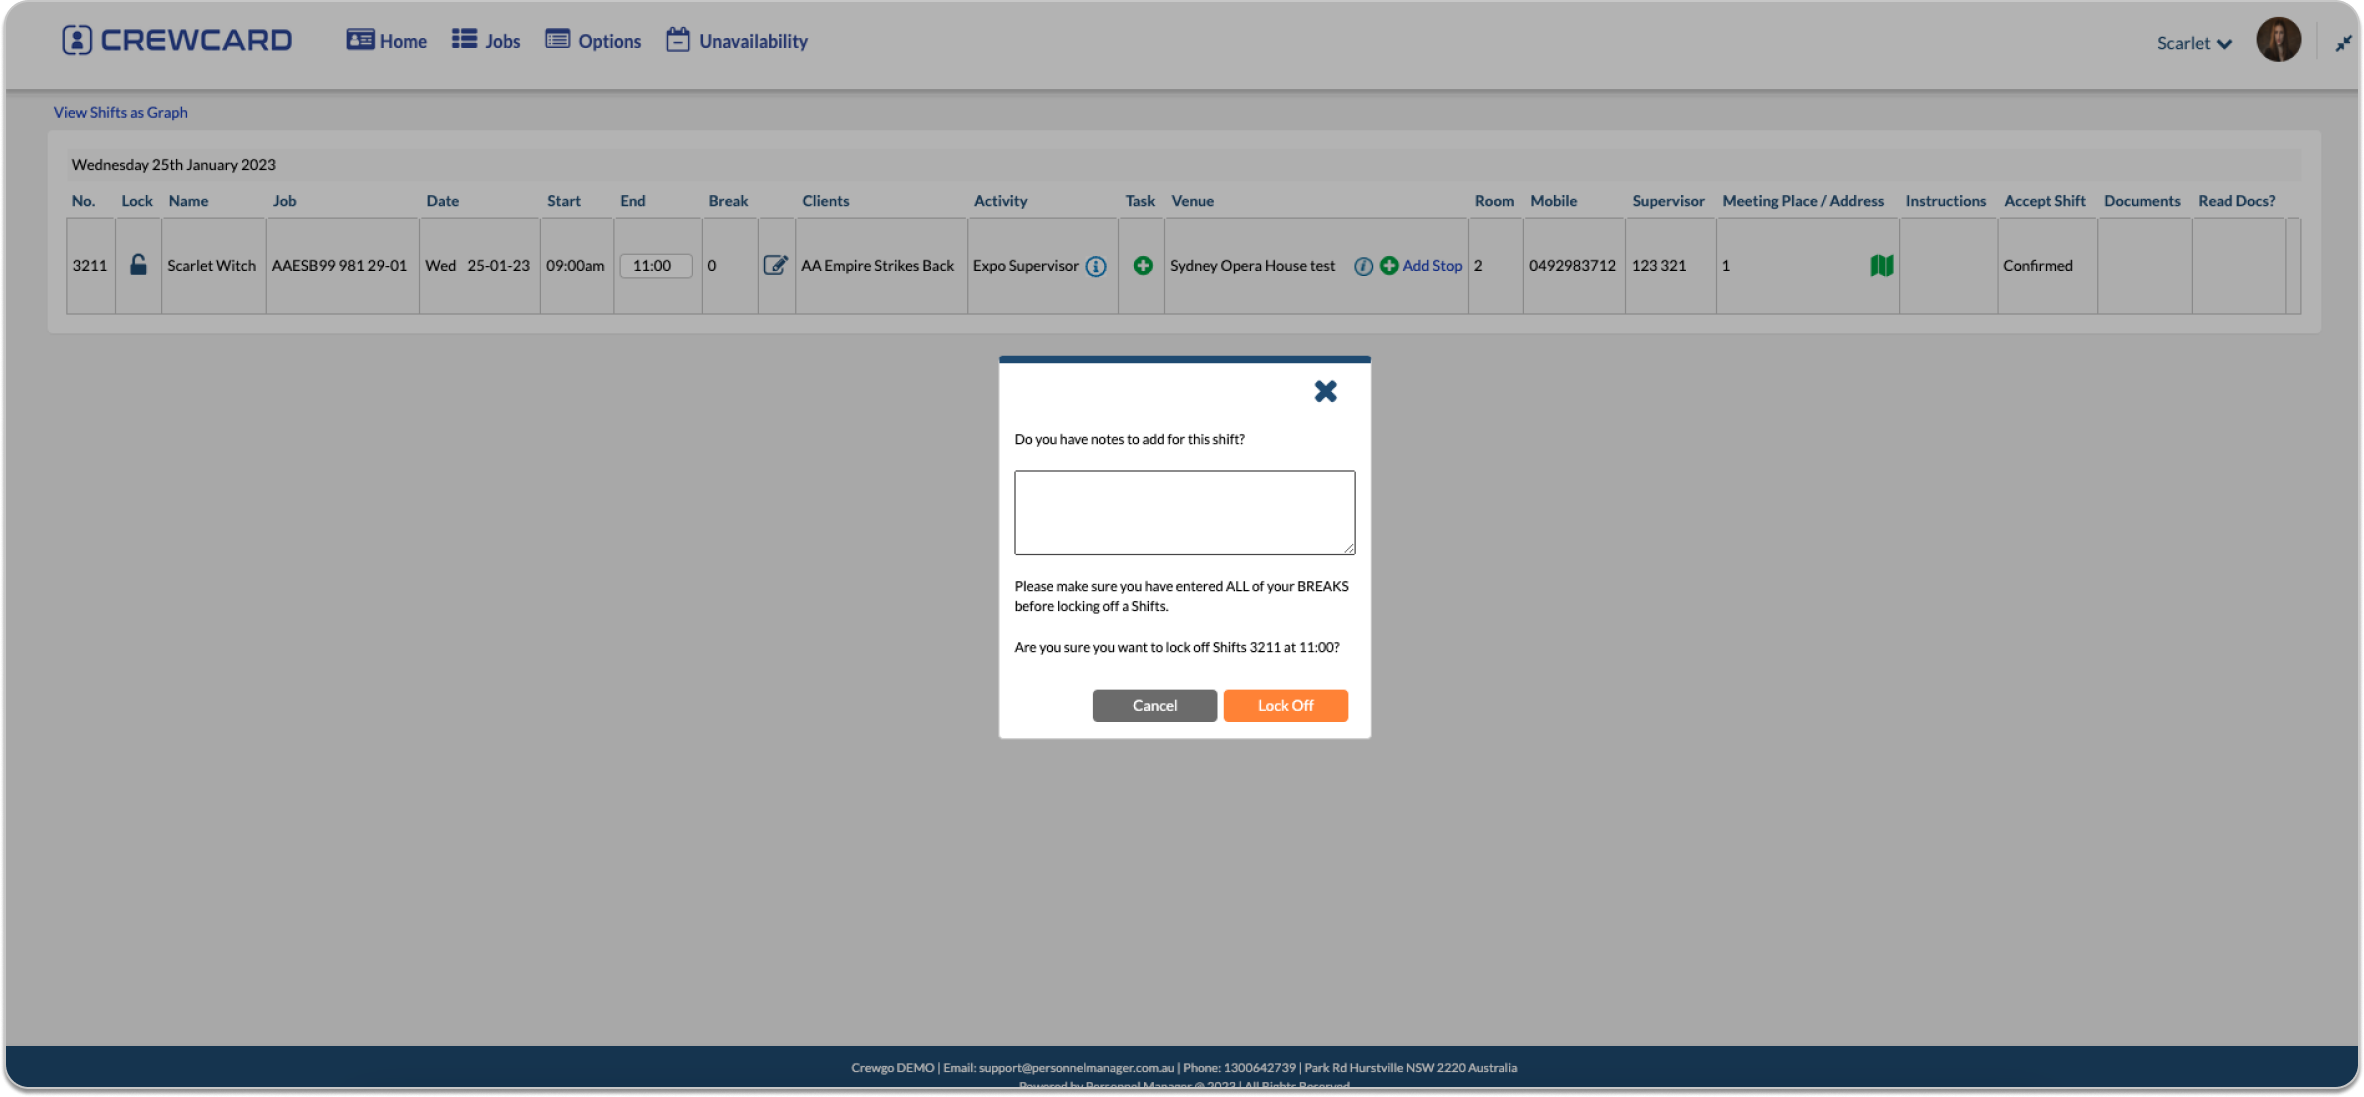
A pop out window will appear, asking if the crew member has any notes to add for the shift, as well as to ensure that all breaks have been entered. The crew is asked again if they are sure they would like to lock off the shift.
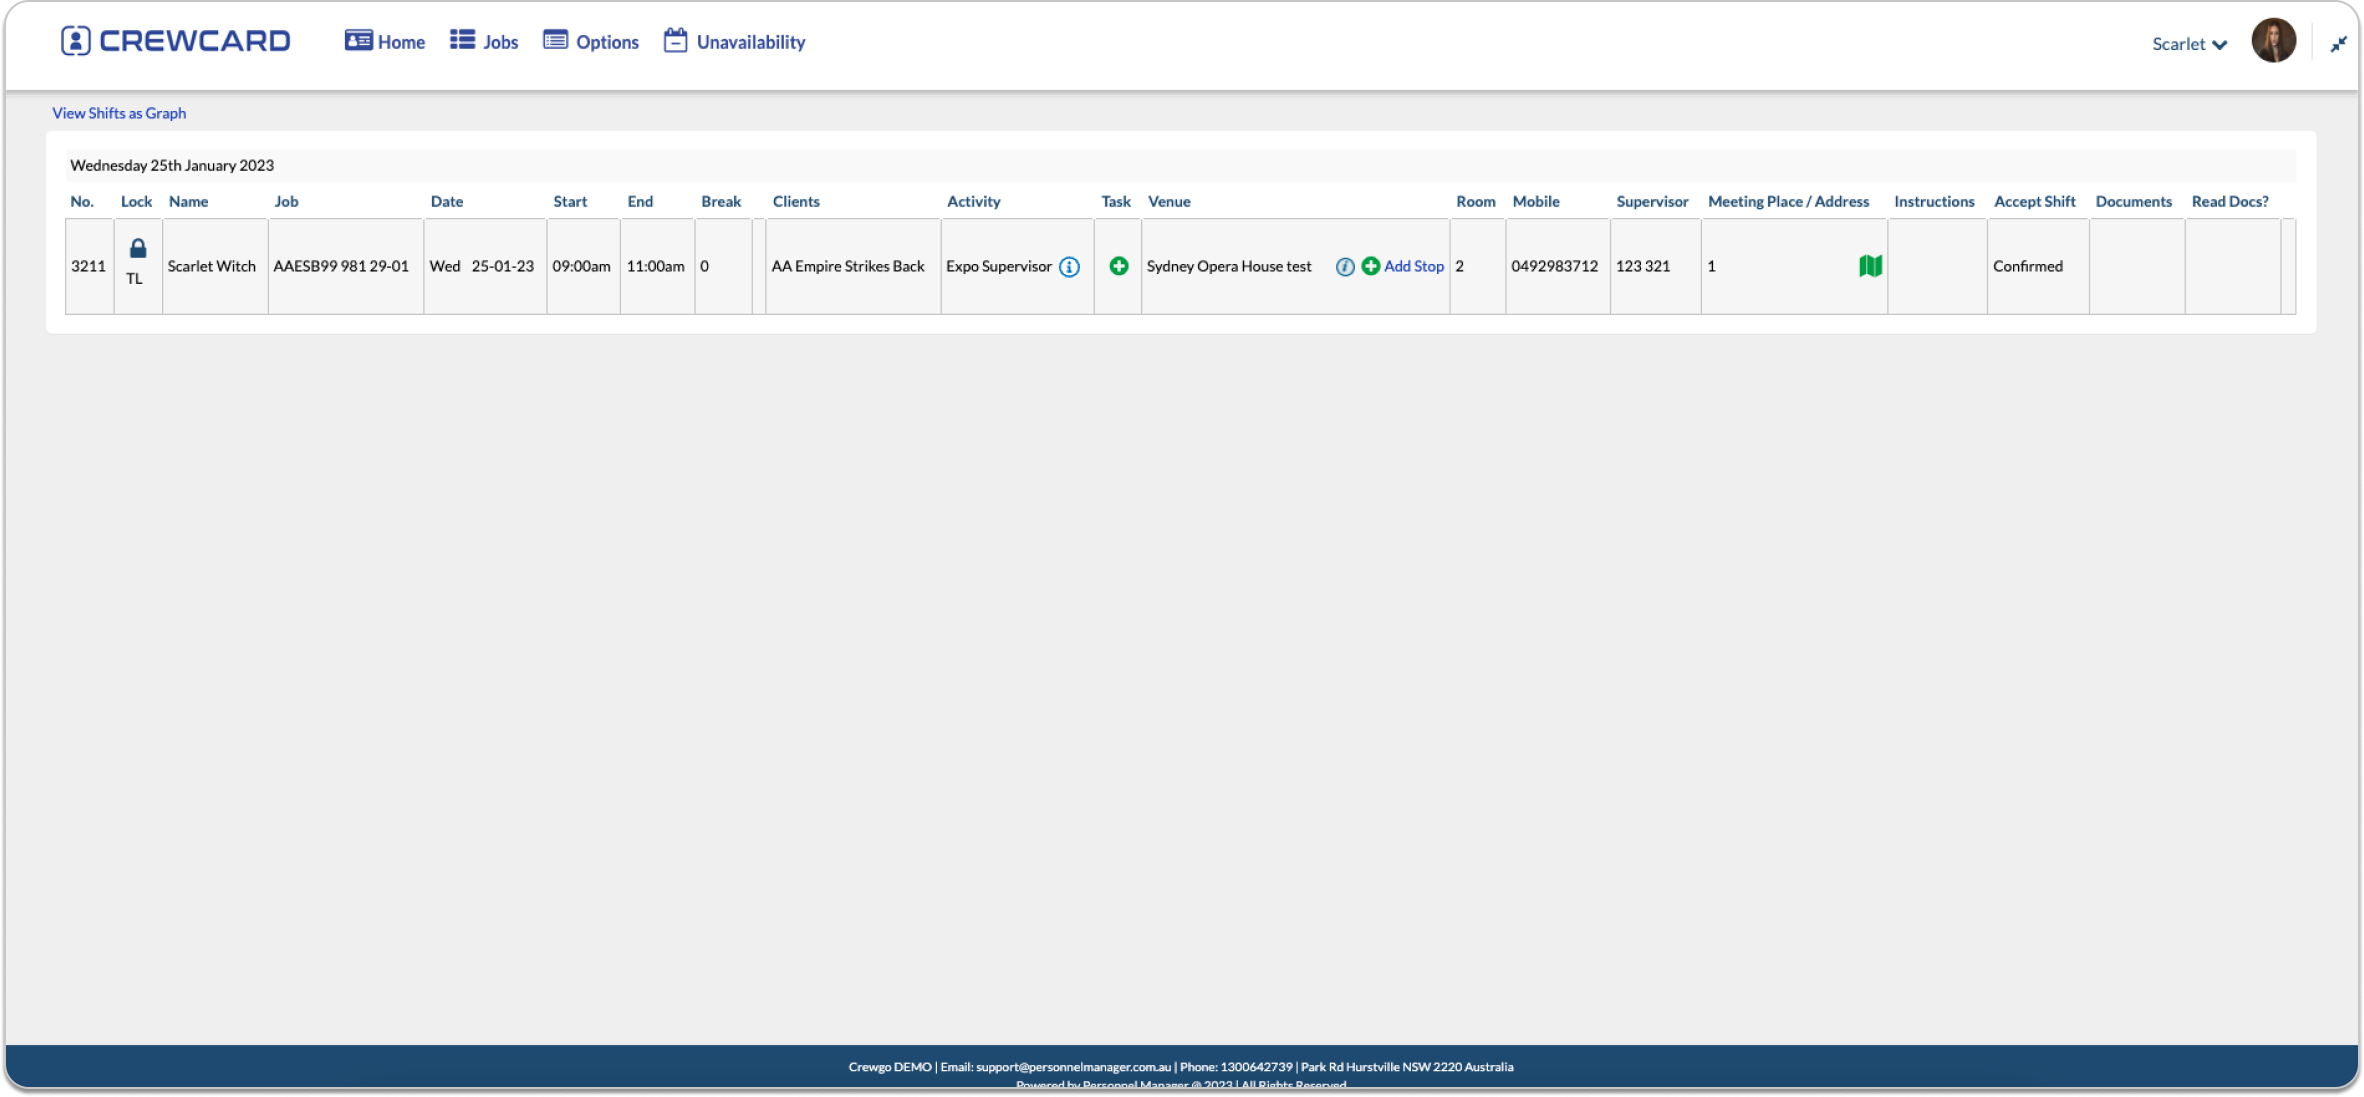
Once ‘Lock Off’ is selected, the shift is locked, and the lock icon will now appear as closed.
When a crew member locks a shift, an email is send to the admin:

This will take you to the shift page, please view guide 2.5 shifts. However, this will only display upcoming jobs and no past jobs.
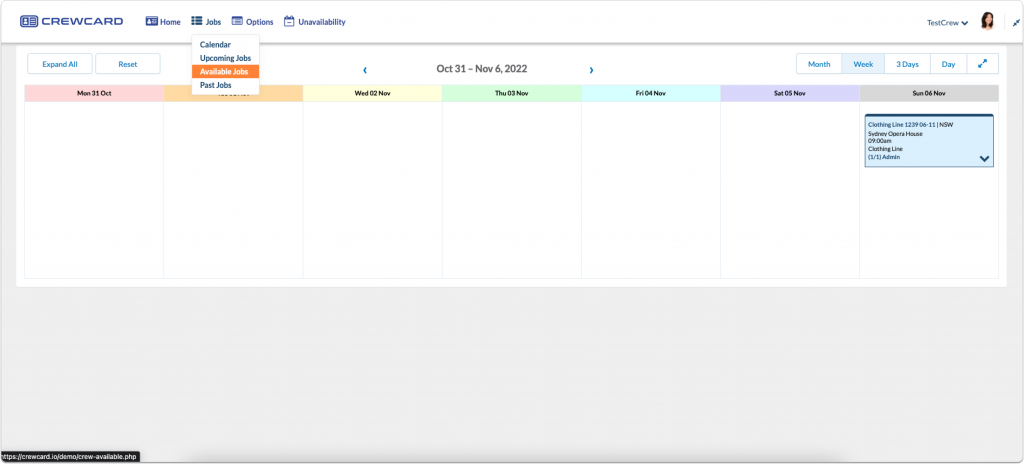
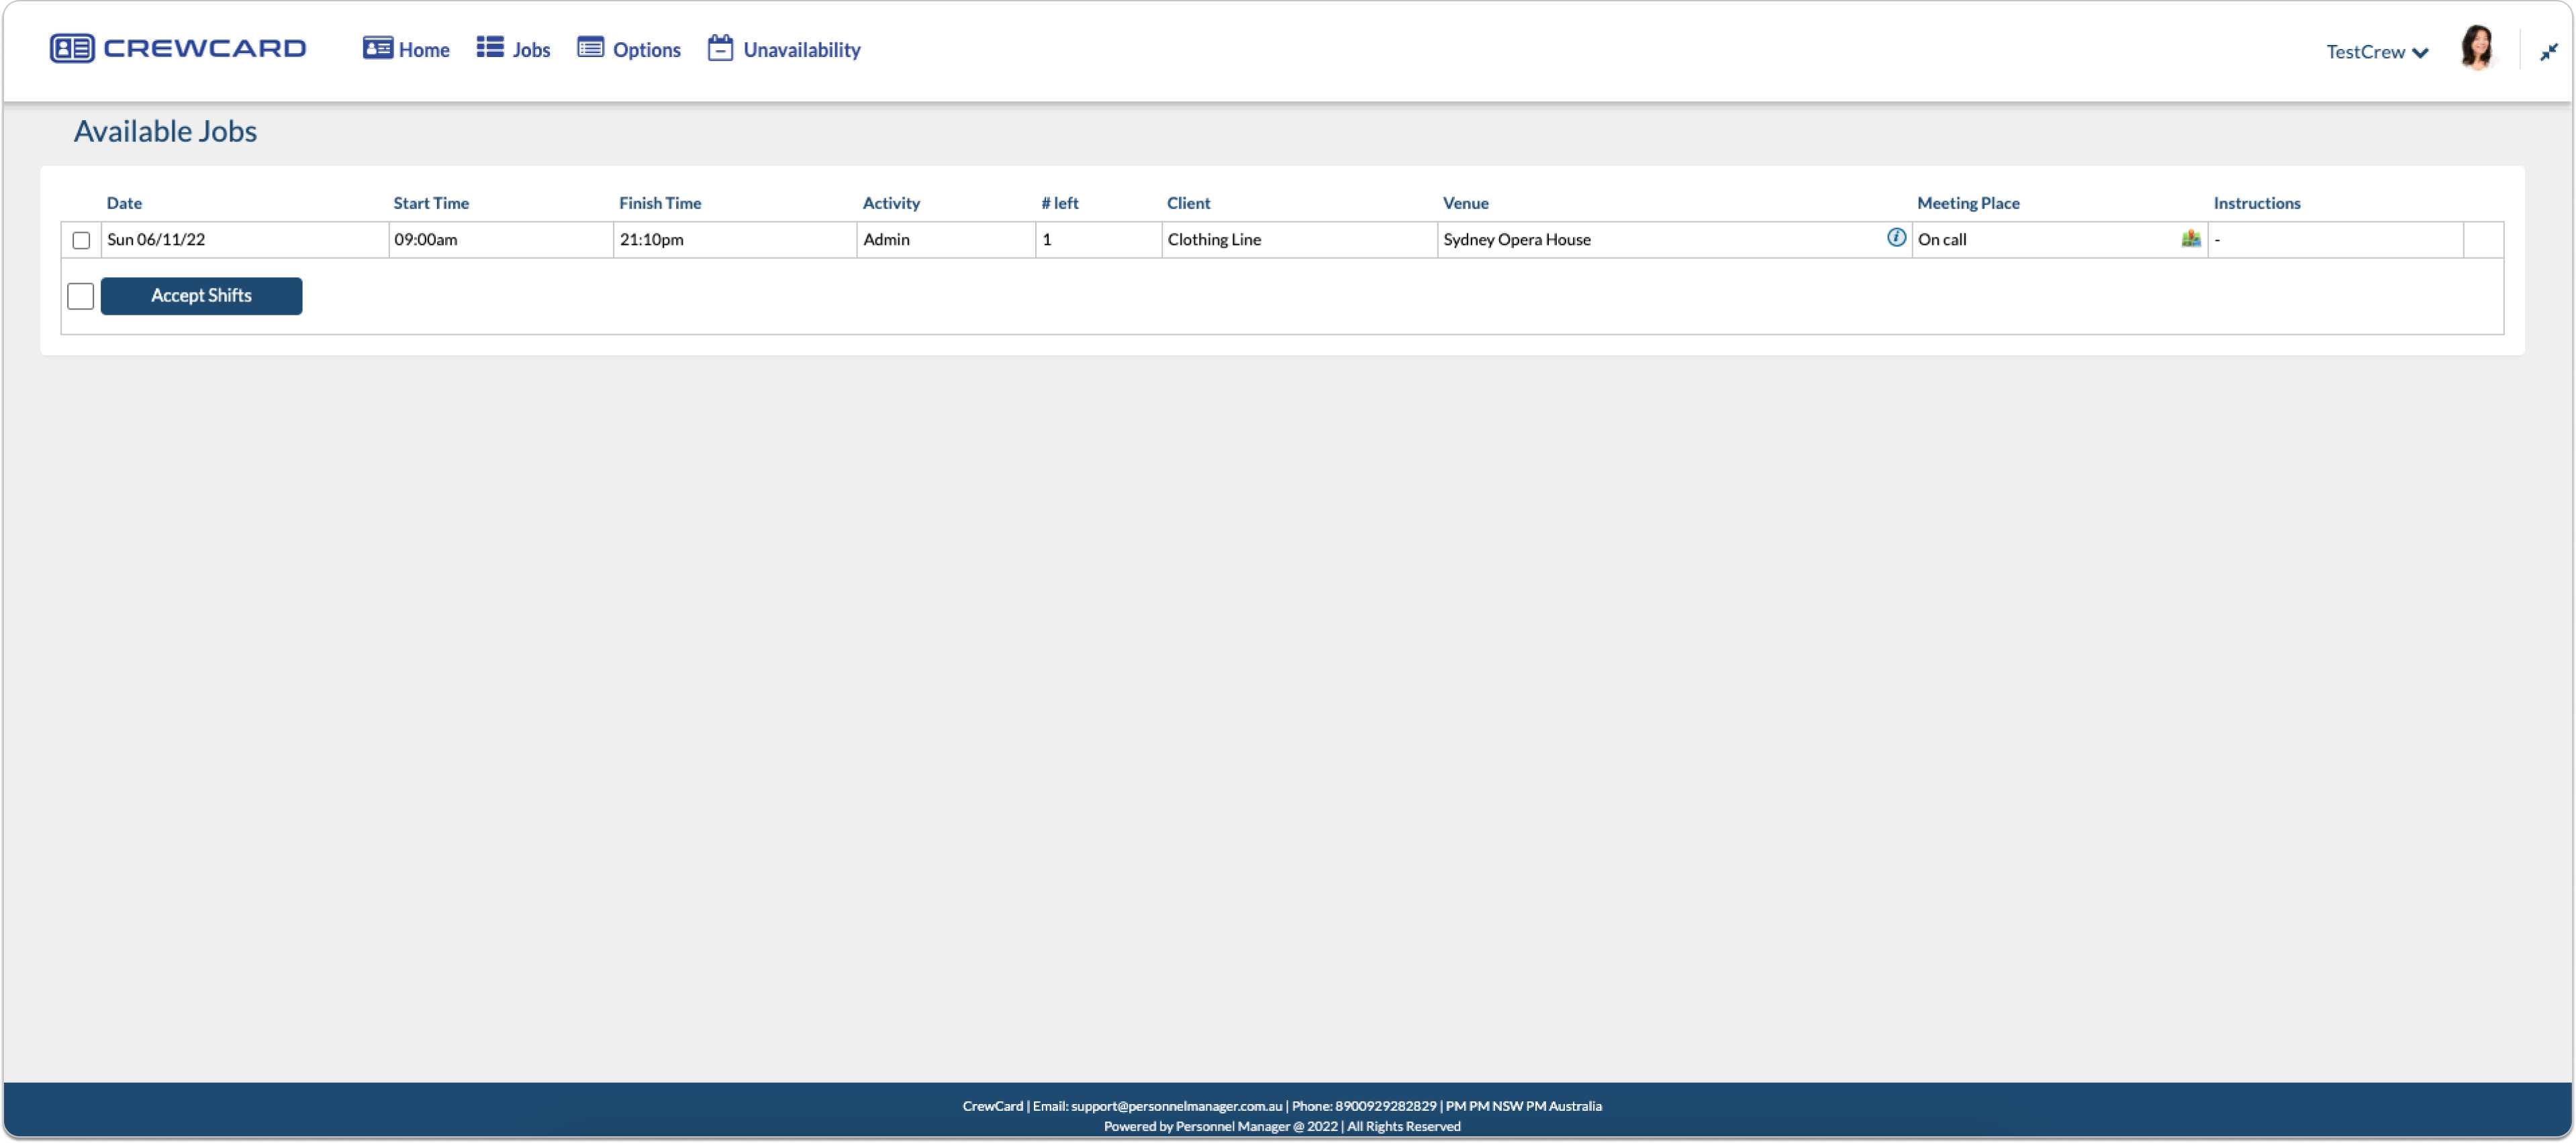
In order to view available jobs via the CrewCard website, login to the CrewCard website and hover your mouse over the ‘Jobs’ tab on the central navigation bar. A list will present itself. Select ‘Available Jobs’. This will present the Available Jobs page.
To accept the shift, tick the checkbox on the left on the job, and select ‘Accept Shifts’. To select multiple shifts, select the checkbox next to ‘Accept Shifts’, then select ‘Accept Shifts’.
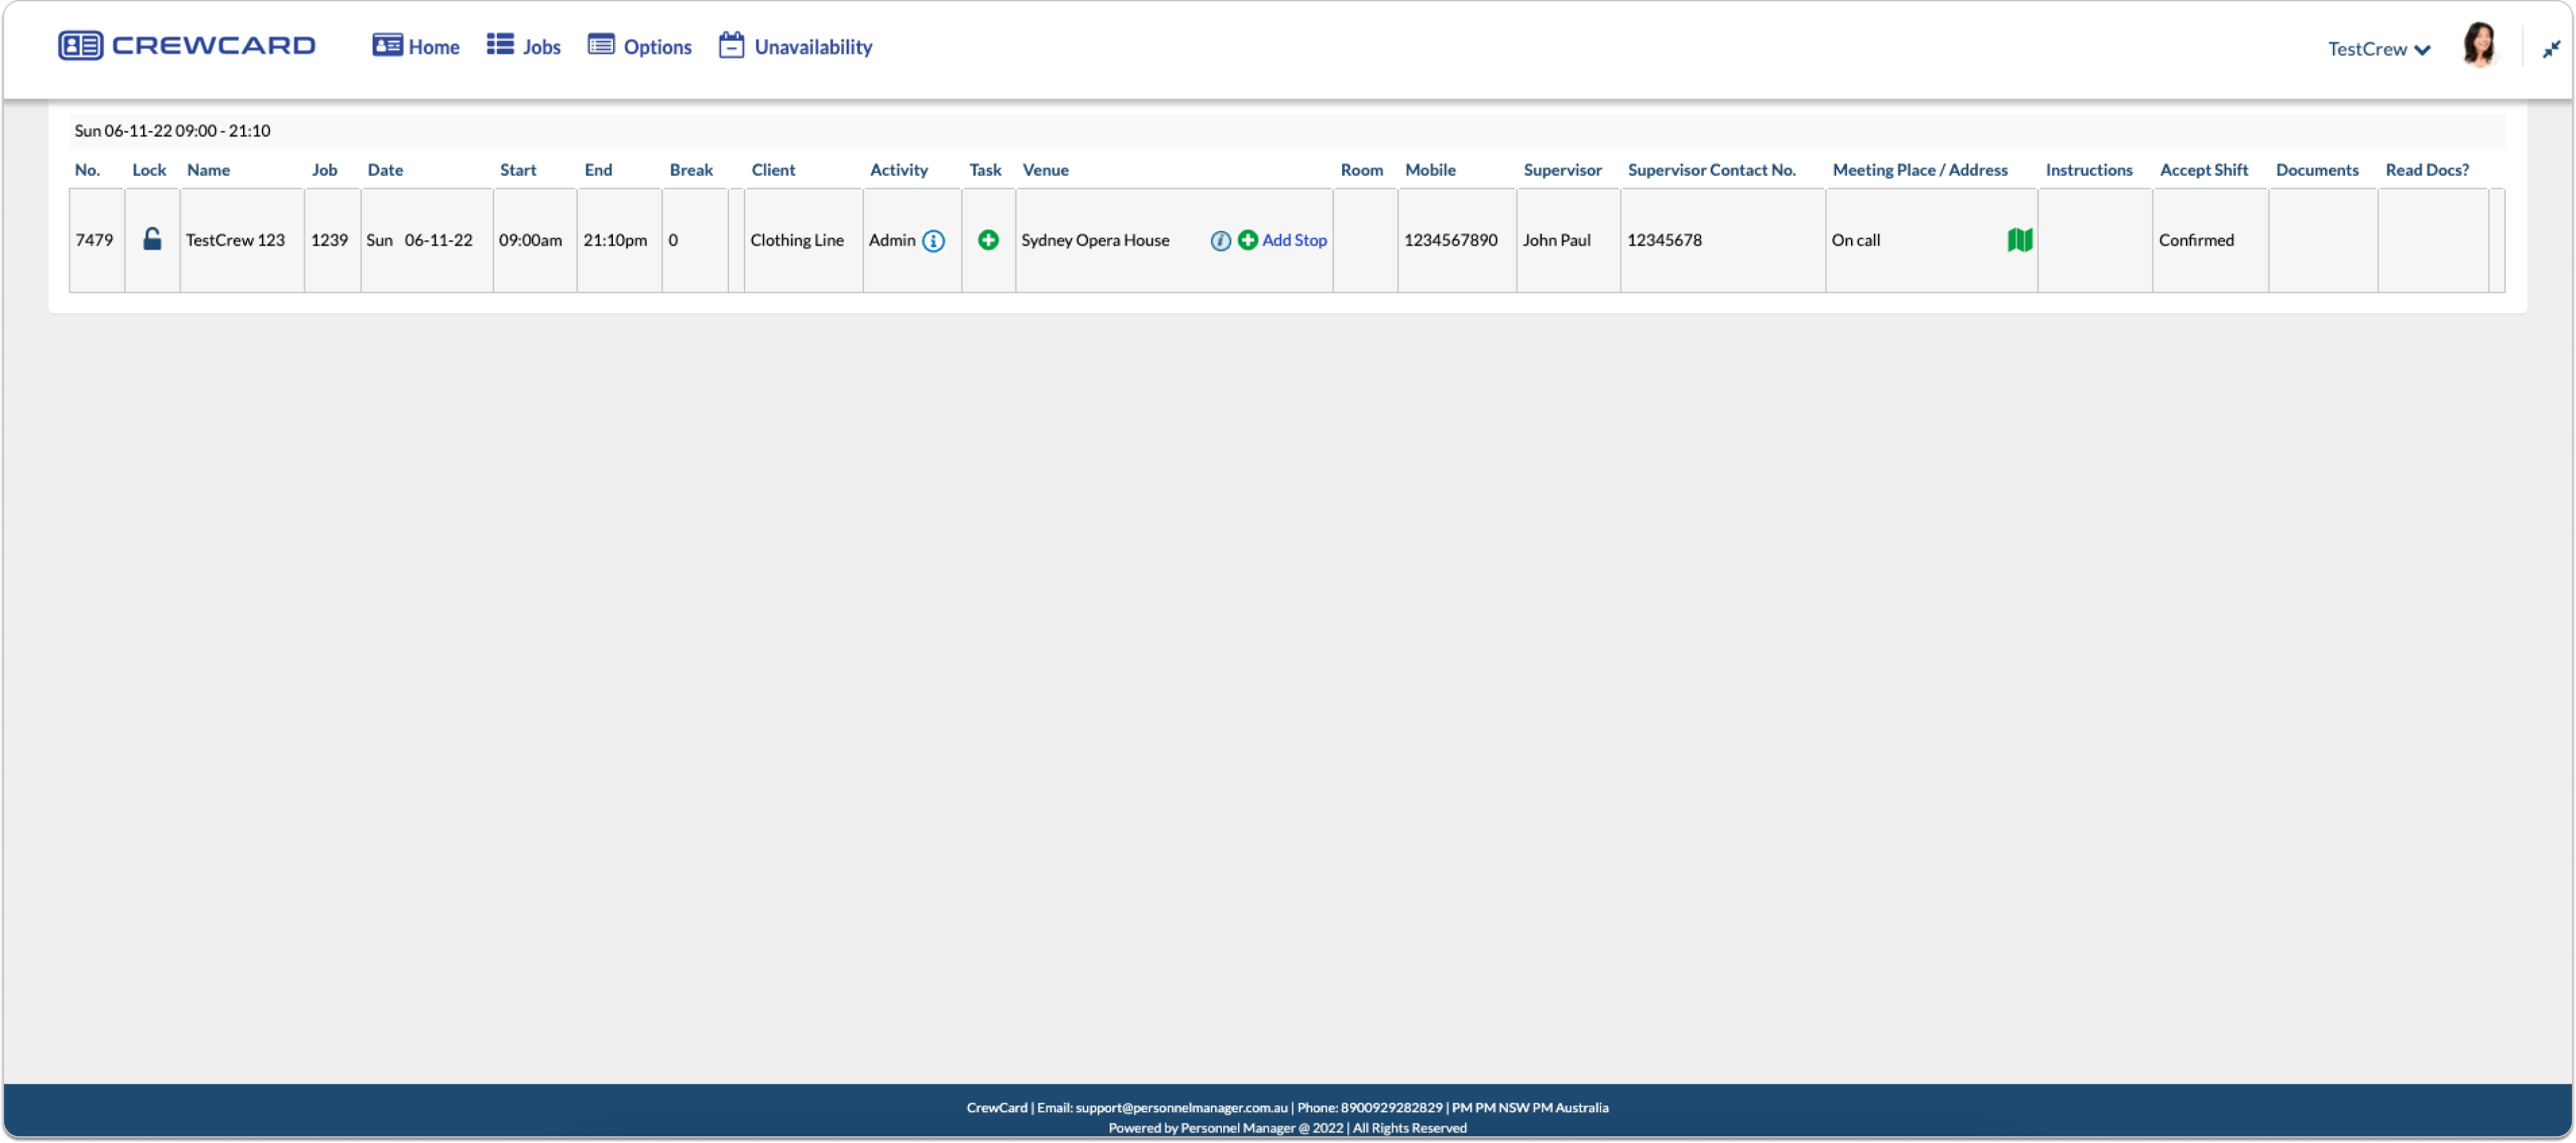
Once accepted, the shift will display the word ‘ACCEPTED’ on the far right text box.
Once the shift has been confirmed by the admin, it will be displayed under ‘Upcoming Jobs’ and in the Calendar function, both of which are accessible via the ‘Jobs’ tab.
This is similar to past jobs however, shows you jobs that have been completed.
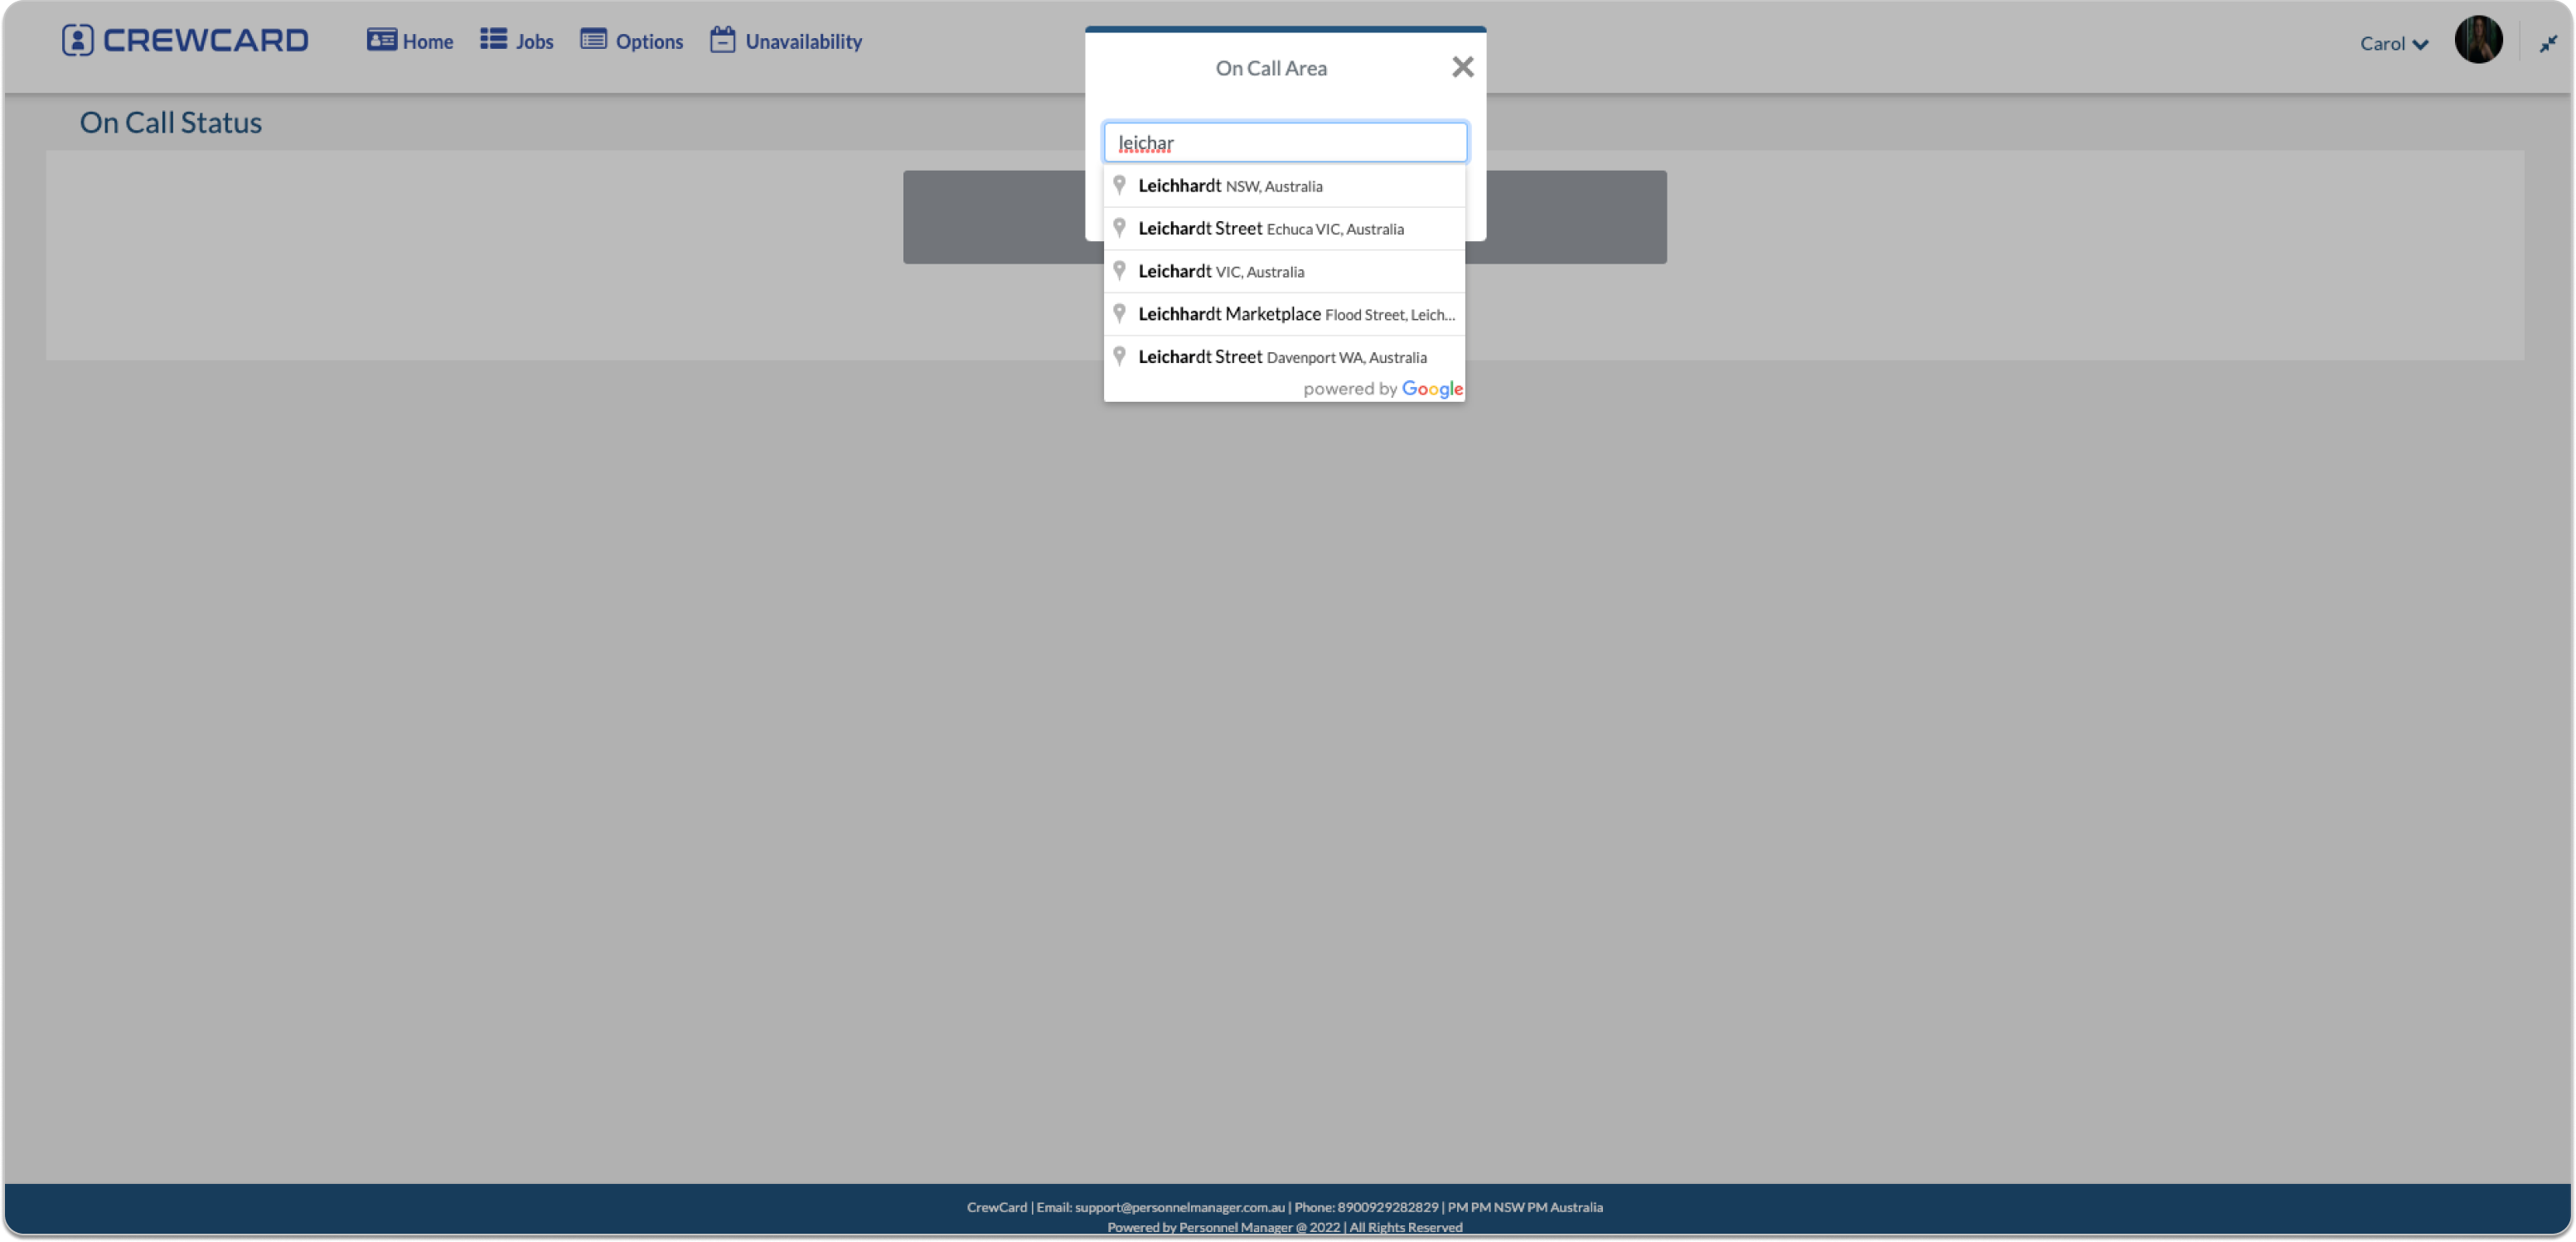
This window provides the list of actions that are needed to be taken before a job. For more information see guide 2.3 Actions.
This allows you to be available to accept shifts when you are not rostered. click on the Off-Call Status button.
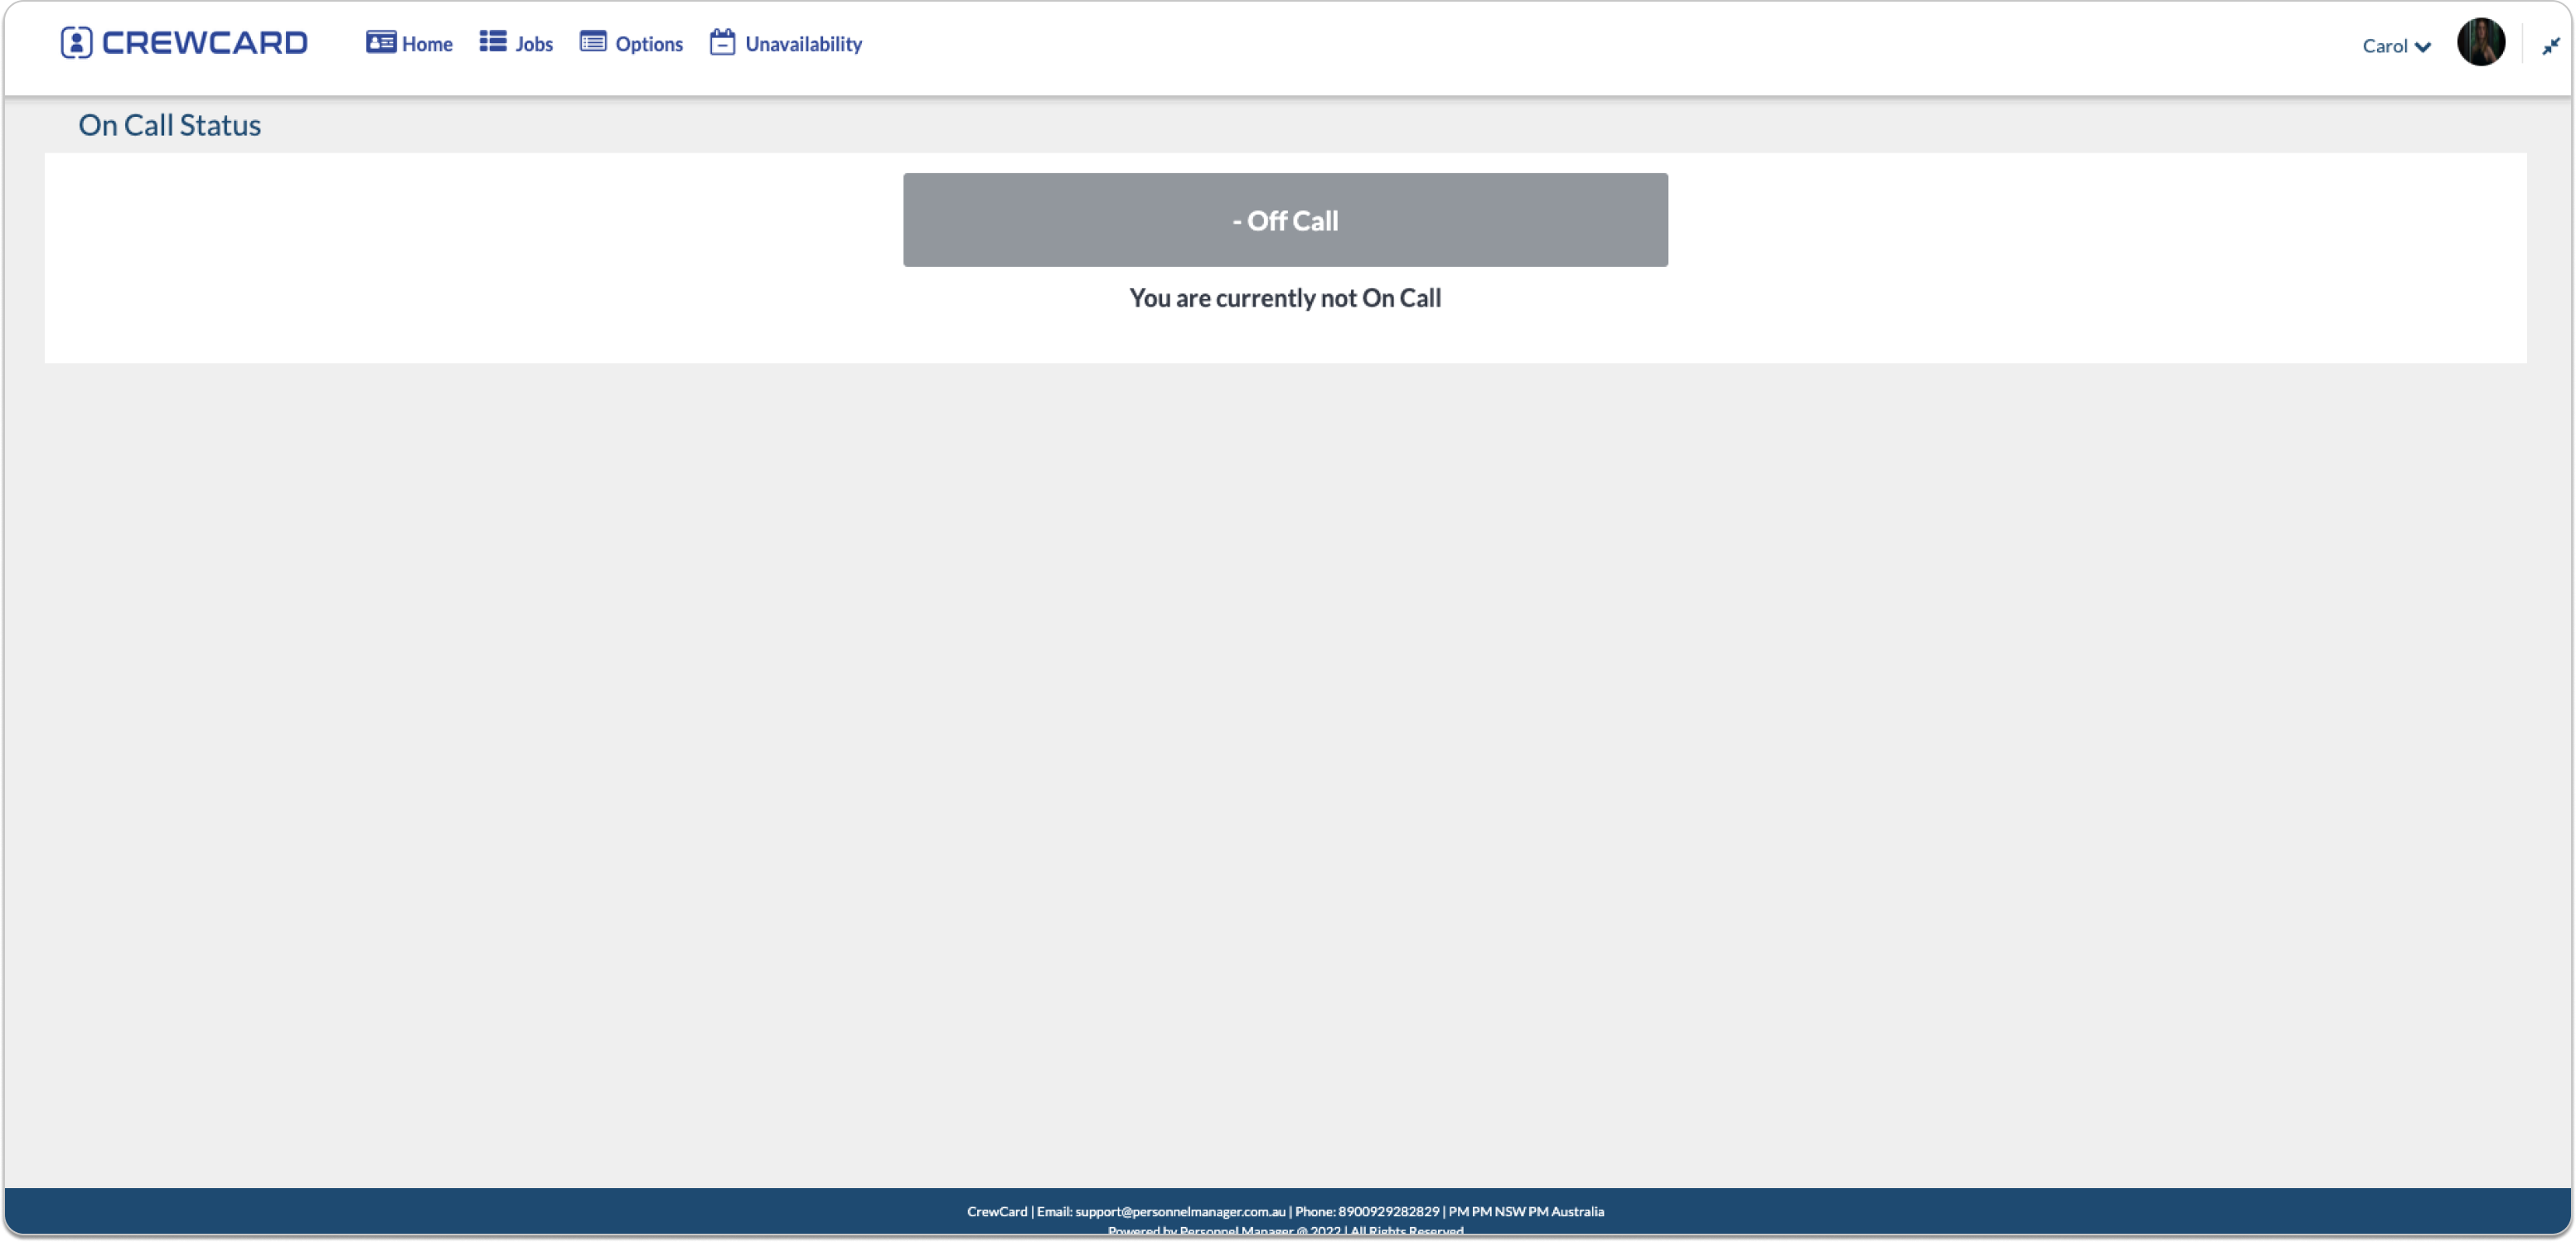
Type Suburb where you are currently located and select from the search result.
Click Submit.
On Call Status will ignore your current unavailability and preferred area to work based on your current location. Job Offers will be sent until On Call is switched off. Off Call meaning you are not available to accept any jobs outside your preferred location.
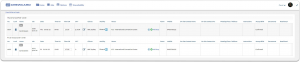
On this page you will be able to view the Actions you have completed and see the current status.
This is like actions section however, you can overview all actions that are required to complete and needed to be submitted. Files, please see guide 2.4.
Actions and other files will display here. These files are uploaded by the company. You can revisit them at any time to read.
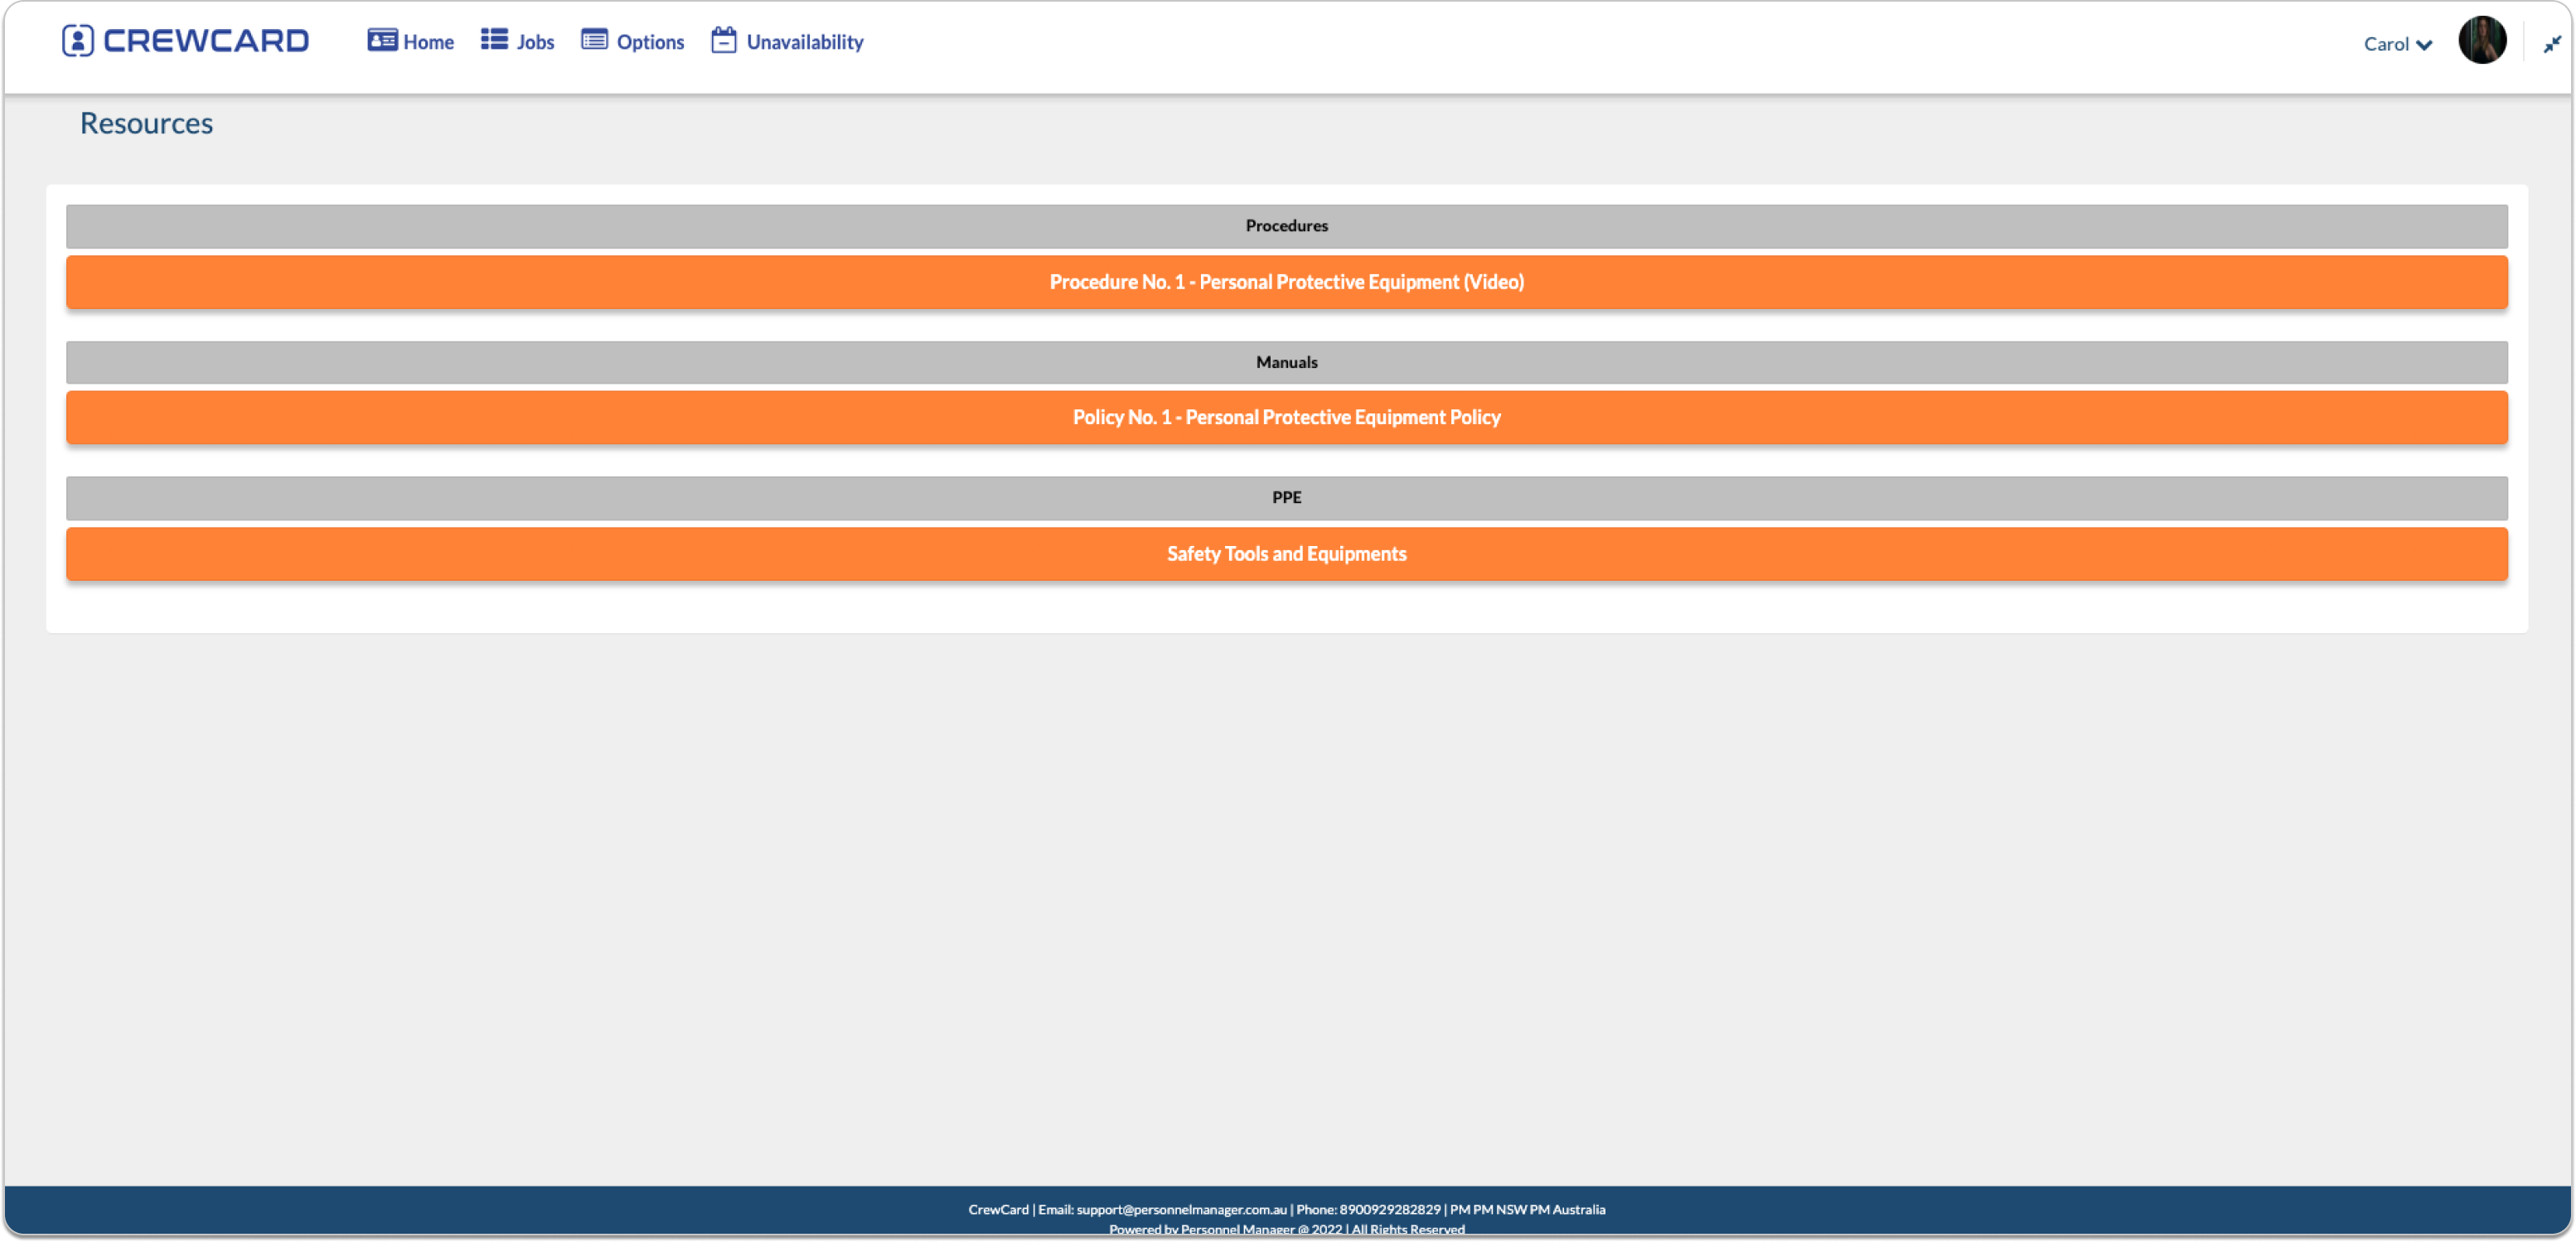
To be able to view the corresponding resource, please select one and a new window showing the resource information will appear.
Select close once understood.
Processes are uploaded by the company, they will be stored here for crew to refer back at anytime when needed.
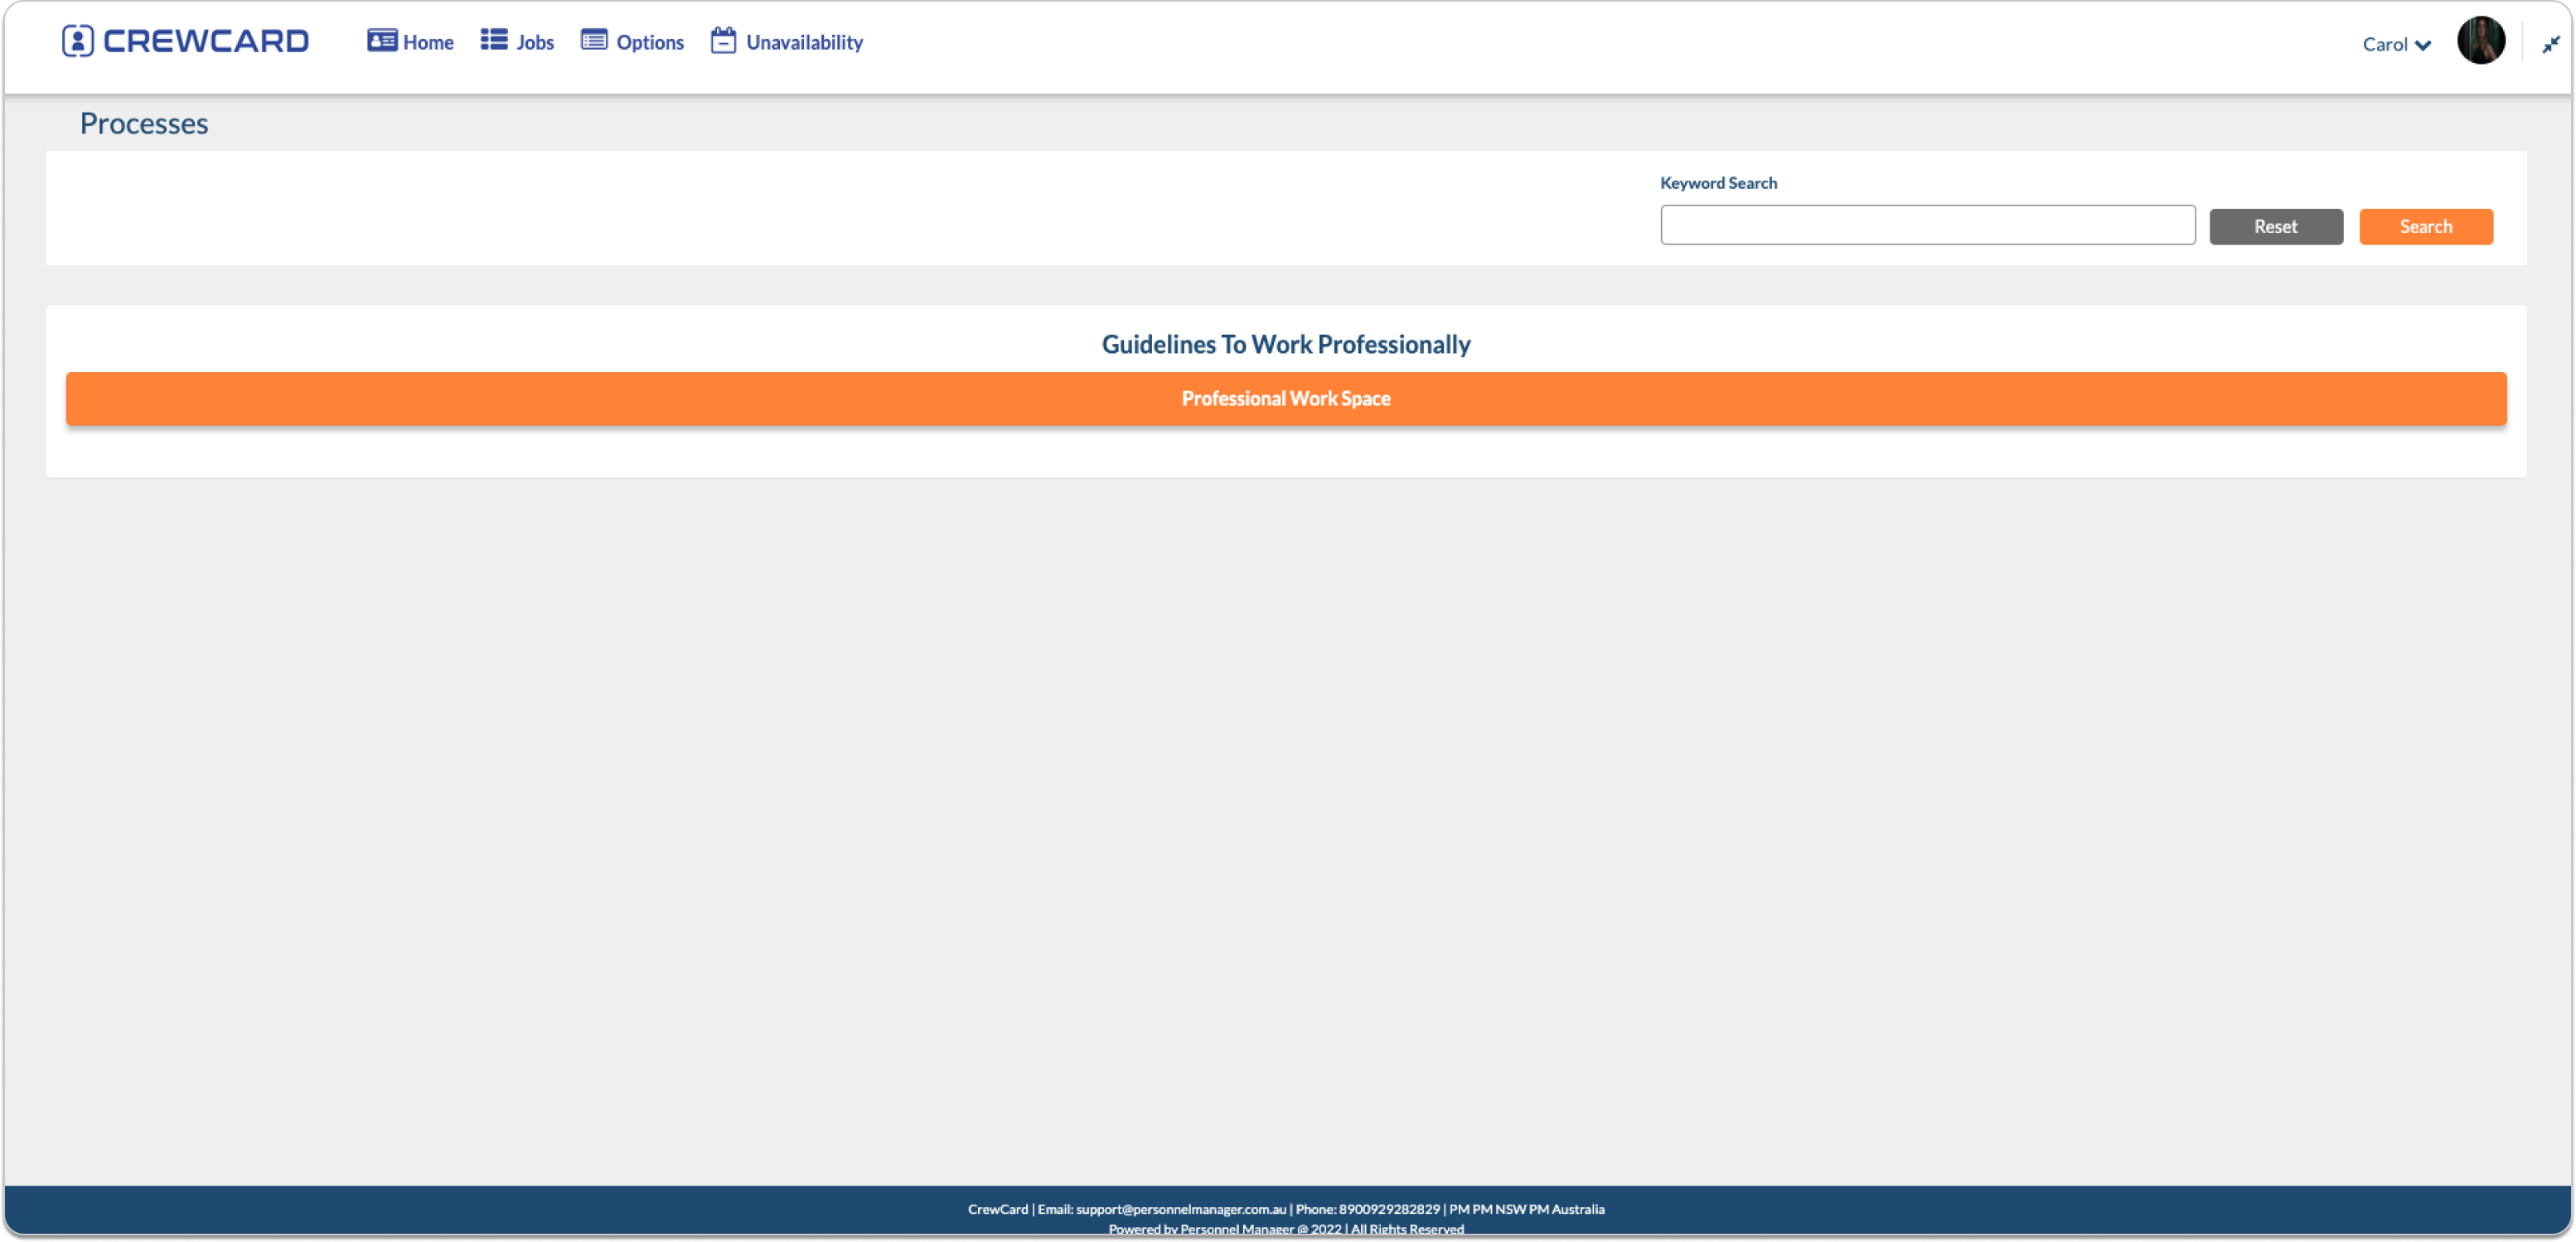
To be able to view the corresponding process, please select one and a new window showing the process information will appear.
Select close once understood.
Contracts are signed when singing up are stored here.
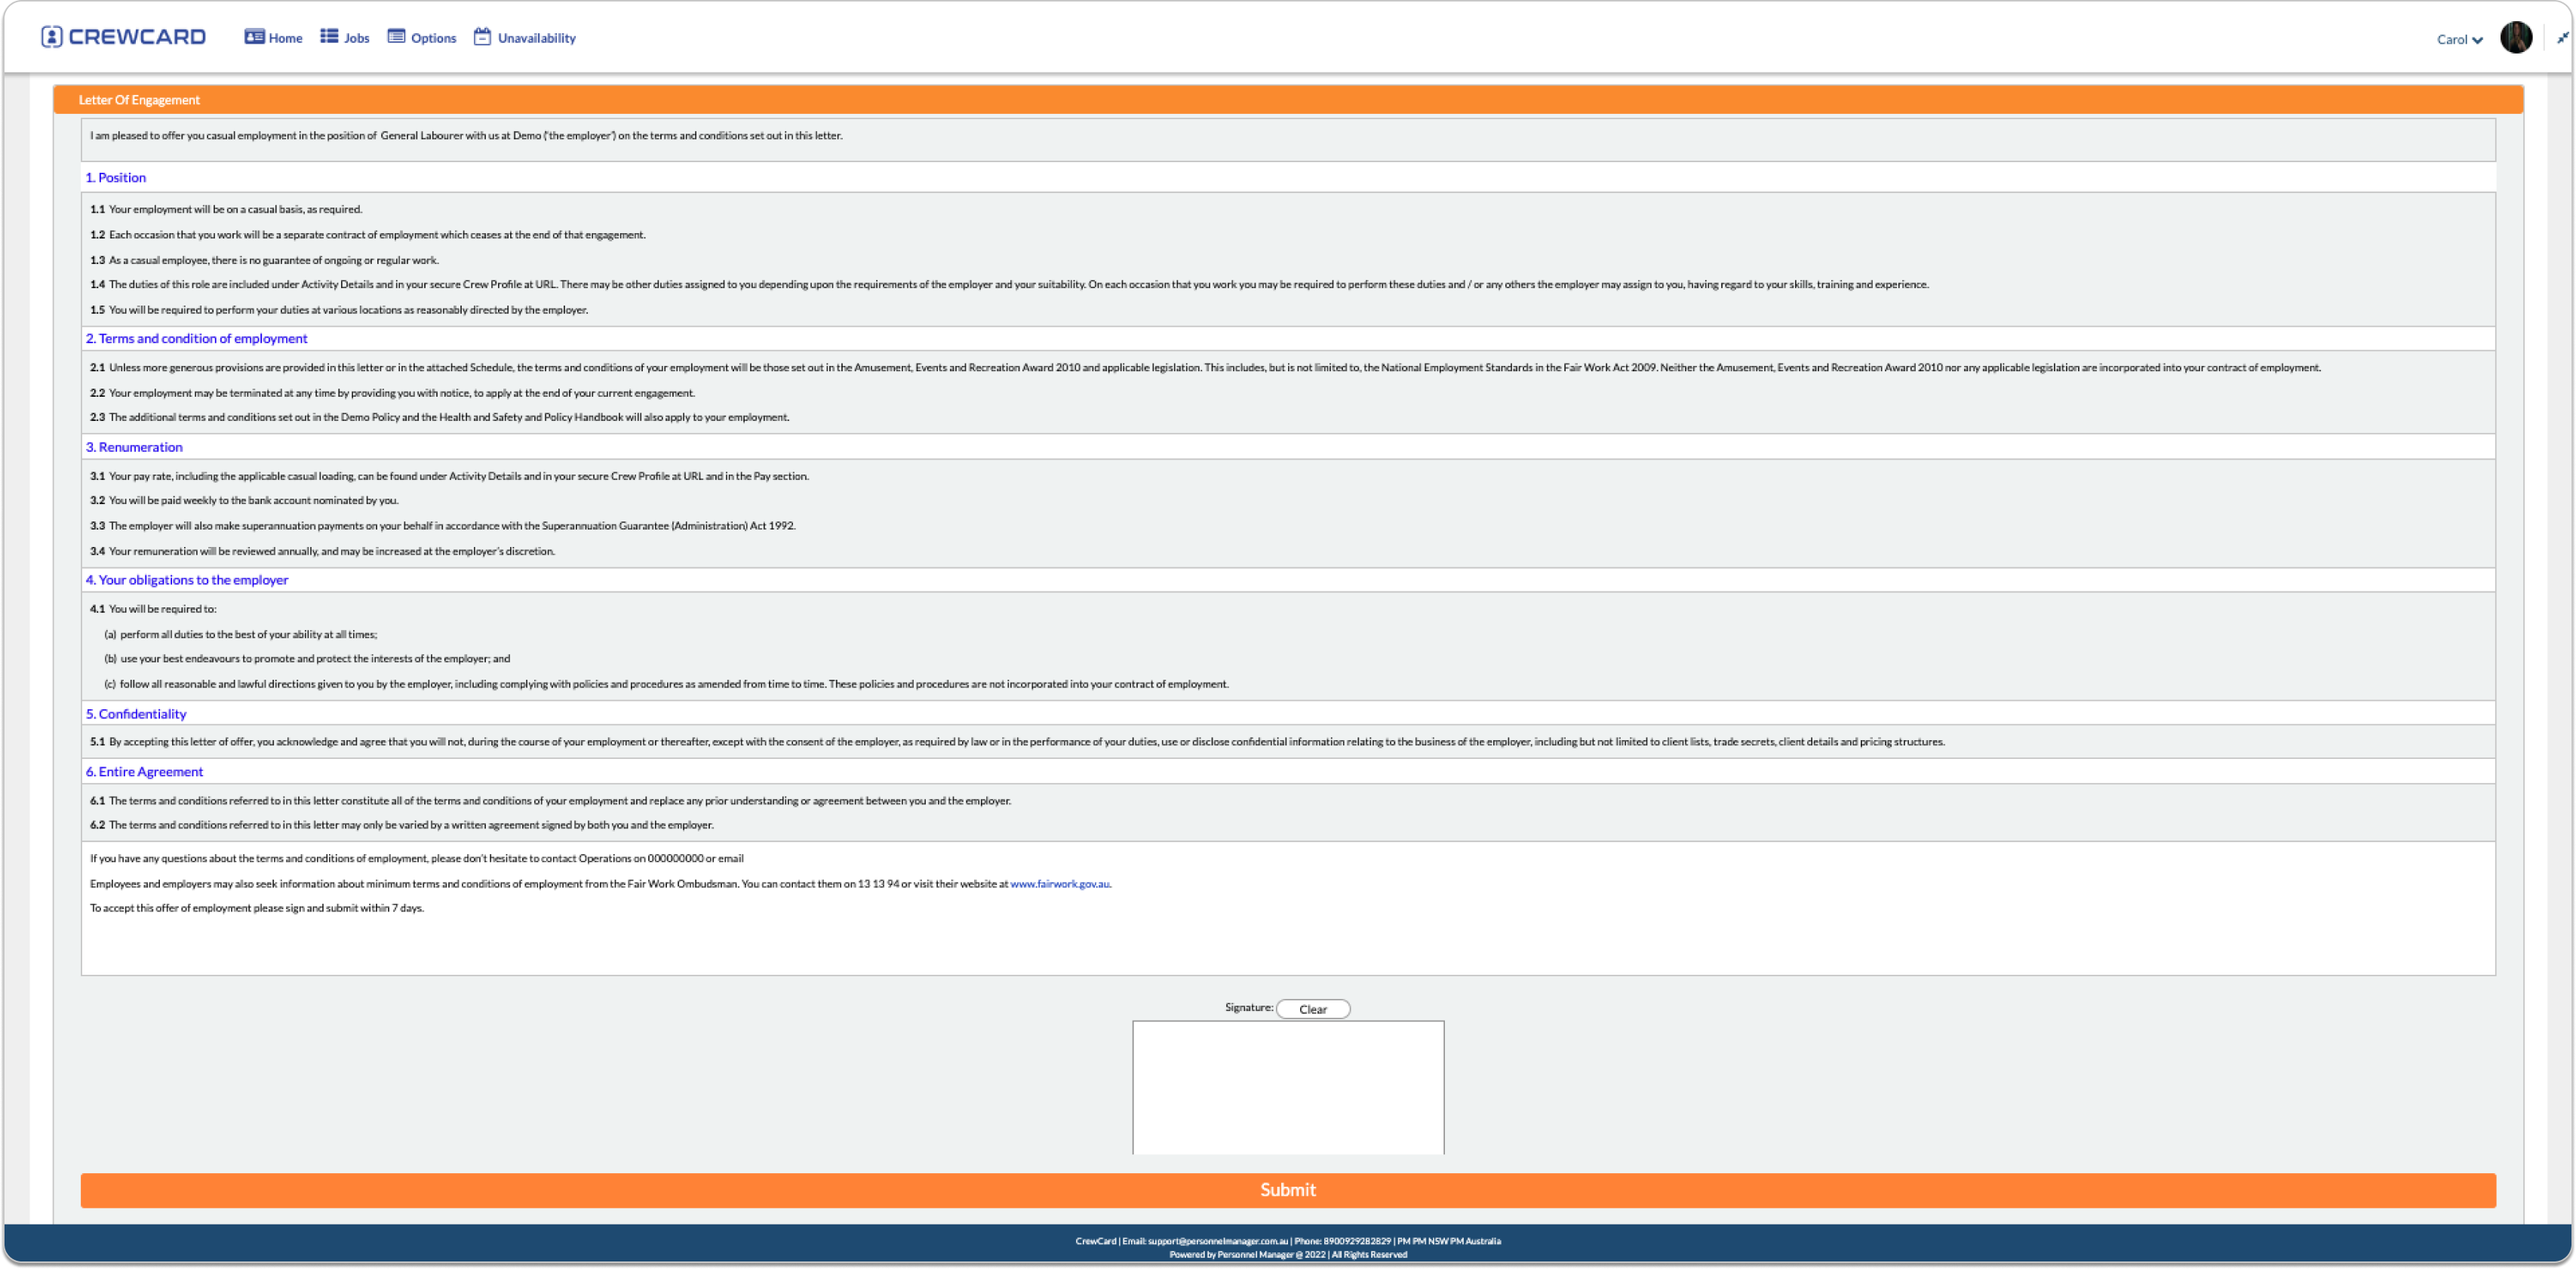
Double click the orange box to download the contract.
Timesheets display the shift you have worked and the times.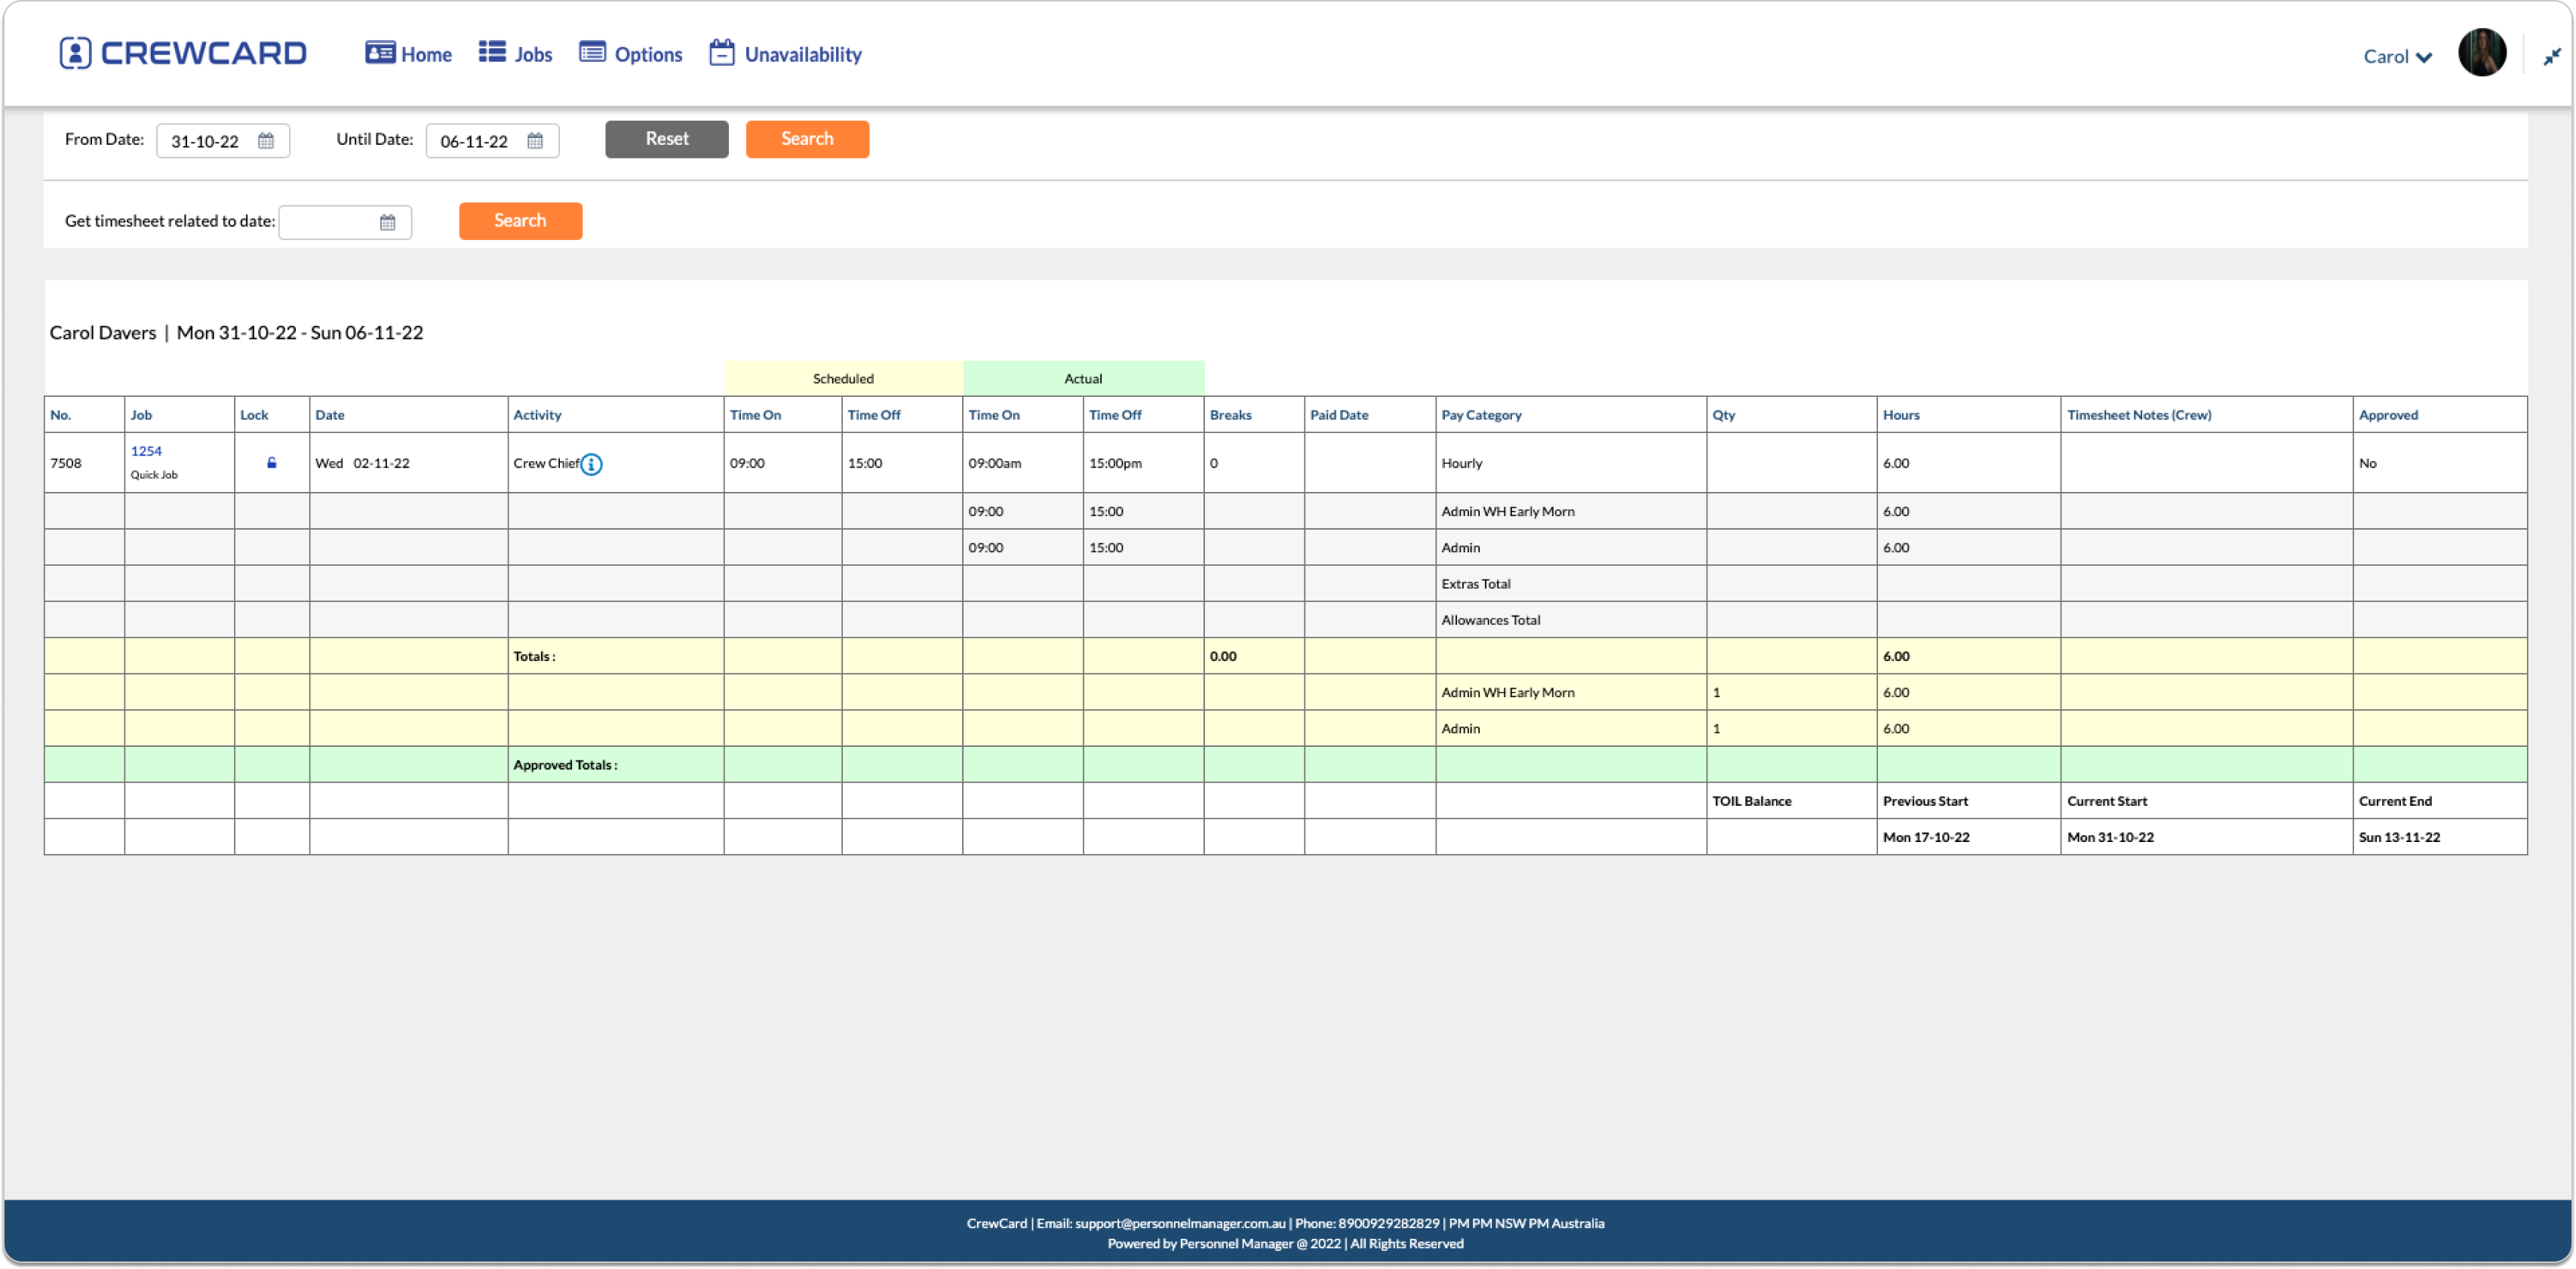
Only lock shifts will display here.
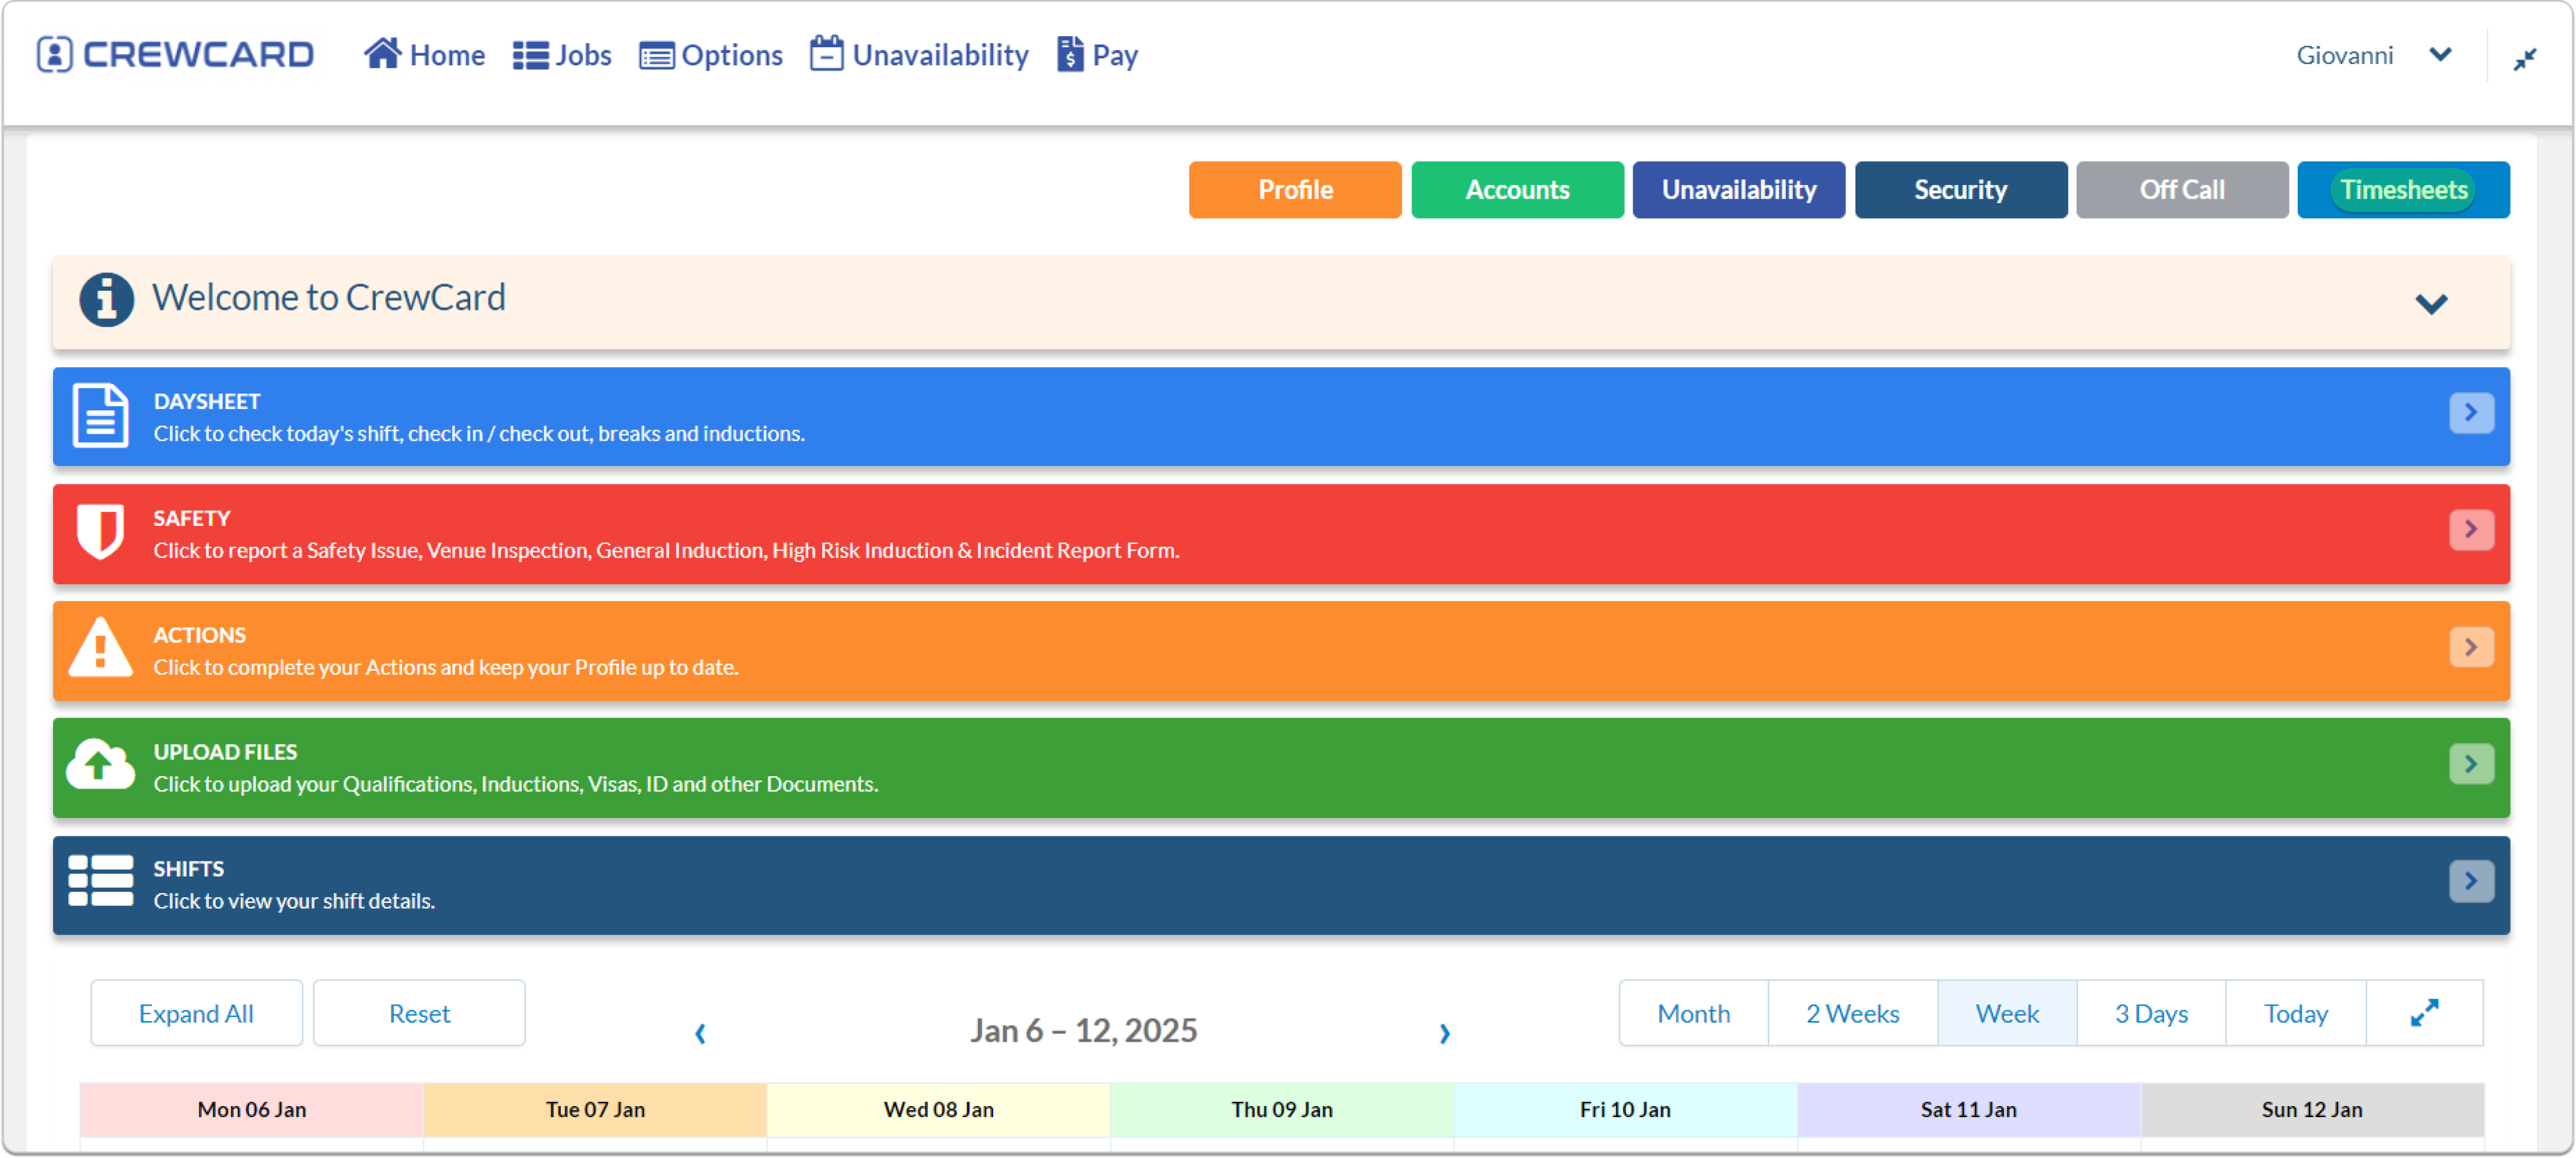
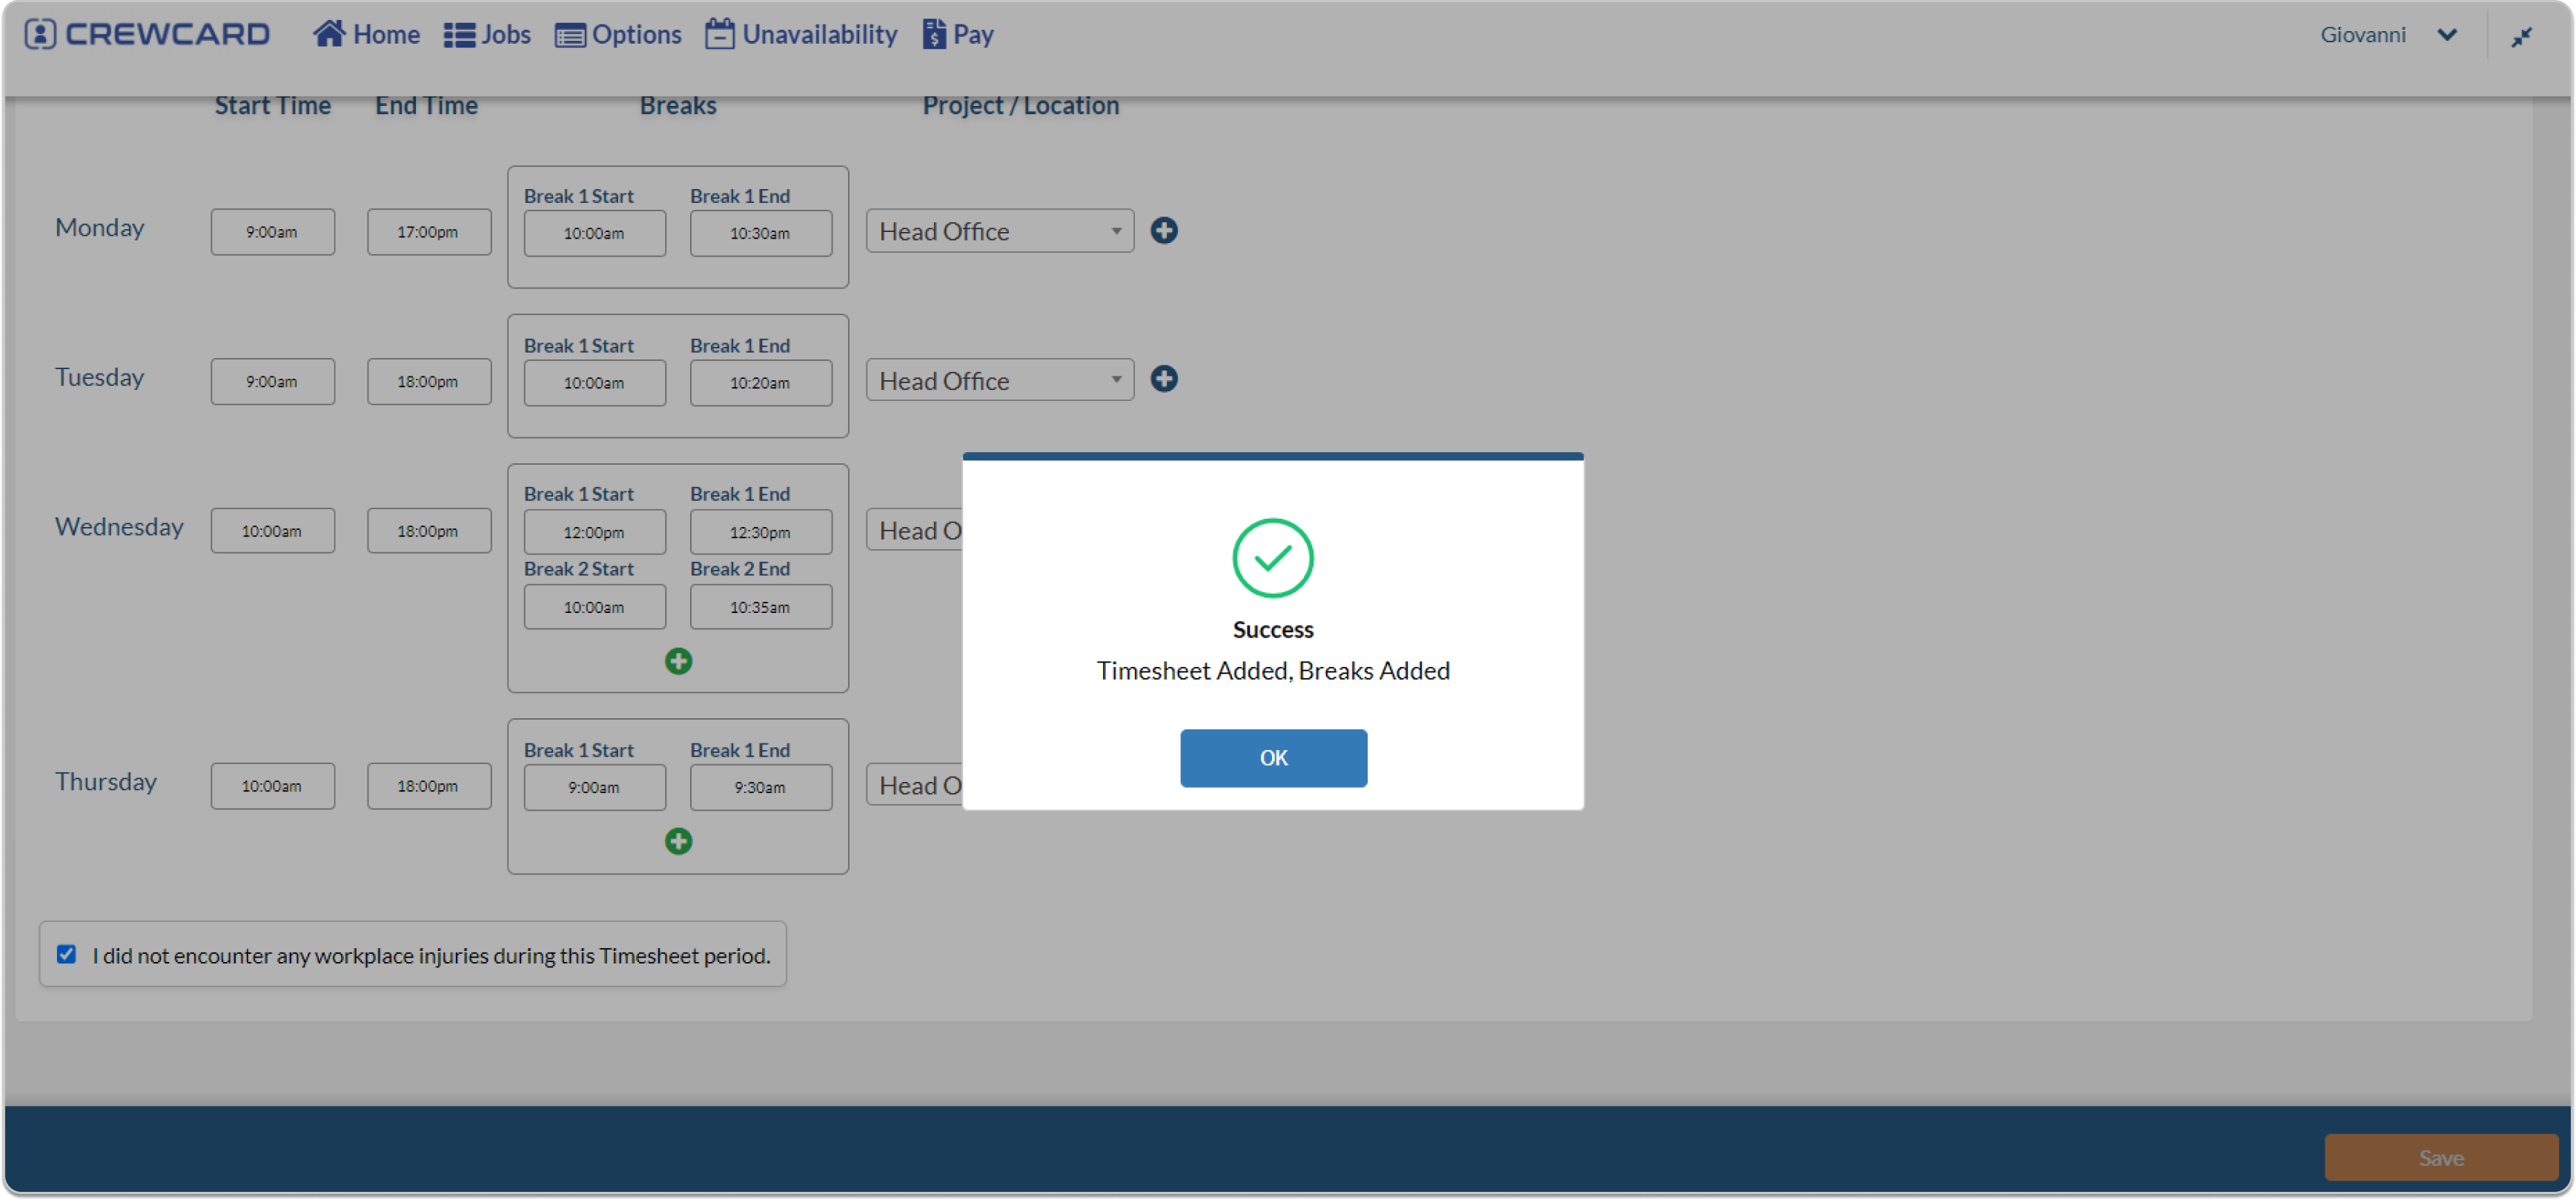
A new Timesheets button has been introduced to the Crew Portal. It enables crew members to efficiently access and manage their shift details, breaks, and project or location information.
To use the Timesheets feature, log in to the Crew Portal. Locate the Timesheets button and click on it. This action will redirect you to the Timesheets page.
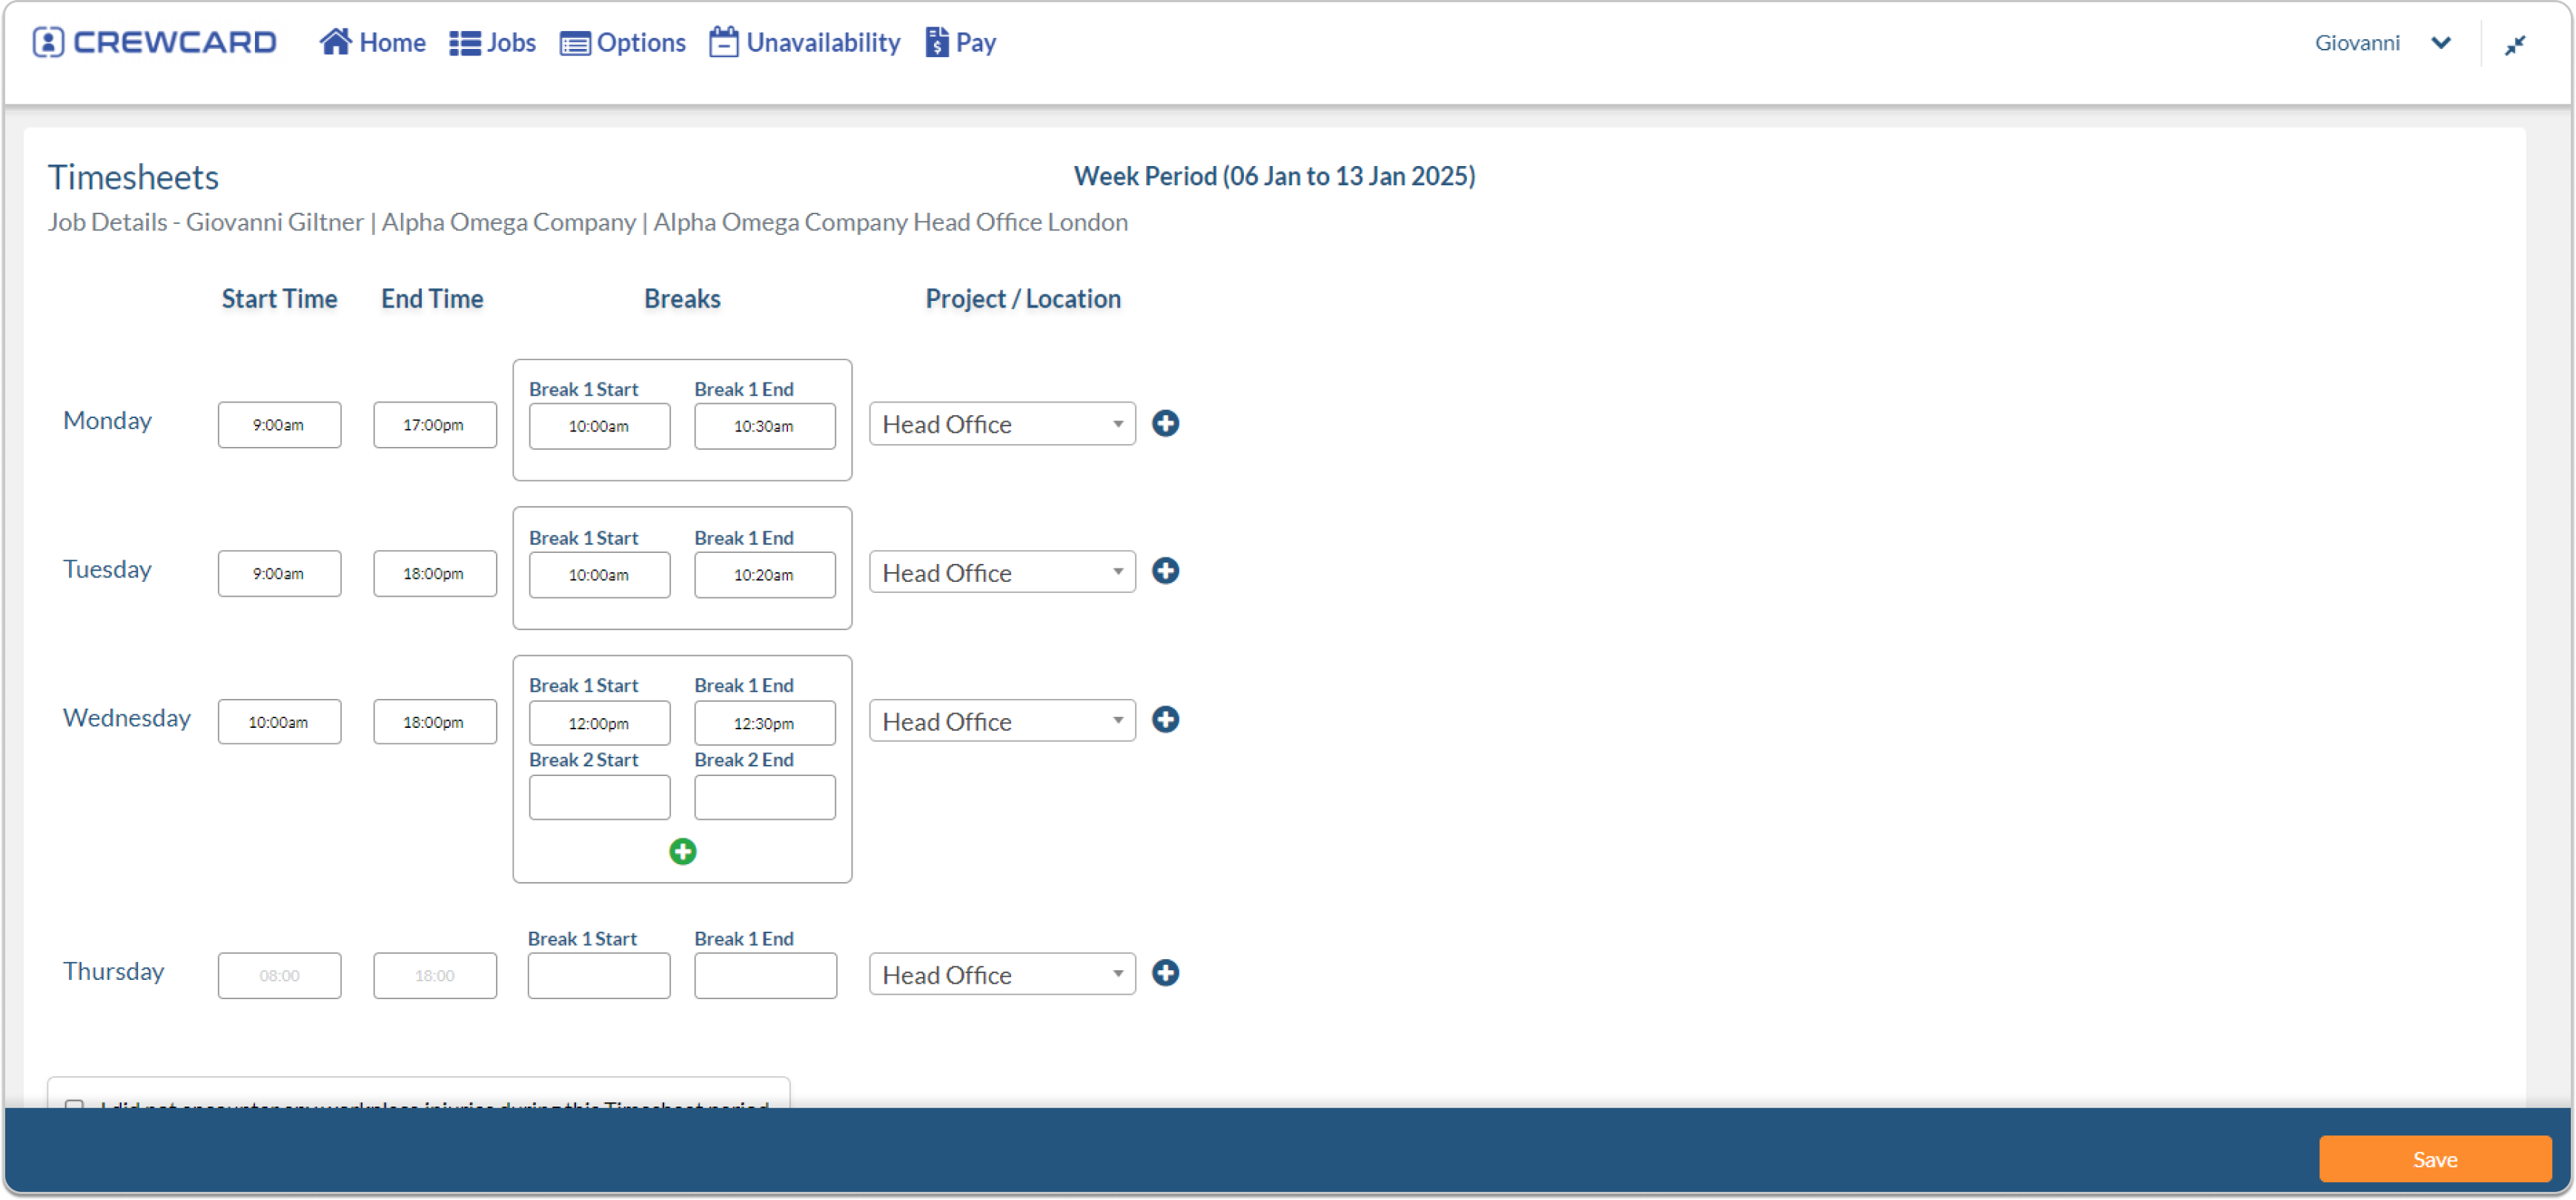
The Timesheets page provides an organised interface for crew members to log their working hours, breaks, and project or location details. It is structured by day, with multiple rows available for adding shifts or breaks as required.
The + button adds a new row to the timesheet. Clicking this button creates a new shift entry, where users can input start and end times, breaks, and project/location details. Please note that only three breaks are allowed.
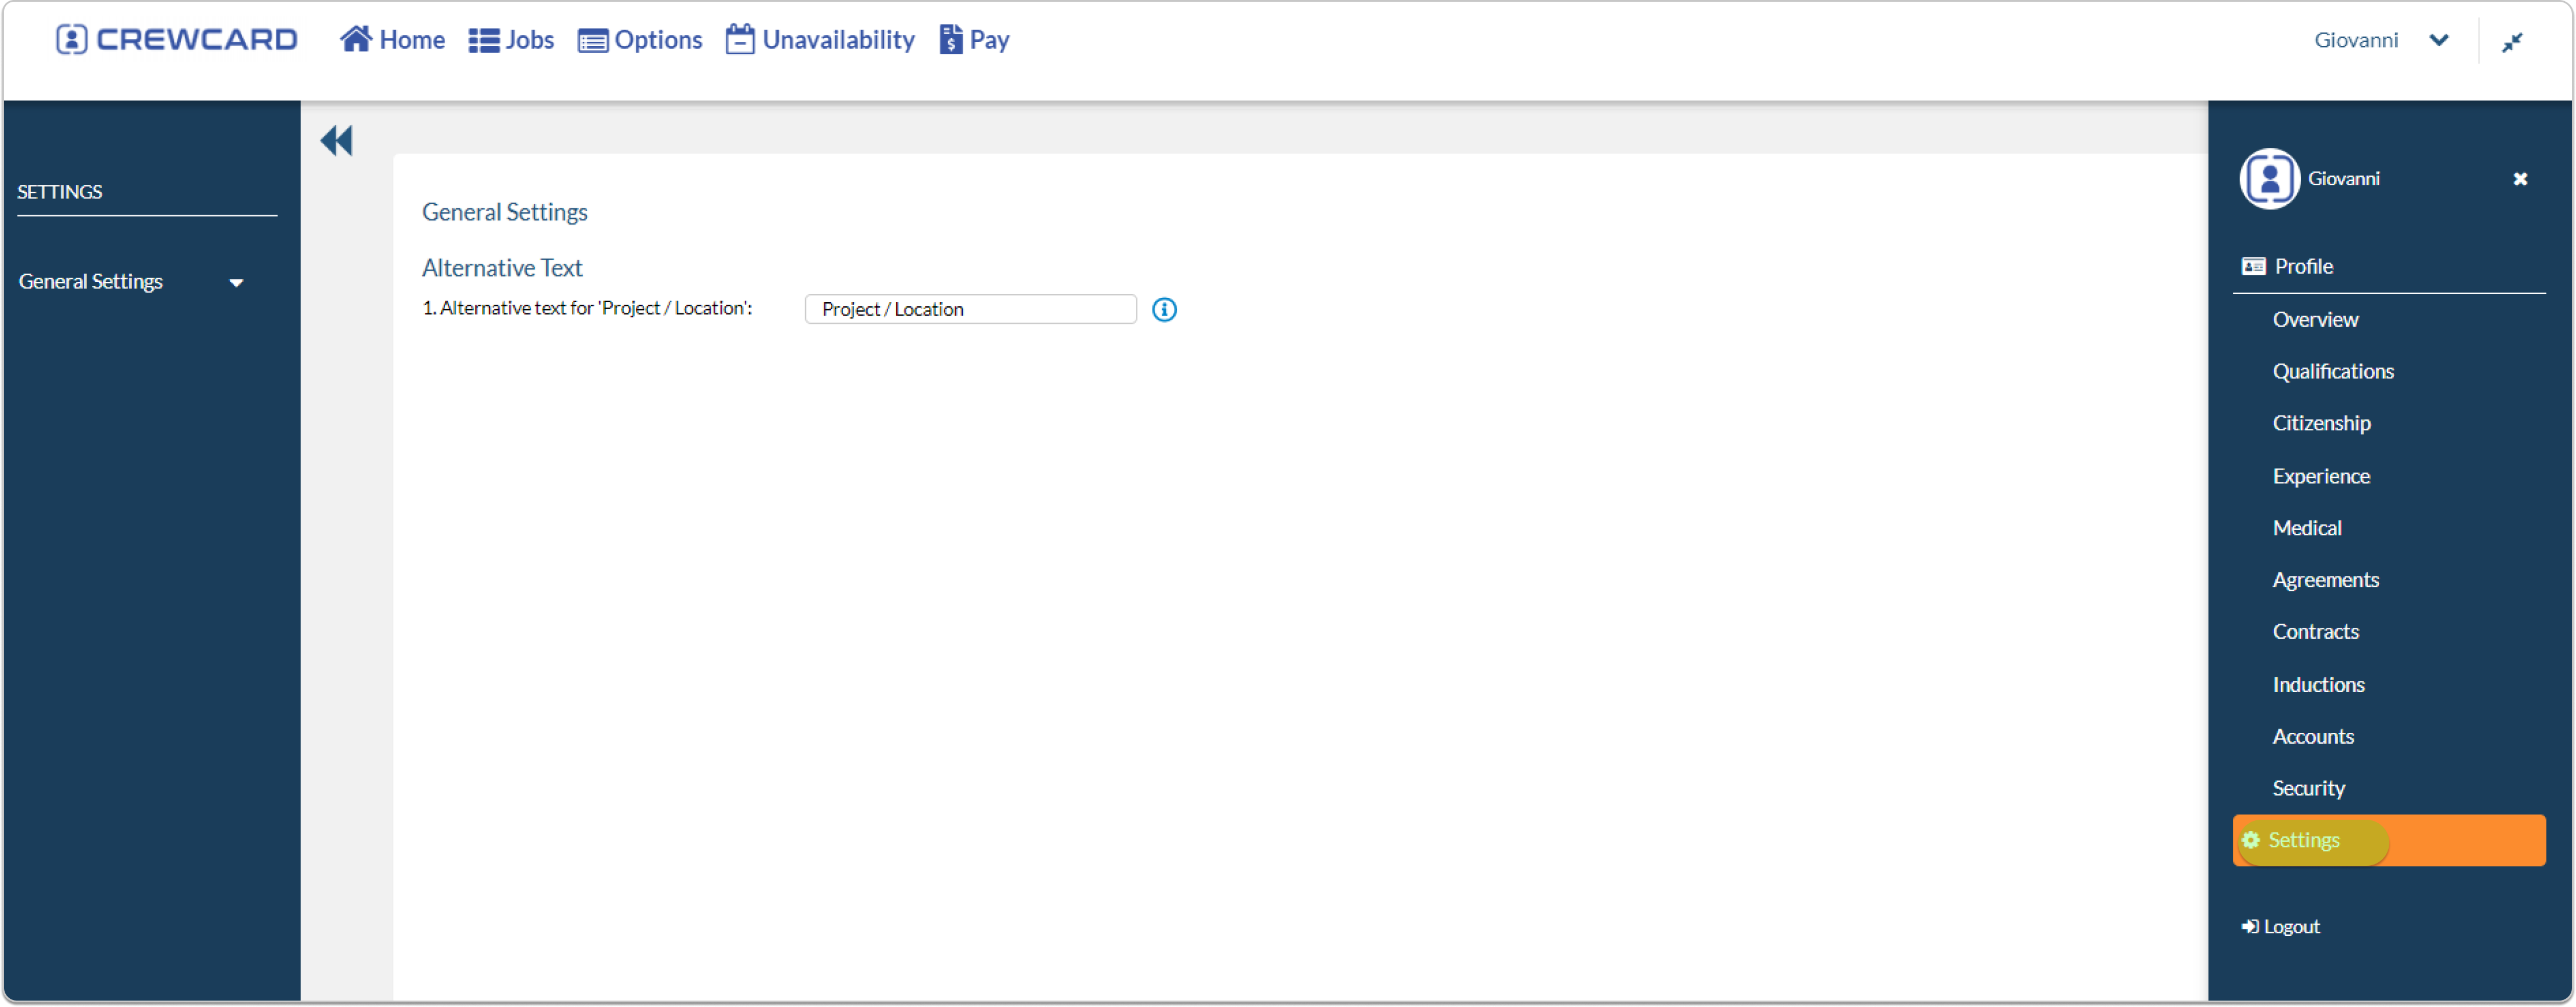
A new Settings menu has been added to the Crew Portal dropdown, offering additional configuration options.
To access the settings, click the dropdown menu, and select Settings. The General Settings section enables customisation of labels on the Timesheets page.
The Alternative Text feature allows users to rename the Project/Location field on the Timesheets page to better align with organisational requirements. Once changes are made, clicking Save will apply the updates.
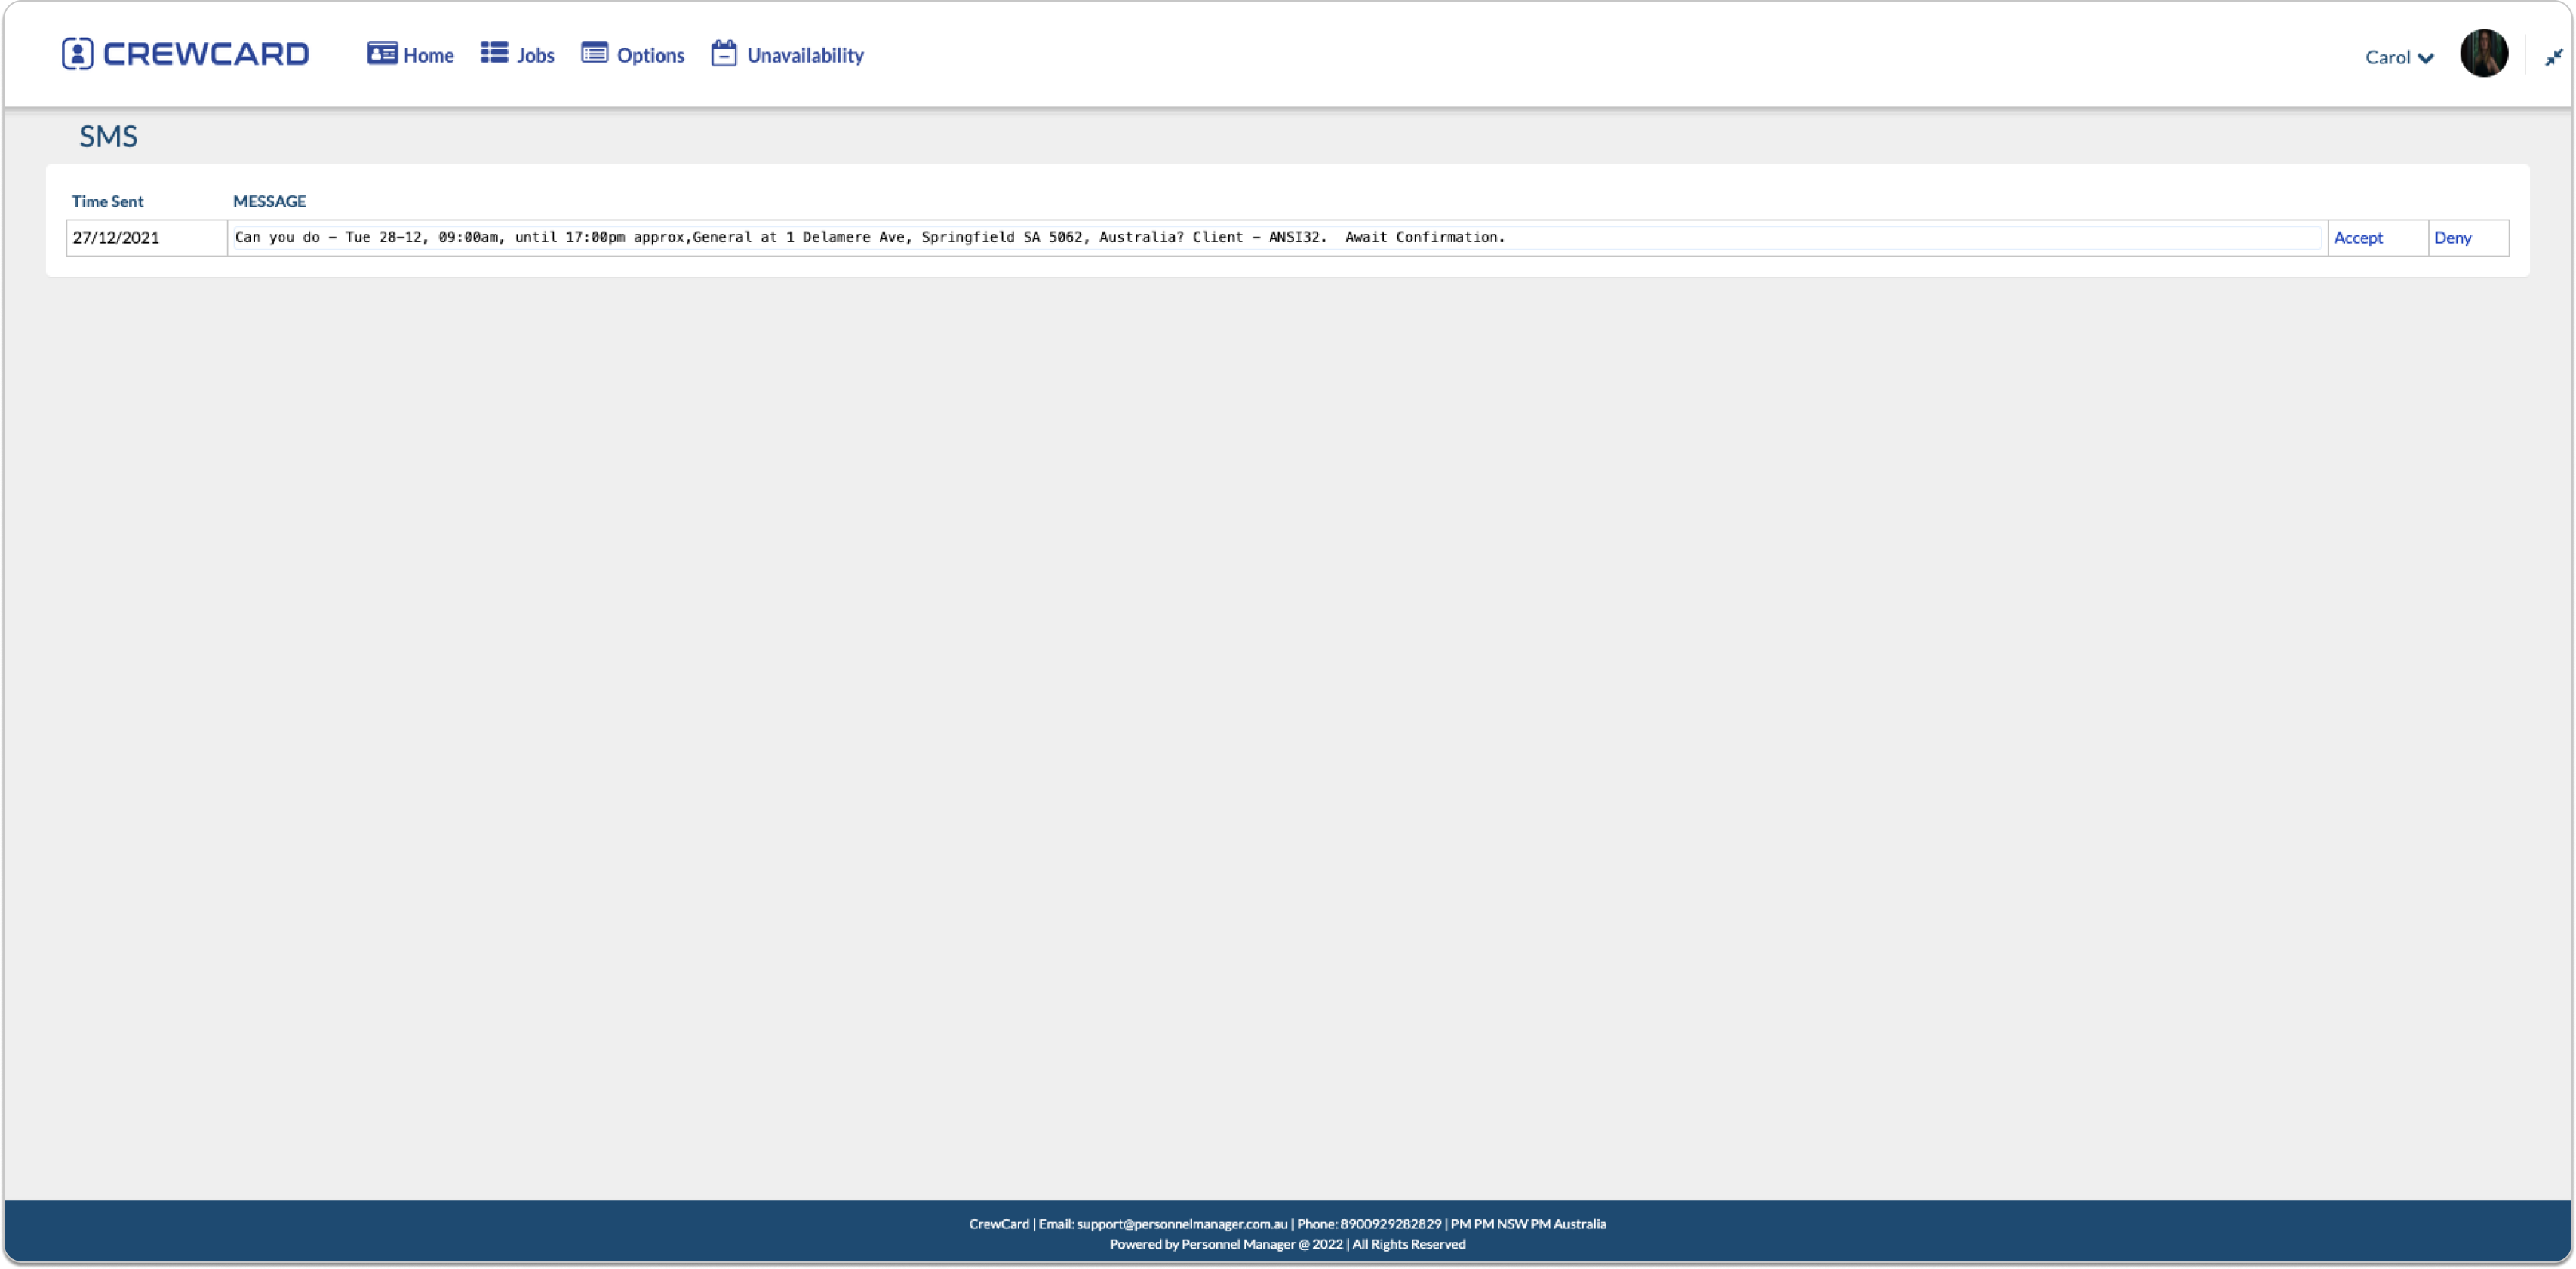
View SMS messages that are sent to you. It will log all the messages that have been delivered
This page will display your play slip. It is broken up in the location or business with details about the job times. It will break down any allowances that were given.

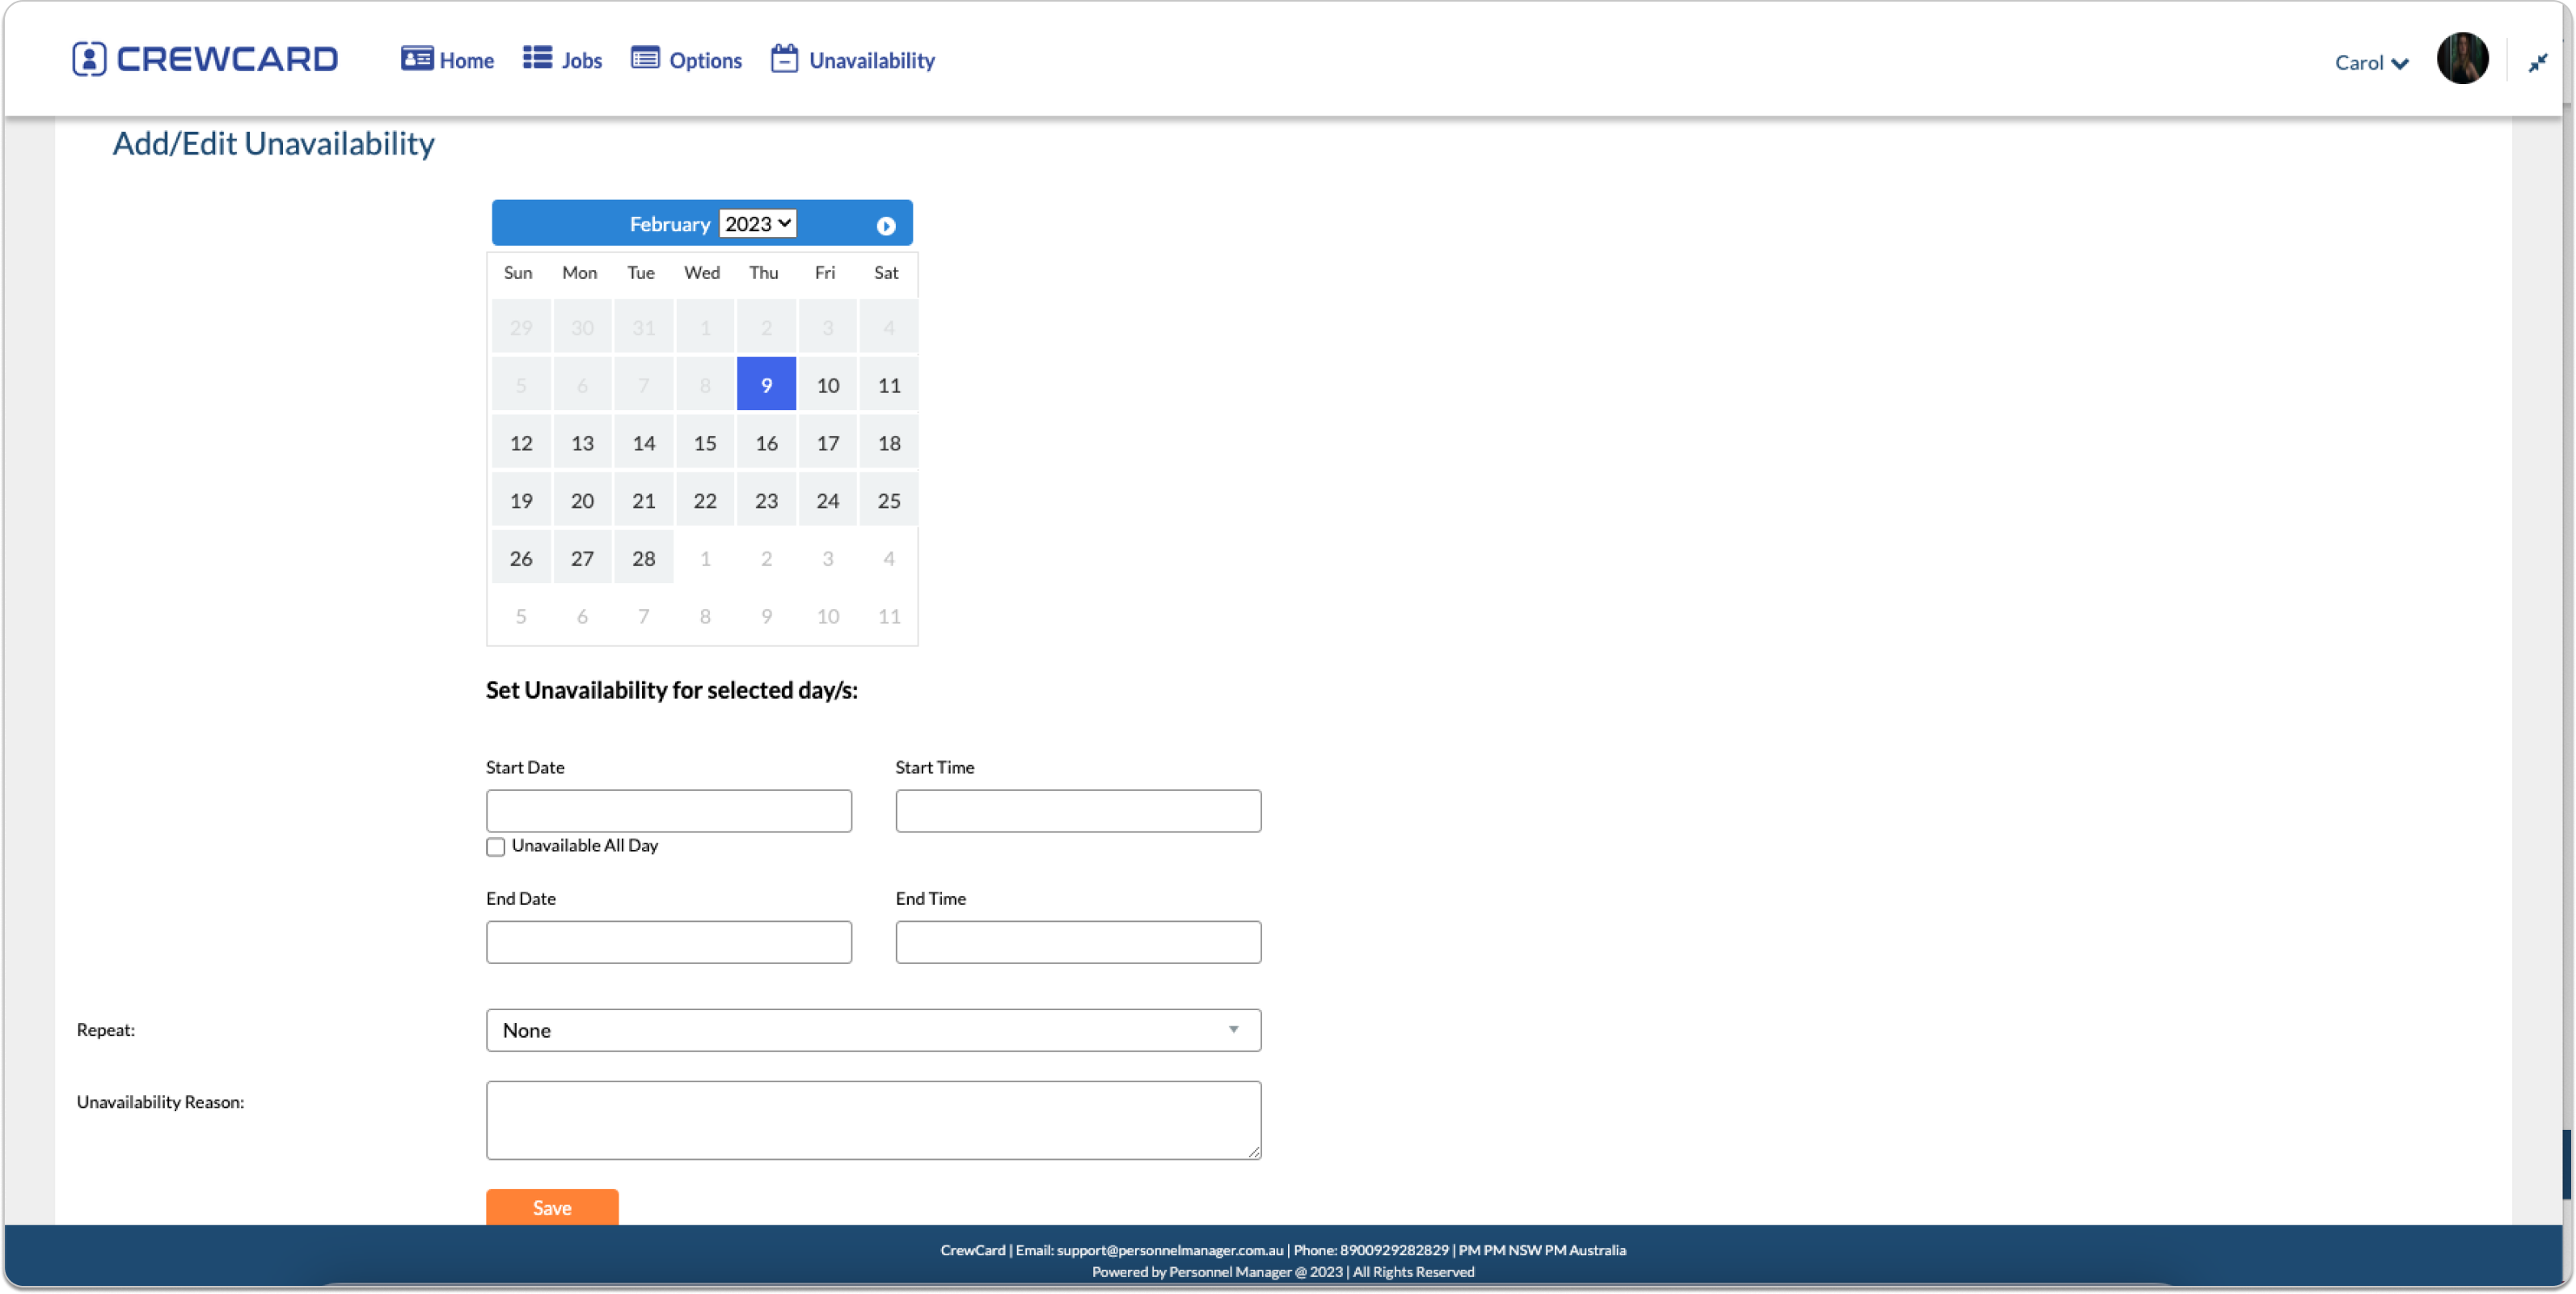
One this page you can enter your unavailability.
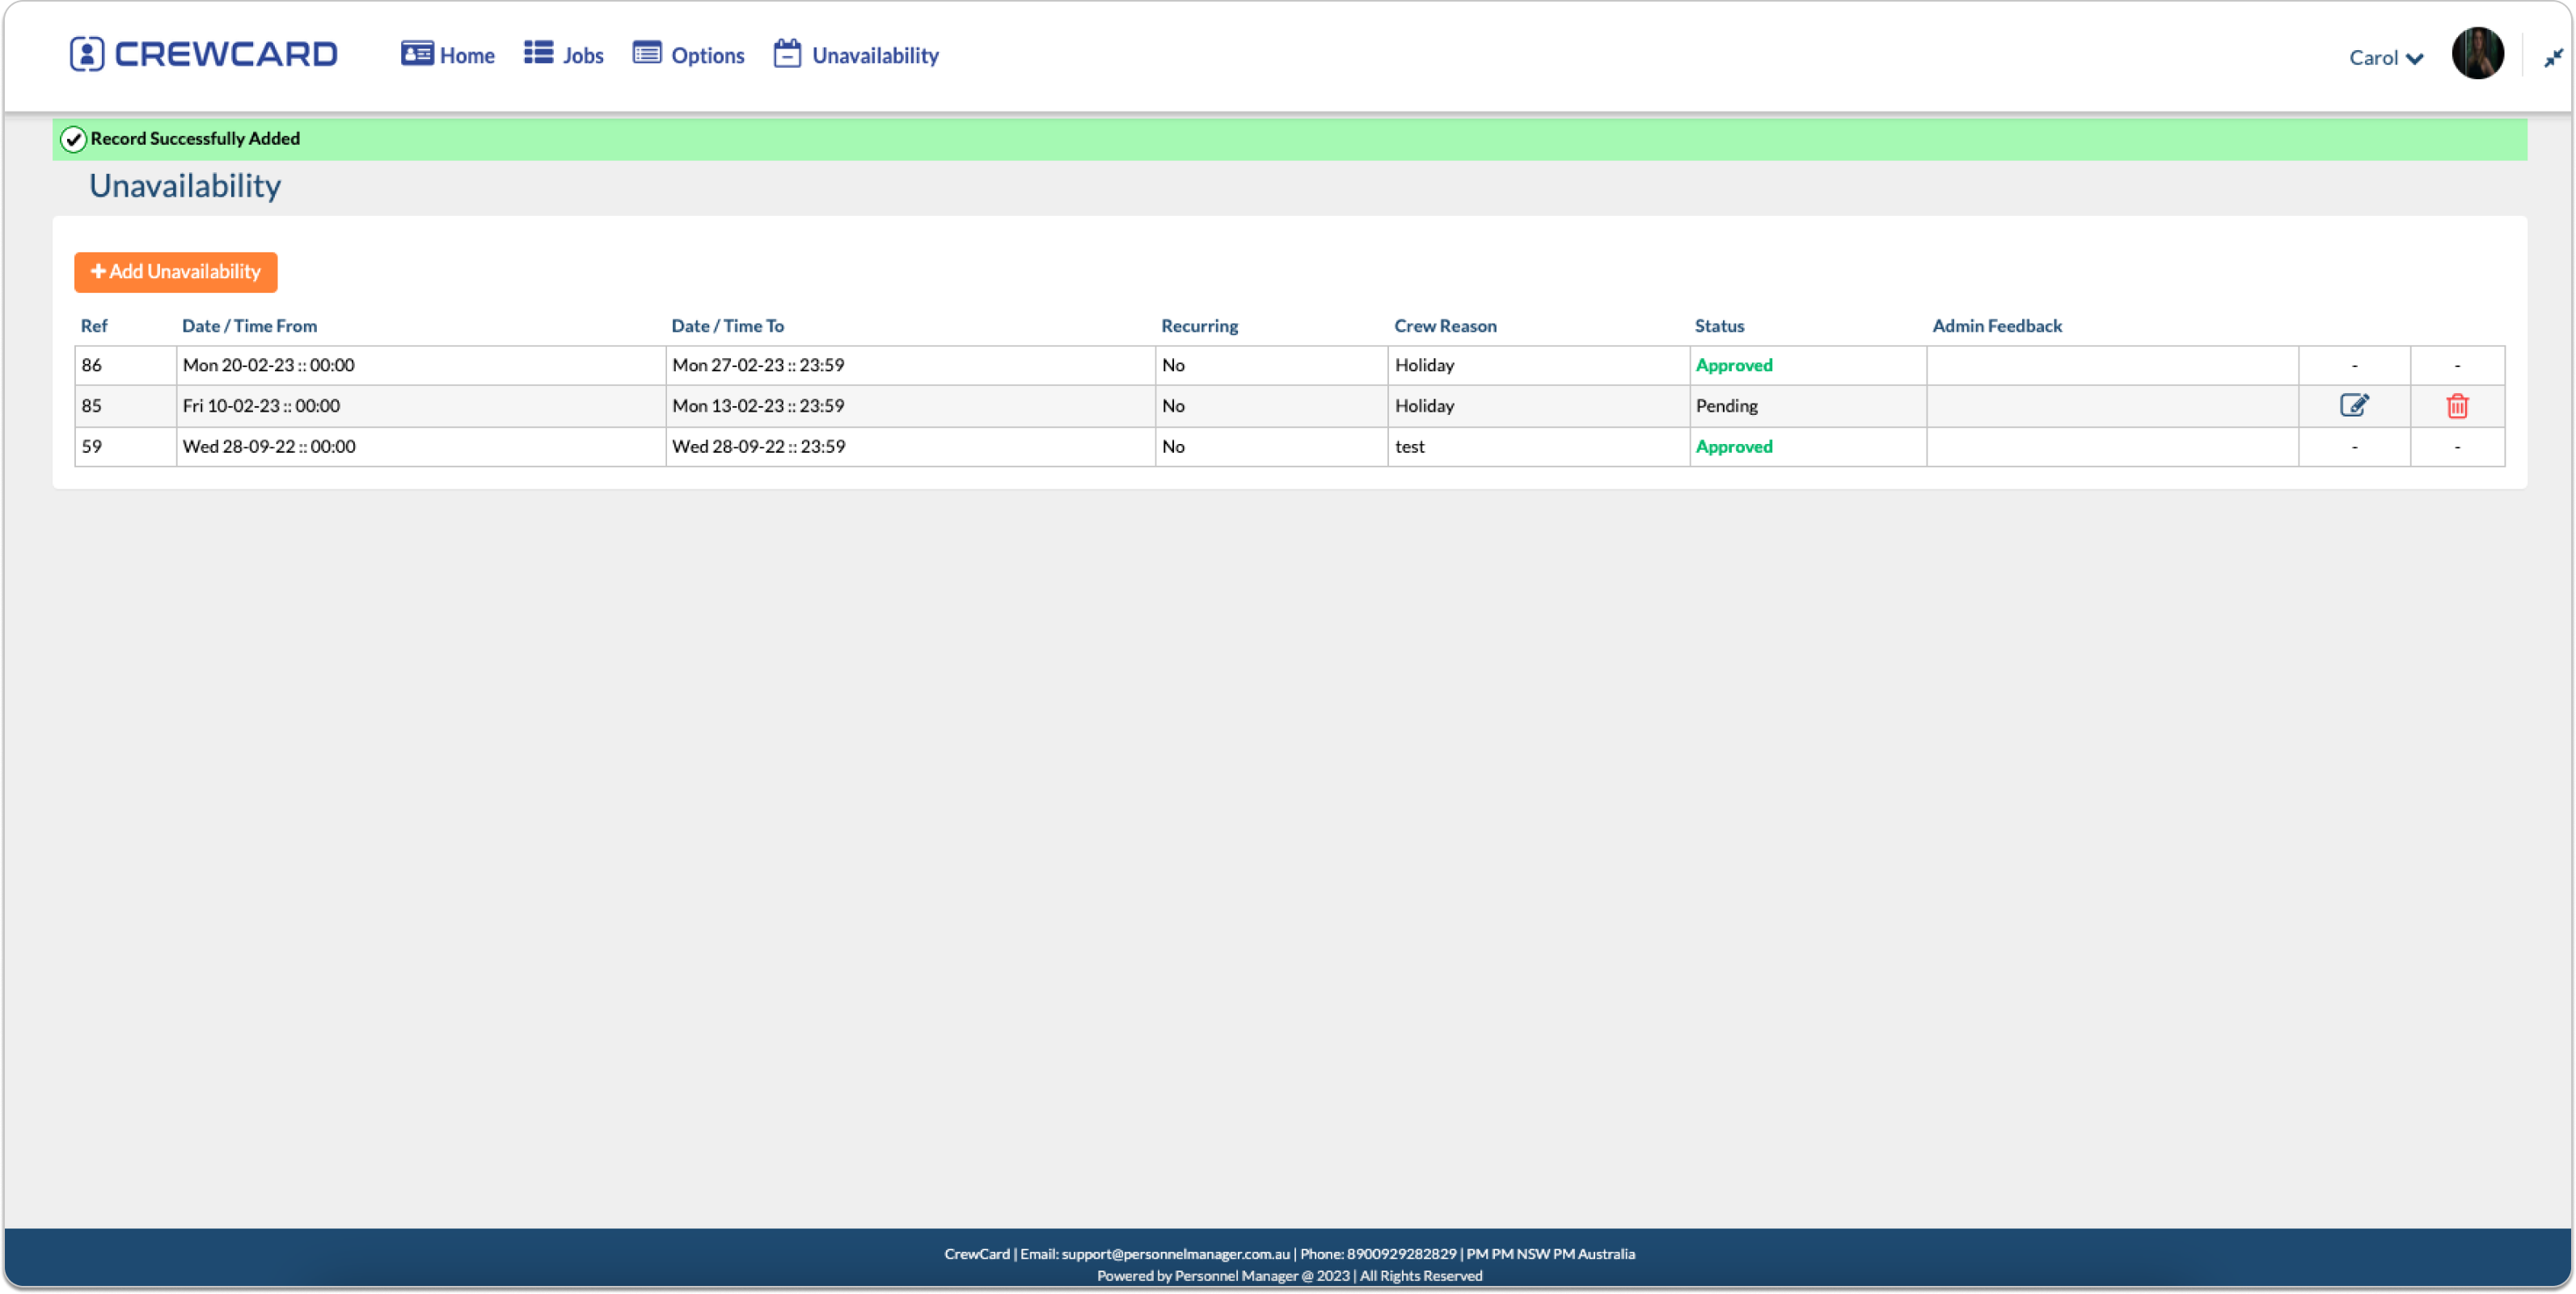
Click Add Unavailability and fill out the fields. Depending on the setting set by admin, the unavailability will either be sent to the company to be reviewed, or approved and added to the system automatically.
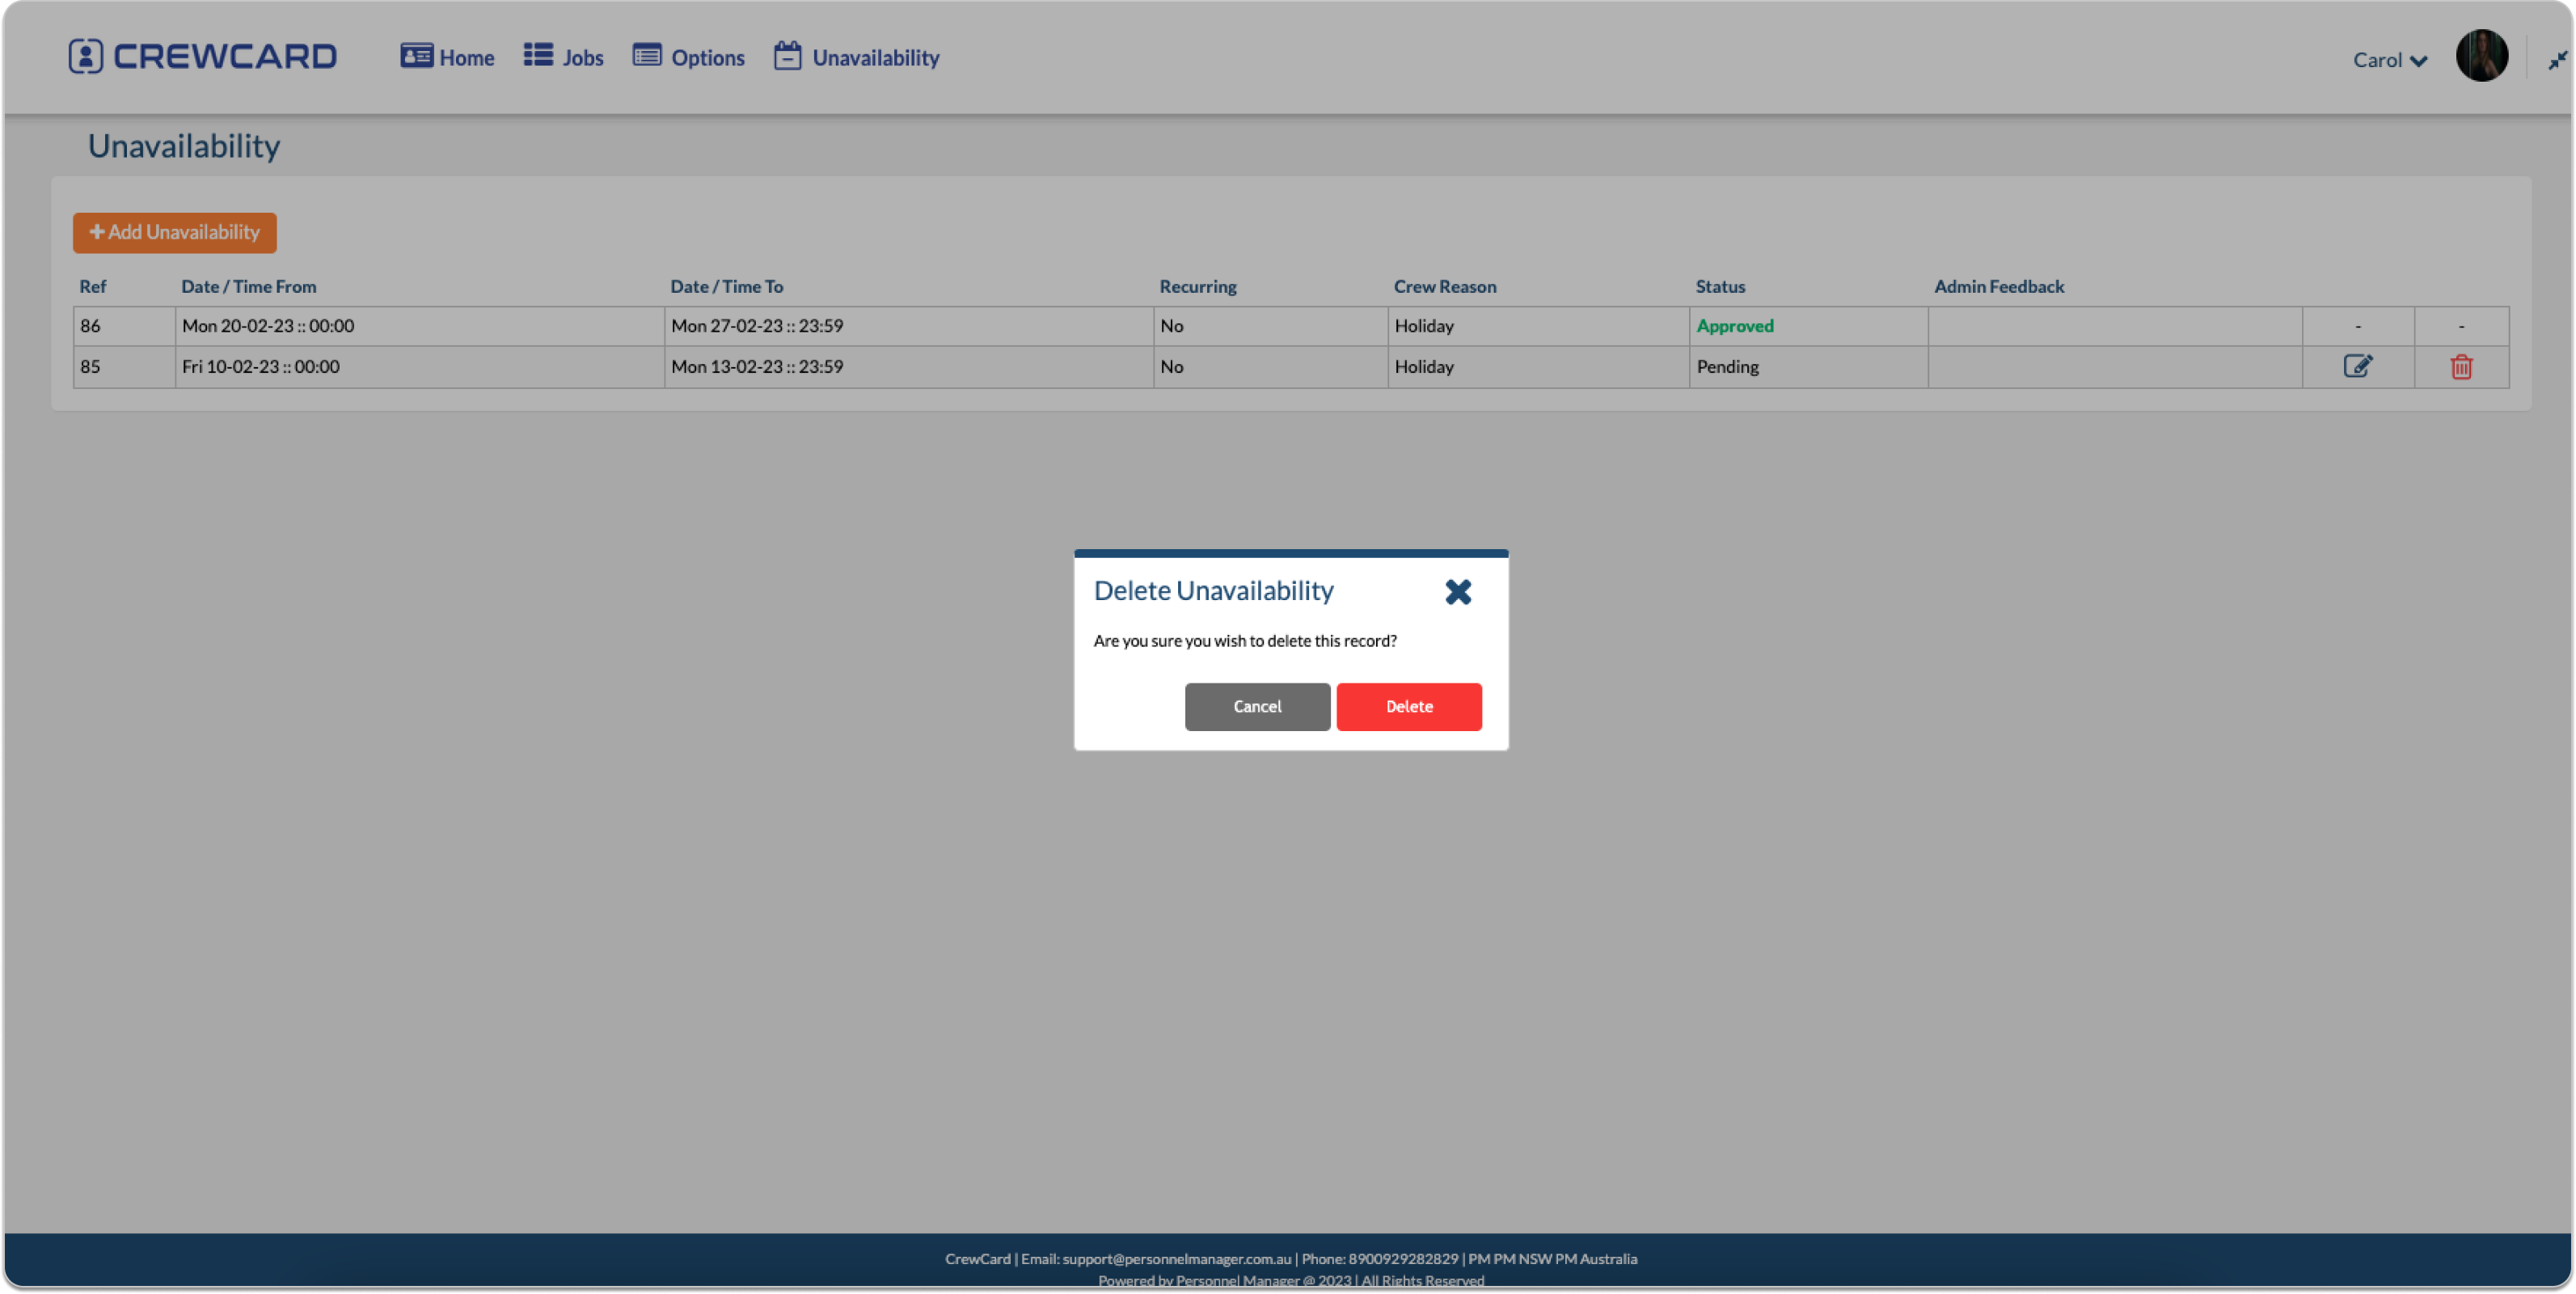
Approved and/or denied unavailability will no longer be editable; only pending unavailability may be edited or deleted by the crew in the Crew Portal.
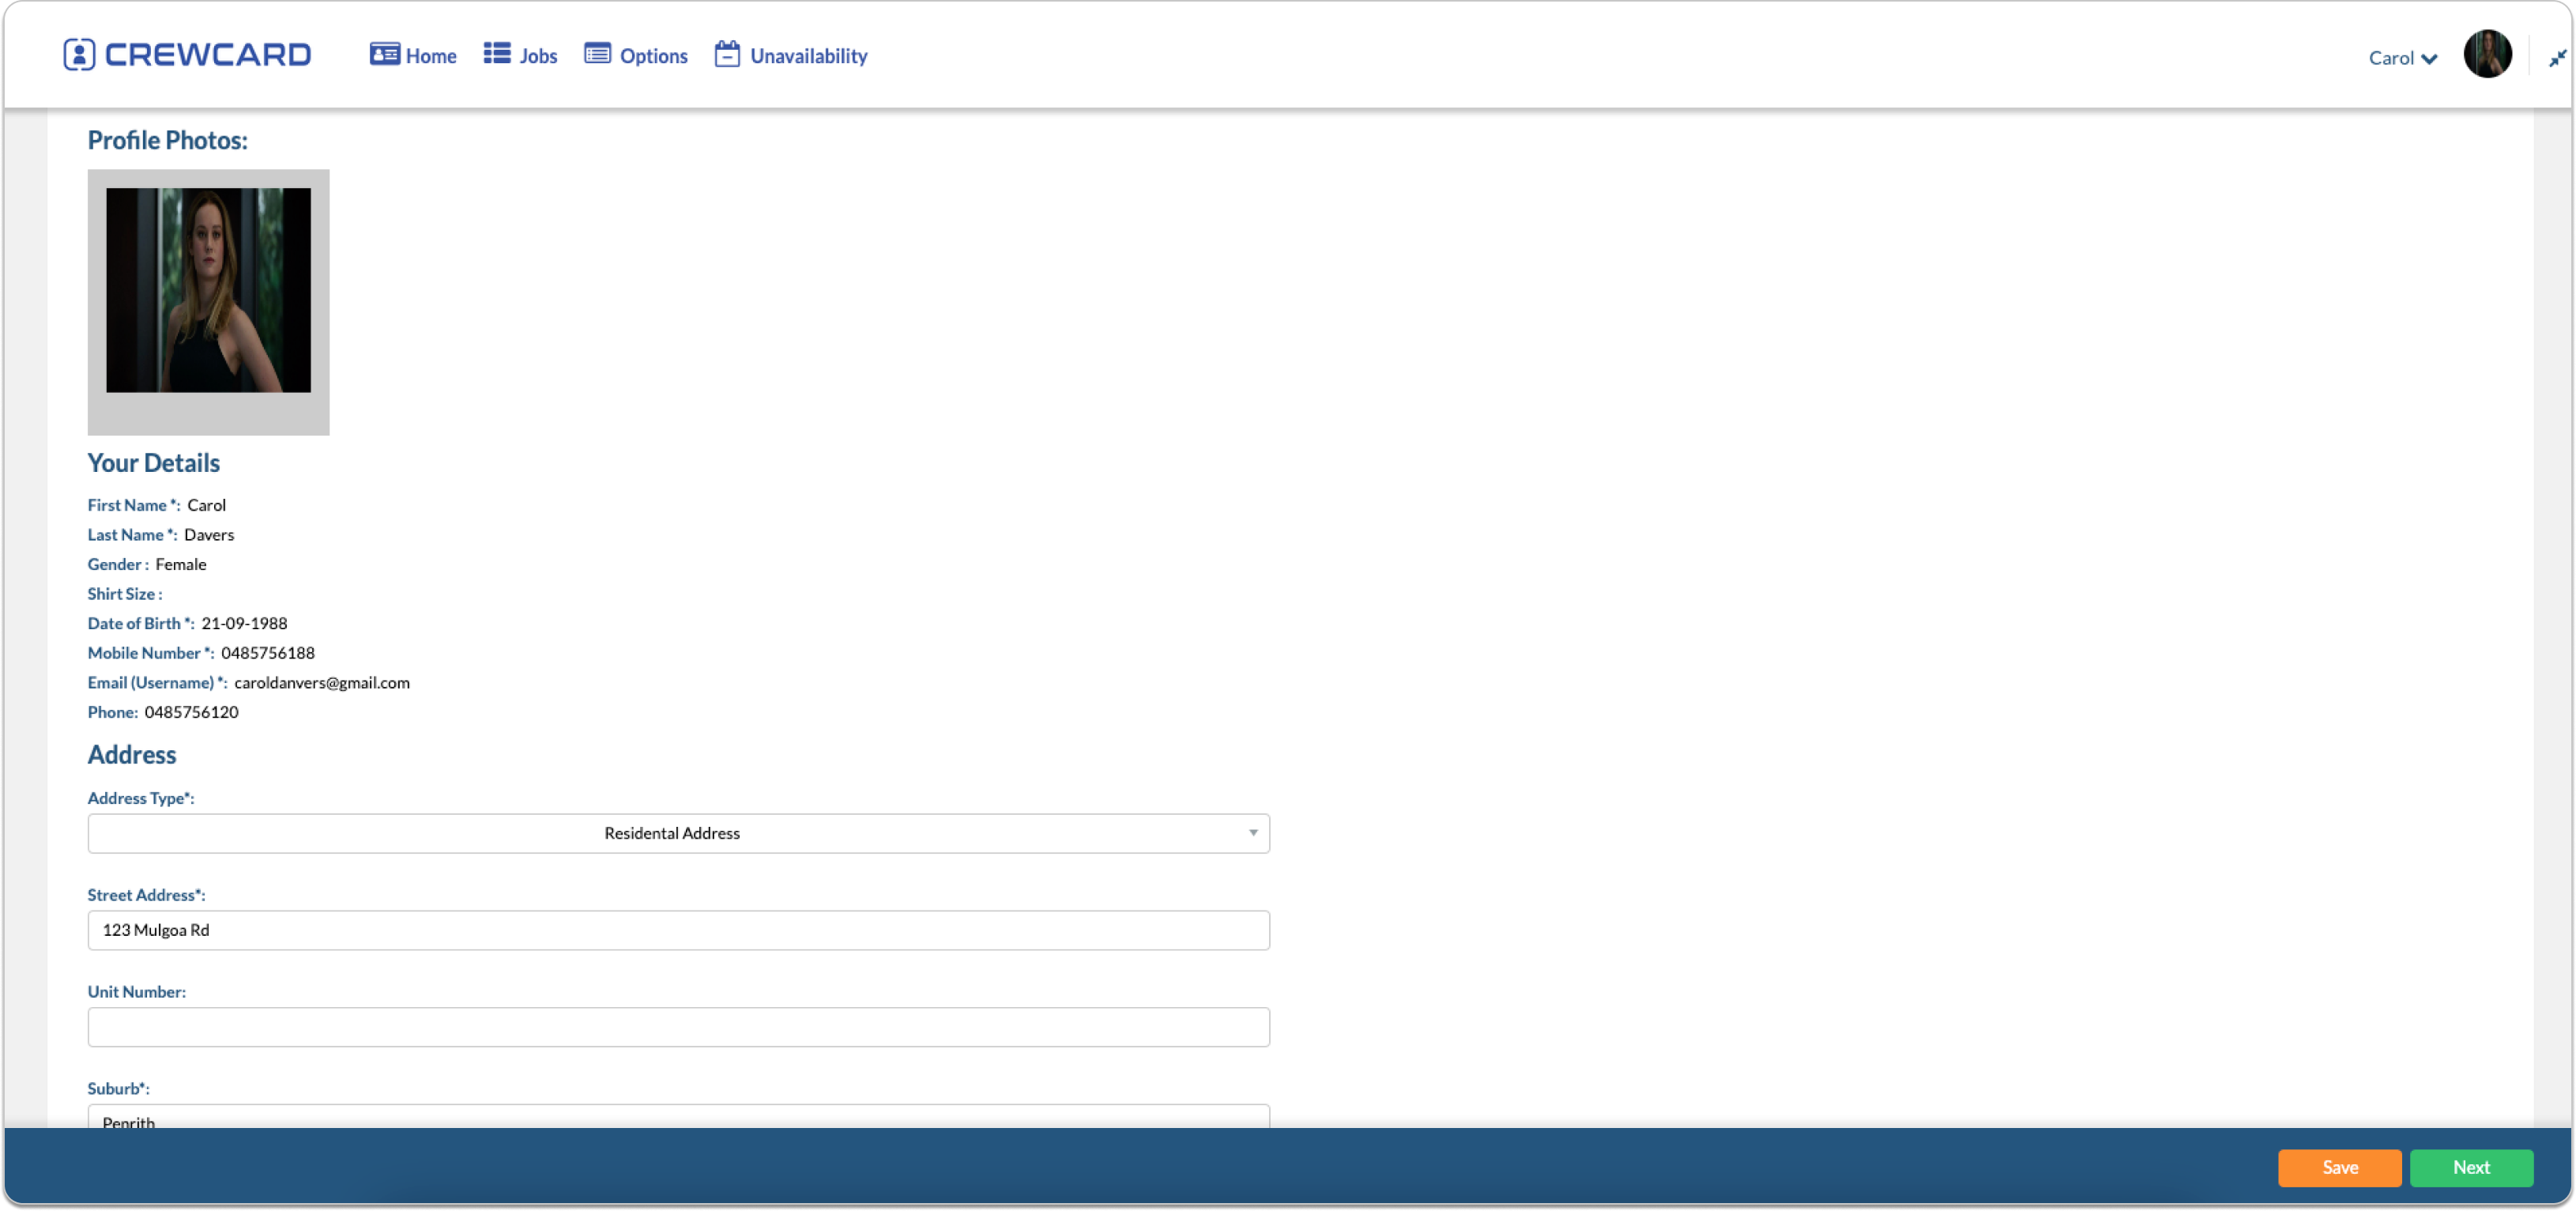
Overview
The overview of your profile will contain your profile photo, details, address and emergency contact. Enter the information in the text boxes provided under the appropriate headings. Note that you are able to select your address type as either Residential, or a PO box. When completed, select ‘Save’ or ‘Next’ in the bottom right corner.
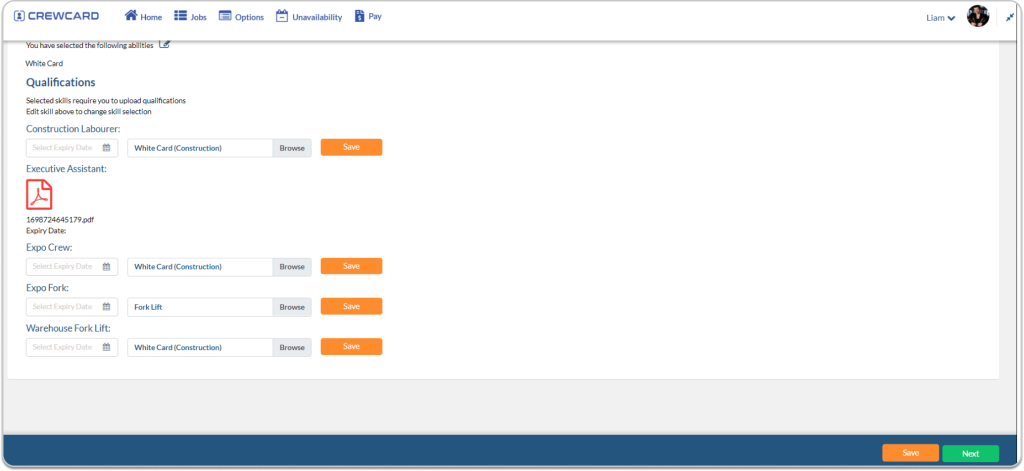
Qualifications
Qualifications provides an area to select abilities and skills with their respective proof of qualification. Here you may select abilities and view the uploaded files.
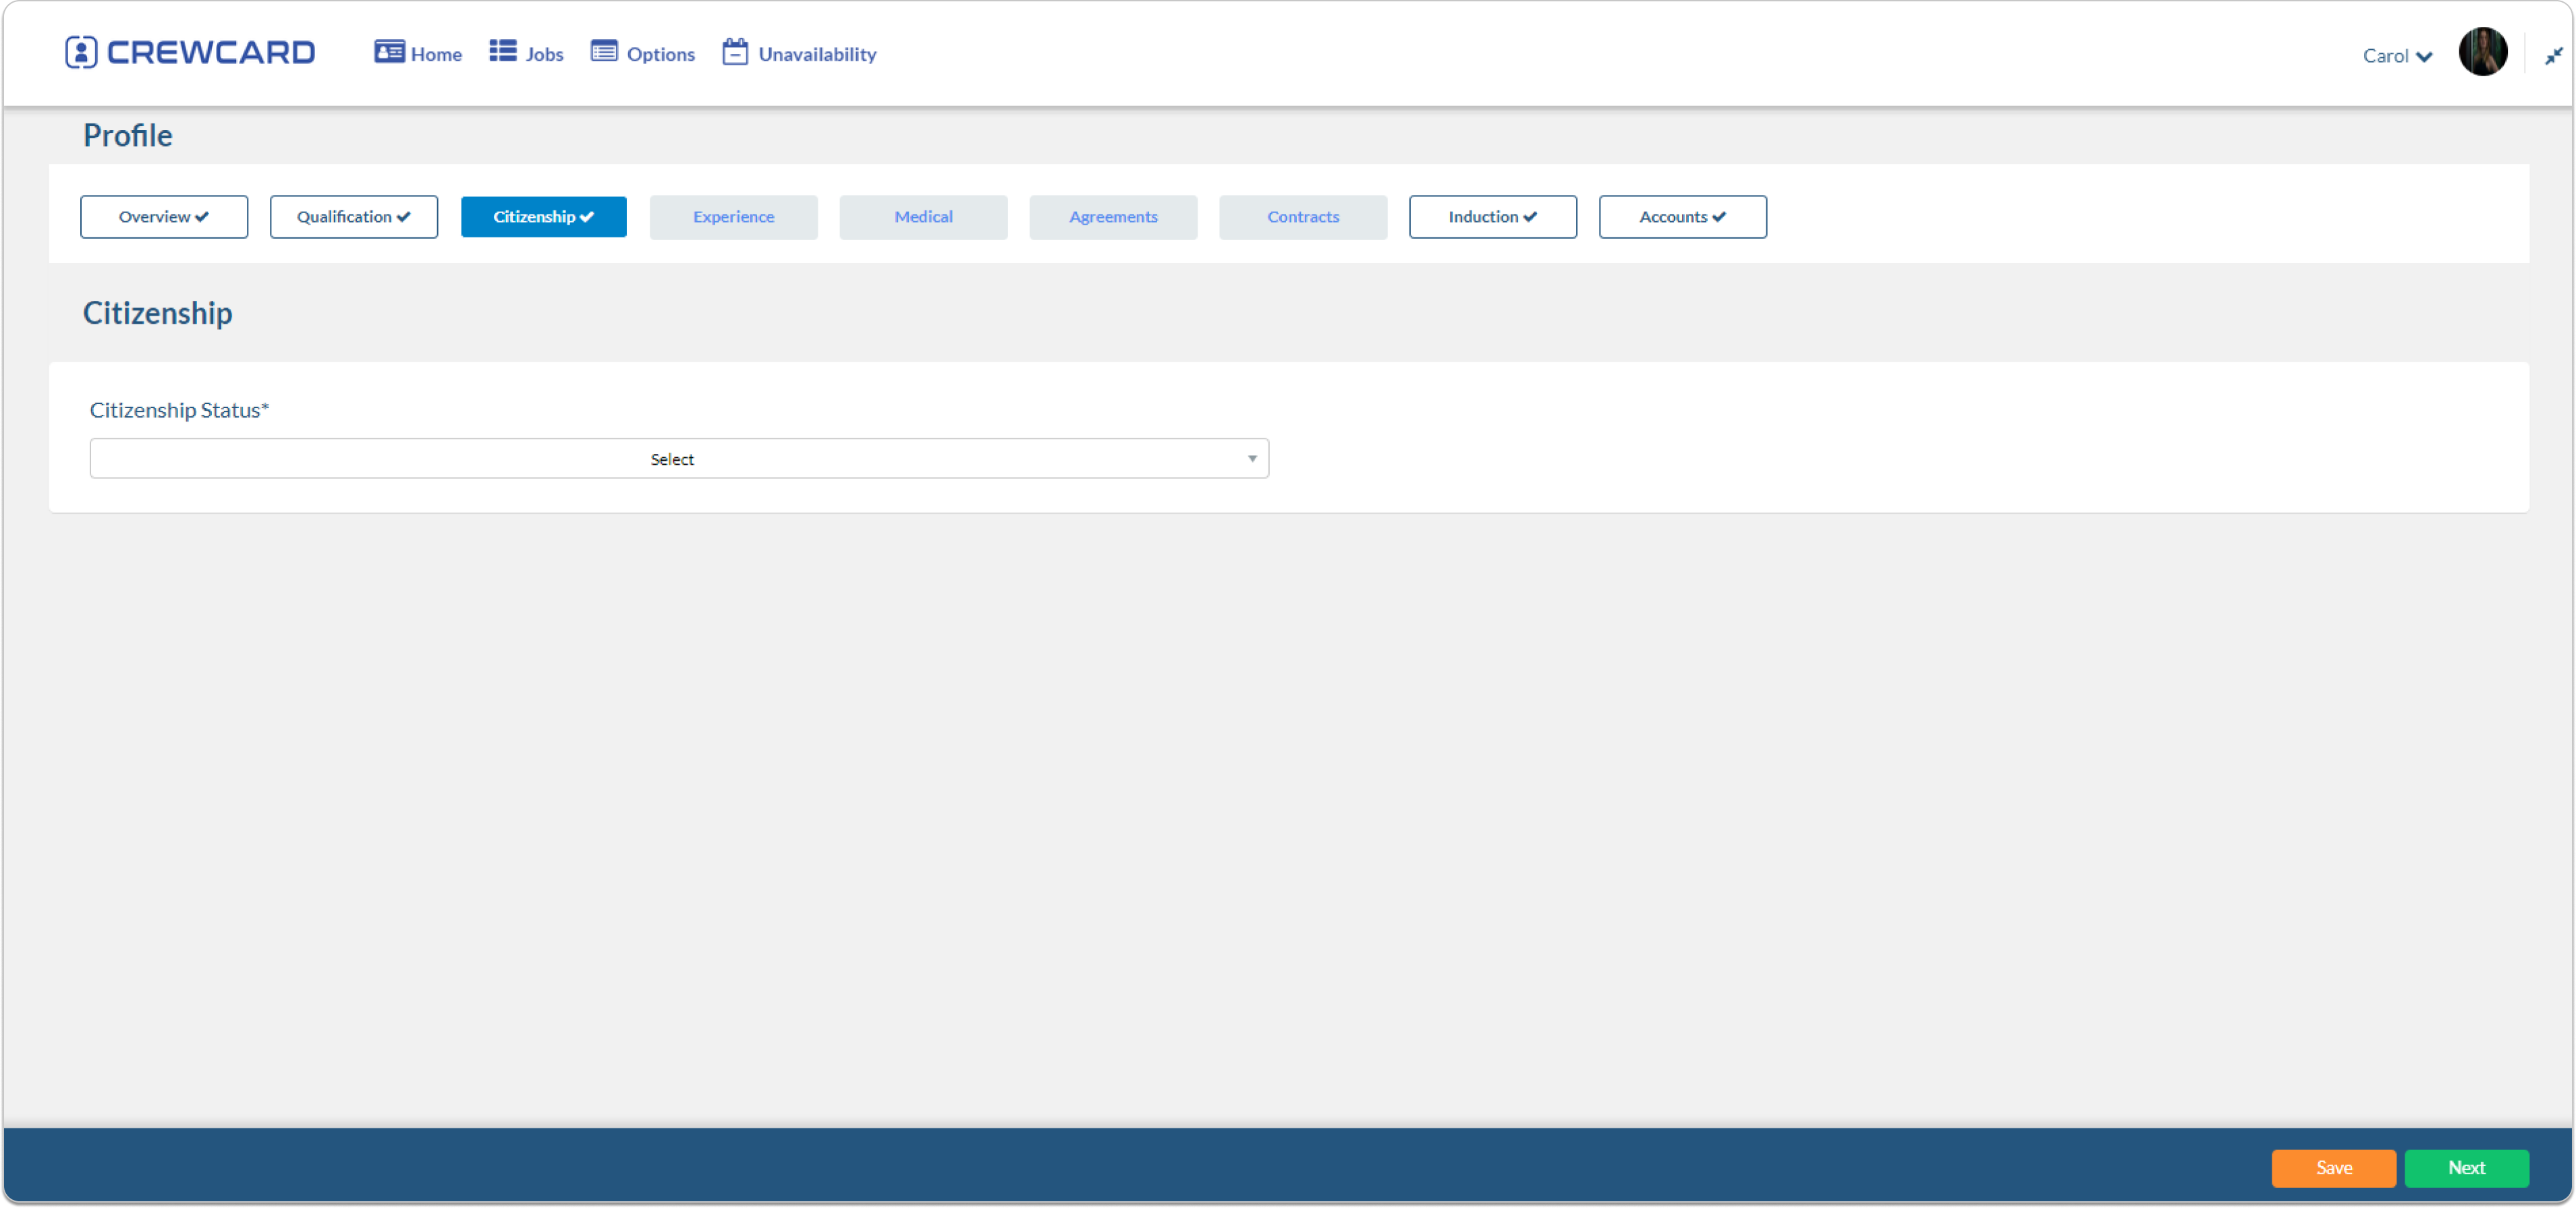
Citizenship
Select your citizenship status from the drop down menu.
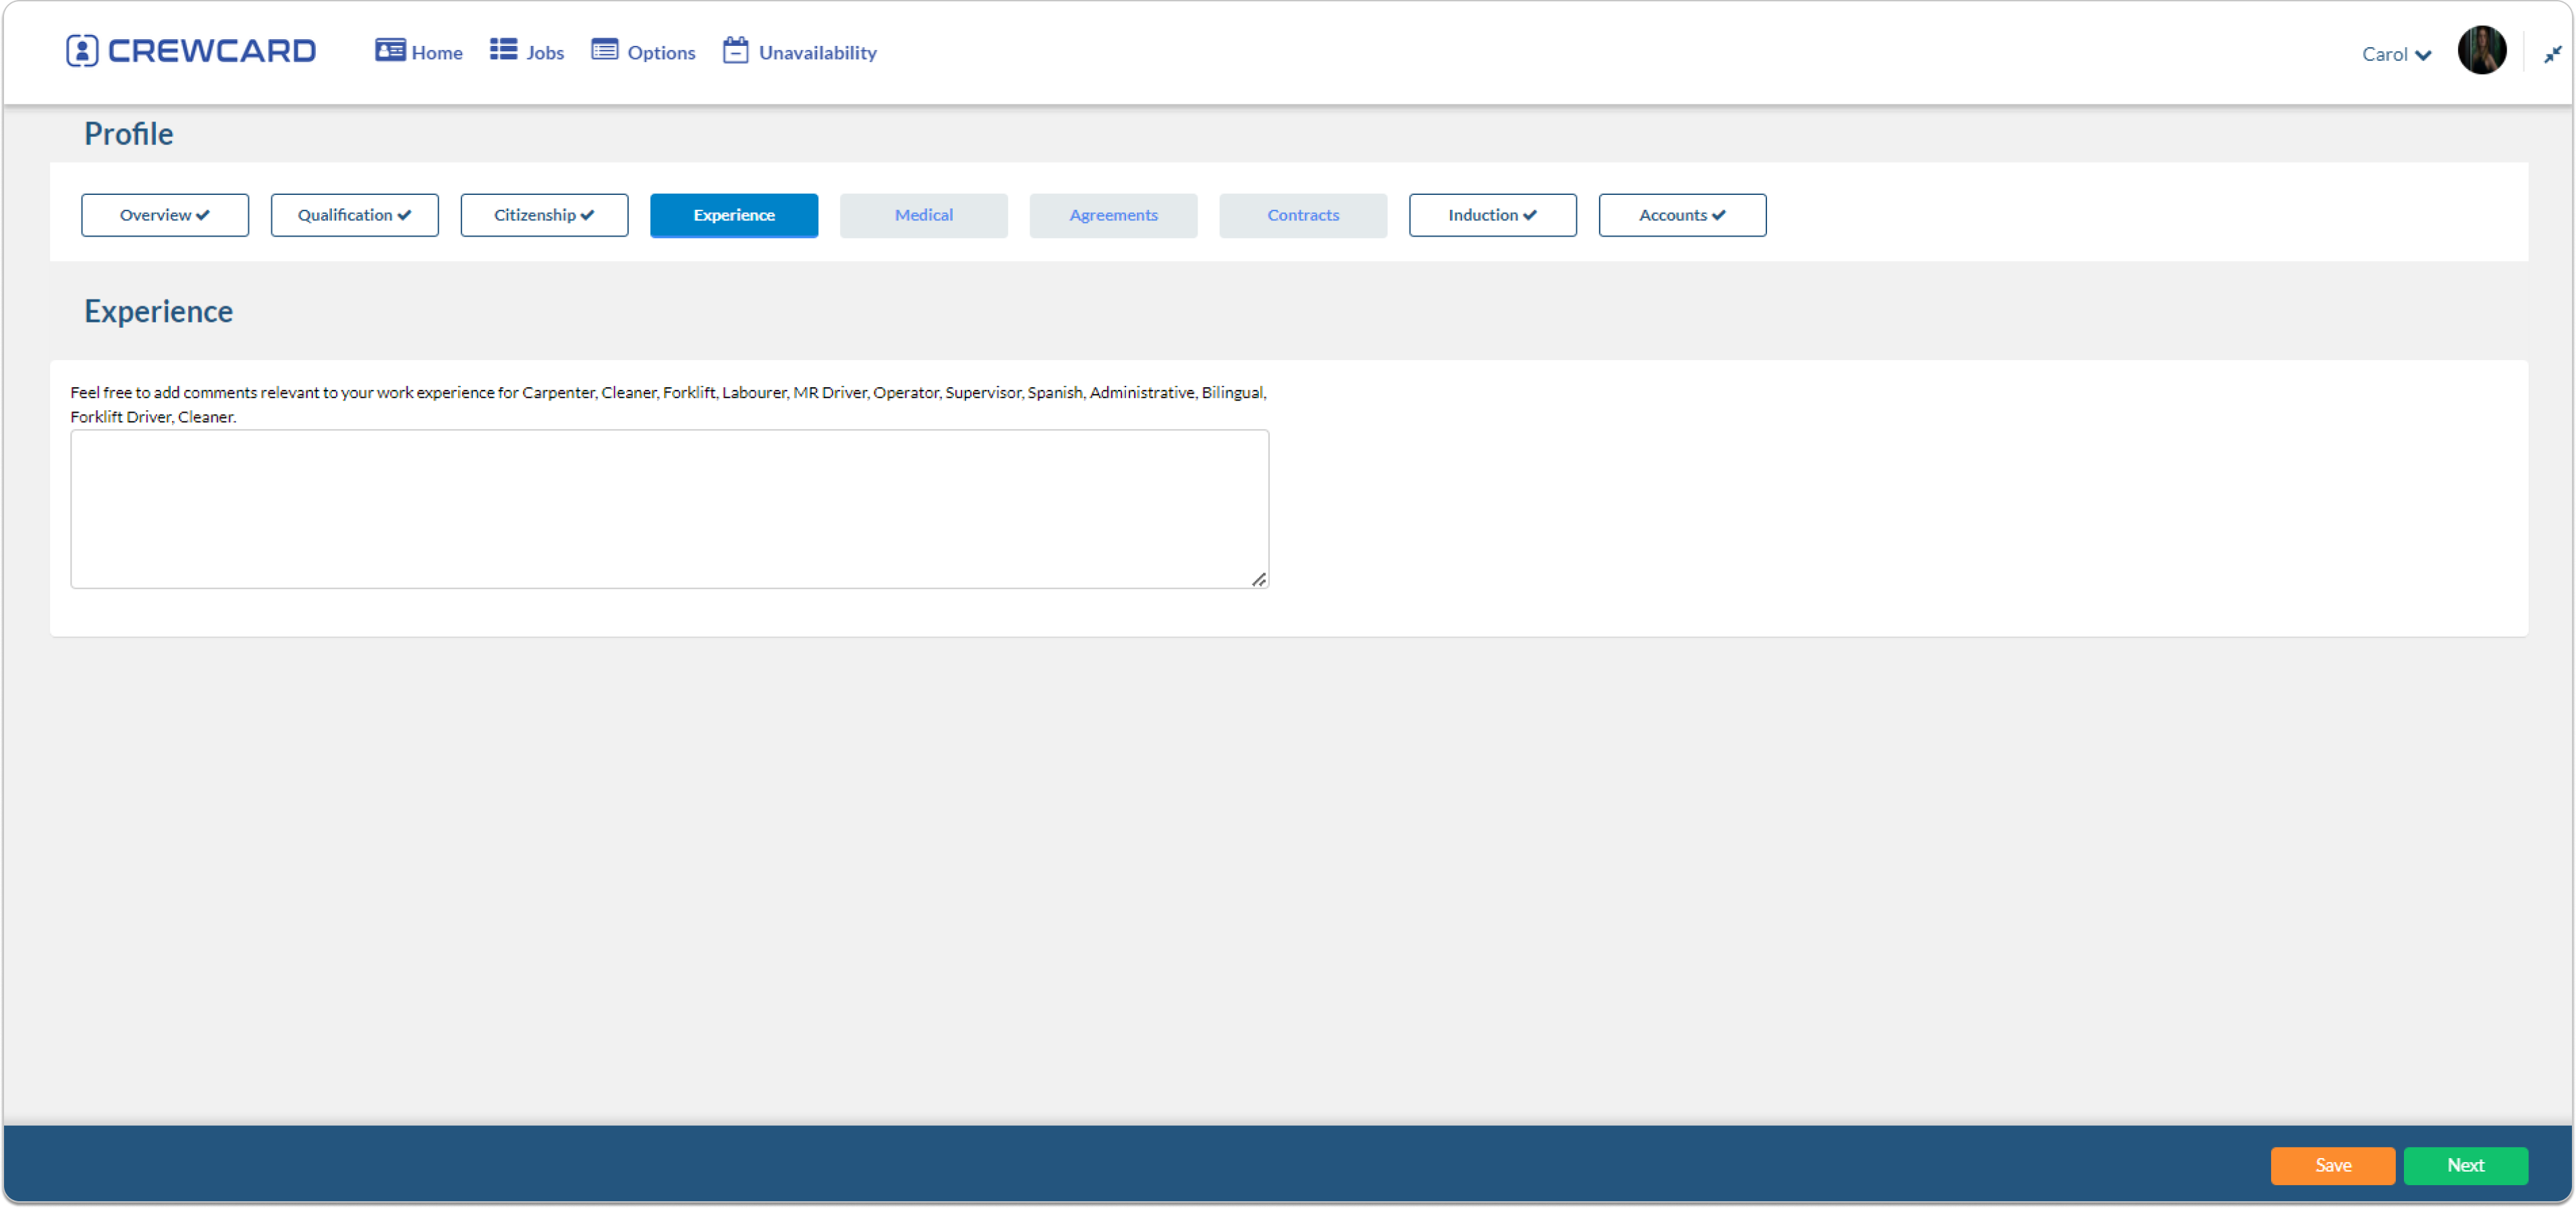
Experience
Add comments relevant to your work experience that relate to the skills listed . To update your selected skills, please contact your admin.
Medical
Where appropriate, tick the tick boxes provided . Then, list all previous physical or psychological injuries that may affect your work performance. Note, this answer is not compulsory.
Select ‘Save’ or ‘Next’

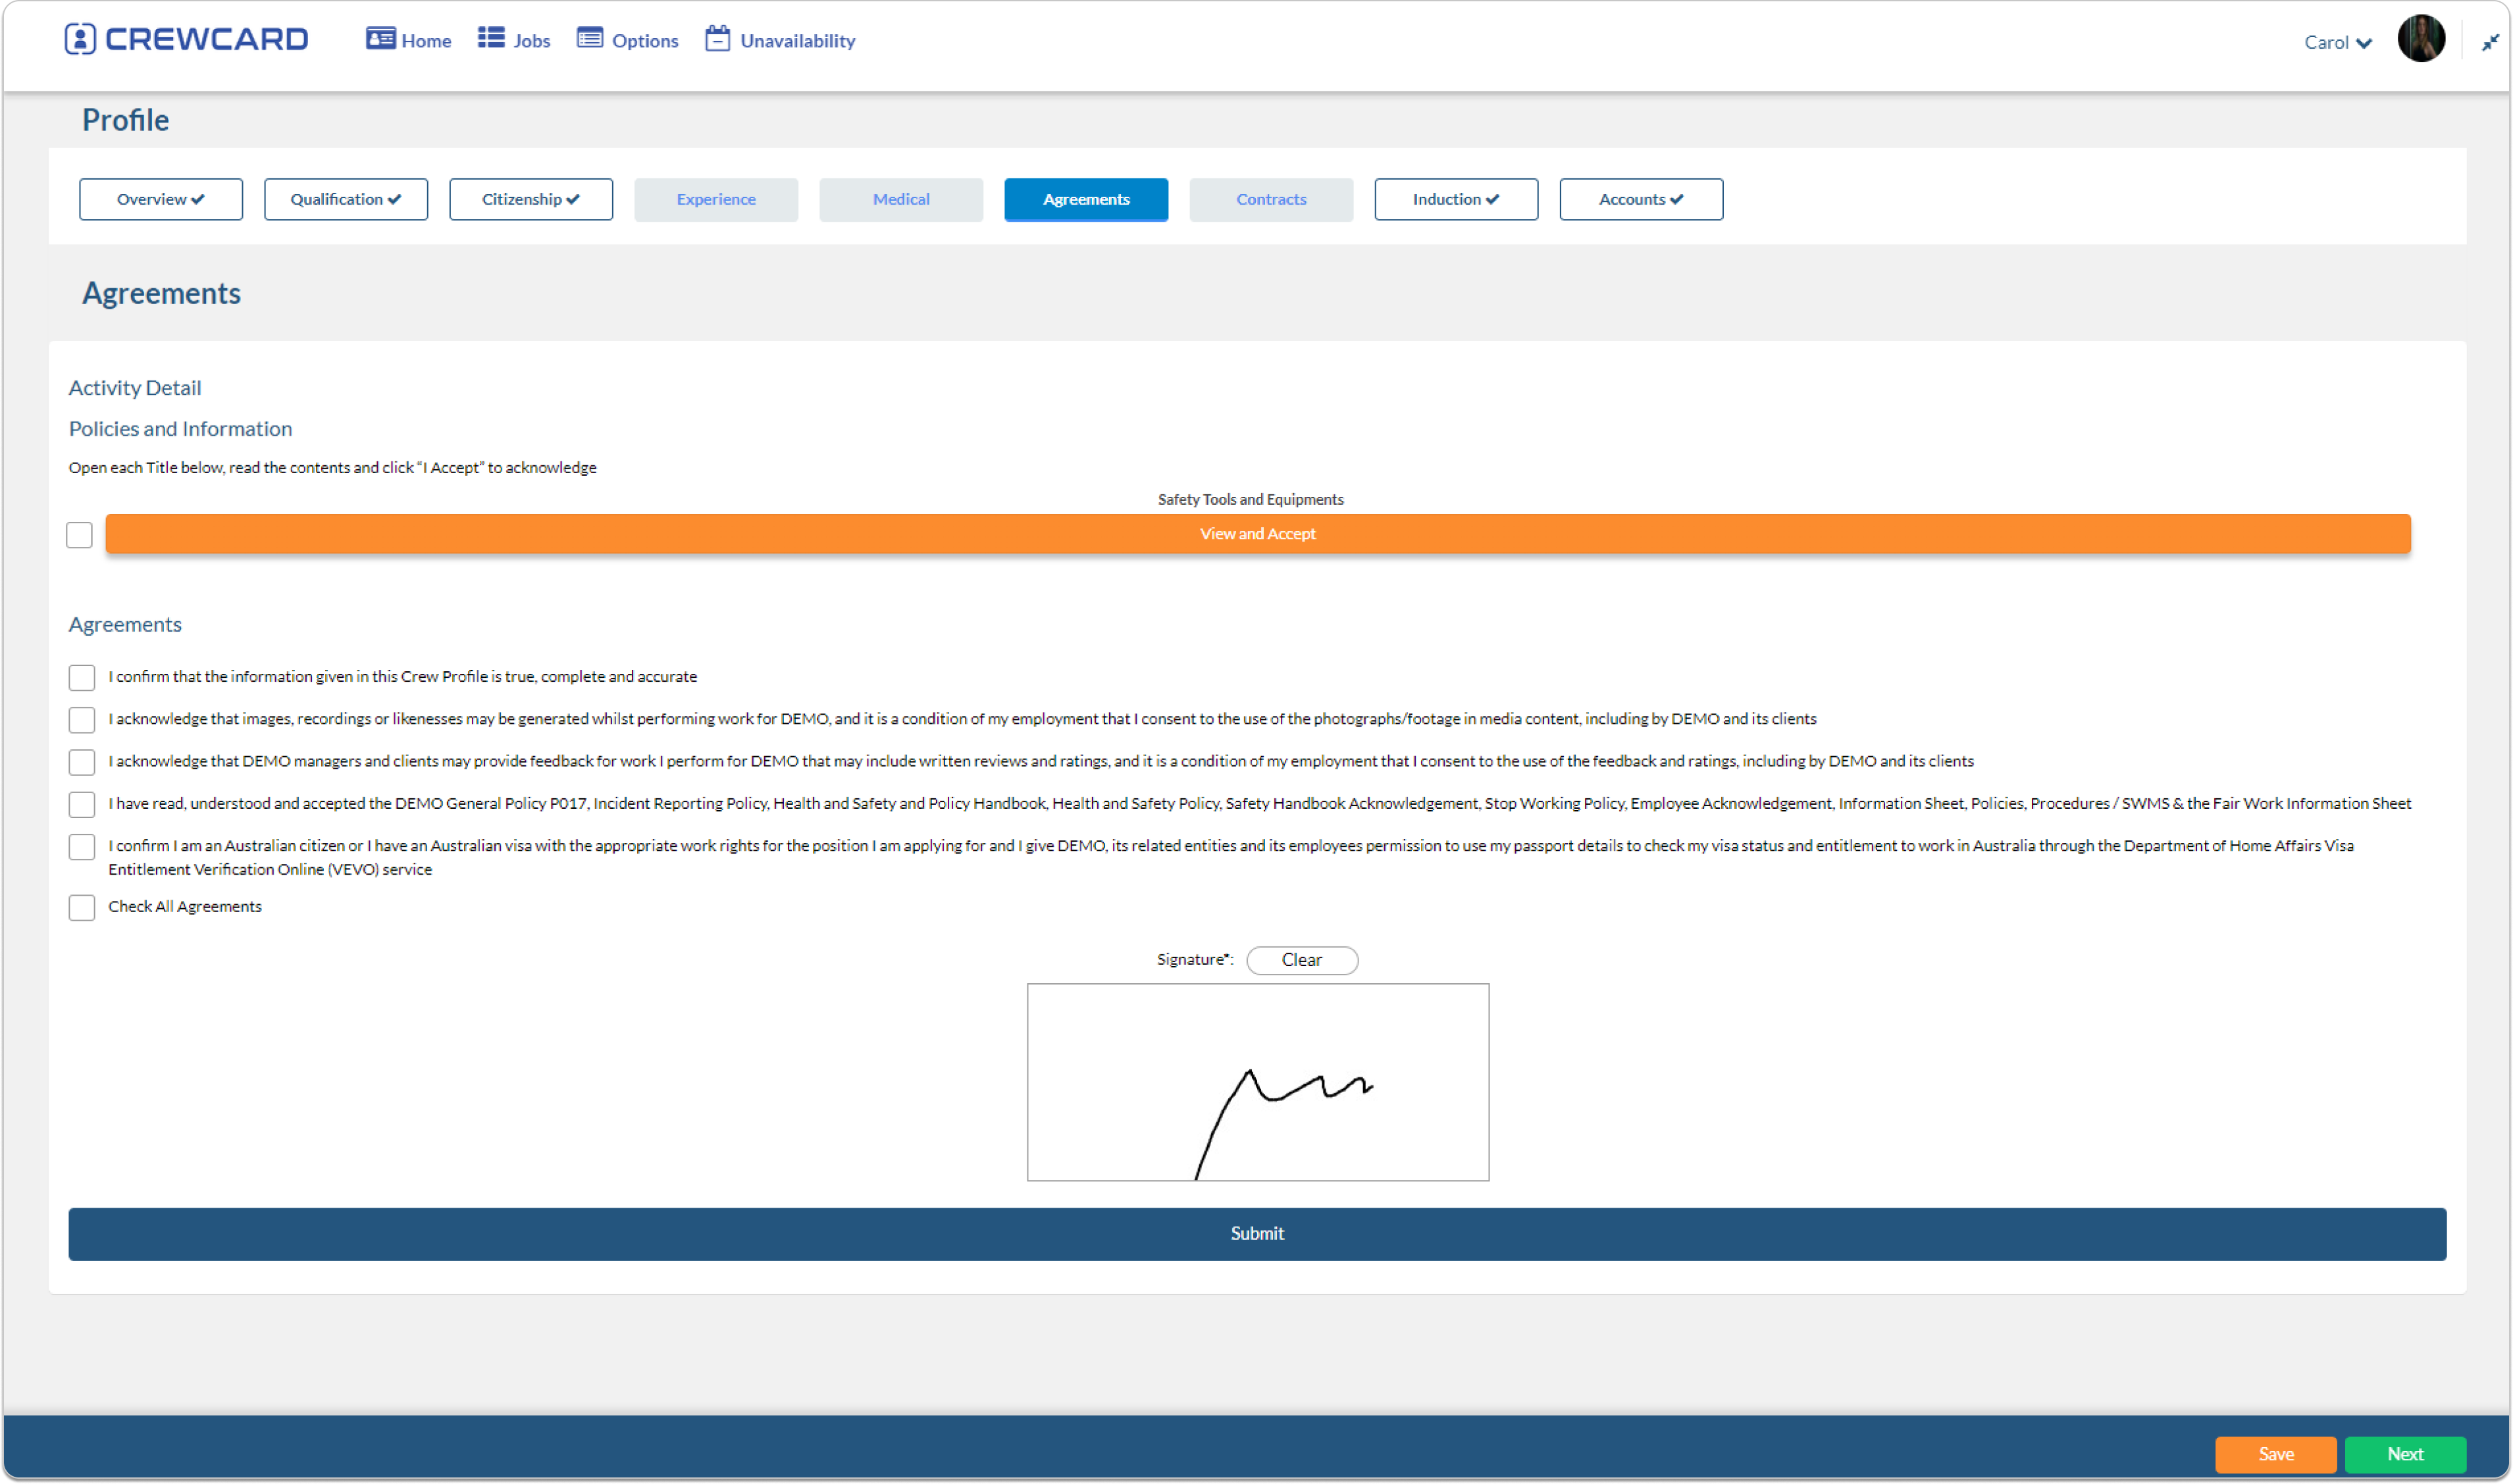
Agreements
This page allows you to view agreements signed in the past. Any new agreements will appear here. You can also view an accept policies and information.
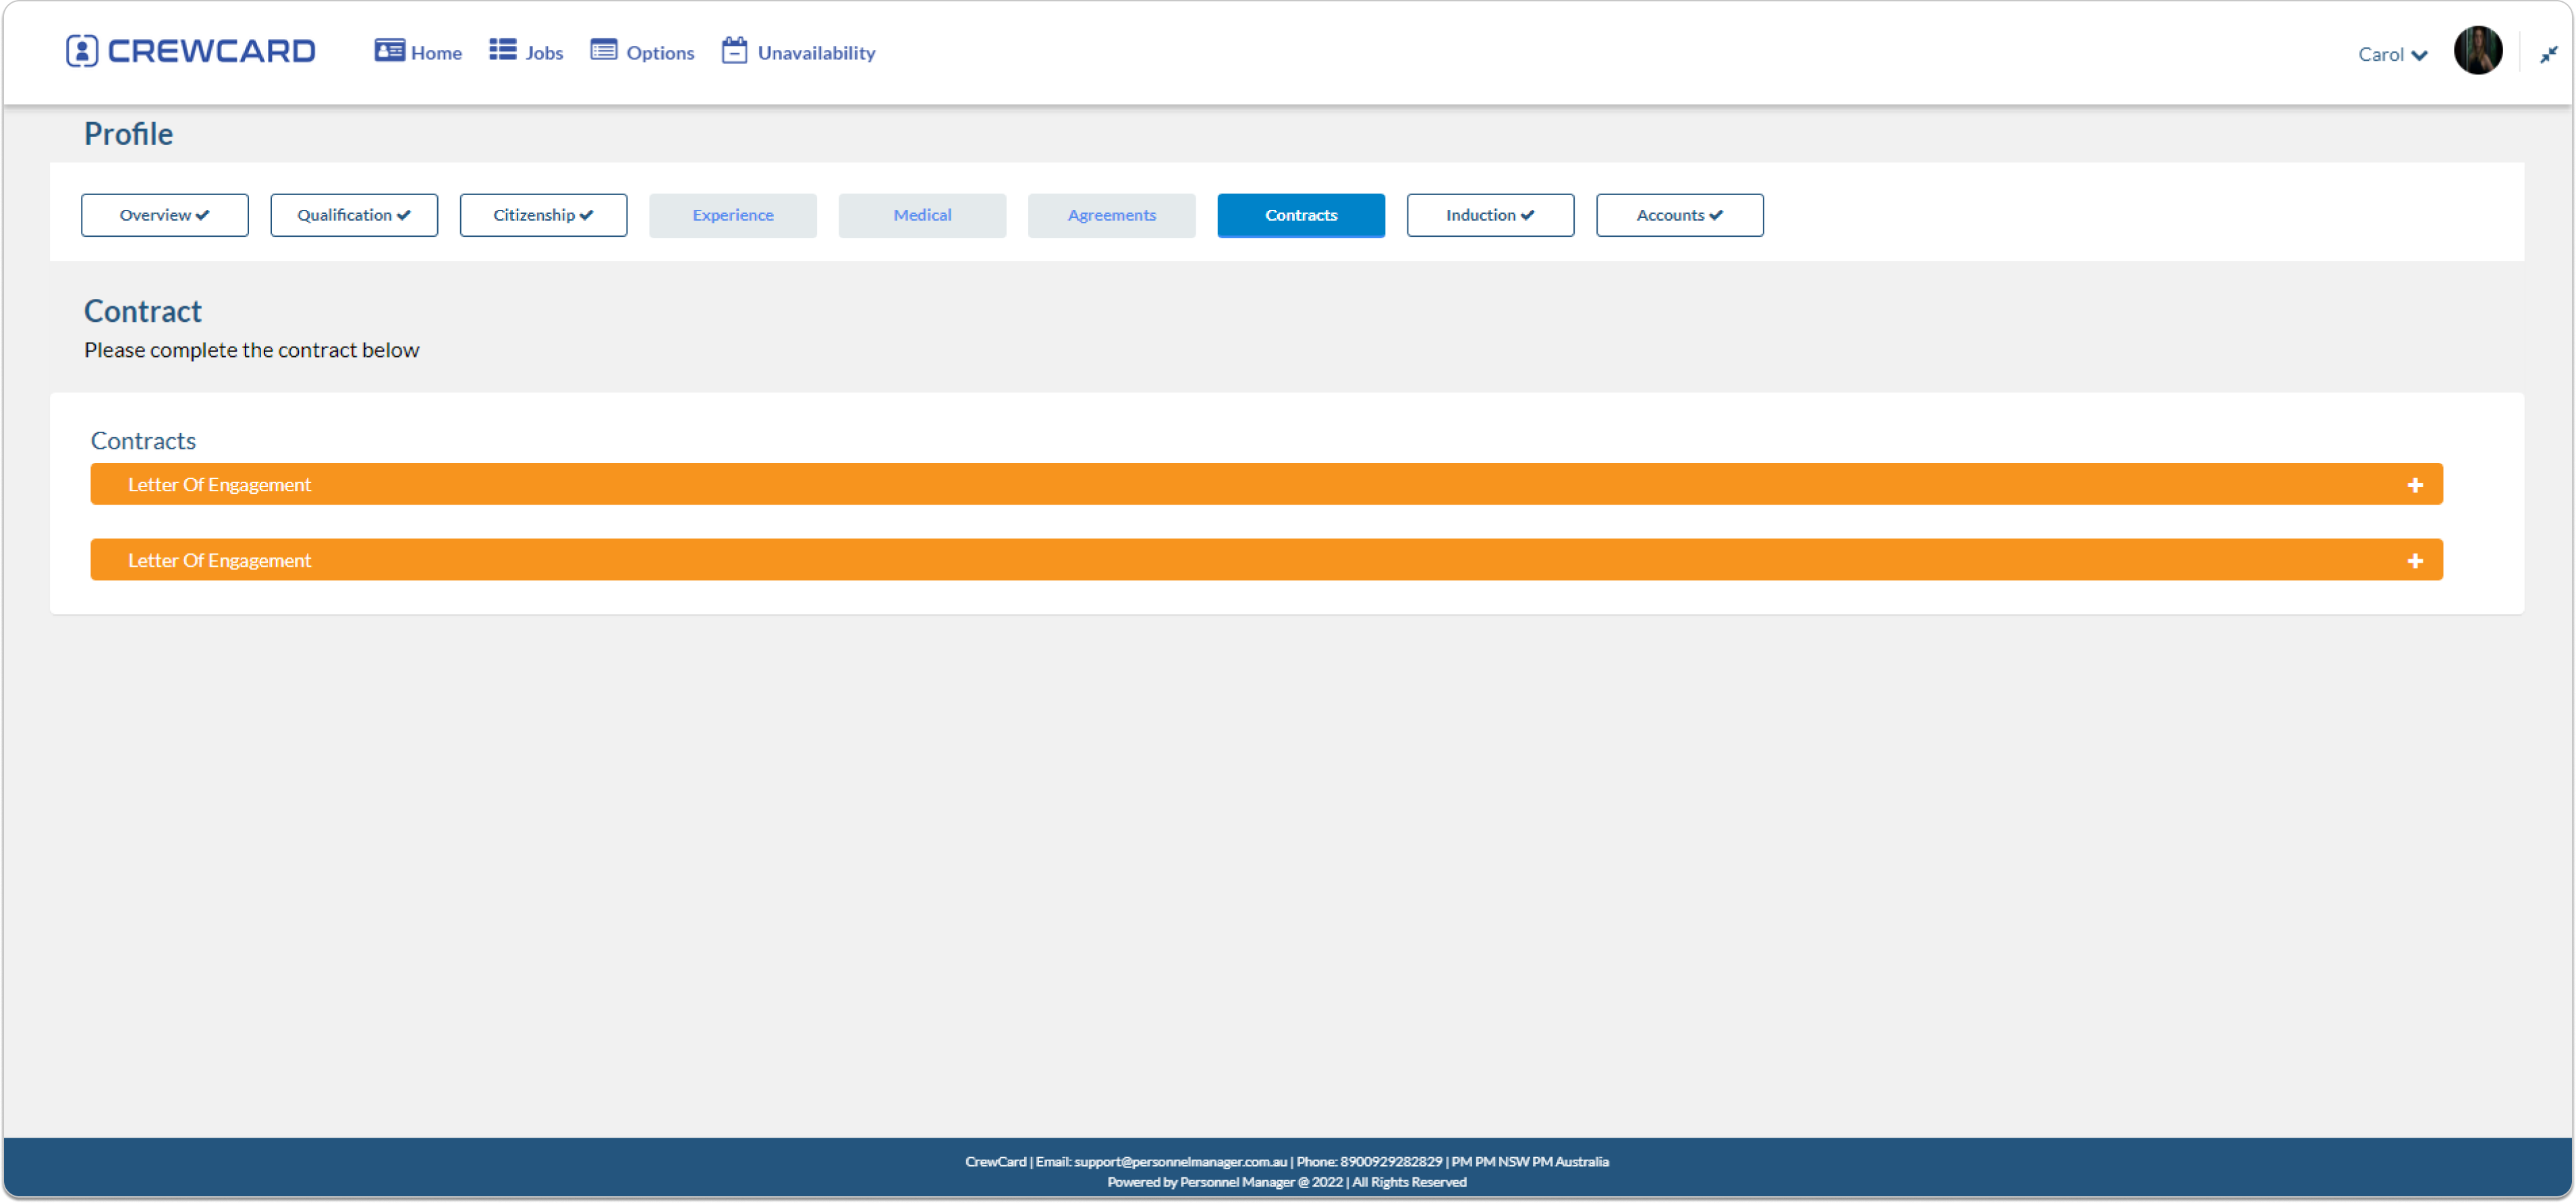
Contracts
Read and accept the contracts that are uploaded to this page. You may enter and reread the contracts at anytime.
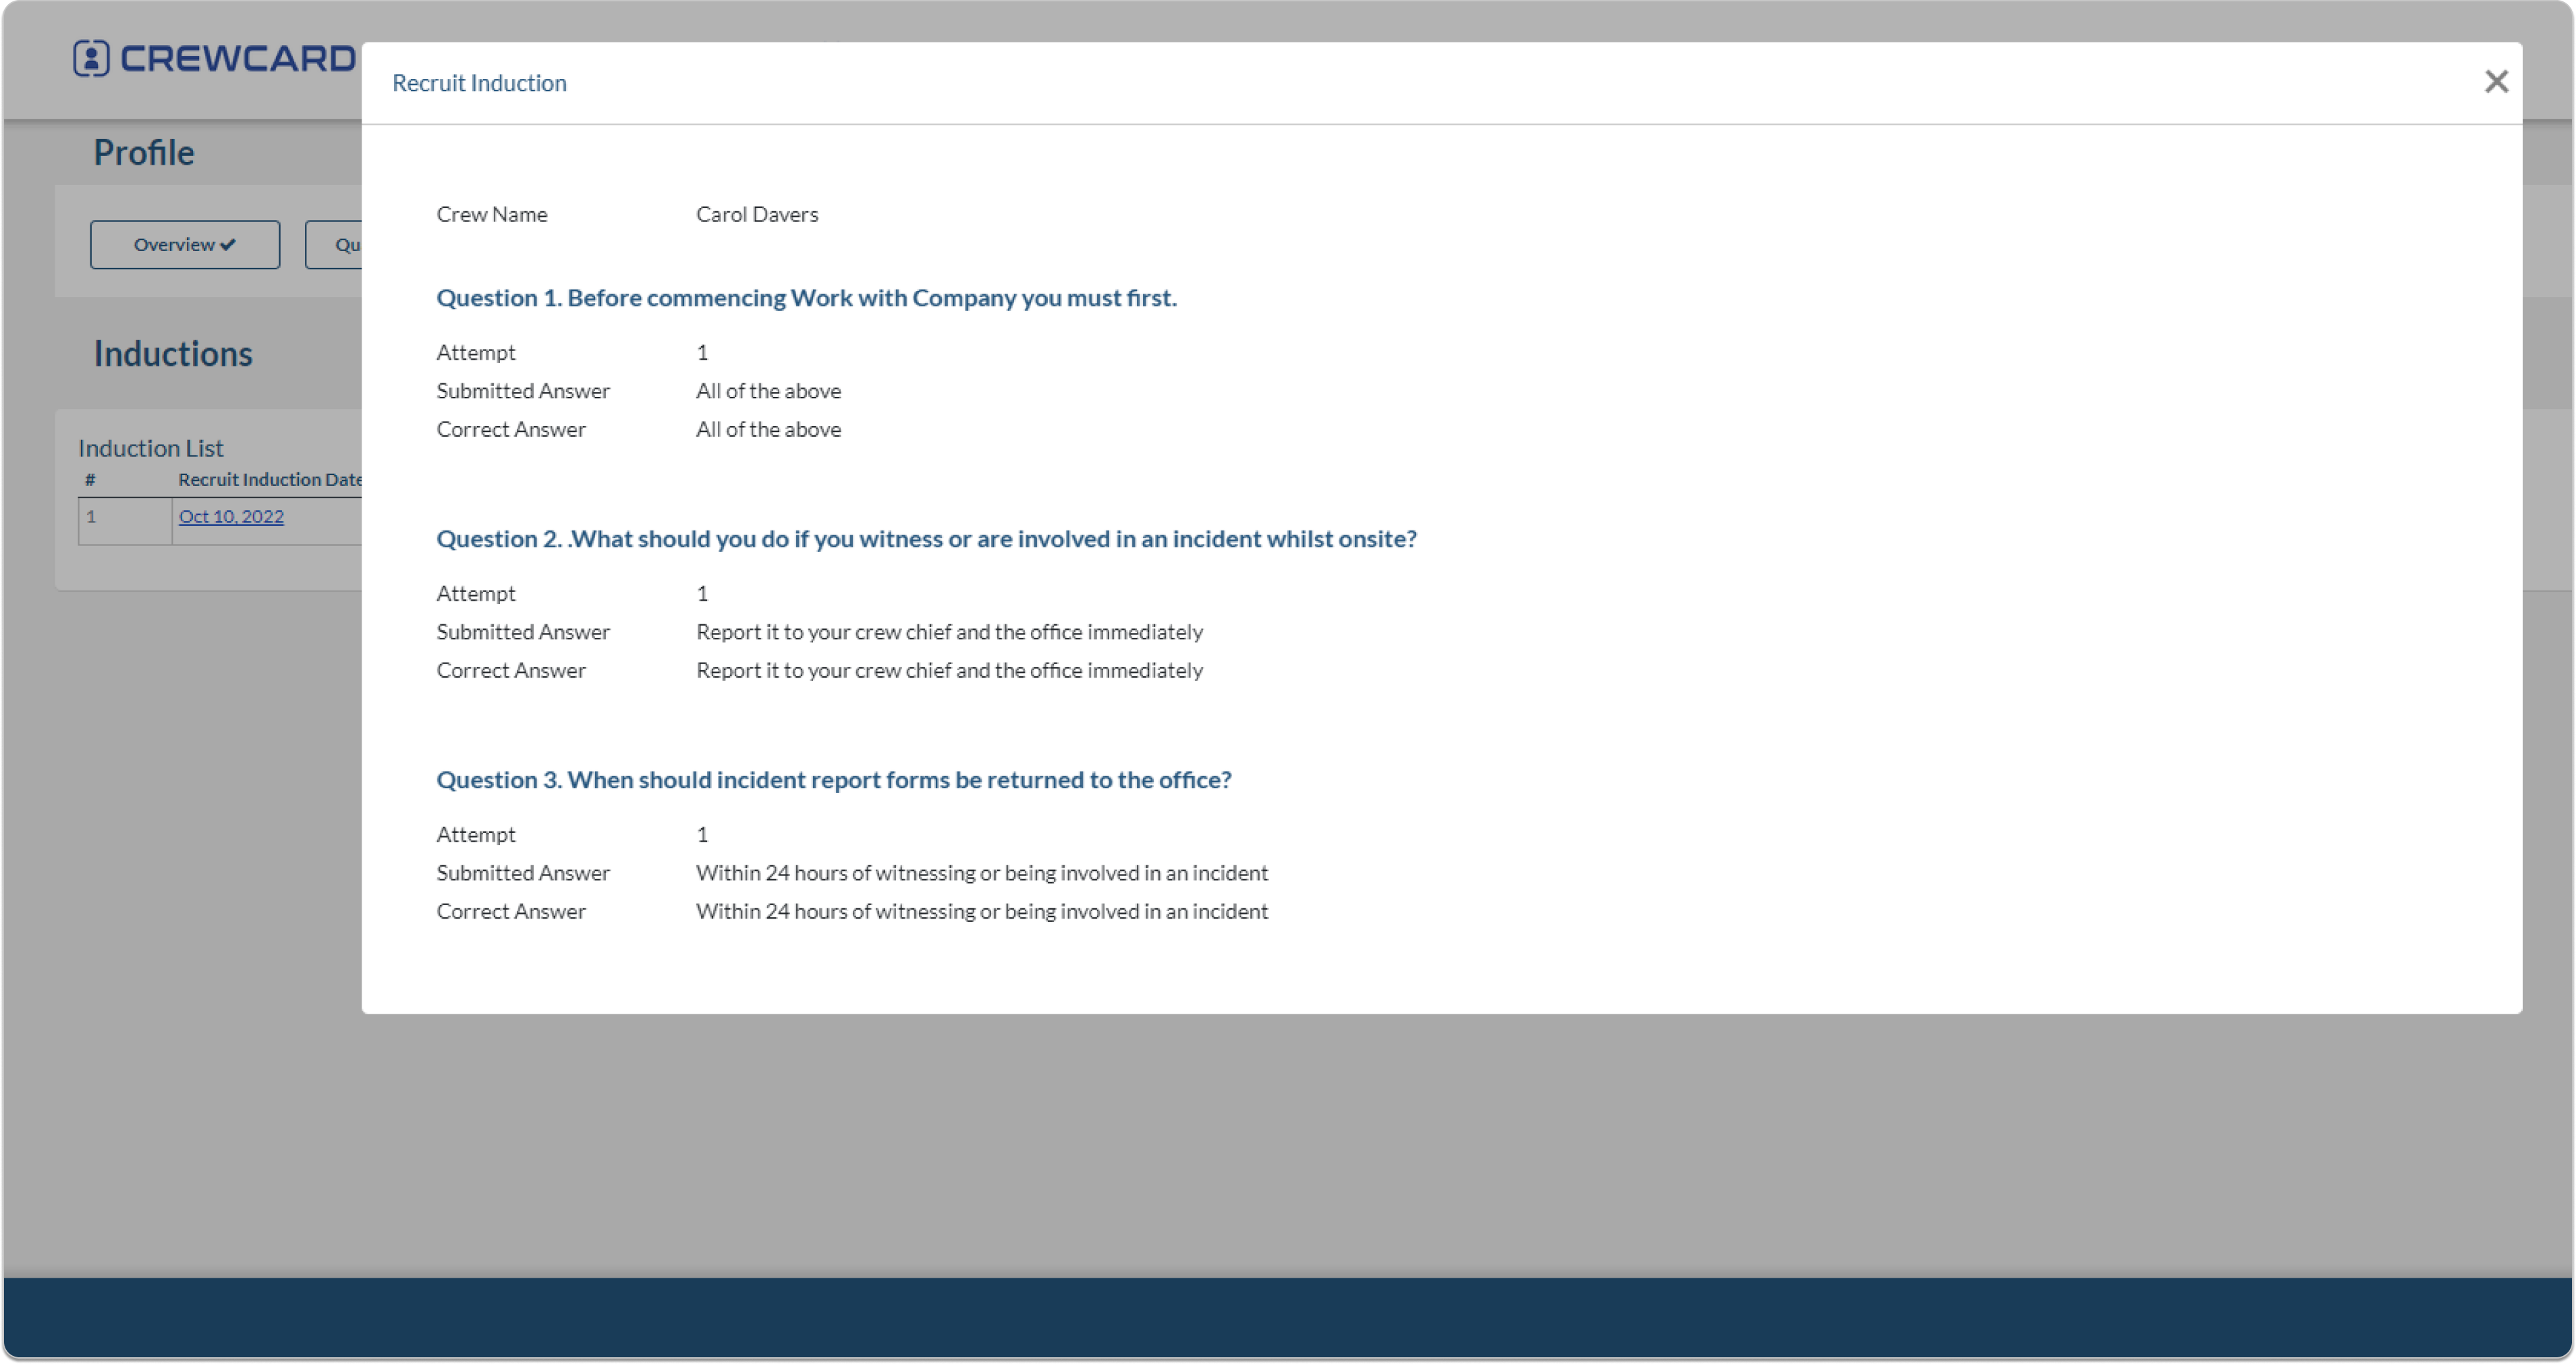
After inductions are completed, they will be stored here. You may refer back to them at anytime.
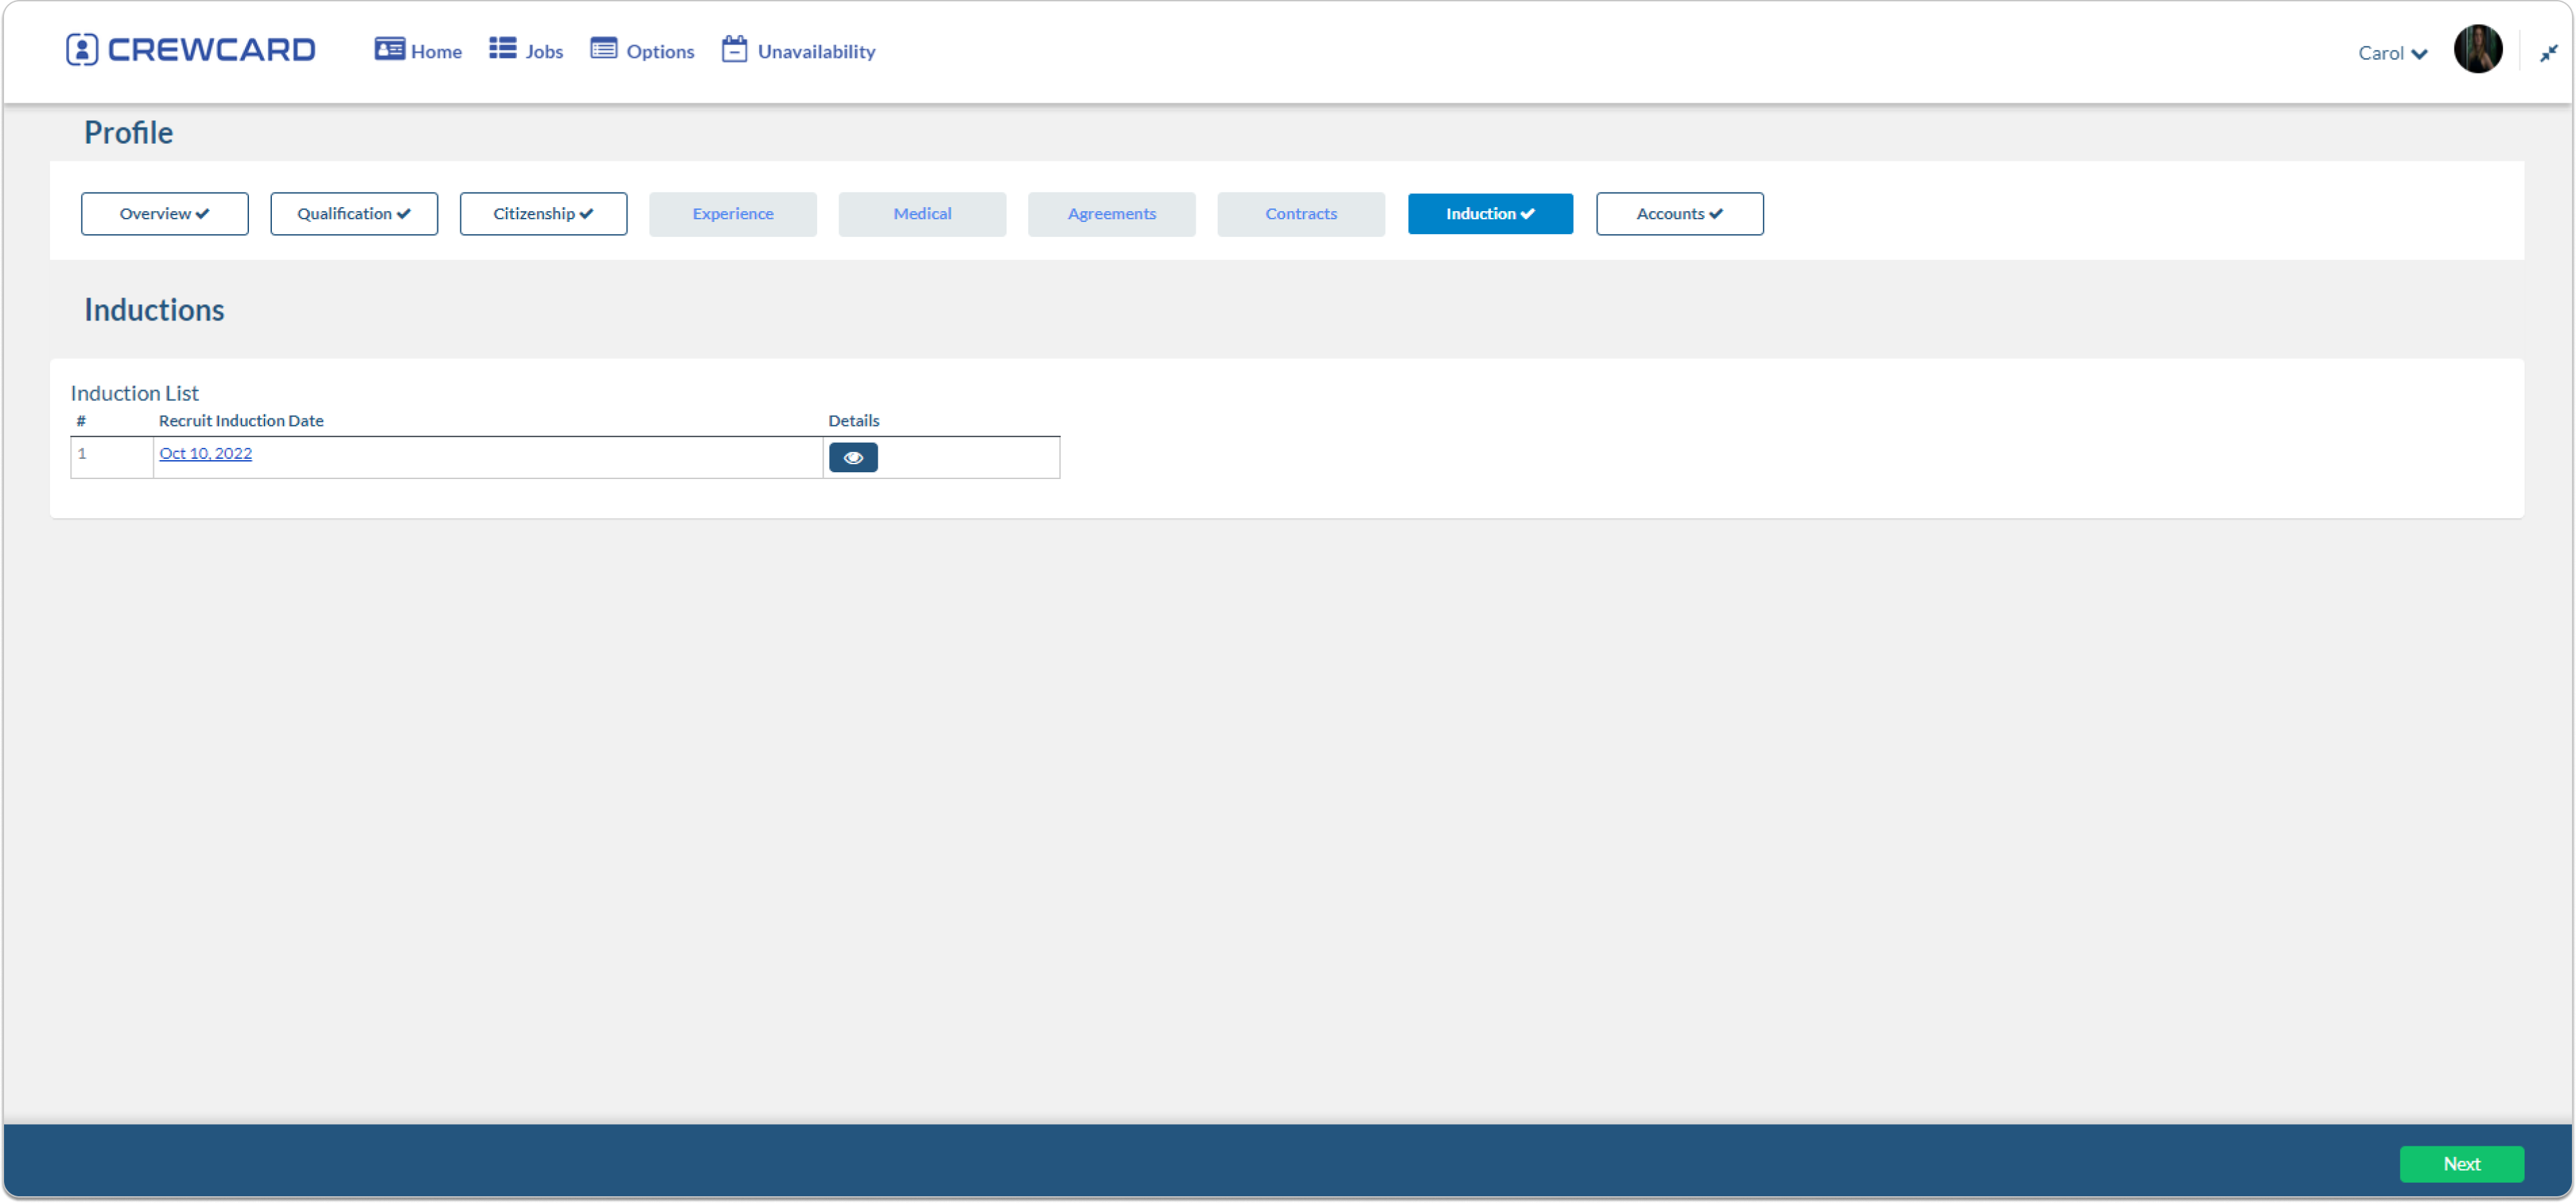
View the details of the induction by selecting the eye icon.
On this page you may update your account details.
Banking Details
Bank Name: Bank Name of the Crew
Name of Account: Account Name of the Crew
BSB: 6 Digits number used to identify the individual branch of an Australian Bank
Account Number: Bank Account Number of the Crew
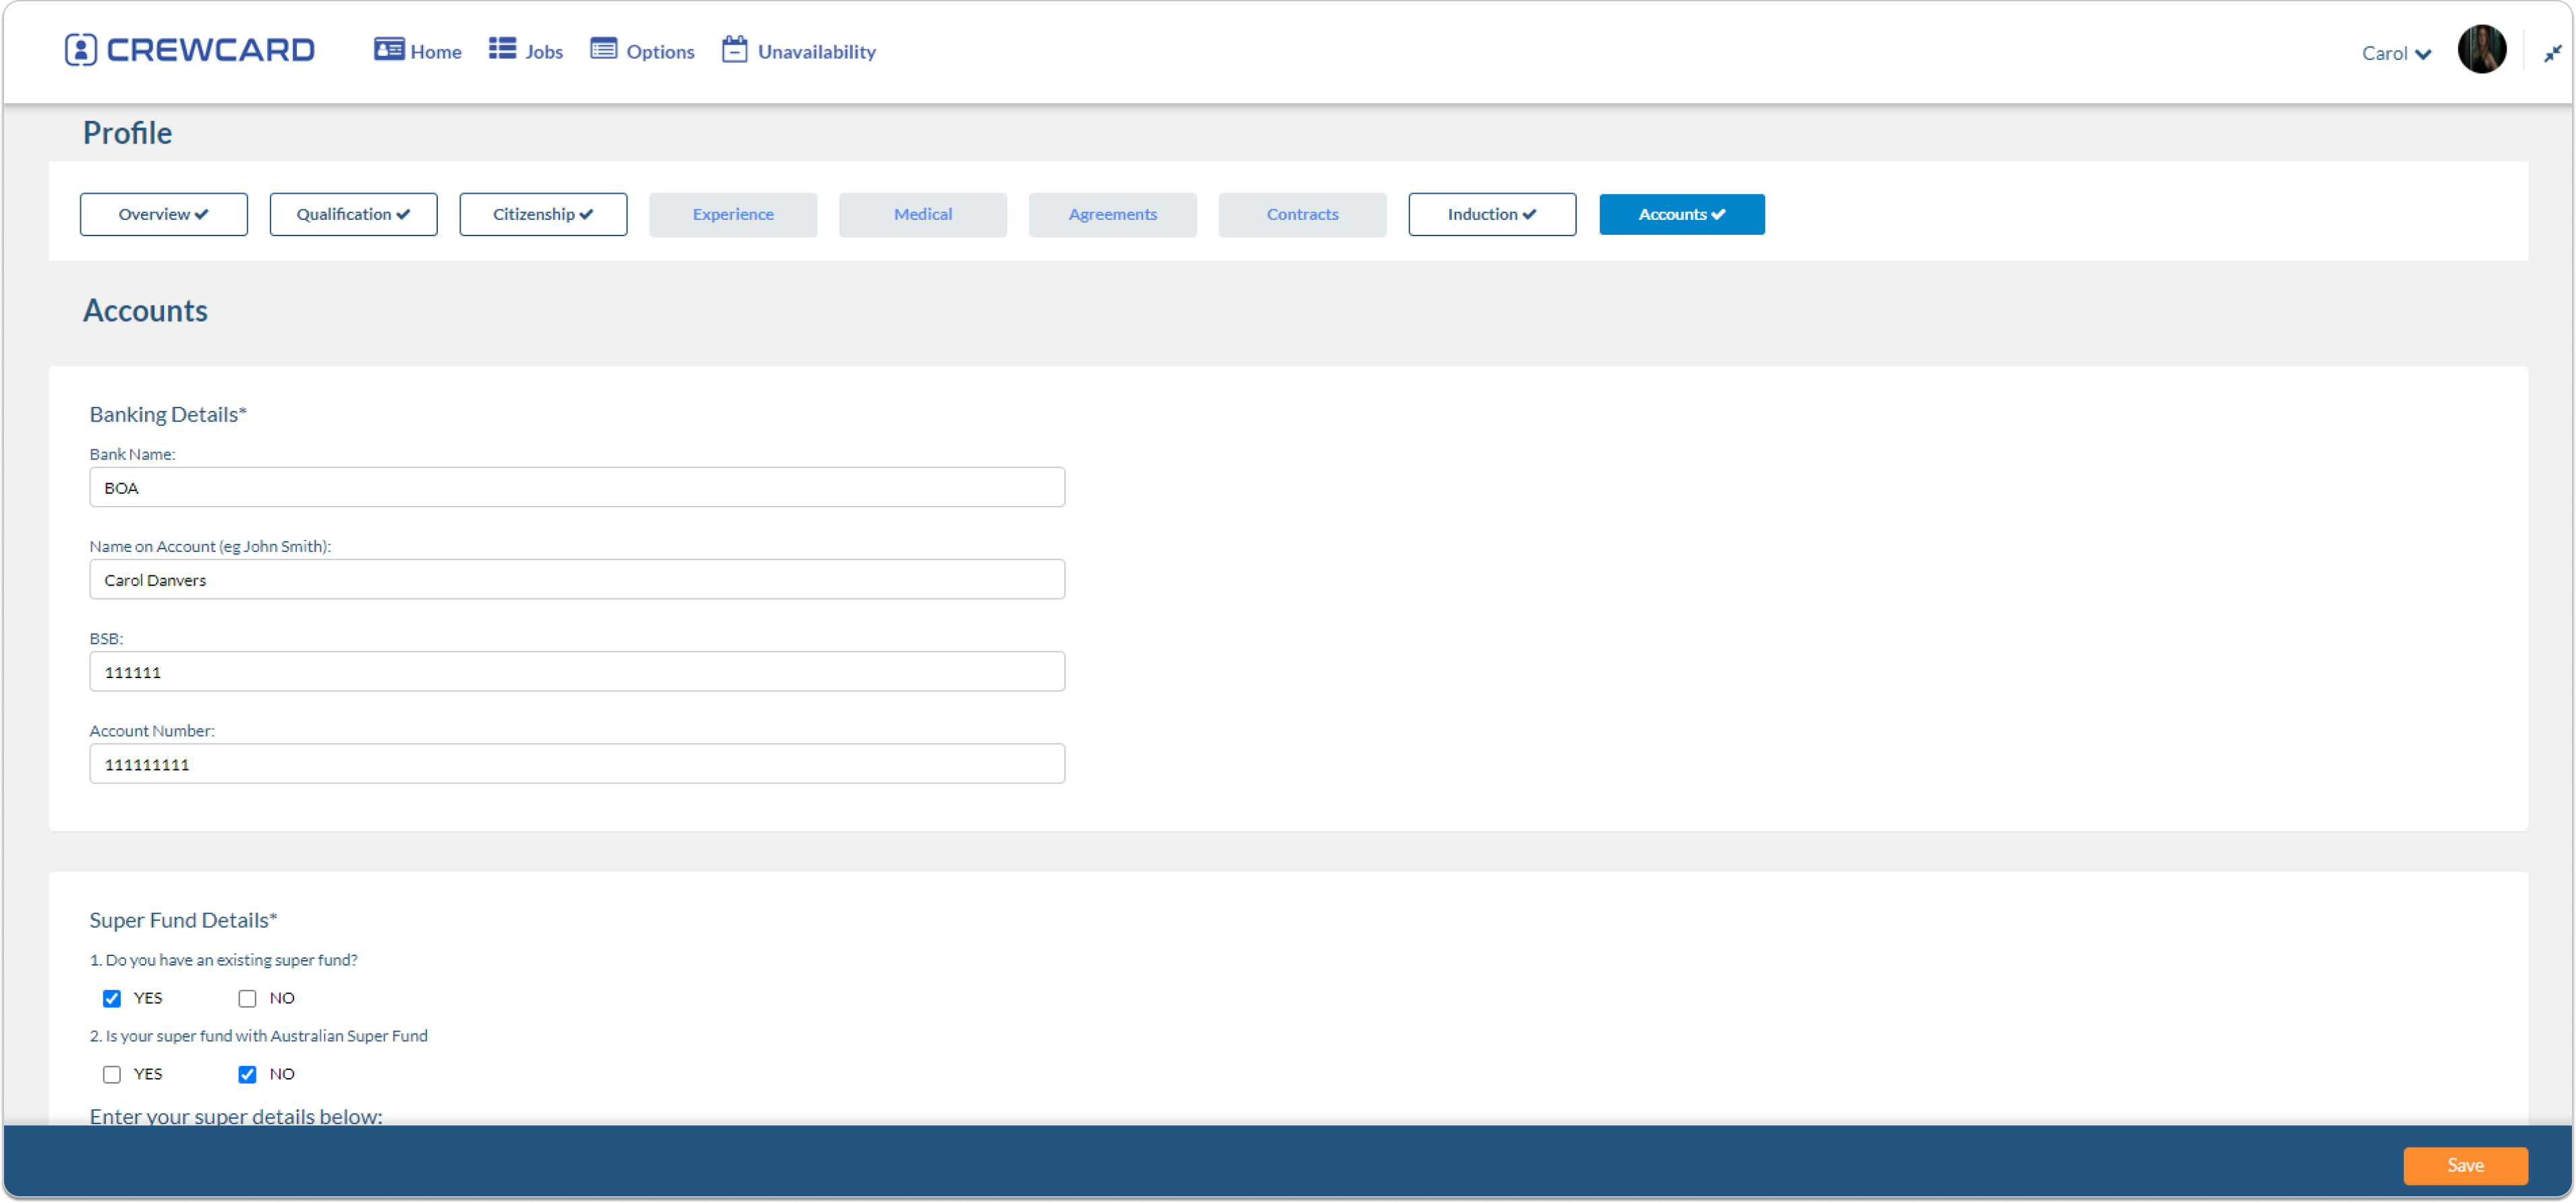
Super Fund Details
Super Company Name: Name of the Super Company financial institution EG Australian Super
SPIN/USI: Super Fund USI
Super ABN: Super Fund ABN
Super Product Name: Is the name of the Product under the specific super fund. It is identified by the USI
Super Account Name: Crew Super Account Name
Your Super Membership Number: Crew Super Membership Number
CrewCard Super default fund
Membership Number: Crew Membership Number
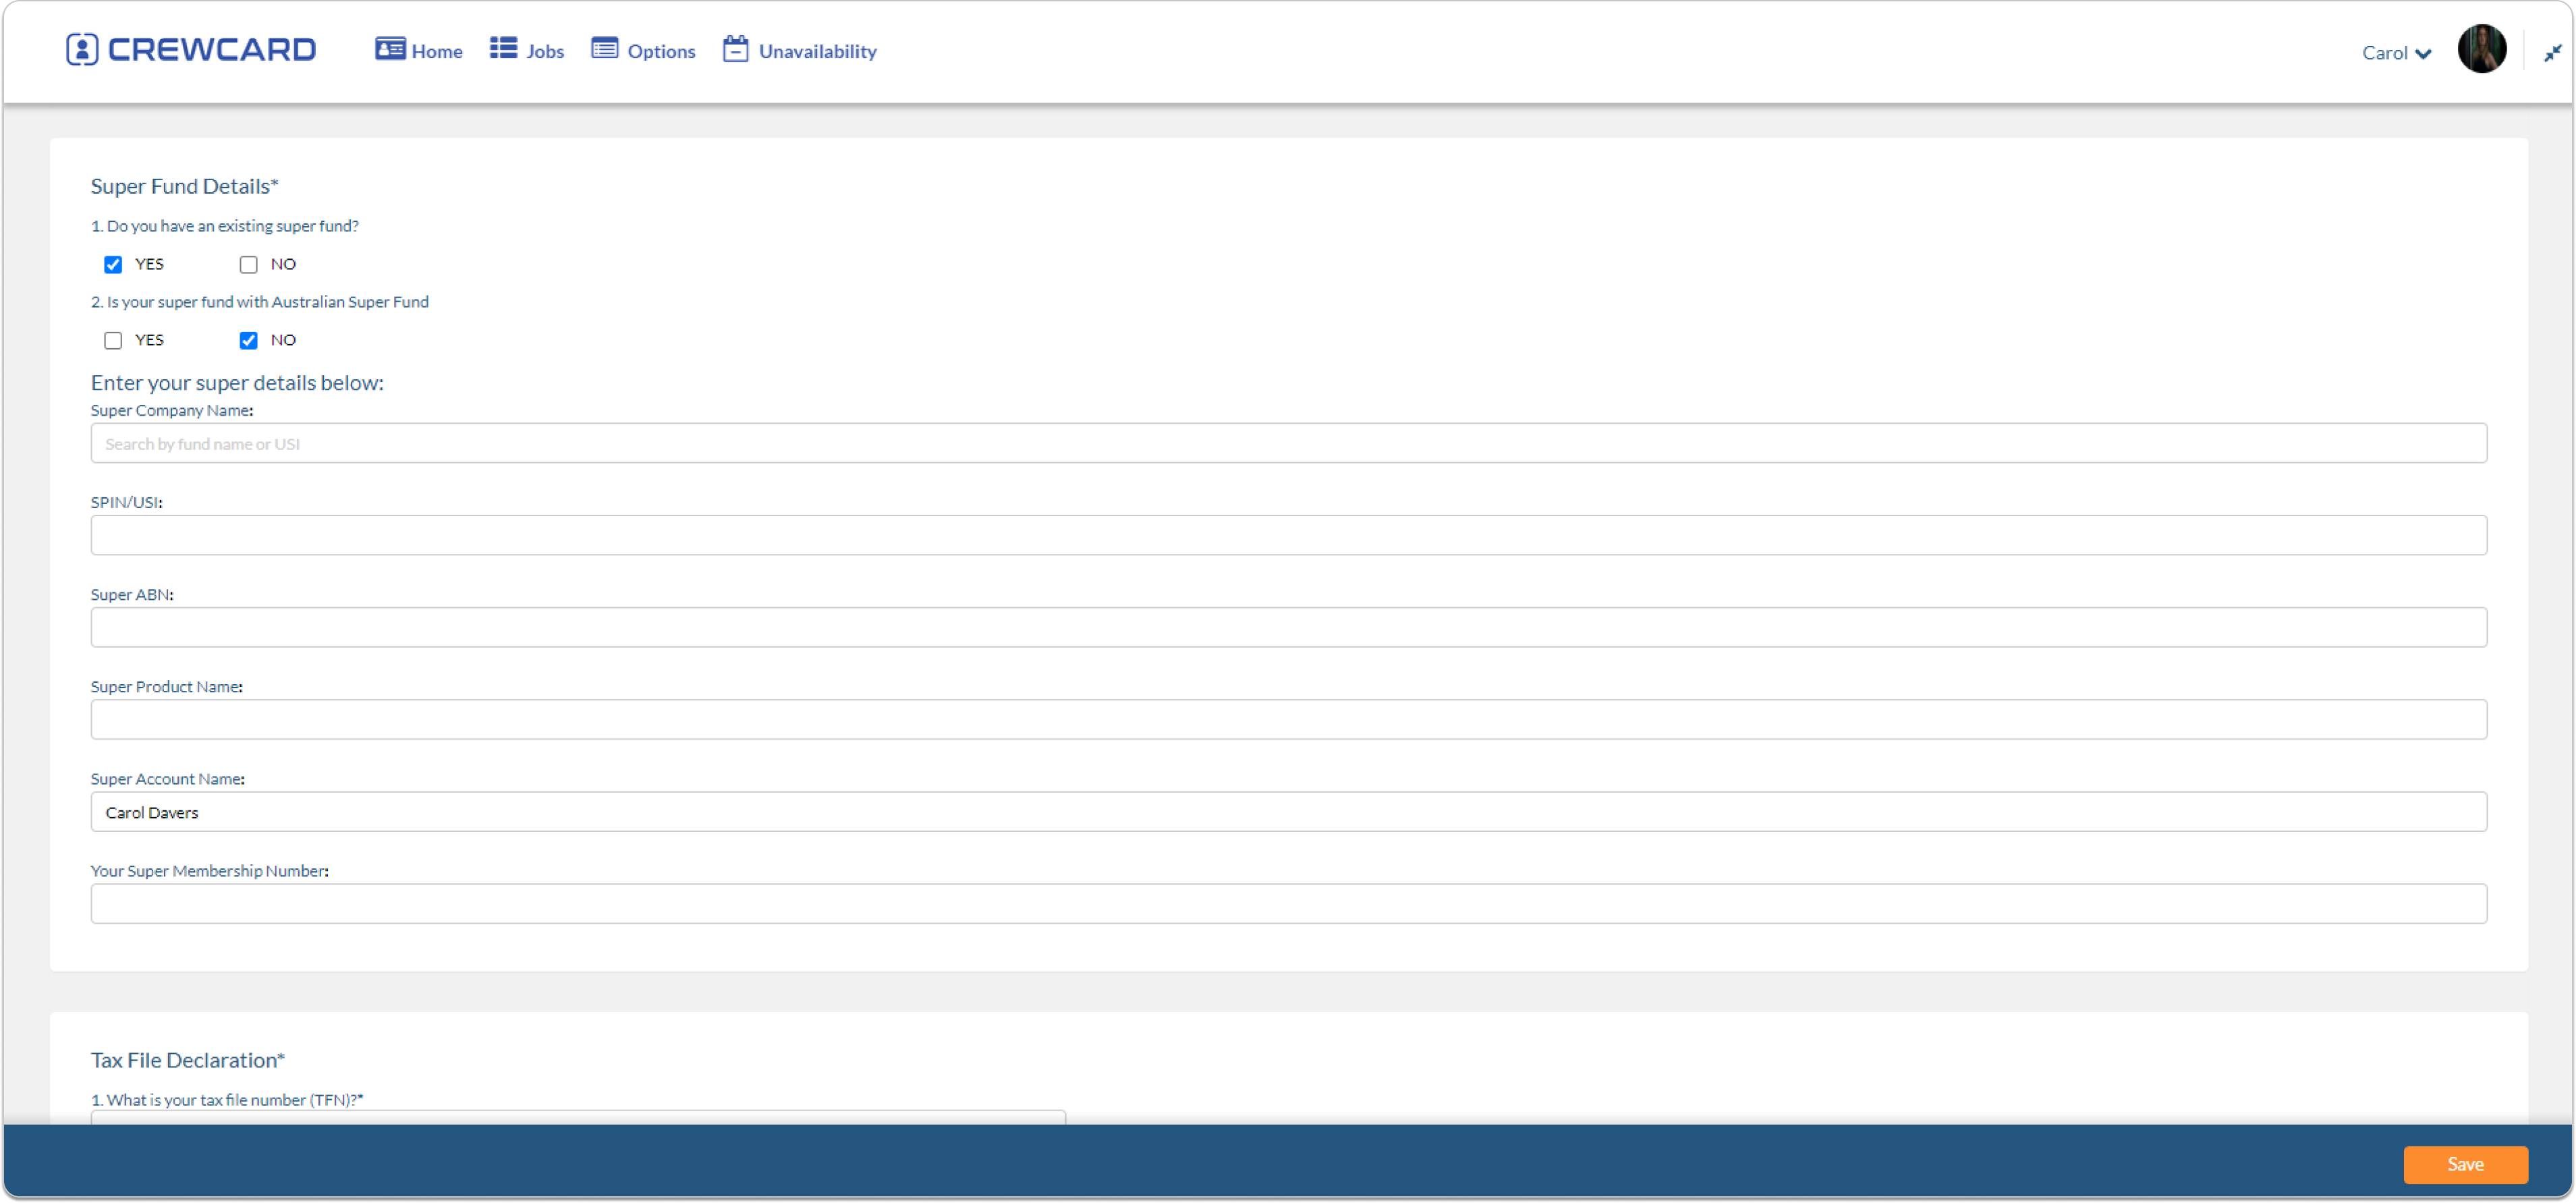
Tax File Declaration
File Number (TFN): Crew Tax File Number (9 Digits number)
Fill out the rest of the fields under Tax File Declaration section.
Once the account details has been updated, click Save button.
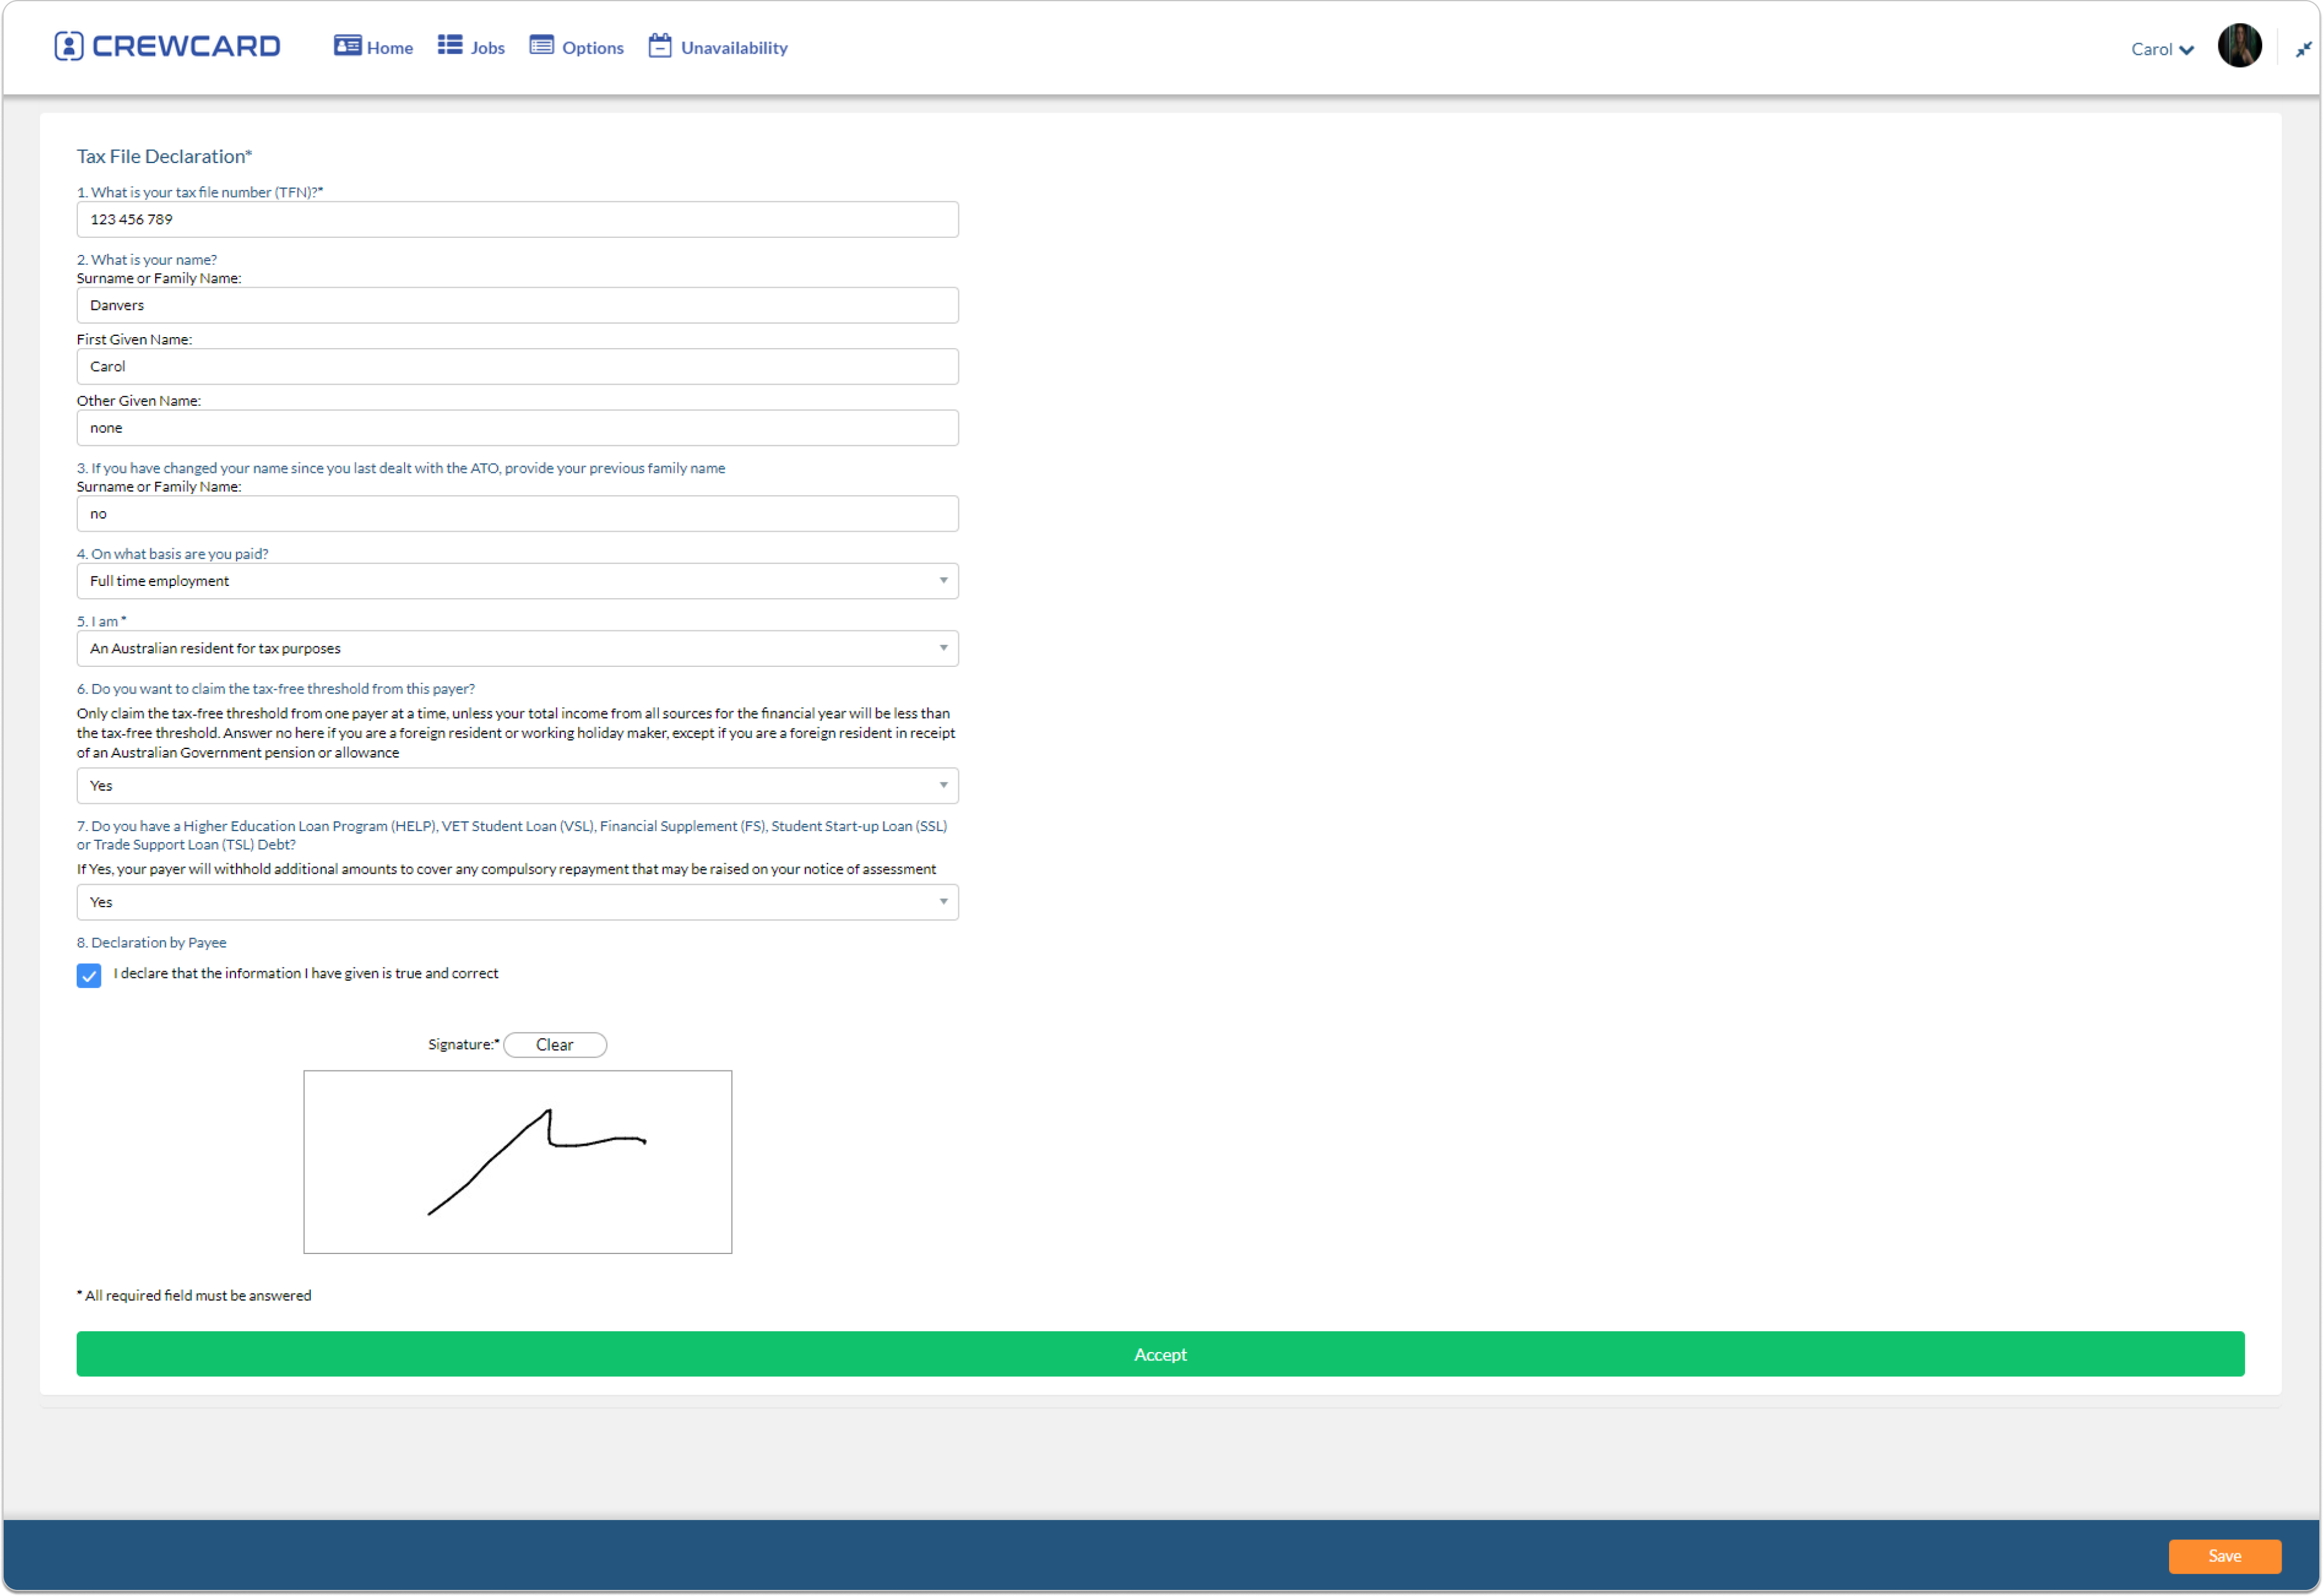
Declare that the information given is true by ticking the tick box at the bottom of the page and affix signature below. Select Accept.
Contractor Invoices are used by workers in Australia who operate under an ABN and are engaged as contractors rather than employees.
Contractors can send invoices for completed shifts through the CrewCard Crew Portal.
How to send Contractors Invoice
Step 1: Sign in to the Crew Portal using your CrewCard credentials.
Step 2: From the top menu, click Invoice. This will open the Crew Invoices page.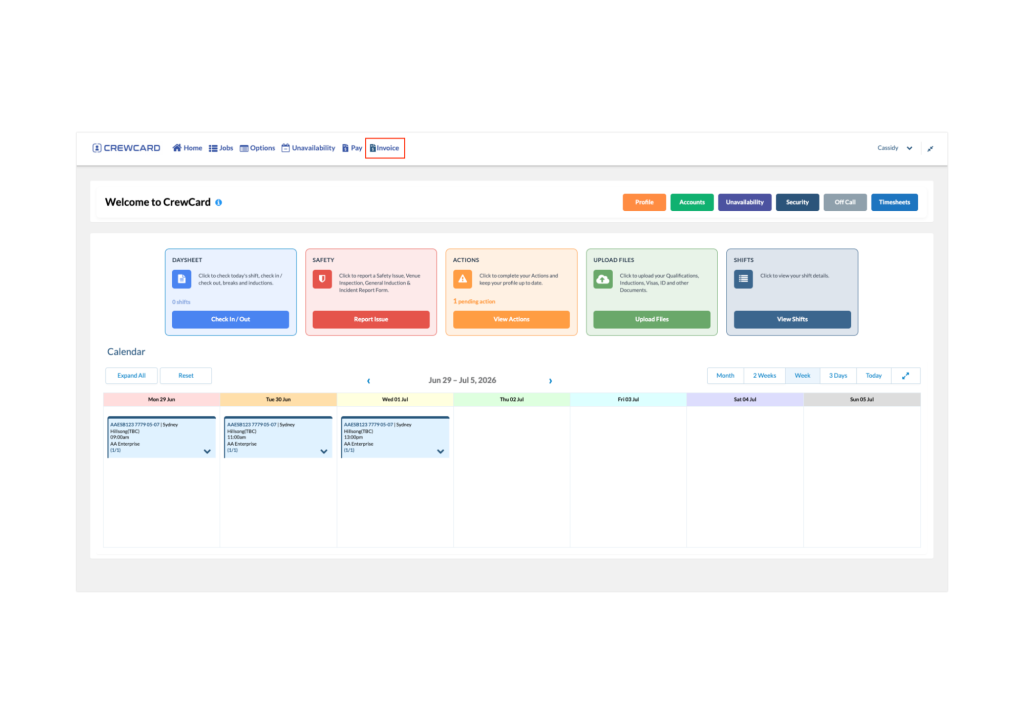
Note: A shift must be admin locked before the contractor can send an invoice. Before a contractor can send an invoice, the company must first review and finalise the shift details, including the hours worked and rates payable. This process is called Admin Locking.
A shift that has not yet been reviewed cannot be invoiced and the Send Invoice button will be greyed out. Once the shift has been reviewed and finalised by the company, the button will turn green and the invoice can be sent.

Step 3: Click the green Send Invoice button next to the shift you want to invoice.
Once the invoice has been sent, a confirmation pop-up will display “Crew Invoice has been sent”.

Step 4: Invoice Email will be sent out.

After the invoice is sent, both the contractor and the hirer/admin will receive a copy of the invoice by email.
The Contractor Invoice contains a summary of the completed shift and payment details, including: