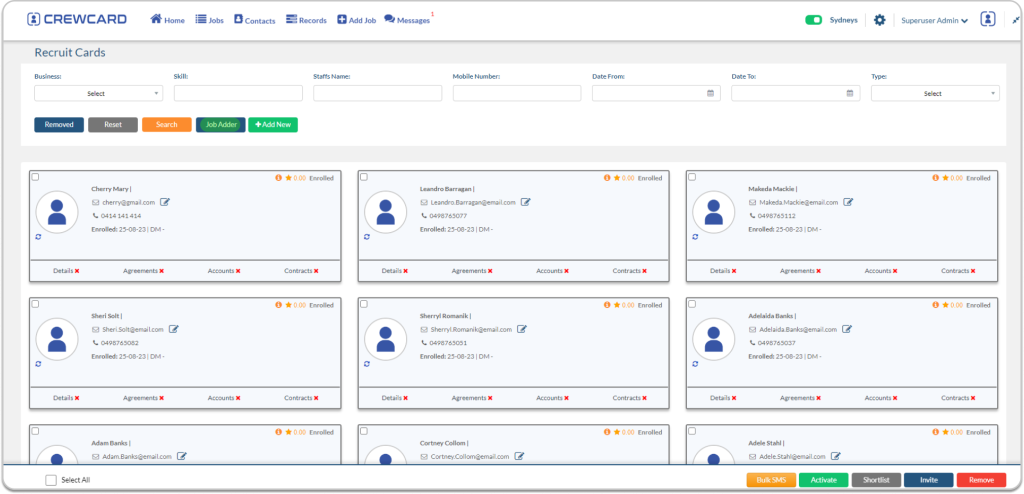
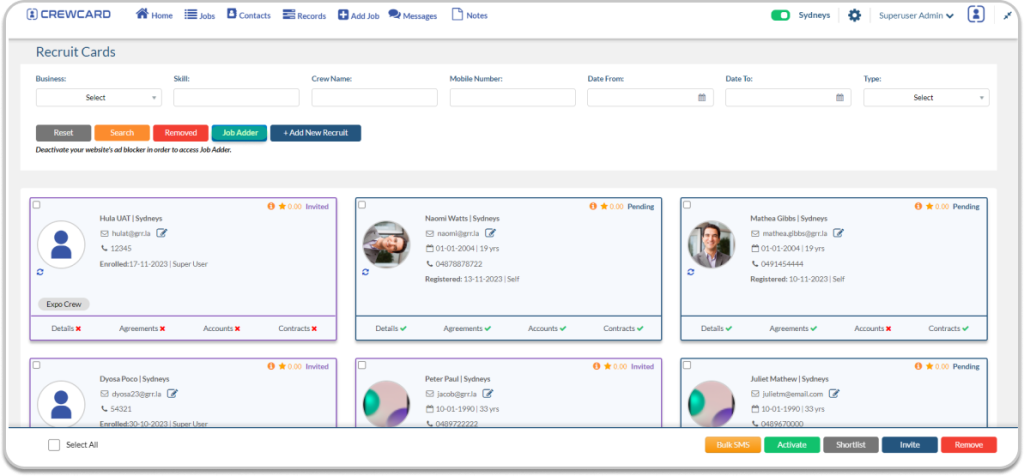
Navigate to the Personnel Manager/ CrewCard Platform and hover your mouse over contacts in central navigation bar and select the Recruit Cards Page. 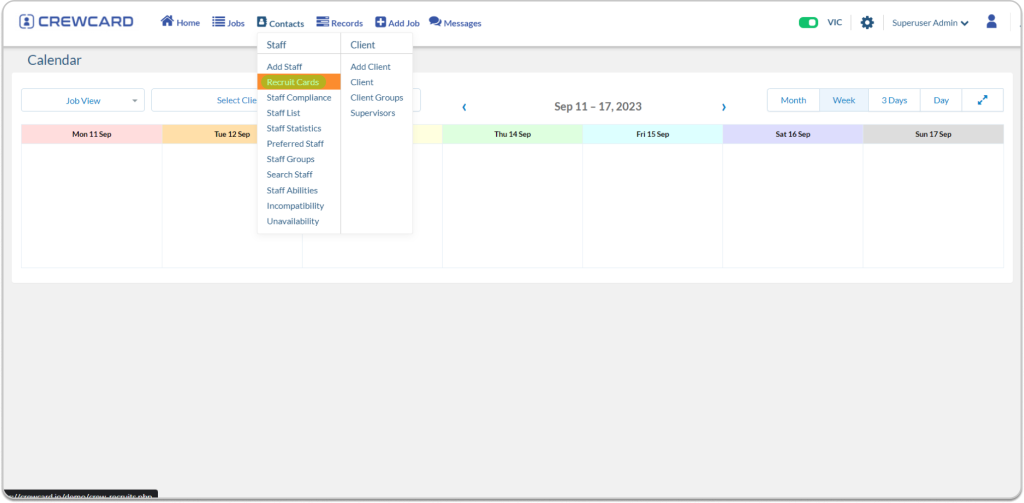
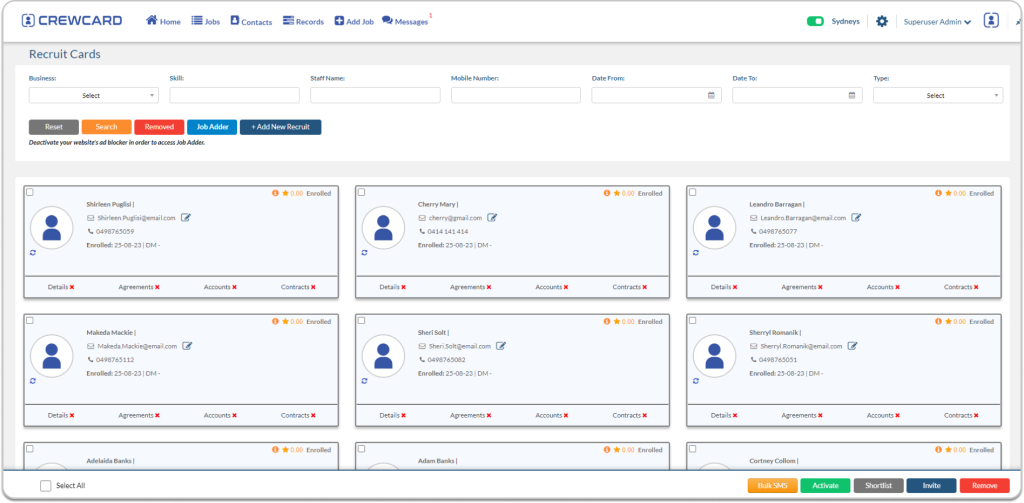
After creating a placement in JobAdder, it becomes effortless to export the recruit’s information to CrewCard/Personnel Manager. Simply Click the Job Adder button in the Recruit Cards page.
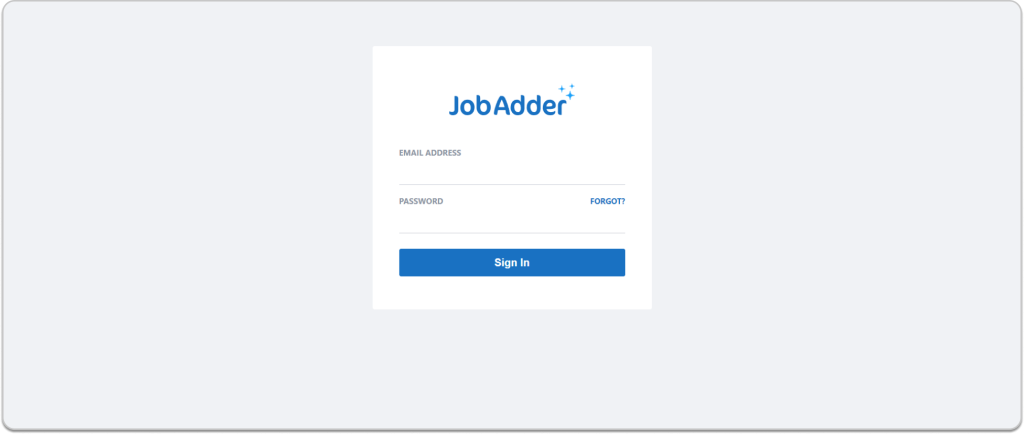
Log in to Job Adder by inputting your Username and Password, then proceed to click on the Sign In button.
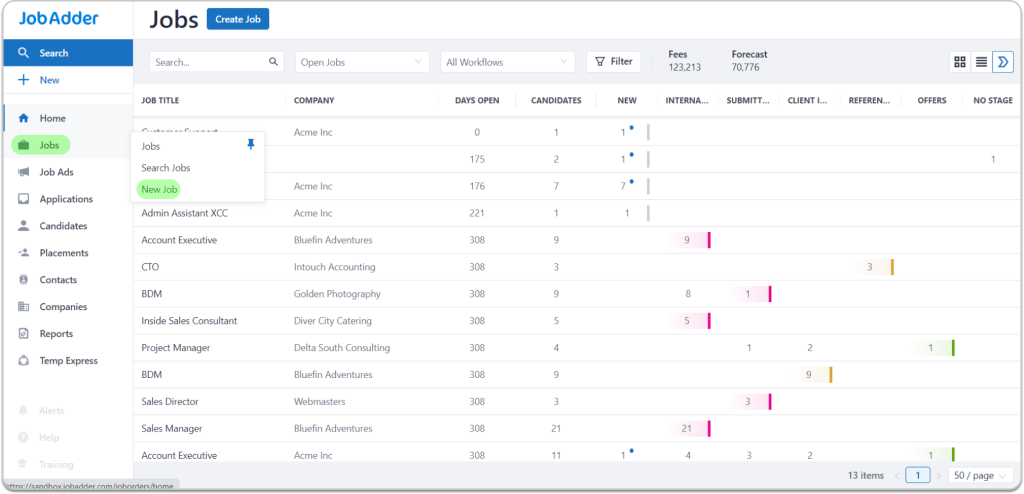
Position your cursor over the Jobs tab and choose the option labeled New Job.
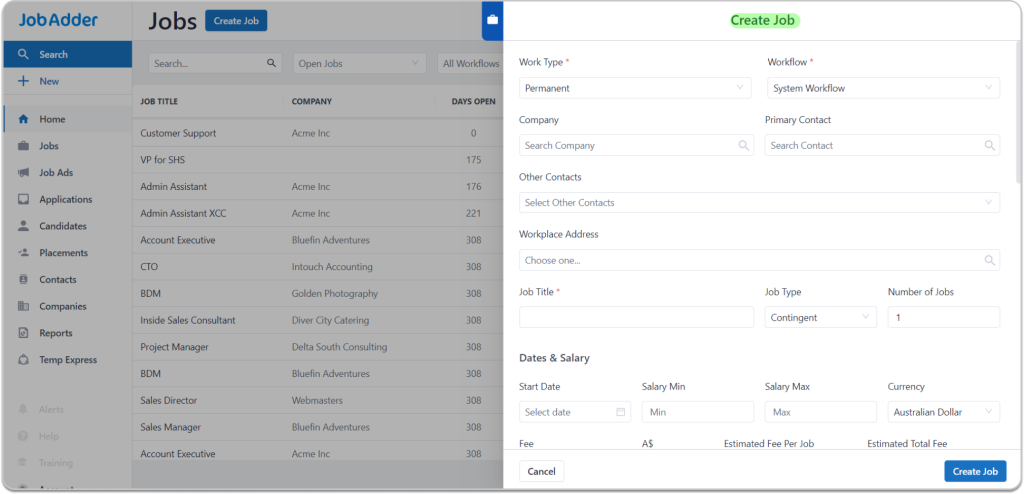
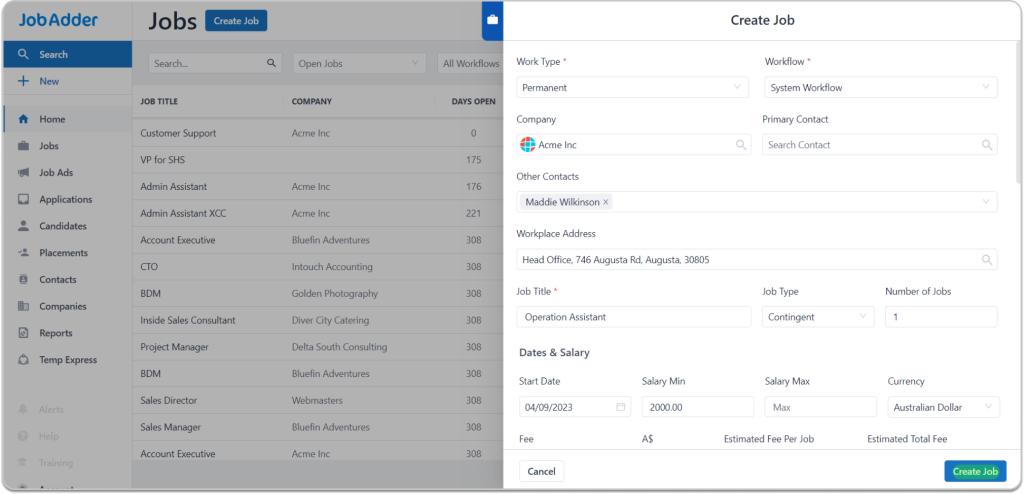
The create job dialog will emerge; complete the form and, once finished, press the create job button.
After successfully creating the job, you can proceed to close the create job dialog.
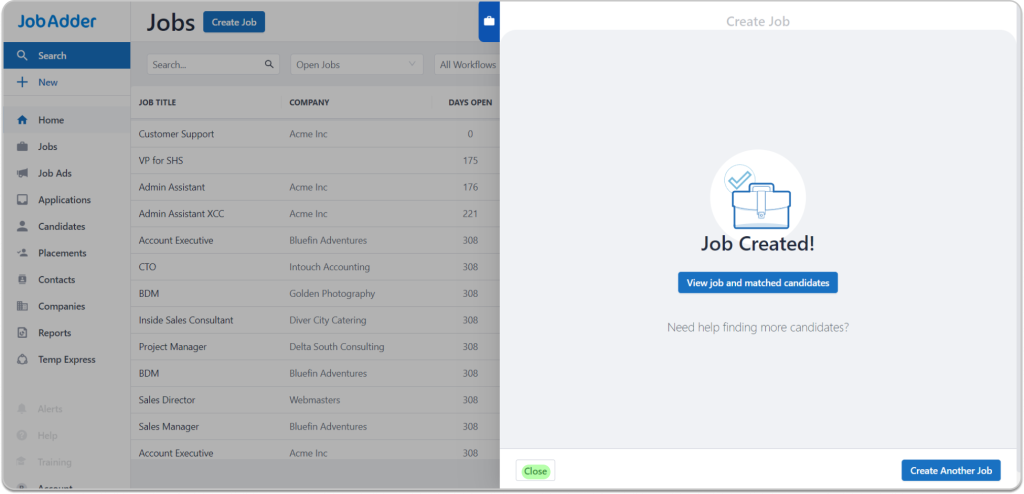
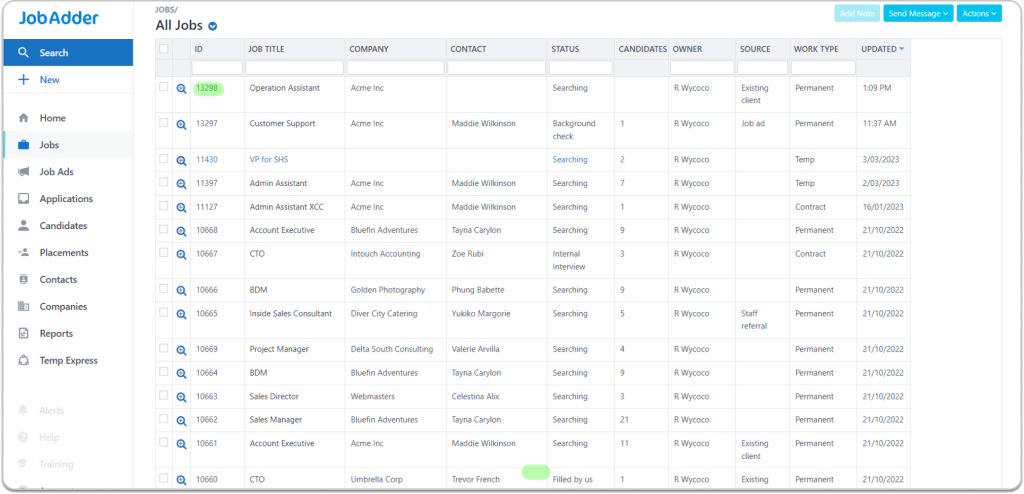
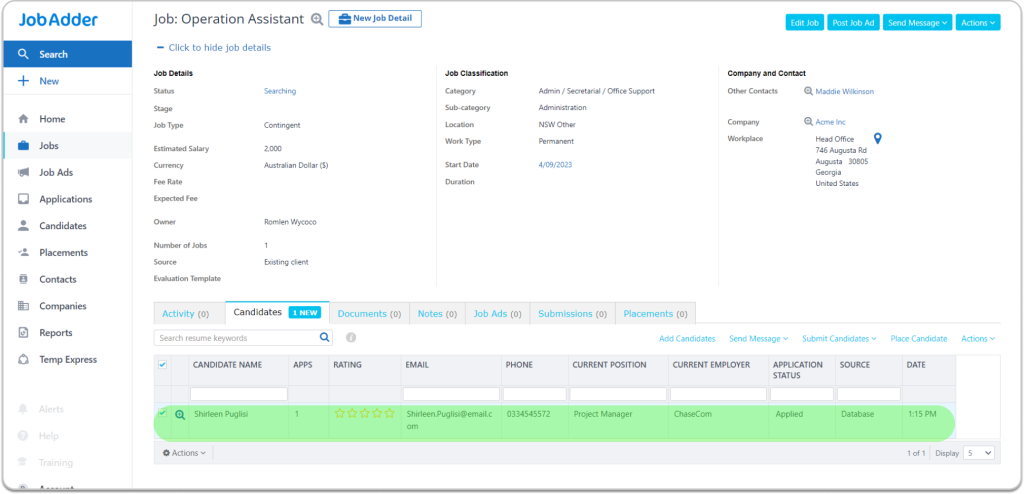
Navigate to the Jobs section to view the job you’ve generated.
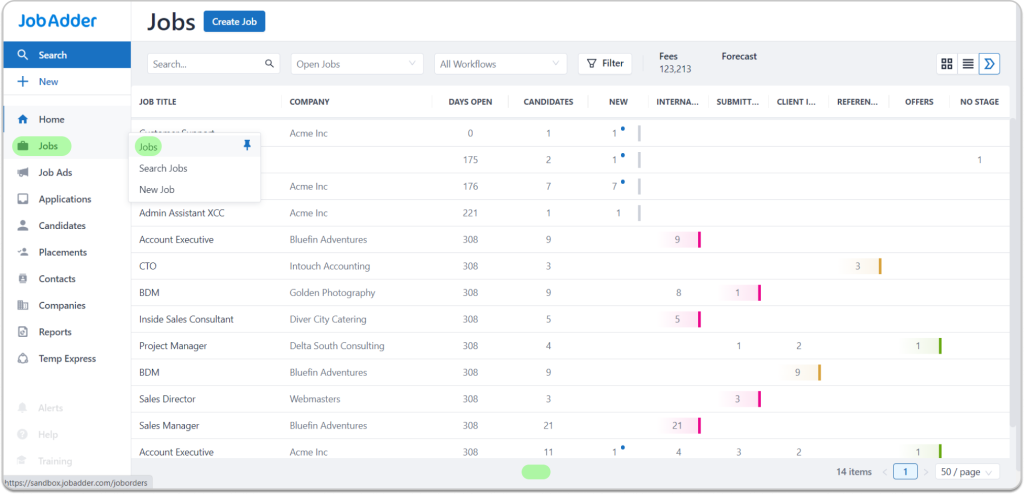
Choose the Job ID number of the job you’ve generated.
Select the Candidates Tab and Select the link labeled as Add Candidate.
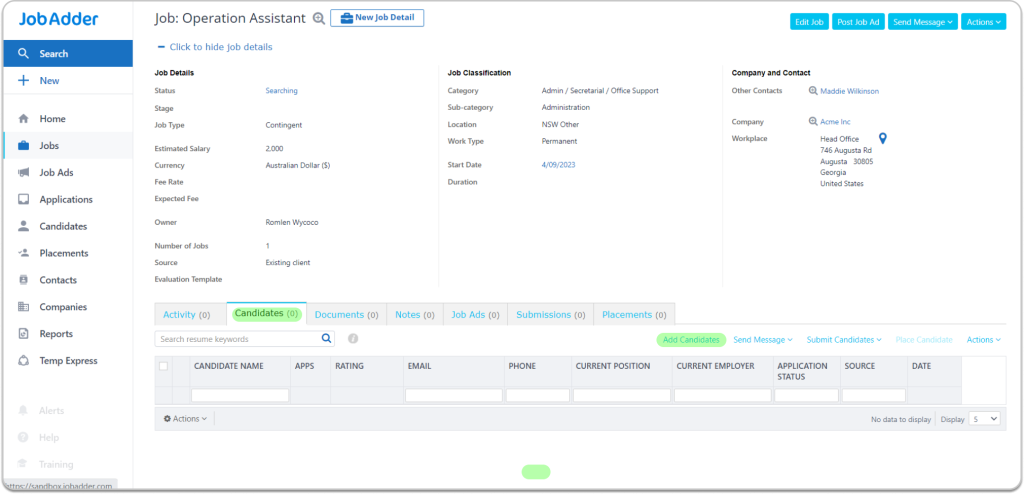
A popup will emerge, allowing you to choose the candidates.
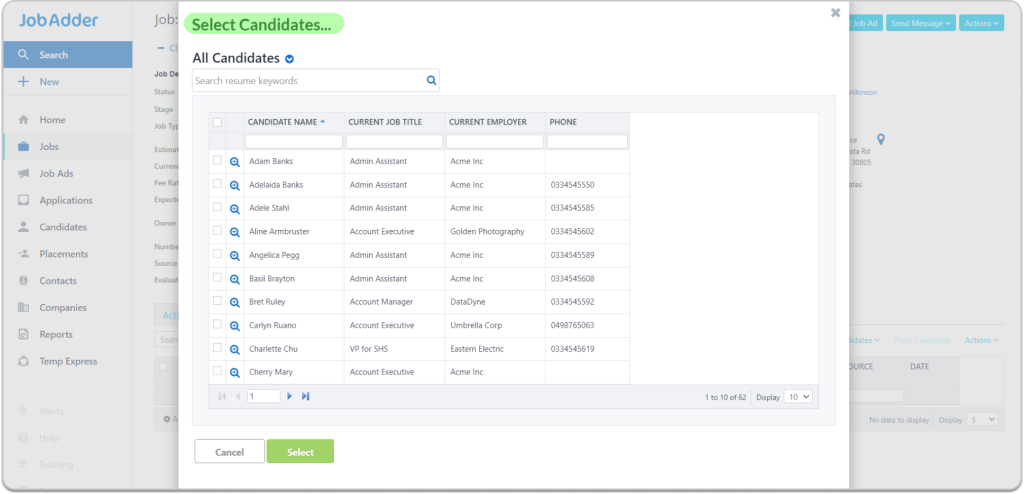
As an example, I opted for Shirleen Puglisi. Just tick the checkbox to choose the Candidate or Recruit.
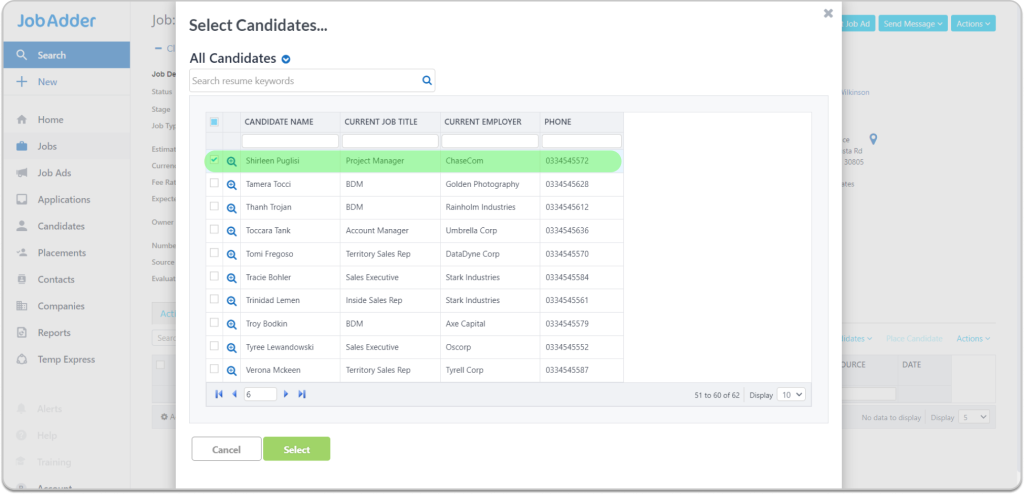
Tick the checkbox and select the link labeled as Place Candidate.
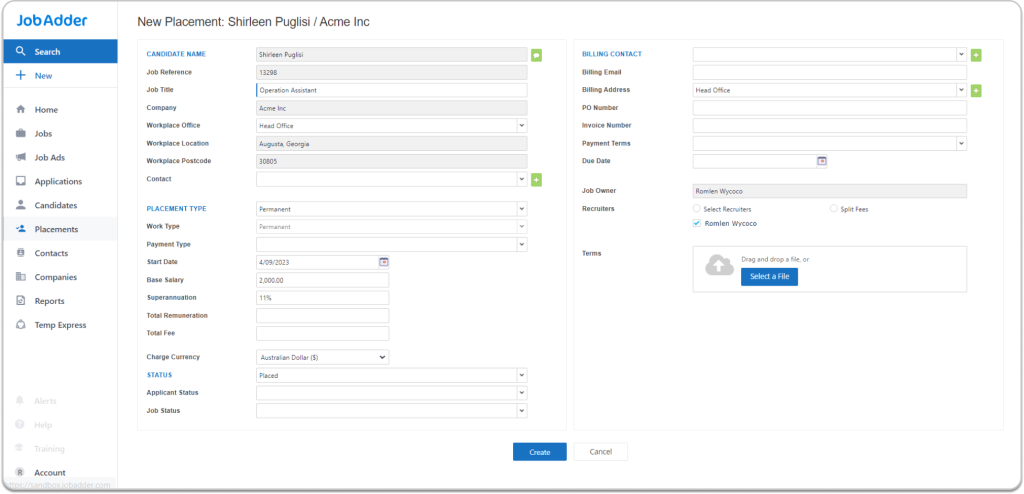
You will be taken to the New Placement Page, where you should click the create button.
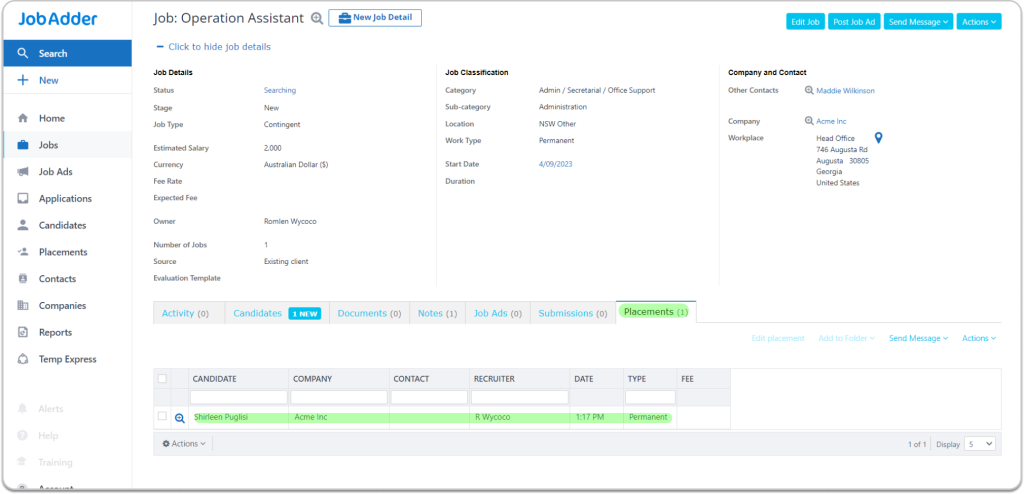
Once you’ve completed the creation process, you will observe that the candidate is now visible in the Placement Tab.
To access your Job Adder placements within CrewCard/Personnel Manager, simply click on the Job Adder button located on the Recruit page.
This action will trigger a pop-up that requests permission to access Job Adder data.
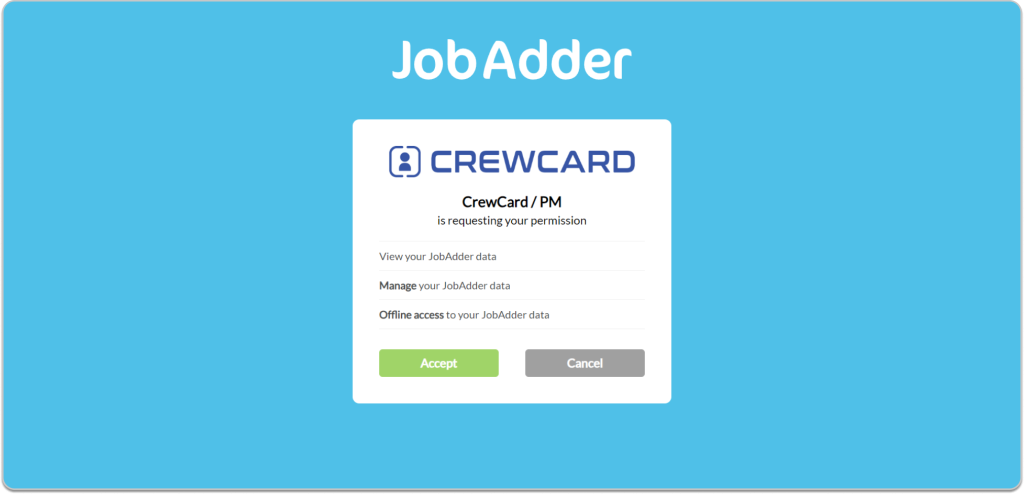
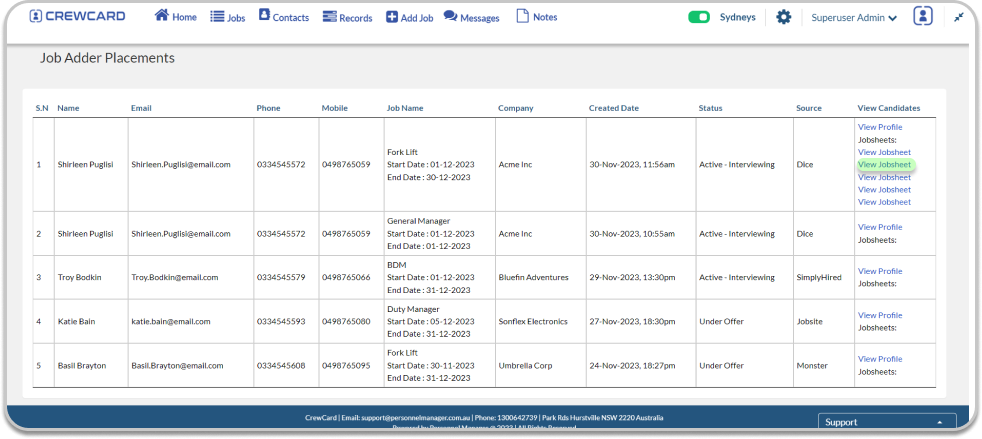
After selecting Accept, CrewCard/Personnel Manager will retrieve all placements made through the JobAdder Portal and present them in a list.
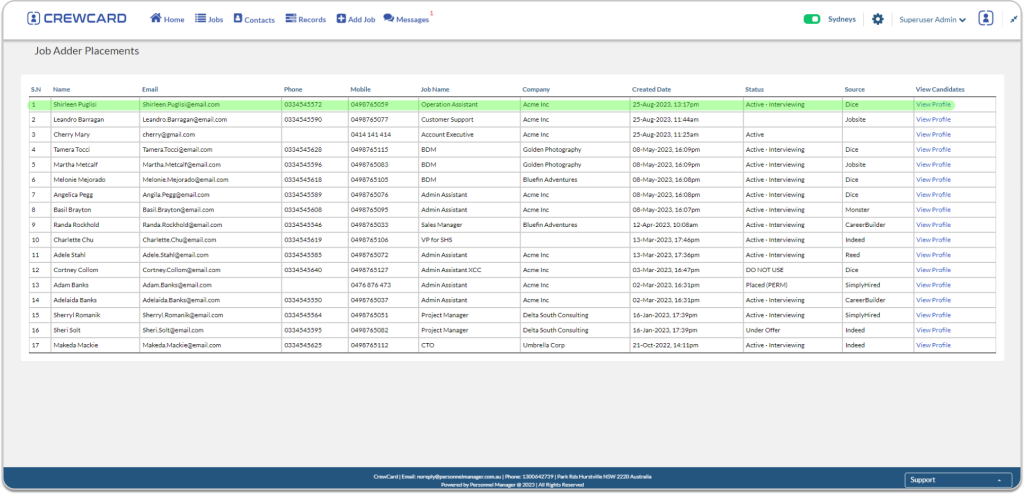
Through this integration, you can effortlessly oversee and handle your JobAdder placements directly within the CrewCard/Personnel Manager interface, as all placements will automatically transition into Recruit Cards.
Clicking on the “View Profile” option will redirect you to the candidate’s Recruit Card, where their information is organised into distinct tabs for easy access.
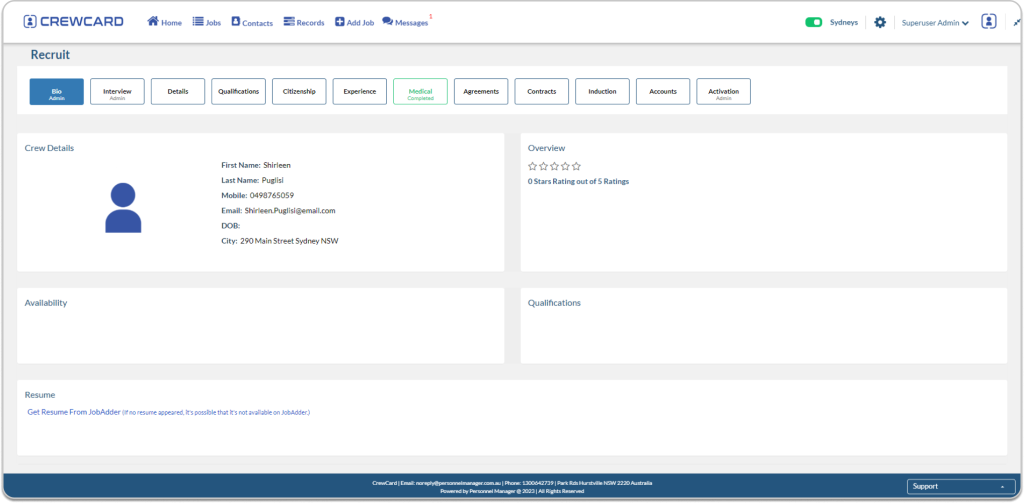
These tabs furnish comprehensive details about the recruits, easily navigate through the recruits information and quickly assess whether they are a suitable fit for the role you are trying to fill.
The integration between Job Adder and CrewCard/Personnel Manager, you can efficiently navigate the recruits information, promptly assessing their suitability for the intended position.
Log in to Job Adder by inputting your Username and Password, then proceed to click on the Sign In button.
Position your cursor over the Jobs tab and choose the option labeled New Job.
The create job dialog will emerge; complete the form and, once finished, press the create job button.
After successfully creating the job, you can proceed to close the create job dialog.
Navigate to the Jobs section to view the job you’ve generated.
Choose the Job ID number of the job you’ve generated.
Select the Candidates Tab and Select the link labeled as Add Candidate.
A popup will emerge, allowing you to choose the candidates.
As an example, I opted for Shirleen Puglisi. Just tick the checkbox to choose the Candidate or Recruit.
Tick the checkbox and select the link labeled as Place Candidate.
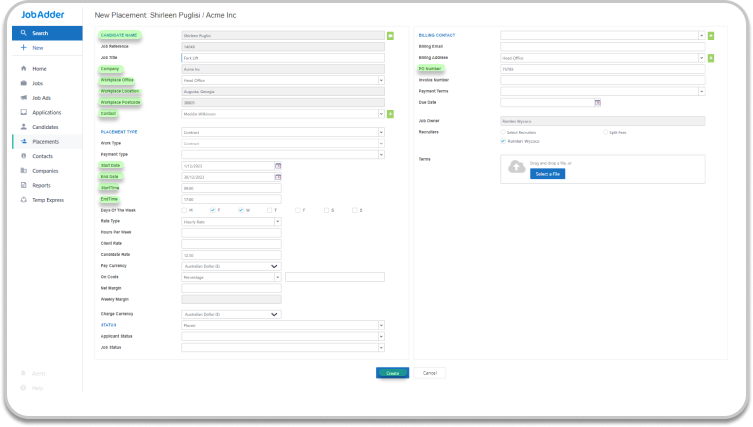
You will be taken to the New Placement Page and need to fill out the following fields:
Candidate Name = Crew Name
Job Title = Activity
Company = Client Name
Workplace Location = Venue
Contact = Supervisor
Start Date = Start Date
End Date = End Date
Start Time = Start Time
End Time = End Time
PO Number = PO Number
Once done, click the Create button.
Once you’ve completed the creation process, you will observe that the candidate is now visible in the Placement Tab.
You have two methods to access your Job Adder placements within CrewCard/Personnel Manager:
To access your Job Adder placements within CrewCard/Personnel Manager and the Jobsheet generated simply click on the Job Adder button located on the Recruit page.
This action will trigger a pop-up that requests permission to access Job Adder data.
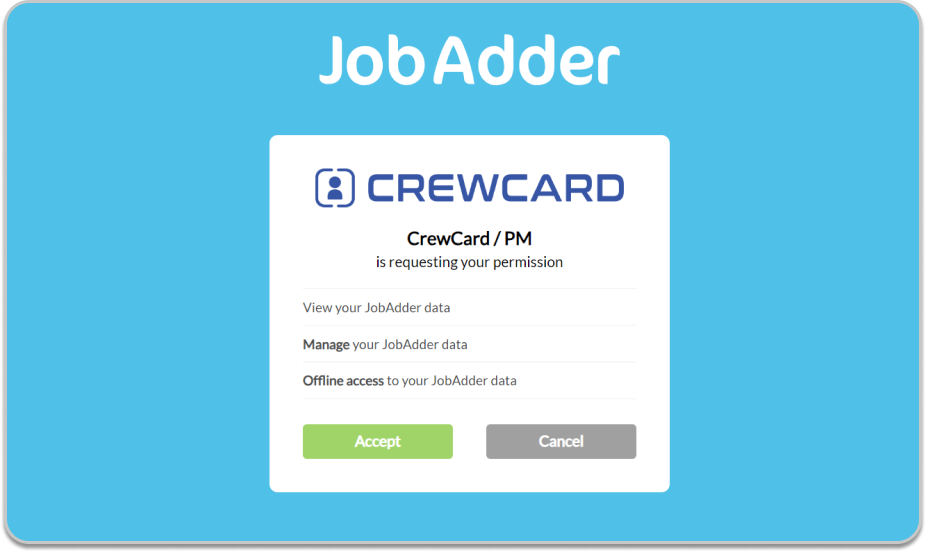
After selecting Accept, CrewCard/Personnel Manager will retrieve all placements and jobs made through the JobAdder Portal and present them in a list.
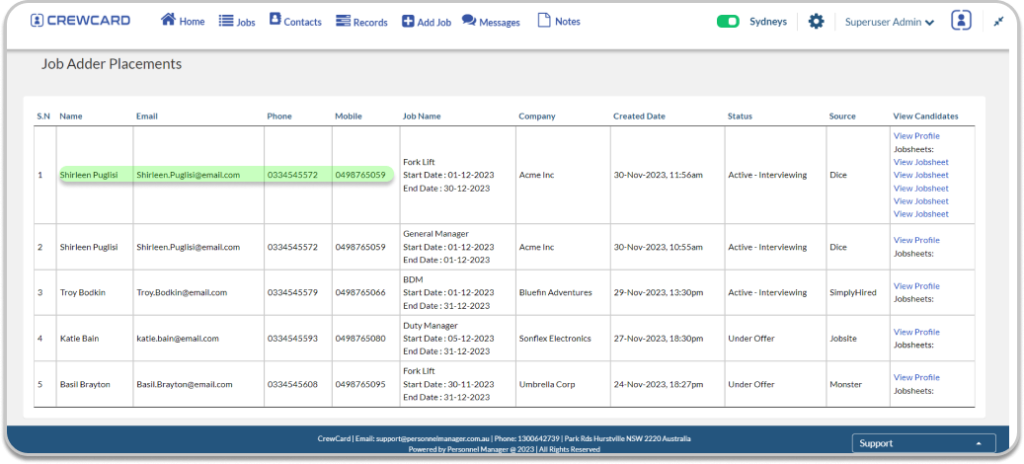
Jobsheets are produced on a weekly basis, corresponding to each pay week. For example, if you’ve input a job into the New Placement page from December 1st to December 30th, between 9:00 AM and 5:00 PM, CrewCard/Personnel Manager will generate a list of Jobsheets once it has retrieved the jobs created through the Job Adder Portal, aligning with the weekly pay cycle.
Through this integration, you can effortlessly oversee and handle your JobAdder placements directly within the CrewCard/Personnel Manager interface, as all placements will automatically transition into Recruit Cards and Jobsheet.
Clicking on the “View Profile” option will redirect you to the candidate’s Recruit Card, where their information is organised into distinct tabs for easy access.
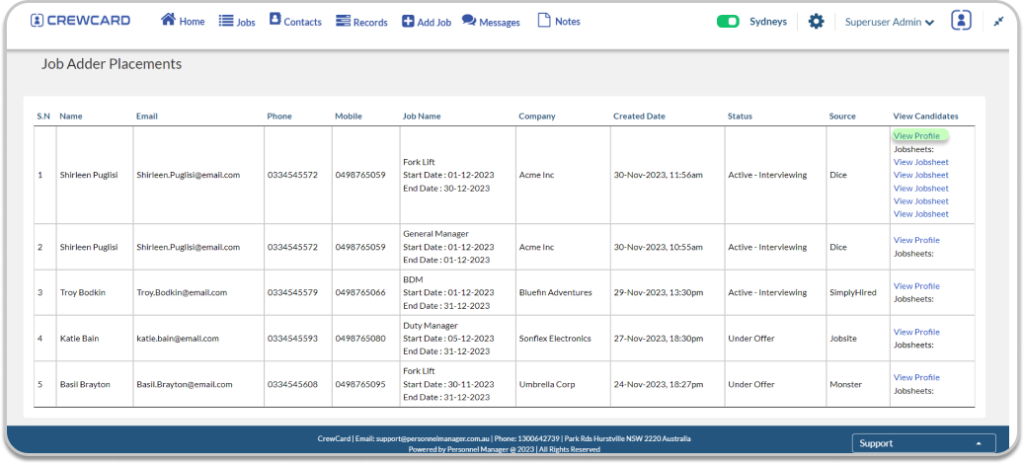

These tabs furnish comprehensive details about the recruits, easily navigate through the recruits information and quickly assess whether they are a suitable fit for the role you are trying to fill.
The “View Jobsheet” feature enables you to access and review the job that was generated when filling out the necessary fields in the New Placement Page.
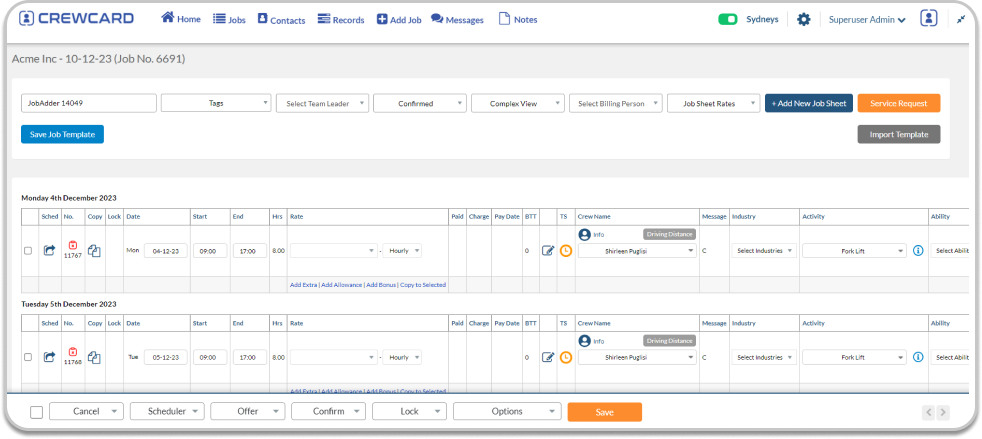
The integration of Job Adder with CrewCard/Personnel Manager streamlines the process of accessing recruit information, allowing for quick assessments of their suitability for the intended role. Furthermore, this integration facilitates the effortless creation of a jobsheet by entering the necessary information in the Job Adder’s New Placement Page.
Once you have successfully logged into your JobAdder account, you will be directed to the Jobs page. This page serves as your dashboard, displaying job listings and their associated fields.
To import a recruit, the user should hover the mouse over the Candidates section. A side panel will appear, showing key navigation options such as the following:

JobAdder | CrewCard |
Candidates | Crew |
In JobAdder, when you click on a candidate, you will be directed to the Candidates list view. This section displays all candidate entries. Within this view, you will also have access to detailed candidate information, including the candidate’s current job title, current employer, status, rating, location, and notice period. These fields provide a quick overview of each candidate’s employment background and availability, allowing recruiters to assess suitability and readiness for placement at a glance.

The equivalent of Candidate in CrewCard is Crew. In CrewCard, when you click on the Crew List, you will be directed to a complete list of crew members. This section provides a quick overview of each crew member, displaying key information such as rank, business, name, contact details and other relevant profile data, similar to the Candidates list in JobAdder.

JobAdder | CrewCard |
Search candidates | Search Crew |
The Search Candidates function in JobAdder includes various fields designed to help users locate specific candidates efficiently. These fields typically include the candidate’s name, current employer, current job title, and other relevant information necessary for a refined search. After filling in the required or relevant search criteria, scroll to the bottom of the screen and click the Search Now button. The system will then display a list of candidates that match the entered details.

In CrewCard, the equivalent feature is called Search Crew, which allows users to locate crew members based on specific criteria. The available search fields include business, job date, time on, activity, qualification, status, and other relevant details that help narrow down the search. After entering the necessary information, click the Search Crew button.

JobAdder | CrewCard |
New Candidate | Add Crew |
The ‘New Candidate’ feature in JobAdder is the equivalent of the ‘Add Crew’ function in CrewCard. When you click on Add Crew, a form will pop up where you can enter key information about the crew member. This includes fields such as first name, last name, email address, mobile number, date of birth, business association, and the activities or skills the crew member possesses or is qualified.

Similarly, in JobAdder, when the user clicks on “New Candidate,” a form will appear where essential candidate information can be entered. This form includes fields for Name, Email Address, Mobile Number, Skills, Resume upload, and additional notes. After completing the form, the user must click the Create button to save the candidate’s entry.

After completing the form, click Create and the entry will be saved. Then, go to the Candidates section by clicking on Candidates, where you will see the candidate you just created.

Click on the candidate’s name to view the fields, along with their corresponding equivalents in CrewCard.

JobAdder | CrewCard |
Name | Name |
Last Period | Enrolled |
Details Tab | Details Tab |
Mobile | Mobile |
Resume | Resume |
Skills | Skills/Activities |
Documents Tab | Citizenship Tab |
In JobAdder, the Documents tab allows the user to upload various types of files. After selecting a file using the Upload File button, the system will display a menu to categorise the document. Available document types include Resume, Cover Letter, Screening and Assessment, Formatted Resume, Check, Reference, and License. These categories help keep documents organized and easily accessible within the candidate’s profile.

In CrewCard, similar functionality exists under the Citizenship tab. This tab allows the user to indicate the candidate’s citizenship or visa status, such as Australian Citizen, Student Visa, Working Holiday Visa, or Permanent Resident. Like in JobAdder, a document can be uploaded here and categorised according to the recruit’s type of citizenship.

Once the candidate’s details and documents are complete, the user can proceed to send the candidate to CrewCard. There are two ways to do this:
First, next to the candidate’s name, click on the dropdown arrow labeled Options. From the menu, either click CrewCard directly or hover your mouse over CrewCard to reveal the sub-option Send to CrewCard. Clicking this will begin the import process.

Second, the user can navigate to the Candidates section, tick the checkbox beside the candidate’s name, and then right-click to open a menu. From the menu, selecting Send to CrewCard will trigger the import.

After performing either import method, a confirmation message will appear stating “Candidate successfully imported.” The candidate’s profile will now be visible on the Recruit Card page in CrewCard, confirming that the transfer was successful.

Following the import, the candidate will receive an email with the subject “Invitation to Complete Crew Profile.” This email prompts the recruit to log into CrewCard and complete their profile by adding any missing information.

Any documents uploaded in JobAdder, including resumes, will also appear in CrewCard. When a recruit’s profile is transferred to CrewCard, all relevant files that were uploaded in JobAdder are carried over, maintaining consistency across both platforms. These files are stored in the Bio section of the recruit’s profile in CrewCard. Specifically, resumes will be located under the Resume field, making it easy to access and view all documents related to the recruit’s qualifications.
