Click the New App button to create a new application.

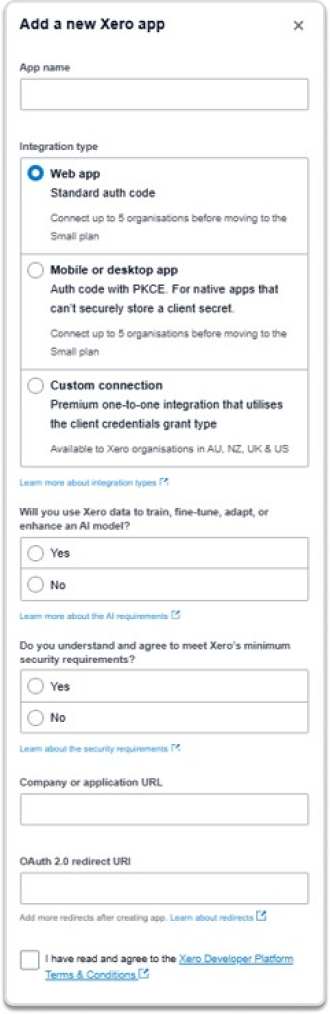
2. This will display the Add a New App window.
Enter the Callback URL below:
Sample Xero Callback URL:
https://crewcard.io/demo/callback.php
Complete the remaining required fields and save the application.
3. Once the Callback URL has been entered and the application has been created:
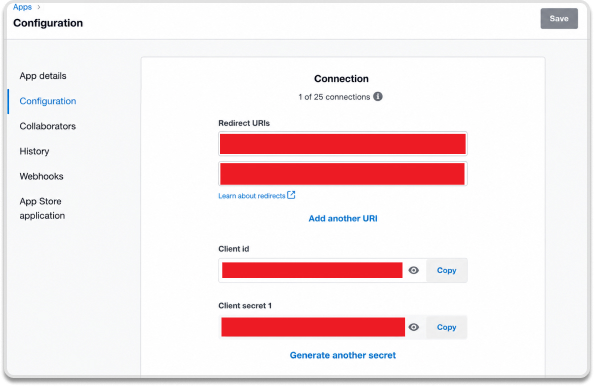
4. Copy the Client secret 1 and send the following details to support@crewcard.co.
Admin has Access to Update the Client XERO ID in Client Profile Page.
When setting is enabled:
The Xero Client ID field in the Client Profile becomes editable for users with Admin access.

When the setting is disabled, Admin accounts will still be able to view the Client XERO ID section, but the field will be greyed out and not editable.
Please contact us at email us at support@crewcard.co to provide admin users to update the Xero Client ID field in a client’s profile.
Where do we get the XERO ID to map to the Client Profile?
Log in to Xero.
Go to Contacts → search and select the client.
Once the client’s details page opens, check the URL in your browser.
Example:
The long alphanumeric code after /View/ is the Client ID.
Copy that and map it to the Client Profile page. Please see the sample screenshot for reference.

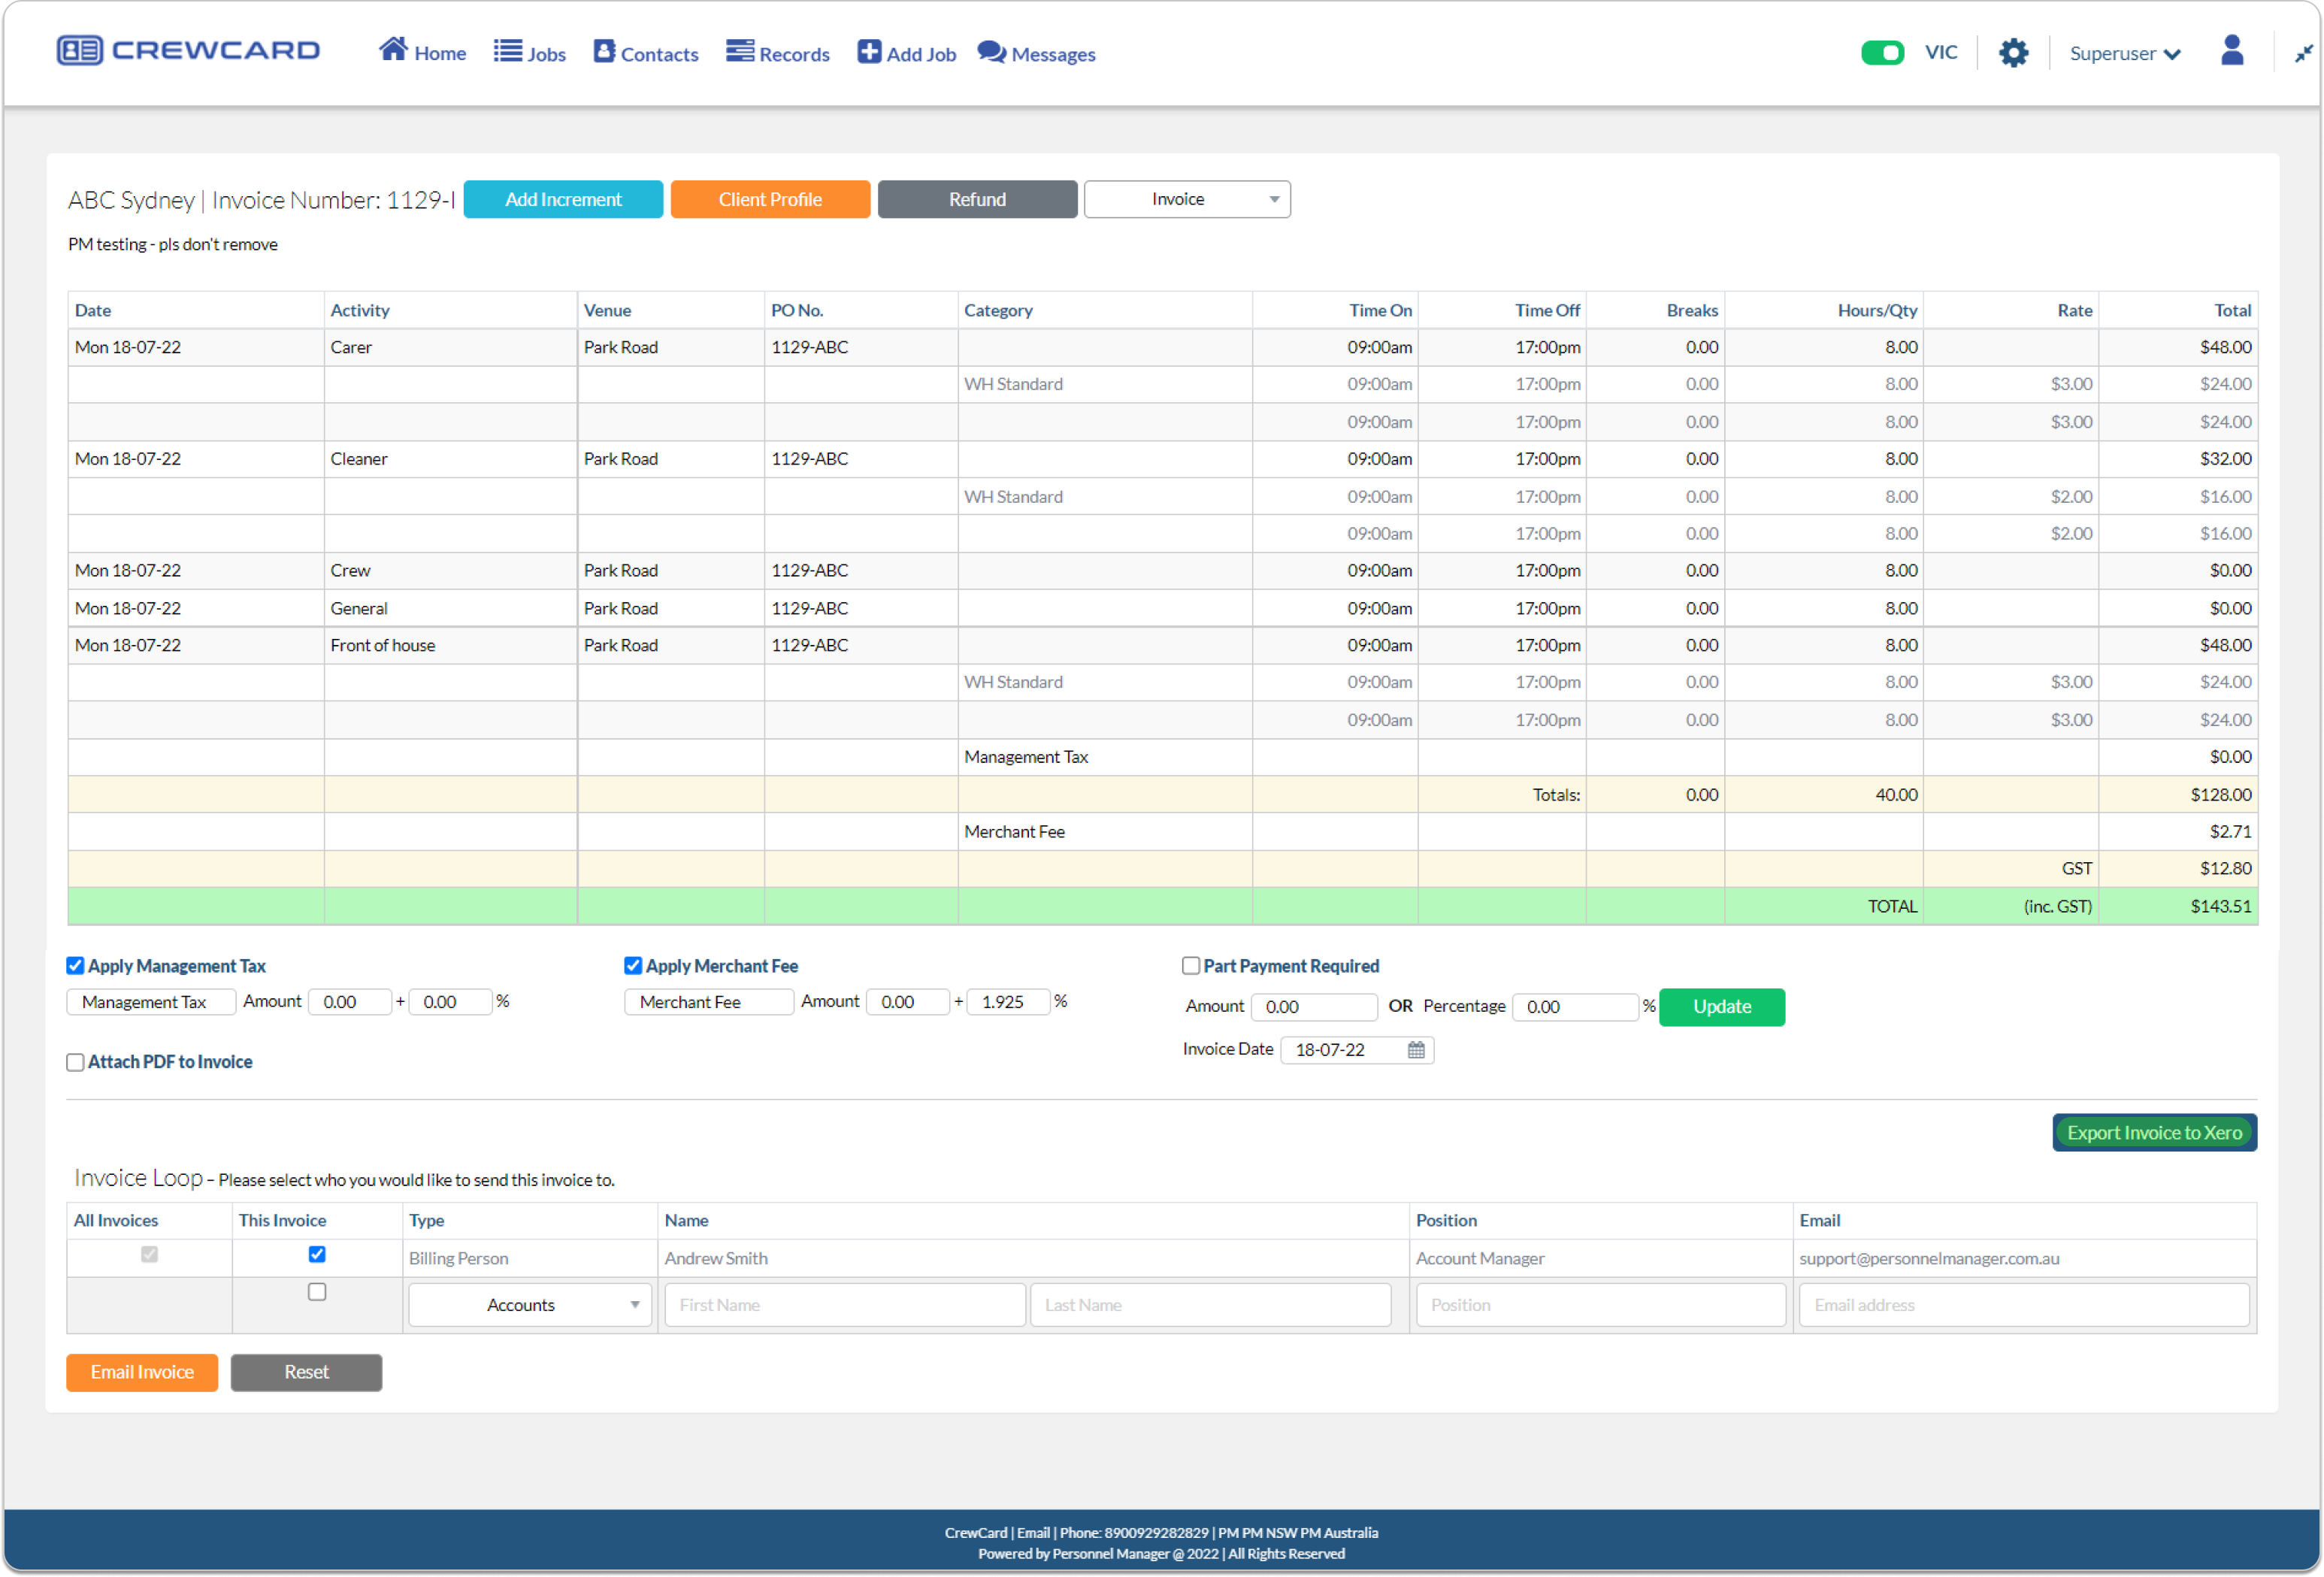
Export in Invoice Page
To Export Invoice to XERO, click the Export Invoice to XERO in the Invoice Page.
Xero Bulk Send
The “Xero Bulk Send” feature enables bulk export of invoices to Xero from the Jobs page. This function allows users to send multiple selected jobs/invoices to Xero in a single action.
Navigate to the Jobs Page. Select Jobs for Export, Tick the checkboxes next to the jobs you wish to export.
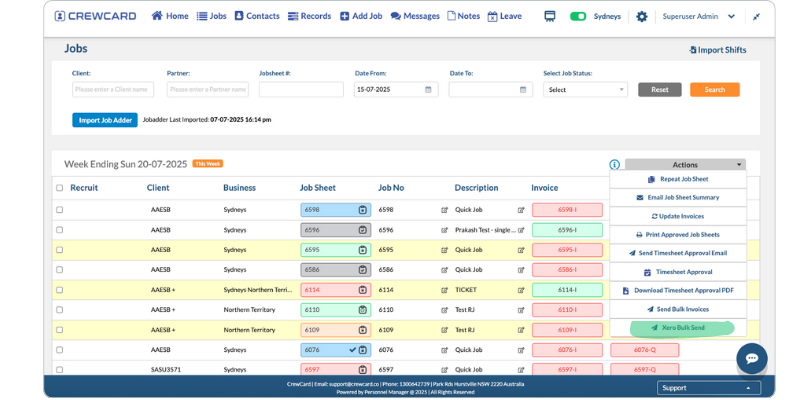
Choose the “Xero Bulk Send” Action. Click on the “Select Actions” dropdown and Select “Xero Bulk Send” from the list.
The Xero login page will appear.Enter your Xero user credentials to proceed.
Select the organization from the list. Click the “Continue with Organization” button located at the footer of the page.

A pop-up notification will confirm the export process. Message: “Invoices exported to Xero.”

Each exported invoice will have a log entry, similar to the existing individual invoice export logs and Each invoice will display a “Last Exported” timestamp below the “Export Invoice to Xero” button after a successful export.

If an export fails, a pop-up notification will display the reason. Example messages:
Title: “Invoice Failed to Export”

A marker will be displayed next to each invoice number to indicate the export status:


These markers function similarly to the ongoing and timesheet markers.
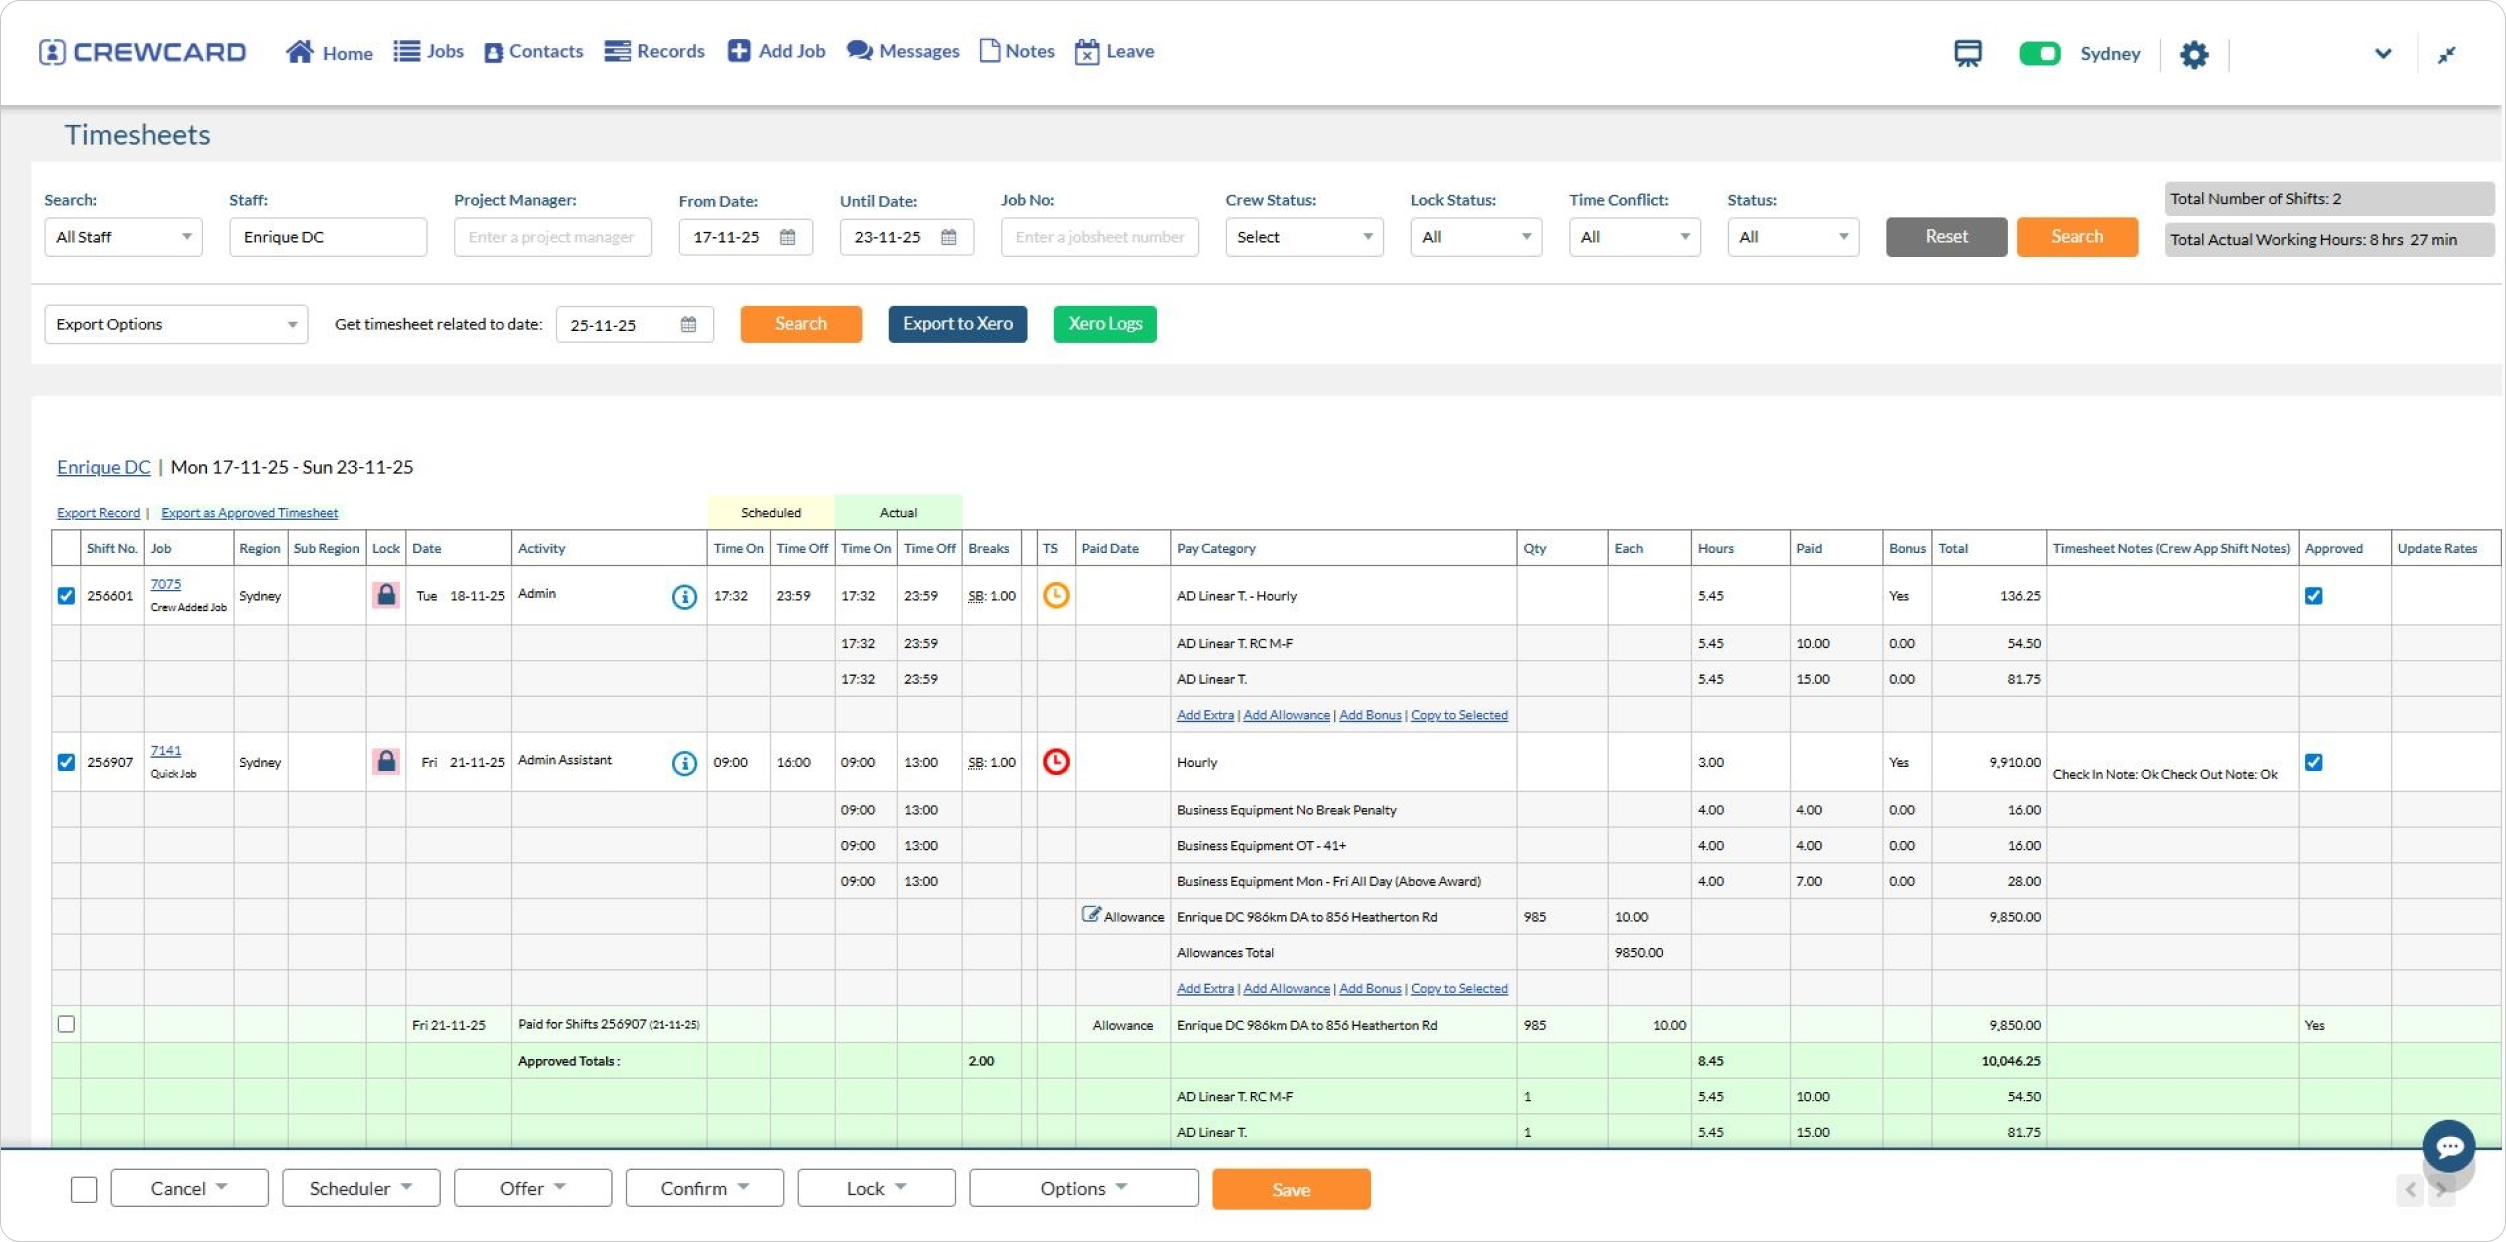
Timesheet Export to XERO
This guide helps you export timesheet data from CrewCard to Xero, ensuring staff are paid accurately and invoices are correctly generated.
Go to the Timesheets page in CrewCard. Click Export to Xero.
Review the Export Preview. The XERO TimeSheet Payroll Export window shows:
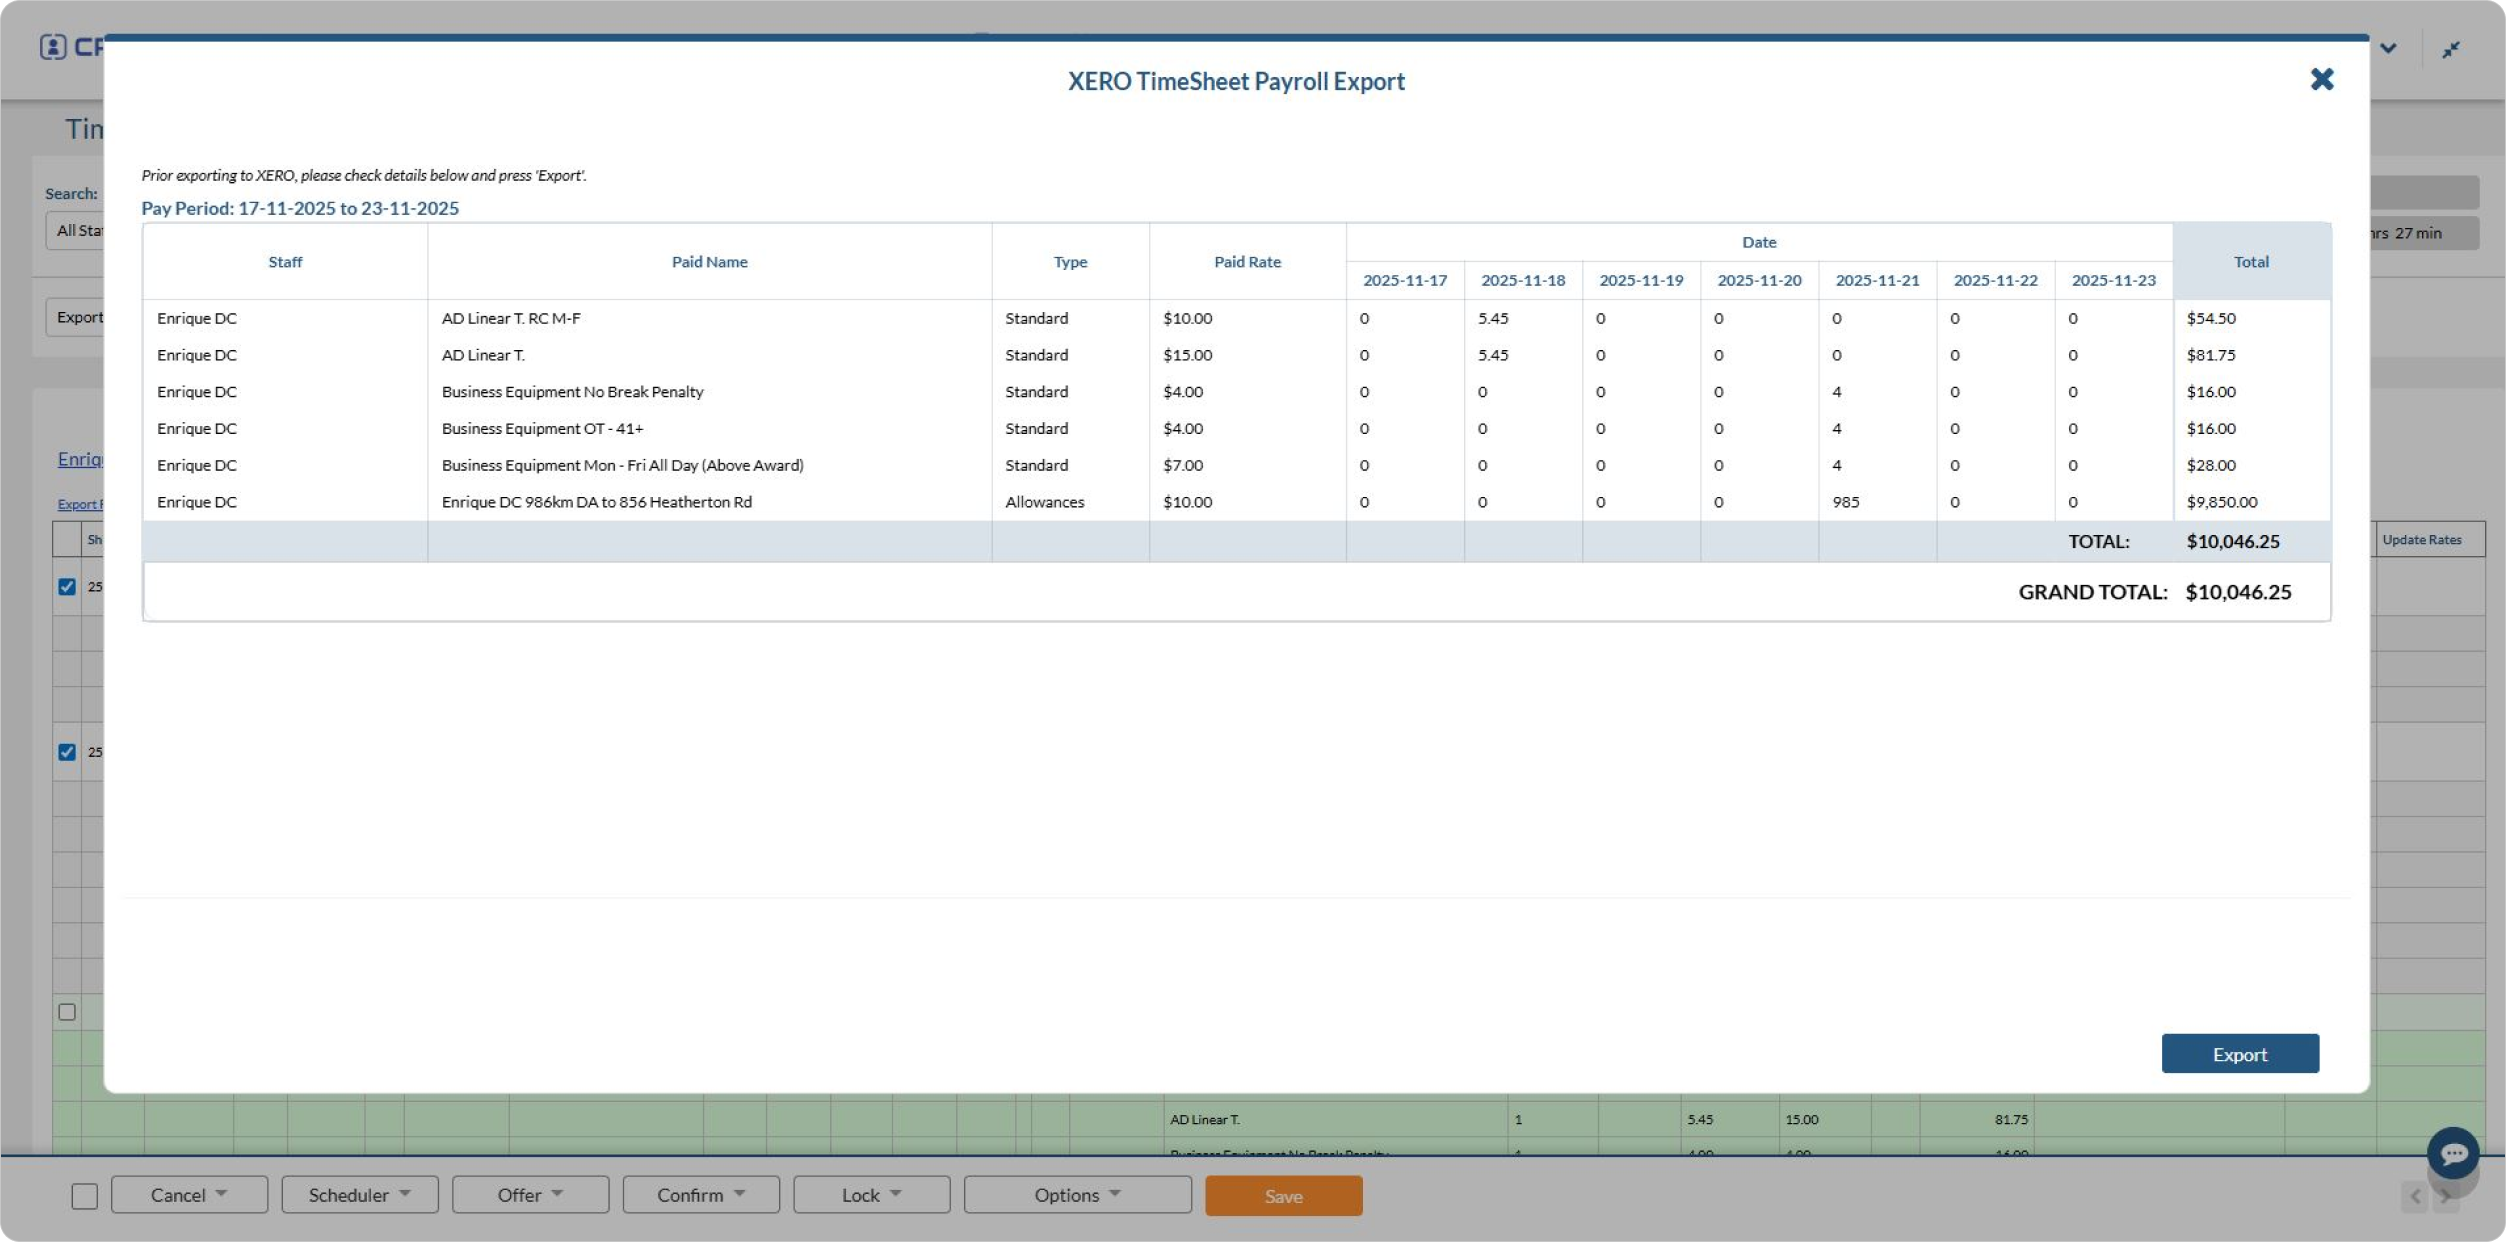
Note: The crew exported from CrewCard will be created as a new employee in the Xero portal. If the employee already exists in Xero, a duplicate employee record will be added. To prevent this, the Xero Employee ID needs to be entered in the CrewCard Crew Employee profile.
Enter your Xero credentials (Email and Password).
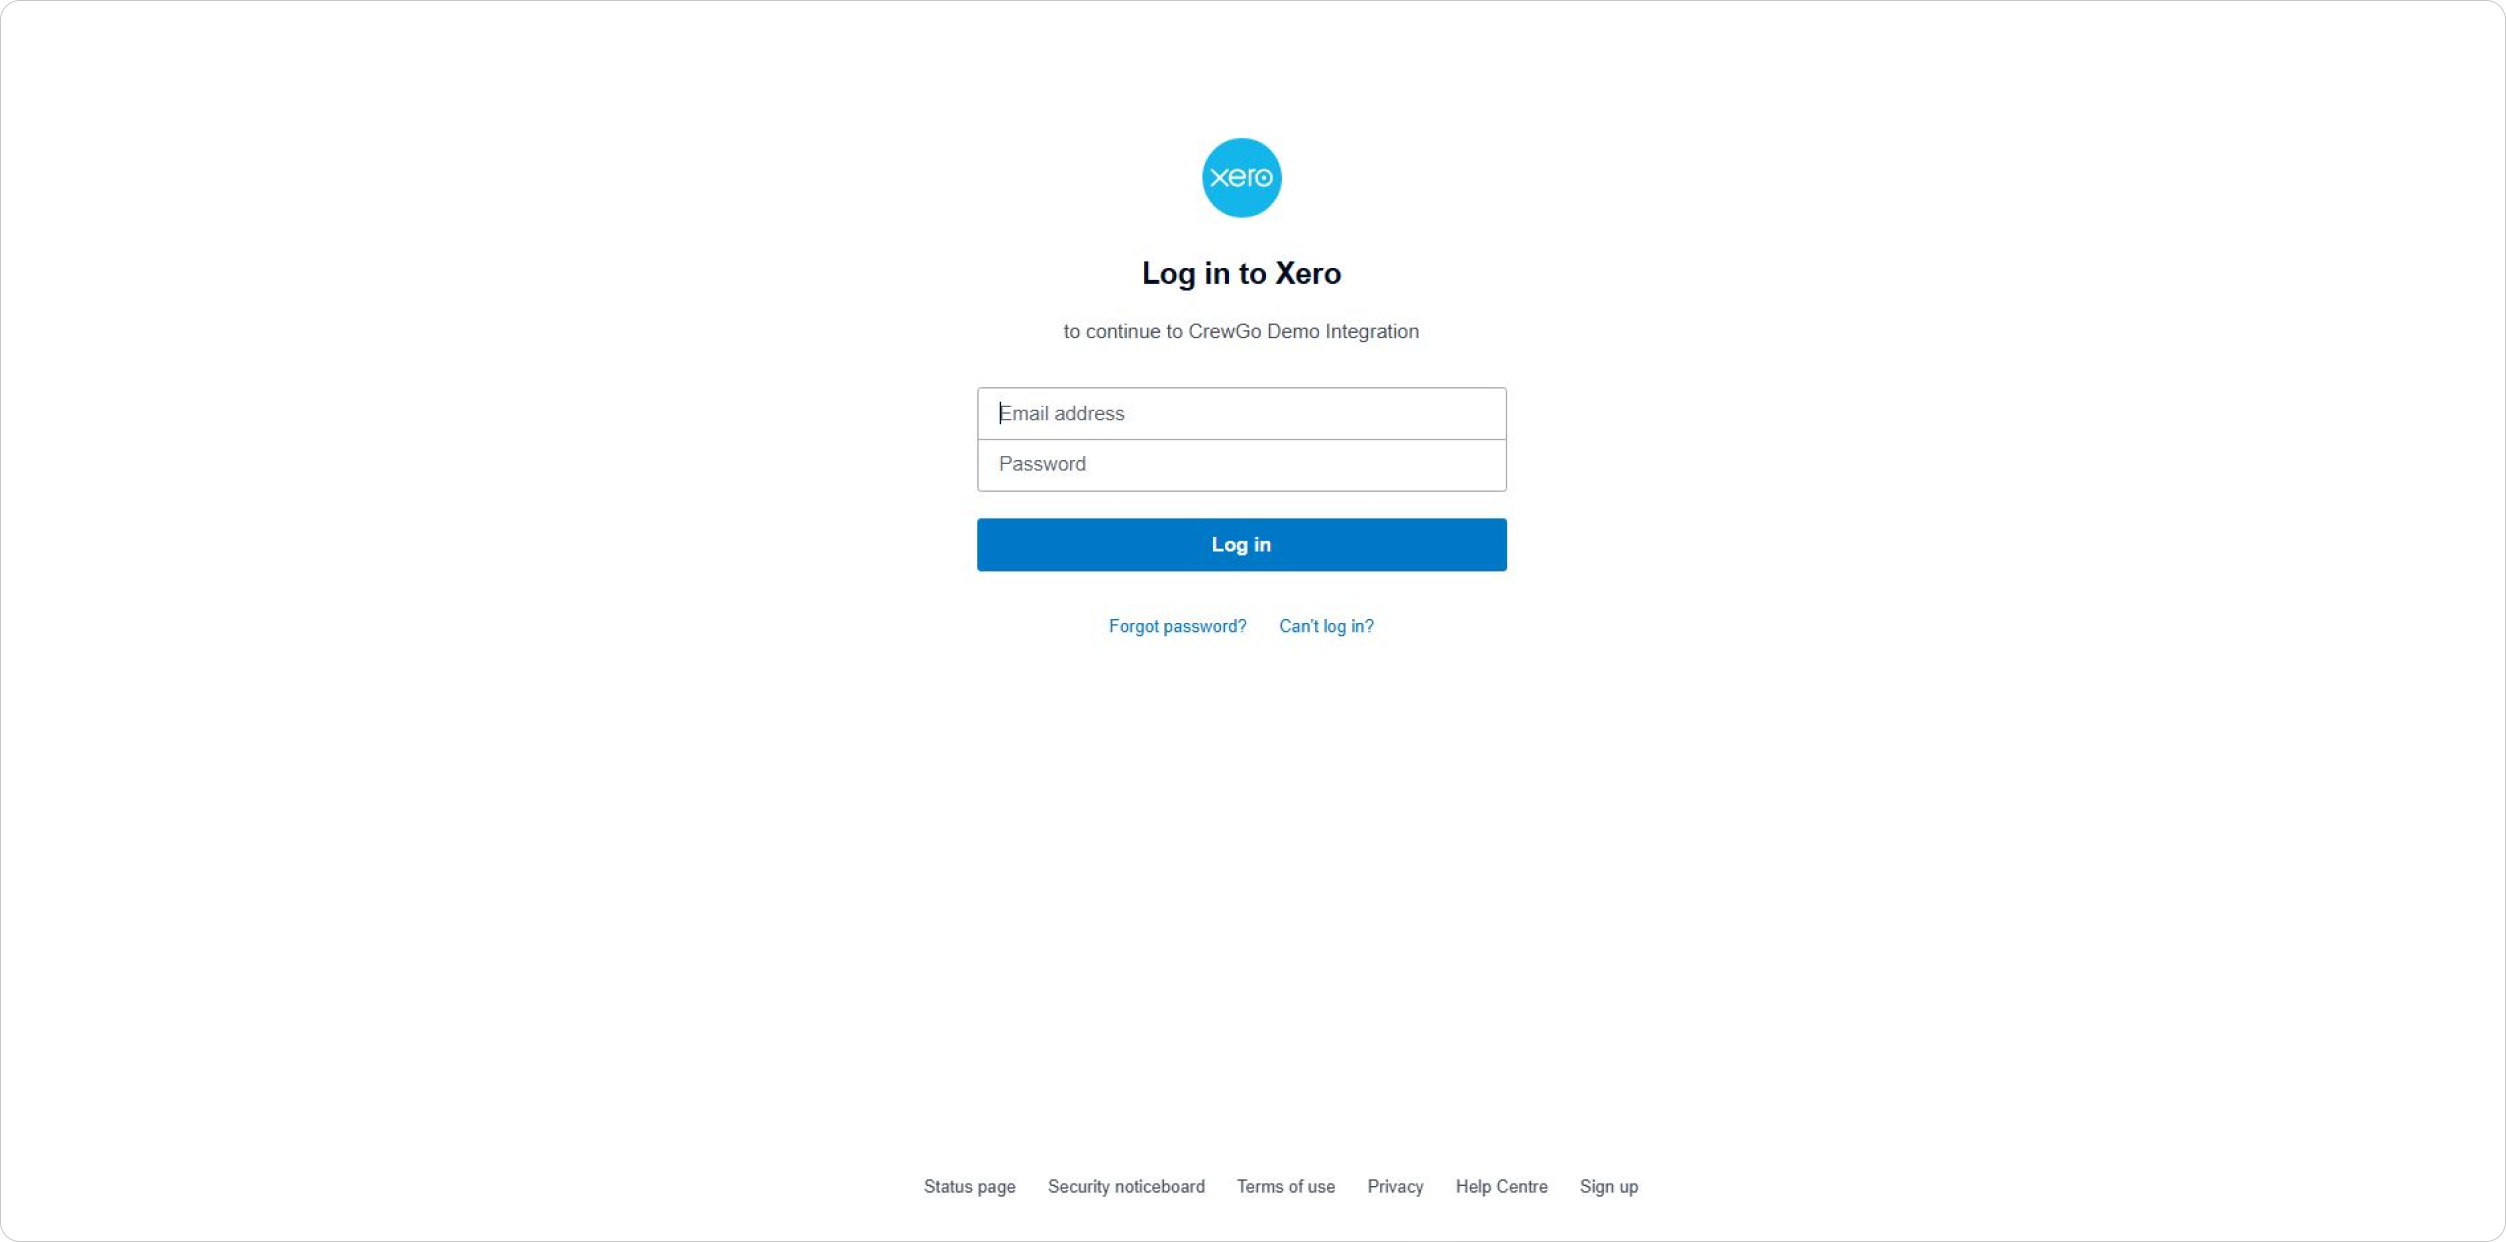
Click Allow Access to grant CrewCard permission to send data to Xero.

After signing in, review the payroll details shown in the window. Click the Export button to send the timesheet data to Xero.
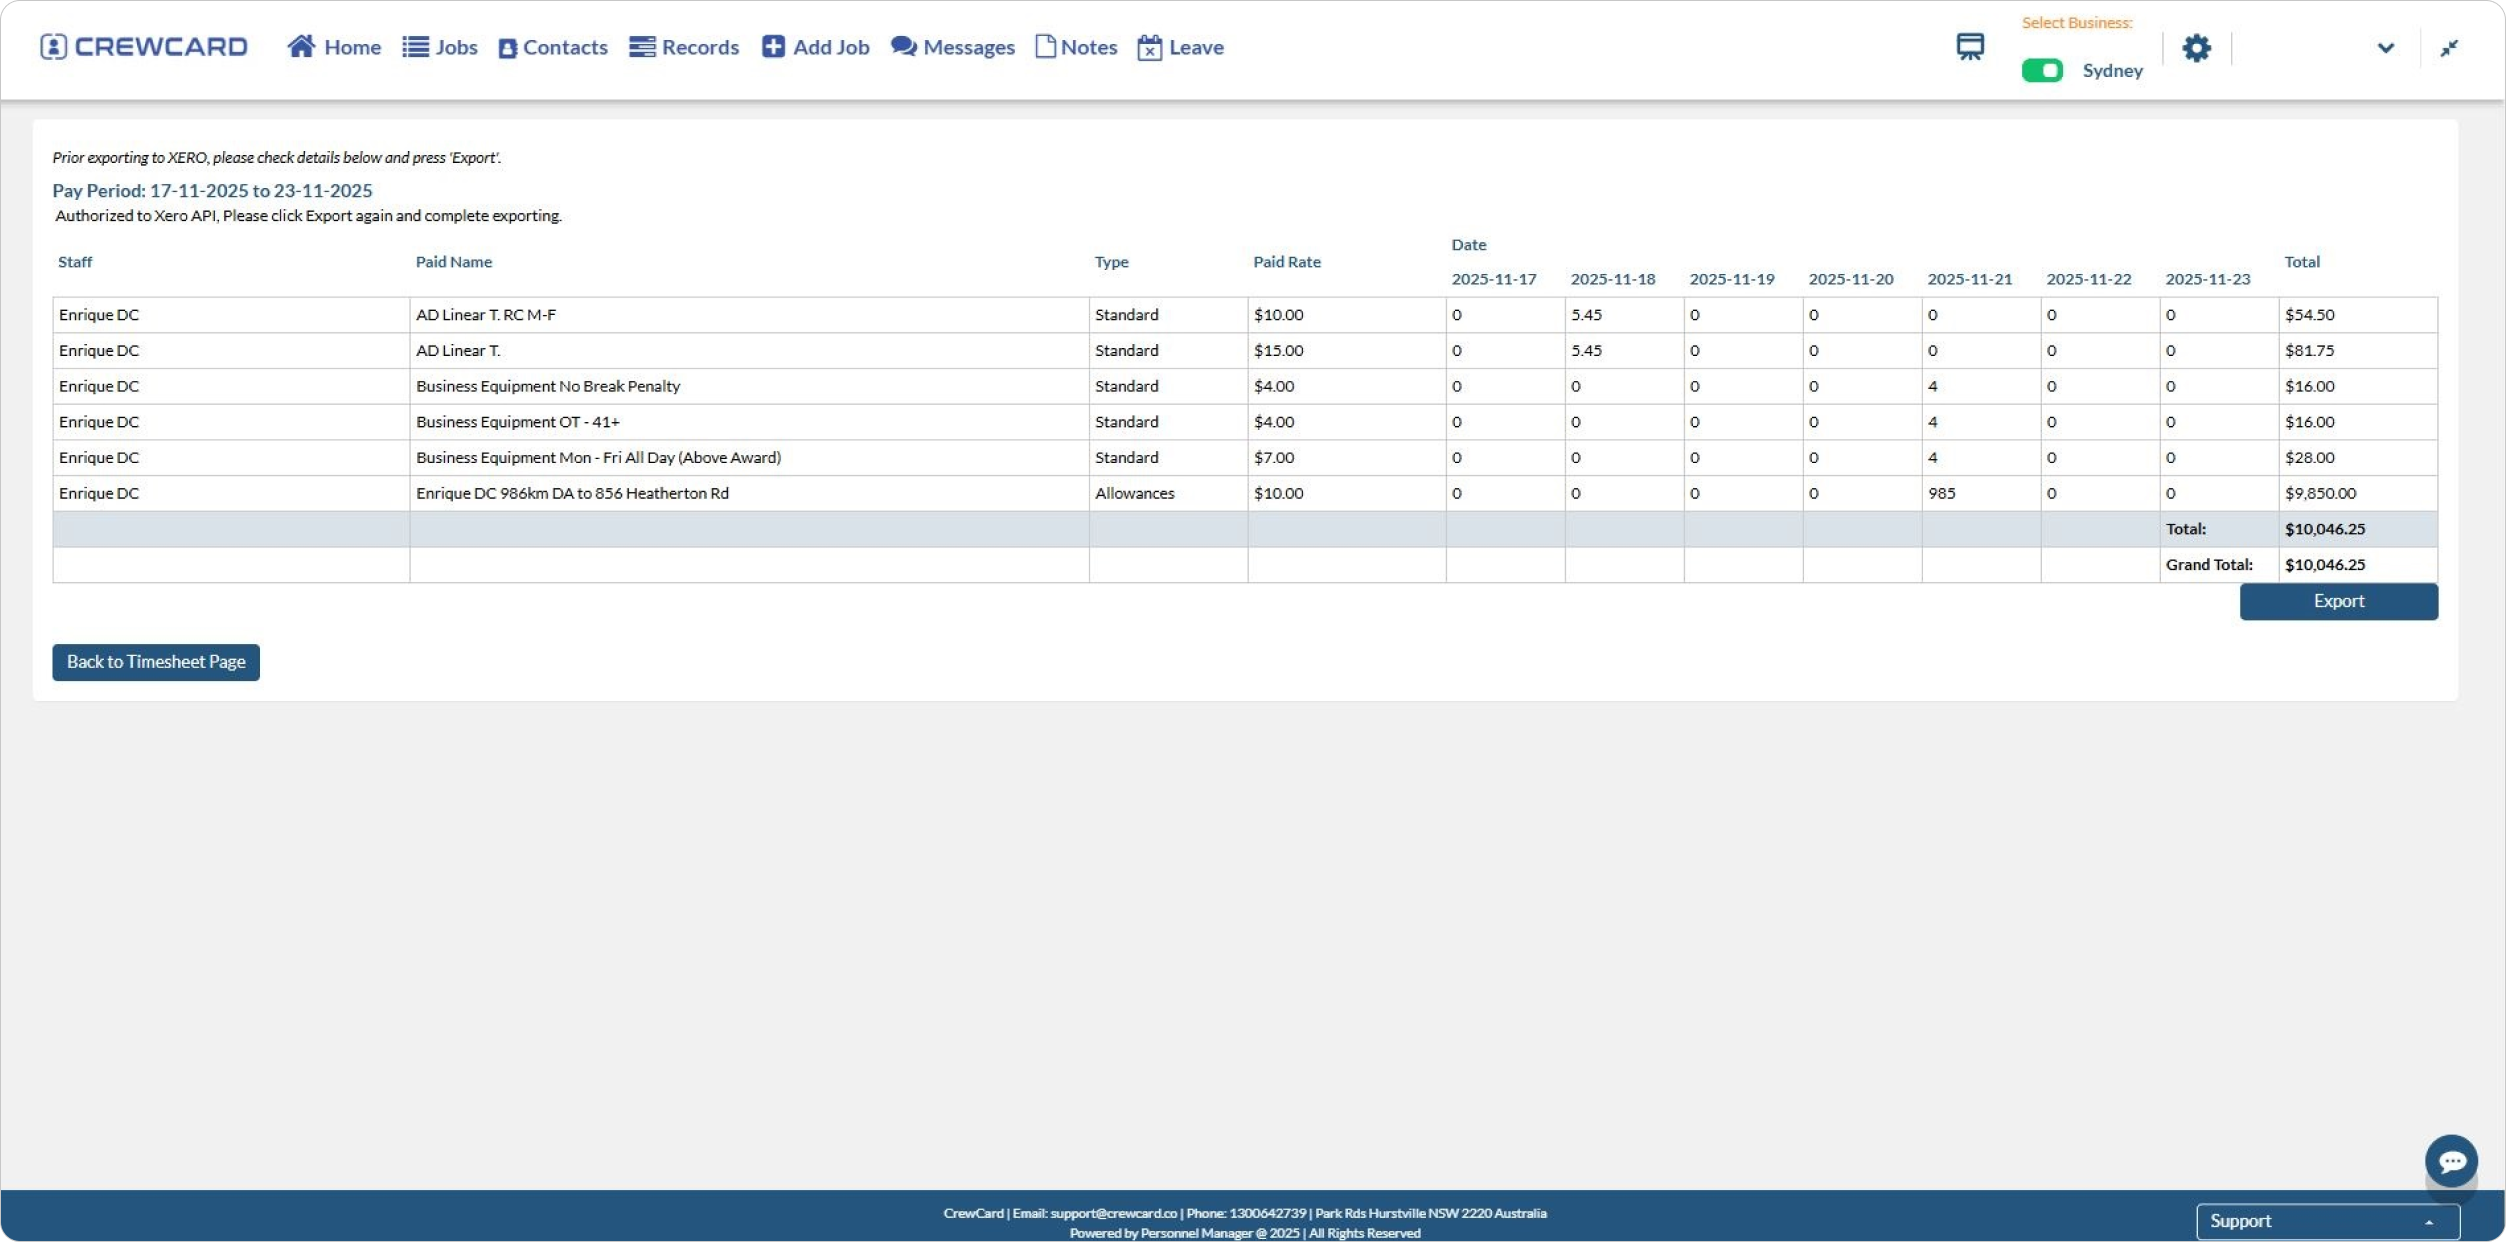
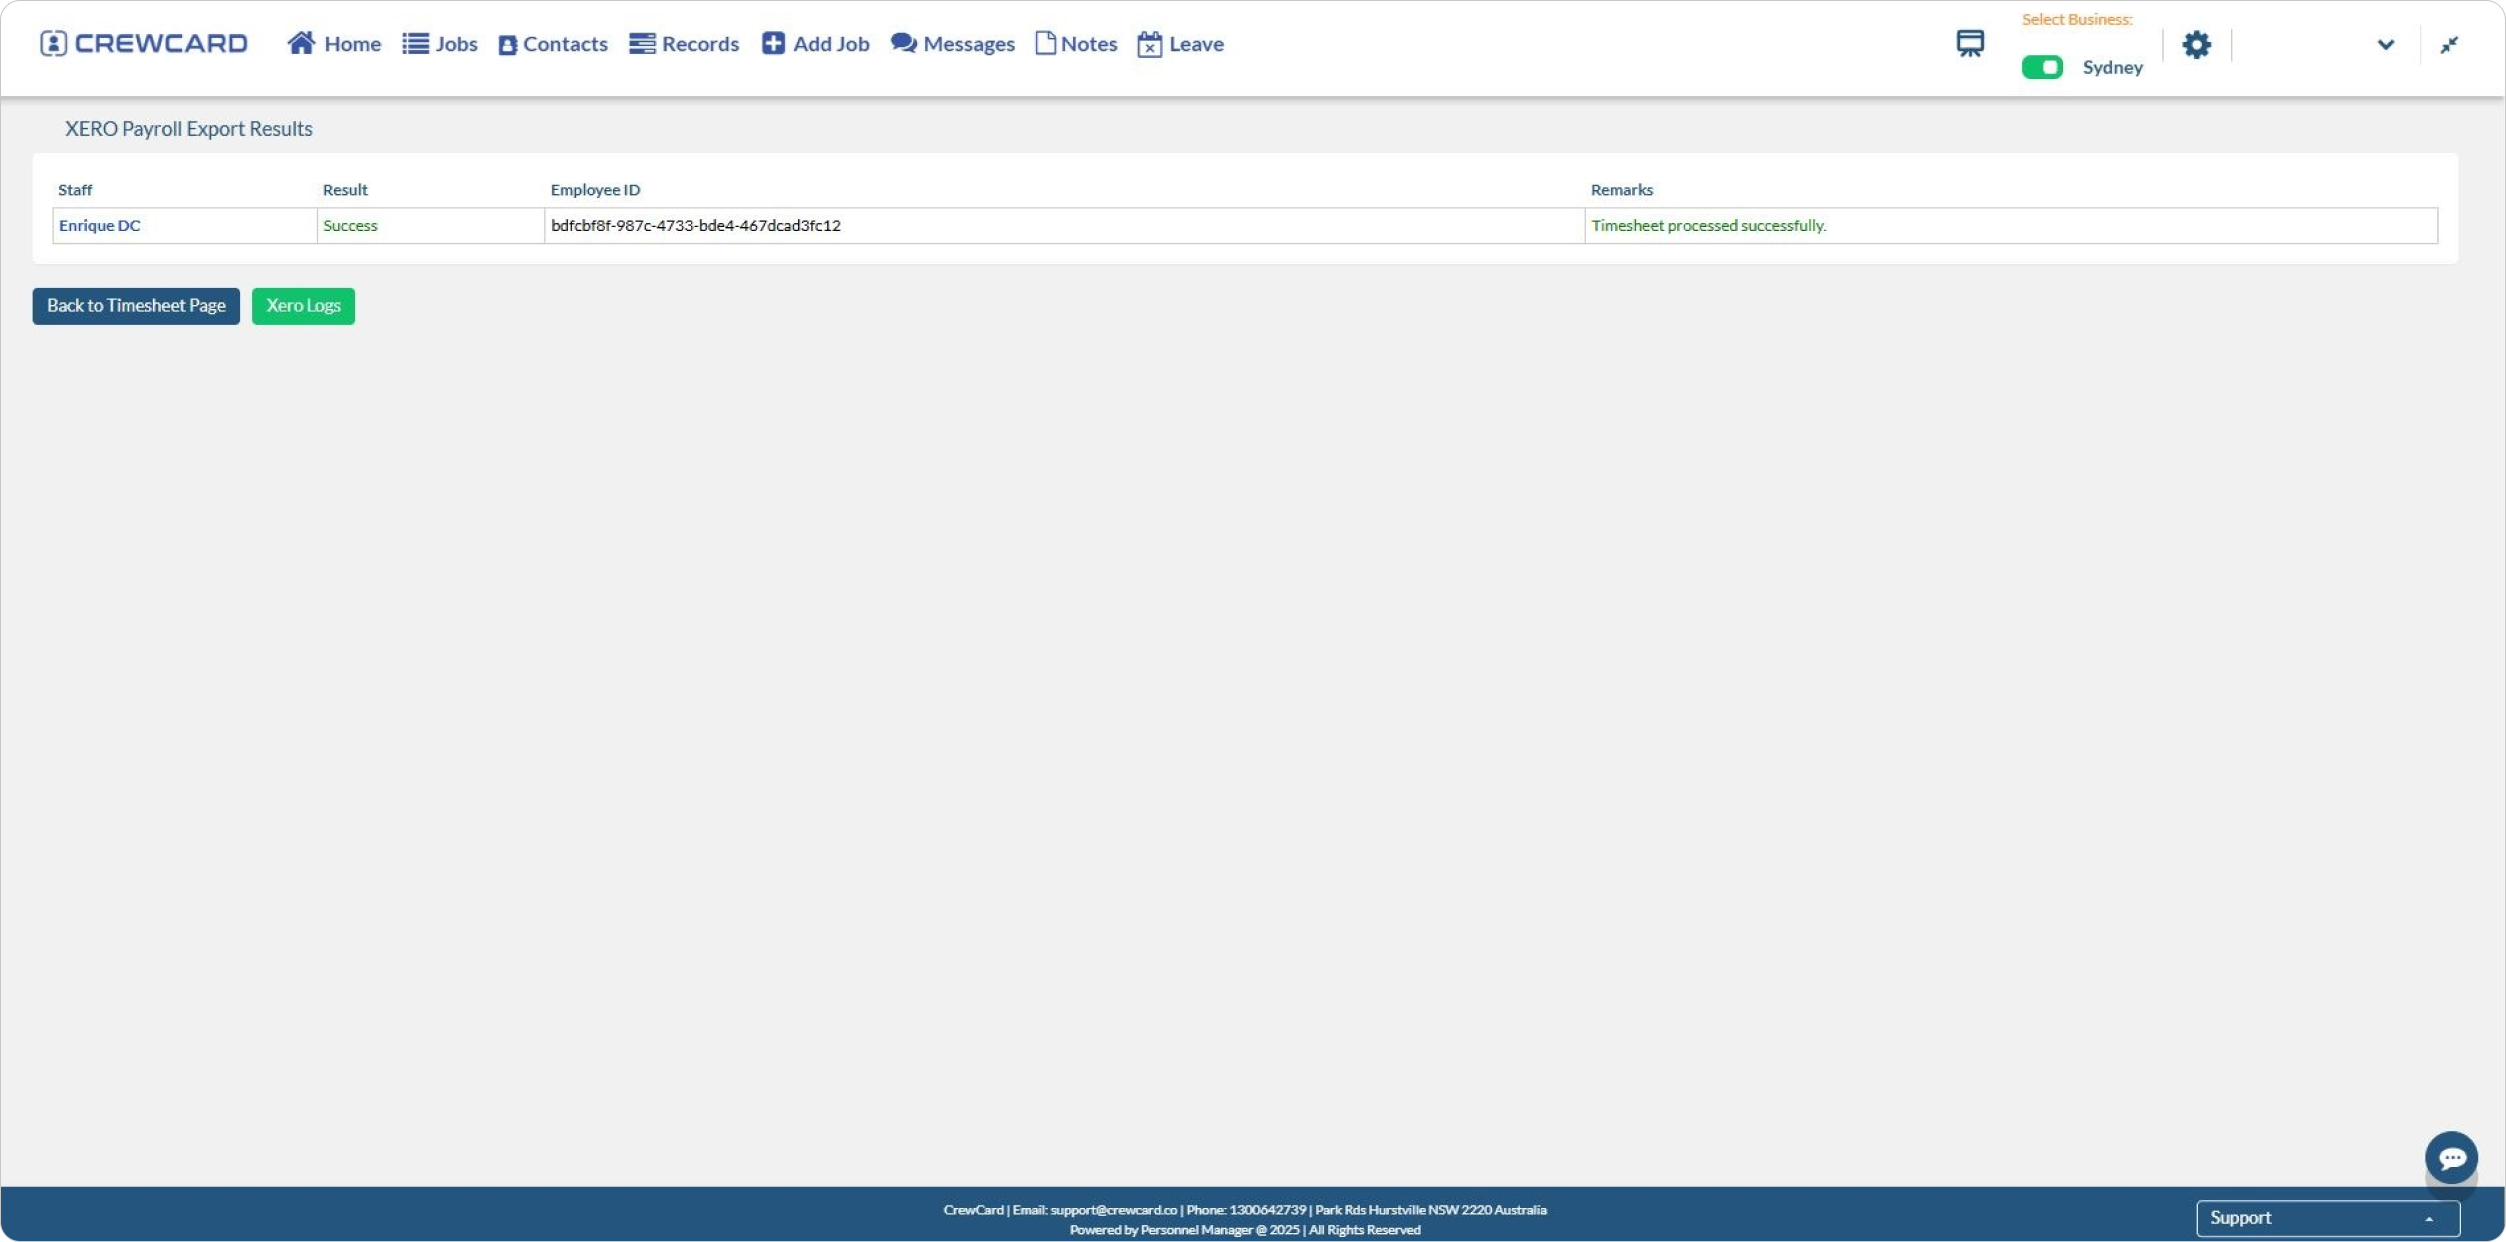
The XERO Payroll Export results will be shown here. To see the logs, click the Xero Logs button; otherwise, click Back to Timesheet Page.
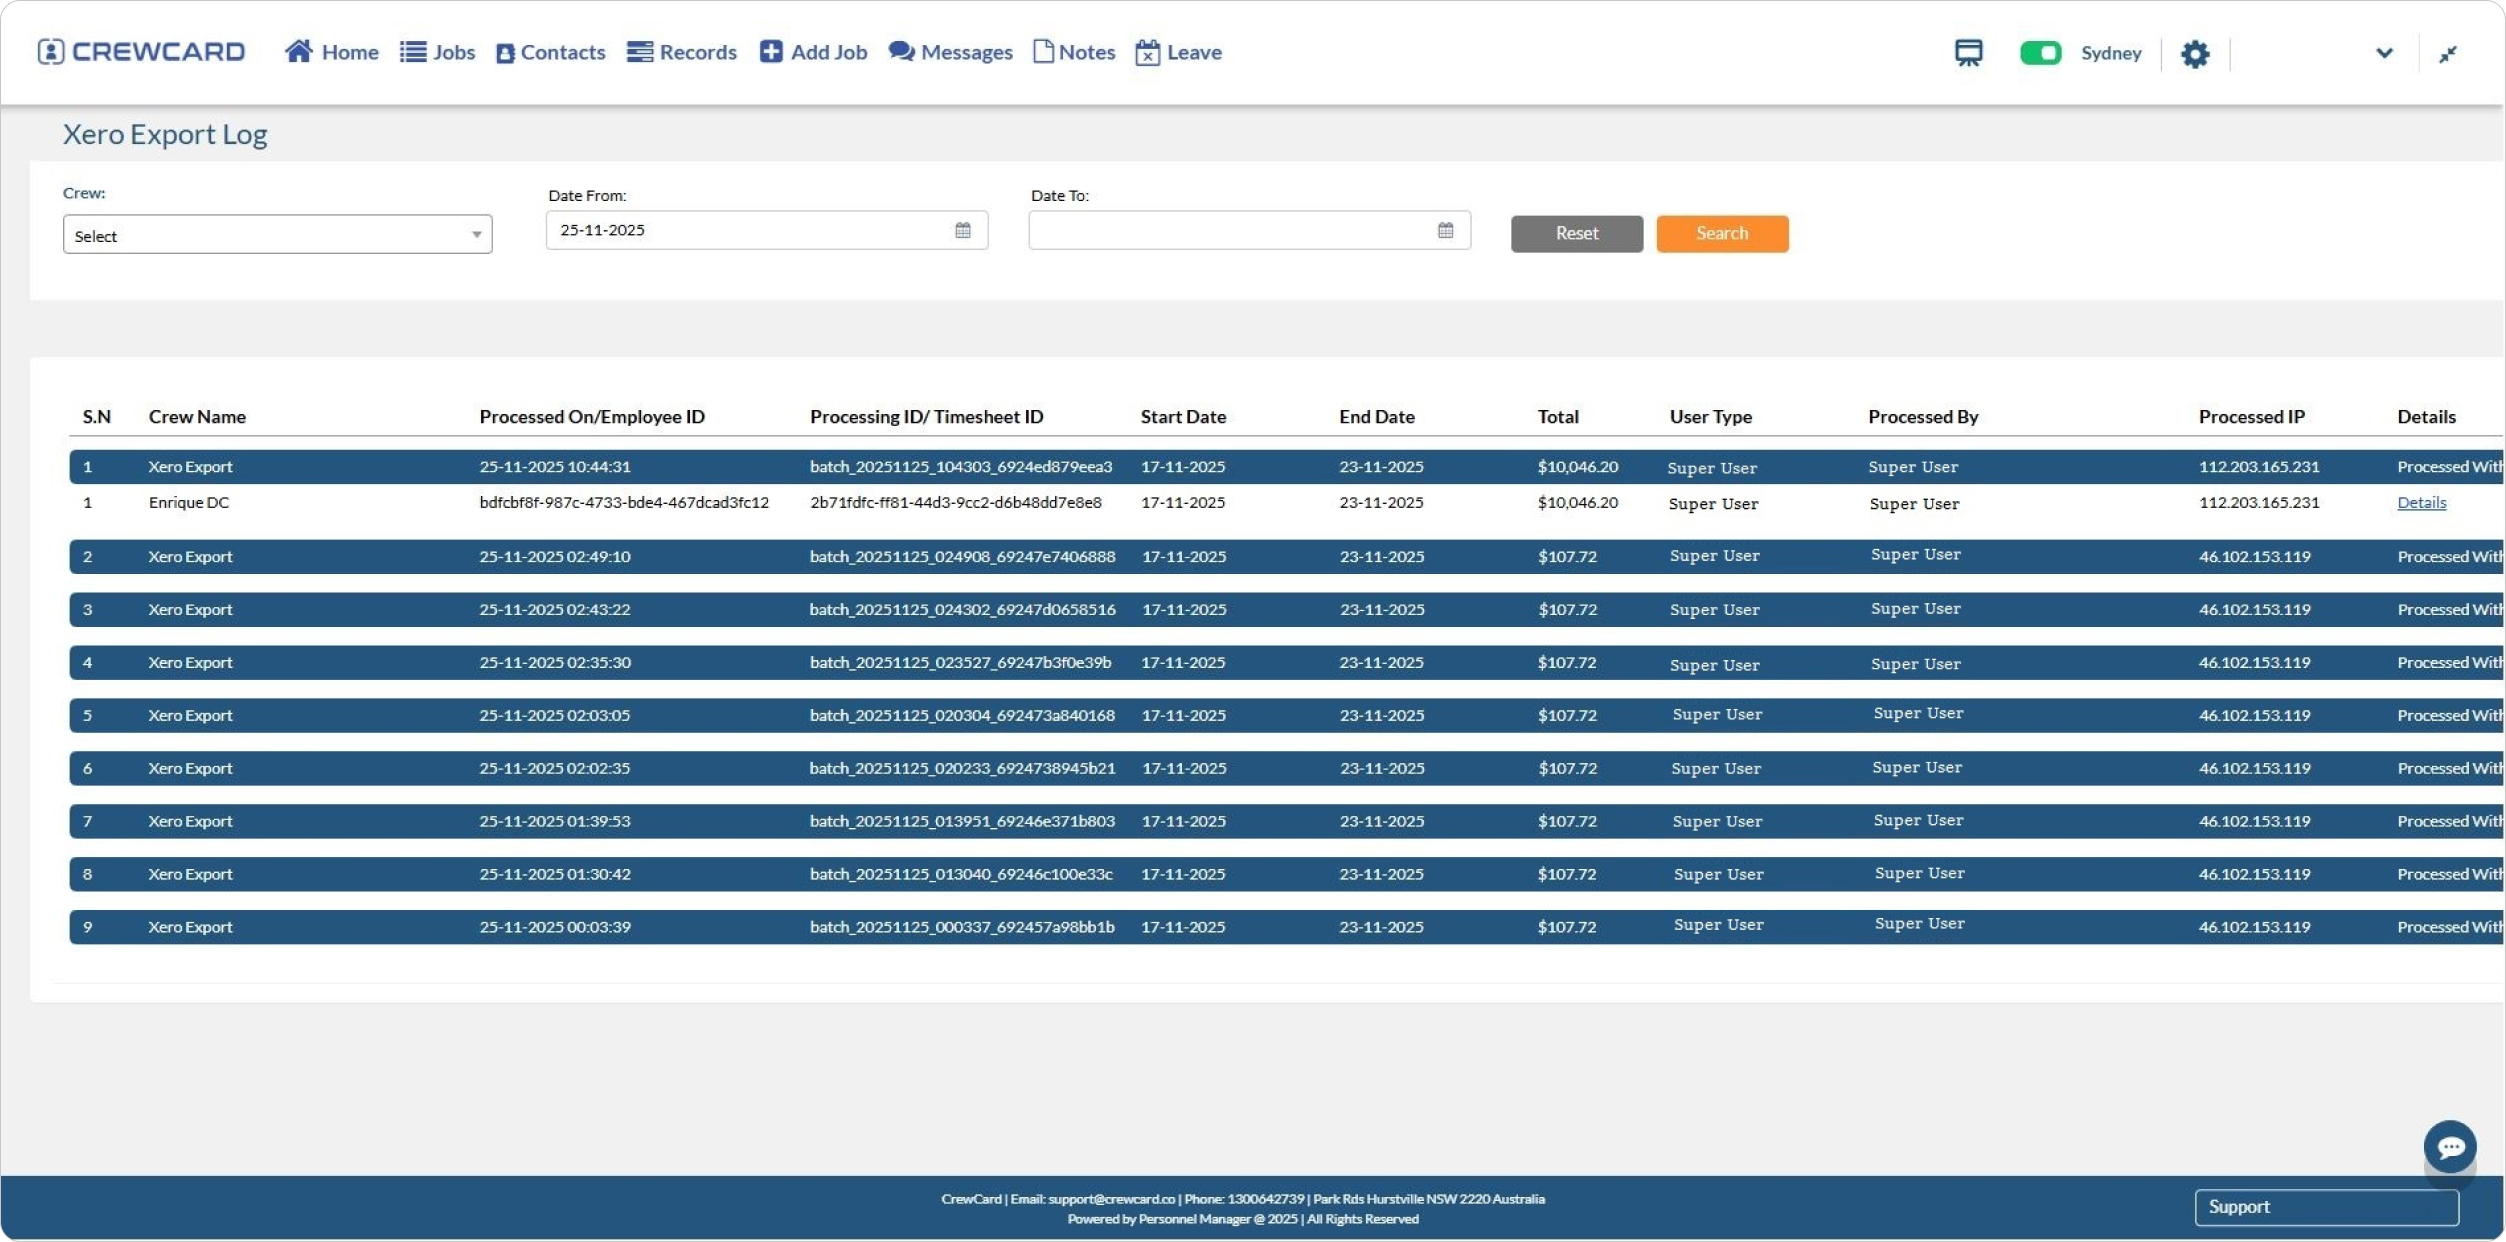
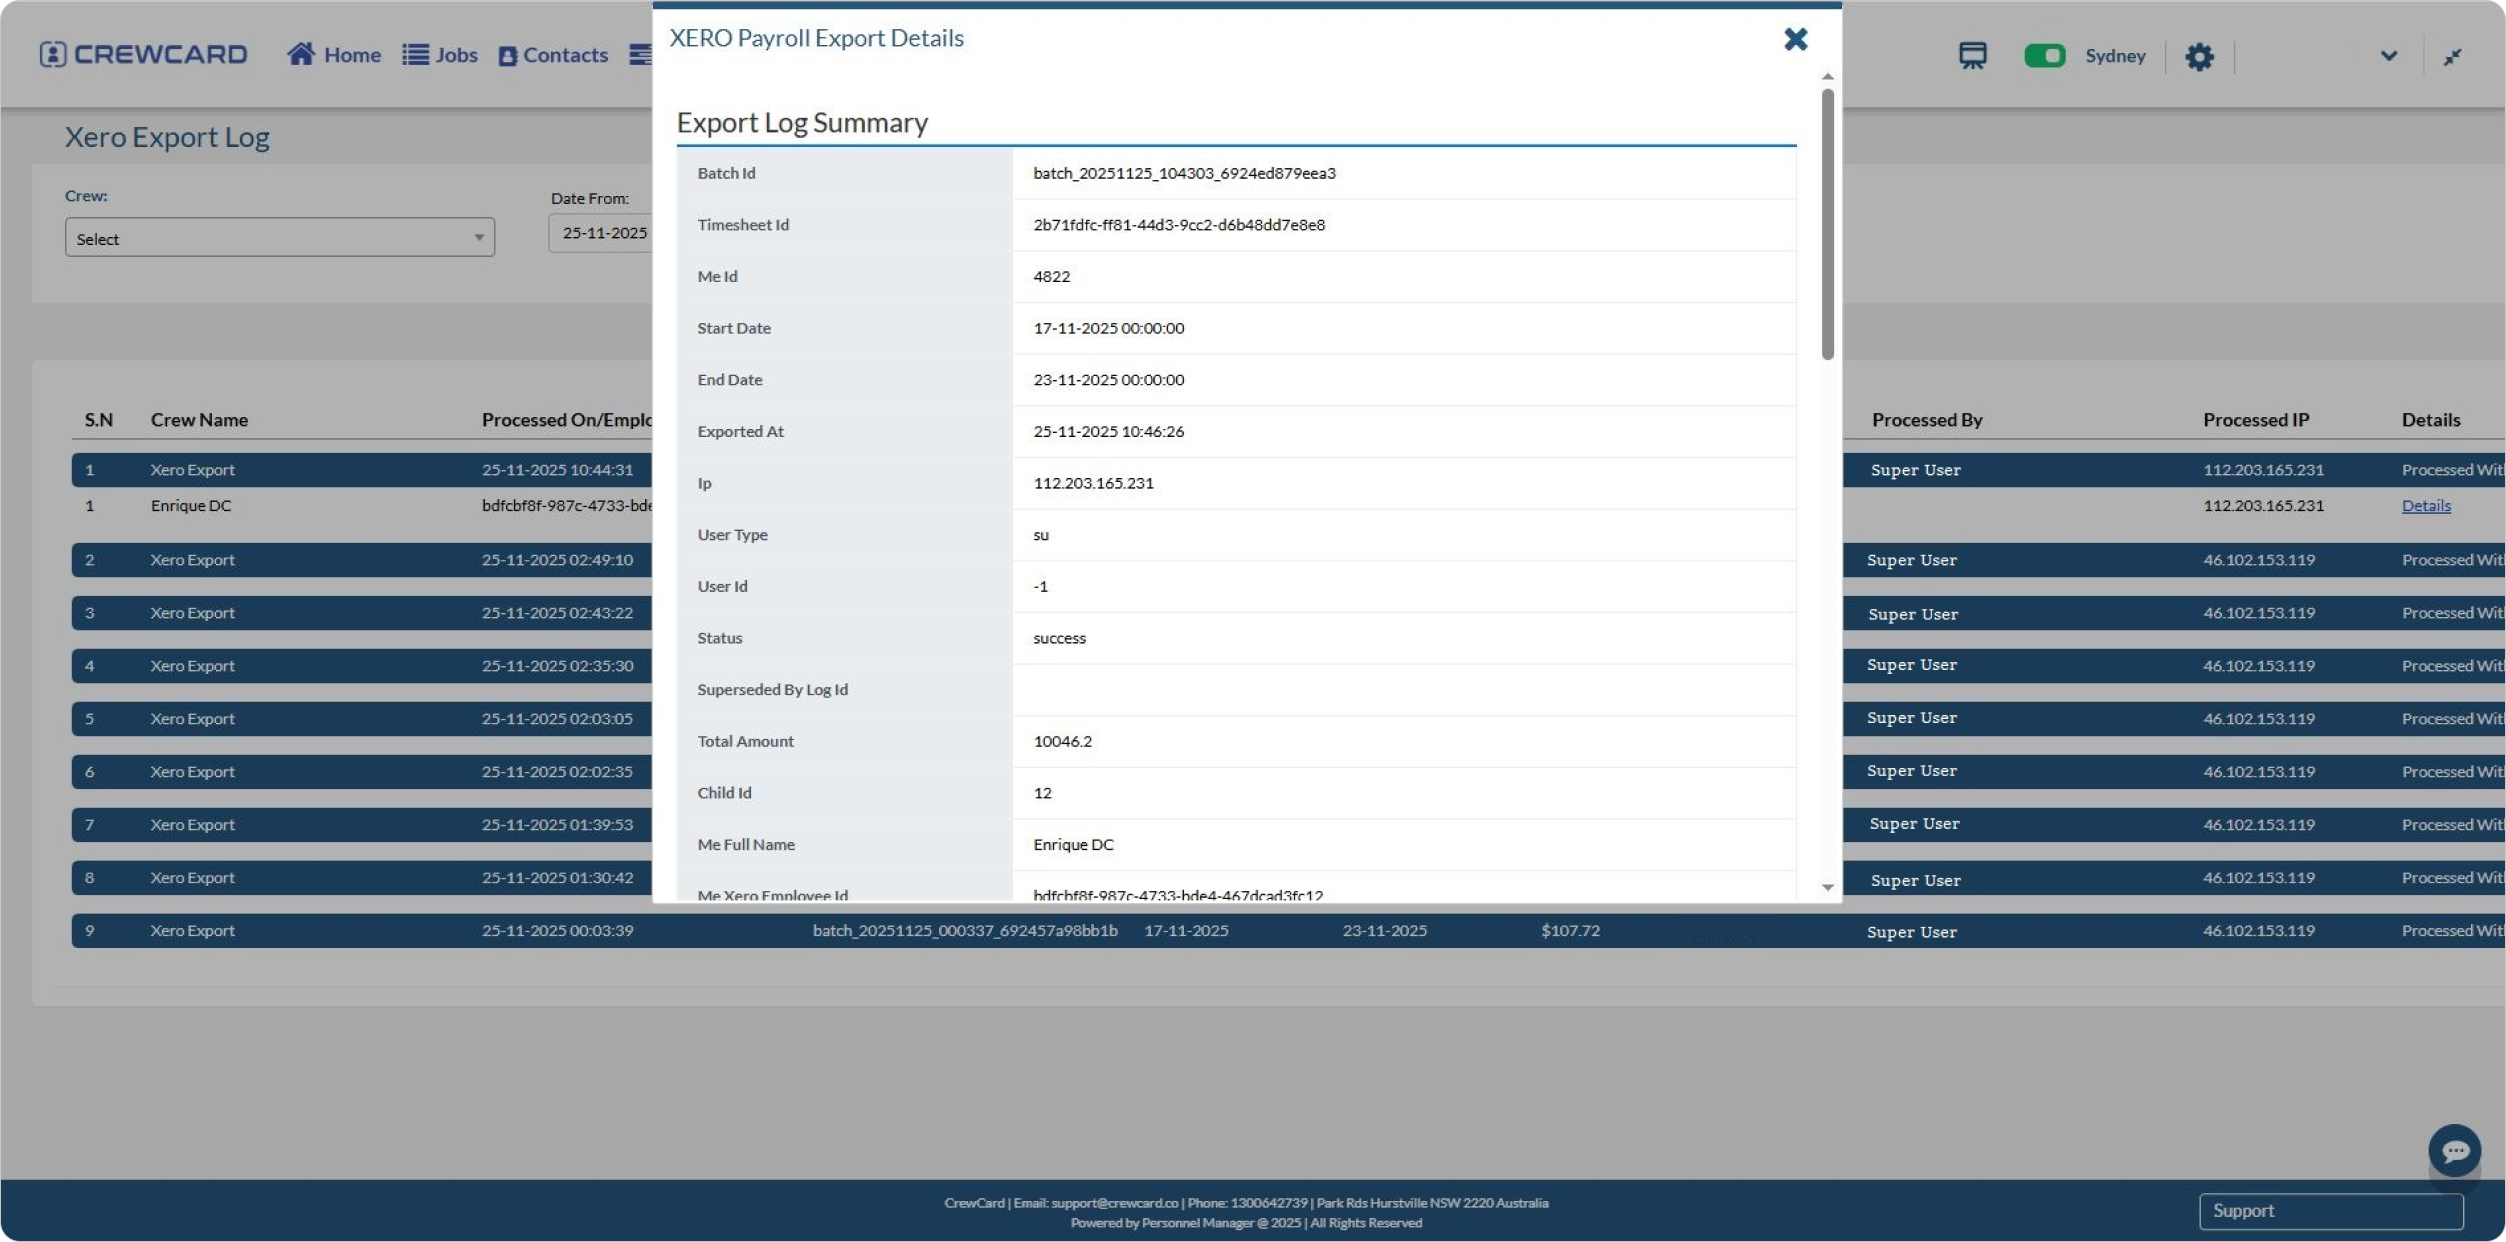
To view the details of the logs, click the Details Link.
Tip: How to find a Xero employee’s unique ID?
Log in to Xero using an account that can see payroll and employee details.
At the top of Xero, go to Payroll → Employees (the menu may look slightly different depending on your Xero setup).

Click the employee’s name so you’re looking at their full employee details.
At the top of your screen, look at the website address (URL) in your browser.
In that link, you’ll see a very long mix of letters and numbers — something like:
123e4567-e89b-12d3-a456-426614174000
This long code is the employee’s unique Xero ID.

Copy that long code, go to CrewCard, open the crew member’s profile, and paste the code into the “Xero Employee ID” field, then save.
