We here at Scene Change Brisbane have been using Personnel Manager for our Crewing System since 2021 and have been continually impressed by ongoing improvements and functionality. Most Crewing Apps seem to be the same but what stands out to me is the very fast Technical Support and also the ability the developers have to make changes to how the system runs and improve the user experience at short notice.
We have just gone through an Inventory System change in our office and the Personnel Manager group have been very attentive to get a new system and API up and running for us so that we could do this change seamlessly. There are always teething problems in Technology, as this is the industry we work in ourselves, but the key is being able to adapt and update regularly when requested in a timely manner. The PM/CrewCard support team are lightning fast at this and take our requests for added functionality onboard and implement changes.
Crewing is a very important part of our day to day business in delivering Live Events to our Clients and we are very happy to be collaborating with Personnel Manager/CrewCard to ensure everyone makes it to their Shift on time!
Thank you, Tim.
Complete Workforce Management,
From Hire to Payroll

All-In-One Personnel Manager

LEGALLY SIGN UP DOZENS OF NEW HIRES DAILY
Keep a steady stream of new staff coming in with CrewCard. Applicants can onboard themselves or can be taken through the simple step-by-step process with the help of your recruiters, with legal compliance prioritised.
Automate scheduling and rostering
CrewCard offers advanced capabilities for rostering your staff. Effortlessly create and manage staff schedules and send Job Offers and Job Confirmations automatically based on staff ranking or proximity to the job site.
Save legal issues with smarter compliance
Our user-friendly platform simplifies the onboarding process, ensuring that all necessary compliance requirements are met seamlessly. With CrewCard, you can scale your workforce quickly and confidently, knowing that compliance is a top priority. CrewCard also blocks staff from working that have expired qualifications.
Seamless Payroll & Invoicing
Designed to simplify financial processes, our system automates payroll, tax compliance, and employee payments for accurate, efficient pay cycles. Integrated invoicing streamlines billing, supporting cash flow and transparency. With a user-friendly interface, compliance tools, and integration with Xero and MYOB, our platform centralises seamless, efficient financial management.
Staff Management Made Easy
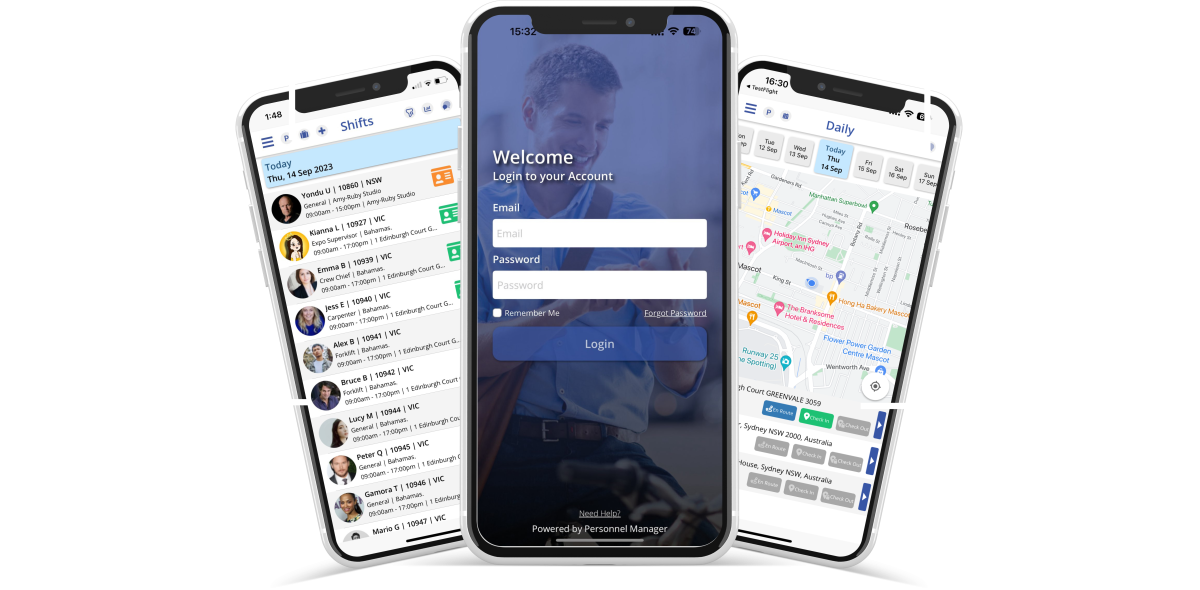
CrewCard is the complete workforce management platform for onboarding, staff scheduling, compliance, rostering, communications, inductions, payroll, timesheets, checklists, qualifications and more, to streamline your business operations and make the work of recruiters and operations managers as smooth and efficient as possible.
Complete Staff Management Solution
Effective Labour Management
CrewCard's admin portal and mobile app offer powerful connectivity to your entire workforce, anytime, anywhere, with essential tools for streamlined labor management.
Simple Onboarding
CrewCard simplifies the journey of applicants into employees, continually funnelling bulk new hires into your system while ensuring legal compliance. For recruiters using JobAdder, integration is now available.
Efficient Scheduling
CrewCard's advanced scheduling simplifies staff allocation and enhances workforce management while reducing the risk of hiring unqualified or non-compliant staff.
Precise Timesheet Management
CrewCard's timesheet software ensures precise time tracking, with GPS data, boosting the efficiency and accuracy of your payroll processing and minimising disputes.
Complete Compliance Solutions
CrewCard delivers comprehensive compliance management, helping businesses seamlessly meet industry regulations and standards.
Effortless STP Payroll
CrewCard guarantees accurate and timely payroll processing, including Single Touch Payroll (STP) compliance for ATO-approved tax regulations.
Job-Saving Notifications


Transform Your Workforce Management
Spend less time performing mundane office tasks and more time growing your business or simply enjoying your life.
Stress Reduction

Less Stress, More Success with CrewCard
Let go of stress and embrace peace of mind. CrewCard simplifies your workload.
Business Growth

Fuel Your Business Dreams with CrewCard
Don’t be buried in admin work. CrewCard frees you to focus on driving your business forward.
Less Admin Work

Ditch the Admin Overload with CrewCard
Say hello to fewer administrative tasks and more time for what you love.
Efficient Workflow

Streamline Your Workflow with CrewCard
From chaos to cohesion. CrewCard ensures your team’s efficiency and productivity.
Hassle-Free Management

Simplify Management with CrewCard
Manage your business with ease and confidence. CrewCard is your secret to hassle-free management.
Compliance Solutions

Master Compliance with CrewCard
Navigate complex regulations effortlessly. CrewCard is your compliance ally.
Industries

Technical Services

Any Company

Event Management

Audio Visual

Logistics

Delivery

Labour Hire

Employment Agencies

Education

Construction

Warehousing

Careers and Nursing

Cafes and Clubs

Retail Outlets

Security

Hospitality and Events

Best Labour Hire Software Since 2006
While CrewCard (and its predecessor Personnel Manager) serves as a versatile solution for any company looking to streamline their staffing and HR operations, it excels as the top choice in workforce management software for labour hire companies.
Download InsightsTestimonials