Recruit staff for your job bookings. You can setup requirements, inductions, and other pre-requisites for recruitment before accepting a crew.
The recruitment settings are divided into:
10.4.1 Recruit General Settings
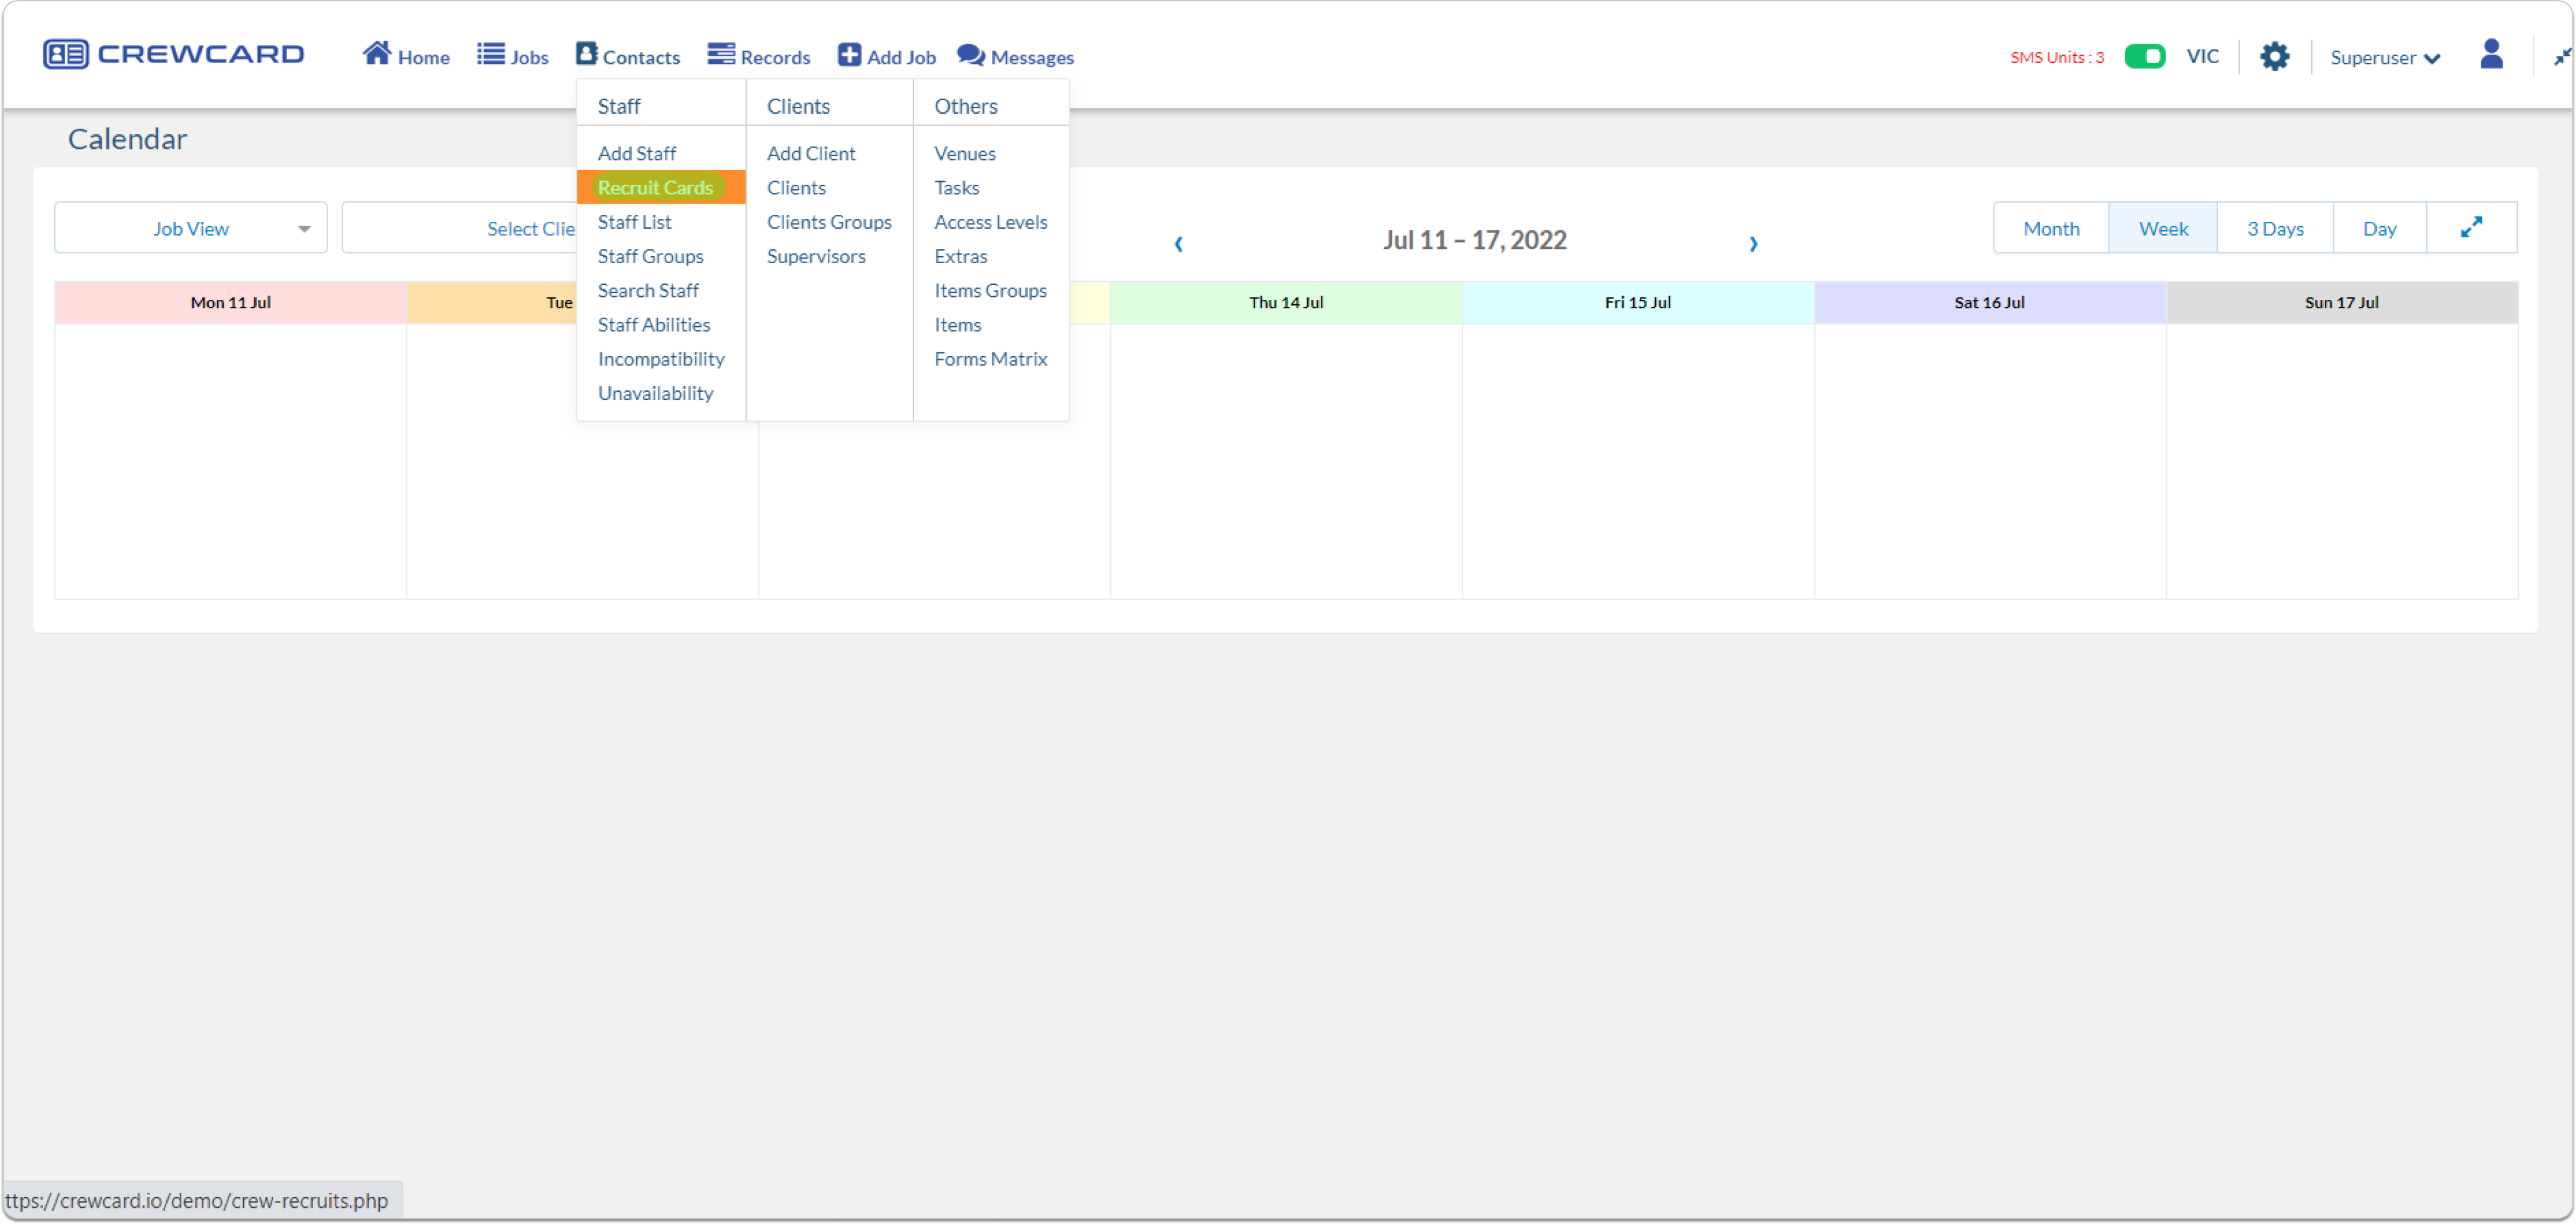
1. Enable Recruits Page Menu: This will enable the Recruit Cards page via Contacts > Recruit Cards.
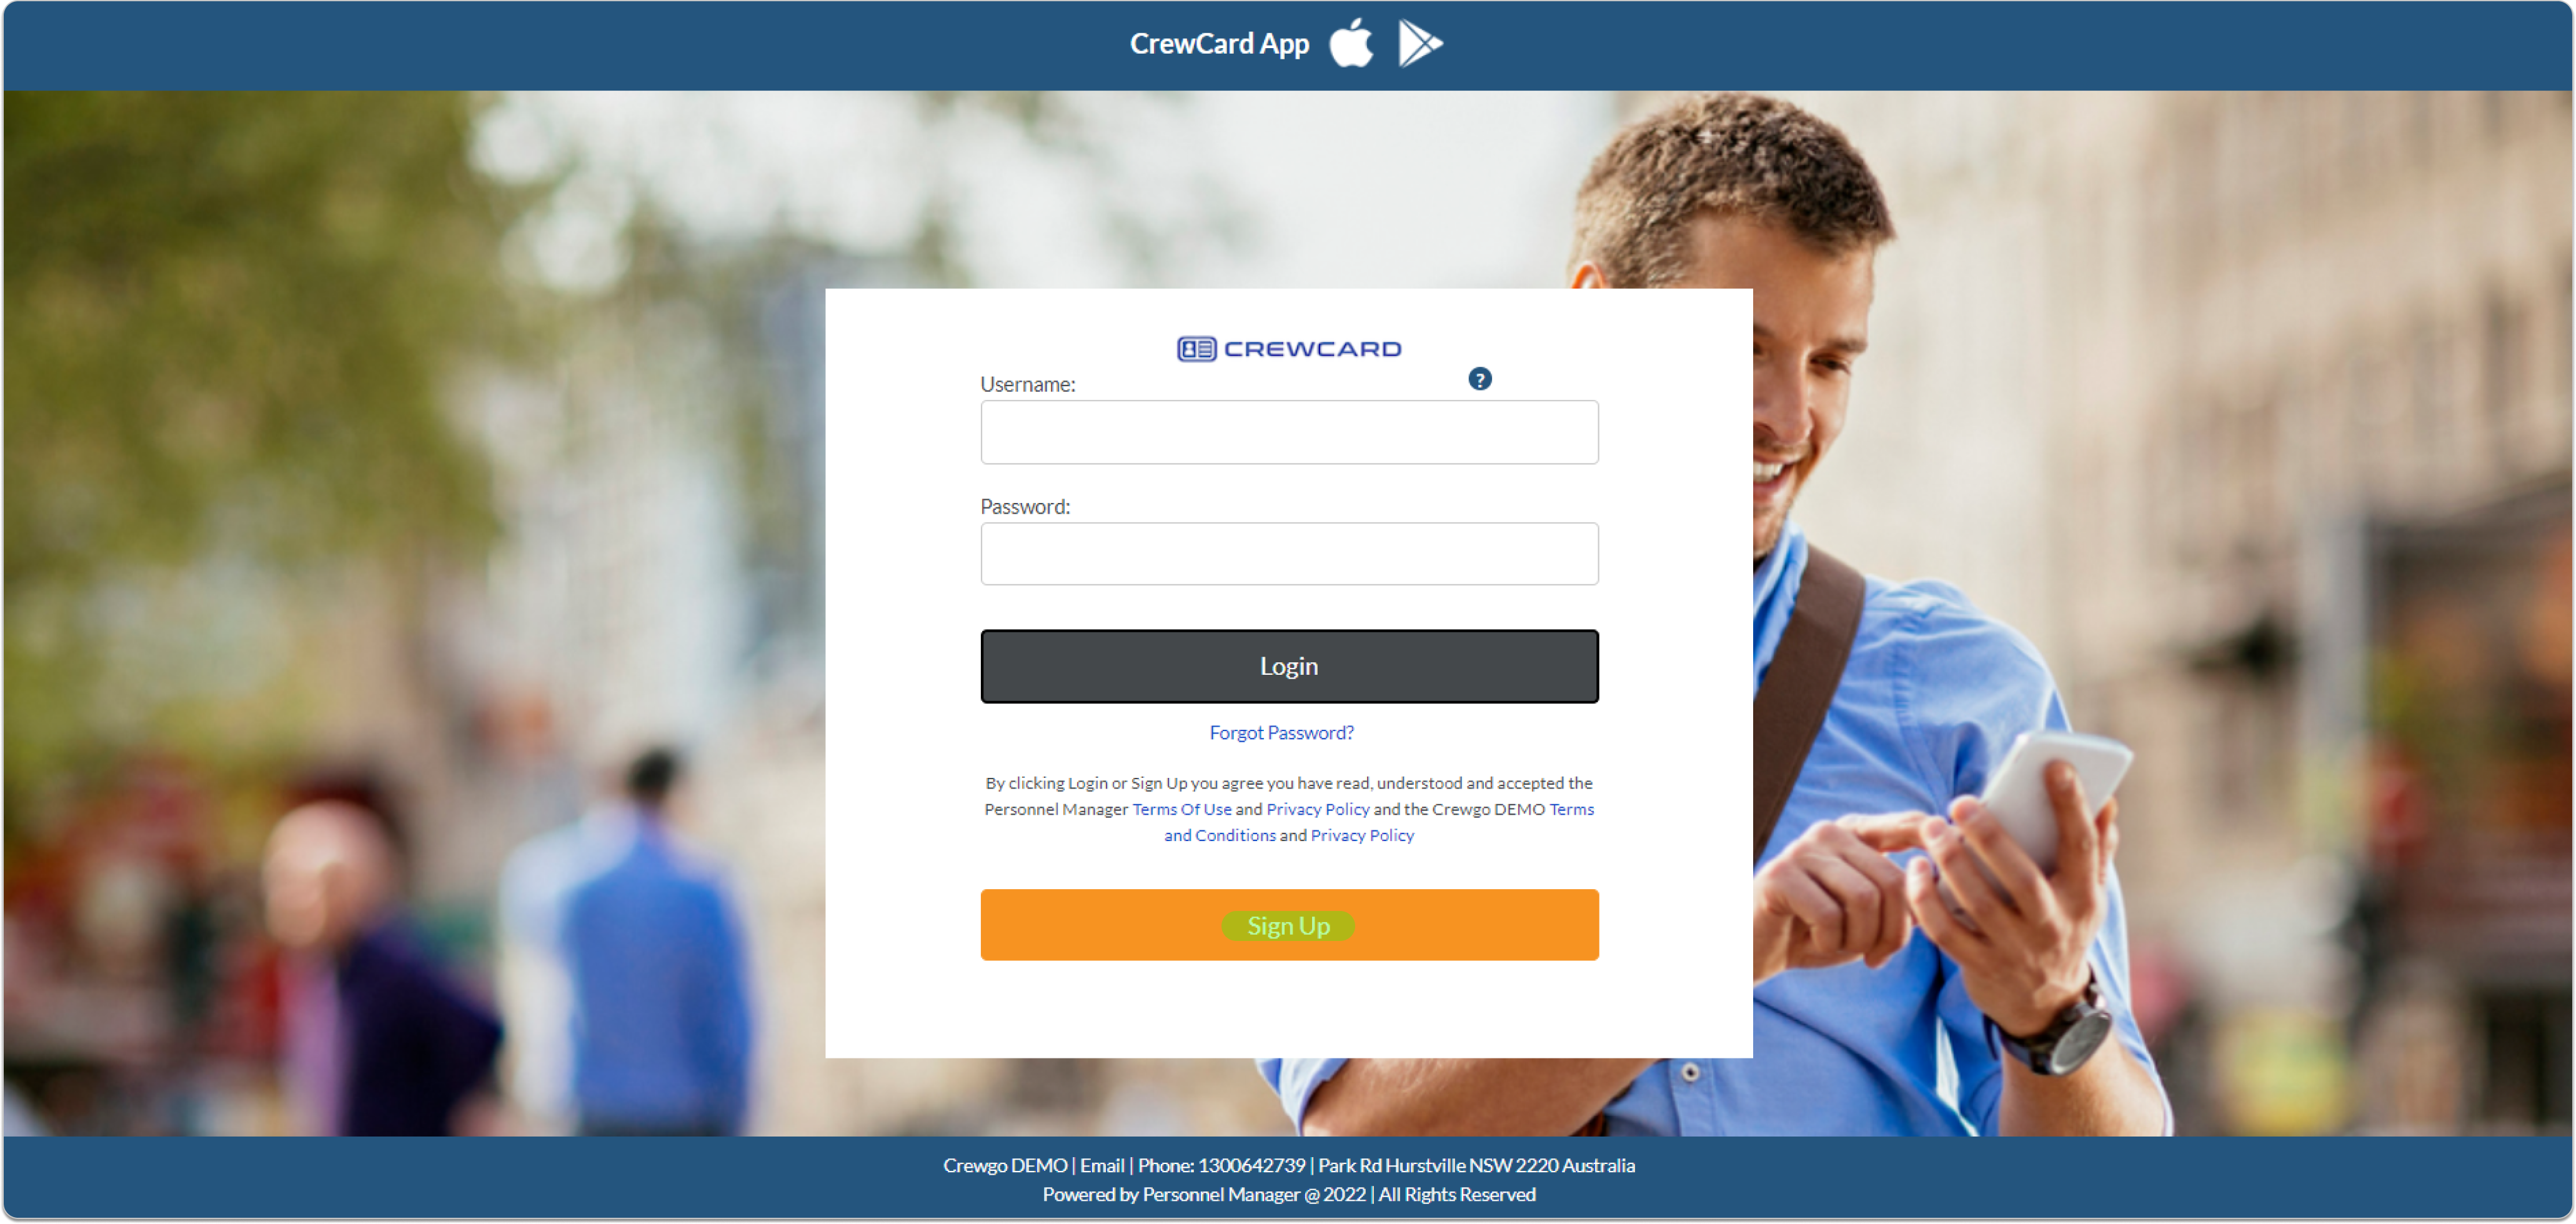
2. Display Recruits Sign Up on Login Page: This will show the Sign-Up option on the System Login Page that directs recruits to the Sign-Up page.
3. Recruit Access: From the dropdown menu, pick either Manual or Auto invite
Manual Invite – Applicant can either registered themselves from the Sign-Up page or been enrolled by a recruiter, once they have done that, they will be invited by the recruiter via an email with a once-only access token to open their Recruit Details page and continue the process of onboarding themselves as recruits.
Auto Invite – The Auto Invite option bypasses the step of Recruiters manually inviting recruits to set their password, fill in their personal details, qualifications, experience, medical history, agreements, contract, induction and accounts so that once an applicant has registered on the Sign-Up page, they can progress to the next steps without the need for an email invitation
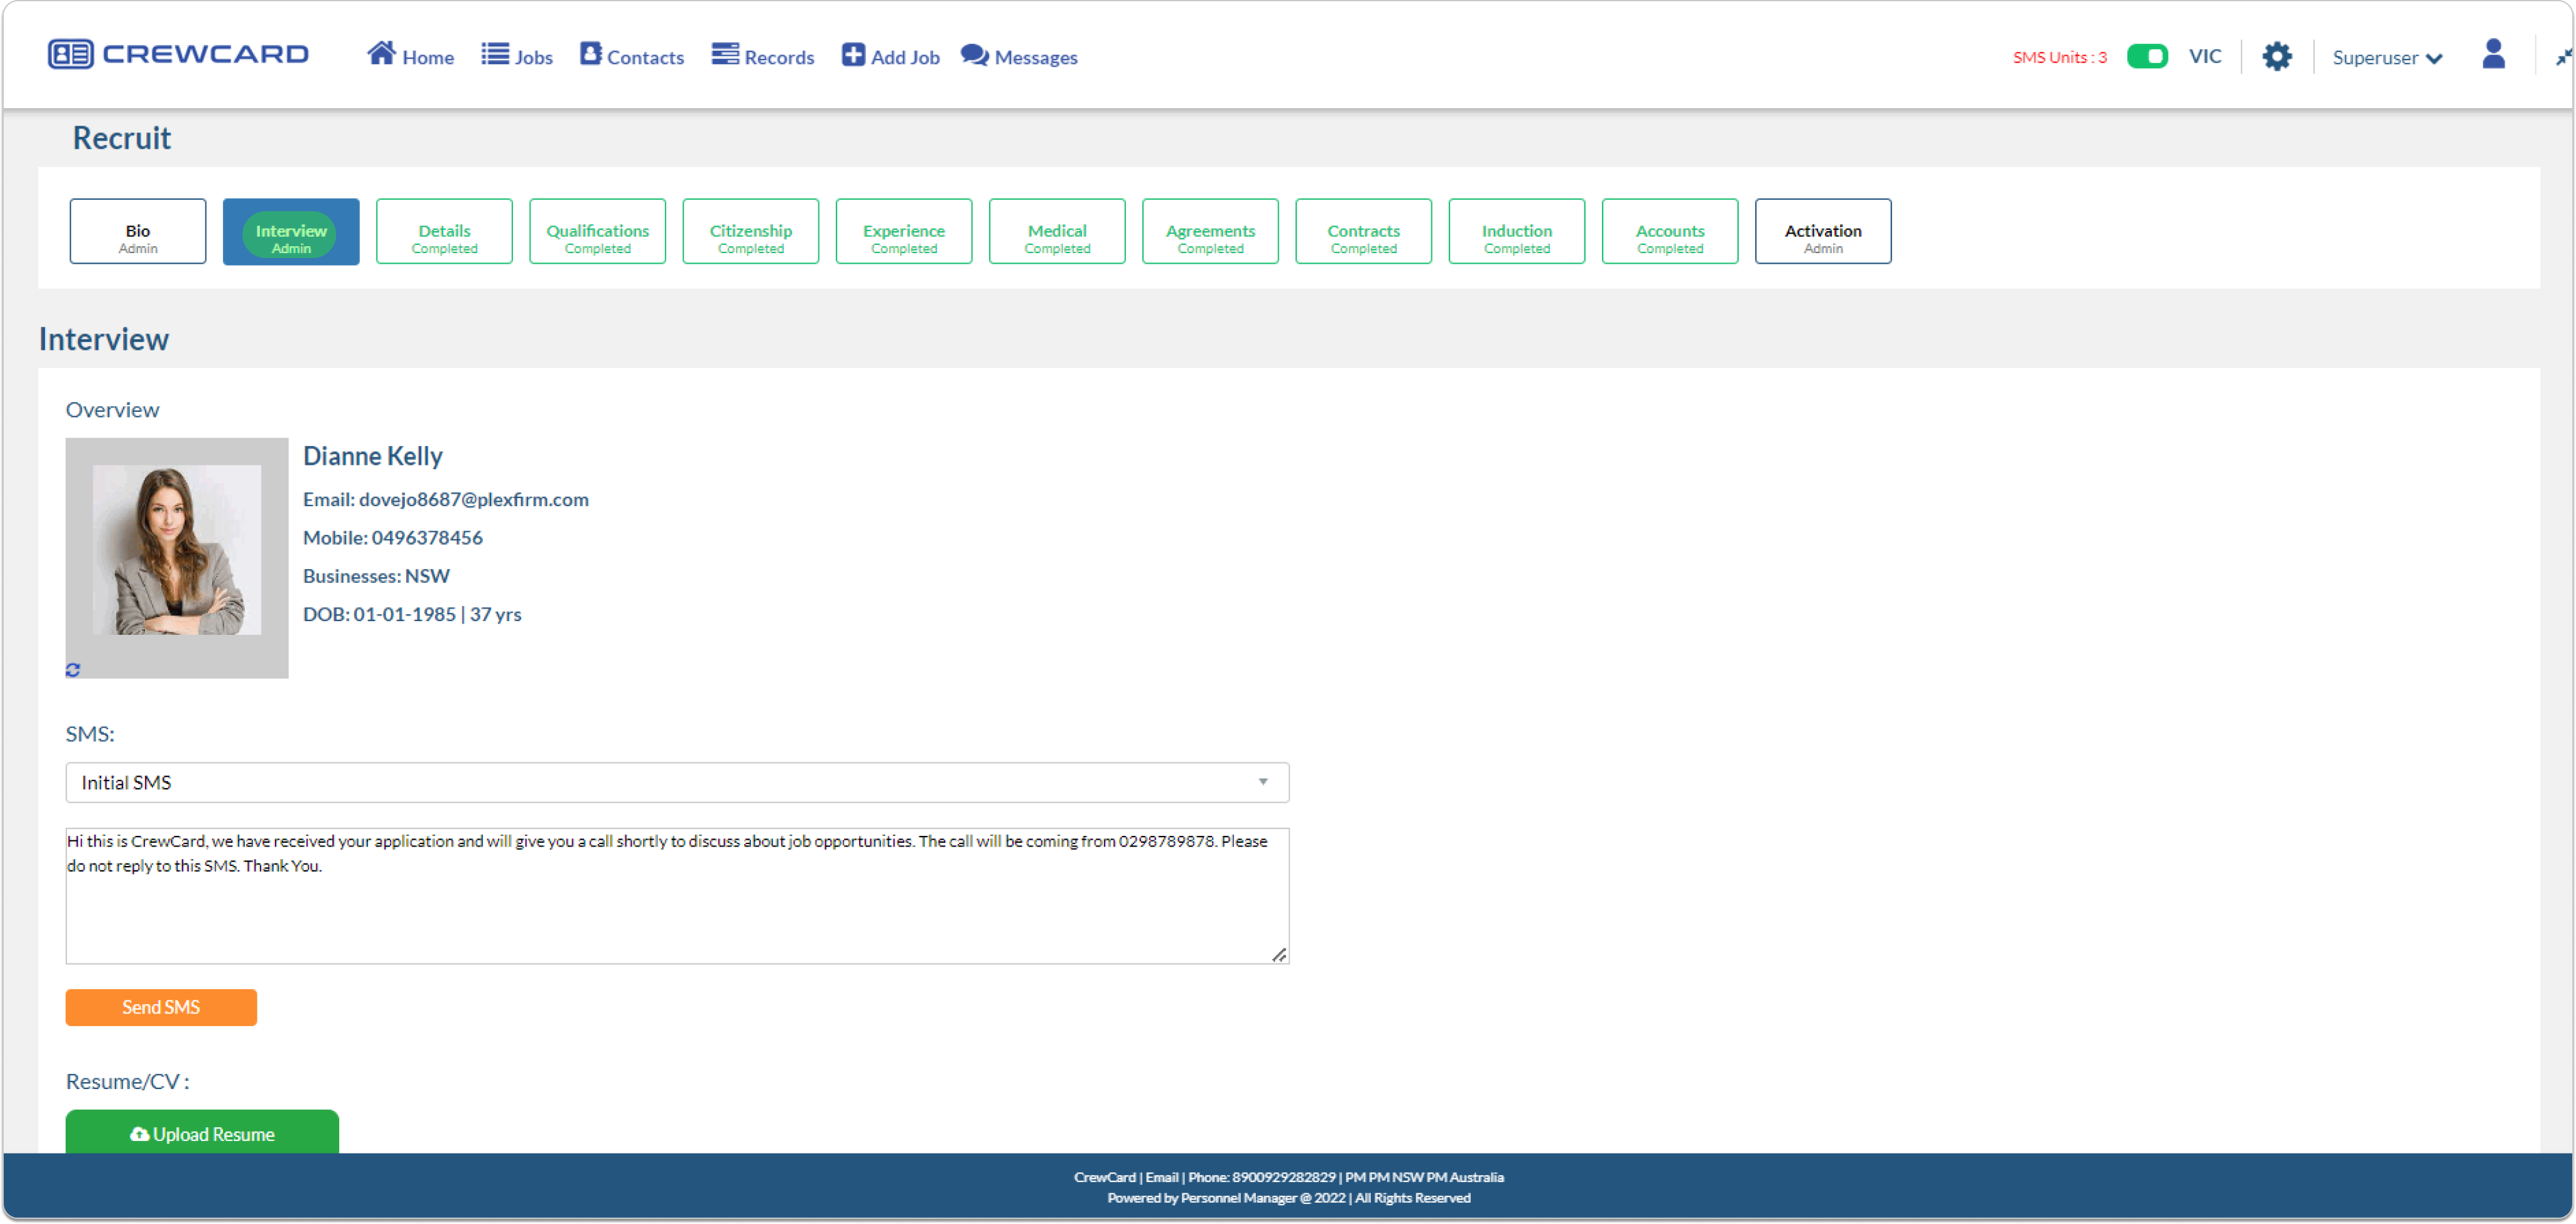
4. Interview:
Enable Interview
This will enable the Interview Tab for both Admin and Duty Manager.
5. Recruit Activation Email Send to Crew
When admin activated a recruit via Recruit Cards or Activation tab, the recruit will receive an email notification (Recruit Activation Email)
10.4.2: Crew Portal Profile Page
Tick box the following tabs that will be shown on the recruitment header.
Interview – Details – Qualifications –Experience – Medical – Citizenship –Agreements – Contracts– inductions– Accounts
This will also mean the recruits will need to fill out the information.
6. Details: Enable Details Page
7. Qualifications: Enable Qualifications Page
8. Experience: Enable Experience Page
9. Medical: Enable Medical Page
10. Citizenship: Enable Citizenship Page
11. Agreements: Enable Agreements Page
12. Contracts: Enable Contracts Page
13. Inductions: Enable Induction Page
14. Accounts: Enable Accounts Page
10.4.3 Sign up page
15. Hide business selection on sign up page: When user signs up, they do have to select what business. (This is helpful if there is only one business). Enable Business in the Sign up>> Job Seeker Sign up>> Business Location
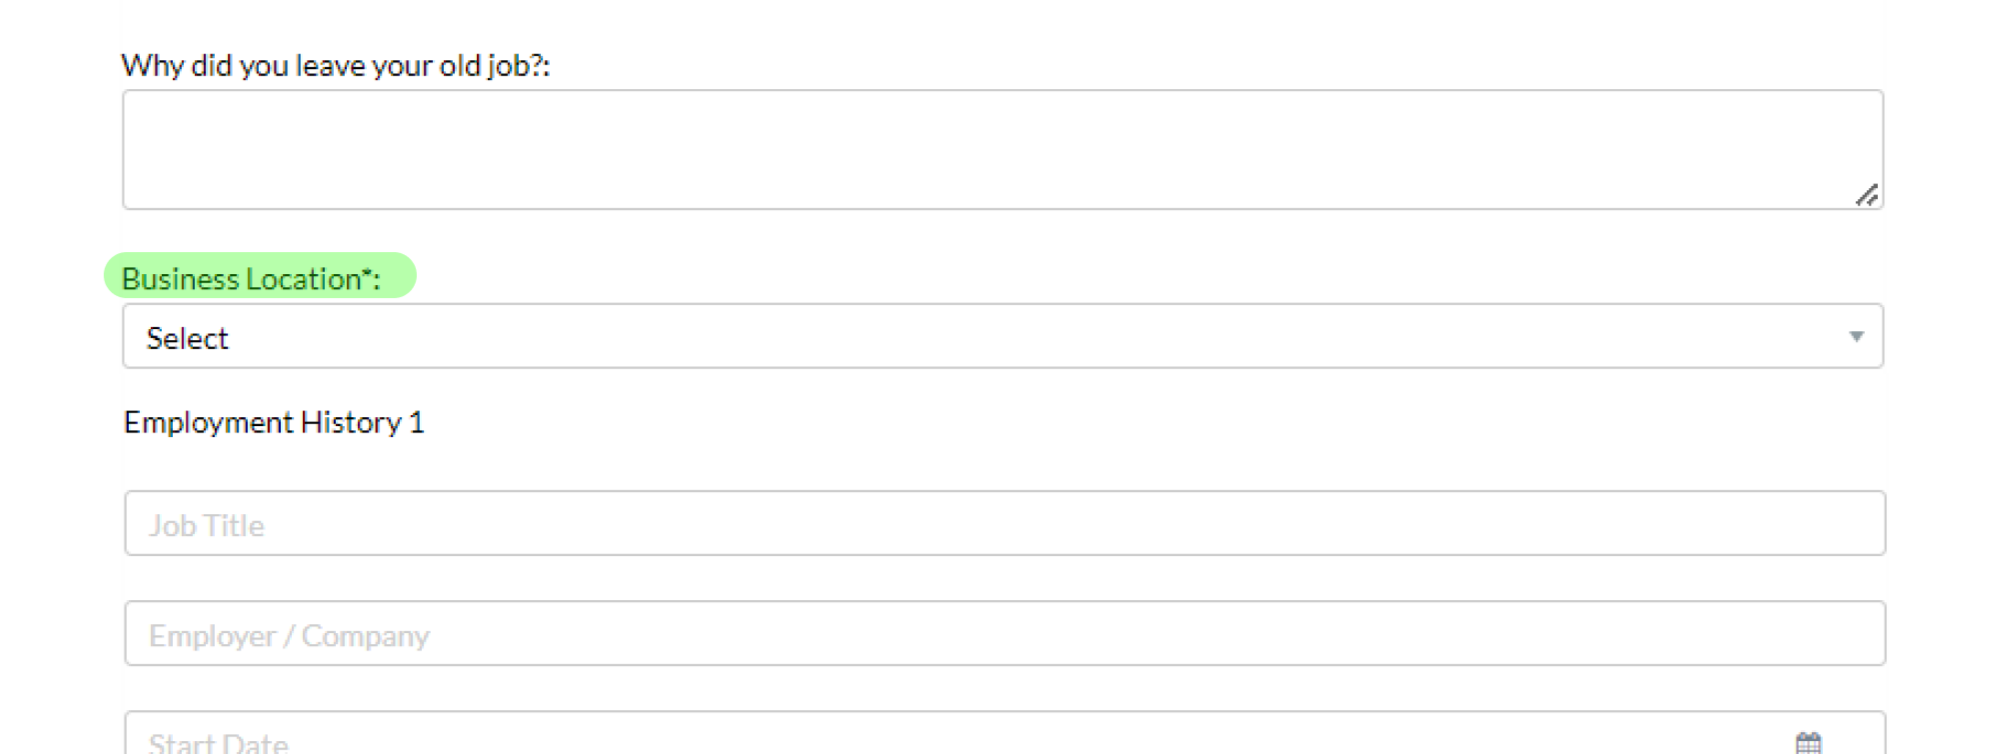
16. Business Label: Relabel Business in the Sign up>> Job Seeker Sign up>> Business Location
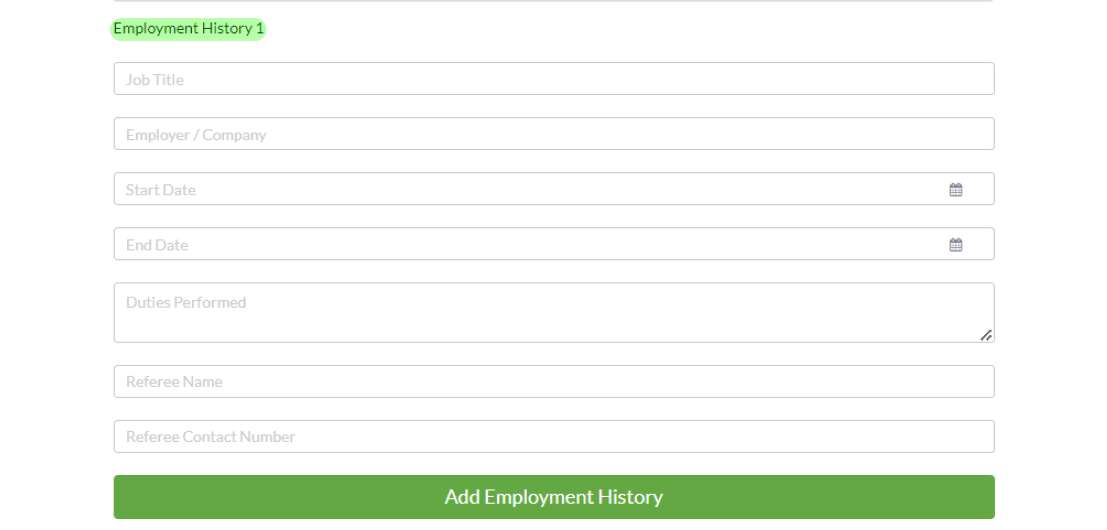
17. Display employment history section on sign up: Sign up>> Job Seeker Sign up>> Employment History
18. Allow UK mobile number: The system defaults to accept 10 digits for Australian mobile numbers. Enable this setting to accept 11 digits for UK mobile numbers.
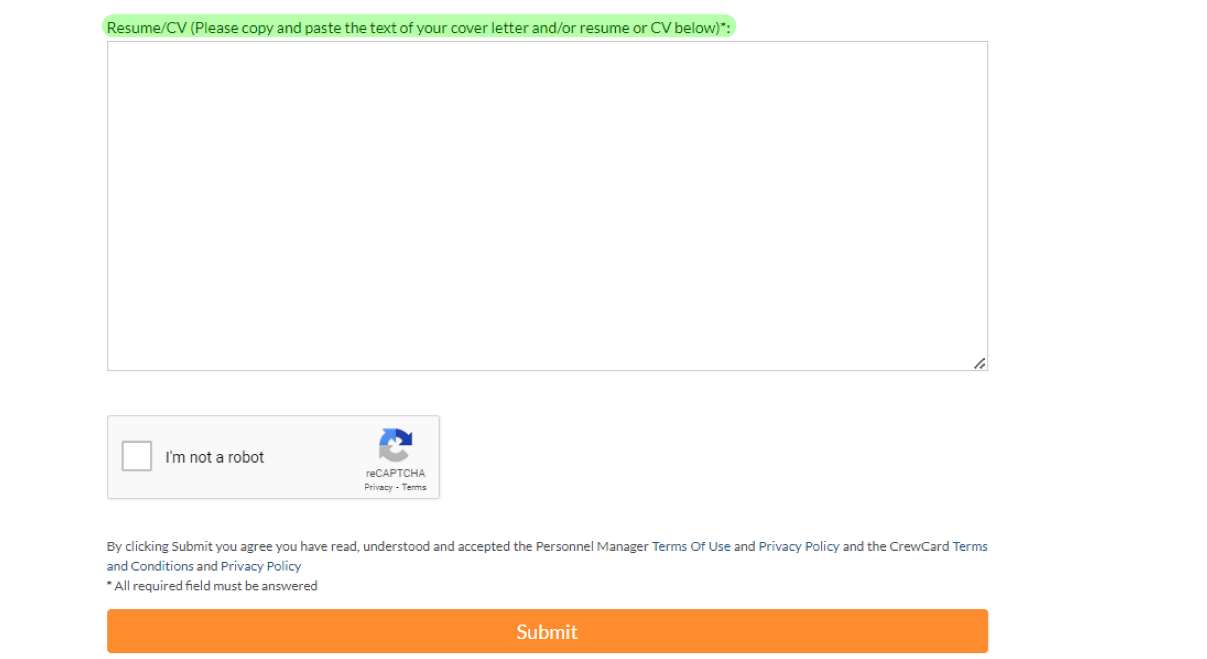
19. Resume: Select how you would like recruits to upload (upload it in a textbox or as an attachment).
Resume Textbox style:
Resume Attachment style: 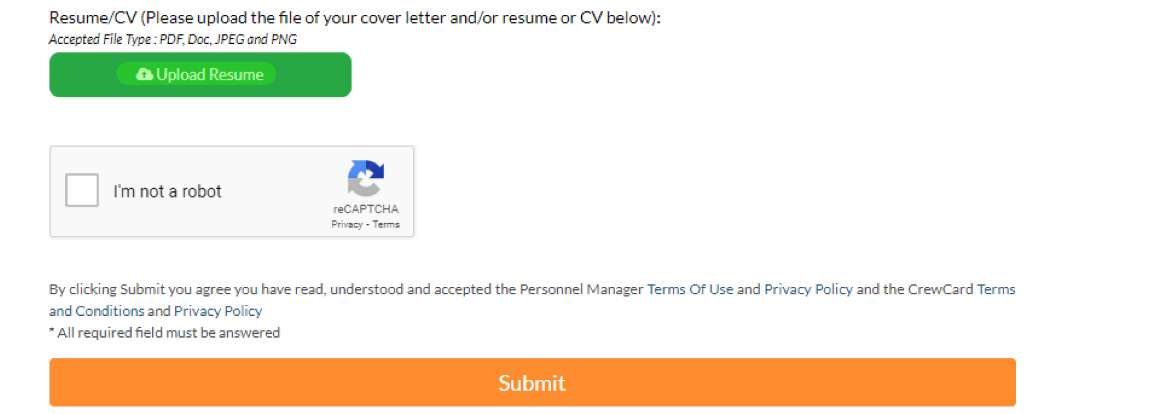
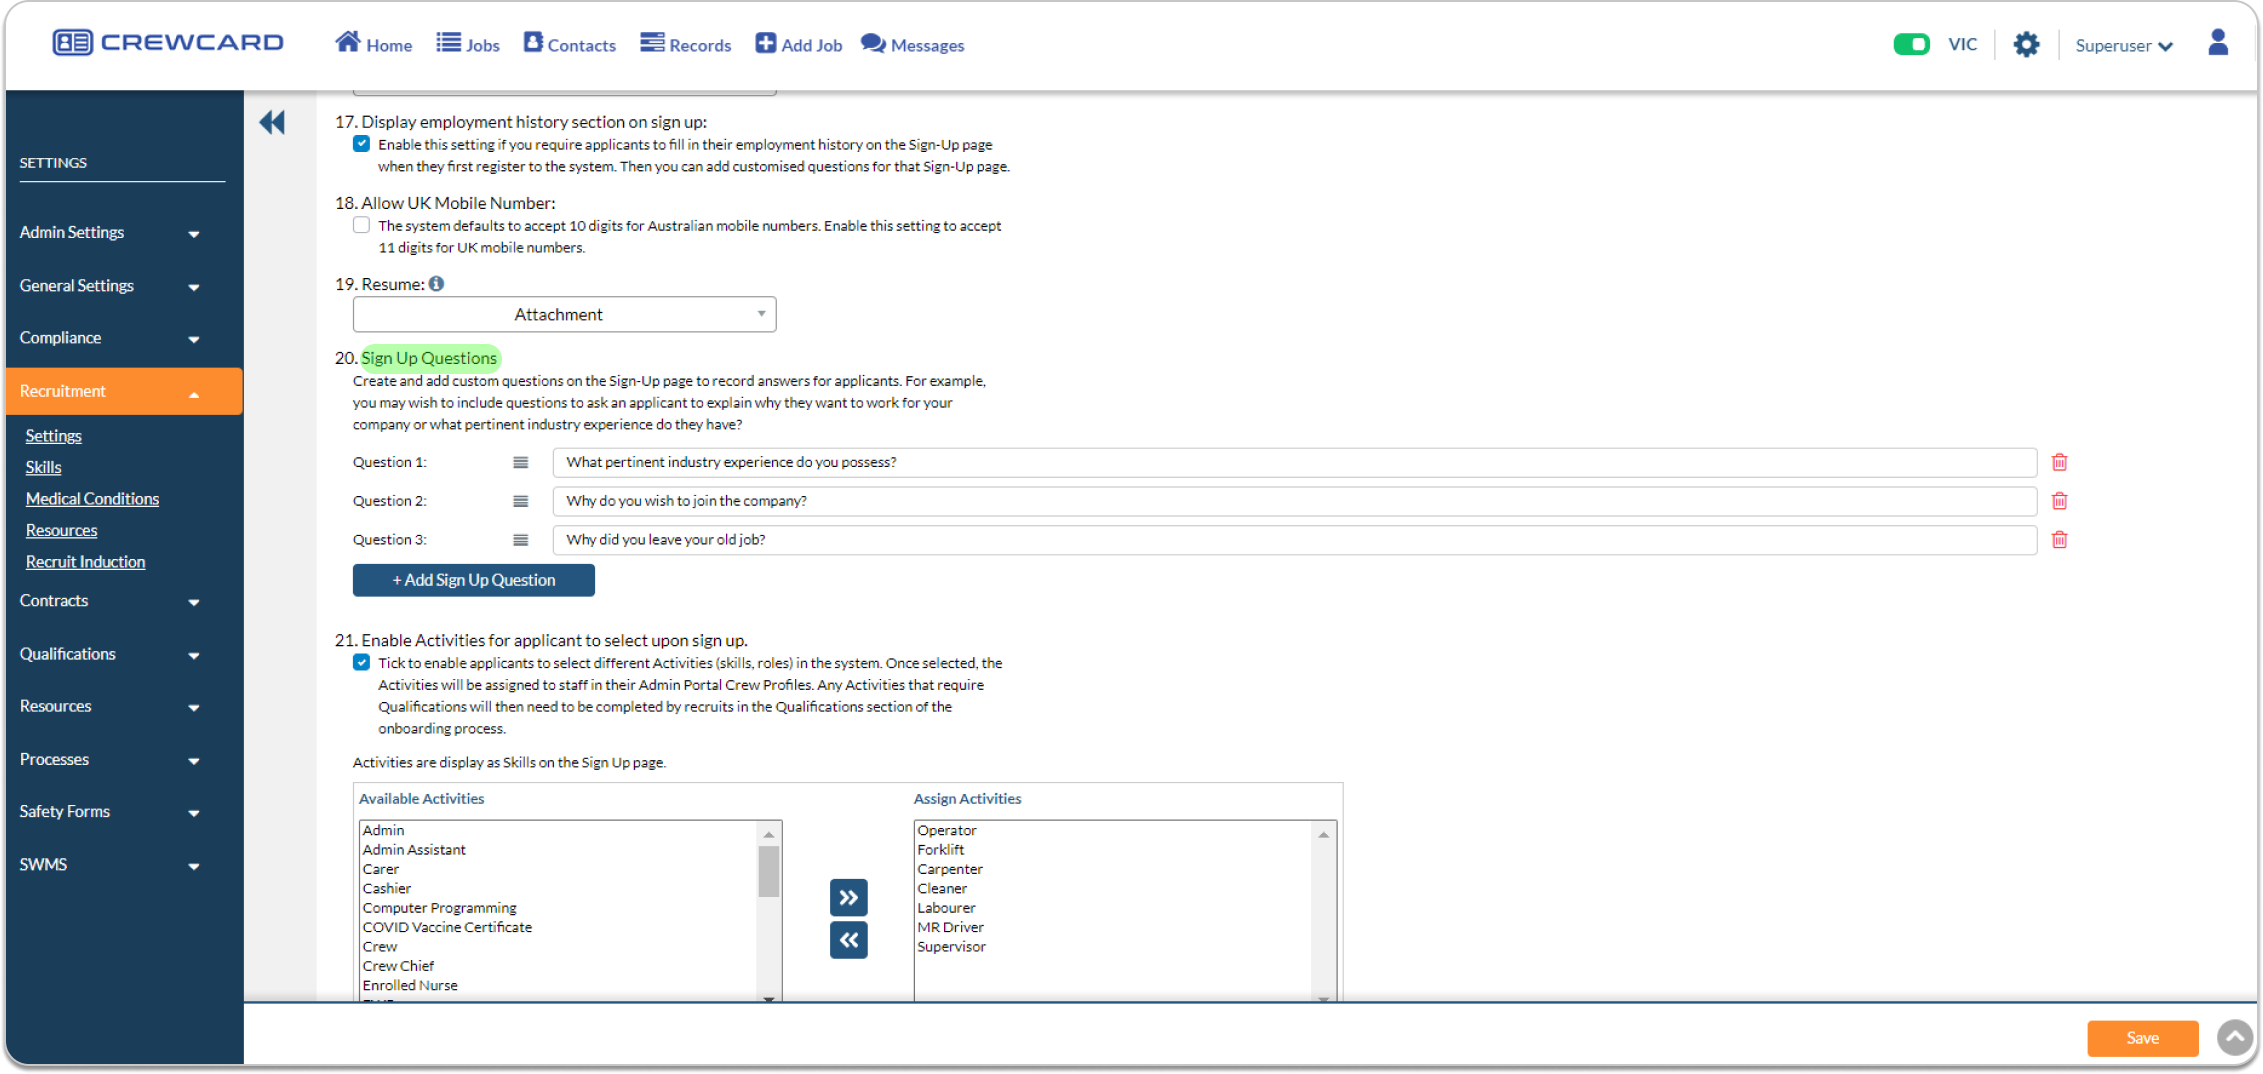
20. Sign Up Questions: Create and add custom questions on the Sign-Up page to record answers for applicants.
Same as interview but when a recruit first signs up, you can add questions that they can fill in themselves.
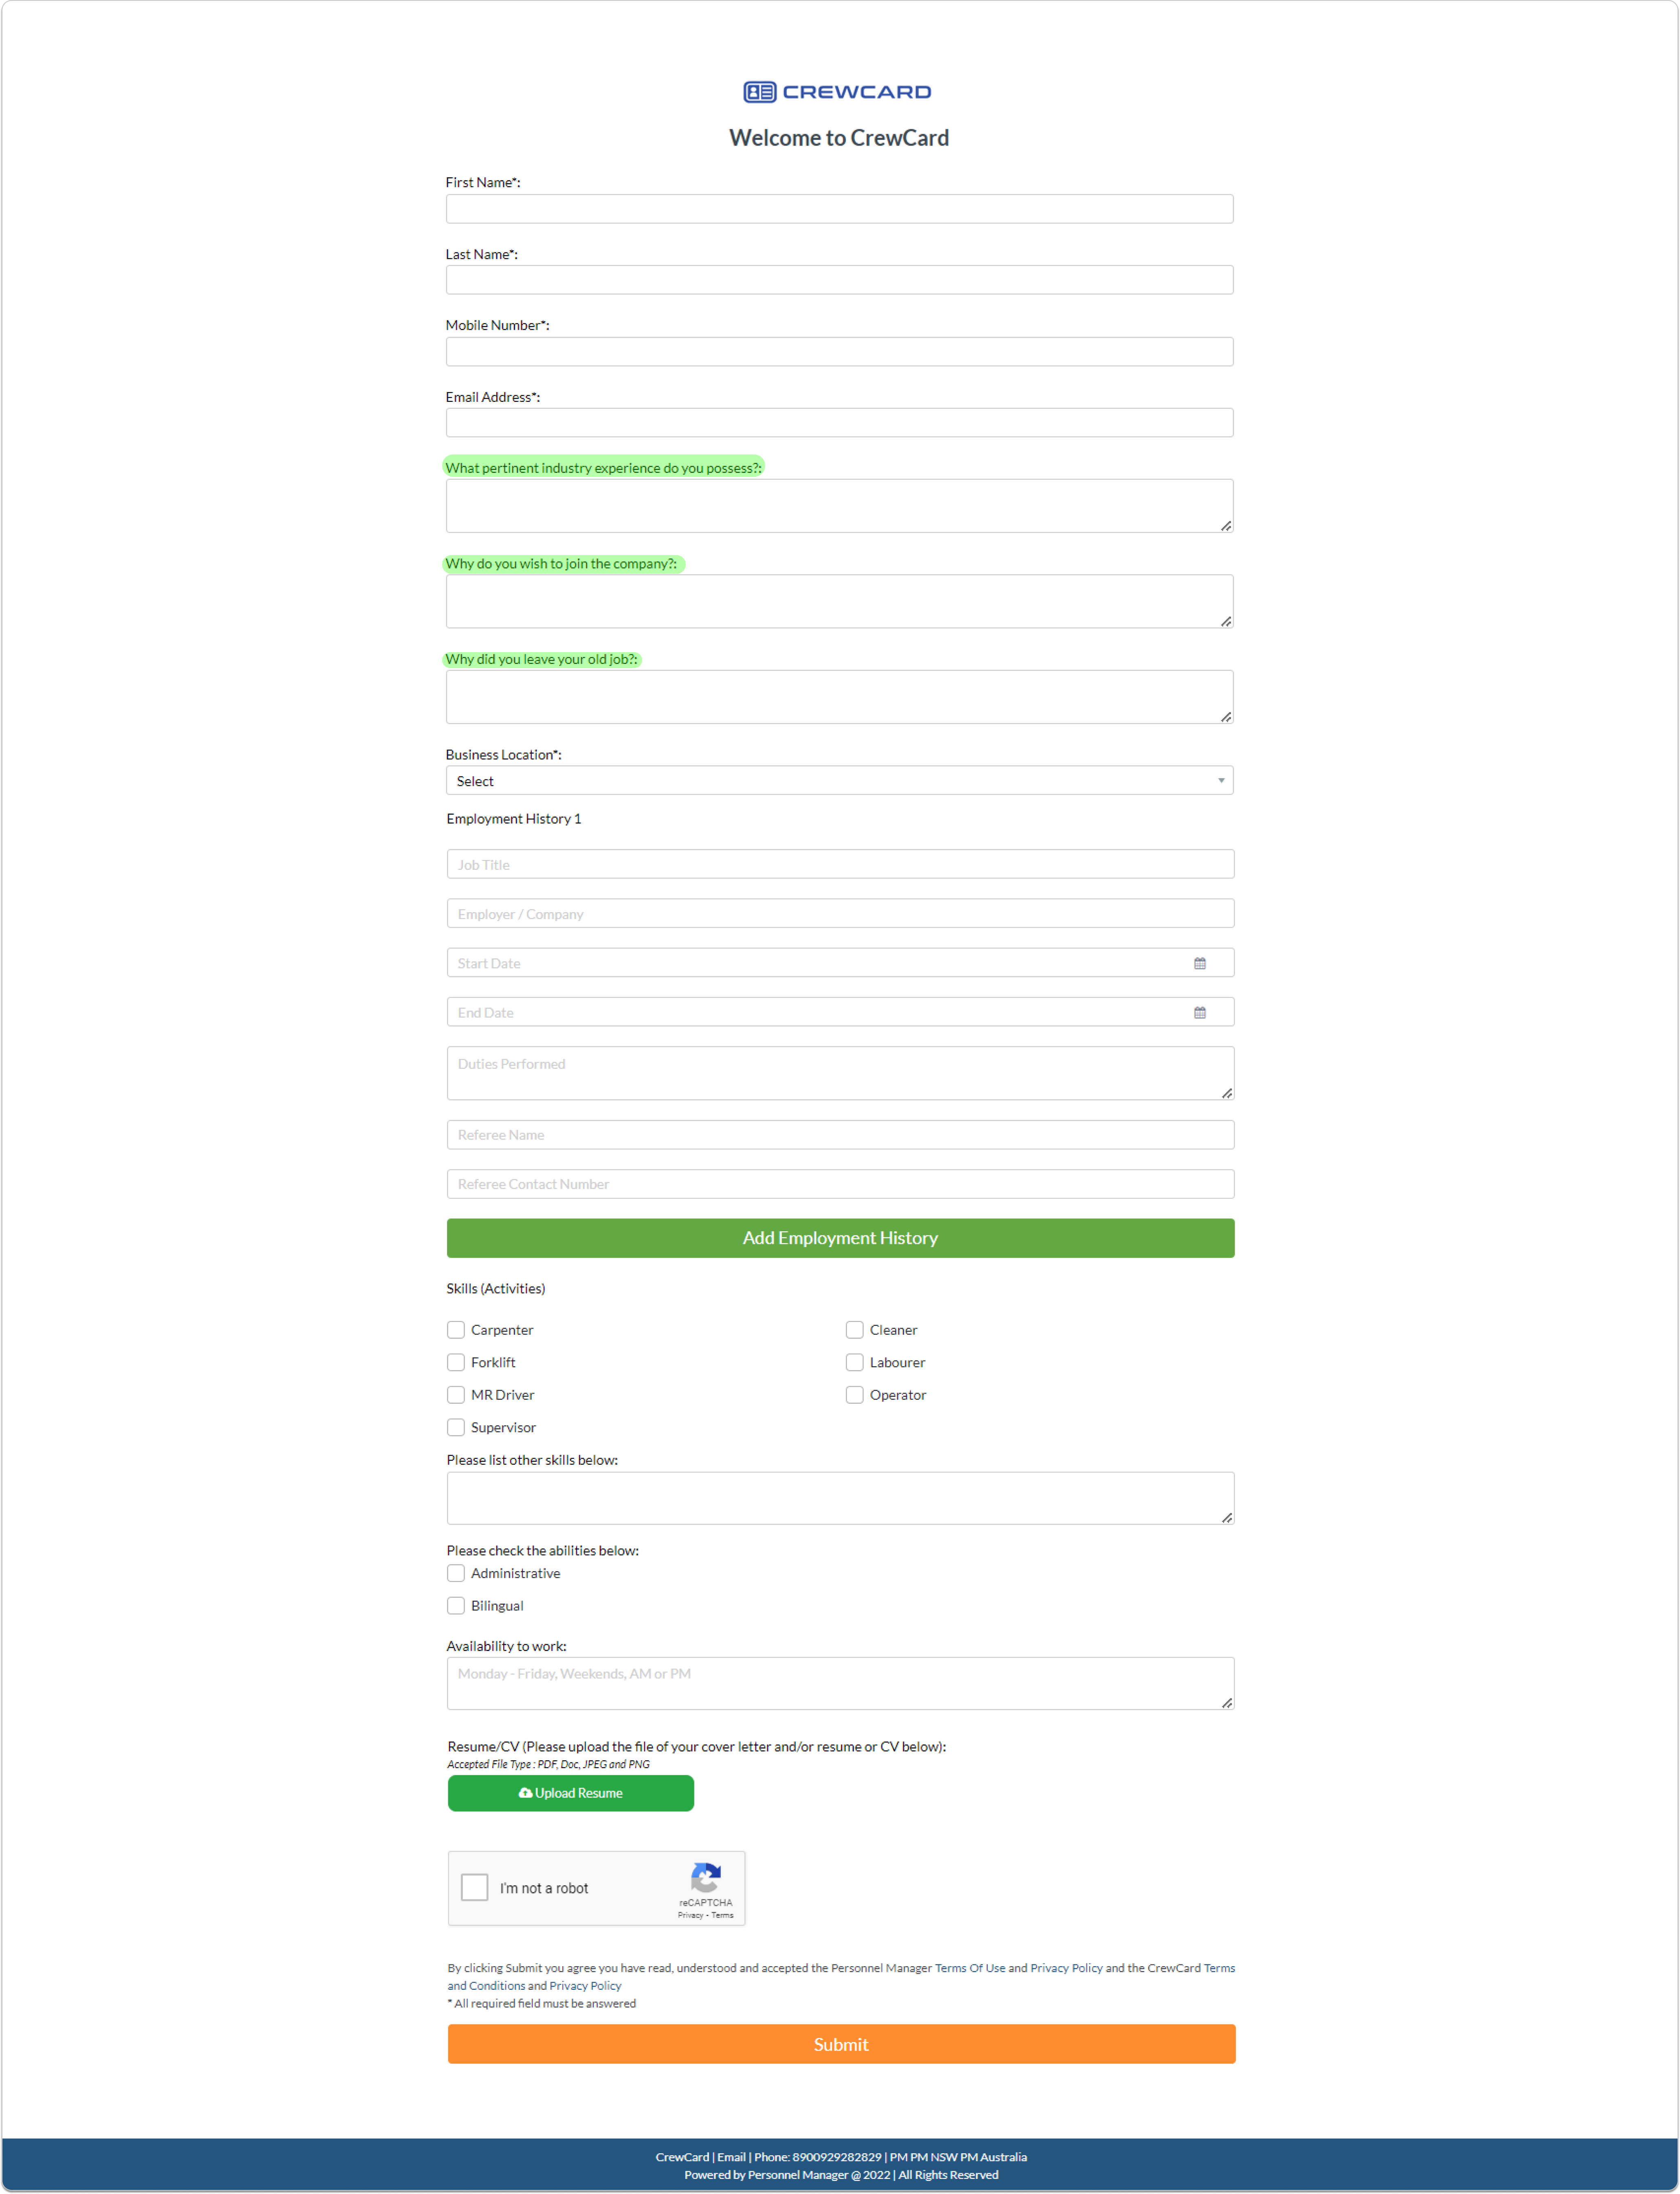
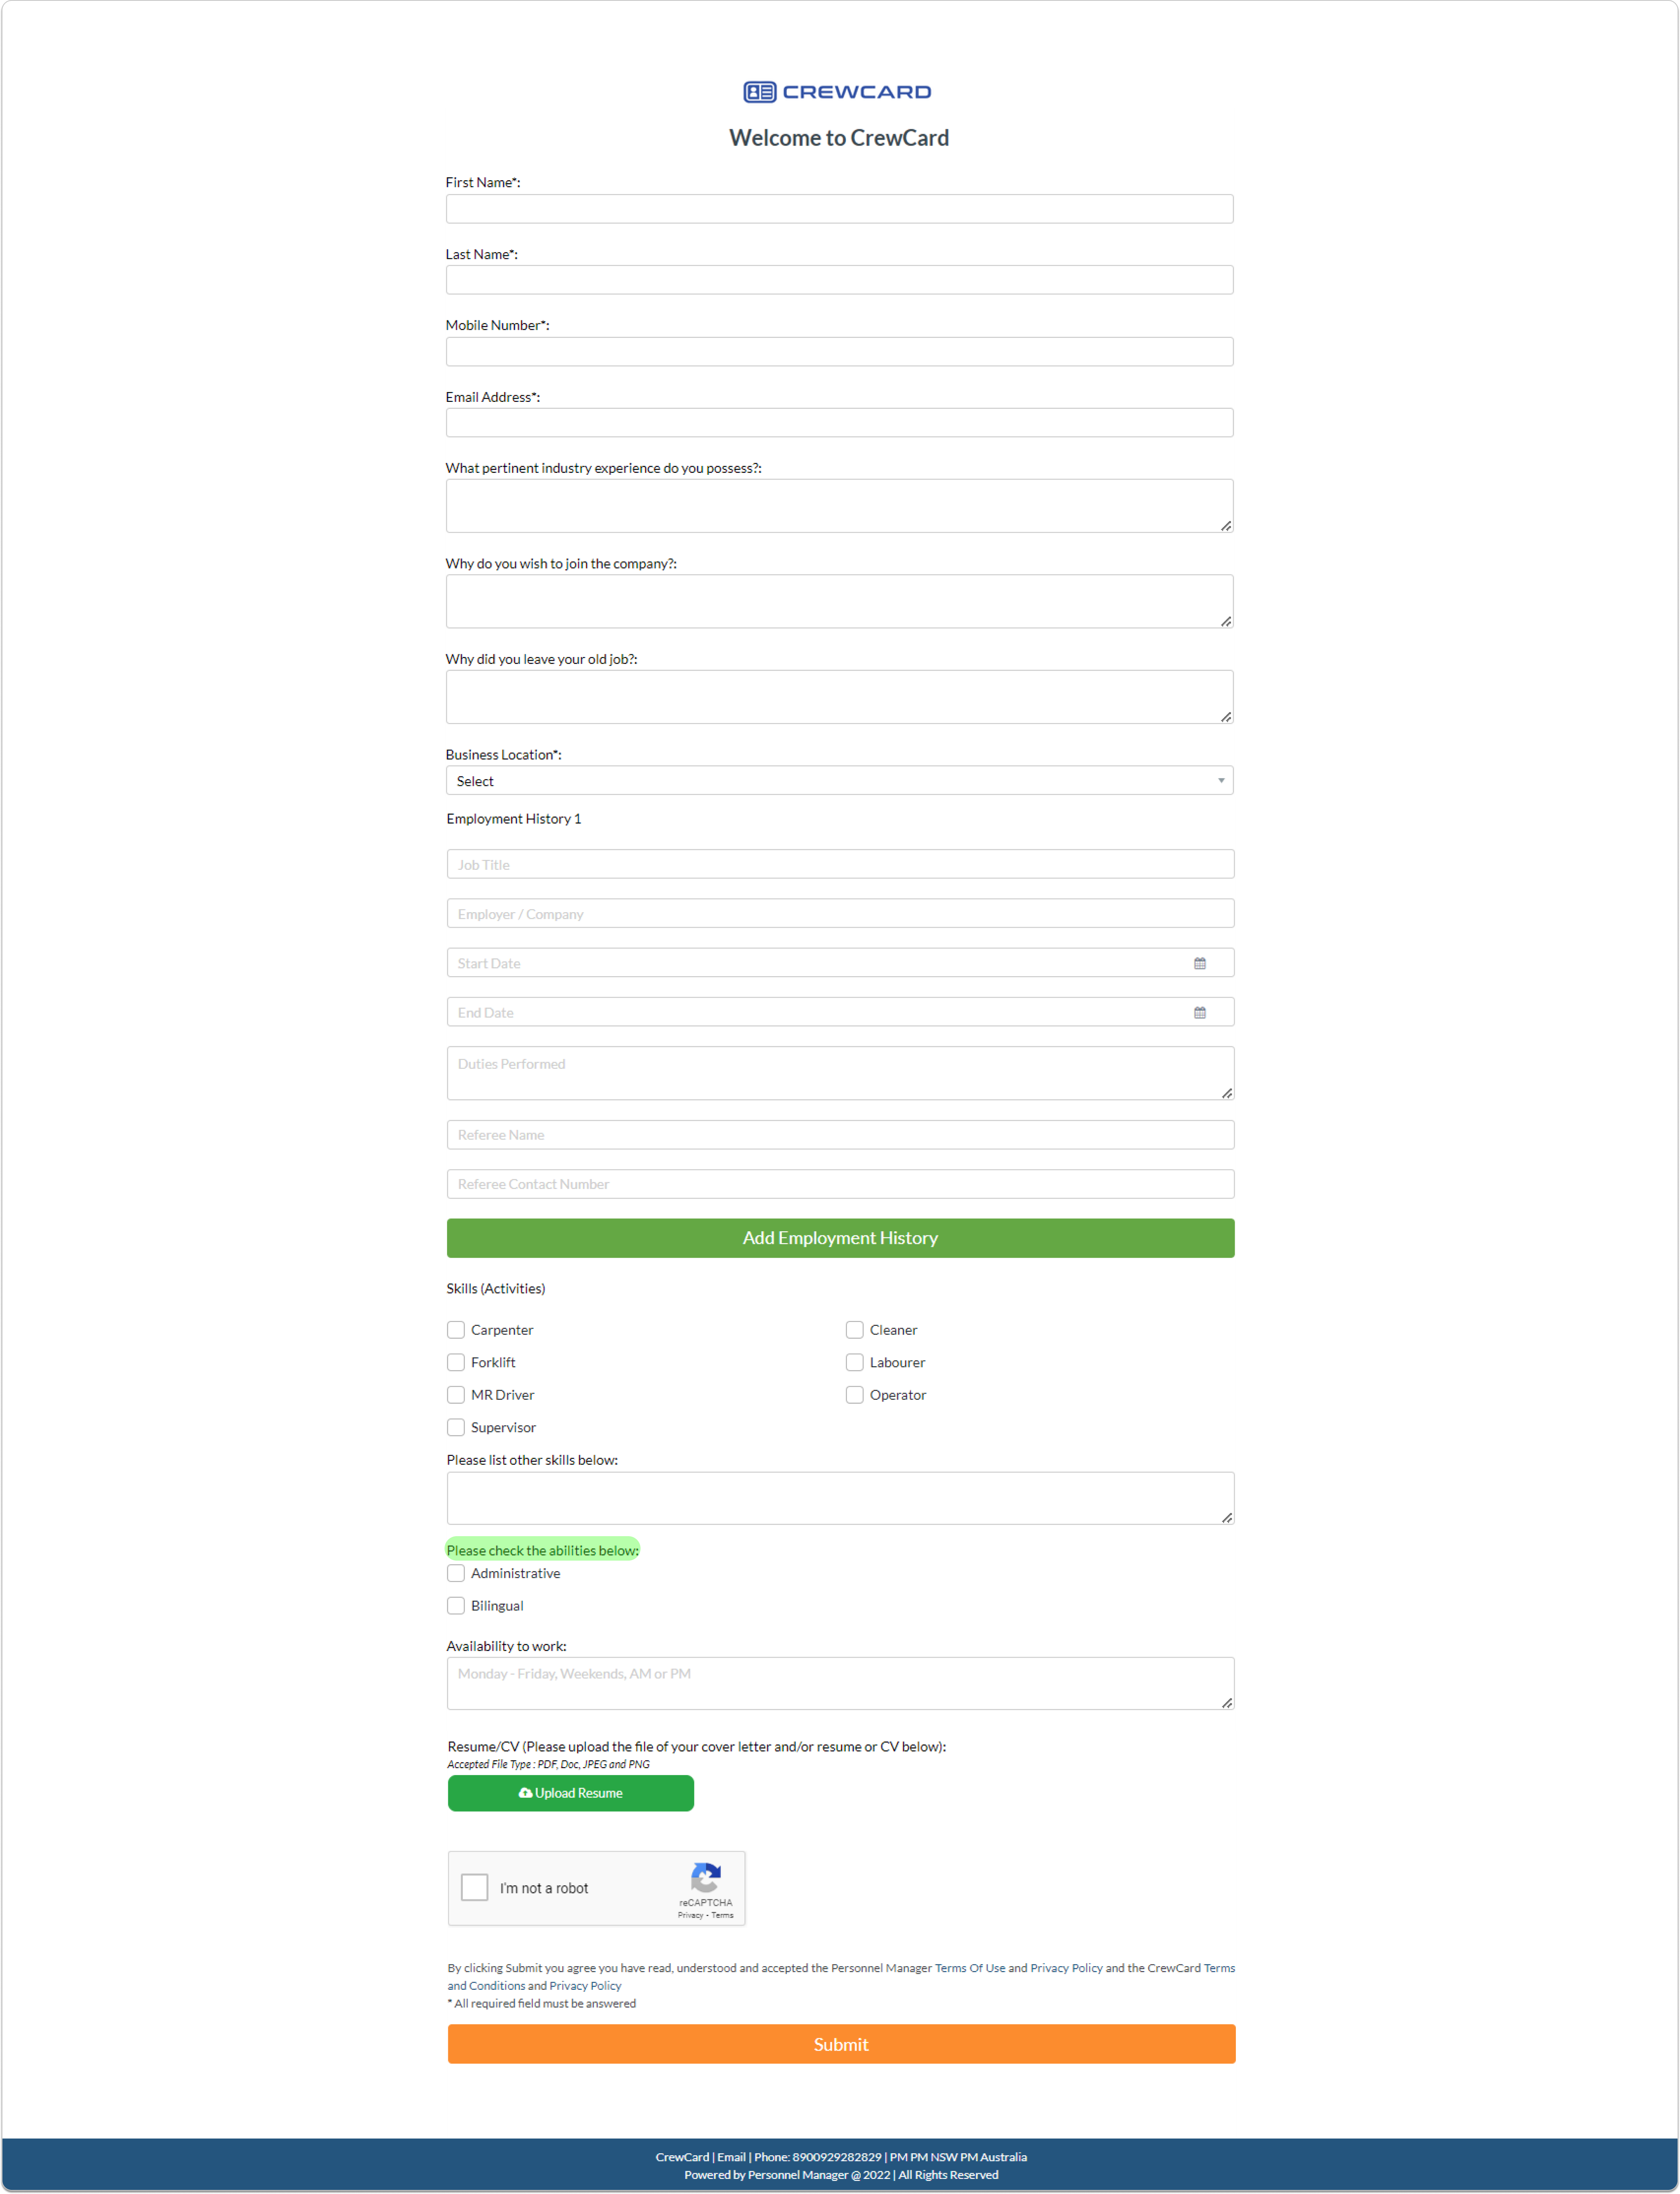
What applicants will see:
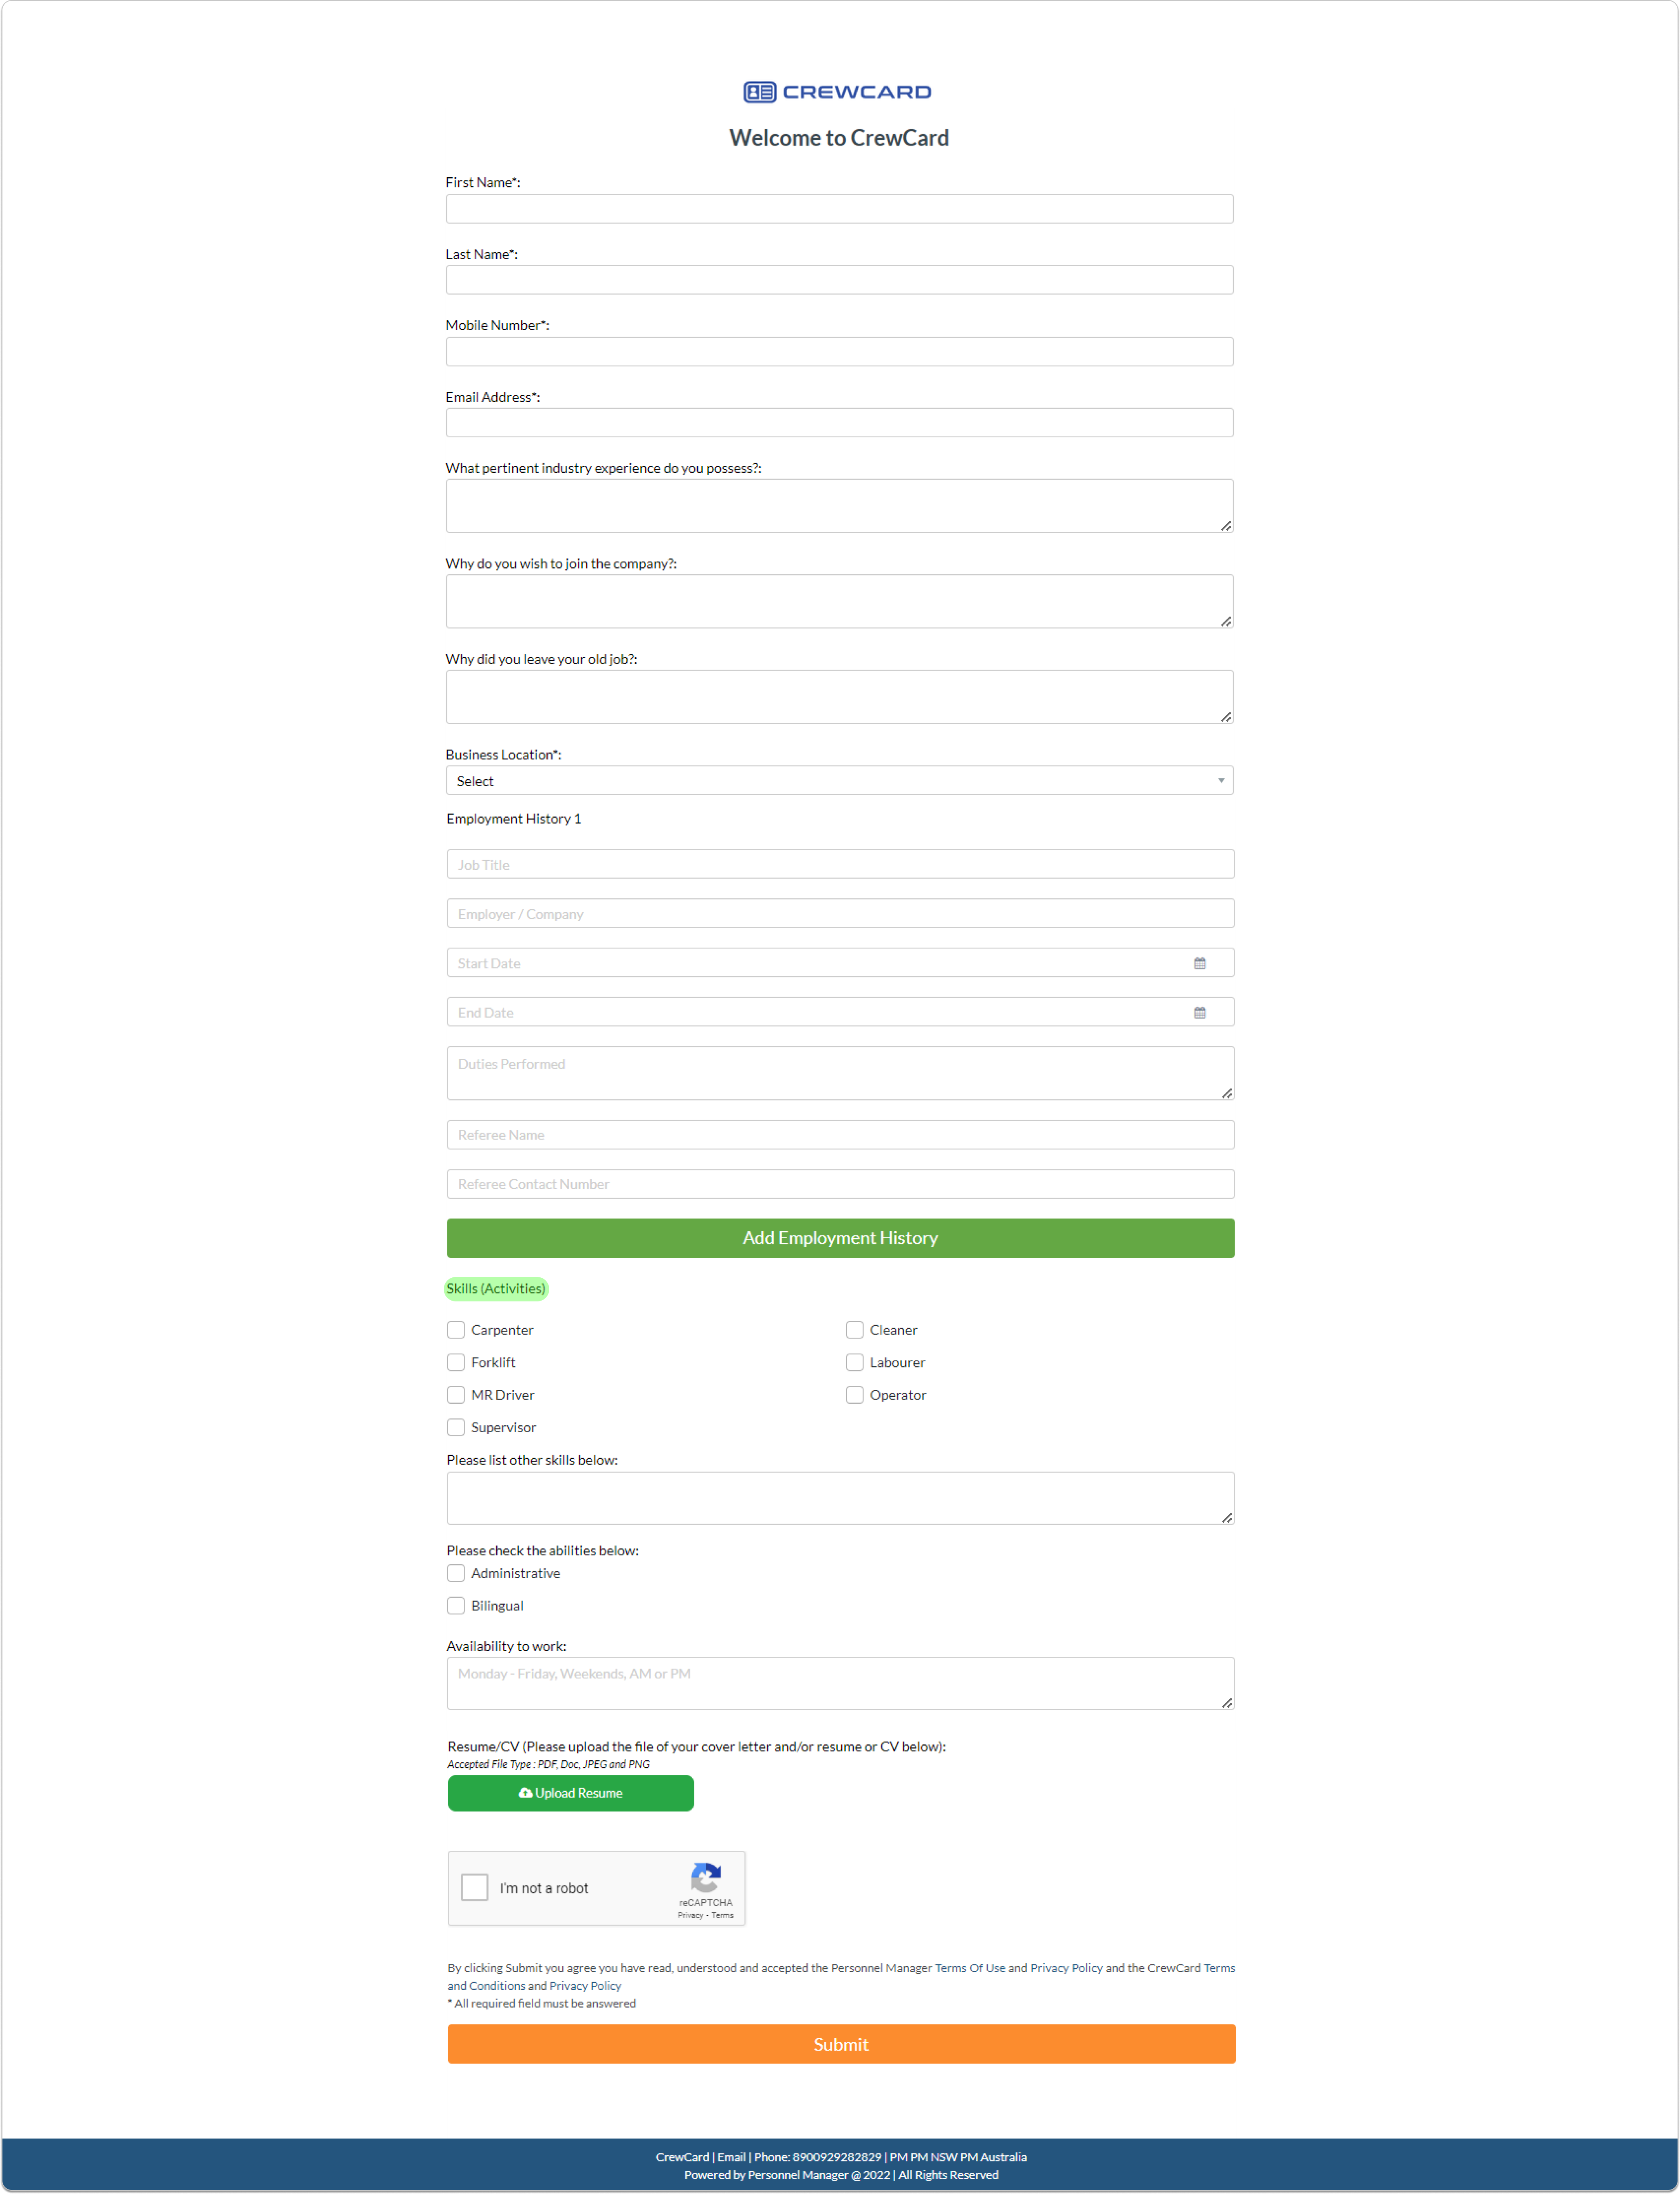
21. Enable Skills/Activities for applicant to select upon sign up : Enable applicants to select different Activities(Skills and roles) in the Sign up>> Job Seeker Sign up>> Skills (Activities).
Fill the following SMS:
You can add more titles if needed.
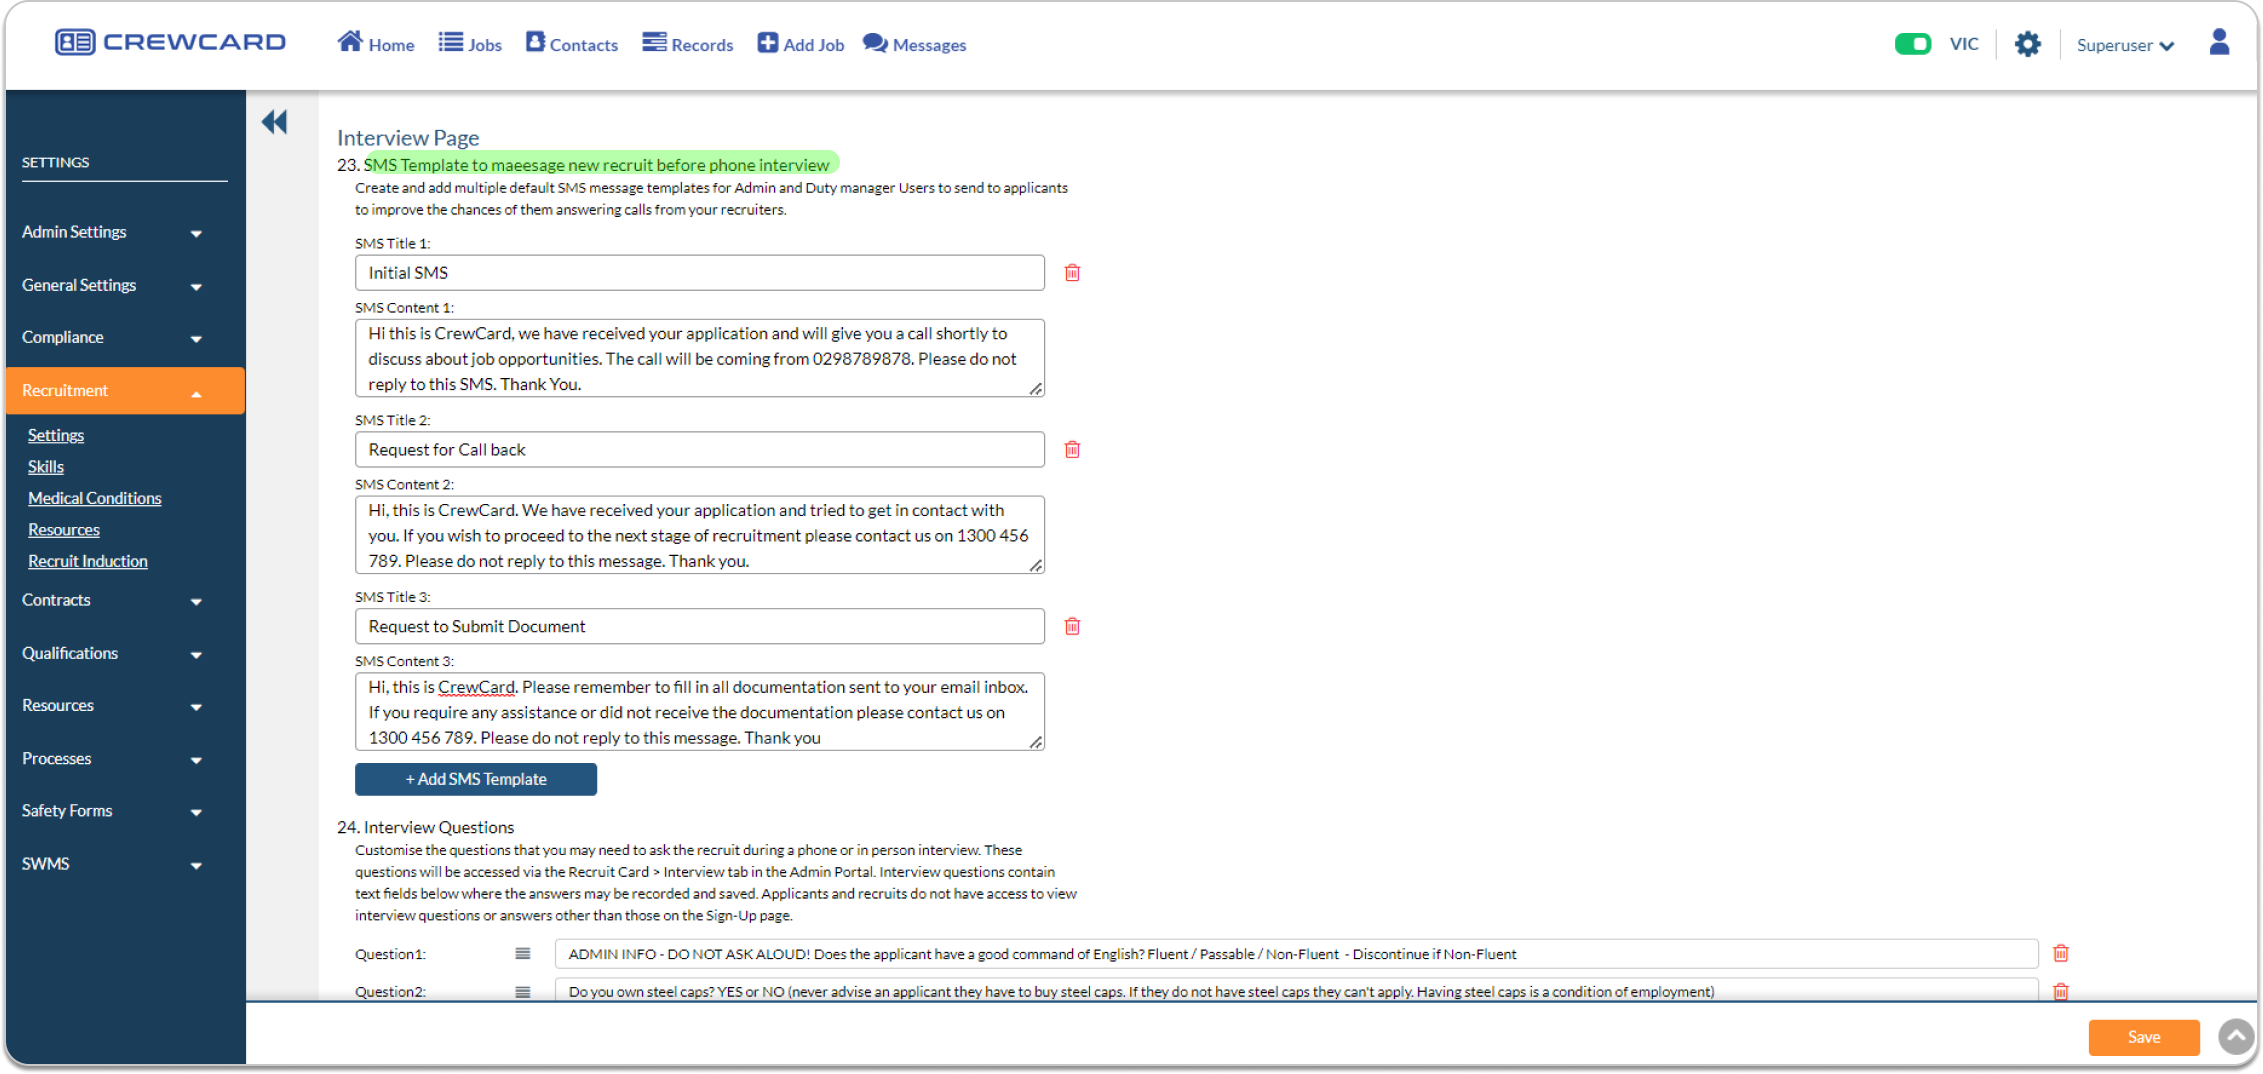
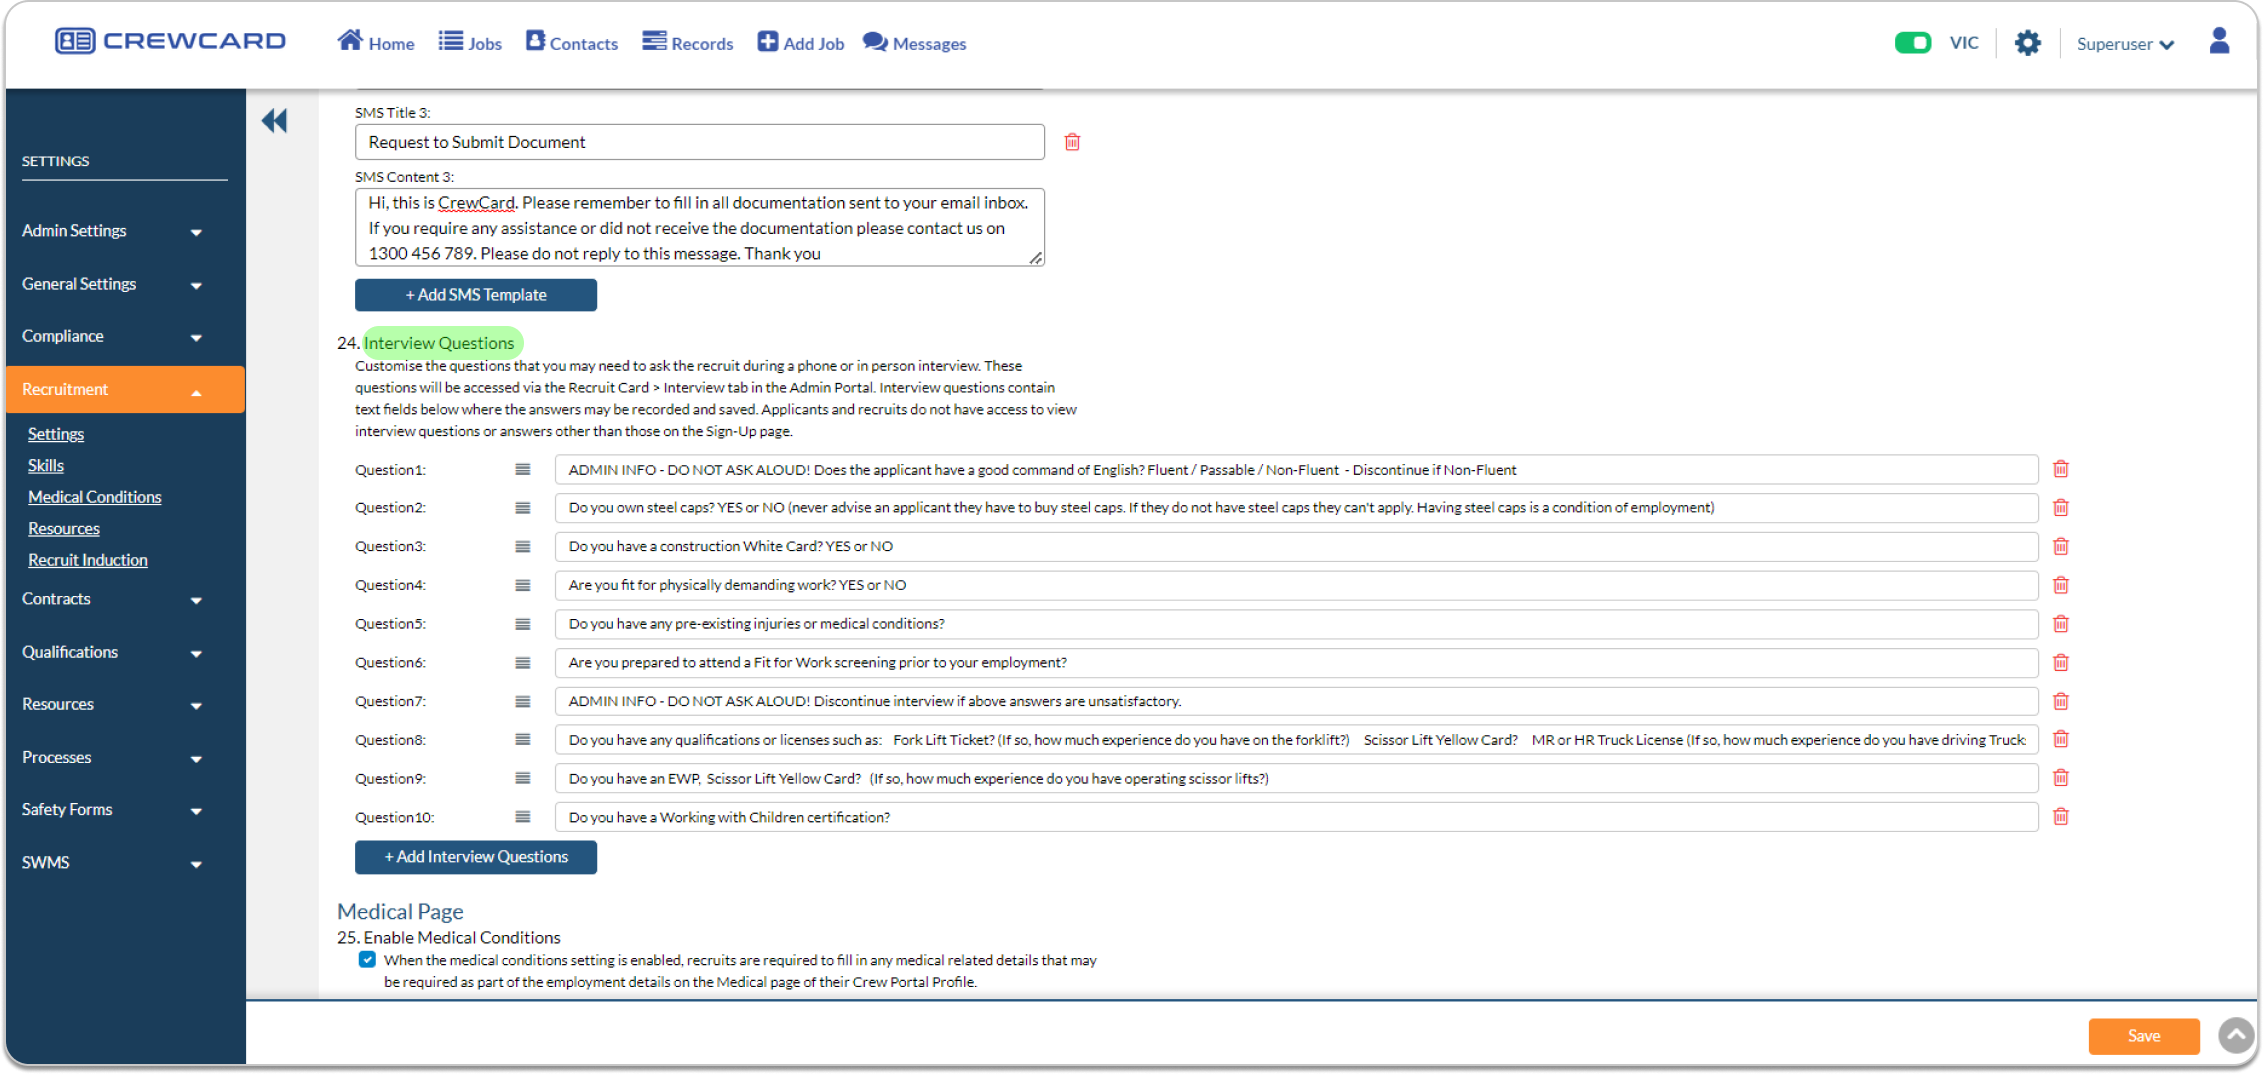
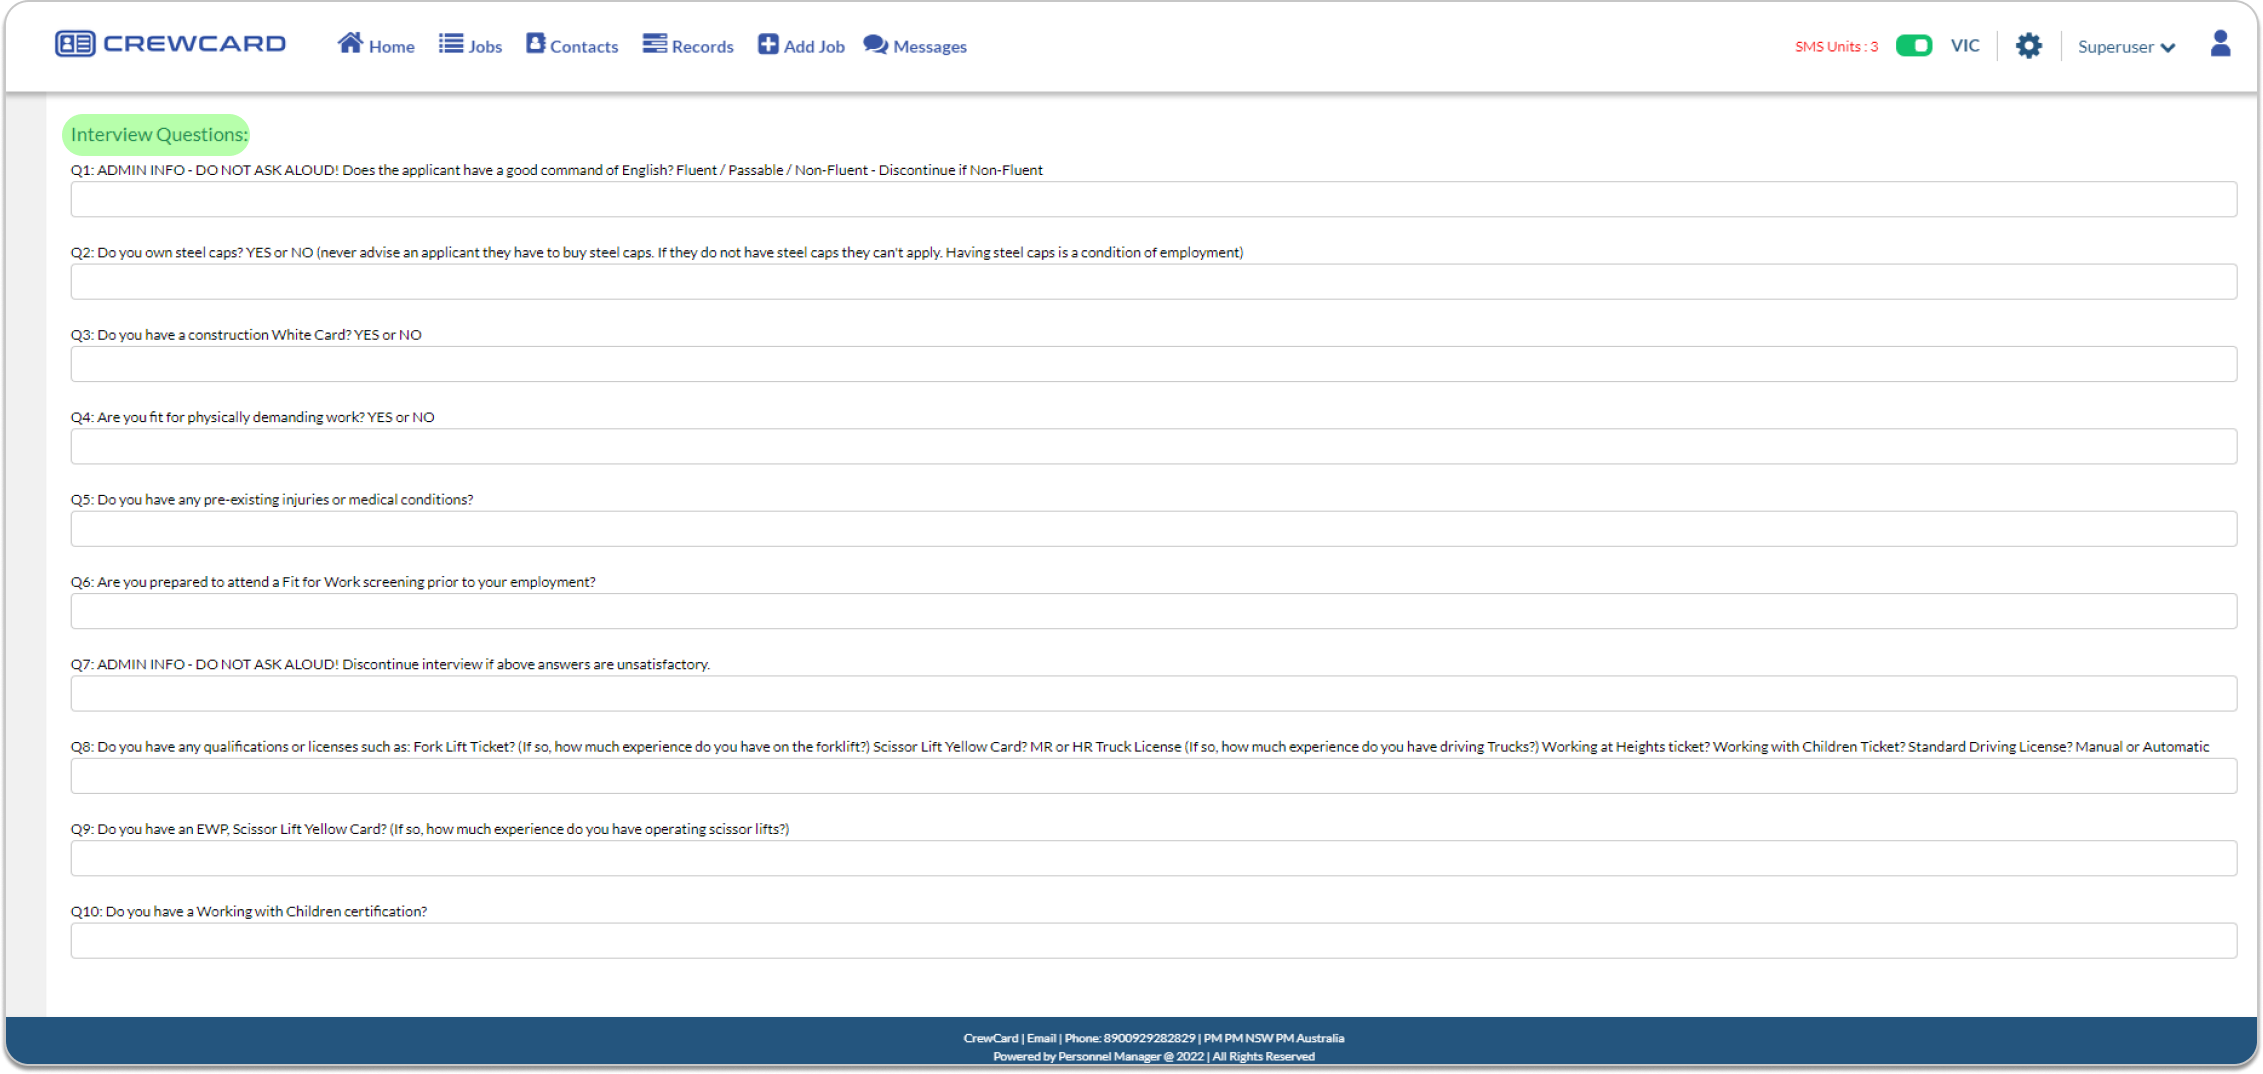
24. Interview Questions
Customise the questions that you may need to ask the recruit during a phone or in-person interview.
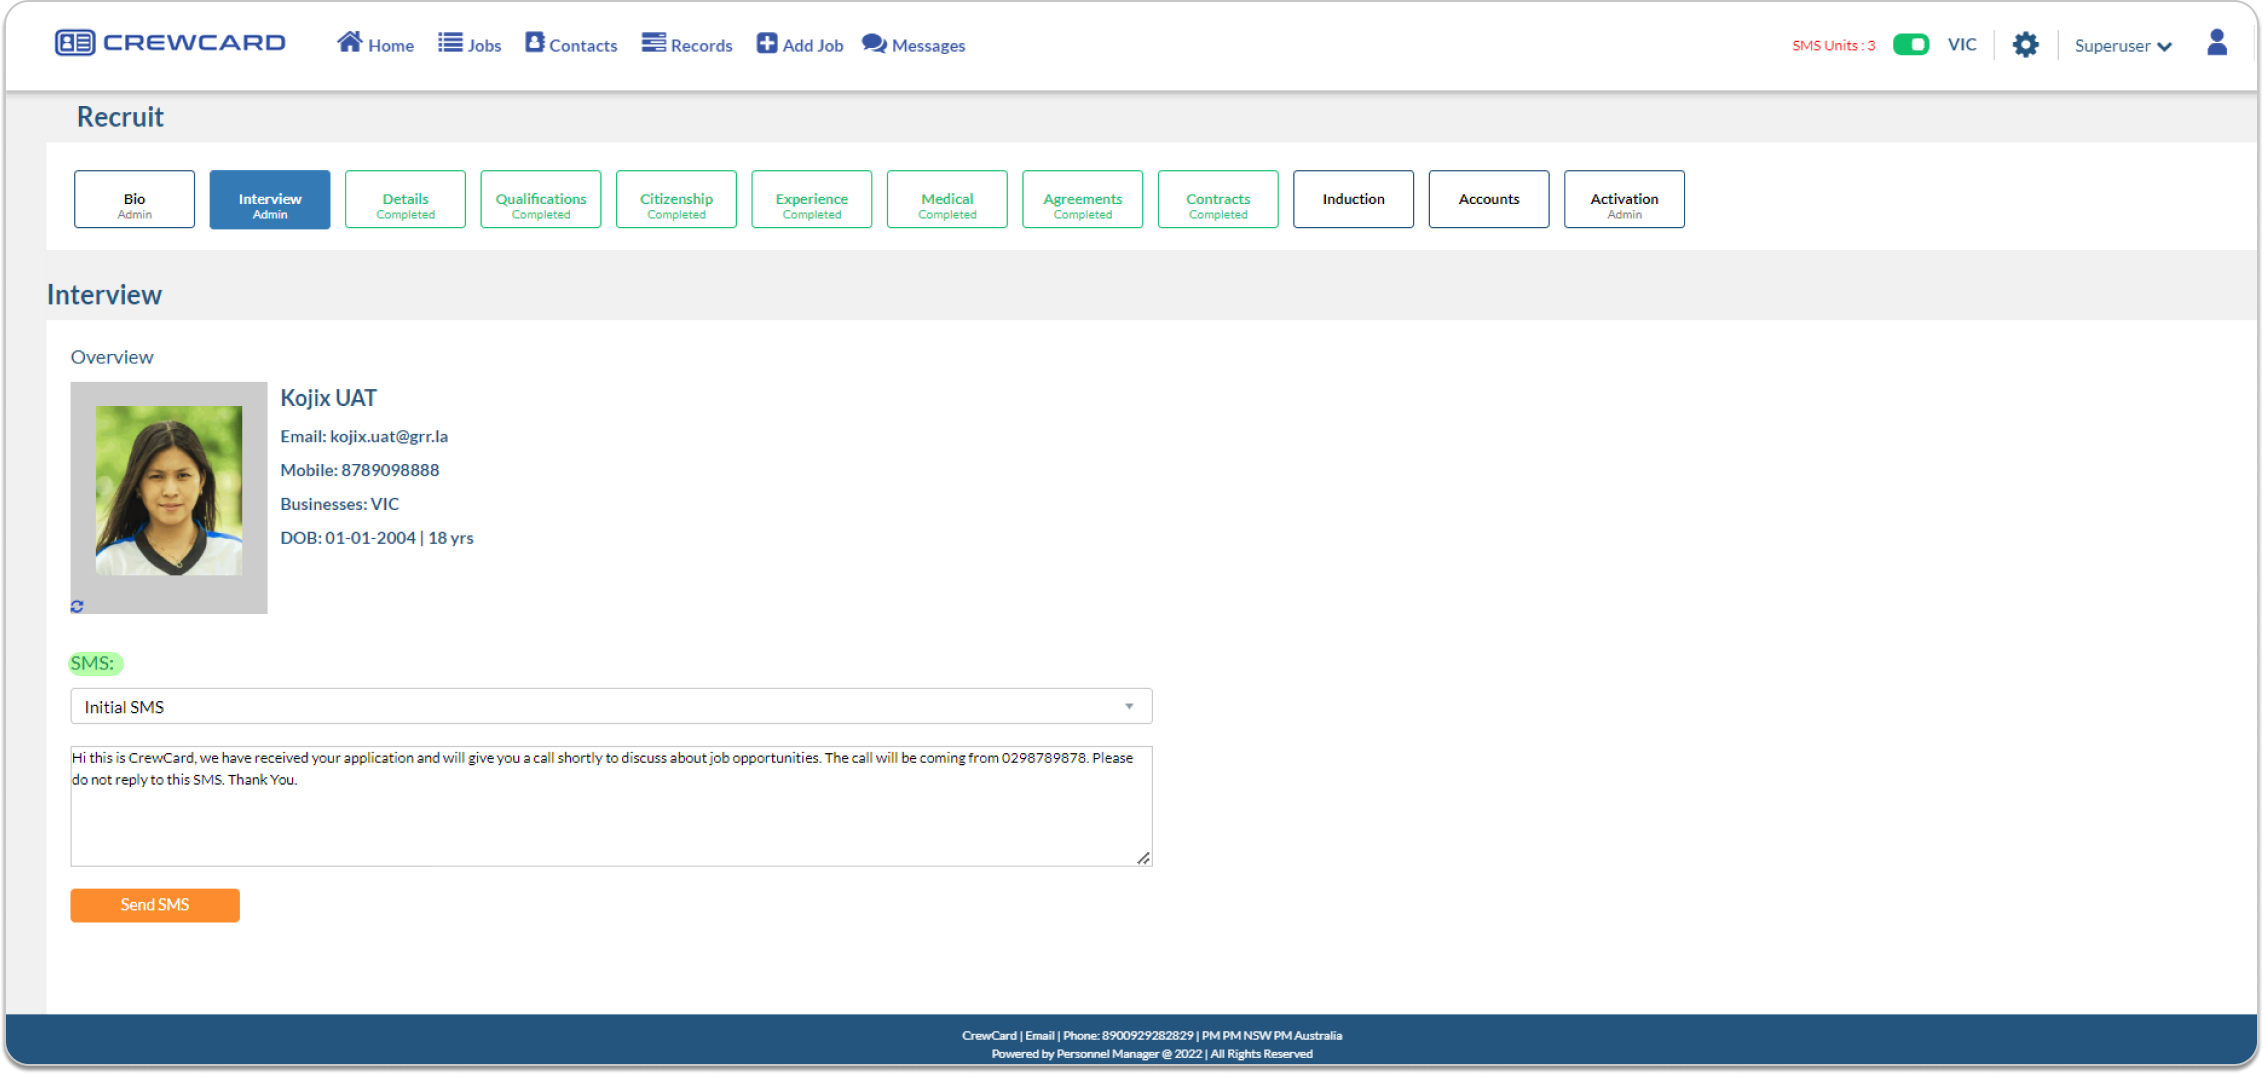
Admin’s View:
10.4.5. Details Page
25. Add any additional custom questions under the details page section for your recruits to check and acknowledge.

Admin’s View:

10.4.6 Medical Page
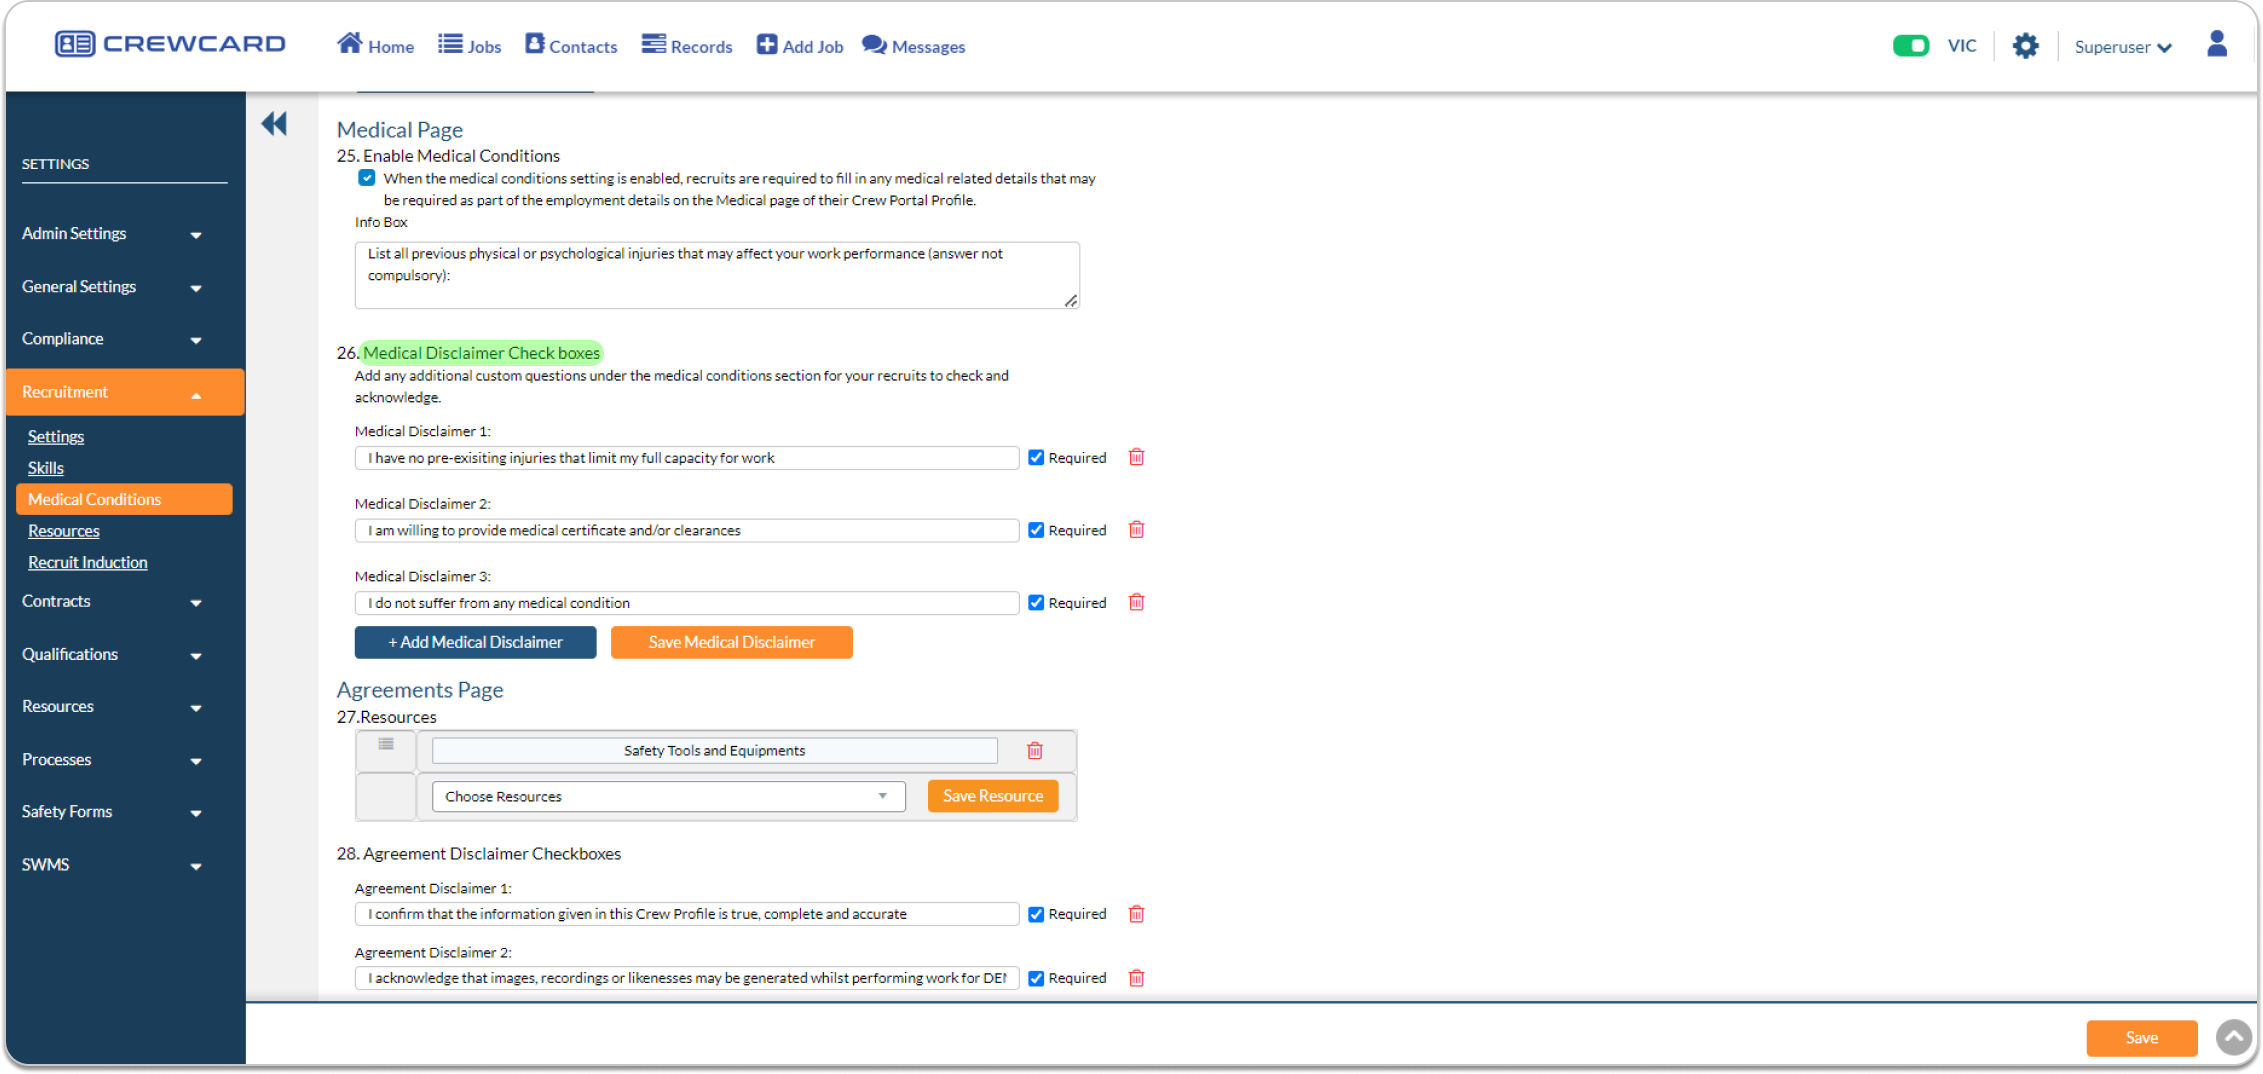
26. Medical Conditions: Enable medical condition, Recruits are required to fill in any medical related details that may be required as part of the employment details on the Medical page of their Crew Portal Profile. Explainer text can be customised for Medical Conditions.
When tick box ‘Enable Medical Conditions’, the ‘Info Box’ will be visible for the crew. You can also add a label for the info box. In the screenshot below, the label of the info box is “List all previous physical or psychological injuries that may affect your work performance (answer not compulsory)”.
27. Medical Disclaimer Check boxes: Add any additional custom questions under the medical conditions section for your recruits to check and acknowledge.
Click the Add button to a medical disclaimer check boxes. You can also make the medical disclaimer check boxes as mandatory and required by ticking the box ‘Required’.
Crew’s view: 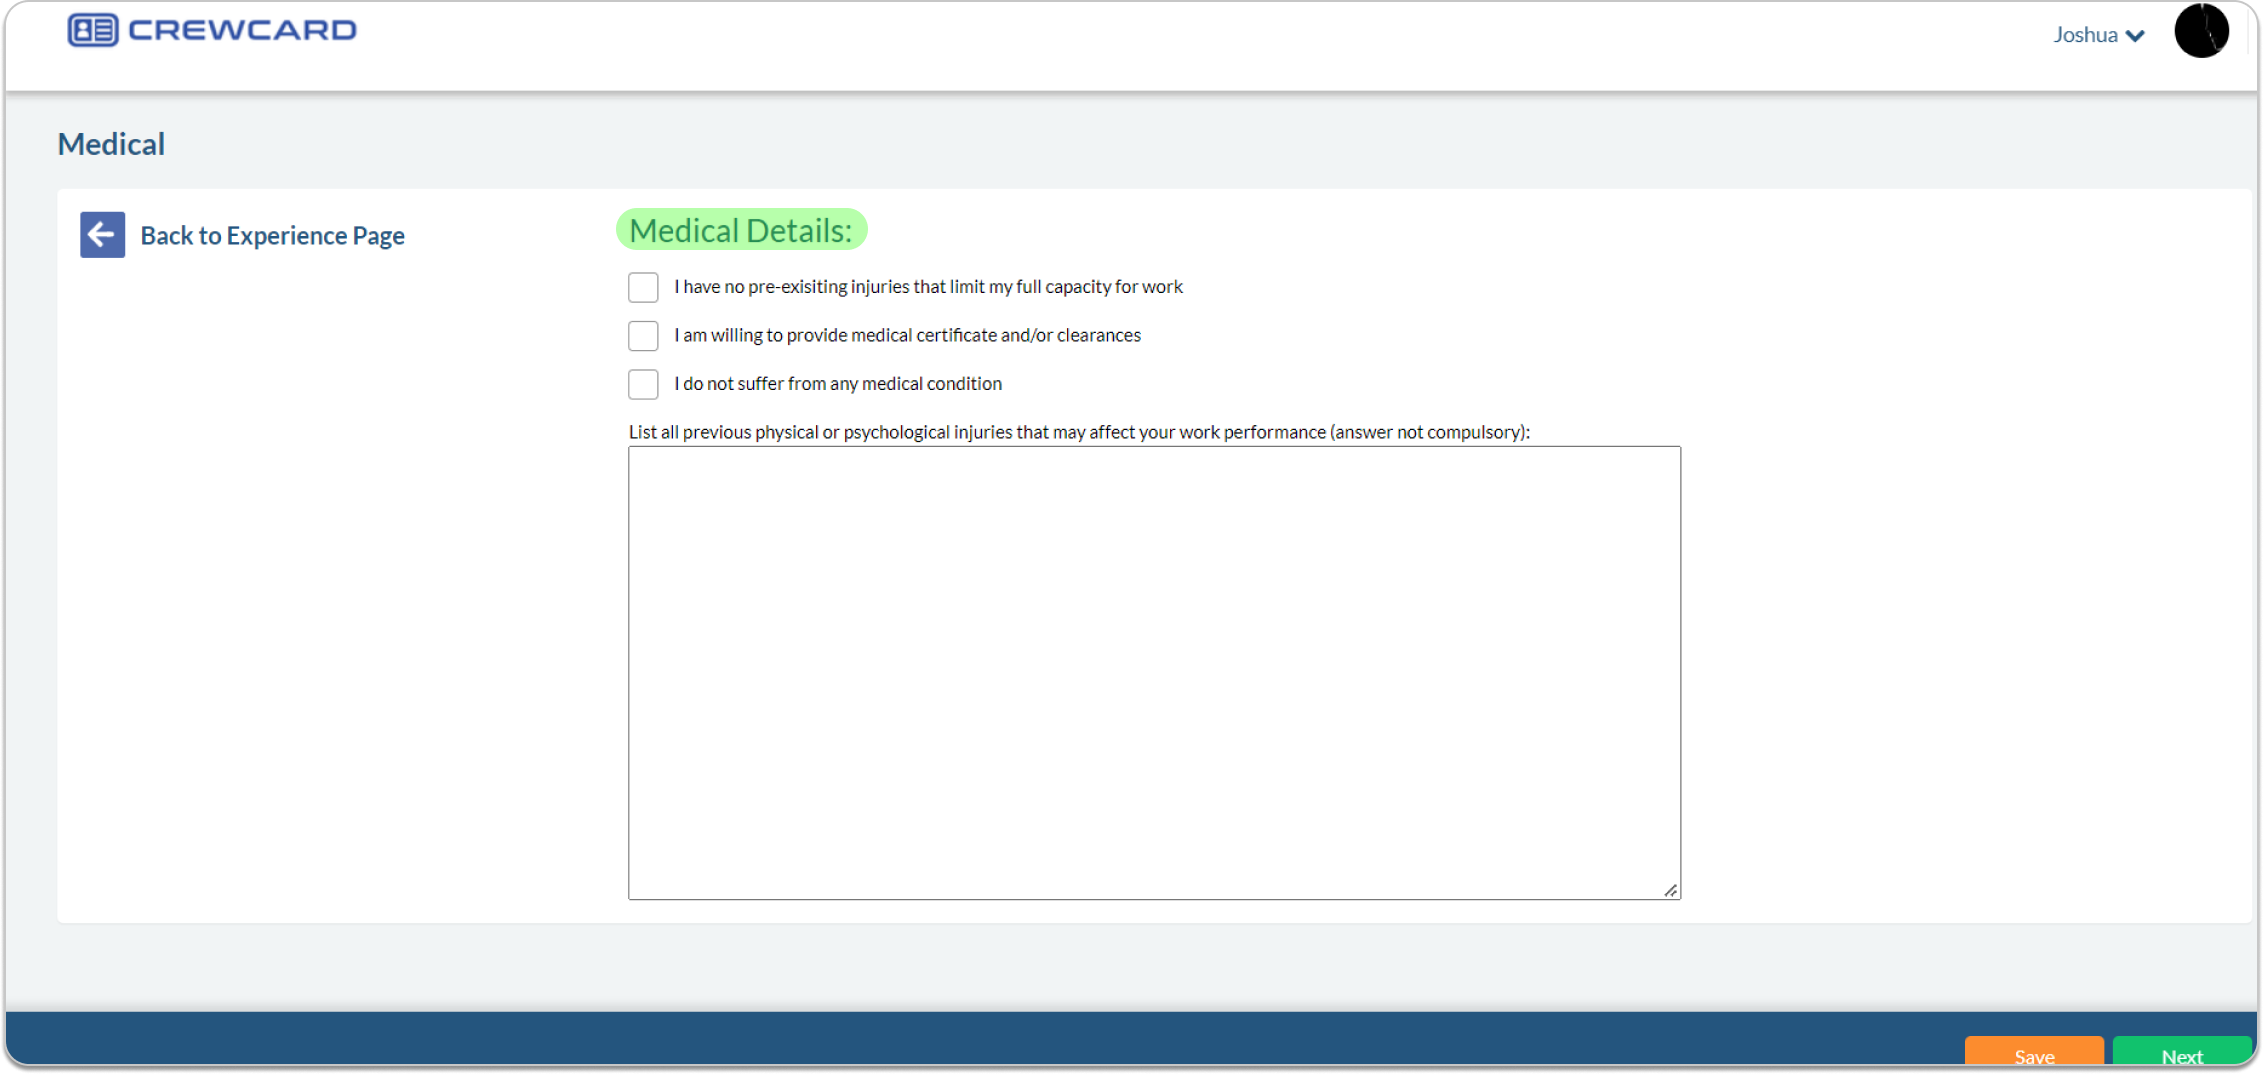
10.4.7 Agreements Page
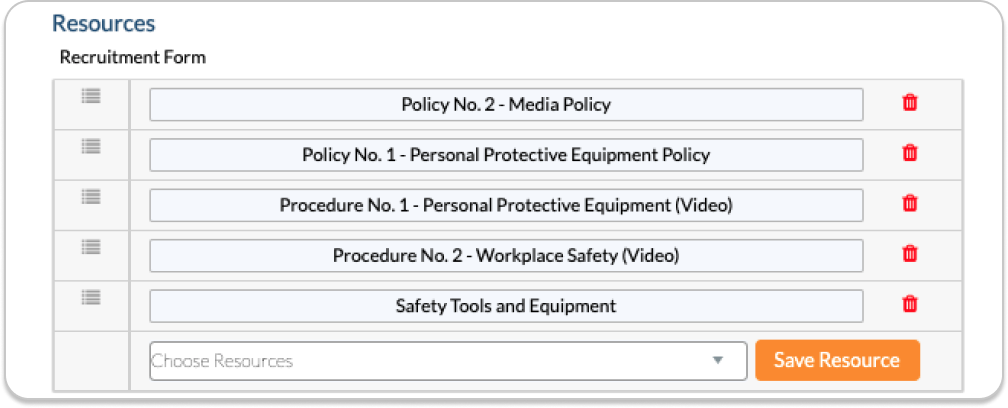
28. Resources: These Resources can be a policy, procedure or any other important information that the crew can access using the Crew Access or via the app. There is no need for an additional software to view the online content. Resources can be easily used in other sections of the CrewCard system such as Recruitment, Actions and Forms. When a resource is edited, it will be displayed automatically across the software. Resources can be added in the Resources Settings.
From the dropdown menu, select the resource that you want to add, then click Save Resources. Resources are configured under the resources settings. Before a resource can be made available in the recruitment, it needs to be created.

29. Agreement Disclaimer Checkboxes : Disclaimer check boxes will be added under the Agreements Tab in Agreements Section for the recruit tab of the potential crew member. To add a disclaimer check box, simply click the Add Agreement Disclaimer and enter the text in the provided field. If you want to make the disclaimer box as a mandatory field, tick the box ‘Required’. Click ‘Save Agreement Disclaimer’ once you are finished adding disclaimer boxes.

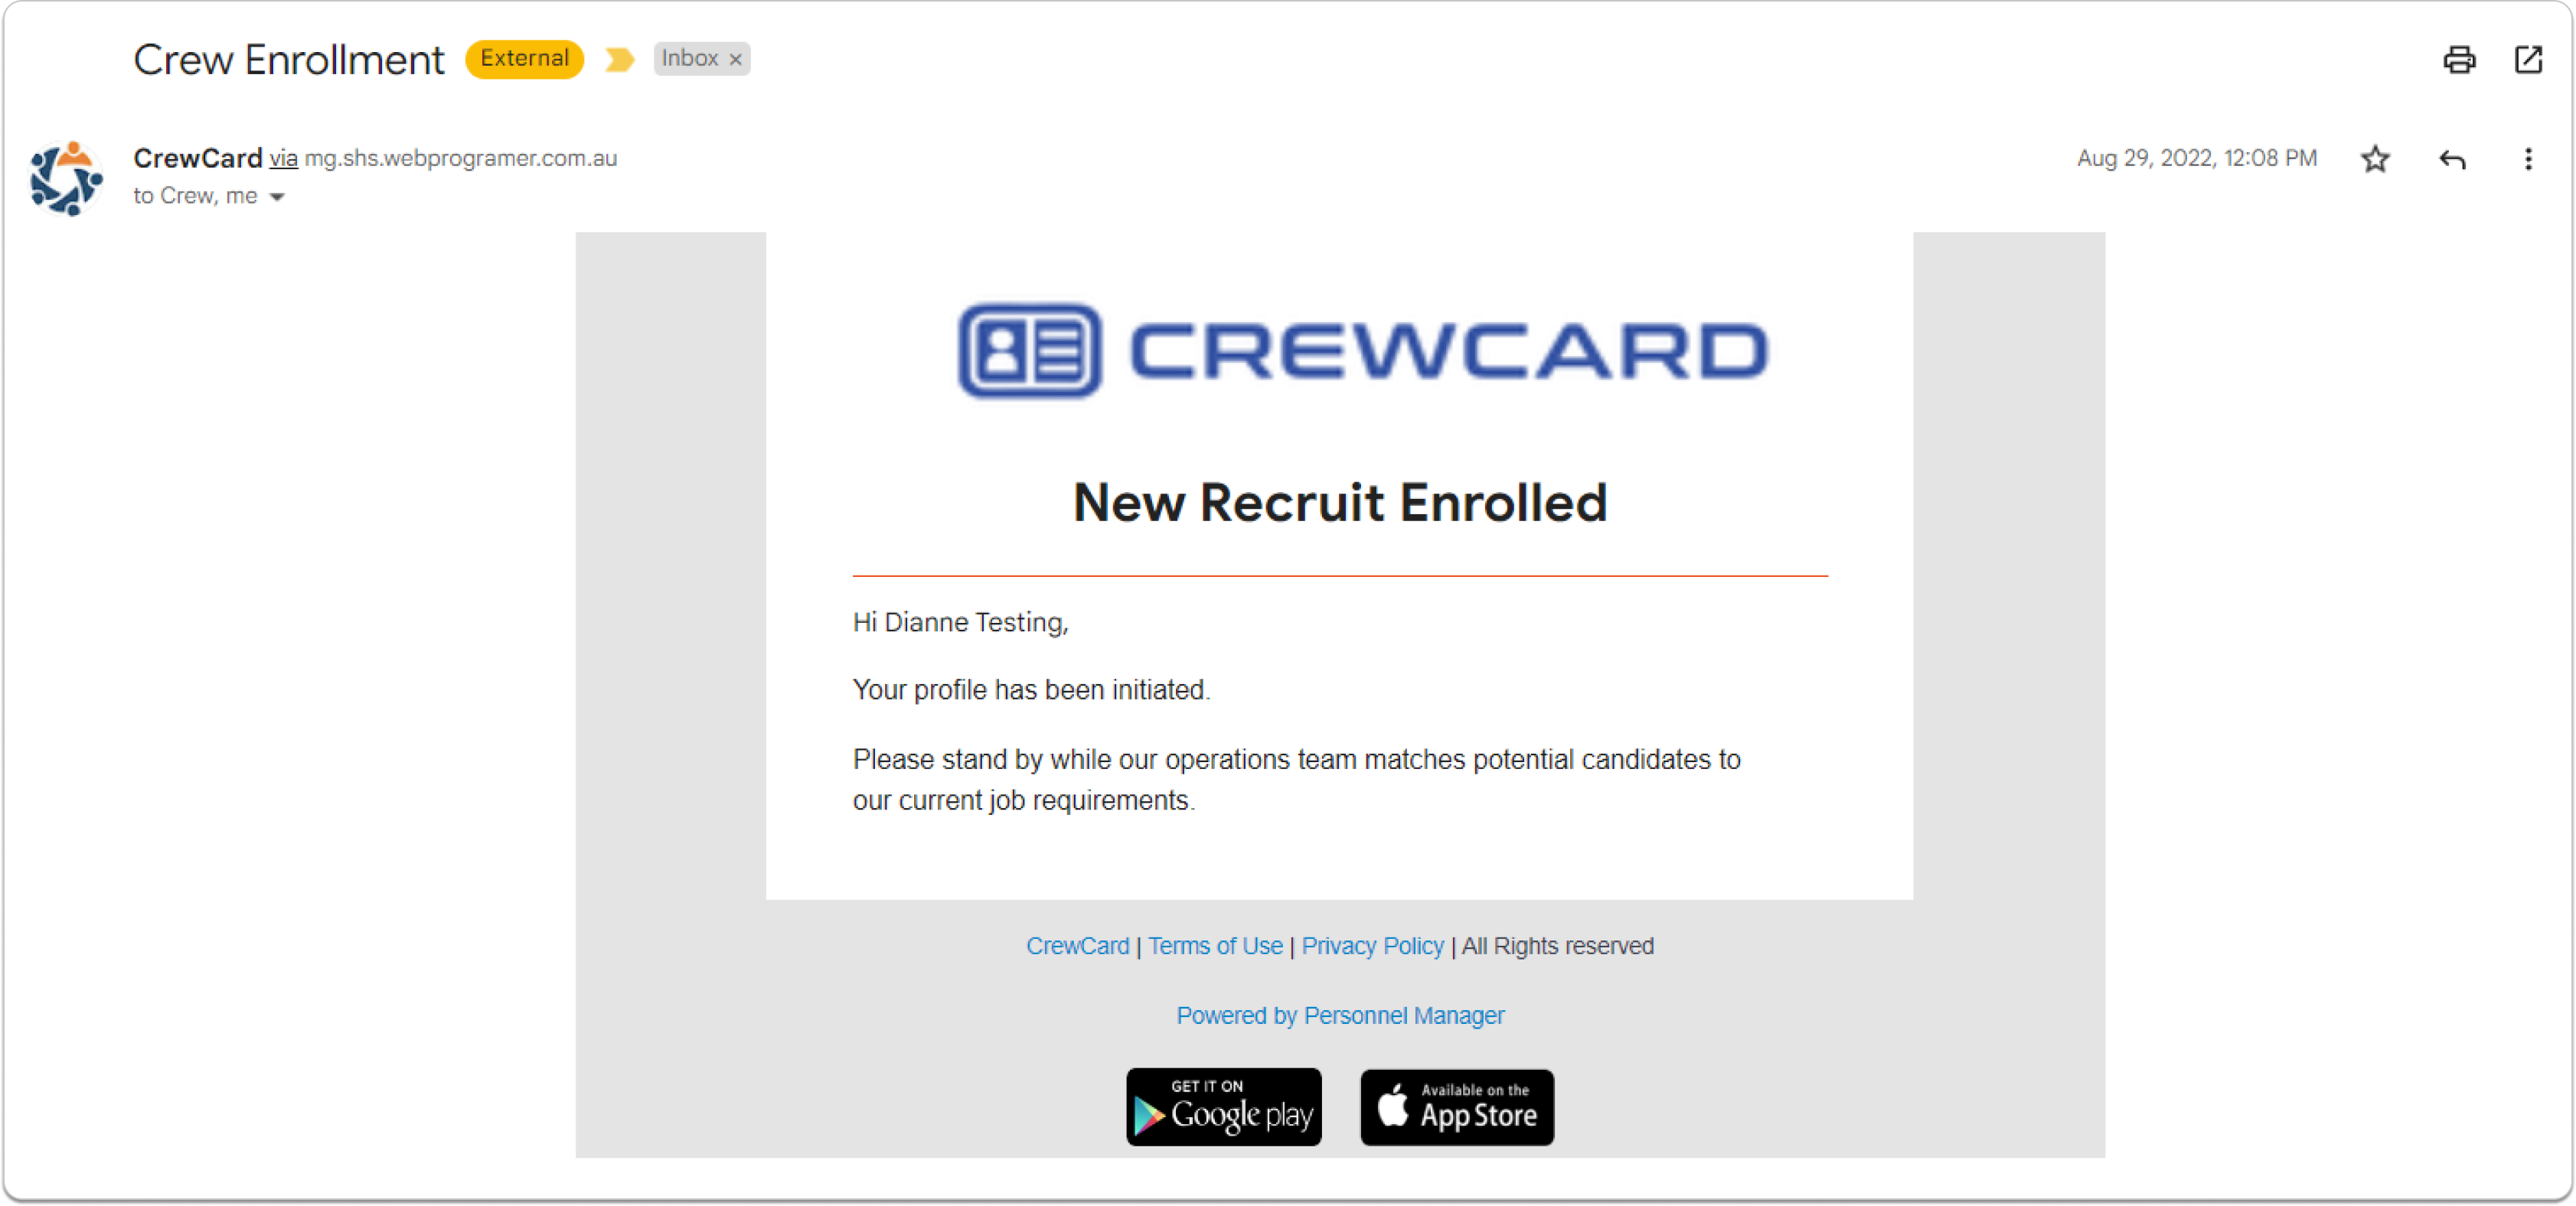
30. New Recruitment Enrolled Email: This settings allows you to set from where the email came from and who will be copied in the new recruitment enrolled email.
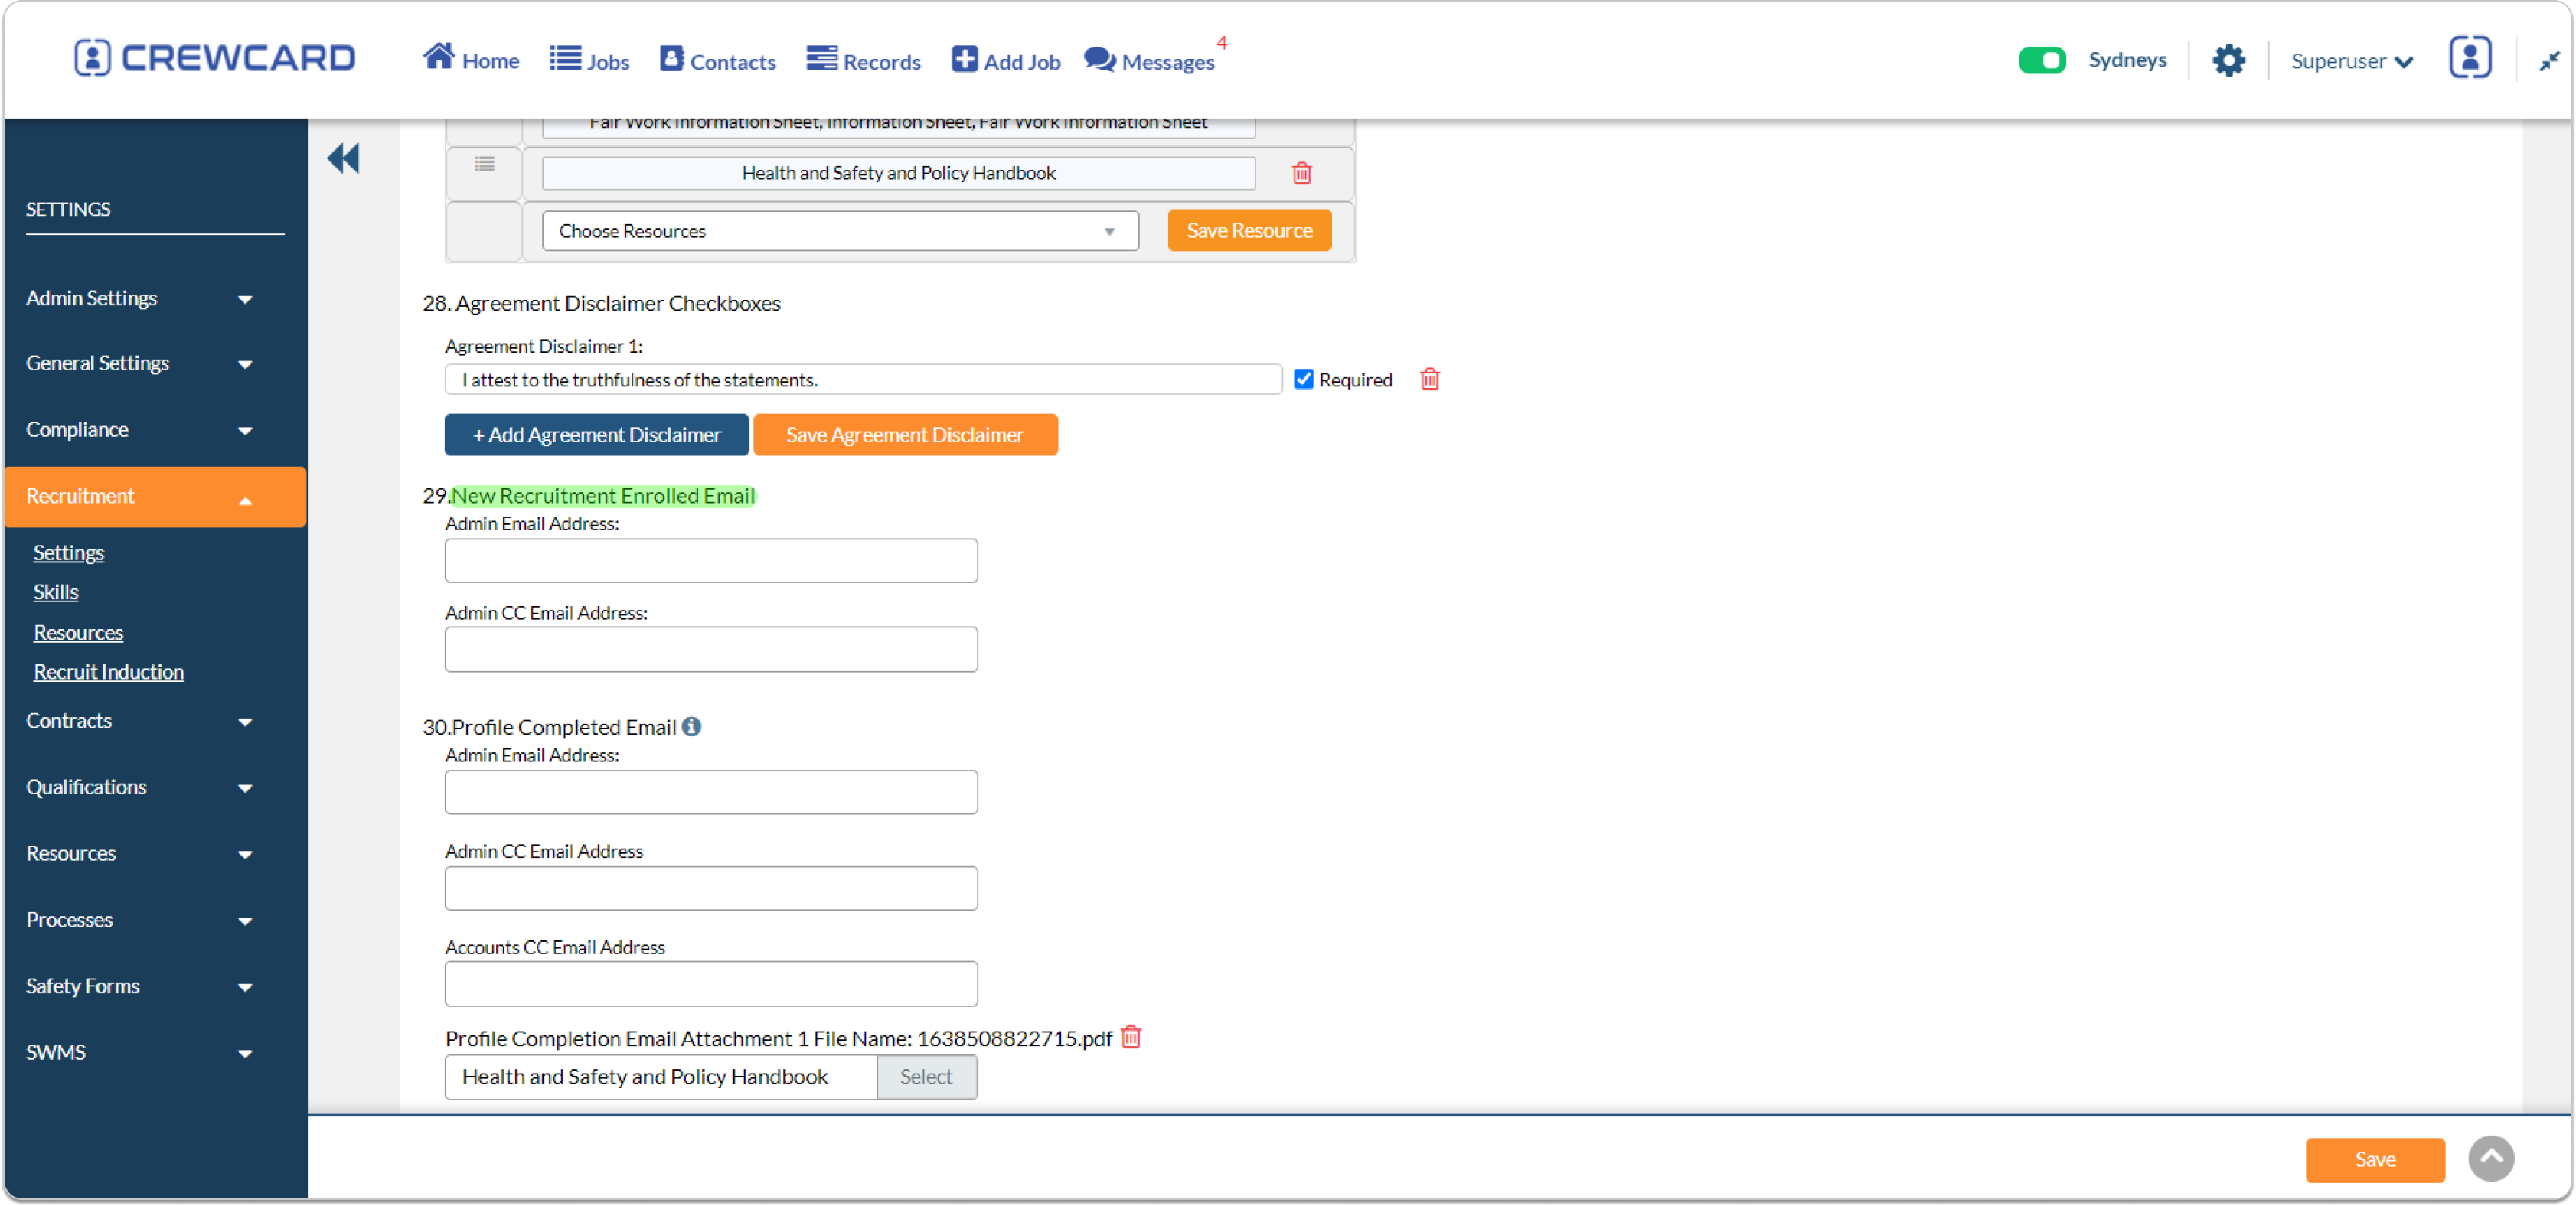
Admin Email Address: Enter the email address, this will be the email address that will be used during the course of the recruitment process.
Admin CC Email Address: Enter the email address, that address will be copied for the Recruitment Enrolled Email.
This is what the Recruit will received:
31. Profile Completed Email:
Admin Email Address: this will be the email address that will be used during the course of the recruitment process.
Admin CC Email Address: that address will be copied with the same email during the course of the recruitment process.
Accounts CC Email Address: that address will be copied with the same email during the course of the recruitment process.
Profile completion Email Attachment: When a potential crew member has completed their profile, they will receive an email confirming that profile has been completed. In that e-mail, files that needs to be completed will be included.
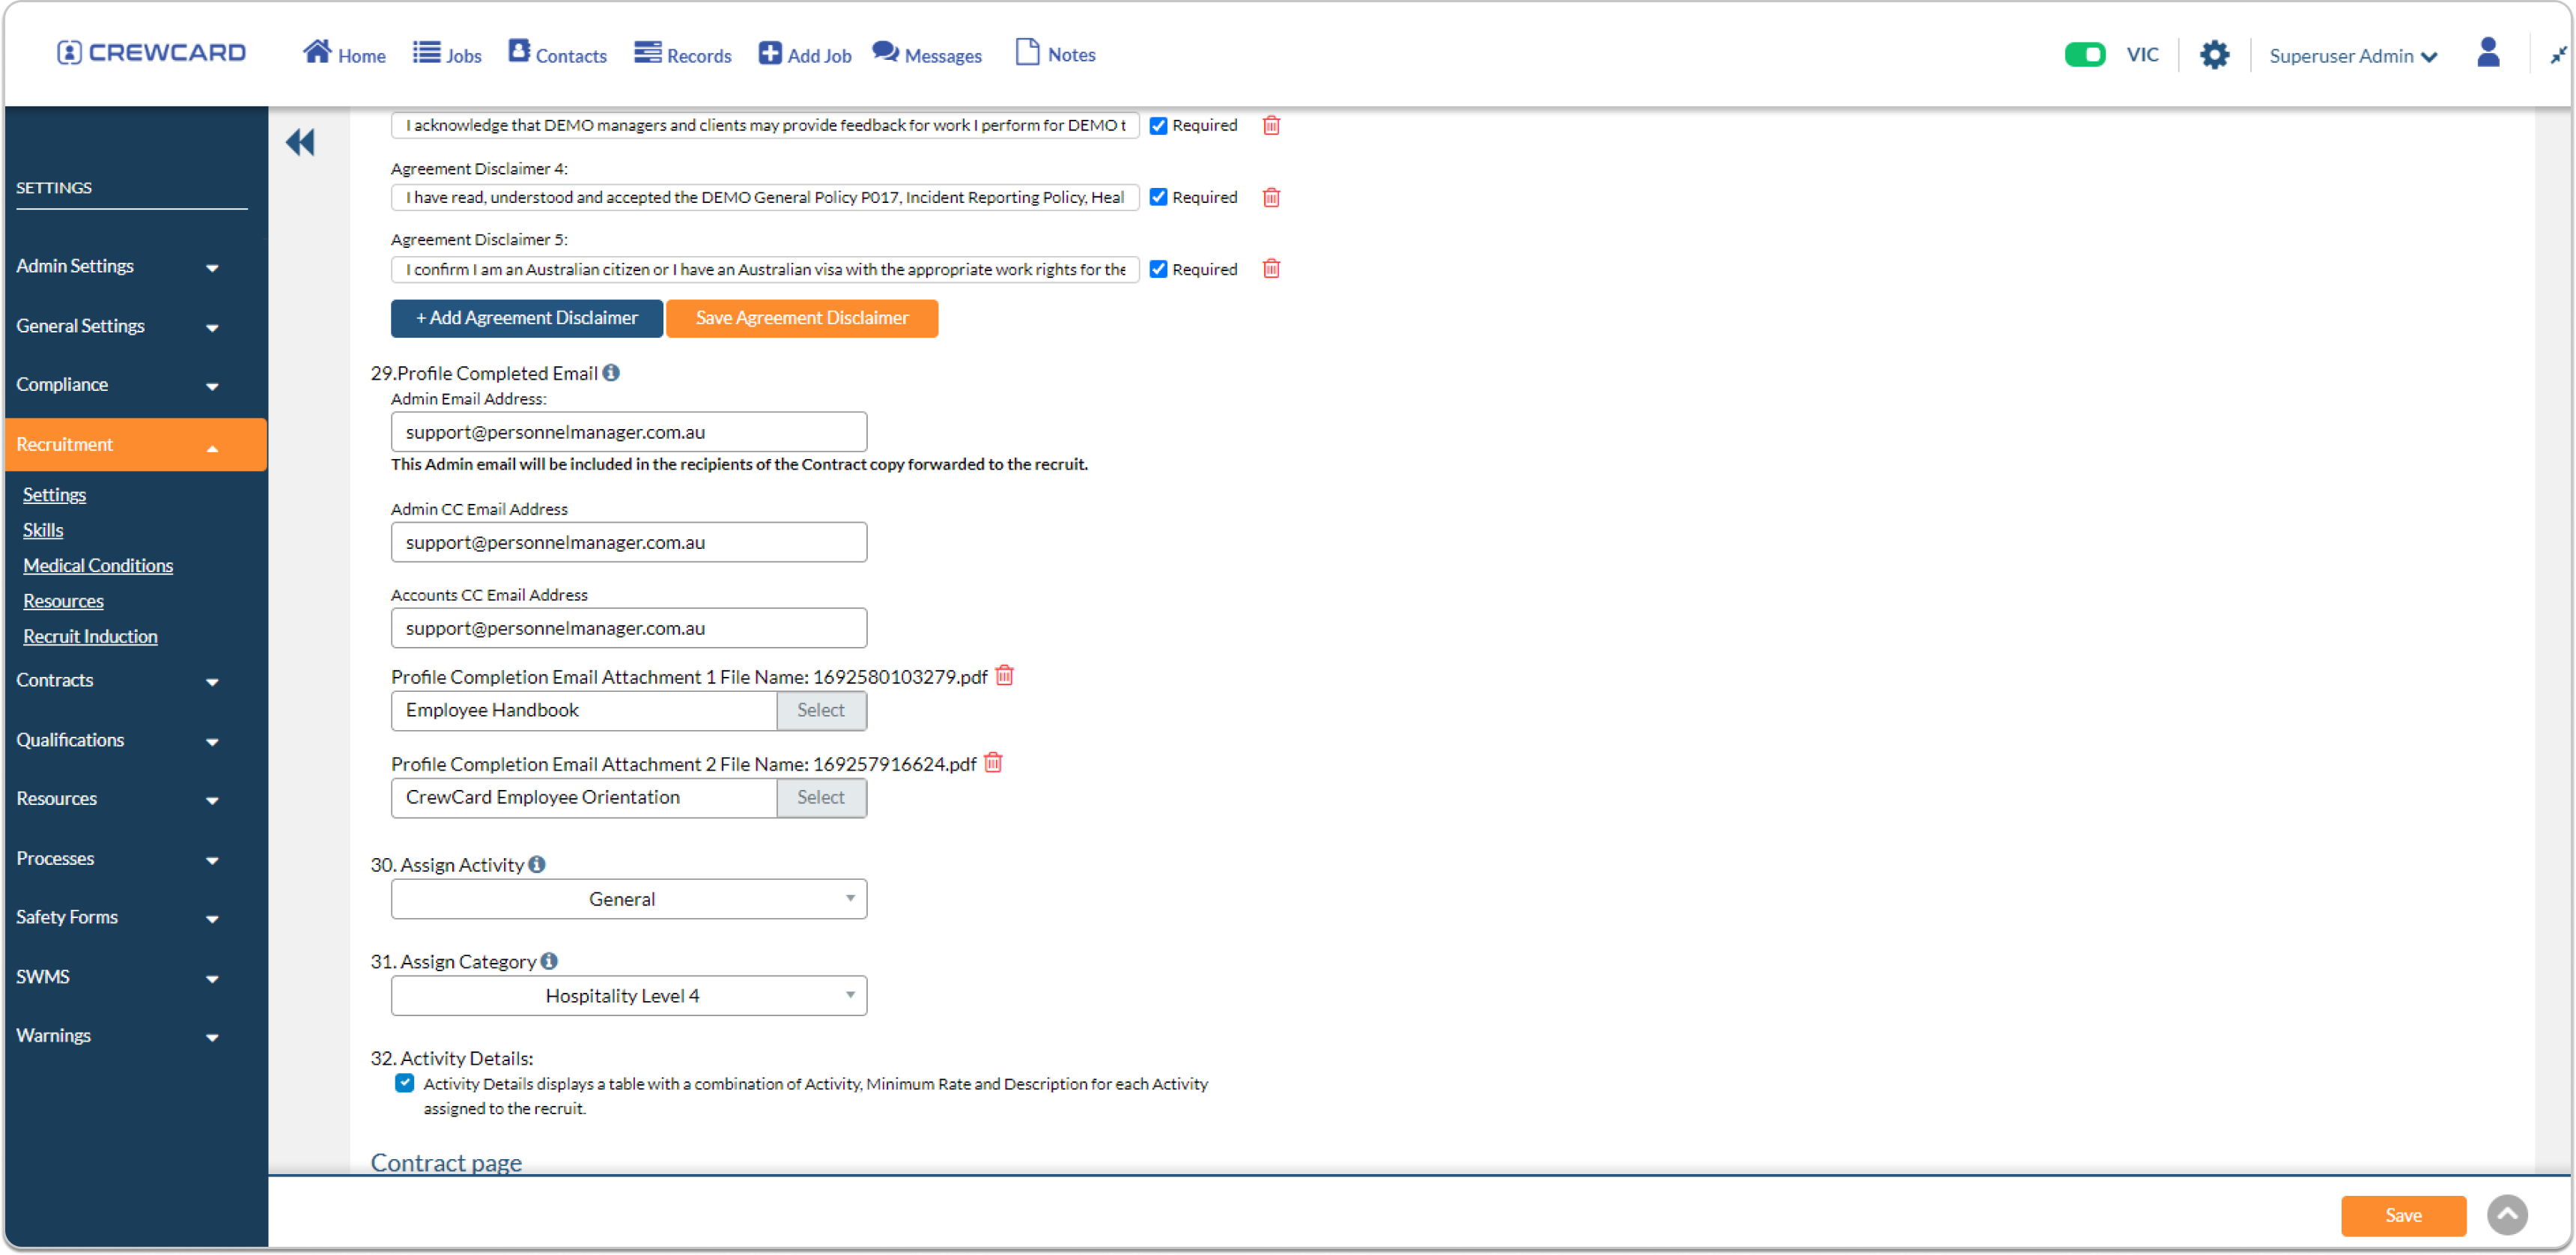
32. Assign Activity: The selected activity will be the one displayed during the recruitment process.
33. Assign Category: The selected category will be the one displayed during the recruitment process.
34. Insert Activity Details: The details of the activity will be displayed.
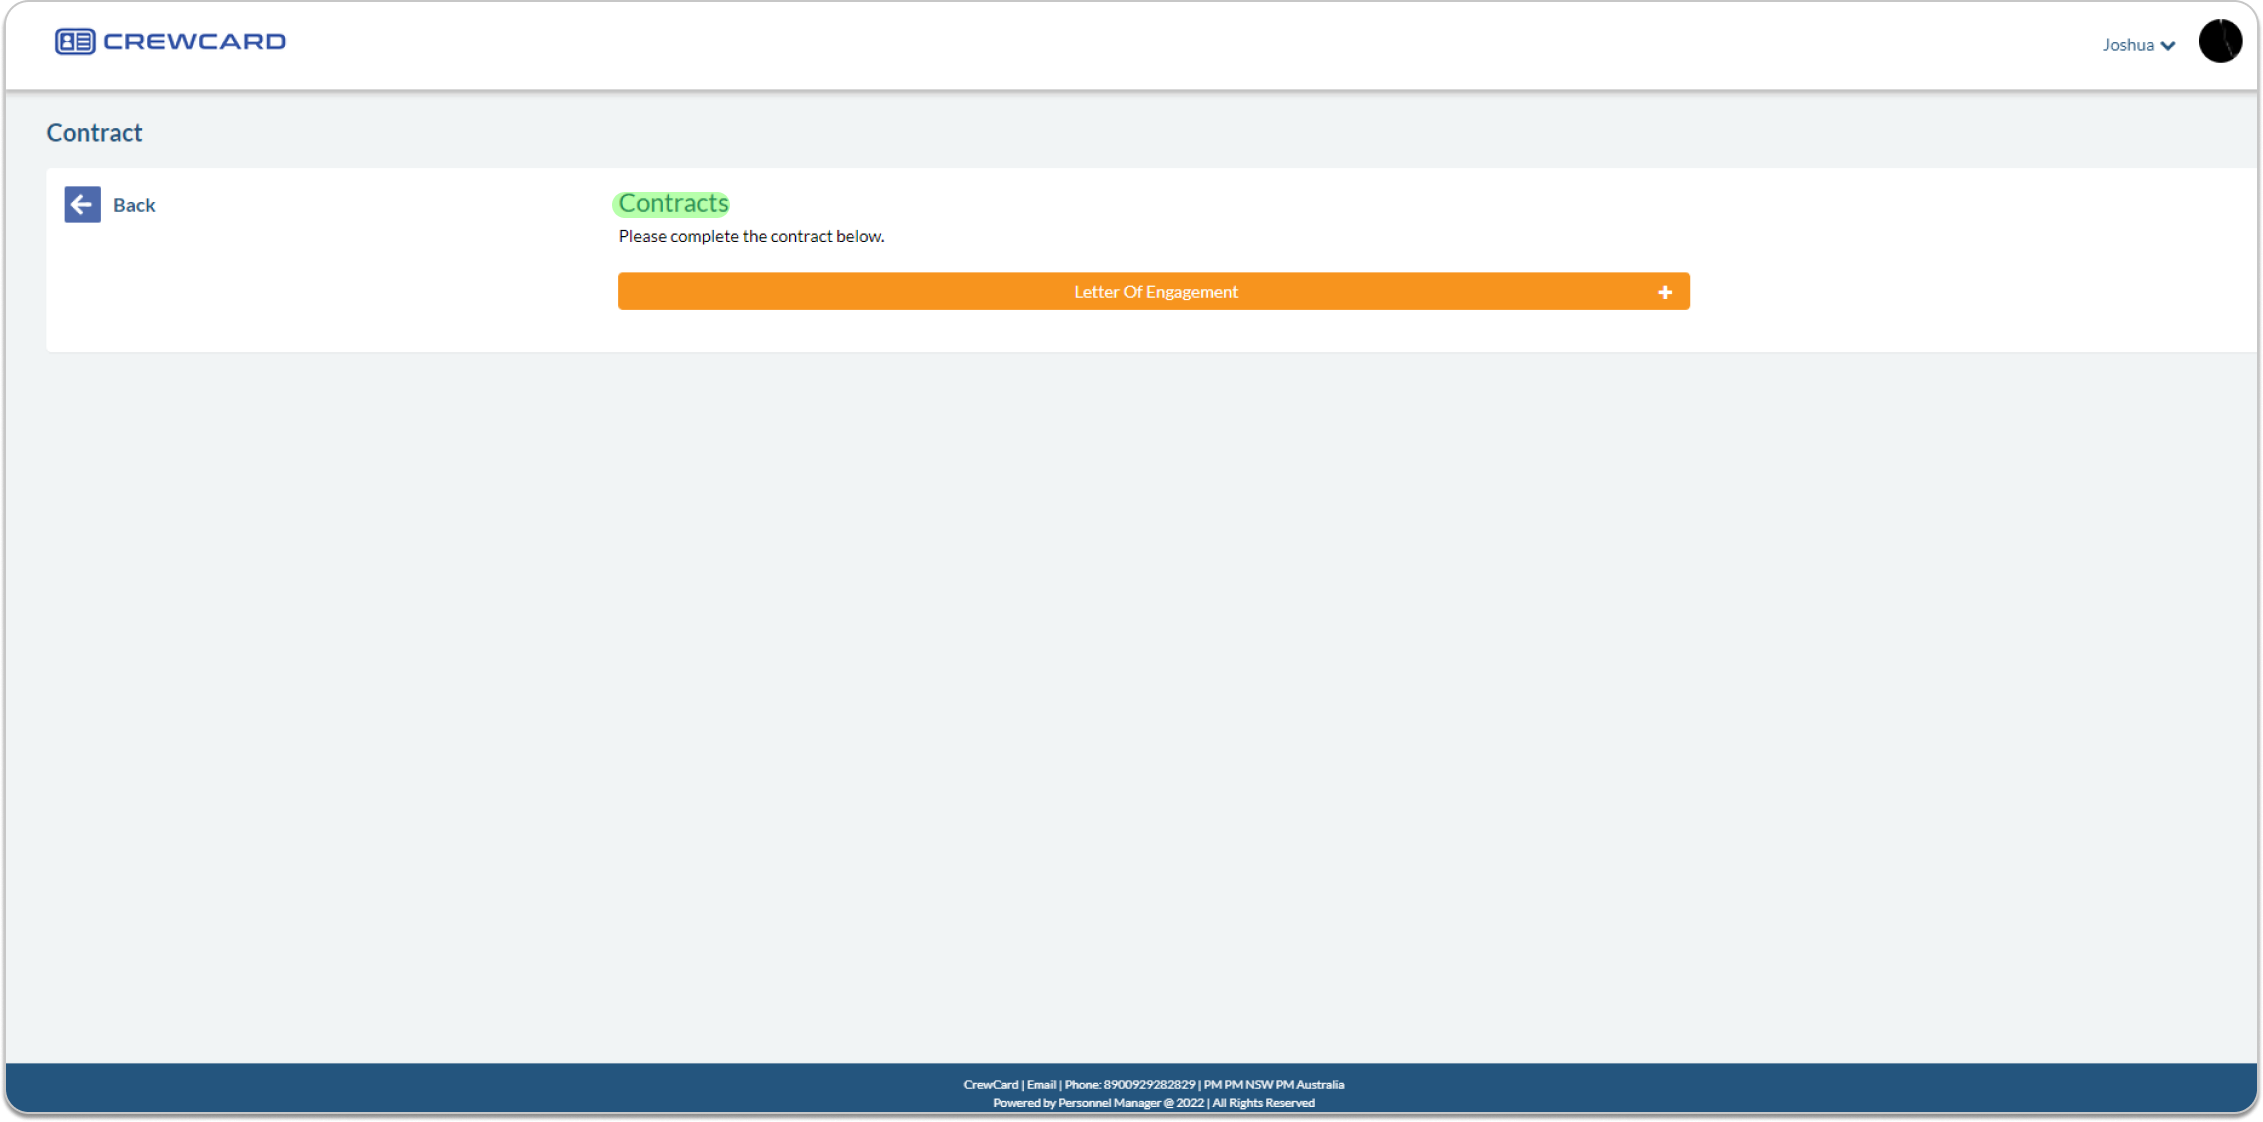
10.4.8 Contract Page
35. Contracts: From the dropdown menu, select the contract that you want to add, then click Save Contract. Before a contract can be made available in the recruitment, it needs to be created first in the contracts settings.
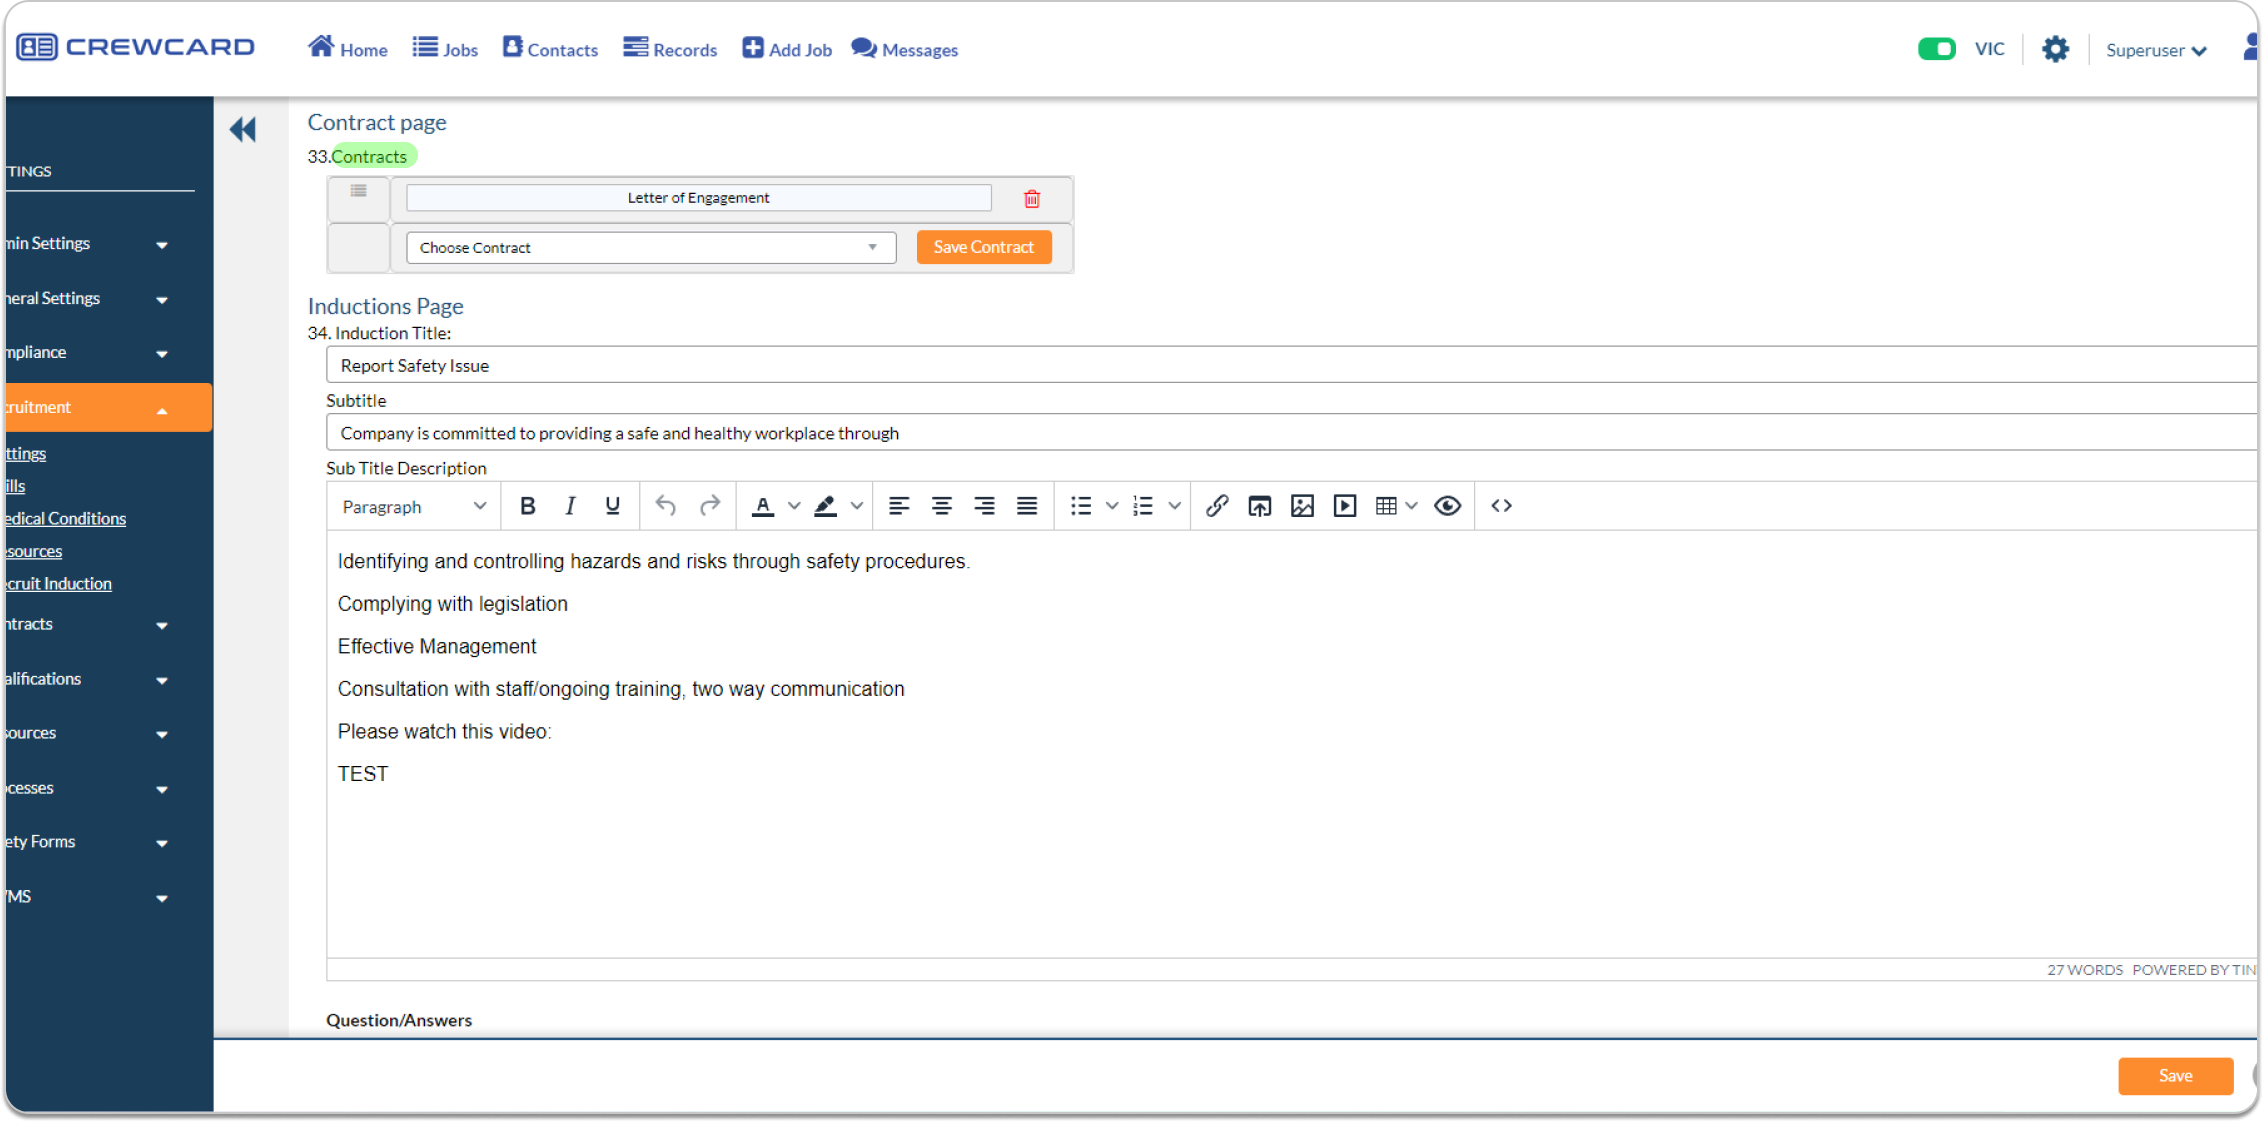
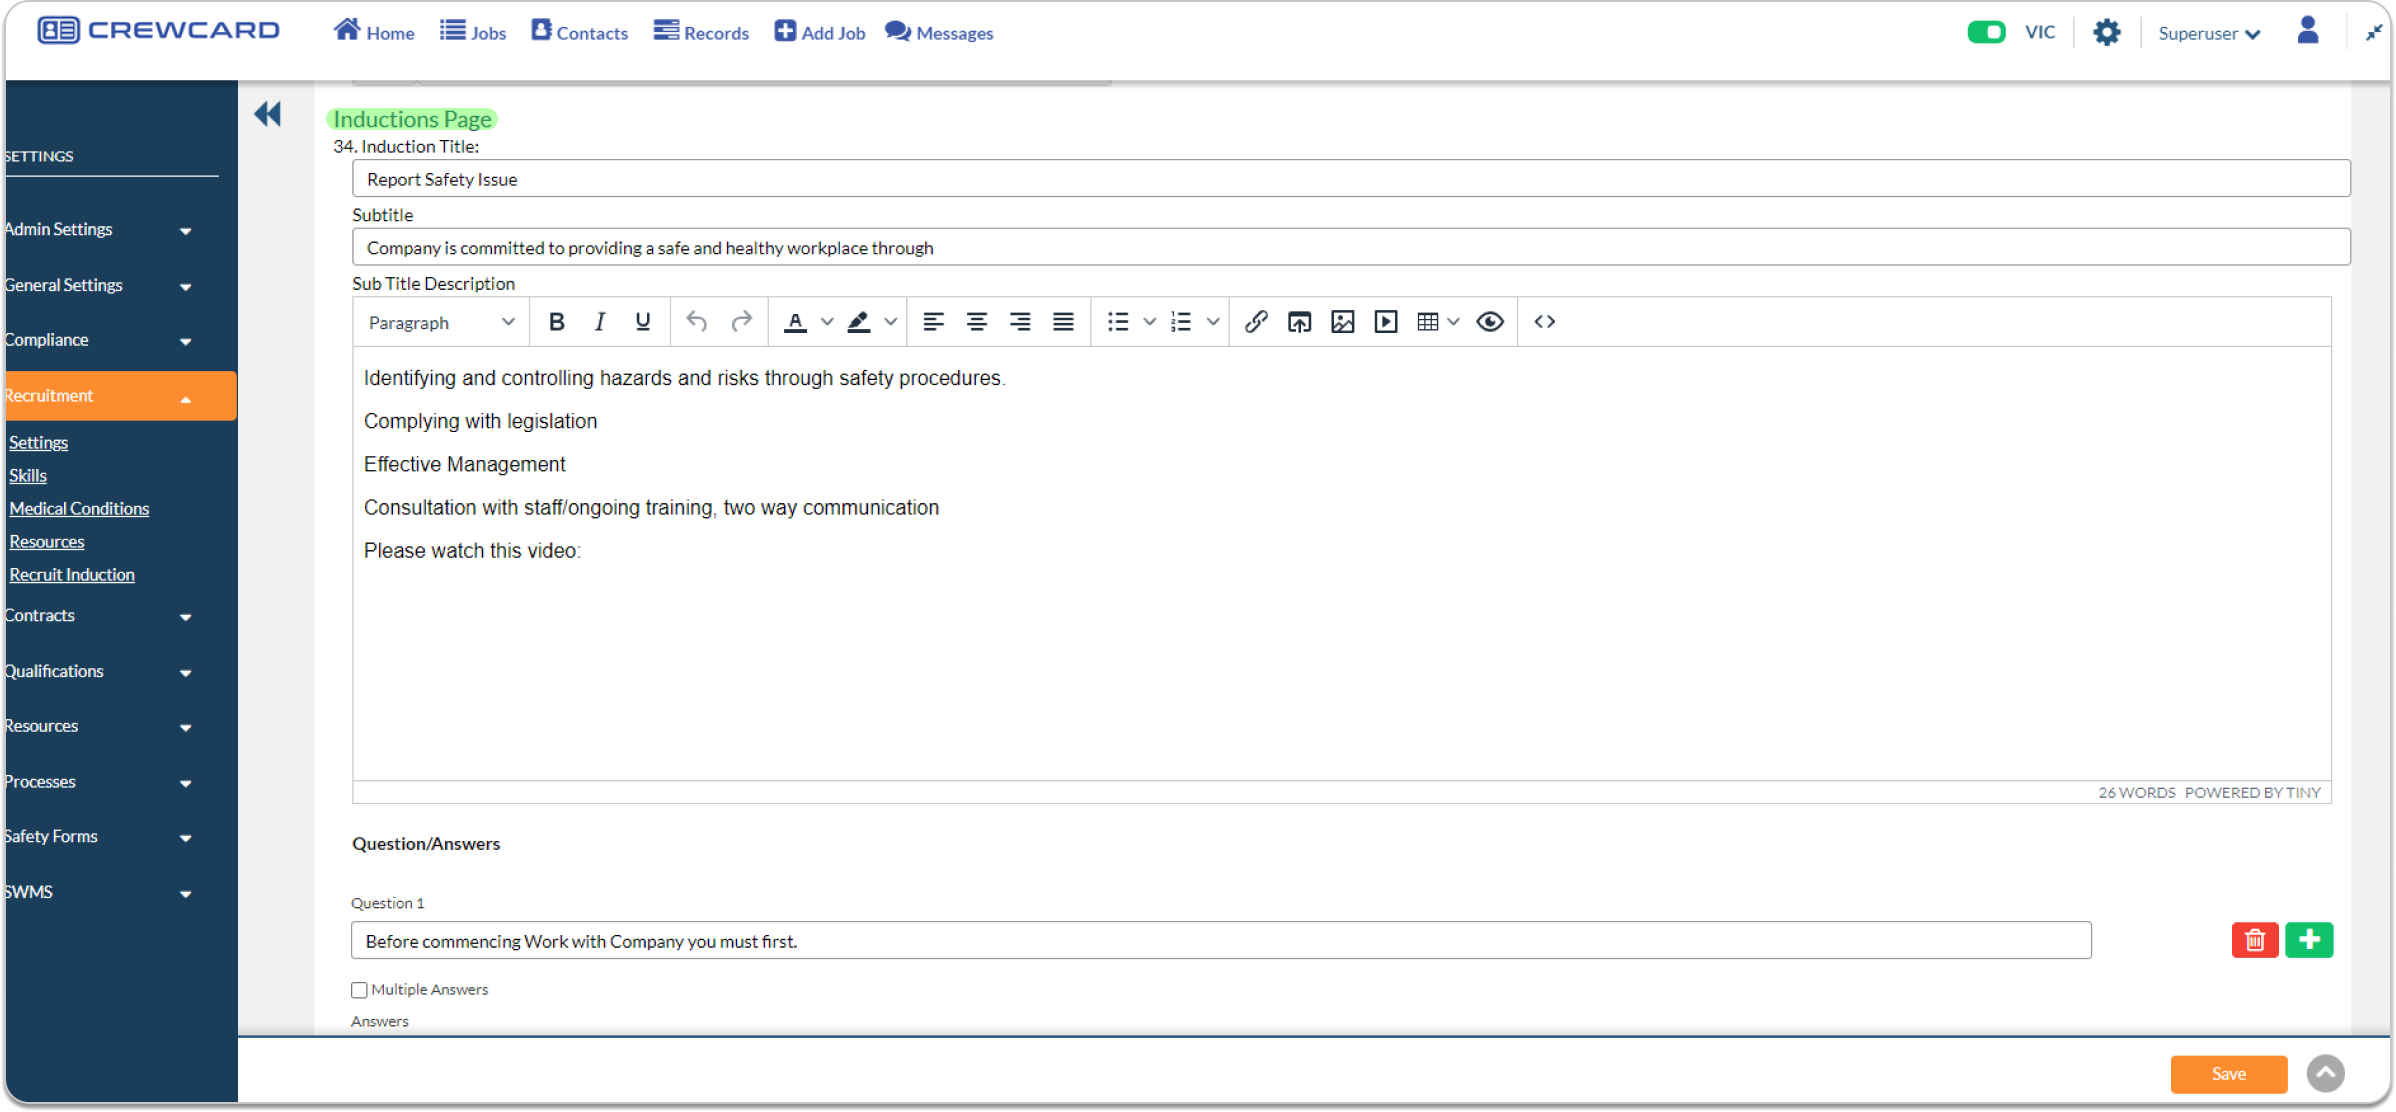
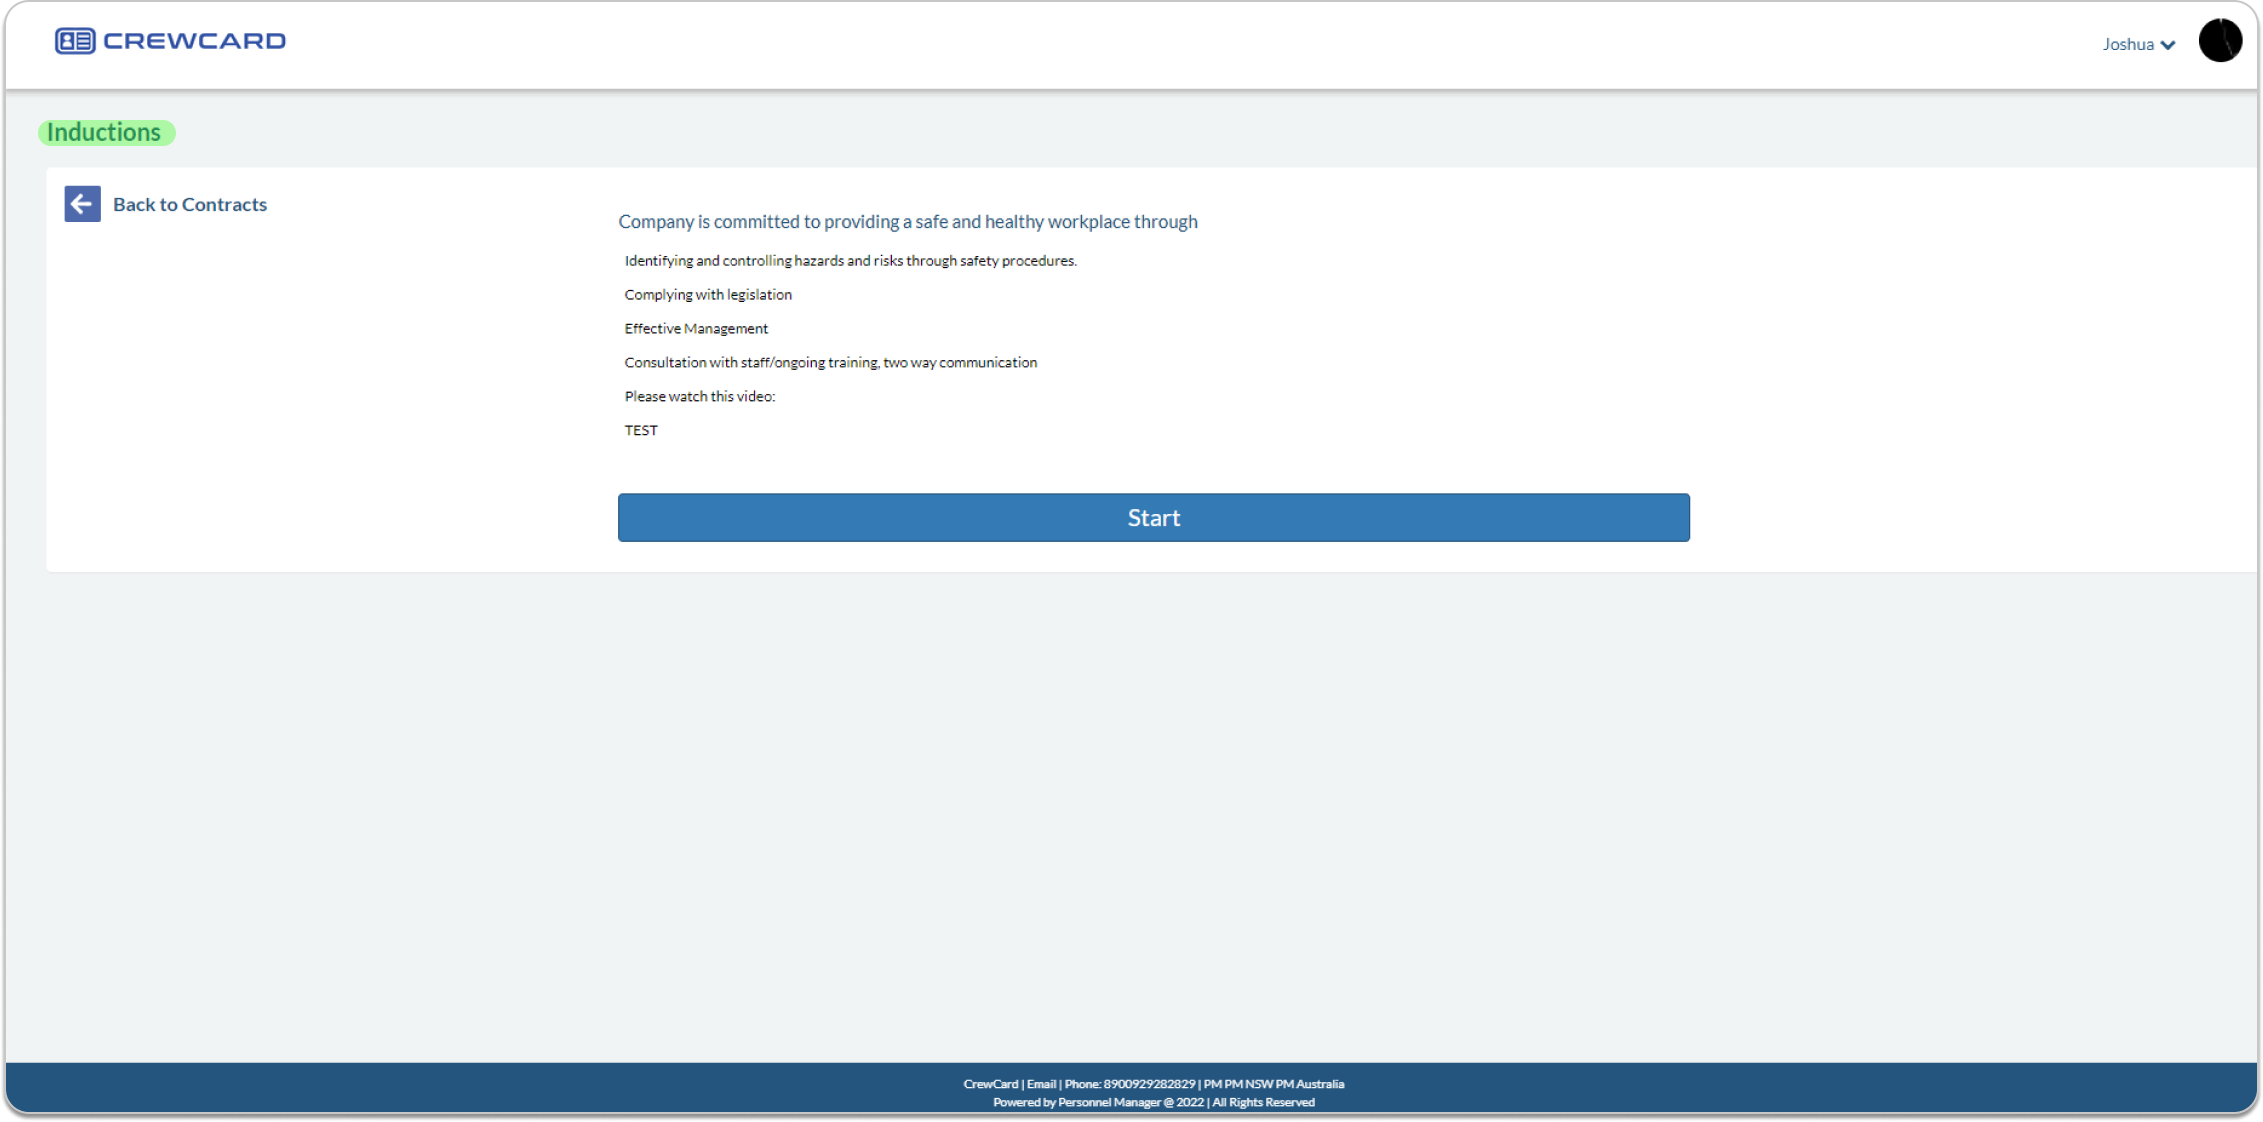
10.4.9 Induction Page
36. Induction title: Allows you to setup requirements, inductions, and other pre-requisites for recruitment before accepting a crew. Enter the Induction title
Subtitle: Enter the Subtitle of the Induction
Sub Title Description: Enter the Sub Title Description of the Induction
37. Default Super Fund
Default Super Fund is set as: Australian Super Fund (change using text box) This will be the fund that will be displayed by default during the recruitment process
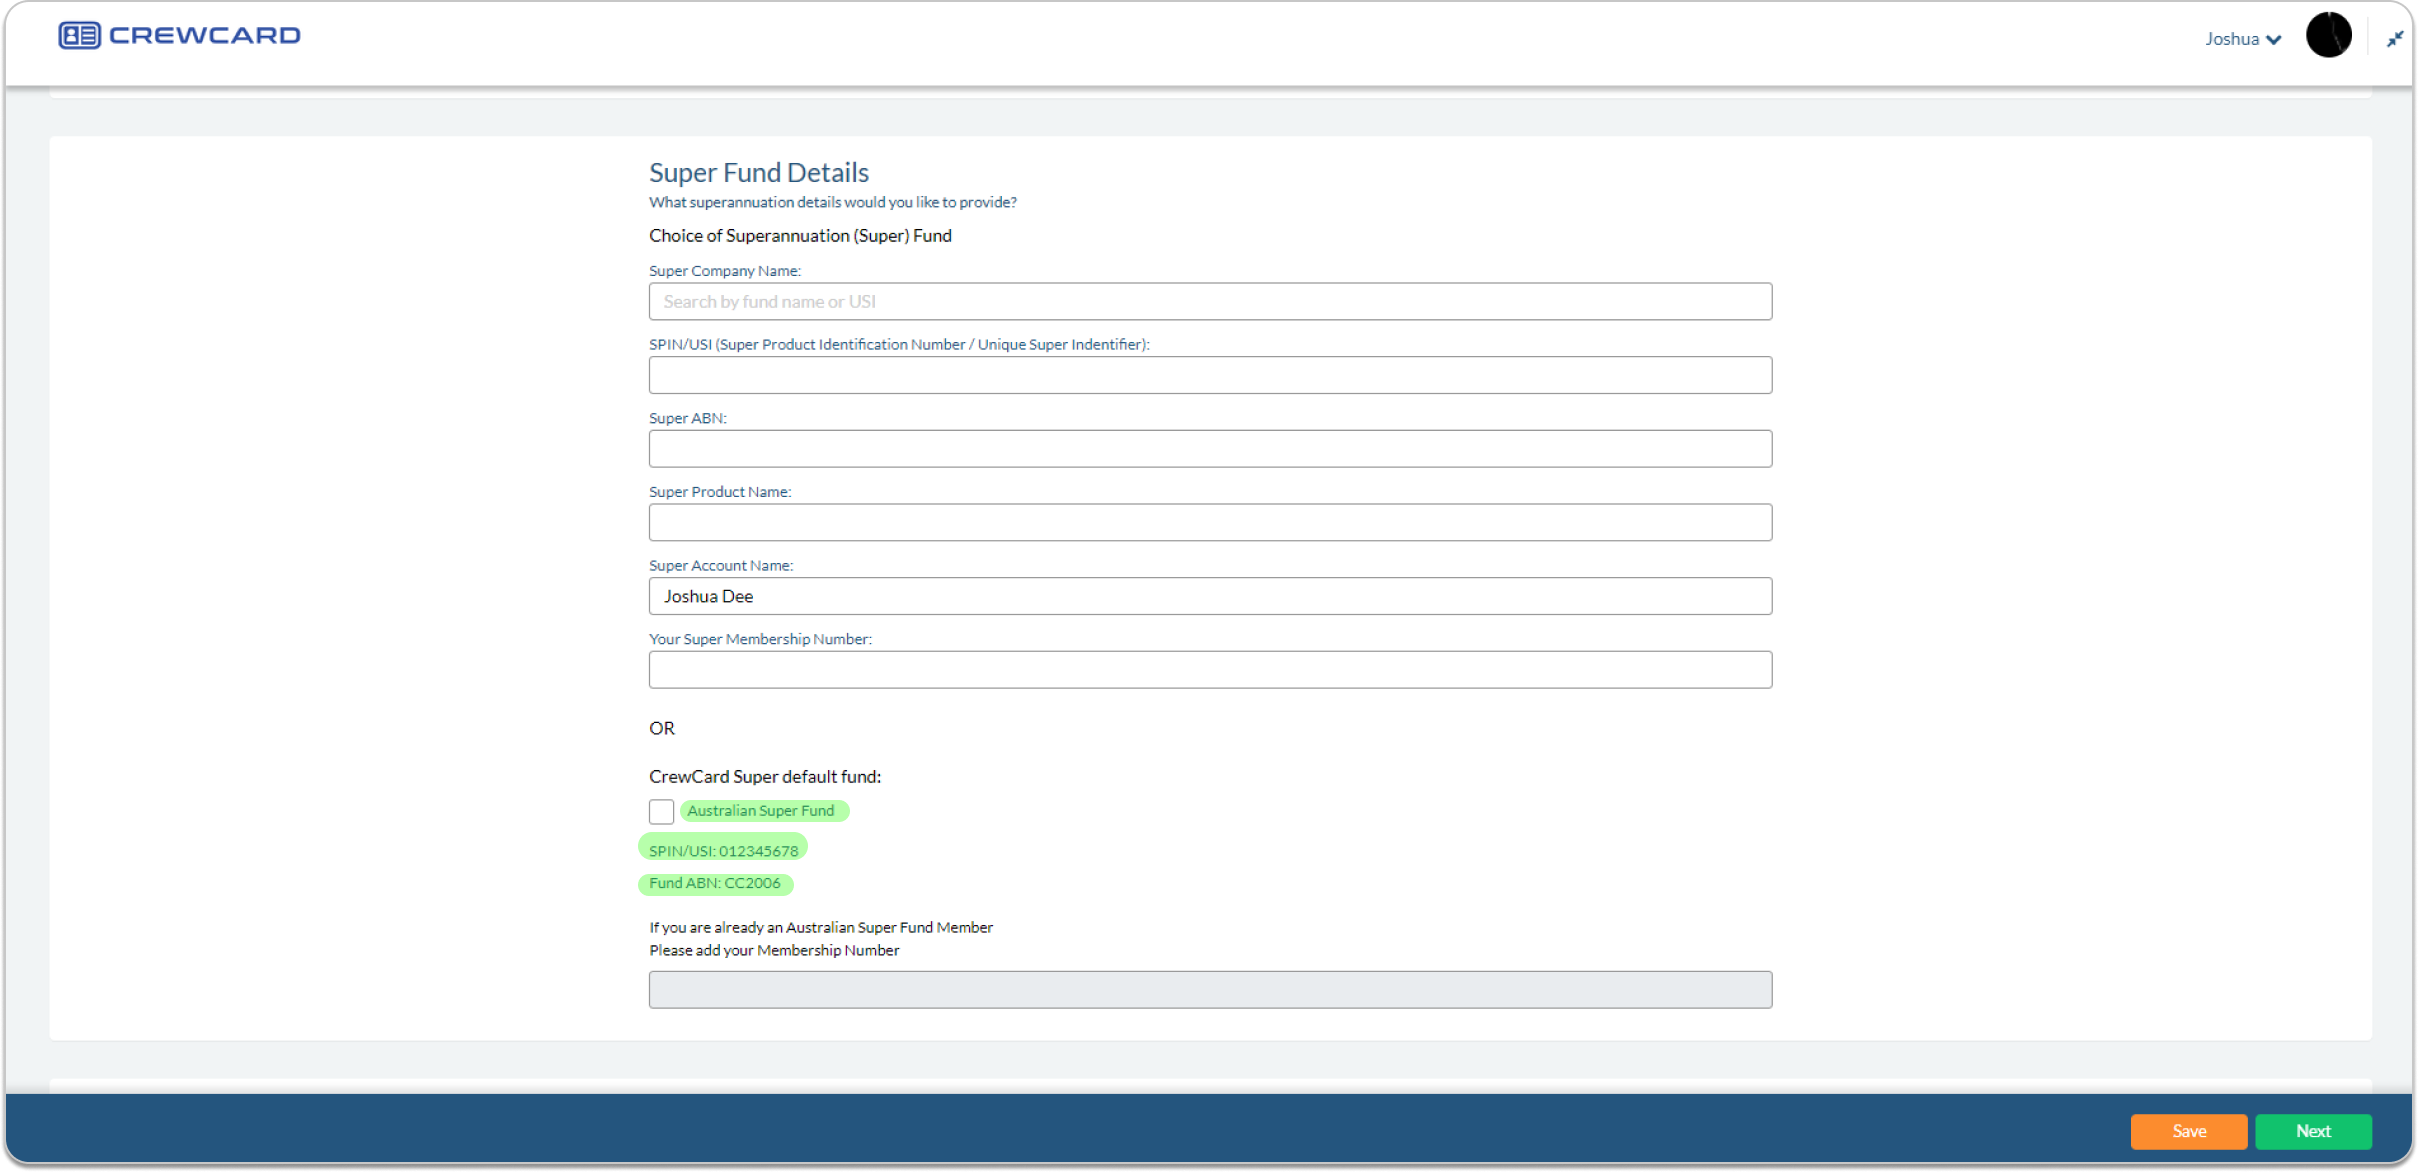
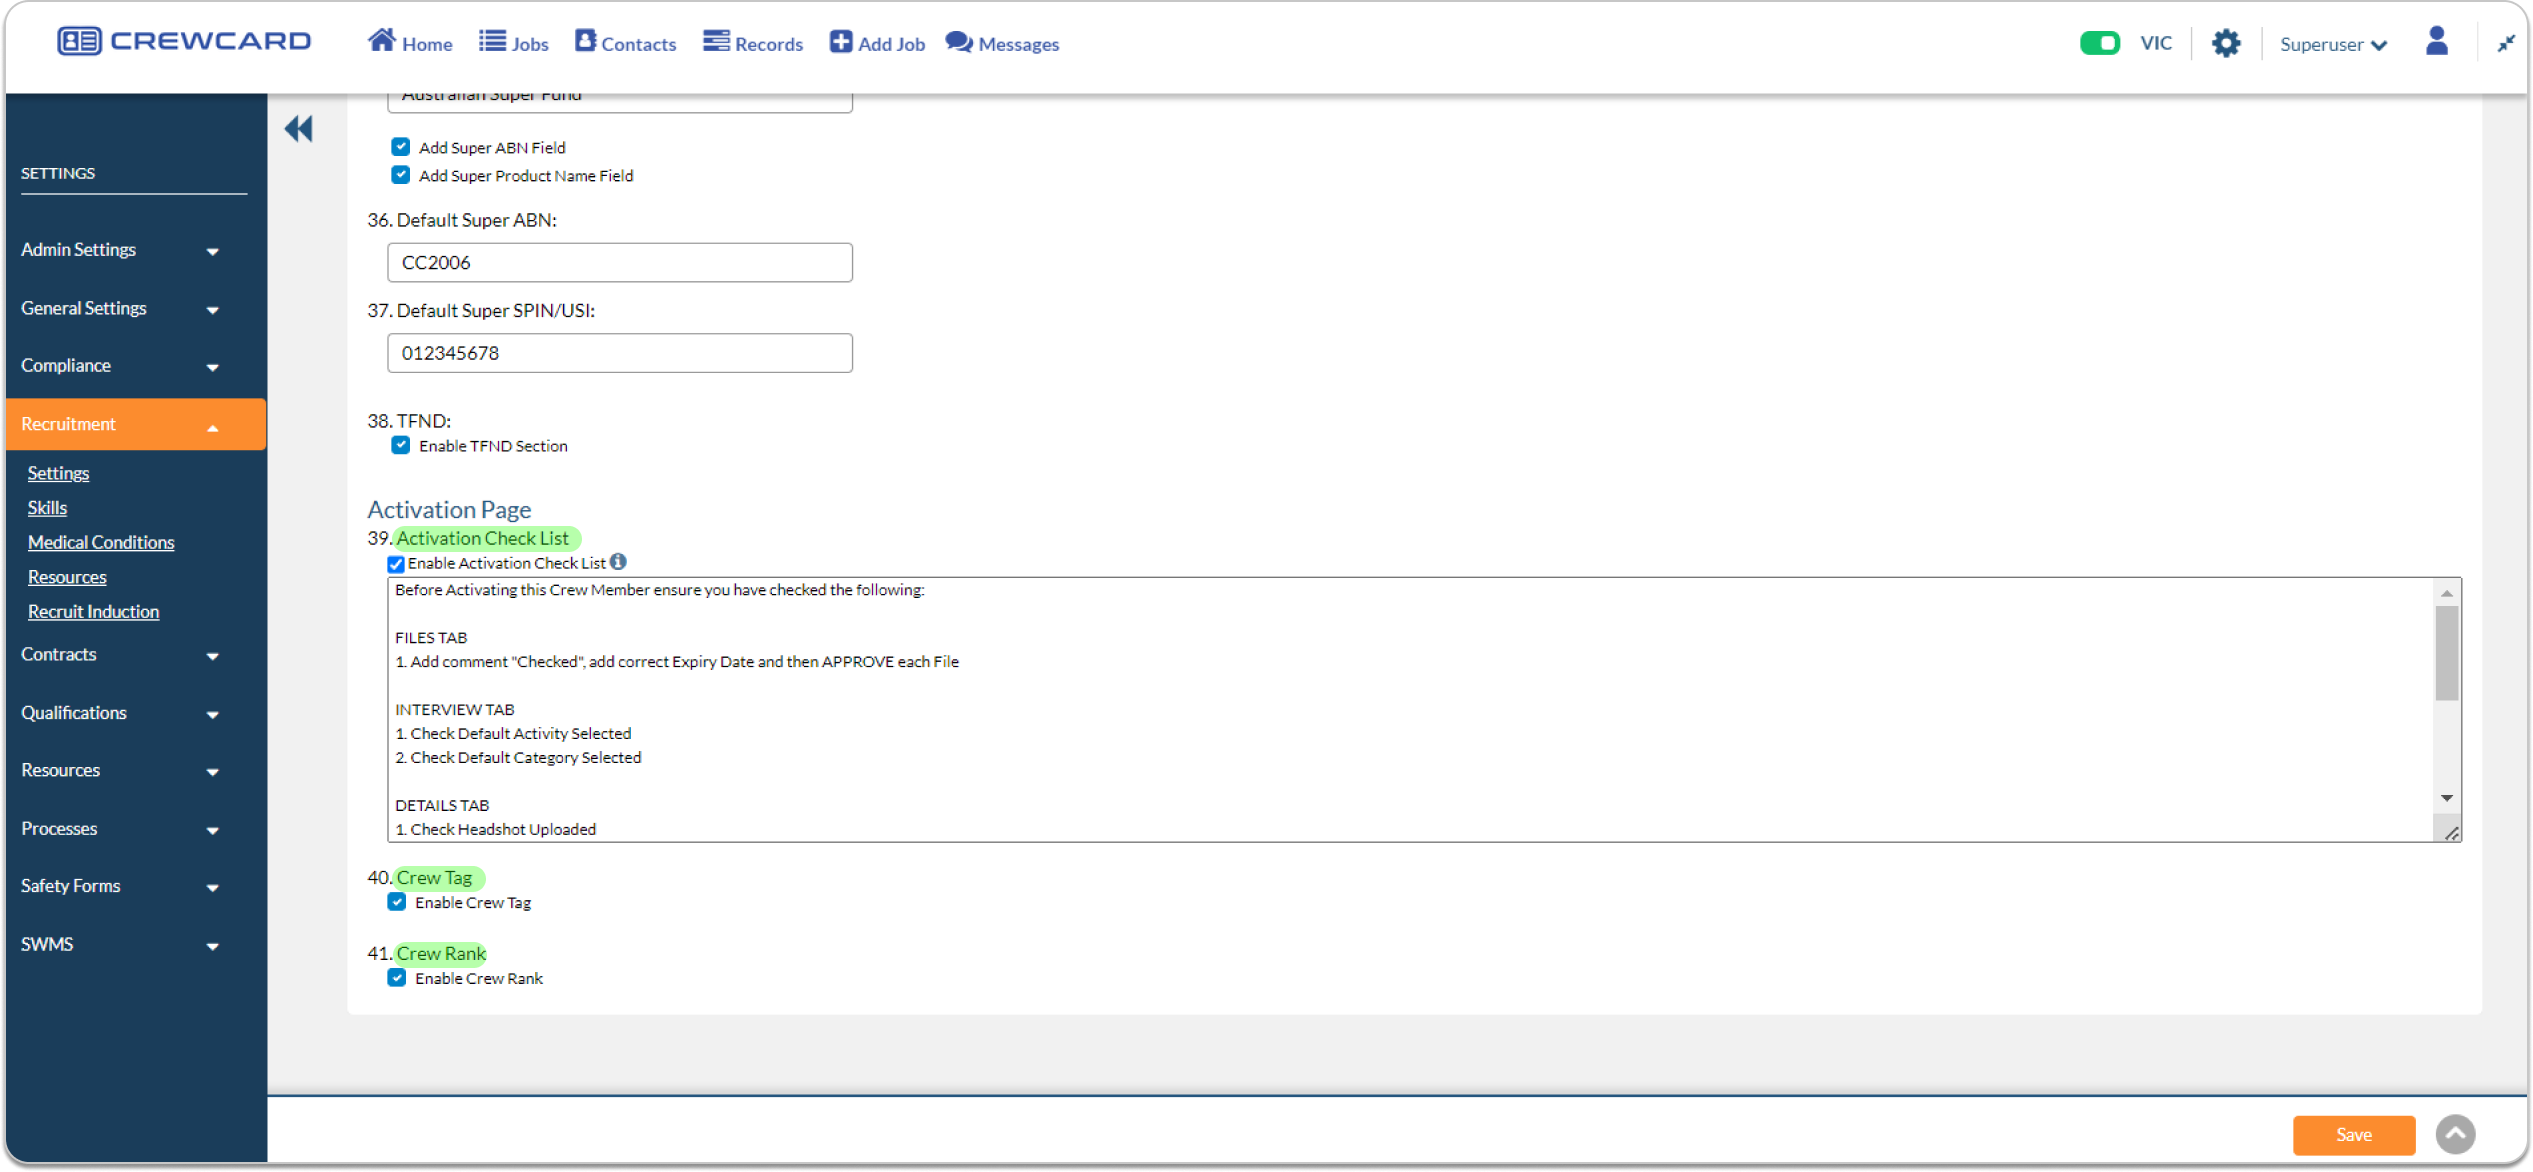
38. Default Super ABN: Enter Default Super ABN
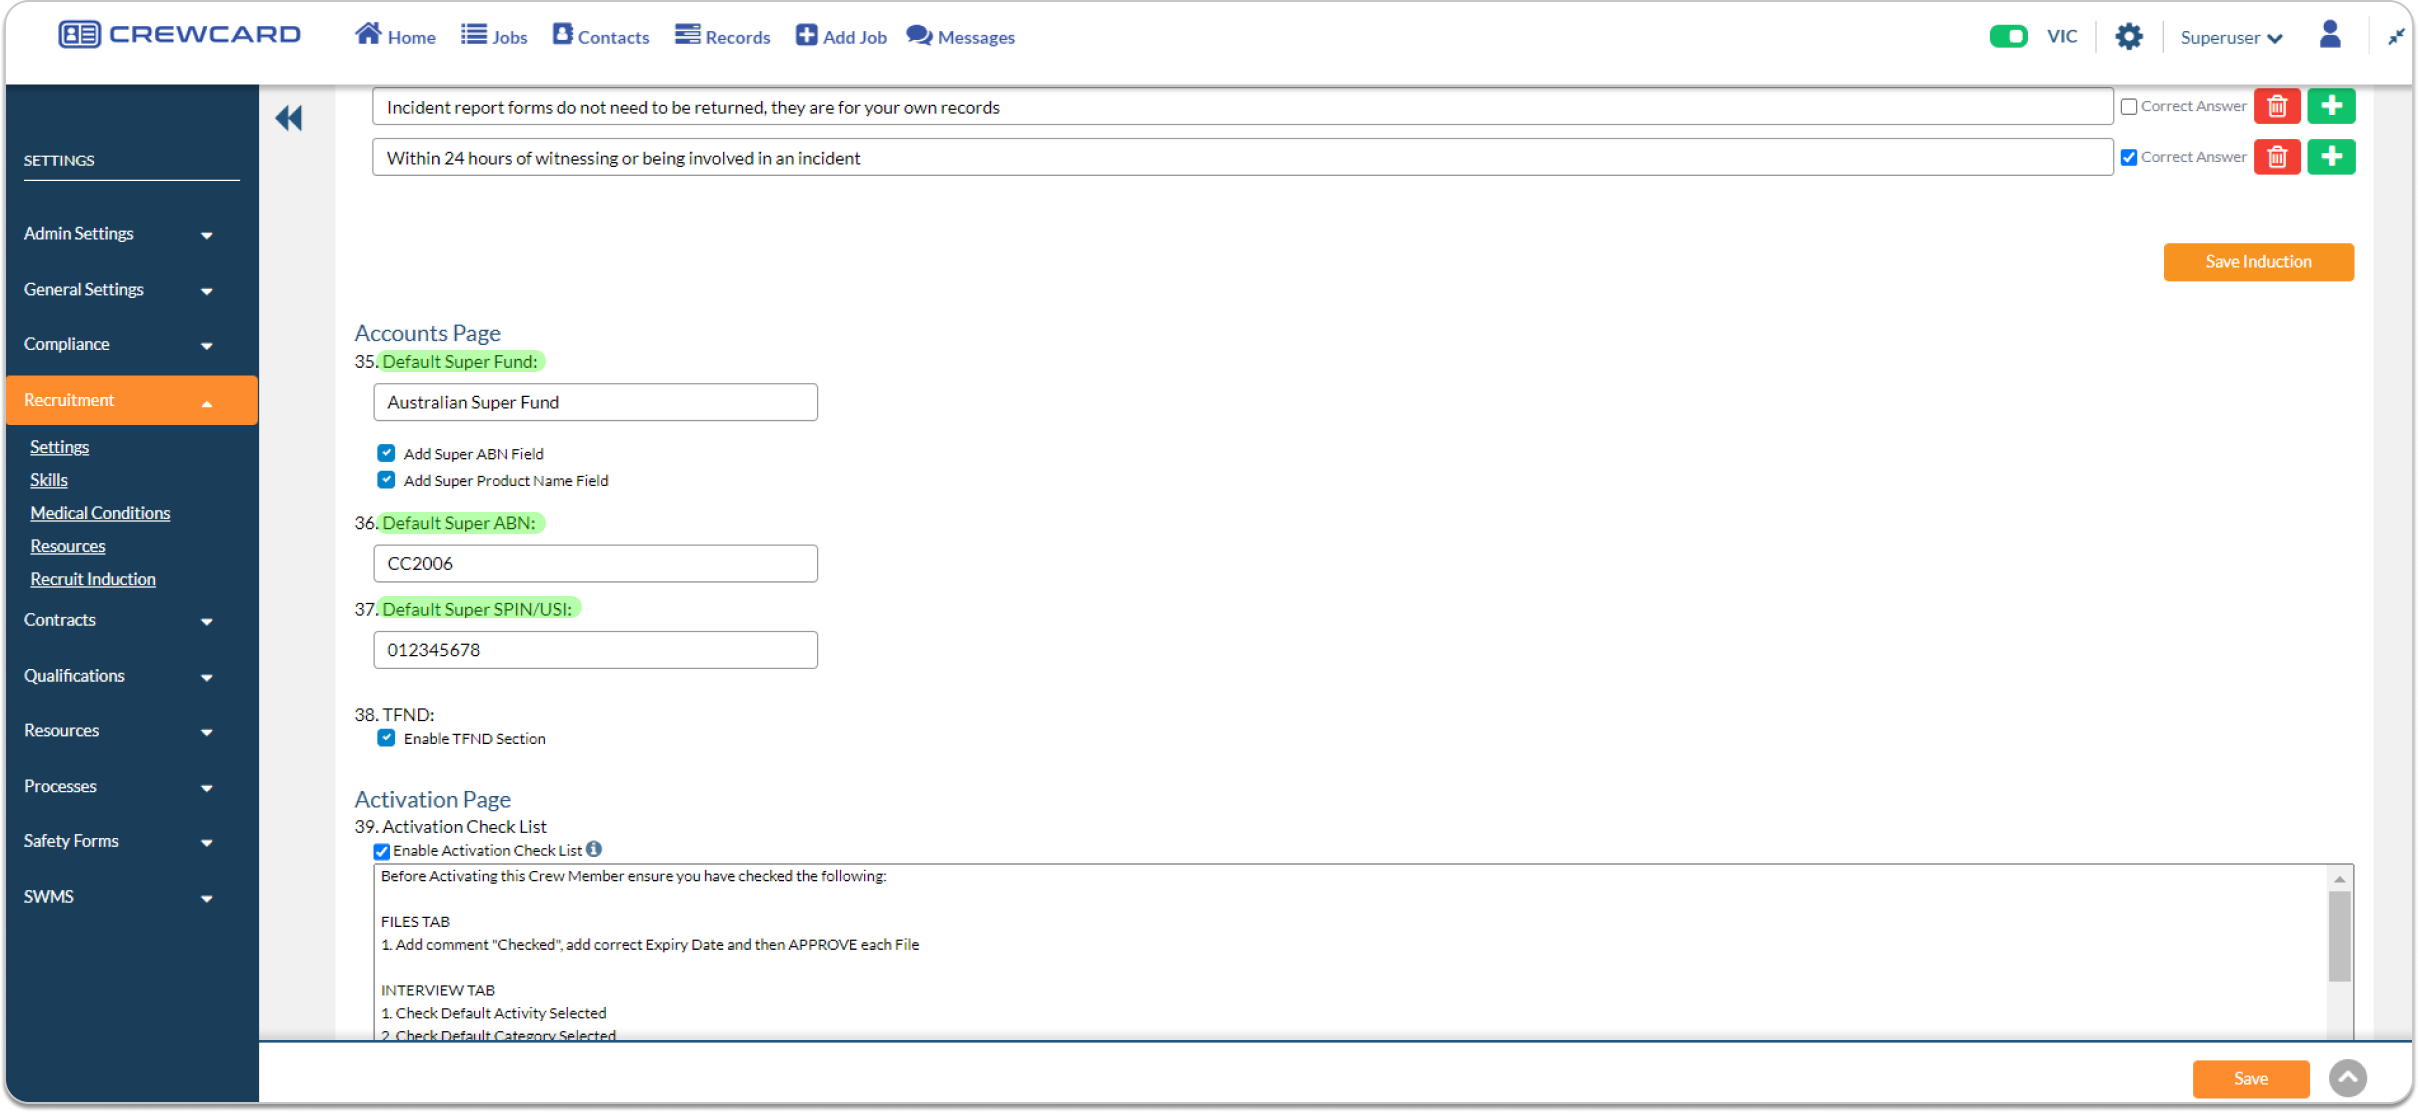
39. Default Super SPIN/USI : Enter default Super SPIN/USI
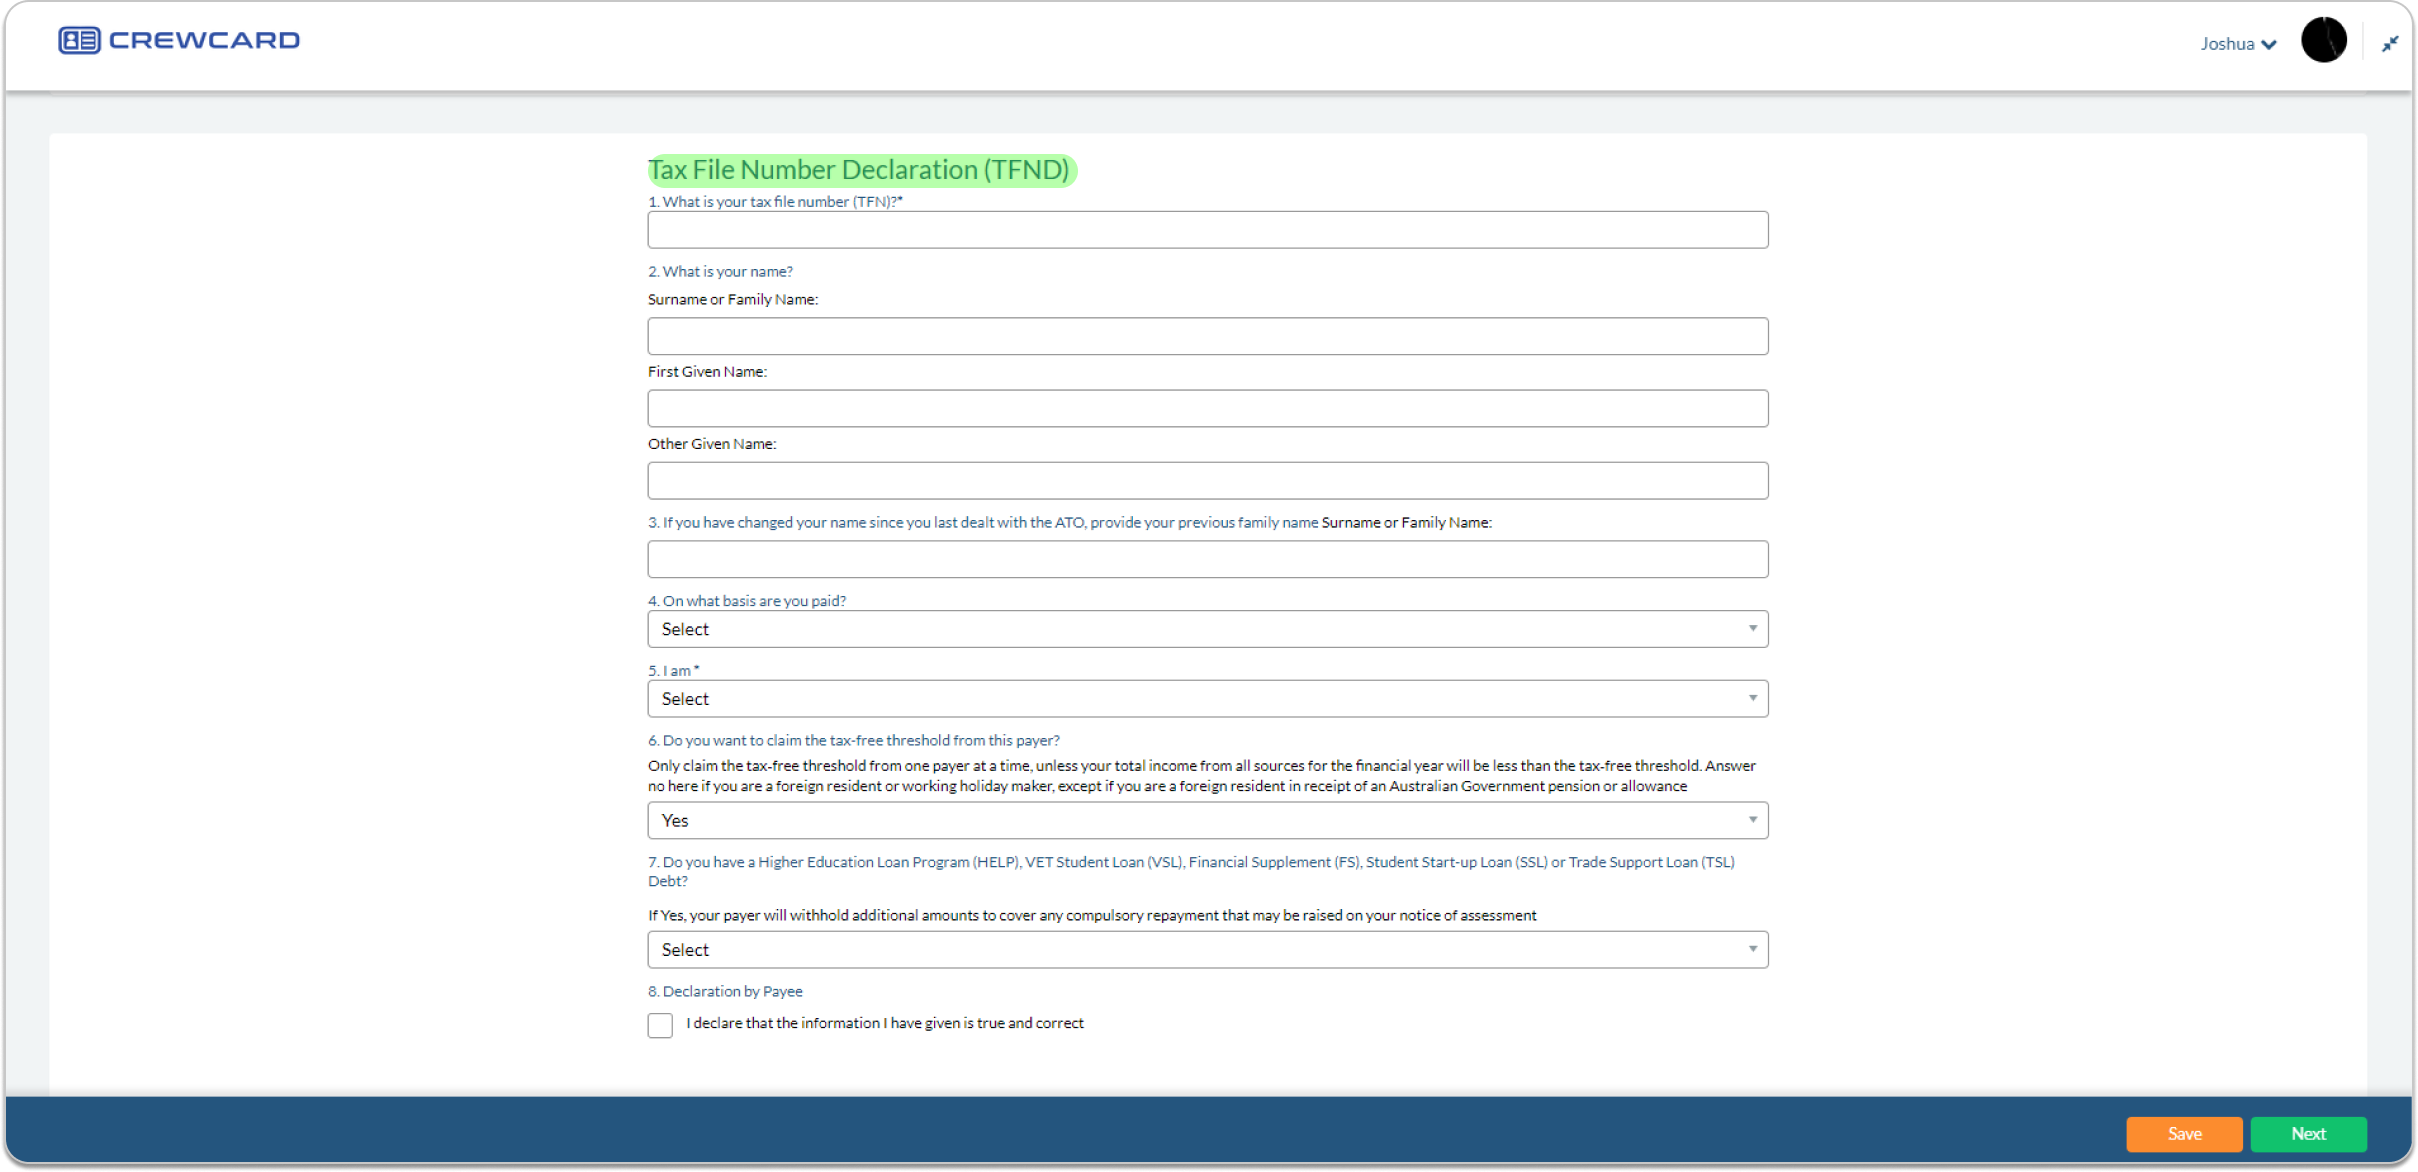
40. TFND: Enable TFND Section in Accounts Tab.

10.4.11 Activation Page
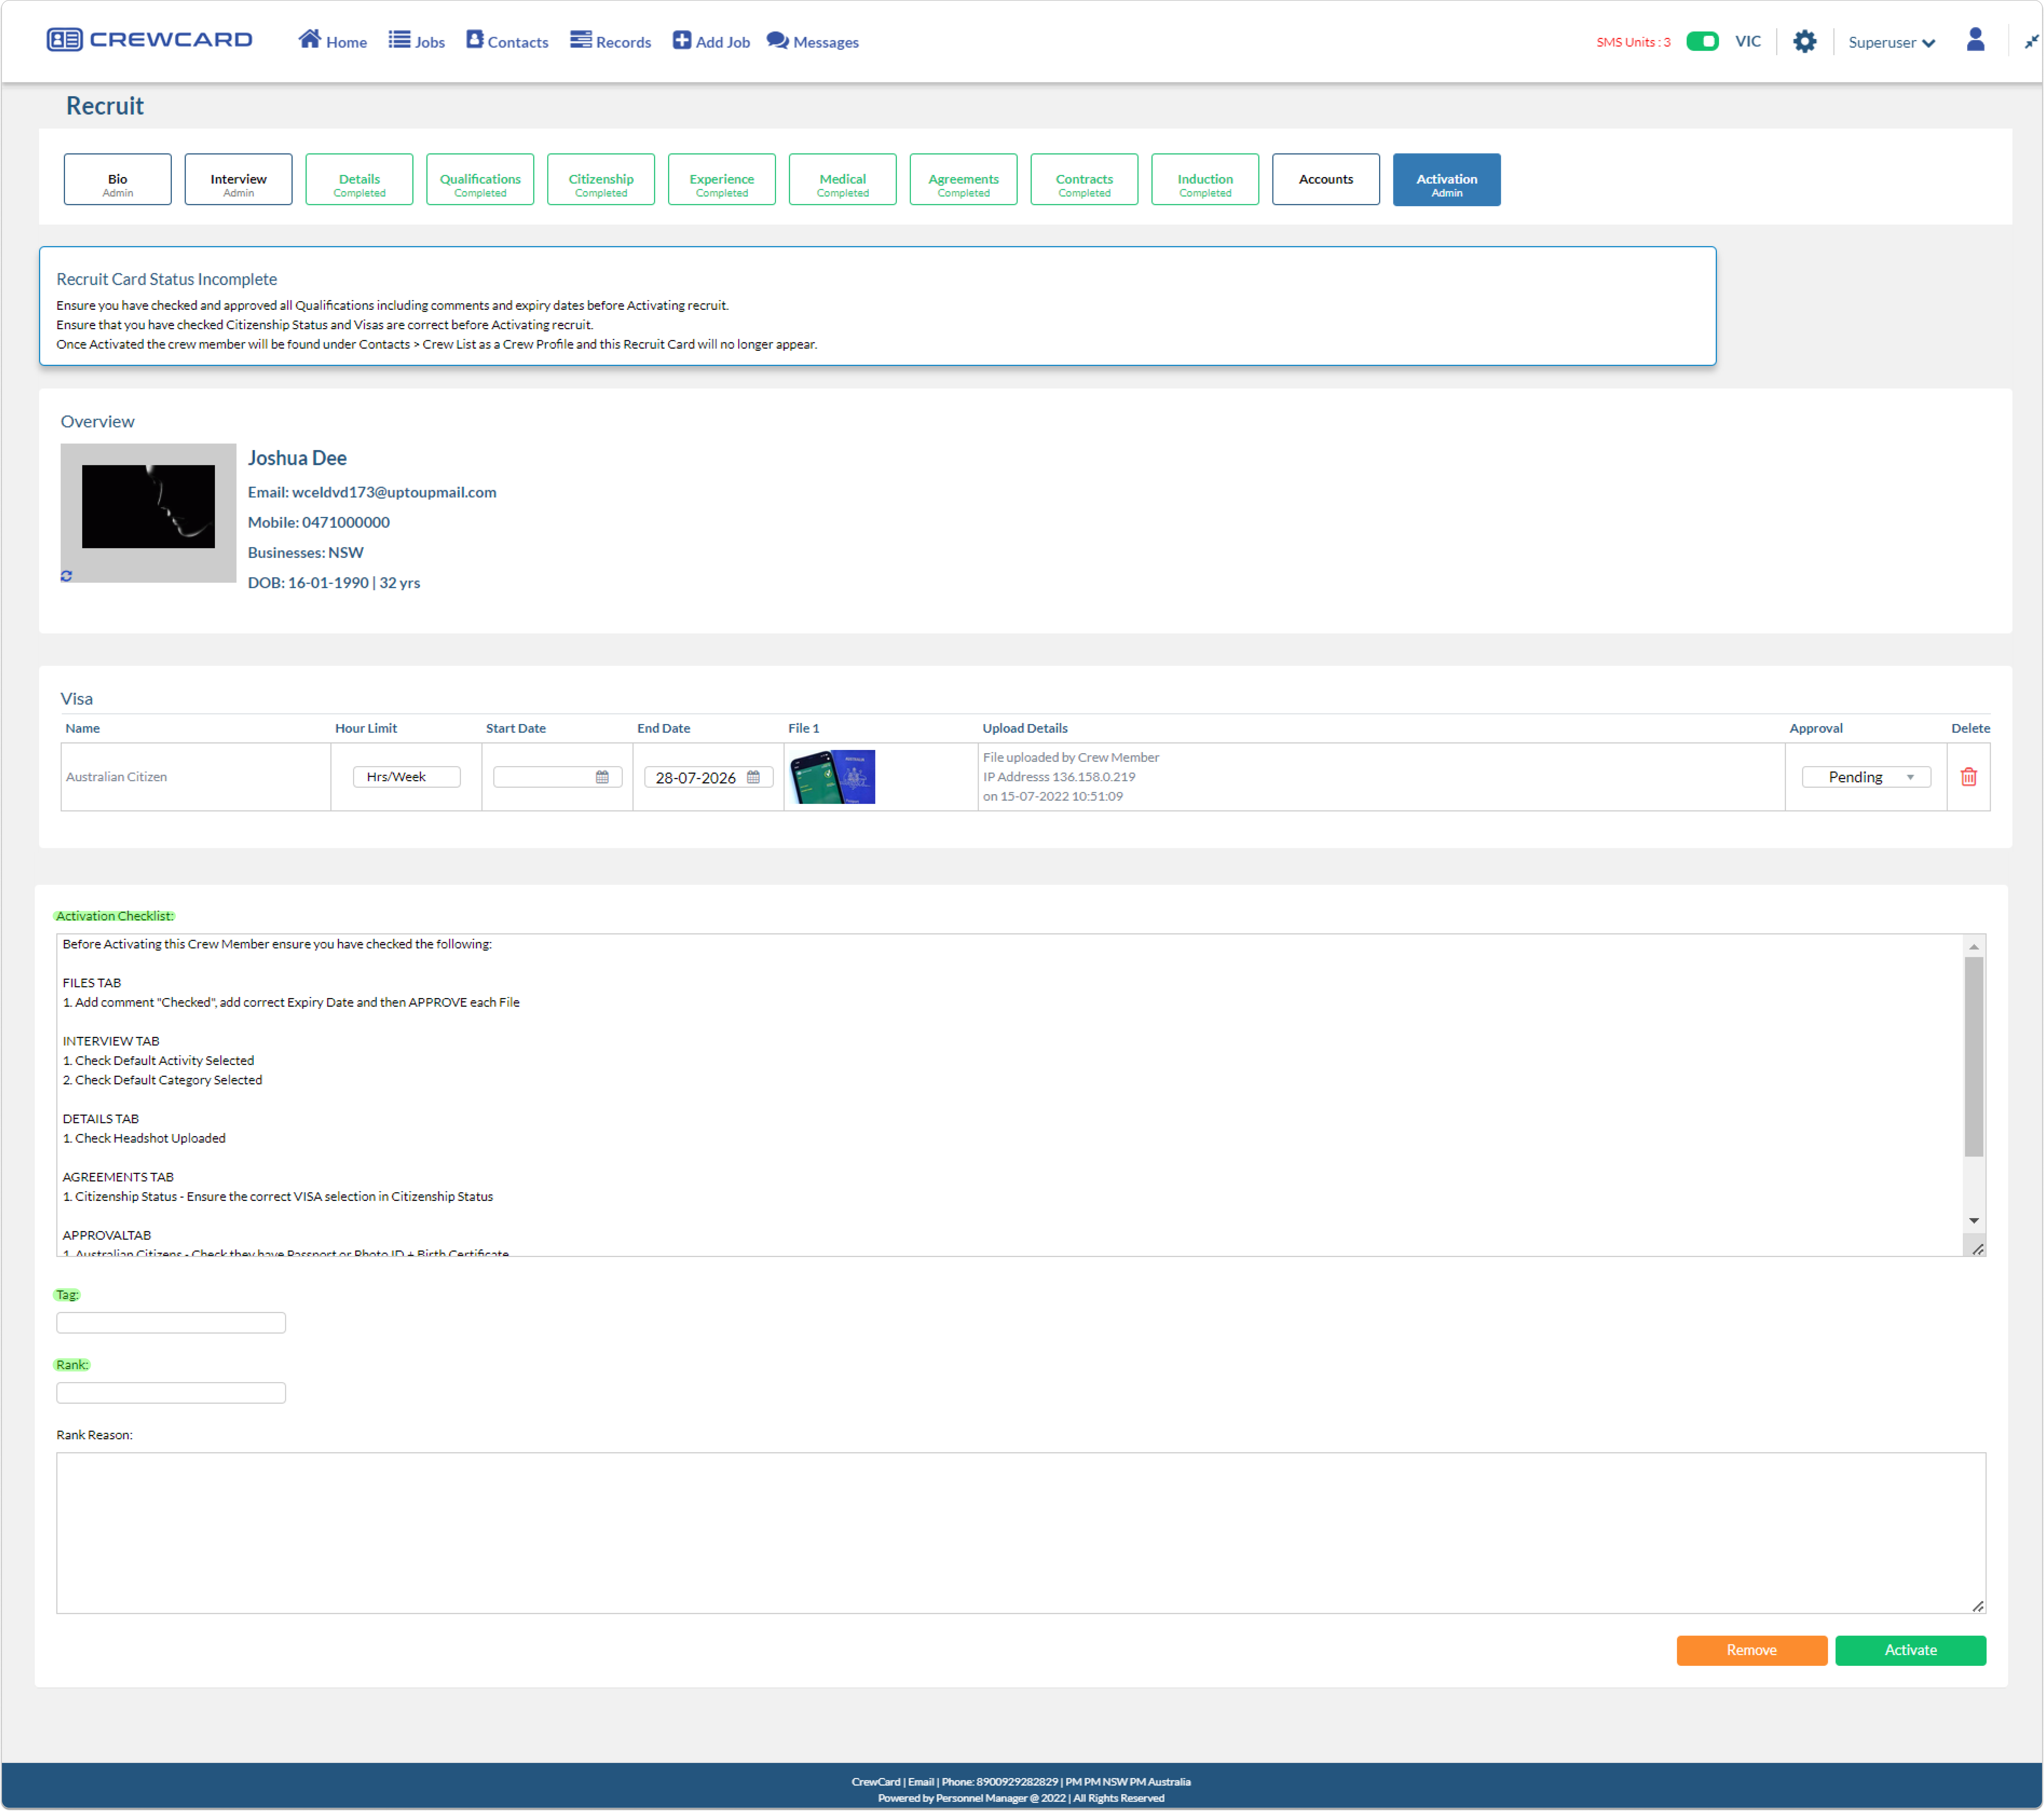
41. Activation Check list: This can be found in the activation tab in Recruit Card
42. Crew Tag: Enable crew tag
43. Crew Rank: Enable crew rank
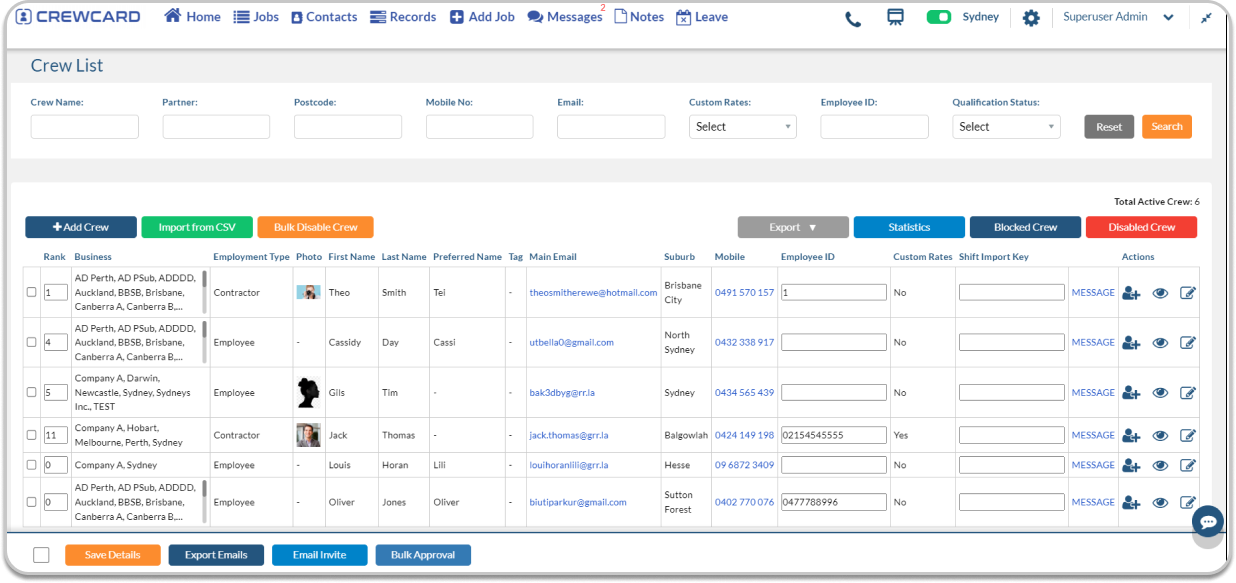
On the Crew List page, there is a Rank field where users can add or update a crew member’s rank.
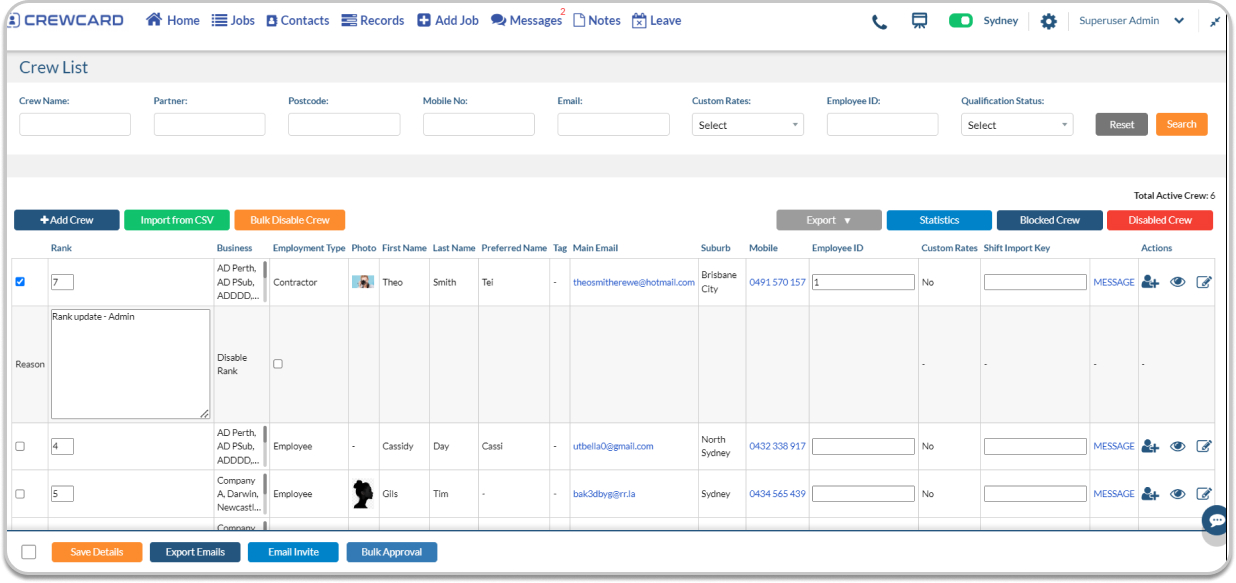
A log will now be created whenever a crew member’s rank is added or updated. Any changes made to the rank will generate a log, which can be viewed on the crew profile page. In this example, the crew member’s rank is changed from Rank 1 to Rank 7, a note is added, and then the changes are saved.
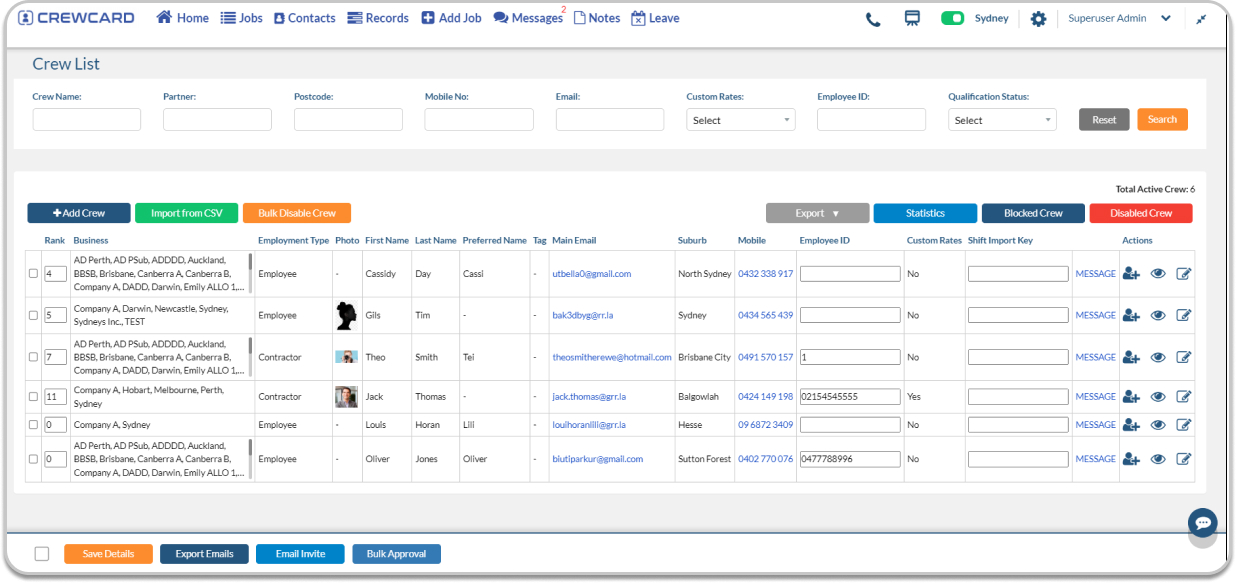
The updated rank will now be reflected in the Crew List page. To view the logs, go to the Crew Profile page. Click the Edit icon.
On the Crew Profile page, click the Profile Change Logs.
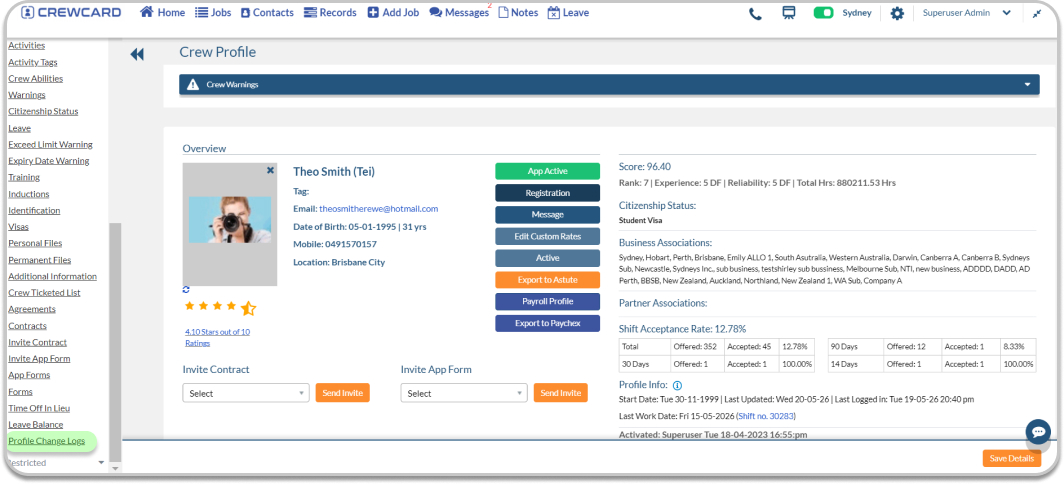
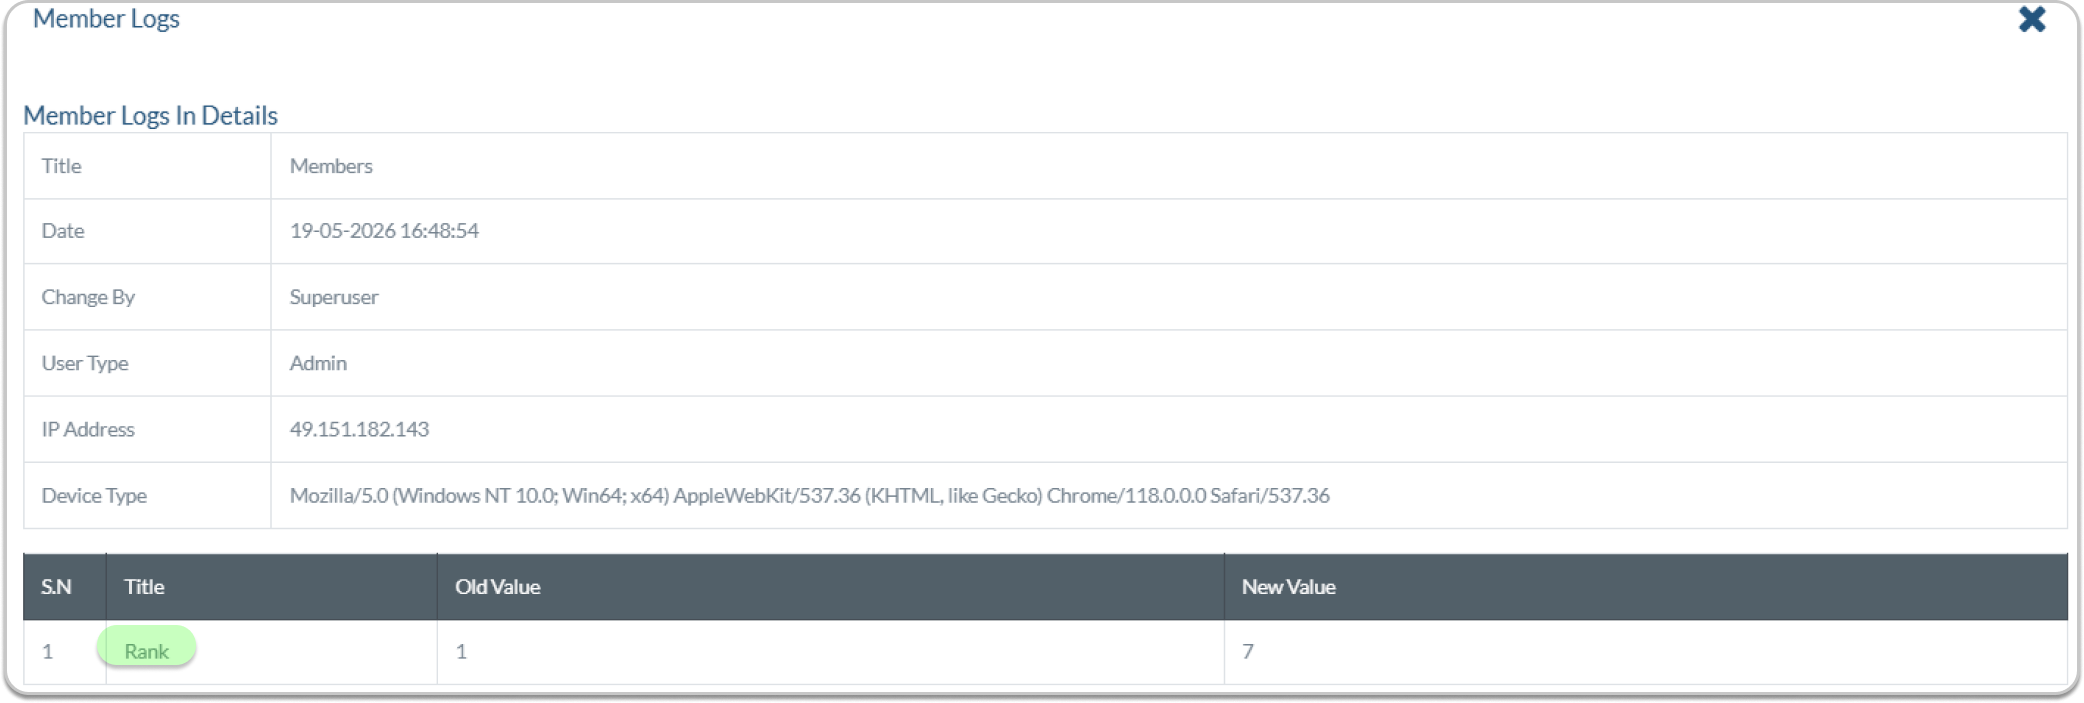
Clicking Profile Change Logs will display all logs related to changes made to that crew member. As shown below, one of the logs is the rank update. Click View to see the log details.

The log details will show when the change was made, who made the update, the IP address, the old value (Rank 1), the new value (Rank 7), and other information related to the crew profile changes.